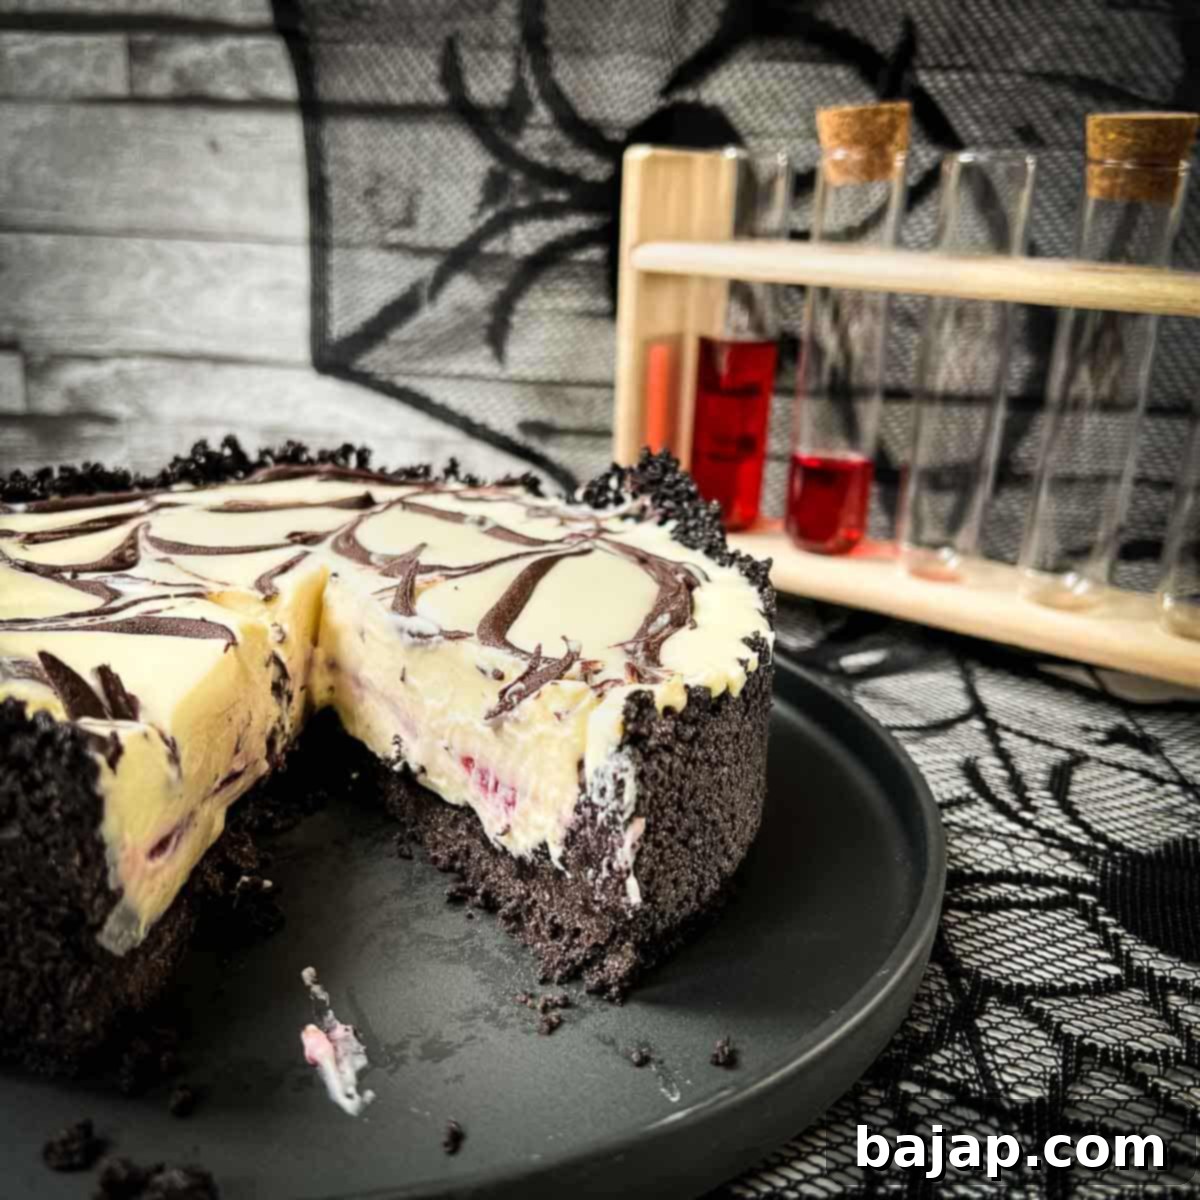
Spooky No-Bake White Chocolate Raspberry Oreo Cheesecake: Your Easiest Halloween Treat!
Get ready to enchant your taste buds and impress your guests this All Hallows’ Eve with our incredibly easy and utterly delicious No-Bake White Chocolate Raspberry Oreo Cheesecake! This isn’t just any dessert; it’s a show-stopping Halloween masterpiece, boasting a dramatic black Oreo crust, a luscious white chocolate cream cheese filling, and a vibrant “bloody” raspberry swirl, all crowned with an artful chocolate spiderweb. Whether you’re hosting a grand Halloween bash or simply craving a sweet, spooky slice after a night of trick-or-treating, this recipe promises to deliver spectacular flavors with minimal effort.
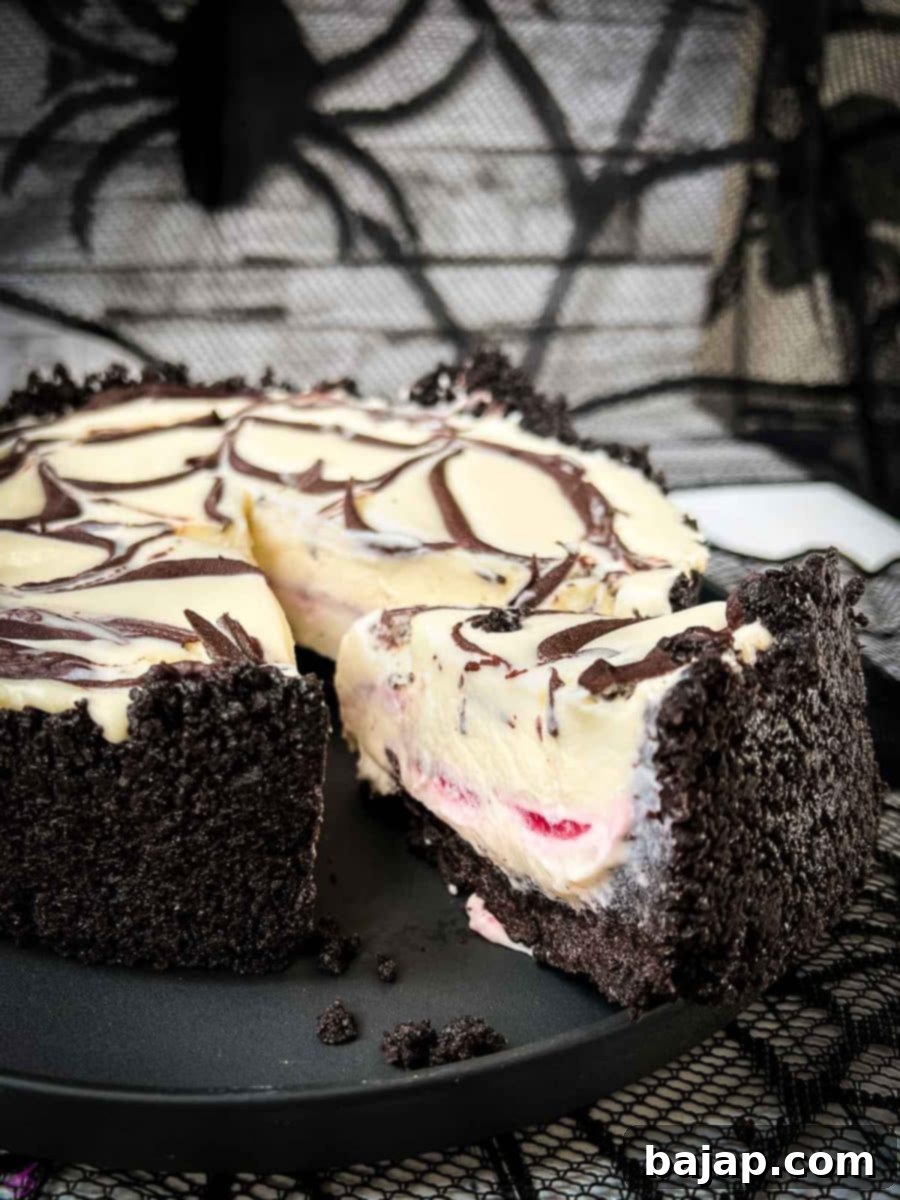
The beauty of this Halloween cheesecake lies in its “no-bake” simplicity. Forget the oven and the stress of cracked cheesecakes; this recipe requires no baking, allowing you to create an impressive dessert without breaking a sweat. The most intricate part, the homemade raspberry sauce, is surprisingly simple to whip up and adds an authentic, fresh fruit flavor that truly elevates the dish. That little extra touch of homemade goodness is detectable in every creamy, dreamy bite, making it worth every moment spent in the kitchen.
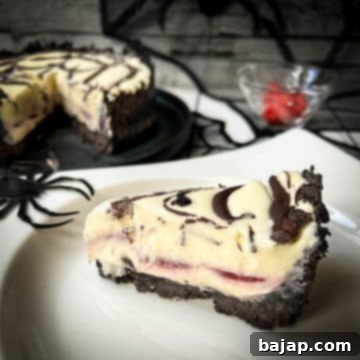
Prepare to be mesmerized by the stunning visual contrast of this dessert. The deep black Oreo cookie crust provides a dramatic, spooky foundation for the silky, light white chocolate cheesecake cream. Swirled within is the vibrant, crimson raspberry sauce, playfully dubbed “bloody” for the occasion, adding a ghoulish touch that’s both appealing and delicious. To complete the eerie aesthetic, a hauntingly beautiful chocolate spiderweb design adorns the top, making this cheesecake a true centerpiece for your Halloween spread. You’ll feel like a culinary magician as this cake comes together effortlessly, leaving you ample time to conjure up other ghoulish games and festive snacks for your Halloween party!
Rest assured, this spooky cheesecake is simply to die for – in the best possible way, of course! I poured my creativity into designing this delightful Halloween treat, and I sincerely hope you and your loved ones, just like my little girl last year, will adore it.
Why This No-Bake Halloween Cheesecake is Your Perfect Spooky Indulgence
Halloween is all about fun, frights, and fantastic food, and this no-bake cheesecake ticks all the boxes. Here’s why it should be at the top of your baking list:
- Effortless Elegance: Being a no-bake recipe means less time in the kitchen and more time enjoying the festivities. No need to worry about water baths or oven temperatures – just mix, chill, and serve!
- Visually Striking: The stark contrast between the black Oreo crust, white cheesecake filling, and “bloody” red raspberry swirl is inherently dramatic and perfectly suited for Halloween. The spiderweb design is the icing on the (no-bake) cake!
- Irresistible Flavor Combination: White chocolate and raspberries are a match made in heaven. The sweet, creamy white chocolate filling beautifully complements the tart, vibrant raspberry sauce, creating a balanced and utterly delicious flavor profile. The Oreo crust adds a chocolatey crunch that ties everything together.
- Crowd-Pleasing Potential: Cheesecake is a universal favorite, and this festive version is guaranteed to be a hit with both kids and adults. It’s a dessert that tastes as good as it looks.
- Make-Ahead Friendly: This cheesecake needs to chill for several hours, ideally overnight, making it a perfect make-ahead dessert. Prepare it the day before your event, and you’ll have one less thing to worry about on Halloween!
For an extra festive touch, consider pairing this eerie-sistible cheesecake with some themed beverages. After the little goblins have retired to bed, why not serve it alongside a red Halloween cocktail or a festive Halloween punch? It’s the ideal way to round off a night of spooky celebrations.
[feast_advanced_jump_to]
🥘 Ingredients
Crafting this spooktacular no-bake cheesecake starts with a selection of simple yet high-quality ingredients. Each component plays a crucial role in building the layers of flavor and texture that make this dessert so special. From the fresh, tangy raspberries to the rich white chocolate and dark Oreo cookies, every ingredient contributes to the overall hauntingly delicious experience.
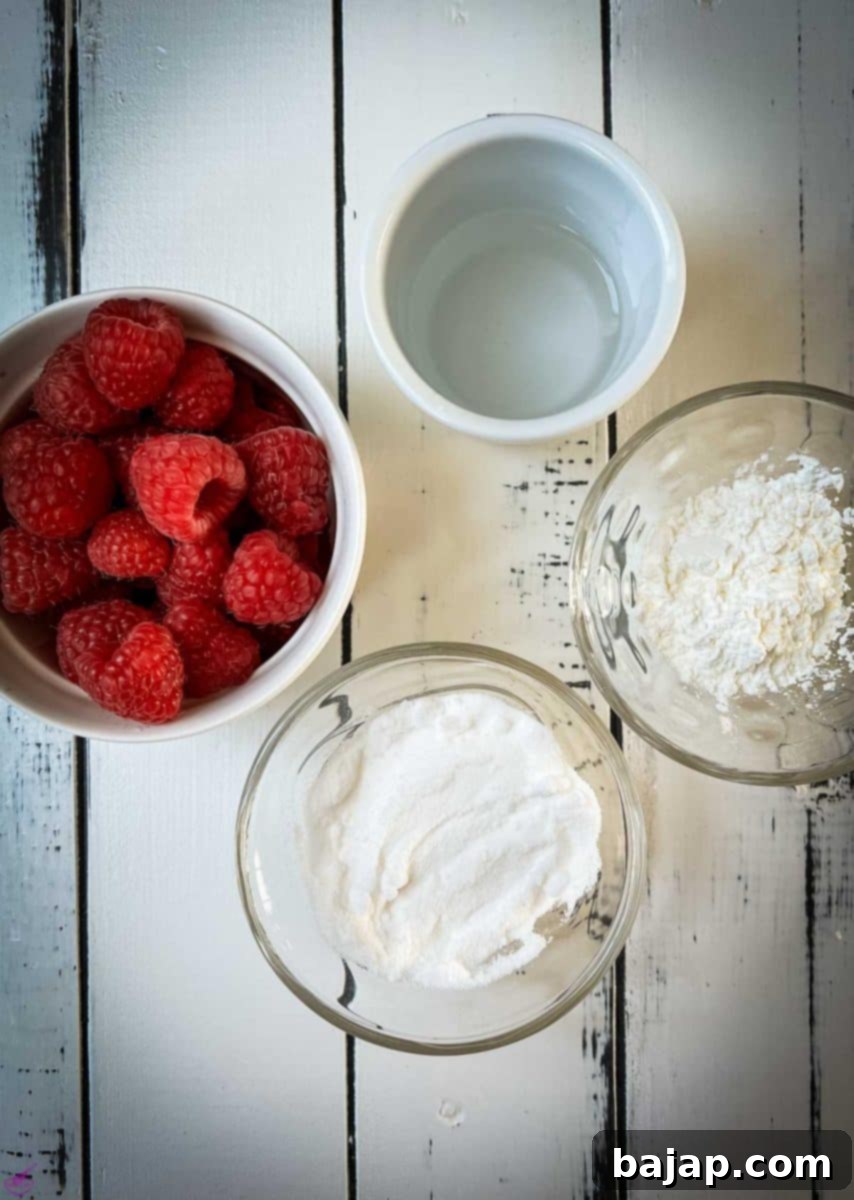
Raspberry sauce
- Fresh raspberries – for that vibrant “bloody” color and tart flavor.
- Sugar – to balance the tartness of the raspberries.
- Water – to help create the sauce consistency.
- Cornstarch – our secret weapon for thickening the sauce without cooking it for too long.
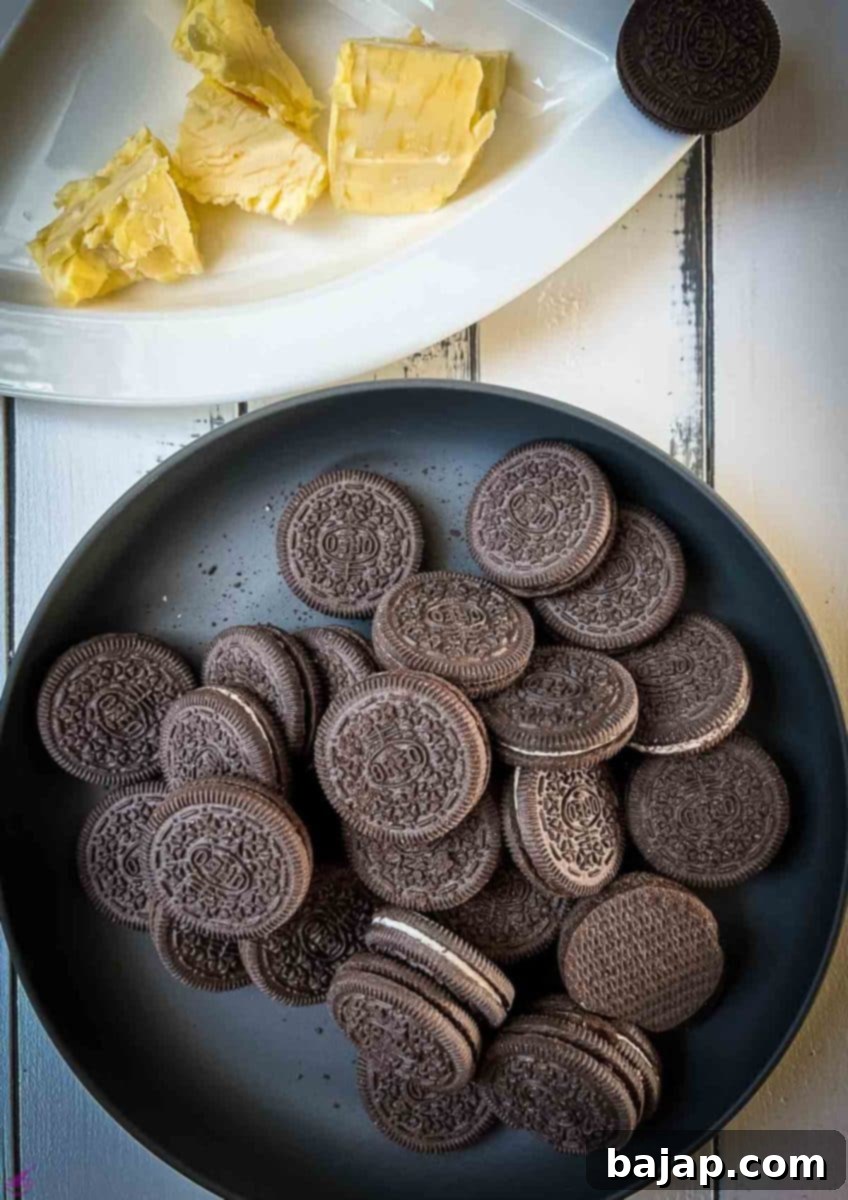
Oreo cookie crust
- Oreo Cookies – or any similar black sandwich cookies for that dramatic dark base.
- Butter – salted – to bind the cookie crumbs into a firm, flavorful crust.
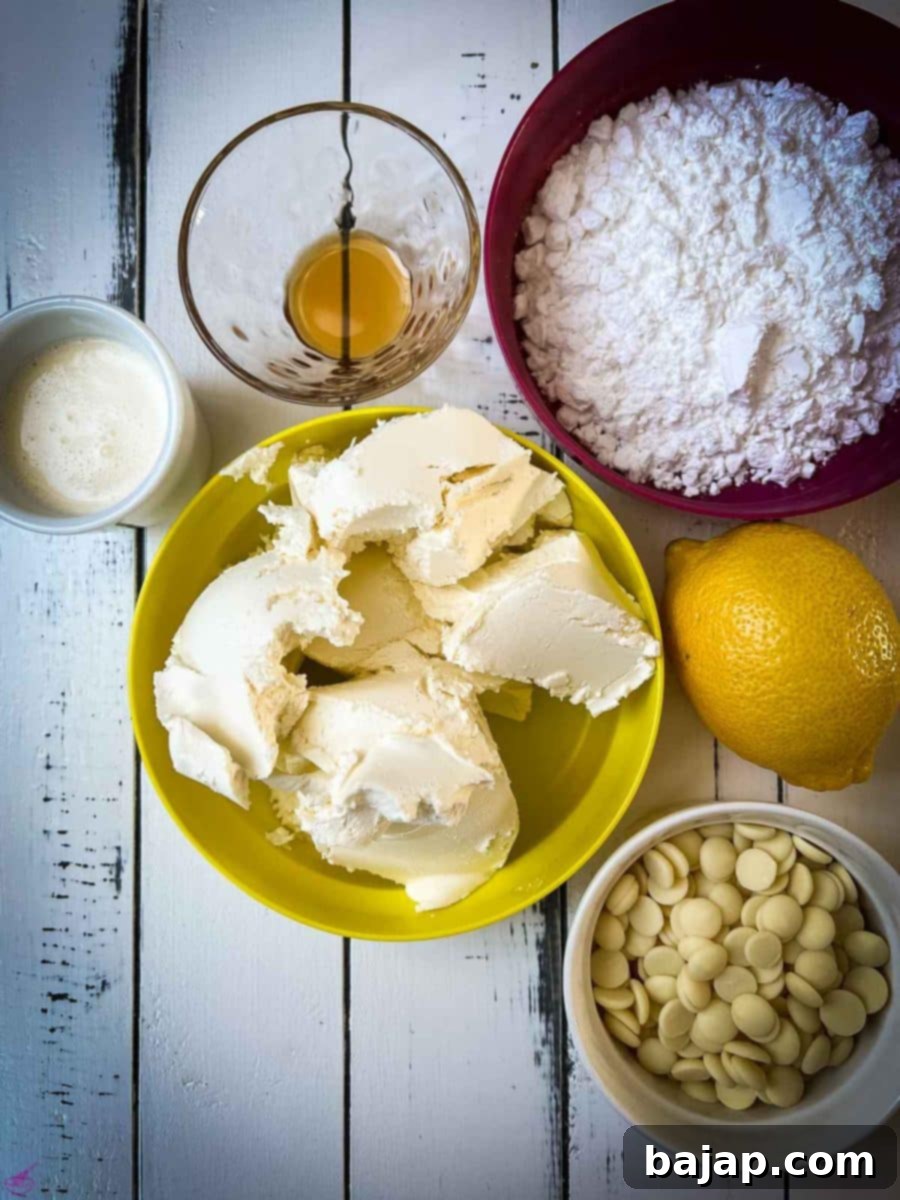
Cheesecake cream
- Full fat cream cheese – the star of our creamy, rich filling. Ensure it’s at room temperature for a smooth texture.
- Confectioner’s sugar – for sweetness and a silky-smooth finish.
- Vanilla extract – to enhance the overall flavor.
- Fresh lemon juice – a touch of acidity brightens the flavors and helps cut through the richness.
- Heavy whipping cream – whipped to perfection, it adds lightness and airiness to the cheesecake.
- White chocolate – chopped – melts into a smooth ganache for that irresistible white chocolate flavor.
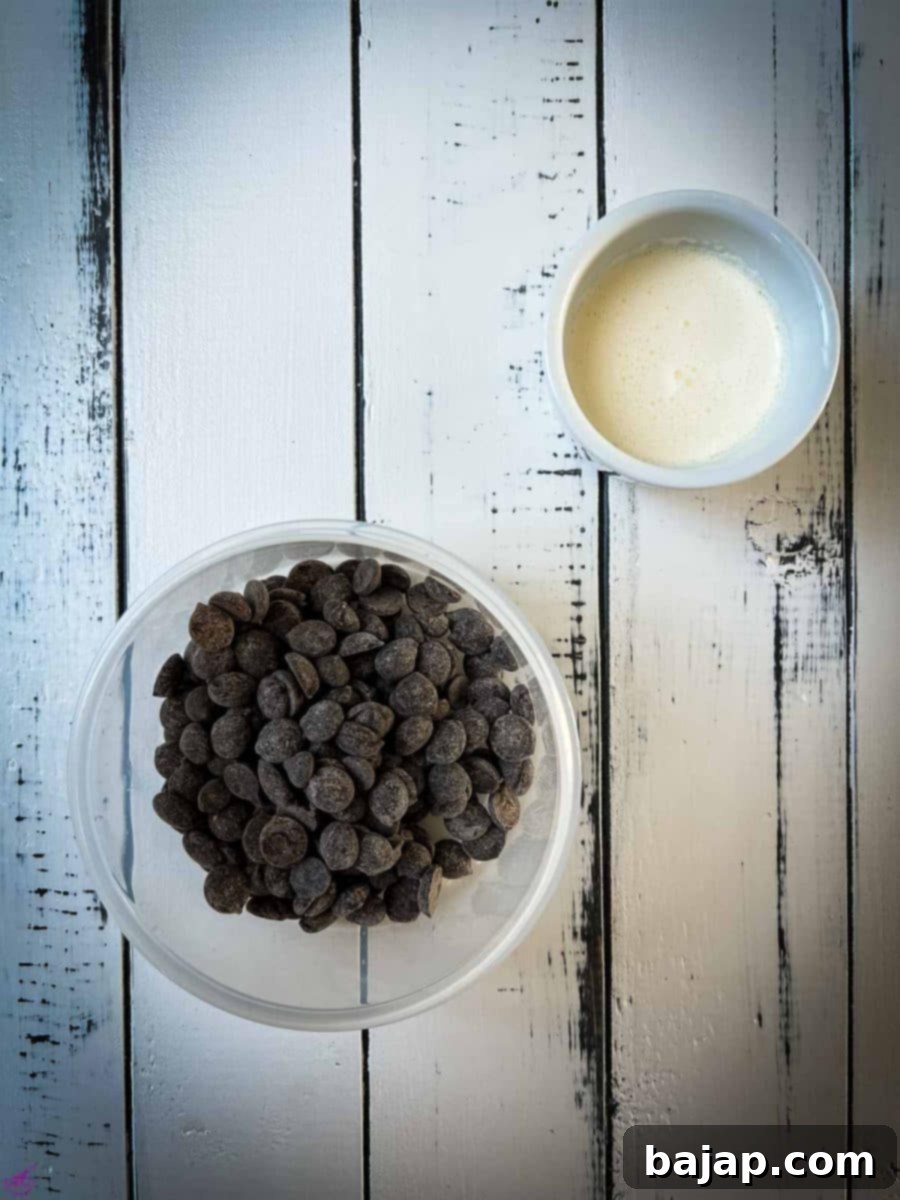
Spider’s web
- Milk chocolate or dark chocolate – the choice is yours for color and intensity, creating the signature web.
- Heavy whipping cream – to transform the chocolate into a smooth, pipeable ganache.
For precise quantities of each ingredient, please refer to the recipe card below.
🔪 Instructions: Crafting Your Spooky Masterpiece
Follow these detailed steps to create a show-stopping no-bake Halloween cheesecake that will bewitch everyone who tastes it. While no-bake implies ease, attention to detail in each stage ensures a perfect, smooth, and delicious result.
Step 1 – Preparation: Setting the Stage
Before you begin mixing, proper preparation of your pan is key for a flawless cheesecake. Start by lining the bottom of a round springform pan with baking paper. This simple step ensures easy removal later. Then, lightly spray the sides of the pan with a non-stick cooking spray. This prevents the cheesecake from sticking and helps achieve those clean, impressive edges. Set your prepared pan aside, ready for the delicious layers to come.
Step 2 – The Oreo Cookie Crust: The Dark Foundation
The dramatic black crust is not only visually striking but also adds a fantastic chocolatey crunch. Begin by taking your chosen Oreo cookies (or similar black sandwich cookies) and placing them in a food processor. Process them until they become uniformly fine cookie crumbs, almost like sand. While the food processor does its magic, gently melt your salted butter in a small pan. The butter will act as the binding agent for our crust.
Pro Tip: No Food Processor? No Problem! If you don’t have a food processor, simply place the cookies in a sturdy ziplock bag. Seal it tightly, then use a rolling pin or the bottom of a heavy glass to crush them into fine crumbs. This can be a surprisingly satisfying way to release any pent-up energy, and it works just as well!
Once your cookies are finely crushed, add them back to the food processor (or into a mixing bowl if you used the rolling pin method) along with the melted butter. Process on high (or mix thoroughly by hand) until the cookie crumbs are well coated and just start to cling together. The mixture should have a slightly moist, sand-like consistency when pinched between your fingers.
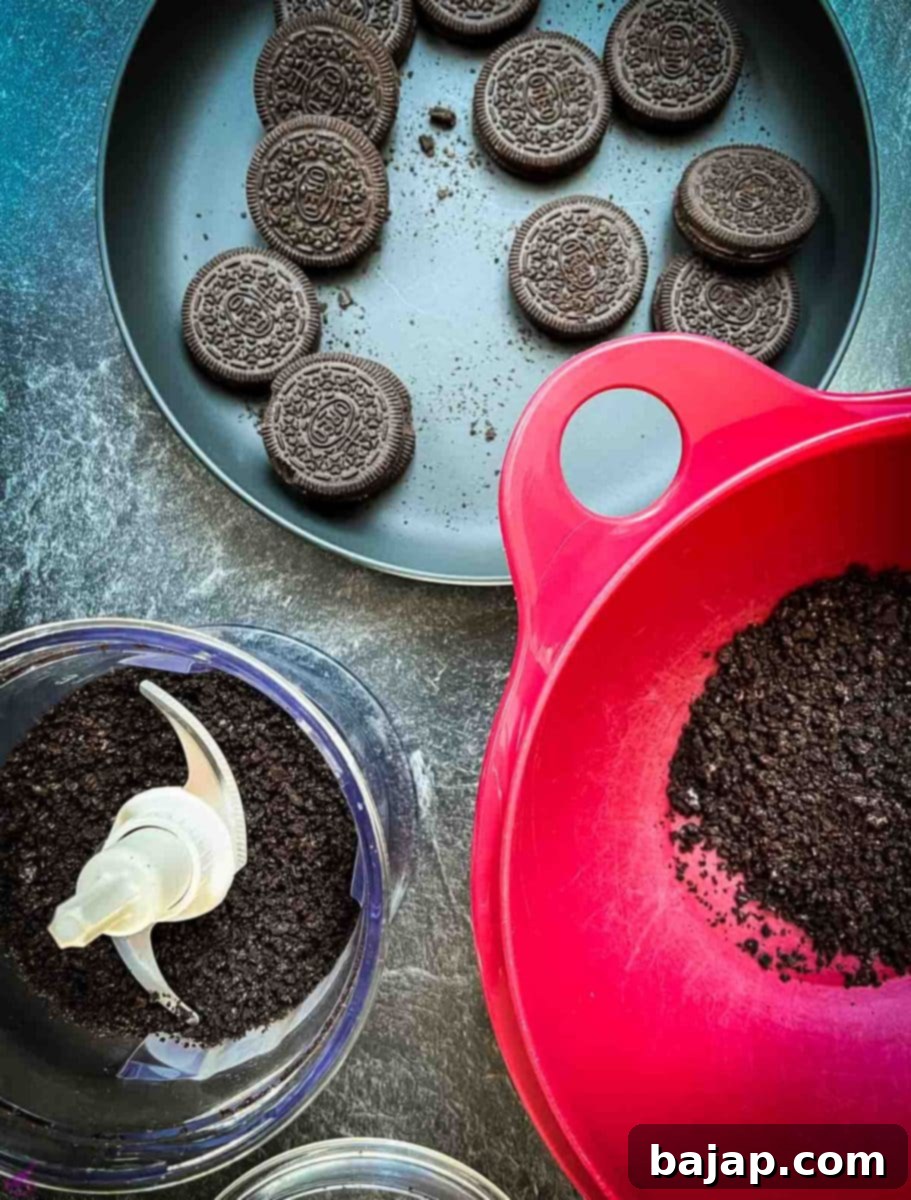
Process Oreo cookies into fine cookie crumbs for the perfect crust.
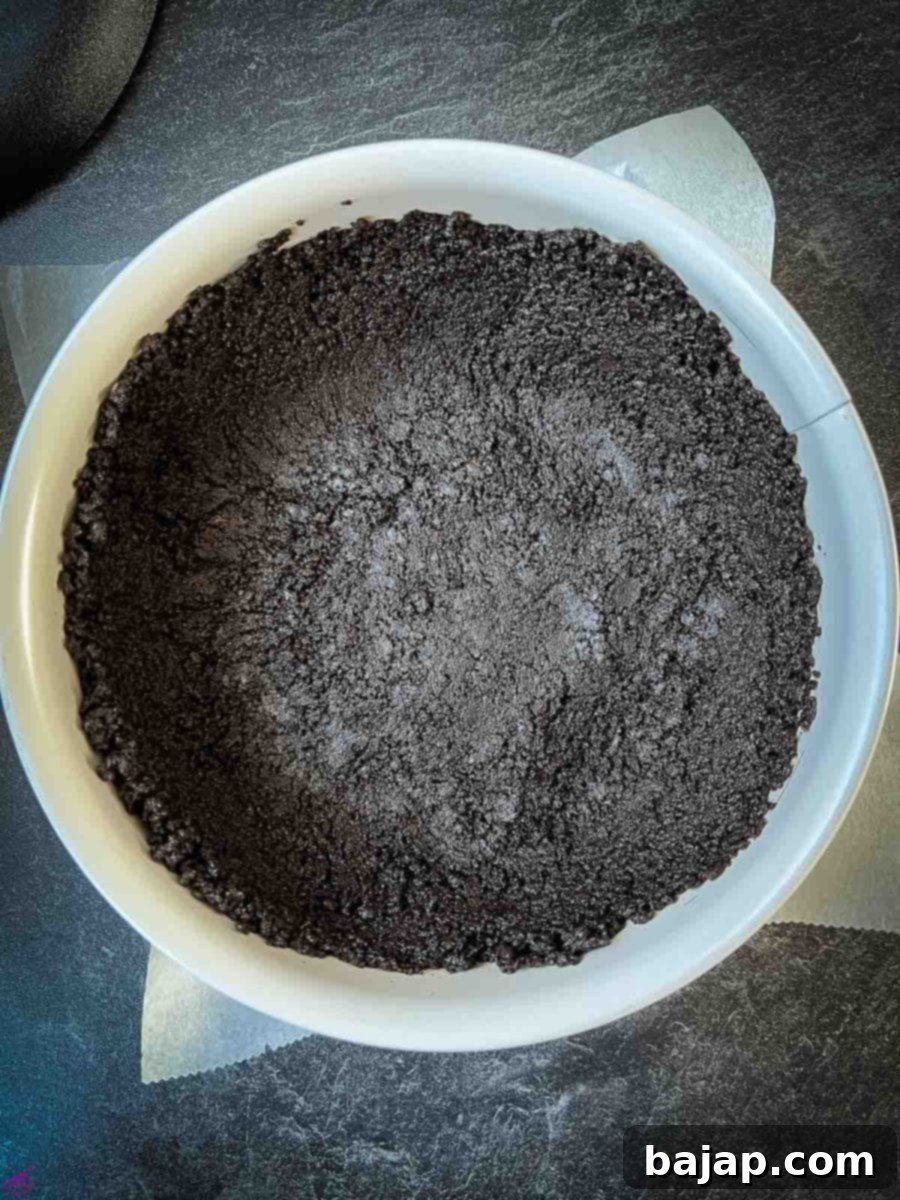
Press the Oreo dough firmly into the springform pan, extending up the sides.
Now, transfer the entire Oreo mixture into your prepared springform pan. Using the back of a spoon or your fingertips, firmly press the mixture across the bottom and slightly up the sides of the pan. The goal is to create an even, compact layer that will hold its shape. A tight crust is essential for a no-bake cheesecake! Once pressed, place the filled pan in the refrigerator for at least 15 minutes to chill and firm up, preparing it for the creamy filling.
Step 3 – Raspberry Sauce: The “Bloody” Swirl
This homemade raspberry sauce is what gives our Halloween cheesecake its spooky, “bloody” allure and bright, tangy flavor. In a small saucepan, combine your fresh raspberries, three tablespoons of water, and the granulated sugar. Heat this mixture over medium heat, stirring occasionally. As it heats, the raspberries will begin to break down, and the mixture will start to bubble gently. Use a rubber spatula or spoon to further mash the berries, ensuring all the ingredients are well combined and the fruit releases its juices.
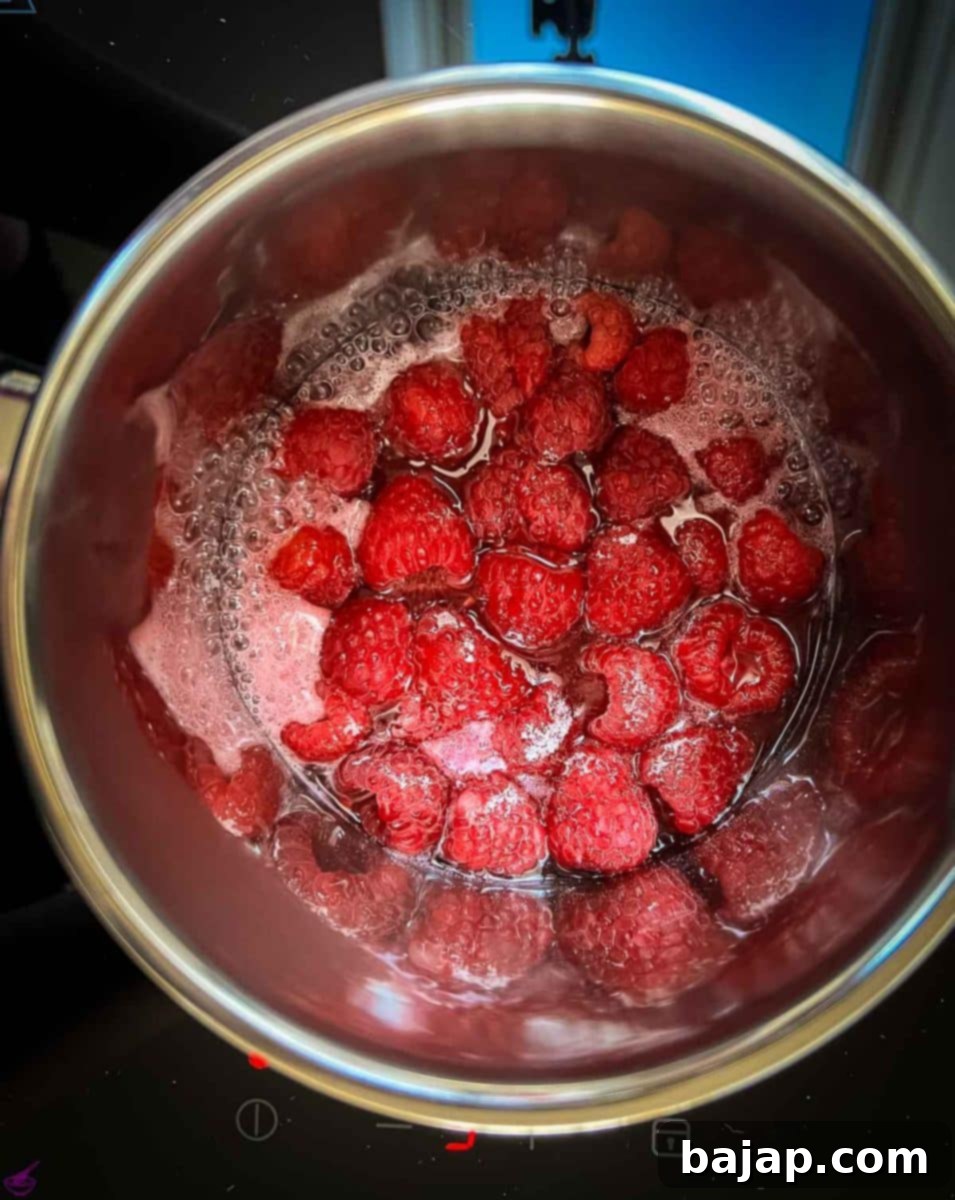
The vibrant raspberry mixture begins to bubble, signaling it’s time to thicken.
In a separate small bowl, whisk together one tablespoon of cold water and the cornstarch until the cornstarch is completely dissolved and no lumps remain. This cornstarch slurry is crucial for thickening the sauce. Add this mixture to the simmering raspberry sauce in the saucepan and stir continuously. Bring the sauce to a brief boil, then immediately reduce the heat to a gentle simmer. The sauce will begin to thicken quite quickly, usually within 2-3 minutes. You’ll know it’s ready when it coats the back of a spoon.
To achieve that perfectly smooth, seedless “bloody” effect, press the prepared raspberry sauce through a fine-mesh strainer into a clean bowl. Discard any remaining seeds or pulp. What you’ll be left with is a gorgeously smooth, vibrant red raspberry sauce. Set this aside to cool completely before using it in the cheesecake. Cooling is essential to prevent it from melting the cheesecake layers.
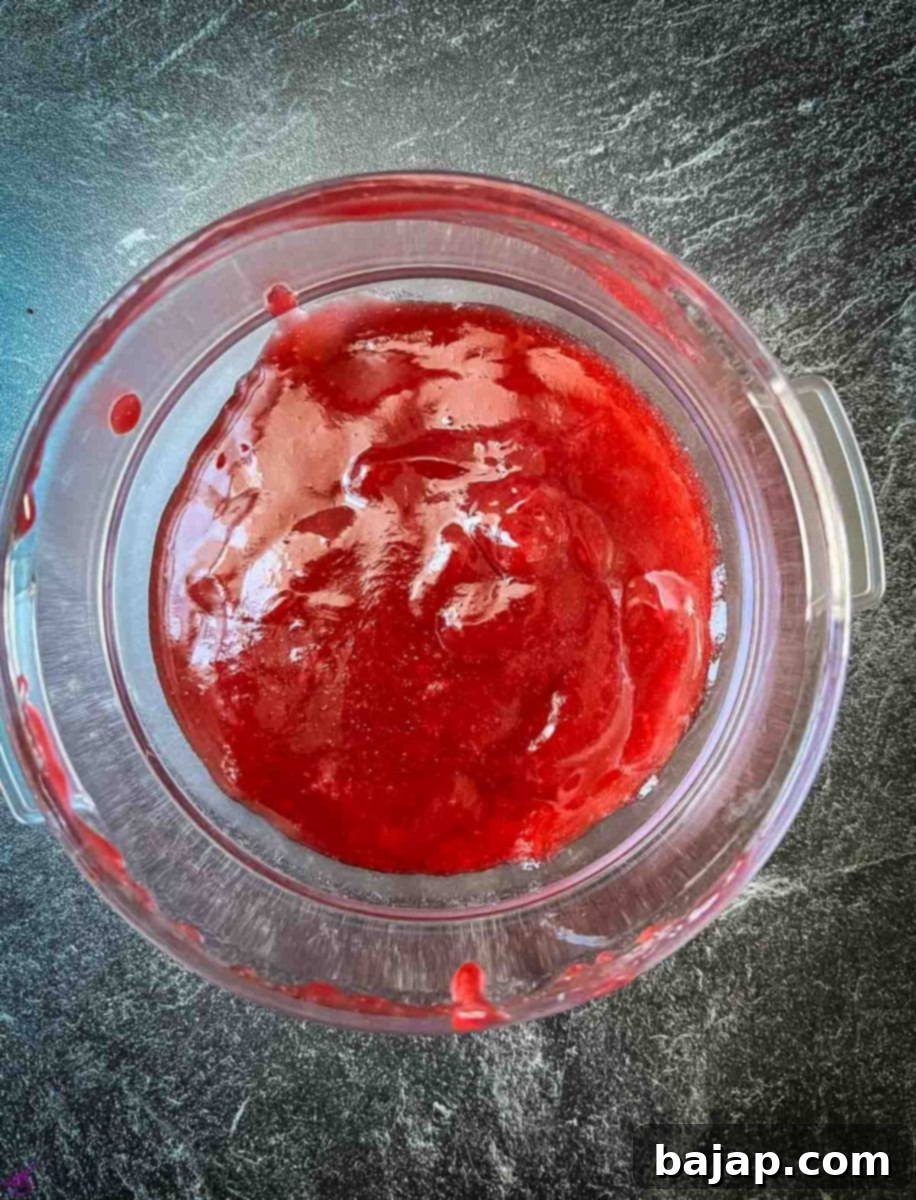
Our finished, perfectly smooth raspberry sauce, ready to add a “bloody” swirl.
Step 4 – The Cheesecake Filling: Creamy White Chocolate Dream
The heart of this dessert is its rich, creamy white chocolate filling. For the best results, ensure your full-fat cream cheese is at room temperature. This is crucial for achieving a lump-free, smooth filling. Place the softened cream cheese in the bowl of your stand mixer (or a large, deep mixing bowl if using a hand mixer).
Whisk the cream cheese on medium speed until it’s completely smooth and fluffy, which usually takes about 3-4 minutes. Remember to scrape down the sides of the bowl periodically to ensure everything is incorporated. If you notice any small lumps, let the cream cheese sit for another 10-15 minutes to soften further, then whip again until perfectly smooth.
Next, squeeze half a lemon to get fresh lemon juice. Add the confectioner’s sugar, vanilla extract, and two tablespoons of fresh lemon juice to the cream cheese mixture. Beat on medium speed for another 3-5 minutes until the mixture is light and fluffy. The lemon juice not only adds a lovely bright note but also helps to stabilize the cheesecake.
Now, prepare your white chocolate ganache. You’ll need a medium bowl and a glass measuring cup for this. Pour half of the heavy whipping cream (60 ml or ¼ cup) into the measuring cup and microwave it for approximately 1 minute, or until it’s heated but not boiling. Be careful not to overheat the cream.
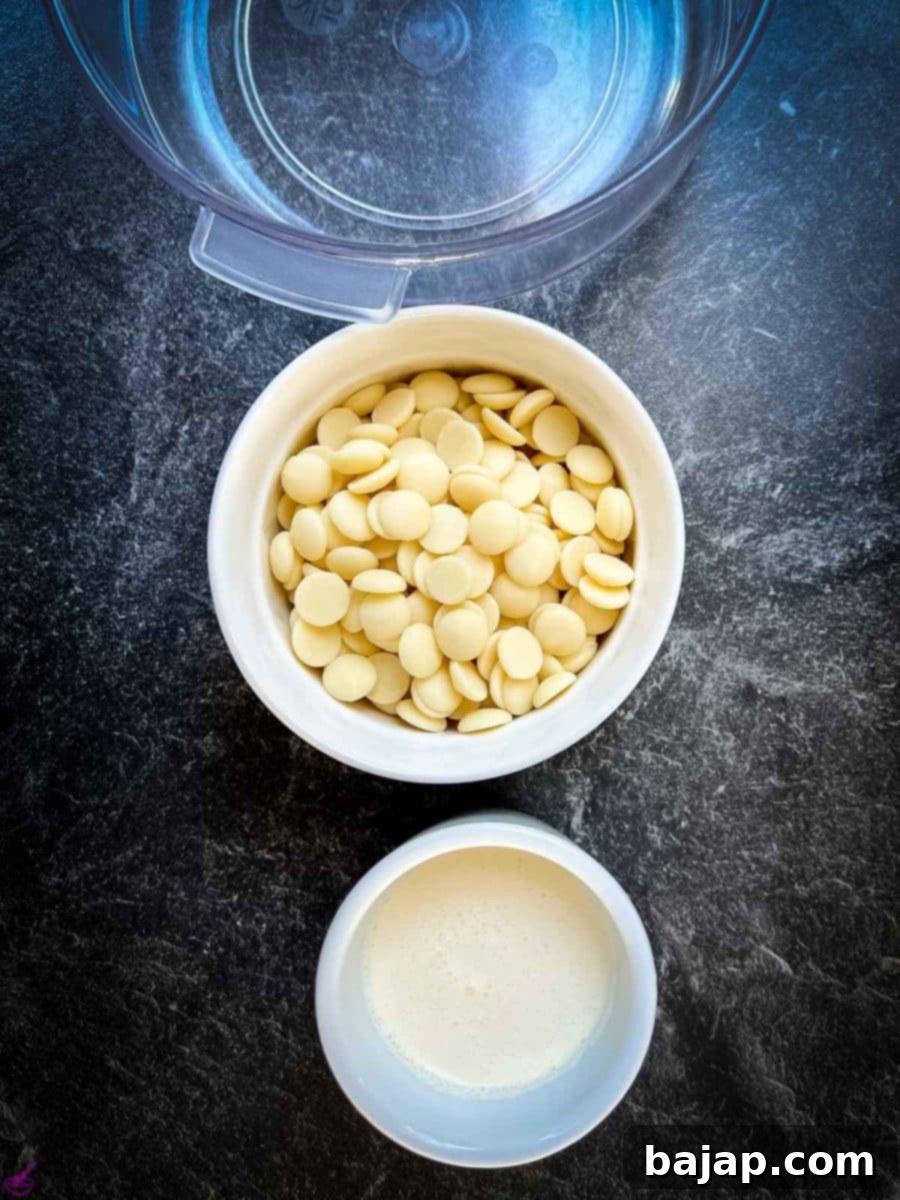
Warm cream meeting chopped white chocolate for a smooth ganache.
Place your chopped white chocolate in a separate bowl. Pour the hot cream over the white chocolate and let it sit for about 30 seconds to begin melting. Then, whisk vigorously with a fork until the white chocolate has fully melted and you have a smooth, pourable ganache. If there are still a few stubborn lumps, microwave the mixture for an additional 10 seconds, but be very careful not to overheat, as white chocolate can seize easily.
With your stand mixer on medium speed, slowly pour the warm white chocolate ganache into the cream cheese mixture, beating until it is thoroughly blended and smooth. Finally, add the remaining heavy whipping cream to the bowl. Mix again on medium-low speed just until everything is well combined and the mixture is light and airy. Be careful not to overmix at this stage, as it can cause the cheesecake to become too stiff or grainy.
Step 5 – Assemble the Cheesecake: Layer by Layer
Now it’s time to bring all the delicious components together! Retrieve your chilled Oreo crust from the refrigerator. Carefully pour half of the creamy white chocolate cheesecake mixture into the crust. Gently spread it out with a spatula to create an even layer that covers the entire bottom of the crust.
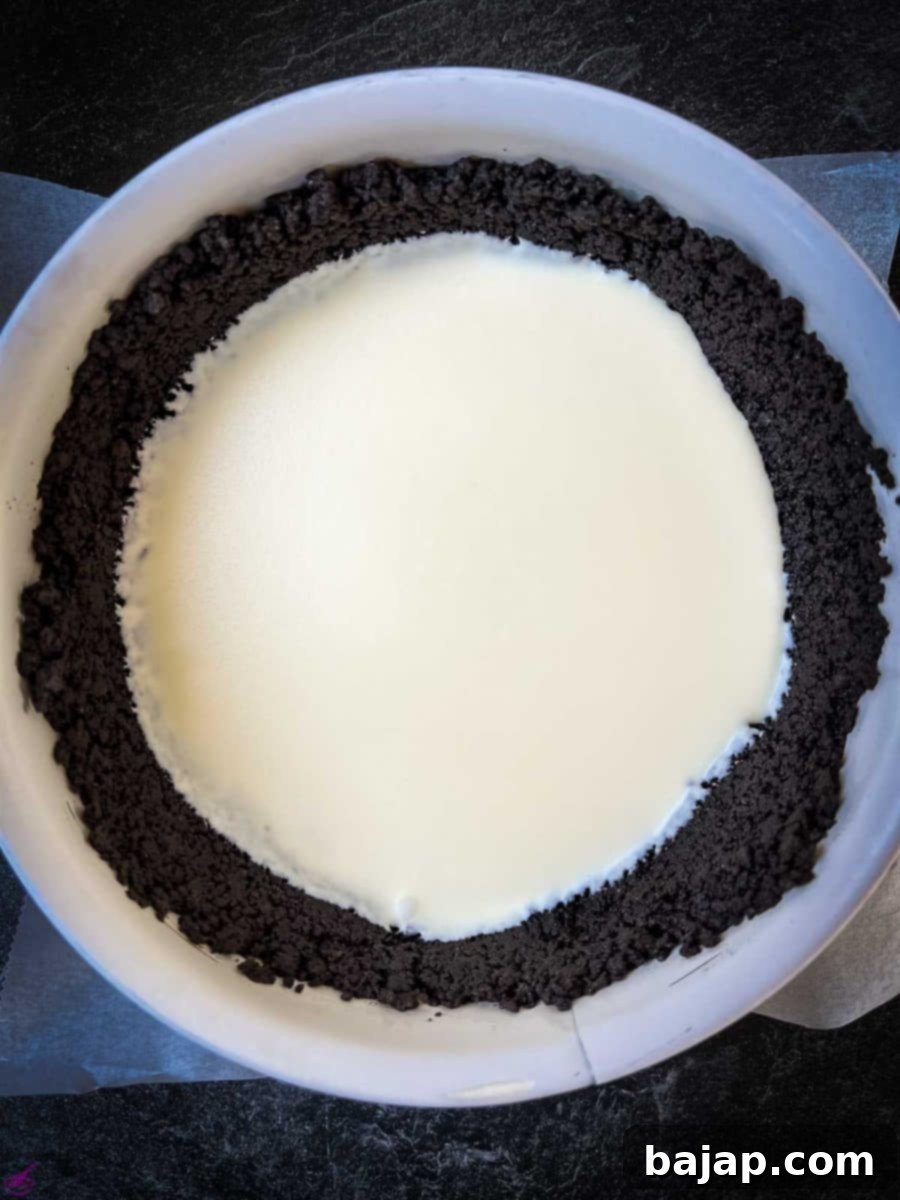
The first layer of creamy cheesecake filling meets the dark Oreo crust.
Place the cheesecake back into the freezer for a quick 10-minute chill. This brief freezing period helps the first layer of cheesecake set slightly, preventing the raspberry sauce from bleeding too much into the white chocolate layer when added.
Once the first layer is slightly firm, remove the cake from the freezer. Spoon your cooled raspberry sauce onto the cheesecake mixture. Gently spread the sauce evenly over the white chocolate layer using a spoon, being careful not to disturb the layer beneath. This creates that striking “bloody” middle layer.
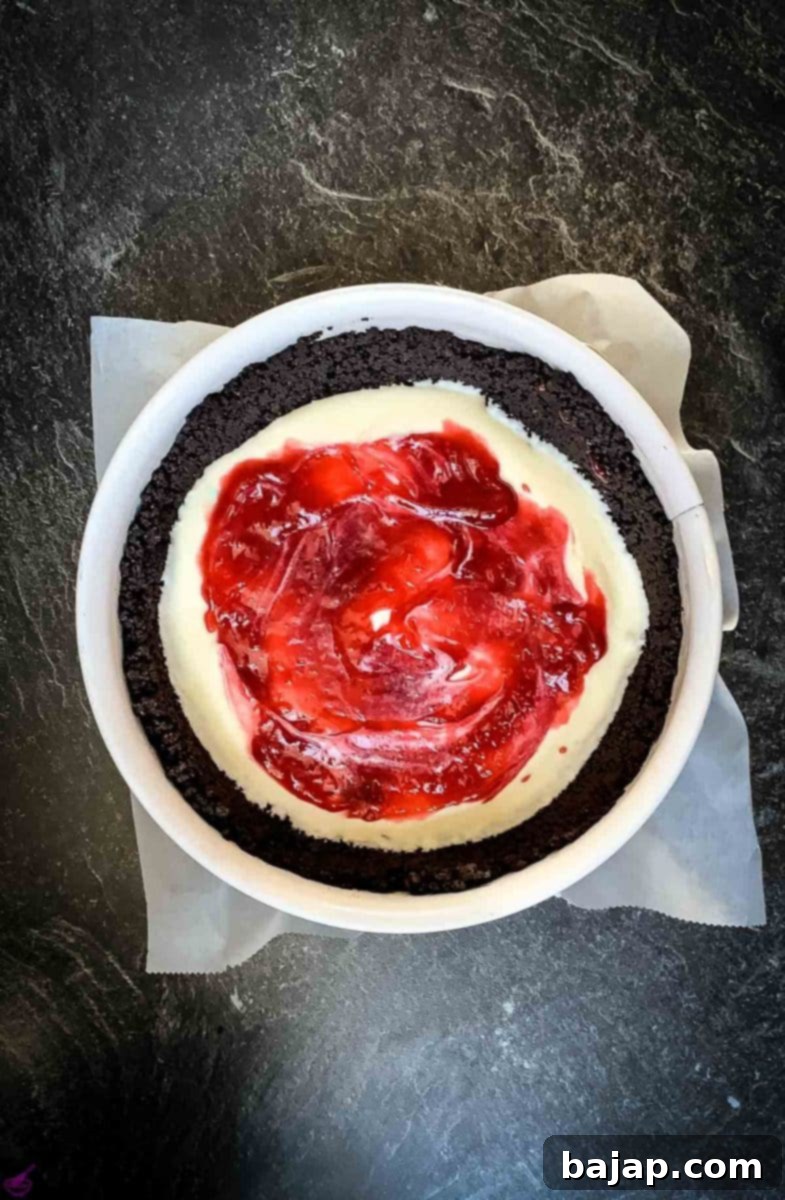
The luscious raspberry sauce creates a vibrant, “bloody” layer.
Finally, carefully spoon the remaining cheesecake mixture on top of the raspberry layer. This step requires a delicate hand to ensure the layers remain distinct. Gently smooth out the top layer to create an even surface.
A Little Trick for a Perfectly Smooth Top Layer: To prevent the cheesecake mixture from sticking to your spoon while smoothing, moisten the back of a spoon with water. Hold the spoon under running water and shake off the excess. When the spoon is wet, the cheesecake mixture will glide smoothly, making it much easier to achieve a beautiful, even top layer. Repeat wetting the spoon as needed to maintain its non-stick quality.
Step 6 – The Spider Web: A Hauntingly Beautiful Finish
The chocolate spiderweb is the crowning artistic touch that brings the Halloween theme to life. To create the ganache for the web, place four tablespoons of heavy whipping cream in a measuring cup and microwave it for about 45 seconds, just until hot. If you prefer using dark chocolate for a bolder contrast, I recommend increasing the heavy cream slightly to six tablespoons, as dark chocolate is thicker.
Put your chosen chocolate (milk or dark) in a medium bowl and pour the hot cream over it. Let it sit for a moment, then stir the mixture vigorously with a fork until you have a completely smooth, thick, and glossy ganache. It should be thick enough to hold its shape but still pourable.
Transfer the chocolate ganache into a cake-decorating piping bag. To make filling easier, place the piping bag in a tall glass or container, folding the edges over the rim. This frees both hands to pour the ganache without mess.
Once the bag is filled, snip off a tiny bit of the tip to create a small opening. Start by piping a single dot of ganache in the very center of the cheesecake. Then, pipe a large circle on top of the cheesecake, leaving about ½-inch (1.2 cm) of space from the edge. Continue piping concentric circles, leaving about ½-inch to 1-inch (1.2-2.5 cm) of space between each circle, moving inwards towards the center dot.
Now for the spiderweb effect! Take the tip of a knife or a toothpick and, starting from the center dot, gently drag a line outwards towards the outer edge of the cheesecake, through all the piped circles. Repeat this process every 1-inch (2.5 cm) around the cake, always dragging from the center outwards. To make the web look more natural and “spooky,” try to make the lines slightly curved rather than perfectly straight. This creates the illusion of delicate, intricate strands.
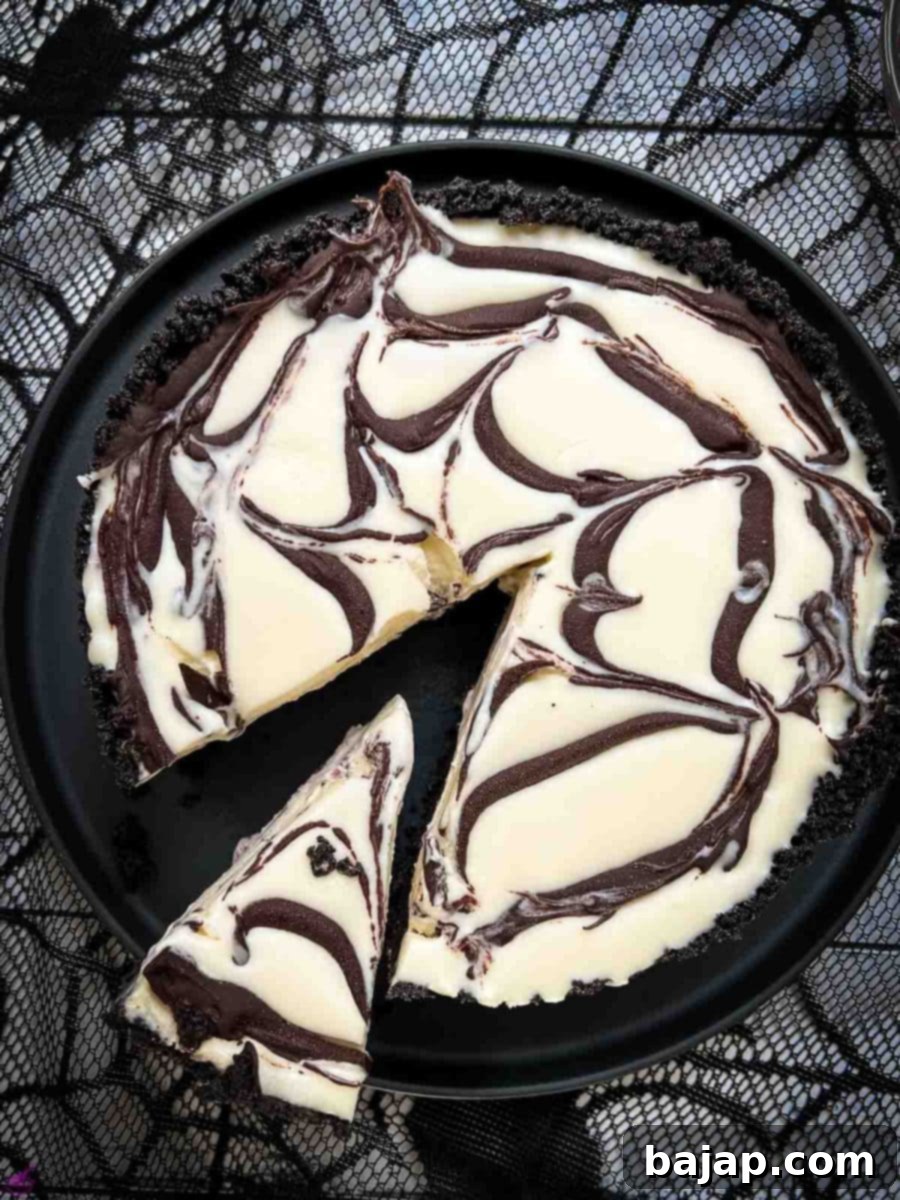
The finished cheesecake, decorated with a haunting chocolate spiderweb, ready to be sliced.
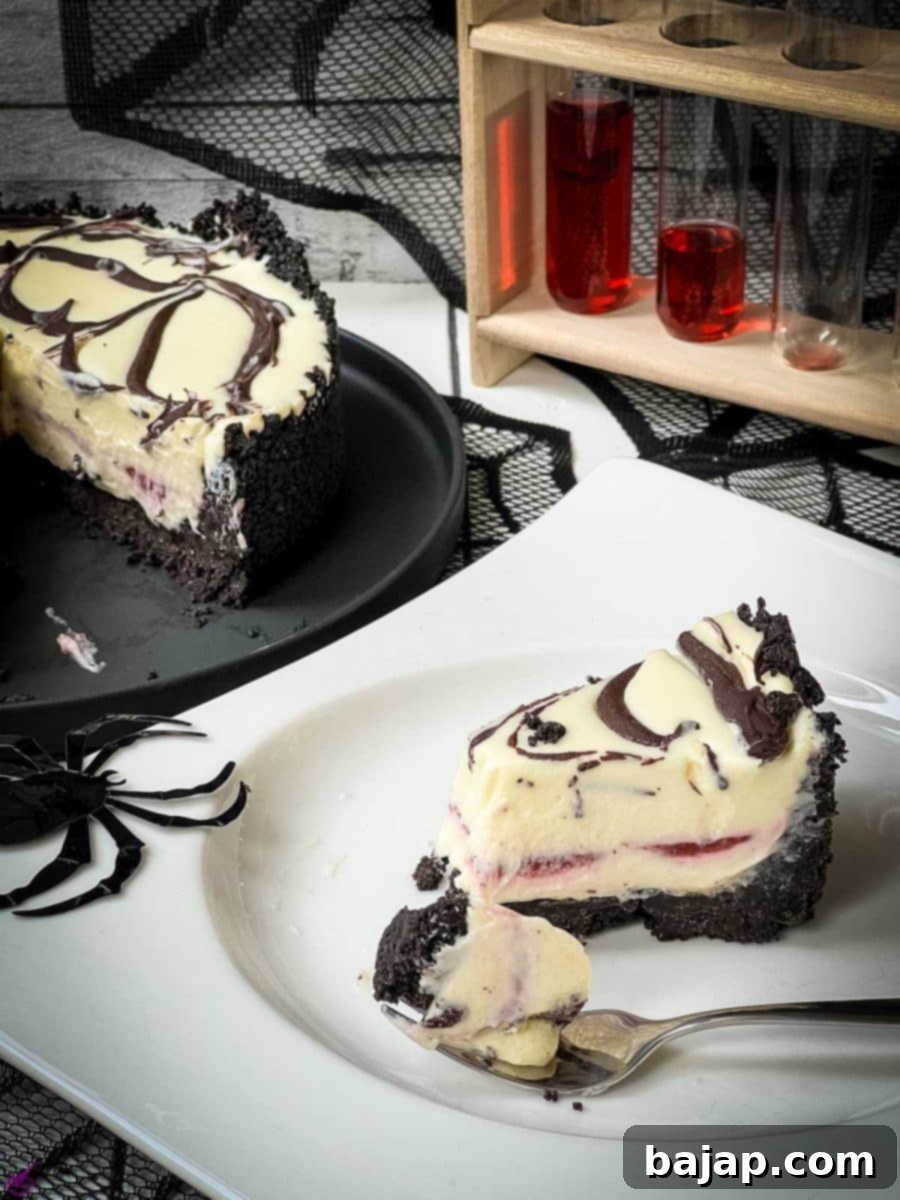
Serve this deliciously chilled cheesecake and watch it disappear!
Finally, and perhaps most importantly, refrigerate the finished cheesecake for at least 6 hours. This crucial chilling time allows the cheesecake to set properly, ensuring it’s firm enough to slice beautifully and preventing it from being too runny. For the best texture and flavor, chilling it overnight is ideal. Serve this wonderful white chocolate raspberry cheesecake chilled for the ultimate indulgence!
👻 More Spooky Recipes for You to Try This Halloween
Looking to complete your Halloween feast with more ghoulish delights? Check out these other hauntingly good recipes from our collection:
- Spiderweb cookies – a fun, decorative treat that perfectly matches your cheesecake theme!
- Red Halloween Cocktail – the perfect crimson drink to accompany your “bloody” cheesecake.
- Limoncello Vodka – a zesty spirit that can add a bright kick to any Halloween gathering.
- Kraken with Ginger Beer – a dark and stormy choice for adult party-goers.
- Halloween Cocktails {roundup} – a collection of eerie drinks to suit every taste.
- Gosling’s Dark & Stormy – another classic dark cocktail for a sophisticated spooky evening.
- Kraken Cola – simple yet satisfying for a quick Halloween drink.
- Kramble – a unique cocktail to surprise your guests.
- Spooky Tarts – miniature treats that complement the cheesecake beautifully.
- Sloe Screw – a vibrant and fruity option for your festive bar.
💭 Pro Tip for a Flawless Cheesecake
The secret to a truly smooth and lump-free cheesecake filling lies in your cream cheese. Before you even think about adding other ingredients, ensure your cream cheese is at proper room temperature. This means taking it out of the refrigerator at least an hour, or even two, before you start. Cold cream cheese will inevitably lead to lumps, no matter how much you whip it. Once it’s softened, whisk it thoroughly with a stand mixer or hand mixer until it’s perfectly smooth and airy before incorporating any sugar or liquids. This foundational step guarantees a silky, luxurious texture for your final cheesecake.
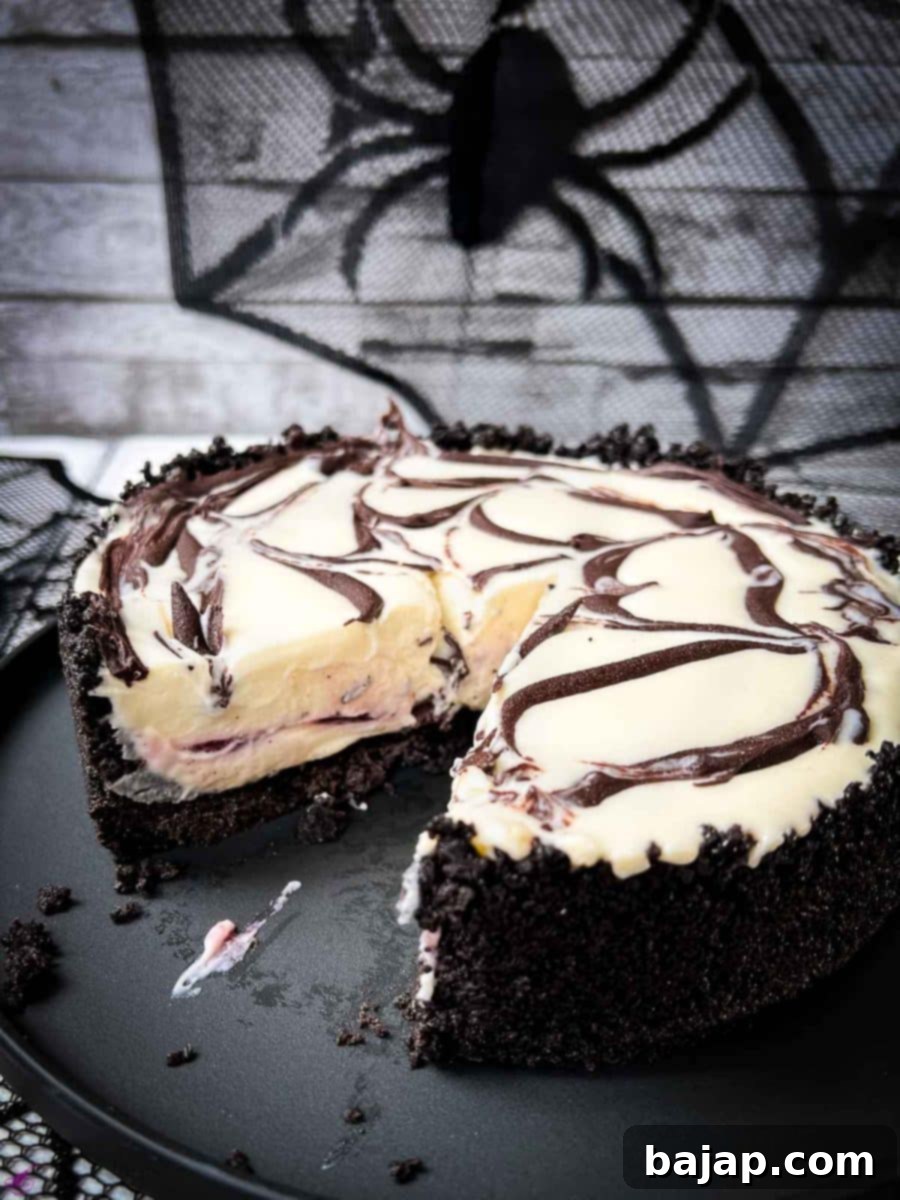
🙋🏻 Frequently Asked Questions About This Halloween Cheesecake
Here are some common questions about making and enjoying this delicious no-bake Halloween cheesecake:
Raspberries and chocolate are indeed a classic and beloved combination! The magic lies in the contrast: the bright, tangy zest of fresh raspberries provides a perfect counterpoint to the rich, deep, and often creamy taste of chocolate. While dark chocolate offers a more intense pairing that enhances both flavors, even the sweeter, milder notes of white chocolate beautifully complement raspberries, creating a delightful duo that excites the palate. It’s a balance of sweetness and tartness that’s universally appealing.
For this particular recipe, you absolutely do not need to worry about the oven at all! This is a “no-bake” spooky cheesecake, which means it relies on refrigeration to set, not heat. Even the delicious Oreo crust comes together without any baking. This makes it incredibly easy and stress-free, especially when you’re busy with other Halloween preparations.
Once assembled, this delicious Halloween cheesecake should be stored in an airtight container in the refrigerator for three to five days. It’s always best enjoyed fresh, but it will hold up well for a few days. If you’re looking to prepare this spooky treat well in advance of Halloween or want to save leftovers, you can also freeze it! Just make sure to remove it from the springform pan first after its initial 6-hour chill, then wrap it tightly in plastic wrap or place it in an airtight freezer-safe container. When ready to serve, thaw it gradually in the refrigerator.
Several elements can enhance the naturally delicious flavor of raspberries. One simple yet highly effective trick is to add a small amount of fresh lemon juice. The acidity of the lemon brightens and intensifies the fruit’s natural sweetness and tartness, making the raspberry flavor really pop. In this particular no-bake cheesecake recipe, we incorporate a touch of fresh lemon juice into the creamy filling, which not only enhances the overall taste but also perfectly complements the raspberry swirl.
If you embark on making this delightful recipe, please share your experience by giving it a ★★★★★ star rating and leaving a comment below. Your feedback means the world! You can also sign up for our Newsletter or follow me on Pinterest or Instagram, and don’t forget to share your creation with me! Just tag me @combinegoodflavors and use the hashtag #combinegoodflavors so I don’t miss your spooky masterpiece.
🥜 Substitutions for Dietary Needs
This versatile no-bake Halloween cheesecake can be adapted to accommodate certain dietary preferences or restrictions without compromising on its deliciousness or spooky charm. Here are some thoughtful substitutions:
- Gluten-Free Option: To make this no-bake Halloween cheesecake entirely gluten-free, the primary substitution needed is for the Oreo cookies in the crust. Many brands offer gluten-free chocolate sandwich cookies that closely mimic the taste and texture of Oreos. Simply swap them out, and follow the rest of the recipe as instructed.
- Fructose Intolerance Considerations: For individuals with fructose intolerance, traditional Oreo cookies unfortunately contain fructose syrup. While some people with mild intolerance might not experience discomfort from the small amount in a slice, it’s always best to err on the side of caution if you are highly sensitive. In such cases, replace the Oreo cookies with a cookie variety that is explicitly fructose-free. You can also make your own simple chocolate cookie crust using fructose-friendly ingredients. Additionally, when preparing the raspberry sauce, consider adding a teaspoon of dextrose (glucose) as a sweetener instead of granulated sugar, as dextrose is often better tolerated by those with fructose intolerance. Always listen to your body and consult with a healthcare professional if you have severe dietary concerns.
🍽 Essential Equipment for Your No-Bake Cheesecake
Having the right tools on hand will make the process of creating this Halloween cheesecake smooth and enjoyable. Here’s what you’ll need:
- 9-inch springform pan (23 cm) – essential for easy release of your cheesecake.
- Baking paper – for lining the bottom of the pan.
- Food processor – for quickly crushing those Oreo cookies into fine crumbs.
- Mixing bowls – various sizes for different components.
- Small saucepan – for preparing the raspberry sauce.
- Small pan – for melting butter.
- Close-meshed sieve – to achieve a perfectly smooth, seedless raspberry sauce.
- Glass measuring cup – for heating cream and precise liquid measurements.
- Lemon squeezer – to get fresh lemon juice efficiently.
- Tablespoon – for measuring and stirring.
- Fork – for whisking small amounts and melting chocolate.
- Pastry bag – for piping the intricate spiderweb design.
🌡 Storage & Freezing Tips
Proper storage ensures your Halloween cheesecake remains fresh and delicious for as long as possible, whether you’re planning ahead or saving leftovers:
- Refrigerator Storage: This no-bake Halloween cheesecake will keep beautifully in the refrigerator for 3-5 days. Always store it in an airtight container or cover it tightly with plastic wrap to prevent it from absorbing other food odors and to maintain its freshness.
- Freezing for Make-Ahead or Leftovers: This cheesecake is fantastic for freezing! If you want to prepare it well in advance or save some slices for later, you can freeze it after it has fully assembled and chilled for the initial 6 hours in the refrigerator. The initial chilling is important for it to firm up before freezing.
- How to Freeze: Once the cheesecake has chilled and set in the springform pan, carefully run a thin knife around the edge of the pan before releasing the spring. This helps prevent sticking. Then, remove it from the pan. For whole cheesecakes, wrap it tightly in several layers of plastic wrap, followed by a layer of aluminum foil, or place it in a large airtight freezer-safe container. For individual slices, wrap each slice separately in plastic wrap before placing them in an airtight container.
- How to Thaw: When you’re ready to enjoy your frozen cheesecake, transfer it from the freezer to the refrigerator and let it thaw slowly for at least 6-8 hours, or overnight. Slow thawing helps maintain the cheesecake’s creamy texture. Do not thaw at room temperature, as this can make it overly soft or compromise its texture.
Other Delicious No-Bake Cheesecake Recipes
If you loved the ease and flavor of this no-bake Halloween cheesecake, you’re in for a treat! We have a whole collection of irresistible no-bake cheesecake recipes perfect for any occasion:
- No-bake Ricotta Cheesecake – a lighter, yet equally indulgent option.
- No-bake Pumpkin Cheesecake – perfect for fall festivities beyond Halloween.
- No-bake Fig Cheesecake in a Jar – individual servings perfect for parties or picnics.
- No-bake Mint Chocolate Cheesecake – a refreshing twist with classic flavors.
- No-bake 4th of July Cheesecake – patriotic and delicious.
- No-bake Eggnog Cheesecake with Ginger Spiced Crust – a festive choice for the holiday season.
- 5 ingredient mini Oreo Cheesecakes – quick, easy, and adorable individual desserts.
- No-bake Strawberry Cheesecake – a timeless classic with fresh berry goodness.
- Cheesecake Pudding Pie (created by whenisdinner.com) – another fantastic no-bake option from a fellow food blogger.
📖 Recipe Card: No-Bake Chocolate Raspberry Cheesecake (Halloween Cheesecake)
No Bake Chocolate Raspberry Cheesecake (Halloween Cheesecake)
Nora
Prevent your screen from going dark
Save Recipe
Saved!
Pin Recipe
1 hour
6 hours 20 minutes
7 hours 20 minutes
Dessert, Partyfood
American
16 Slices
414 kcal
Equipment
-
9-inch springform pan ( 23 cm)
-
Baking Paper
-
Food processor
-
Mixing bowls
-
Small Saucepan
-
Small pan
-
Close meshed sieve
-
Glass measuring cup
-
Lemon squeezer
-
Tablespoon
-
Fork
-
Pastry bag
Ingredients
Raspberry Sauce
- 6 oz Fresh raspberries
- ⅓ cup Sugar
- ¼ cup Water divided
- 1 tablespoon Cornstarch
Cookie Crust
- 35 Oreos
- 7 tablespoon Butter salted
Cheesecake Cream
- 24 oz Cream cheese
- 1 ¼ cup Confectioner’s sugar
- 1 tablespoon Vanilla extract
- 2 teaspoon Fresh lemon juice
- ½ cup Whipped cream divided
- 1 cup White chocolate chopped
Spiderweb
- 6 oz Milk chocolate or dark chocolate
- 6 tablespoon Whipped cream
Instructions
Step 1 – Preparation
-
Prepare a round springform pan with baking paper on the bottom. Lightly spray the sides of the pan with non-stick spray and set aside.
Step 2 – The Oreo cookie dough
-
Place 35 Oreos in a food processor, and process them into fine cookie crumbs. In the meantime, slowly melt 7 tablespoon Butter in a small pan.35 Oreos
-
Add the crumbled cookie pieces to the food processor along with the melted butter and process on high until the cookie crumbs stick to the sides of the food processor.7 tablespoon Butter
-
The mixture will have a sand-like consistency and can be crushed with your fingers.
-
Empty the Oreo mixture into it and press the Oreo dough firmly into the springform pan. Spread it over the bottom and sides of the pan to create a nice even shape.
-
Place the filled pan in the refrigerator for 15 minutes to cool.
Step 3 – Raspberry sauce
-
Place 6 oz Fresh raspberries, three tablespoons of water, and ⅓ cup Sugar in a sauce pot and heat over medium heat.6 oz Fresh raspberries, ¼ cup Water, ⅓ cup Sugar
-
Once the mixture starts bubbling, loosen the raspberries with a rubber spatula or spoon.
-
In a small separate bowl, whisk together one tablespoon of cold water and 1 tablespoon Cornstarch until completely dissolved.1 tablespoon Cornstarch, ¼ cup Water
-
Add this mixture to the raspberry sauce and stir. Bring to a boil briefly, then reduce the heat to a simmer.
-
The sauce will thicken within 2-3 minutes.
-
Press the prepared sauce through a fine mesh sieve to remove the seeds from the sauce. What remains is a lovely, smooth raspberry sauce.
-
Set it aside to cool.
Step 4 – The cheesecake filling
-
Place 24 oz Cream cheese in the bowl of your stand mixer.24 oz Cream cheese
-
Whisk the cream cheese until it is completely smooth and fluffy, scraping down the sides as needed, about 3-4 minutes.
-
Meanwhile, squeeze half a lemon.2 teaspoon Fresh lemon juice
-
Add 1 ¼ cup Confectioner’s sugar, 1 tablespoon Vanilla extract, and 2 teaspoon Fresh lemon juice to the bowl and beat on medium speed until the mixture is fluffy.1 ¼ cup Confectioner’s sugar, 1 tablespoon Vanilla extract, 2 teaspoon Fresh lemon juice
-
Add half of ½ cup Whipped cream (60 ml / ¼ cup) to the measuring cup and microwave for 1 minute or until heated.½ cup Whipped cream
-
Place 1 cup White chocolate in a bowl and pour the cream over the white chocolate. Whisk quickly with a fork to melt the white chocolate into a smooth, pourable mixture.1 cup White chocolate
-
Turn the mixer to medium speed and slowly pour the white chocolate into the cheesecake mixture until thoroughly blended.
-
Add the remaining whipped cream. Remix it until everything is well combined.½ cup Whipped cream
Step 5 – Assemble the cheesecake
-
Remove the chilled crust from the refrigerator. Pour half of the cheesecake mixture into the crust and gently smooth it to cover the bottom.
-
Place in the freezer for 10 minutes to allow the mixture to set and firm up.
-
Remove the cake from the freezer and spoon the raspberry sauce onto the cheesecake mixture. Gently spread it out using a spoon.
-
Carefully spoon the remaining cheesecake mixture on top of the raspberry layer. Be careful not to mix the layers here.
Step 6 – The spider web
-
Place 6 tablespoon Whipped cream in a measuring cup and microwave for 45 seconds.6 tablespoon Whipped cream, 6 oz Milk chocolate
-
If you want to use dark chocolate for the spider web, I recommend using six tablespoons of heavy cream.
-
Put 6 oz Milk chocolate in a medium bowl and pour the hot cream over it. Stir the mixture with a fork until you have a smooth, thick ganache.
-
Pour the chocolate ganache into a cake decorating piping bag to shape the net.
-
Once filled, cut off the tip of the bag and make a dot in the center of the cheesecake.
-
Pipe a large circle on top of the cheesecake and repeat the process, leaving about ½-inch/ 1.2cm of space between the circles.
-
Now drag from the ganache’s center dot to the cheesecake’s outer edge a line (using the tip of a knife or a toothpick).
-
Repeat every 1-inch/2.5cm, making sure the circles are slightly curved to create a spider web.
-
Refrigerate for at least 6 hours to prevent the cheesecake from becoming too runny. Overnight is ideal. Serve chilled.
Never miss a recipe!
Sign up and let me spoil you weekly with a delicious homemade recipe!
halloween no bake cheesecake, no bake cheesecake, no bake spiderweb cheesecake, Oreo cheesecake, raspberry cheesecake
Like this recipe?
Mention @combinegoodflavors or tag #combinegoodflavors!
Nutrition values are estimates only, using online calculators. Please verify using your own data.
Serving: 1Slice
|
Calories: 414kcal
|
Carbohydrates: 45g
|
Protein: 5g
|
Fat: 29g
|
Saturated Fat: 16g
|
Polyunsaturated Fat: 2g
|
Monounsaturated Fat: 9g
|
Trans Fat: 0.2g
|
Cholesterol: 62mg
|
Sodium: 291mg
|
Potassium: 190mg
|
Fiber: 2g
|
Sugar: 25g
|
Vitamin A: 762IU
|
Vitamin C: 3mg
|
Calcium: 87mg
|
Iron: 3mg

❤️ More No-Bake Delights You Might Also Like
If you enjoy simple yet impressive no-bake desserts, be sure to explore these other fantastic recipes from our collection. They are perfect for various seasons and celebrations!
- No bake Vanilla Crescents Cheesecake
- No-bake 4th of July Fruit Tart
- Celebrate St. Patrick’s Day with No-Bake Lime Cheesecake in a Jar!
- Cookies ‘n Cream Blossom Cookies
⛑️ Important Food Safety Guidelines
Ensuring food safety is paramount when preparing any meal, especially desserts that involve fresh ingredients and no-bake methods. Please keep these guidelines in mind to keep your spooky treats safe and delicious:
- Cook to a minimum temperature of 165 °F (74 °C) – While this recipe is no-bake, remember this for any cooked components in other recipes.
- Do not use the same utensils on cooked food, that previously touched raw meat – Prevent cross-contamination by using clean utensils for each stage of food preparation.
- Wash hands after touching raw meat – Always practice good hand hygiene.
- Don’t leave food sitting out at room temperature for extended periods – Refrigerate perishable foods promptly, especially a cream-cheese based dessert like this cheesecake.
- Never leave cooking food unattended – A good reminder for any recipe involving heat.
- Use oils with high smoking point to avoid harmful compounds – Applicable for other recipes with cooking.
- Always have good ventilation when using a gas stove – Important for general kitchen safety.
For further comprehensive information on safe food handling, please refer to the Safe Food Handling – FDA guidelines.
