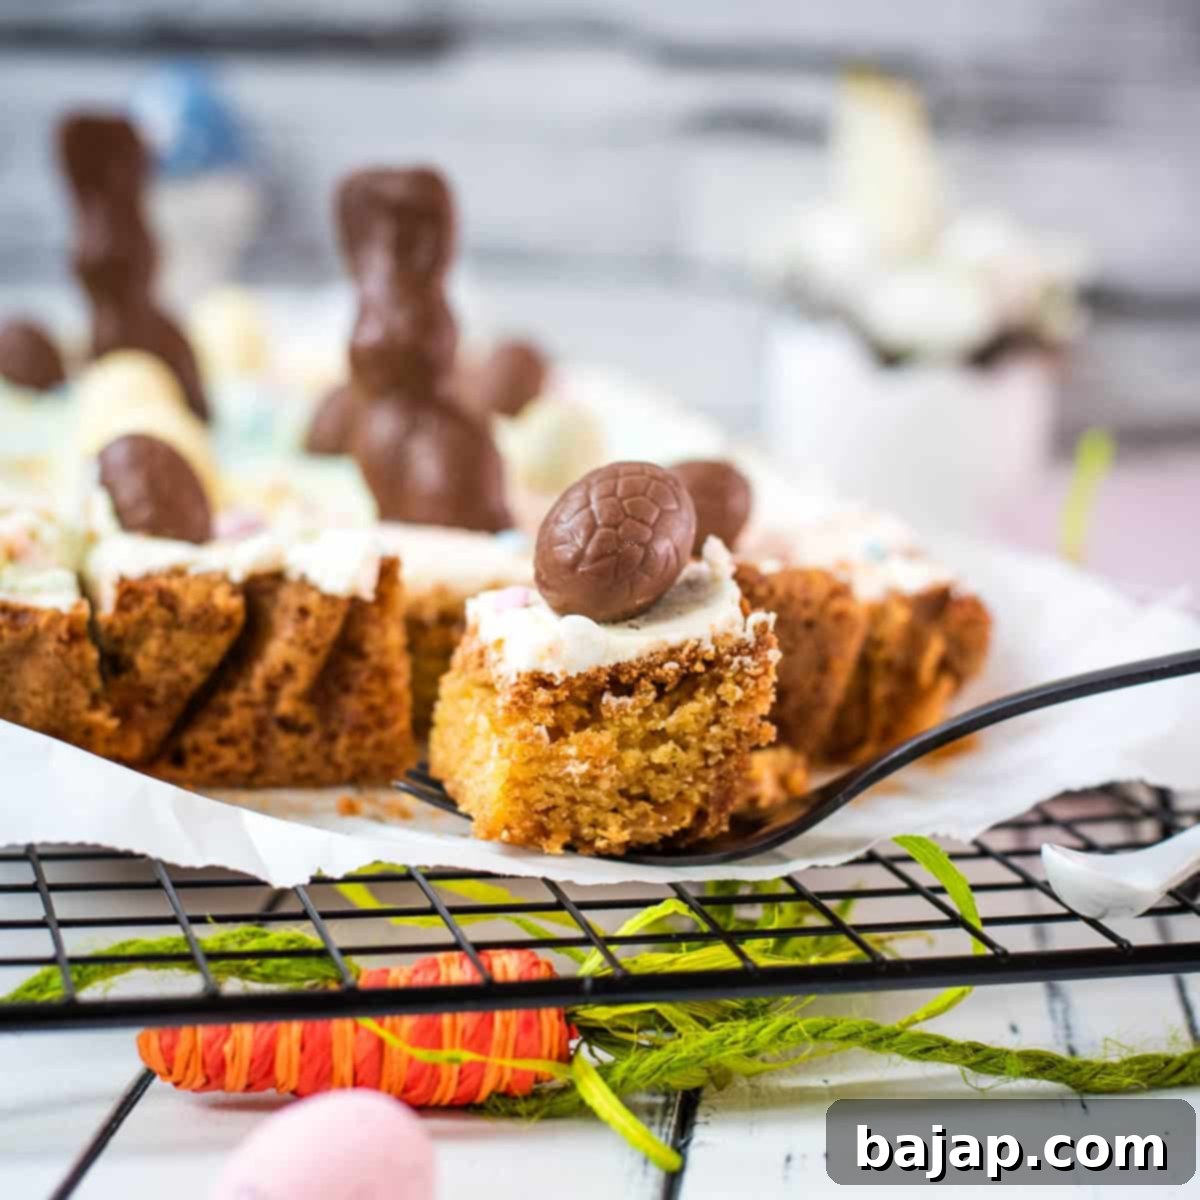
Ultimate Funfetti Easter Sugar Cookie Bars with Dreamy Marbled Buttercream
Spring is truly in full swing, and with its arrival, we’re eagerly anticipating the joy and vibrant colors of Easter! This year, I found myself completely immersed in a pastel fantasy, inspired by the delicate beauty of blooming flowers, the soft hues of springtime, and the cheerful, slightly chaotic fun of an Easter egg hunt. This inspiration led me to create the most enchanting and utterly delicious Easter cookie bars you could ever imagine. These aren’t just any cookie bars; they’re the kind of buttery, sweet, and perfectly gooey-in-the-middle Funfetti treats that practically sing “celebration” from the very first bite. Get ready to add a burst of color and flavor to your holiday table!
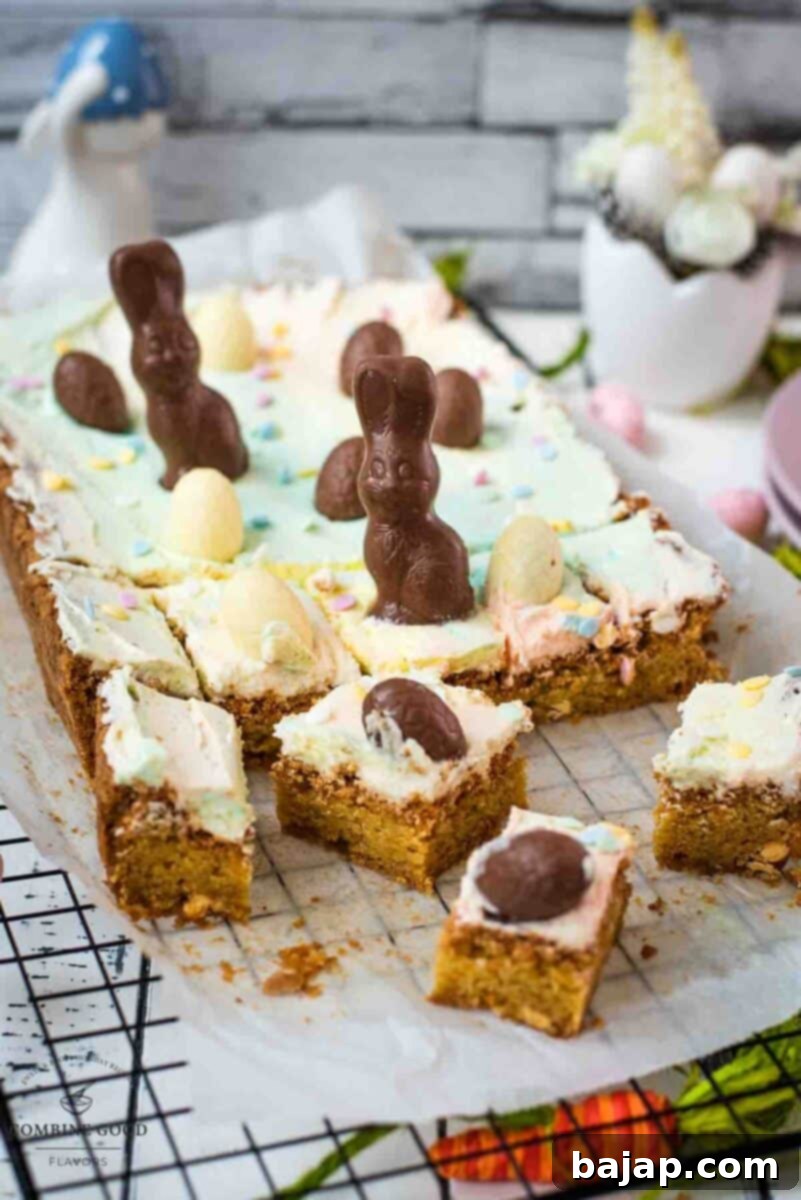
🎉 So, what elevates these Funfetti cookie bars to an extra special (and irresistibly cute) level? It’s a delightful combination of textures, flavors, and a touch of artistic flair that makes them truly memorable!
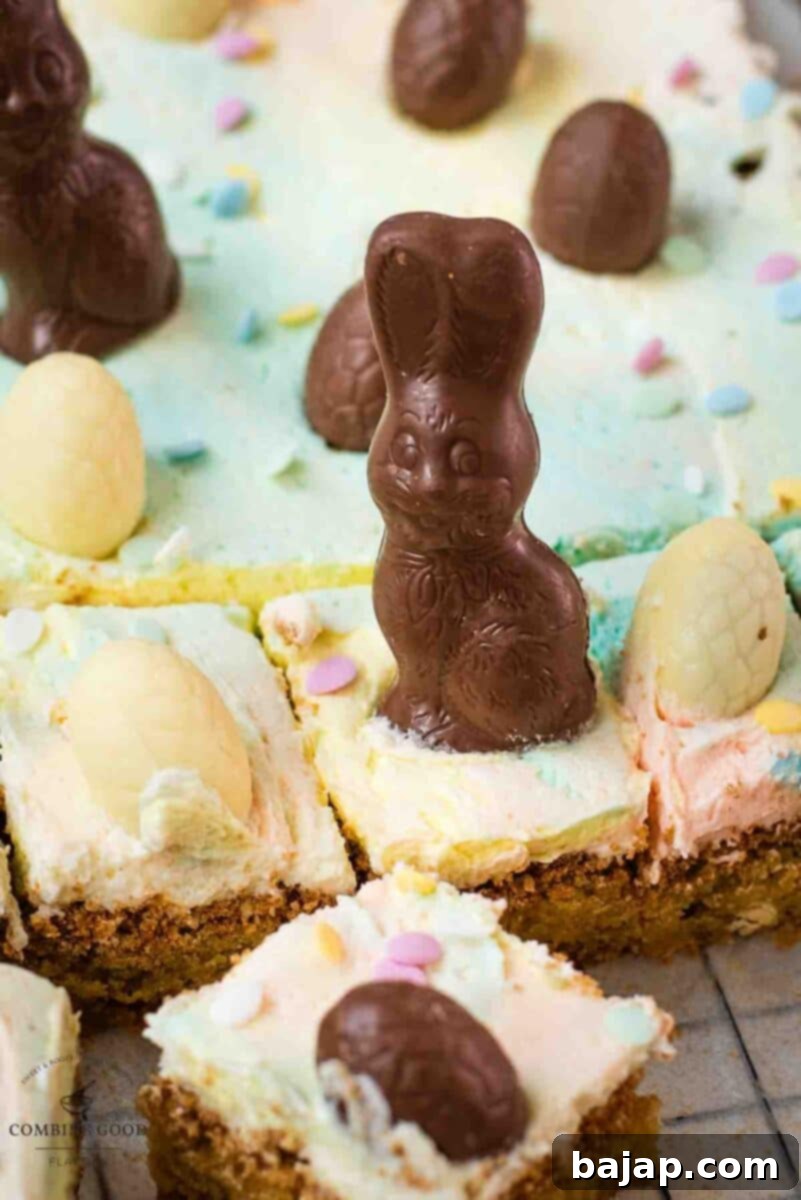
We begin with a base of supremely soft and sweet sugar cookie dough, baked just enough to achieve a sturdy yet wonderfully chewy, almost “half-baked” texture that everyone secretly adores. But the real magic happens next: a vibrant swirl of marbled buttercream, crafted in the most enchanting soft pastel colors. Each brushstroke of frosting mirrors the delicate beauty of spring, creating a visual feast. To complete these delightful Easter sugar cookie bars, I couldn’t resist showering them with a cheerful mix of colorful sugar sprinkles, tiny mini chocolate eggs, and even a few adorable chocolate bunnies peeking out. It’s like the Easter bunny himself made a special stop and left behind the most perfect, festive dessert!
Whether you’re meticulously planning an elaborate family Easter brunch, curating a festive dessert table, or simply craving a bright and joyful homemade treat to brighten your day, these Funfetti sugar cookie bars are an absolute must-bake. Their sweet and comforting flavor pairs wonderfully with a refreshing glass of milk, making them a hit with the little ones, while grown-ups can savor them with a cozy cup of tea or coffee. These bars are not just a dessert; they’re a centerpiece, a conversation starter, and a true embodiment of spring’s joyful spirit.
Let’s hop into the kitchen and bring this sweet Easter magic to life! 🐰✨ You’ll find that making these gorgeous cookie bars is just as enjoyable as eating them.
Why You’ll Adore These Easter Sugar Cookie Bars
- Irresistibly Chewy & Soft: The cookie base is perfectly baked, offering that delightful balance of chewiness and melt-in-your-mouth tenderness that sugar cookie lovers crave.
- Vibrant & Festive: Bursting with Funfetti sprinkles and topped with a gorgeous marbled buttercream, these bars are a feast for the eyes, perfectly capturing the spirit of Easter and spring.
- Easy & Fun to Make: Despite their impressive appearance, this recipe is straightforward and enjoyable, making it perfect for bakers of all skill levels, even for baking with kids!
- Customizable Decorations: Get creative with your sprinkles, mini chocolate eggs, and chocolate bunnies! There are endless ways to personalize these treats.
- Crowd-Pleasing Dessert: These bars are designed to be sliced and shared, making them ideal for holiday gatherings, potlucks, or as a special gift.
- Perfect Flavor Balance: Not overly sweet, the combination of the vanilla-almond cookie base and the creamy buttercream is simply divine.
🥘 Gather Your Ingredients
Creating these delightful Funfetti Easter Sugar Cookie Bars requires a few simple ingredients, easily found in your pantry or local grocery store. Each component plays a crucial role in building the perfect flavor and texture!
For the Cookie Bar Base: The Foundation of Flavor
- All-purpose flour: Provides the essential structure for our chewy cookie bars.
- Baking powder & Baking soda: Our leavening agents, ensuring a soft, slightly risen, and airy texture.
- Salt: A crucial flavor enhancer that balances the sweetness and brings out the richness of the butter.
- Unsalted butter, softened: The heart of our cookie bars, contributing incredible richness and a tender crumb. Ensure it’s perfectly softened for optimal creaming.
- Granulated sugar & Light brown sugar: A blend of sugars for depth of flavor and that desired chewy texture. Granulated provides sweetness, while brown sugar adds moisture and a hint of molasses.
- Large eggs: Act as binders, add richness, and contribute to the structure and moisture of the bars.
- Milk: Adds moisture to the dough, helping to create a smooth, pliable consistency.
- Vanilla extract: Essential for that classic, comforting sugar cookie flavor.
- Almond extract (optional, for extra flavor): A secret weapon for an elevated flavor profile, complementing the vanilla beautifully and adding a sophisticated twist.
- Pastel sprinkles (jimmies work best): The “Funfetti” in our Funfetti bars, adding pops of color and a festive touch. Jimmies hold their shape better during baking.
- White chocolate chips: These melt into pockets of creamy sweetness, adding another layer of indulgence to the cookie base.
For the Frosting: The Dreamy Marbled Topping
- Unsalted butter, softened: The base for our rich and creamy buttercream.
- Powdered sugar: The key to a smooth, sweet, and fluffy frosting. Sifting can help prevent lumps.
- Milk: Used to achieve the perfect frosting consistency – add slowly until desired spreadability is reached.
- Vanilla extract: Infuses the buttercream with classic flavor.
- Pinch of salt: Balances the sweetness of the frosting.
- Food coloring (pastel shades: pink, blue, yellow, etc.): Allows us to create those beautiful, soft spring colors for the marbled effect. Gel food colorings offer more vibrant hues with less liquid.
- Additional sprinkles and mini chocolate eggs for decorating: For that final flourish and ultimate festive appeal. Don’t forget those adorable chocolate bunnies!
For precise quantities and a printable recipe, please refer to the recipe card below.
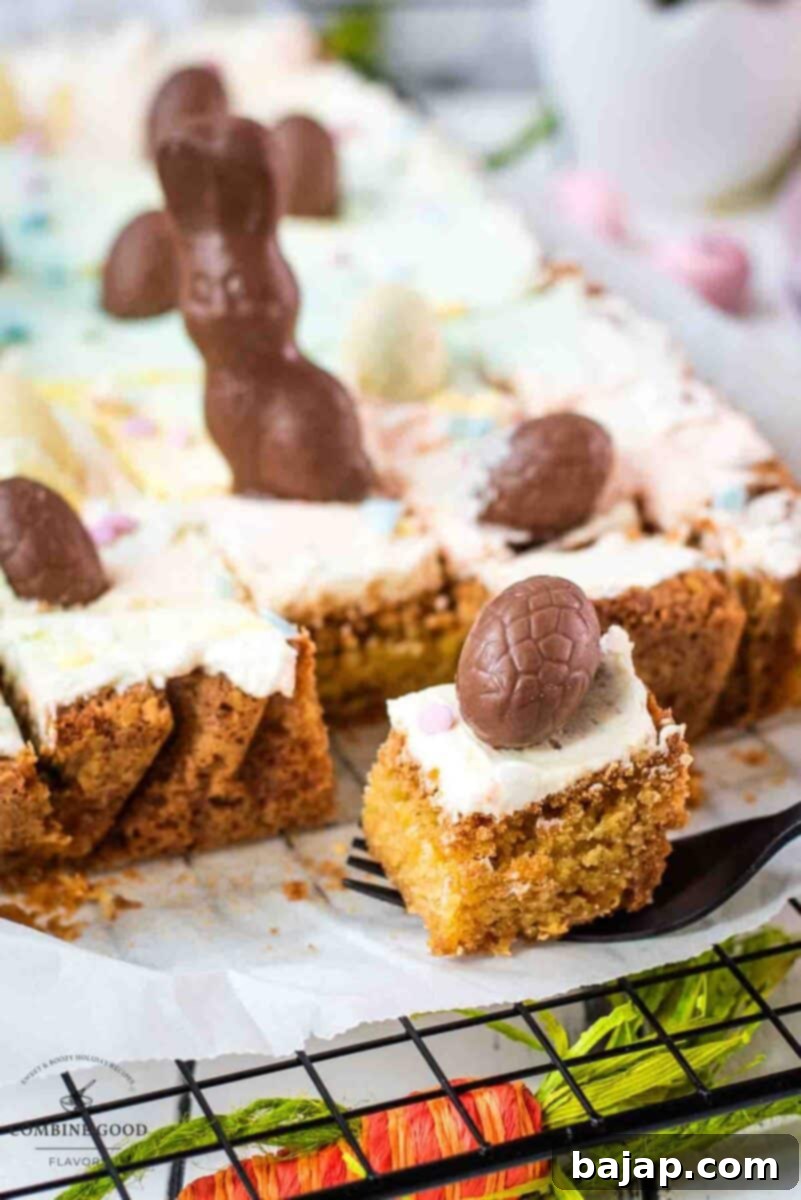
🔪 Step-by-Step Instructions to Bake Easter Funfetti Cookie Bars
Follow these easy steps to create your own batch of magical Funfetti Easter Sugar Cookie Bars!
Step 1: Prep Your Pan
Preheat your oven to a welcoming 350°F (175°C). Take a 9×13-inch (23×33 cm) baking pan and grease it thoroughly, then line it with parchment paper. Ensure the parchment paper hangs over the edges – this creates convenient “handles” that will make it incredibly easy to lift your cooled bars out of the pan later, ensuring a clean cut every time!
Step 2: Combine Dry Ingredients
In a medium-sized bowl, gently whisk together your all-purpose flour, baking powder, baking soda, and salt. Whisking ensures these dry ingredients are thoroughly combined and evenly distributed throughout your cookie dough. Set this bowl aside for now.
Step 3: Cream Wet Ingredients
In a large mixing bowl (the one your hand or stand mixer fits), beat the softened unsalted butter, granulated sugar, and light brown sugar together. Cream these ingredients until the mixture transforms into a light, fluffy, and wonderfully dreamy consistency. This process incorporates air, contributing to the soft texture of your cookie bars.
Step 4: Incorporate Eggs & Extracts
Crack in the large eggs one at a time, mixing well after each addition. Then, pour in the milk, vanilla extract, and that delightful splash of almond extract if you’re feeling a bit fancy! Continue mixing until all these wet ingredients are fully combined and smooth.
Step 5: Mix in Dry Ingredients & Funfetti
Gradually add the whisked dry ingredients into the wet mixture. Mix on low speed until the dough just comes together. Be careful not to overmix, as this can lead to tough cookie bars. Once barely combined, gently fold in the vibrant pastel sprinkles (jimmies are best for maintaining their shape and color!) and the creamy white chocolate chips. This is where the “Funfetti” magic truly comes alive!
Step 6: Bake the Cookie Base
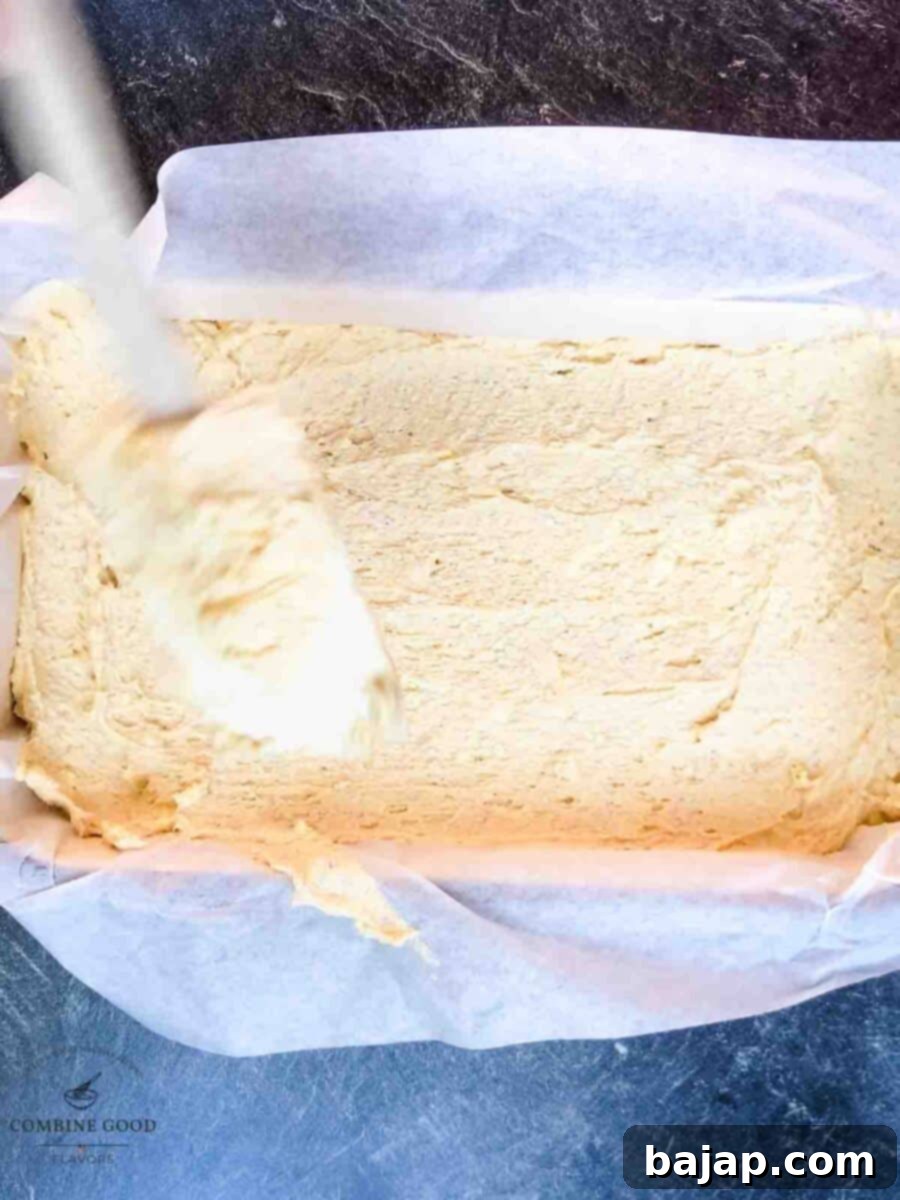
Evenly spread the prepared cookie dough into your parchment-lined baking pan. Use a spatula to smooth out the top, ensuring an even thickness for uniform baking. Bake for 25-35 minutes, or until the top is lightly golden brown and a toothpick inserted into the center comes out with moist crumbs, not wet batter. Avoid overbaking if you want that delightfully gooey center! Once baked, let the cookie base cool completely in the pan before attempting to frost it. Patience here is key for perfect frosting!
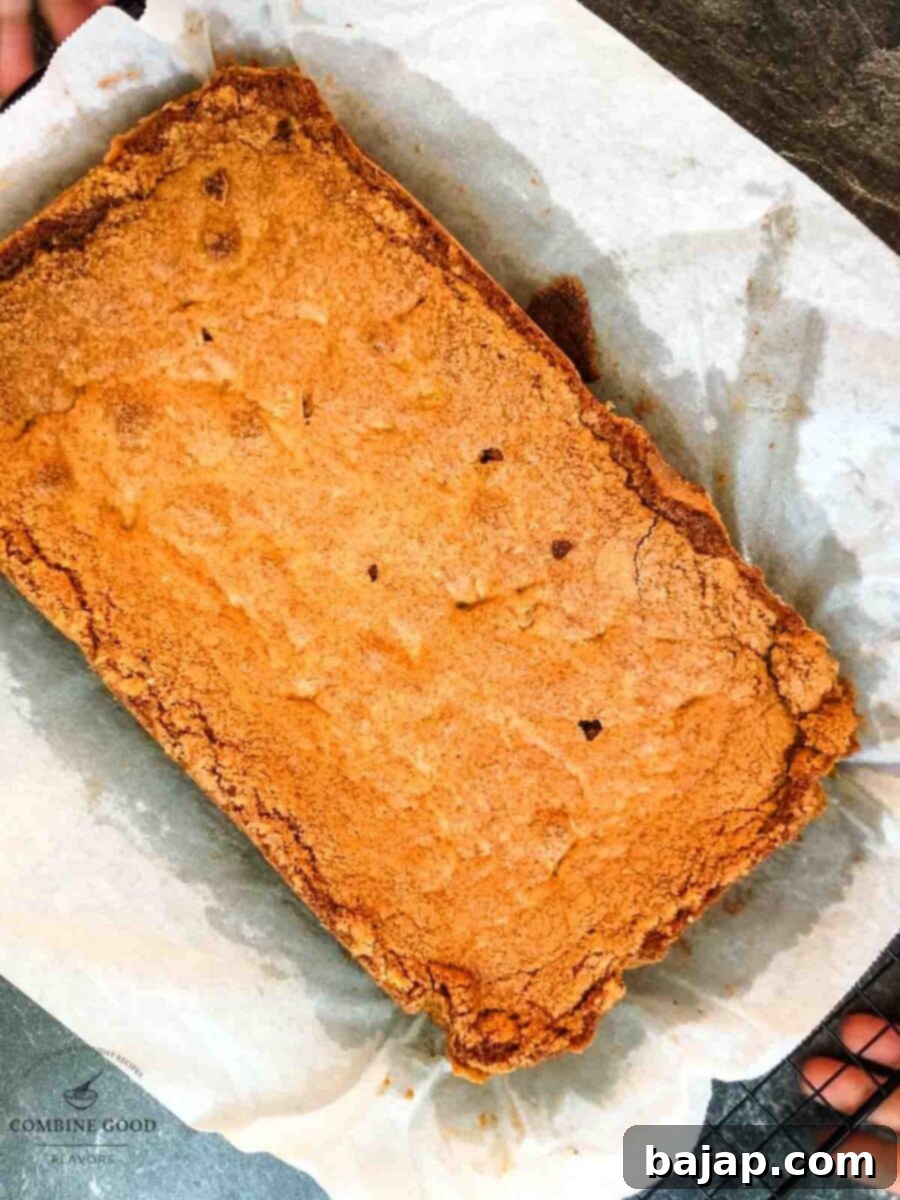
Step 7: Prepare the Buttercream Frosting
Now for the glorious frosting! In a clean large mixing bowl, beat the softened butter until it’s wonderfully smooth and creamy. Gradually add in the powdered sugar, milk, vanilla extract, and that tiny pinch of salt. Start on low speed to avoid a sugar cloud, then increase to medium-high and whip until the buttercream is light, fluffy, and absolutely perfect for spreading. This should take a few minutes.
Step 8: Color Your Frosting
Divide your freshly made buttercream into several small bowls – one for each pastel color you wish to use. Now, tint each bowl of frosting with your chosen pastel food colorings. Think soft pinks, sunny yellows, sky blues, gentle lilacs, and minty greens – go full Easter rainbow! Mix each color thoroughly until you achieve your desired hue.
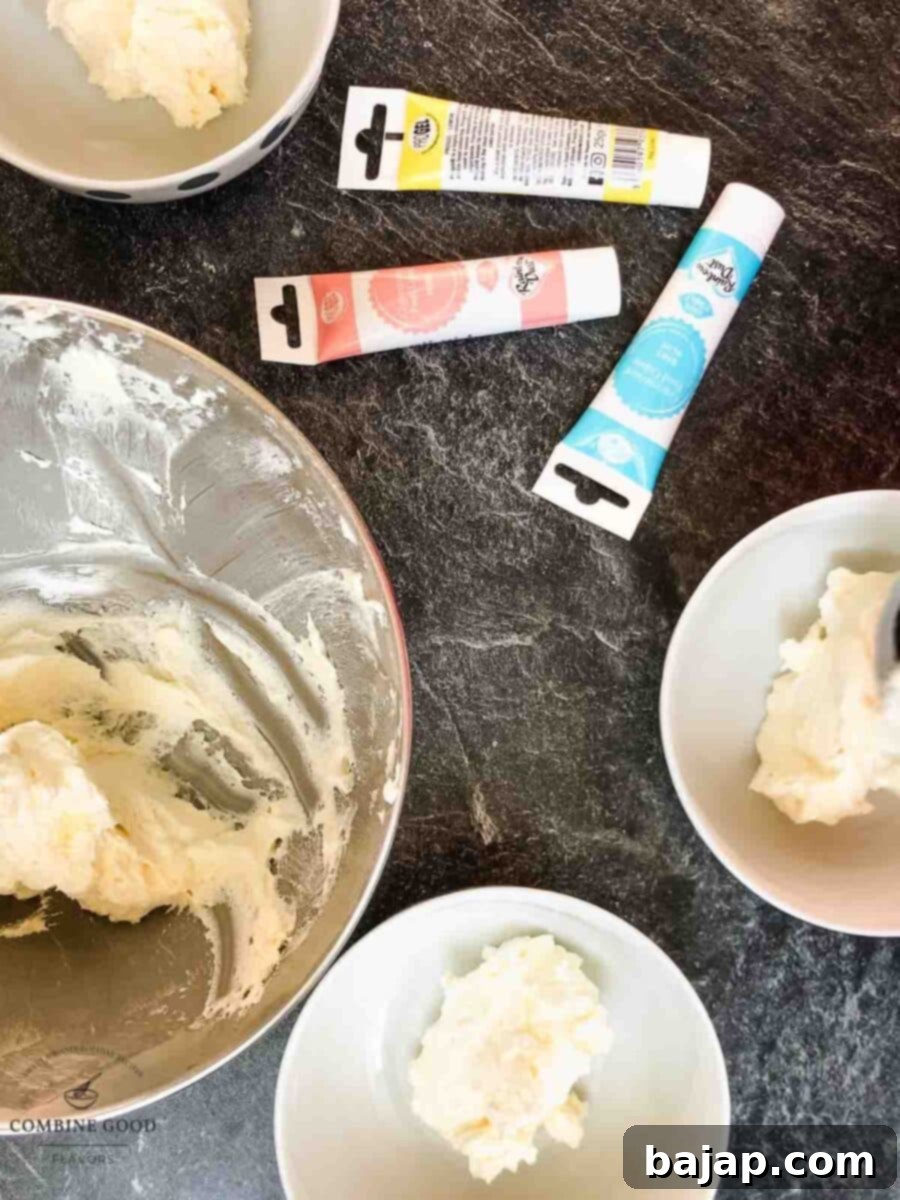
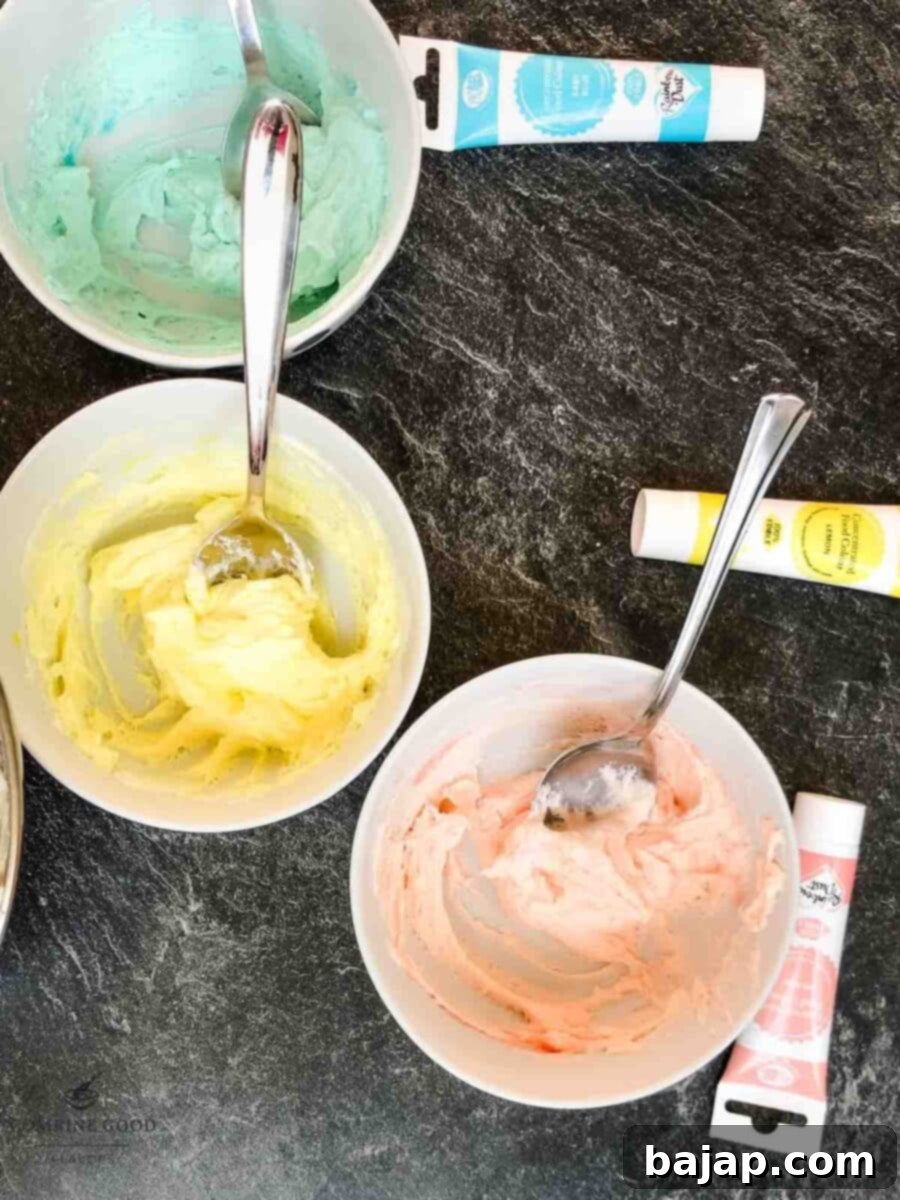
Step 9: Create the Marbled Effect
Now for the artistic part! Once your cookie bars are completely cool, gently dollop spoonfuls of each pastel-colored frosting randomly across the top of the bars. Don’t worry about perfection. Then, with a clean spatula or the back of a spoon, gently swirl the colors together. The goal is to create soft, flowing streaks of color, not to blend them completely into one uniform shade. Less is more when it comes to swirling for that beautiful marbled look! (You can find more detailed tips below for mastering the marble!)
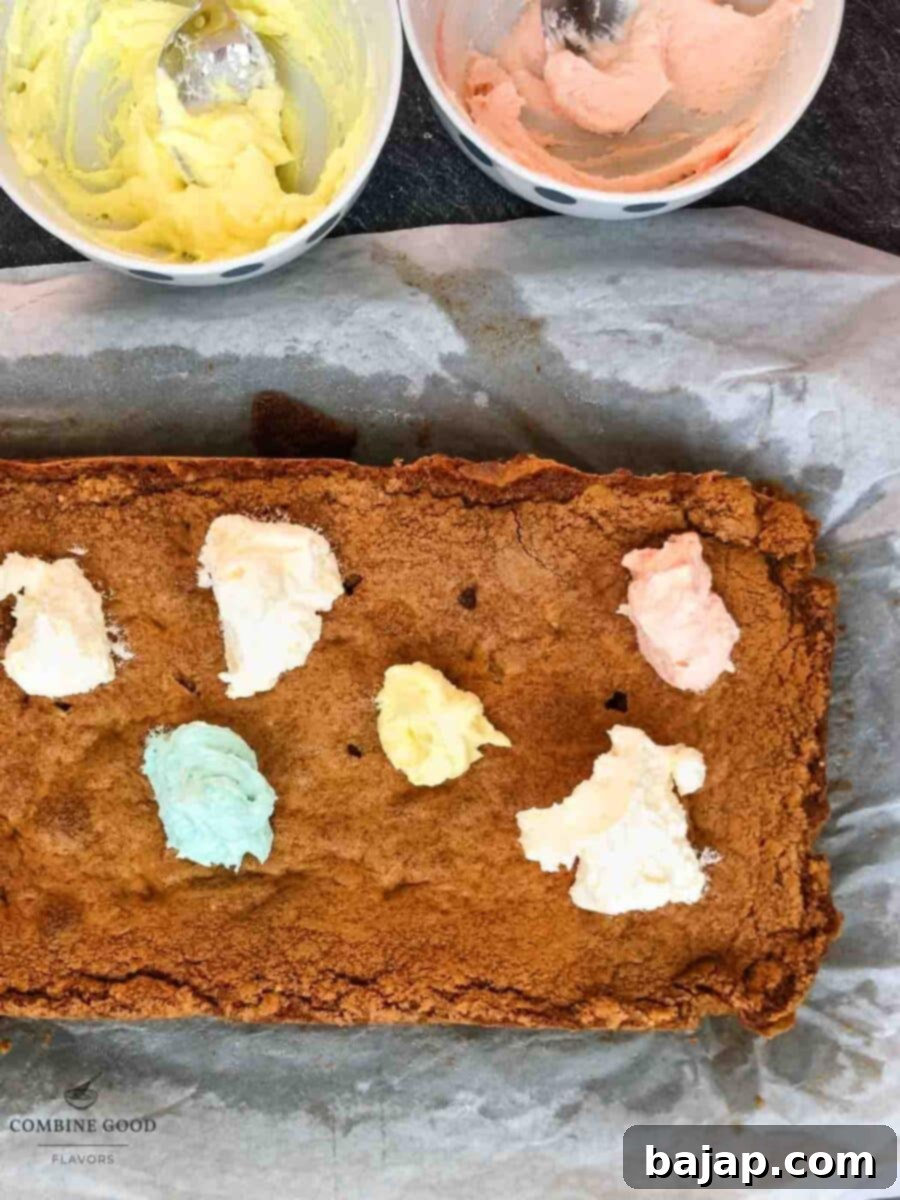
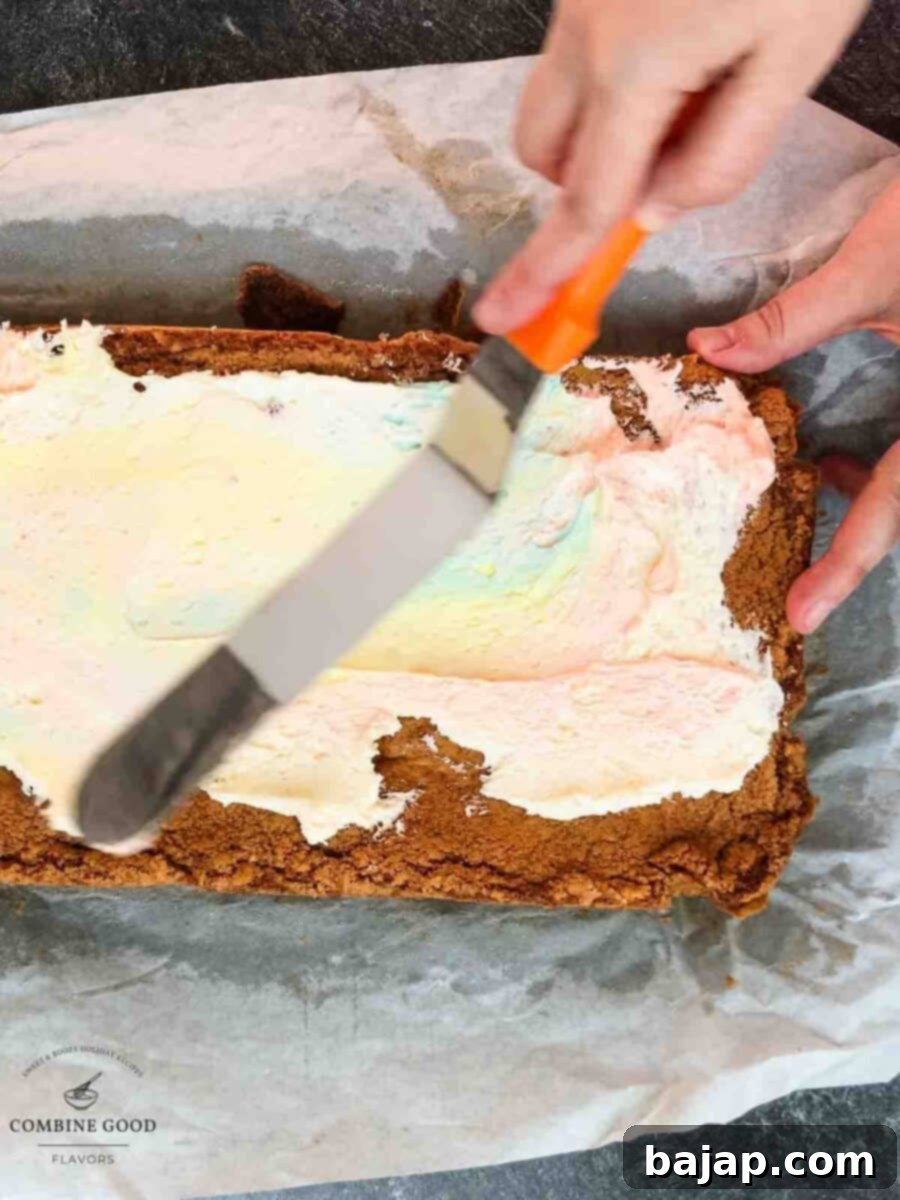
Step 10: Decorate with Easter Magic
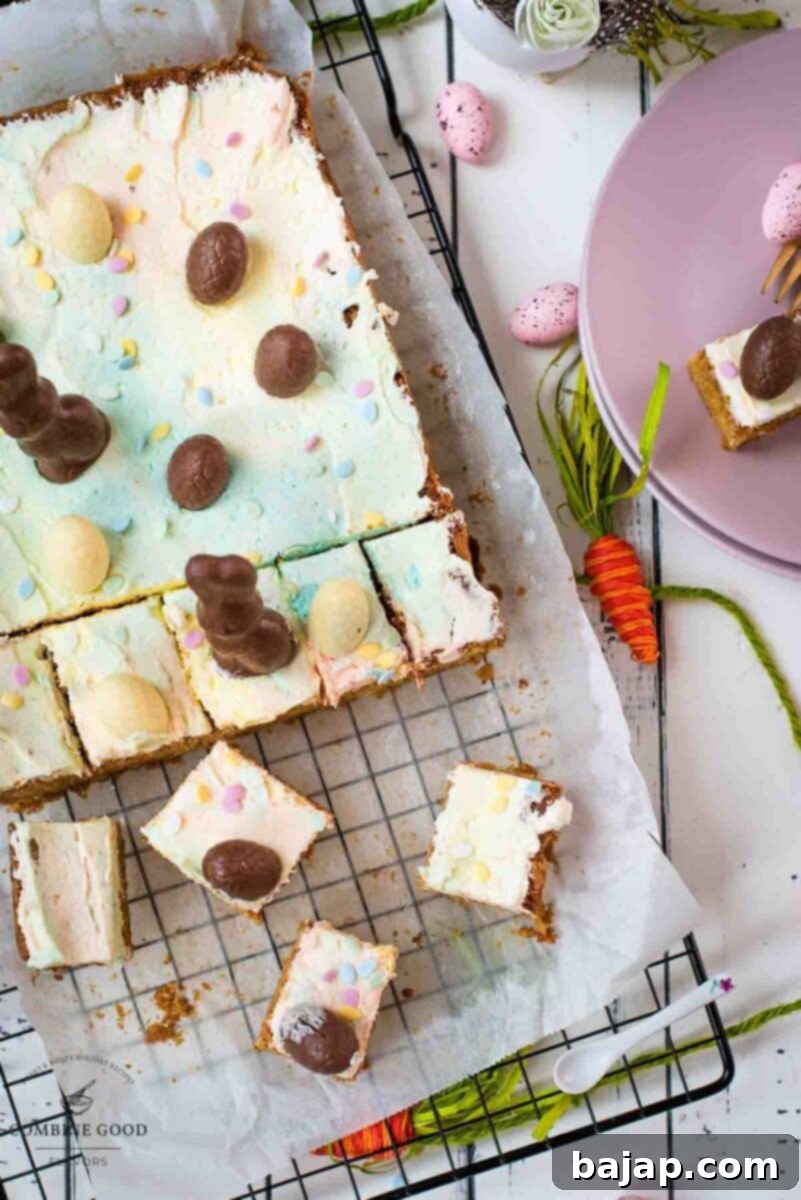
Sprinkle generously with extra sugar sprinkles – bonus points if you found adorable egg-shaped ones, like I did, or spring-themed jimmies! Then, carefully press in your mini chocolate eggs and those charming little chocolate bunnies for that undeniable Easter magic. Arrange them playfully to make each bar unique.
Step 11: Slice & Serve!
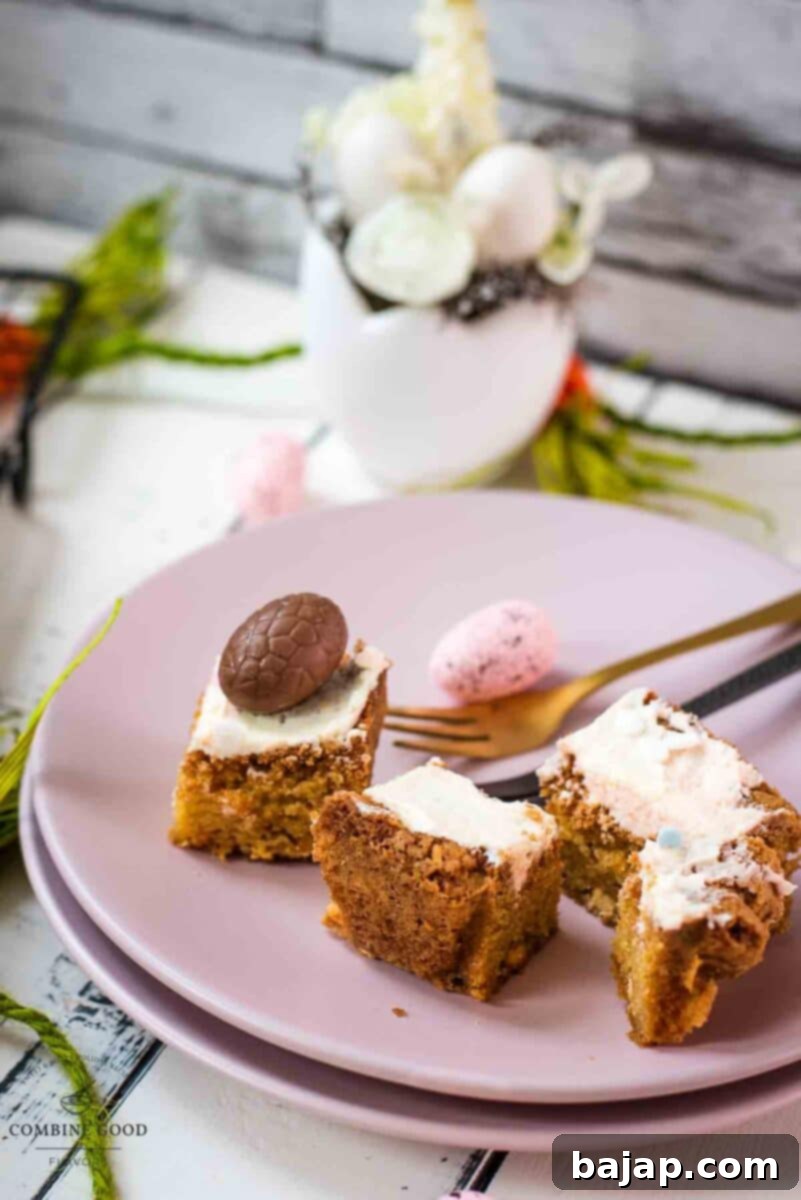
Once decorated, allow the frosting to set slightly (you can pop them in the fridge for 15-20 minutes if you’re in a hurry). Then, using a sharp knife, slice the cookie bars into perfect squares or rectangles. Serve them proudly with a refreshing glass of milk, a warm cup of coffee, or fragrant tea, and bask in your sweet little Easter moment! 🌸💕 They are as delightful to eat as they are to behold.
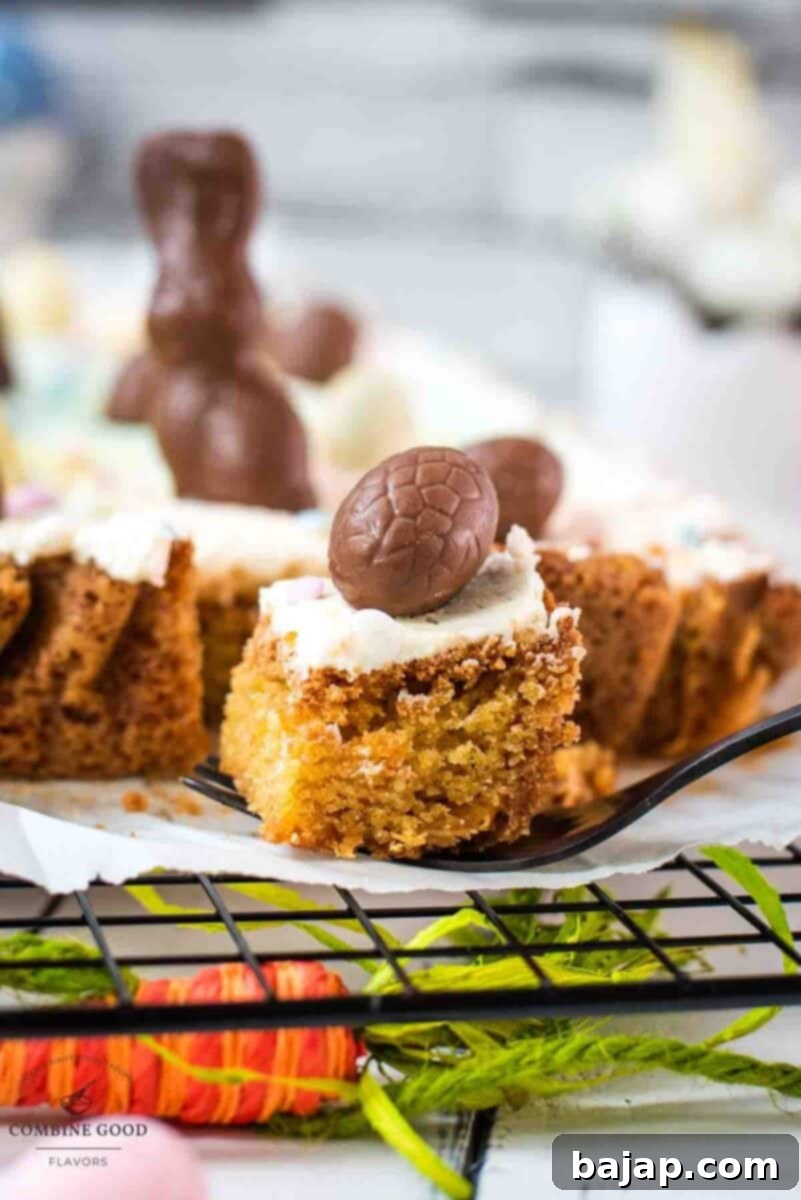
For more sprinkle fun, don’t miss this delicious homemade sprinkles ice cream!
💭 Top Tips for Perfect Funfetti Easter Sugar Cookie Bars
How to Create a Beautiful Marbled Frosting Look Effortlessly
Achieving that stunning marbled effect is simpler than you think, and you don’t need fancy tools! Here’s the secret to those soft, flowing streaks of pastel color:
- Dollop, Don’t Spread Immediately: Once your various pastel buttercreams are ready, spoon small, random dollops of each color all over the surface of your completely cooled cookie bars. Aim for a patchwork of color rather than distinct lines.
- Use Your Spatula Wisely: Forget the toothpick – your offset spatula or even the back of a spoon is your best friend here. Gently spread the dollops, letting the colors swirl and blend *just slightly*.
- The Key: Don’t Overwork It! This is the most crucial tip. Resist the urge to keep blending. A few gentle swipes are all you need. You’re aiming for distinct, soft streaks and swirls, not a fully mixed, muddy color. The beauty is in the subtle blend. If you overmix, the colors will become one, losing their marbled charm.
- Finish with Flair: Once satisfied with your marble, top it all off with an assortment of cute pastel sprinkles. I highly recommend finding egg-shaped or bunny-themed sprinkles for extra holiday cheer! Then, press in a few mini chocolate eggs or bunnies. This playful finish makes these bars truly perfect for Easter and adds an extra layer of texture and delight.
🌡️ Storage Solutions for Your Easter Cookie Bars
To ensure your Funfetti Easter Sugar Cookie Bars stay fresh and delicious for as long as possible, proper storage is key. Here’s a guide to keep them at their best:
1. Room Temperature (Best for 3-4 Days)
- How to Store: Place your frosted and decorated cookie bars in an airtight container.
- Location: Keep them in a cool, dry place, away from direct sunlight or any sources of heat (like a warm oven or sunny window). Excessive heat can melt the buttercream and chocolate decorations.
- Stacking Advice: If you must stack them, place a piece of parchment paper or wax paper between layers to prevent the frosting from sticking and smudging. However, due to the delicate nature of the frosting and Easter chocolate decorations (especially bunnies and eggs that might shift), I generally wouldn’t recommend stacking these specific bars. A single layer is ideal for preserving their beautiful presentation.
2. Refrigerator (Up to 1 Week)
- How to Store: For an extended shelf life, transfer the cookie bars to an airtight container and store them in the refrigerator.
- Texture Note: The bars will firm up significantly in the fridge due to the butter in both the cookie and frosting.
- Serving Tip: For the absolute best texture and flavor, allow them to sit at room temperature for about 15-20 minutes before serving. This brings them back to that soft, chewy consistency that makes them so delightful.
3. Freezer (Up to 3 Months for Unfrosted, 1 Month for Frosted)
- Unfrosted Bars: If you want to bake ahead, you can bake the cookie base, let it cool completely, then wrap the entire slab (or individual bars) tightly in plastic wrap, followed by aluminum foil. Place in a freezer-safe bag or container. They will last up to 3 months. Thaw at room temperature, then frost.
- Frosted Bars: For frosted bars, it’s best to freeze them *before* adding delicate chocolate decorations. First, flash-freeze the individual frosted bars on a baking sheet for about 30-60 minutes until the frosting is firm. Then, wrap each individual bar in plastic wrap, followed by aluminum foil, and place them in a freezer-safe bag or container. They are best enjoyed within 1 month when frozen frosted.
- Thawing: Thaw frozen bars at room temperature for 30-60 minutes (or longer if frozen frosted) before serving. Add delicate decorations after thawing if you froze them unfrosted or only lightly frosted.
🥚 Egg Swap SOS: What to Do If You Only Have Medium Eggs!
Have you ever started baking, only to realize your fridge is lacking those essential large eggs? Don’t worry, it happens to the best of us! For this delightful Funfetti Easter Sugar Cookie Bars recipe, we specifically call for two large eggs. This quantity is crucial for achieving that signature soft, chewy, and perfectly moist texture we’re aiming for.
However, if you, like me on a recent baking adventure, find yourself with only medium eggs on hand, there’s a simple adjustment that works like a charm: I used 2 medium eggs plus one extra yolk, and the resulting bars were perfectly sweet, wonderfully soft, and delightfully moist. You truly couldn’t tell the difference!
Why this smart swap works:
Medium eggs are slightly smaller than large ones. On average, a large egg weighs about 57 grams (2 ounces) out of its shell, while a medium egg is closer to 50 grams (1.75 ounces). This seemingly small difference can impact the overall moisture and structure of your baked goods. By adding just an extra yolk, you cleverly make up for the slight reduction in liquid and fat that comes with using medium eggs. The yolk is rich in fat and protein, which helps maintain the desired richness, binding properties, and moist crumb without making the dough too wet or altering the texture negatively.
While you could theoretically use three whole medium eggs, this would introduce too much extra egg white, potentially making the bars a bit too cakey or dry. If you went this route, you’d also need to reduce the milk in the recipe slightly, making the whole process more complicated. Honestly, the quick yolk fix is much easier and delivers consistently perfect results.
So, next time your kitchen is only stocked with medium eggs, don’t let it derail your baking plans! Grab two medium eggs, separate one, and add that extra yolk to your wet ingredients. You’ll be good to go, and your cookie bars will turn out splendidly! 🧁💕
🍽 Essential Equipment for Baking Success
Having the right tools can make your baking experience smoother and more enjoyable. Here’s what you’ll need for these Funfetti Easter Sugar Cookie Bars:
- Hand or Stand mixer: Indispensable for creaming butter and sugar and whipping up fluffy buttercream. A stand mixer offers hands-free convenience, while a hand mixer is perfect for smaller batches.
- Mixing bowls (for the mixer): A large bowl is needed for the cookie dough, specifically one compatible with your mixer.
- 3-4 small mixing bowls (for the buttercream): These are essential for dividing and tinting your buttercream with various pastel colors.
- Spatula: Ideal for scraping down the sides of bowls, folding in sprinkles and chocolate chips, and most importantly, gently swirling your marbled frosting.
- Spoons: For measuring, mixing small amounts, and dolloping frosting.
- Sieve: Useful for sifting powdered sugar for a lump-free buttercream, or even flour for a lighter cookie dough, though often not strictly necessary for cookie bars.
- 9×13-inch (23×33 cm) baking pan: The perfect size for these bars, yielding a good quantity that’s easy to slice and share.
- Parchment paper: Crucial for easy removal of the baked bars from the pan and minimal cleanup. Don’t skip it!
- Cooling rack: Allows air to circulate around the cookie bars, ensuring they cool evenly and prevent sogginess.
- Sharp knife: Essential for clean, neat slices once your bars are completely cooled and frosted.
Serving Suggestions for Your Festive Bars
These Funfetti Easter Sugar Cookie Bars are delightful on their own, but here are some ideas to make them even more special:
- Classic Pairing: Serve with a cold glass of milk for children, or a warm cup of coffee or tea for adults.
- Dessert Platter: Arrange them on a platter with other Easter treats like mini cupcakes, chocolate-covered strawberries, or fruit skewers for a varied dessert spread.
- With Ice Cream: A warm (or room-temperature) cookie bar with a scoop of vanilla bean ice cream or even sprinkles ice cream is an indulgent treat!
- Brunch Highlight: Perfect as a sweet addition to your Easter brunch menu, offering a pop of color and sweetness.
- Gift Idea: Package a few bars in a pretty box or cellophane bag with a festive ribbon for a thoughtful homemade gift.
Frequently Asked Questions (FAQs)
Can I make these cookie bars ahead of time?
Absolutely! The cookie base can be baked a day or two in advance and stored in an airtight container at room temperature. The buttercream can also be made a day ahead and stored in the fridge; just bring it to room temperature and re-whip until fluffy before frosting. For fully assembled bars, they are best enjoyed within 3-4 days at room temperature, or up to a week in the fridge.
What kind of sprinkles work best for Funfetti?
Jimmie sprinkles (the long, cylindrical ones) are ideal for Funfetti recipes. They tend to hold their shape and color better during baking compared to nonpareils (the tiny round ball sprinkles), which can sometimes melt and bleed color into the dough.
My cookie bars turned out dry. What went wrong?
The most common culprit for dry cookie bars is overbaking. Keep a close eye on them towards the end of the baking time. They should be lightly golden around the edges, and a toothpick inserted into the center should come out with moist crumbs, not liquid batter, and definitely not completely clean. An accurate oven thermometer can also help ensure your oven temperature is correct.
Can I make these gluten-free?
While this recipe hasn’t been tested with gluten-free flour, you can often substitute all-purpose flour with a 1:1 gluten-free baking blend that contains xanthan gum. Results may vary slightly in texture, but it’s worth a try! Ensure all other ingredients are also gluten-free.
How can I get vibrant pastel colors for the frosting?
For the best pastel colors, use gel food colorings instead of liquid ones. Gel colors are more concentrated, so you need less of them, which won’t thin out your buttercream. Start with a tiny drop and add more gradually until you achieve your desired shade. Remember, the colors can deepen slightly as they sit.
Other Delightful Easter Recipes for You to Try
- Vegan Easter Cookies with Apricot Jam
- Easter Cut Out Cookies with Pistachio Ganache
- Chocolate Chip Vanilla Ice Cream
- Braided Bread Wreath
- Berry Wine Spritzer
- Delicious Linzer Cookies with Egg Liqueur
- Simple Layered Eggnog Vanilla Pudding Dessert
- Potato Flour Cake with Eggnog
- Classic Mimosa Recipe
If you make this incredibly festive recipe, I would absolutely love to hear how you liked it! Please show your appreciation by giving it a ★★★★★ star rating and leaving a comment below. Your feedback is truly awesome and helps others discover delicious recipes! You can also sign up for our Newsletter to get weekly delicious homemade recipes delivered straight to your inbox, or follow me on Pinterest or Instagram and share your delightful creation with me. Just tag me @combinegoodflavors and use the hashtag #combinegoodflavors, so I don’t miss seeing your beautiful Easter cookie bars!
📖 Recipe
Easter Sugar Cookie Bars
Nora
Save RecipeSaved!
Pin Recipe
Equipment
-
Hand or stand mixer
-
Mixing bowls for the mixer
-
3-4 Small mixing bowls for the buttercream
-
Spatula
-
Spoons
-
Sieve
-
9×13-inch (23×33 cm) pan
-
Parchment Paper
-
Cooling Rack
-
Sharp knife
Ingredients
For the Cookie Bar Base
- 2 ½ cups All-purpose flour
- 1 teaspoon Baking powder
- ½ teaspoon Baking soda
- ½ teaspoon Salt
- ¾ cup Unsalted butter oftened
- 1 cup Granulated sugar
- ½ cup Light brown sugar
- 2 Eggs large
- 1 tablespoon Milk
- 1 teaspoon Vanilla extract
- ½ teaspoon Almond extract optional, for extra flavor
- ½ cup Pastel sprinkles (jimmies work best)
- ½ cup White chocolate chips
For the Frosting
- ½ cup Unsalted butter softened
- 2 cups Powdered sugar
- 2 tablespoon Milk
- 1 teaspoon vanilla extract
- 1 Pinch Salt
- Food coloring pastel shades: pink, blue, yellow, etc.
- Additional sprinkles, chocolate bunnies, and mini chocolate eggs for decorating
Instructions
For the Dough
-
Preheat oven to 350°F (175°C). Grease and line a 9×13-inch (23×33 cm) pan with parchment paper.
-
In a bowl, whisk together 2 ½ cups All-purpose flour, 1 teaspoon Baking powder, ½ teaspoon Baking soda, and ½ teaspoon Salt.2 ½ cups All-purpose flour, 1 teaspoon Baking powder, ½ teaspoon Baking soda, ½ teaspoon Salt
-
In another bowl, beat ¾ cup Unsalted butter, 1 cup Granulated sugar, and ½ cup Light brown sugar until light and fluffy.¾ cup Unsalted butter, 1 cup Granulated sugar, ½ cup Light brown sugar
-
Mix in 2 Eggs, 1 tablespoon Milk, 1 teaspoon Vanilla extract, and ½ teaspoon Almond extract (optional).2 Eggs, 1 tablespoon Milk, 1 teaspoon Vanilla extract, ½ teaspoon Almond extract
-
Gradually add dry ingredients and mix until just combined.
-
Fold in ½ cup Pastel sprinkles and ½ cup White chocolate chips.½ cup Pastel sprinkles, ½ cup White chocolate chips
-
Spread dough evenly into prepared pan and bake for 25-35 minutes, until lightly golden. Let cool completely.
For the Buttercream
-
Beat ½ cup Unsalted butter until smooth.½ cup Unsalted butter
-
Add 2 cups Powdered sugar, 2 tablespoon Milk, 1 teaspoon vanilla extract, and 1 Pinch Salt. Beat until fluffy.2 cups Powdered sugar, 2 tablespoon Milk, 1 teaspoon vanilla extract, 1 Pinch Salt
-
Divide frosting into bowls and tint with pastel Food coloring.Food coloring
To Decorate
-
Dollop pastel buttercream across cooled bars.
-
Gently swirl frosting with a spatula to create a marbled look.
-
Add Additional sprinkles, chocolate bunnies, and mini chocolate eggs for decoratingAdditional sprinkles, chocolate bunnies, and mini chocolate eggs for decorating
-
Slice, serve, and enjoy!
Nutrition values are estimates only, using online calculators. Please verify using your own data.

⛑️ Food Safety Guidelines
Always prioritize food safety when baking. Here are some essential tips to keep in mind:
- Cook to Proper Temperature: Ensure all ingredients, especially eggs in the cookie base, are cooked to a minimum internal temperature of 165°F (74°C). While these bars are not typically measured with a thermometer, ensuring the golden-brown color and firm texture indicates they are thoroughly baked.
- Prevent Cross-Contamination: Always use separate utensils, cutting boards, and bowls for raw ingredients (like eggs) and cooked food to prevent cross-contamination. Wash everything thoroughly in hot, soapy water.
- Wash Your Hands: Wash your hands thoroughly with soap and warm water before and after handling any food, especially raw ingredients.
- Refrigerate Perishables Promptly: Do not leave perishable ingredients, such as butter or milk, sitting out at room temperature for extended periods. Return them to the refrigerator as soon as possible after use.
- Never Leave Cooking Unattended: Always stay in the kitchen and supervise your oven while baking to prevent overcooking or burning.
- Proper Ventilation: If using a gas stove for any part of your preparation (though not strictly required for this recipe), always ensure good ventilation to prevent the buildup of fumes.
For further comprehensive information on safe food handling practices, please check the official guidelines from the FDA – Safe Food Handling.
