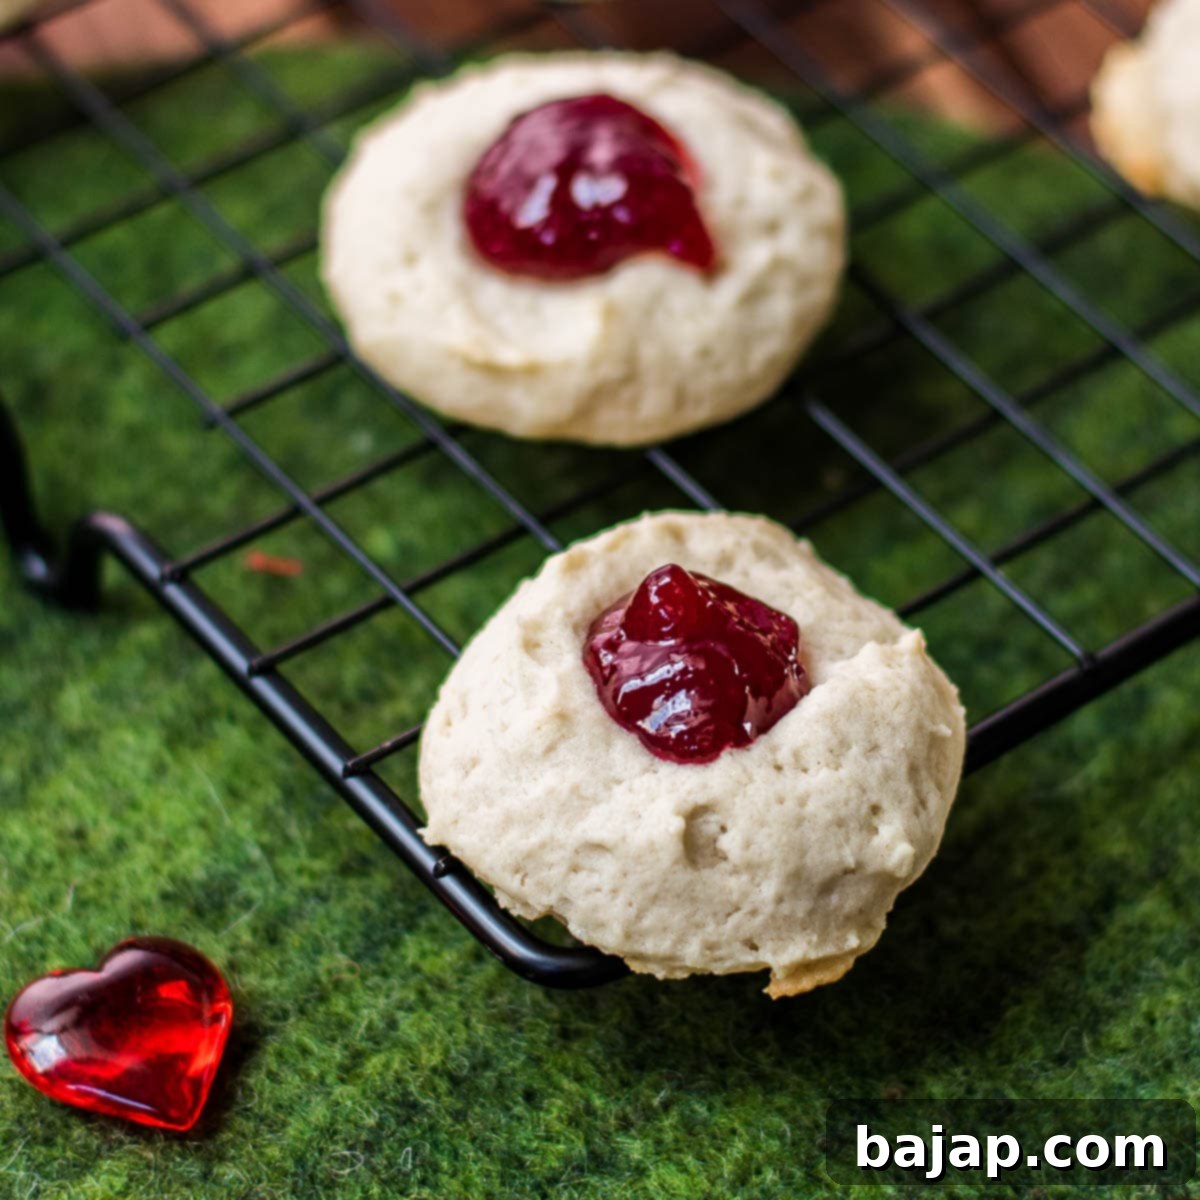
Delicious 5-Ingredient Raspberry Cheesecake Thumbprint Cookies: Your New Go-To Recipe!
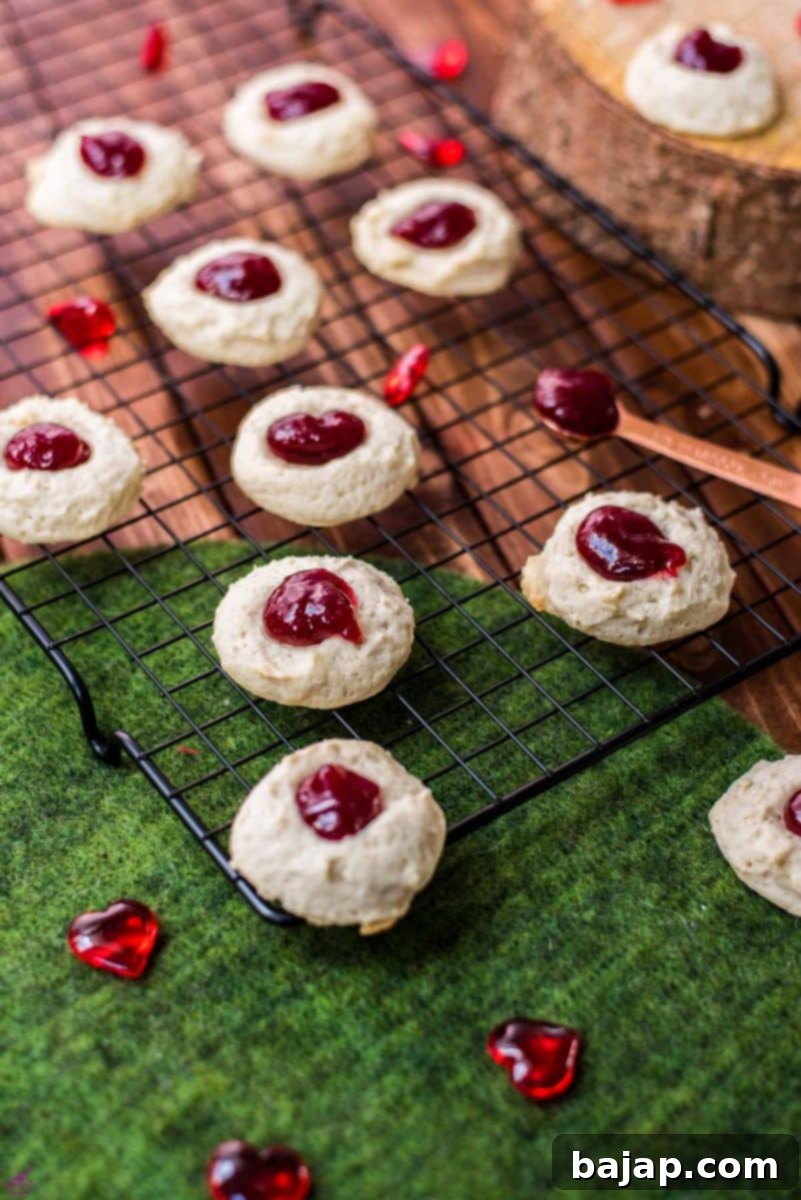
Get ready to indulge in an extraordinary baking experience with these absolutely scrumptious and incredibly simple-to-make thumbprint cookies! Forget complicated recipes and long ingredient lists; all you need are five basic ingredients and a mere ten minutes of preparation, and you’ll be enjoying these sweet, delightful treats in no time. These cookies aren’t just easy; they’re a revelation, combining the creamy richness of cheesecake with the vibrant burst of raspberry jam, all nestled in a tender, melt-in-your-mouth cookie base. Perfect for a quick dessert, a potluck, or a cozy evening treat, these raspberry cheesecake thumbprint cookies are destined to become a staple in your recipe collection.
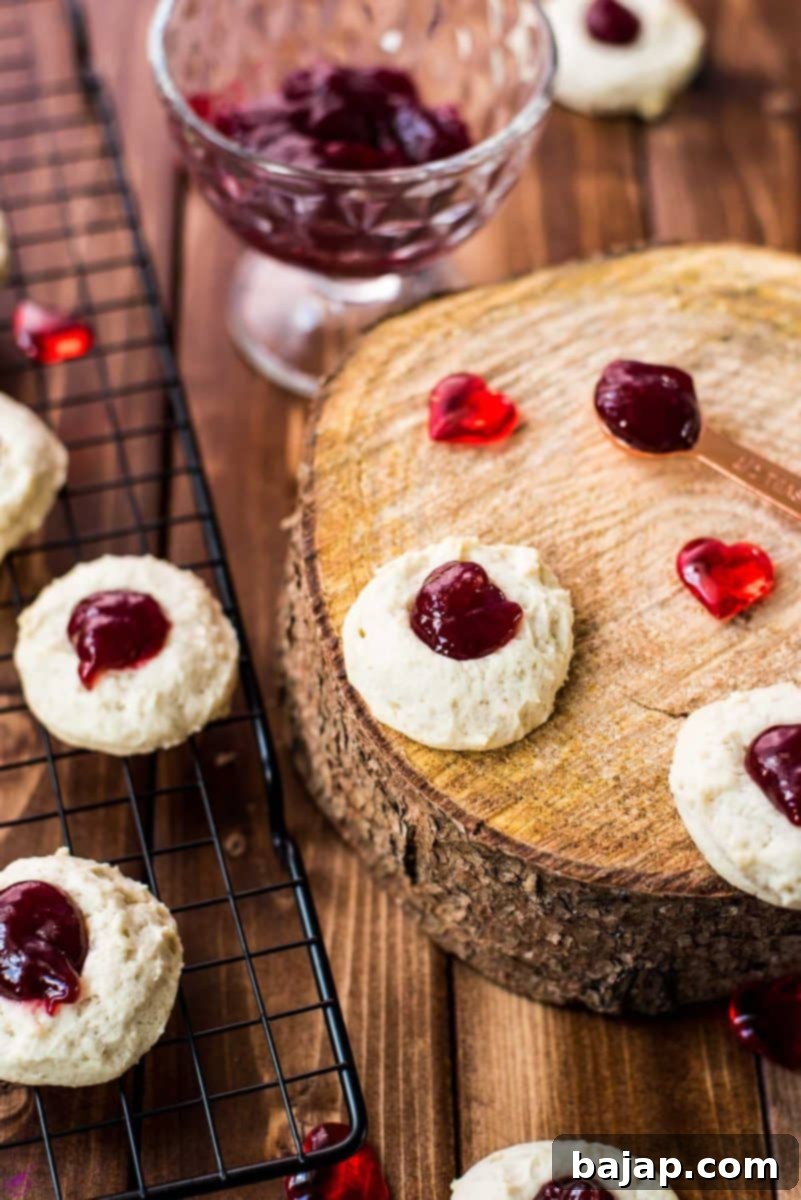
What truly sets these thumbprint cookies apart isn’t solely the sweet and tangy raspberry jam filling, but the exceptional cookie dough itself! It boasts a unique texture and a subtly sweet flavor, often described as reminiscent of a brioche bun. This distinctive characteristic comes from the inclusion of cream cheese, which not only adds a wonderful depth of flavor but also contributes to the cookies’ incredibly soft, tender, and slightly chewy crumb. This rich, brioche-like dough provides the perfect buttery, delicate canvas that pairs harmoniously with any sweet or tart filling you choose, making each bite a delightful balance of flavors and textures.
Another fantastic aspect of this recipe is its incredible versatility when it comes to fillings. While raspberry jam offers a classic and delightful burst of tartness, your thumbprint doesn’t have to be limited to just raspberry. If that’s not your personal “jam,” feel free to experiment! Consider trying out sweet strawberry or mellow apricot preserves for a fruitier twist. For those who prefer a tangy kick, a dollop of bright lemon curd or rich cherry curd would be absolutely divine. But don’t stop there – for the ultimate indulgence, you can even fill these adaptable cookies with melted chocolate, a luscious caramel sauce, or even a swirl of hazelnut spread! The possibilities are endless, allowing you to customize each batch to your specific cravings or to whatever you have on hand.
These cookies are also an ingenious solution if you find yourself with leftover cream cheese after whipping up a delicious cheesecake or other cream cheese-based desserts! This smart approach ensures that nothing goes to waste, transforming those extra ounces of cream cheese into a fresh batch of irresistible cookies. It’s a win-win: you get to enjoy more delightful treats, and your fridge stays perfectly organized!
Ingredients
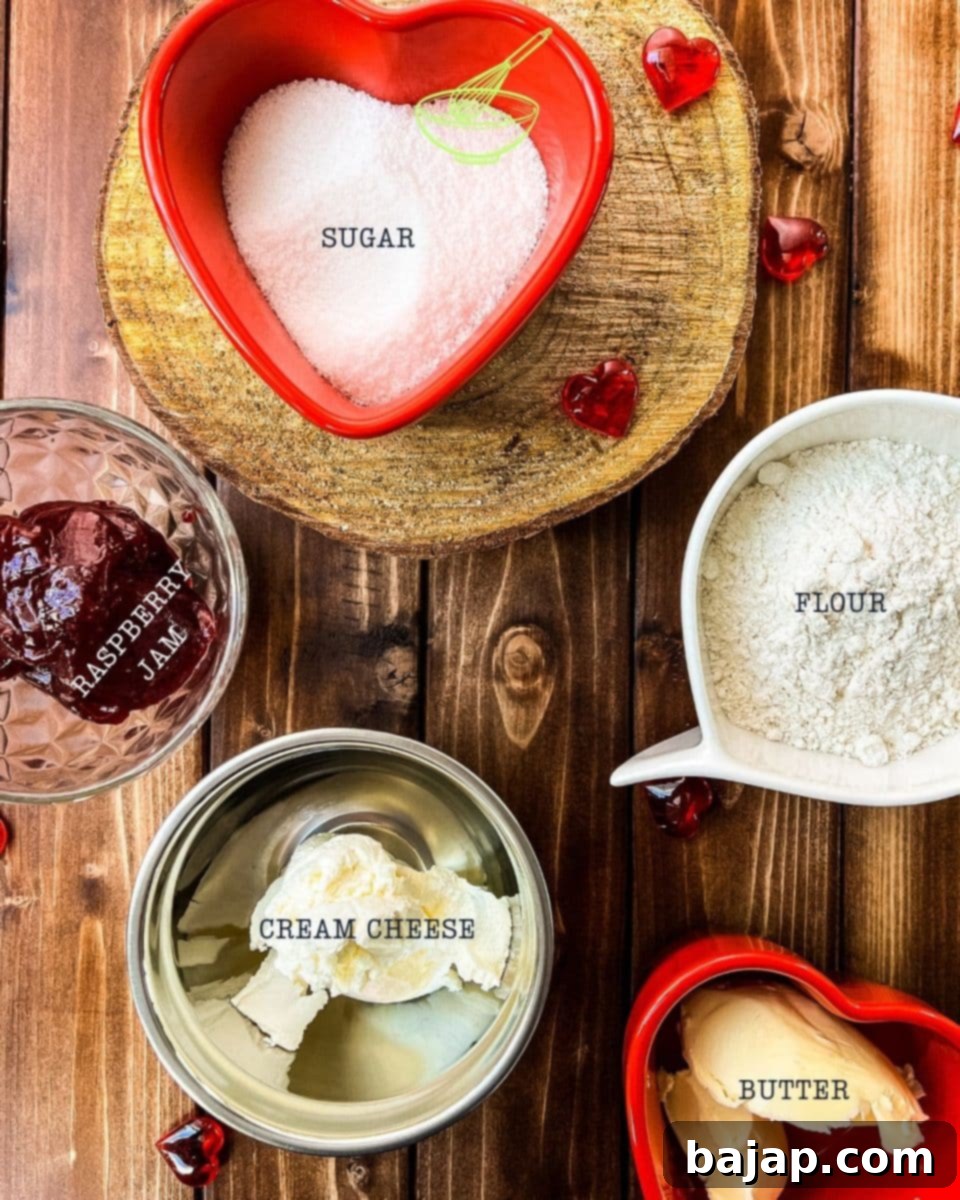
- Butter: Use unsalted butter, softened to room temperature. This is crucial for proper creaming and a smooth dough consistency. Unsalted butter allows you to control the salt content in your baking.
- Granulated Sugar: Provides the perfect level of sweetness, complementing the cream cheese and jam without overpowering them.
- Cream Cheese: The star ingredient that gives these cookies their signature cheesecake-like richness and incredibly tender texture. Ensure it’s full-fat and at room temperature.
- Cake Flour: This is key for a delicate, soft cookie. Cake flour has a lower protein content than all-purpose flour, resulting in a lighter, more tender crumb that truly melts in your mouth.
- Raspberry Jam: The vibrant, fruity filling. Choose a good quality jam for the best flavor. Its tartness perfectly balances the sweet and rich cookie dough.
For precise quantities, please refer to the recipe card below.
Instructions
Creating these delightful thumbprint cookies is a straightforward process that yields impressive results. Follow these simple steps for perfect cookies every time:
The first crucial step is to prepare your base dough. Break out your hand mixer (or a stand mixer if you prefer) and begin combining the unsalted butter, cream cheese, and granulated sugar in a large mixing bowl. It’s absolutely essential that your butter and cream cheese have been softened to room temperature. This ensures they cream together smoothly and evenly, creating a light and fluffy mixture. Mix on medium speed for about 2-3 minutes, or until the mixture is pale and well-combined, scraping down the sides of the bowl as needed.
Next, you’ll gradually incorporate the cake flour into your creamed mixture. Continue mixing on medium speed, adding the flour spoonful by spoonful. This slow addition helps prevent a cloud of flour and ensures it gets evenly distributed. As you add more flour, the dough will naturally become thicker. If it becomes too tough for your mixer to handle comfortably, switch to kneading the remaining flour in by hand. The key here is to mix or knead only until the flour has been just evenly incorporated into the dough. Overmixing at this stage can develop the gluten too much, leading to tough cookies, which we definitely want to avoid for that tender, brioche-like texture.
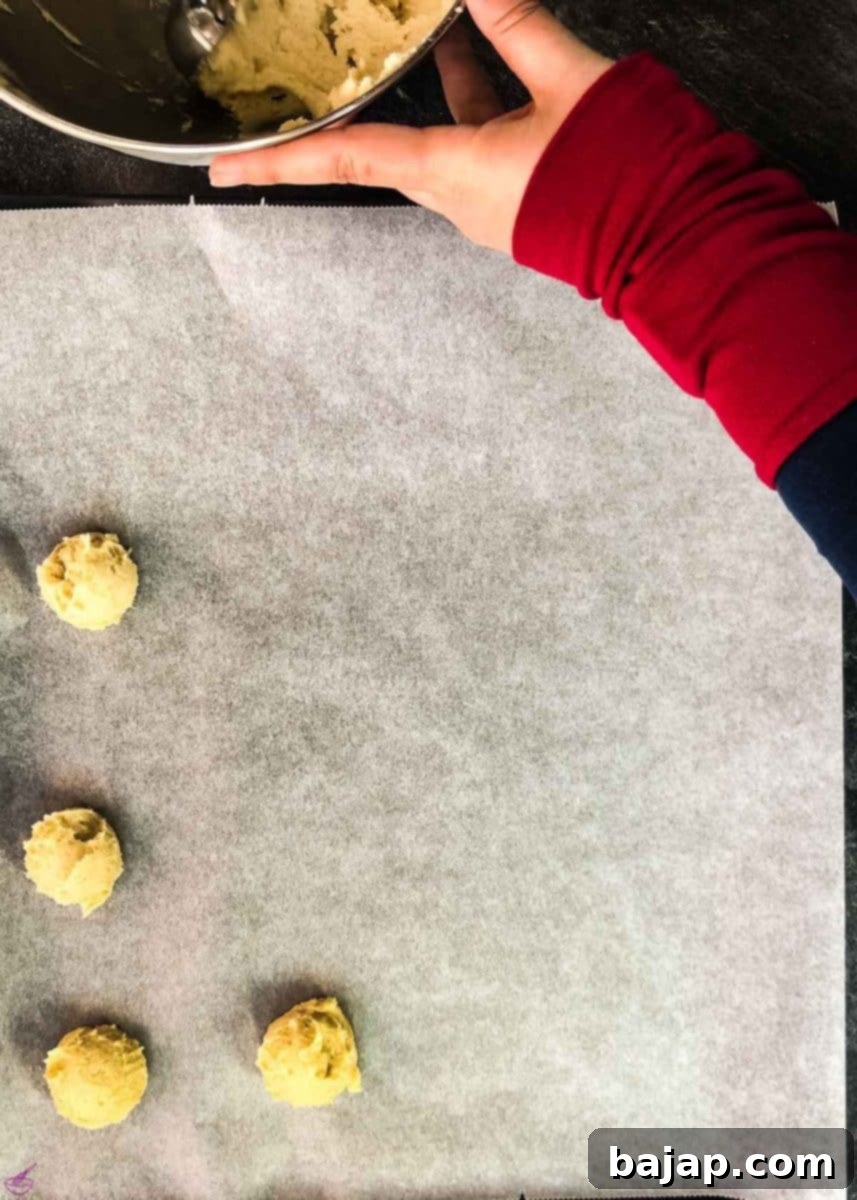
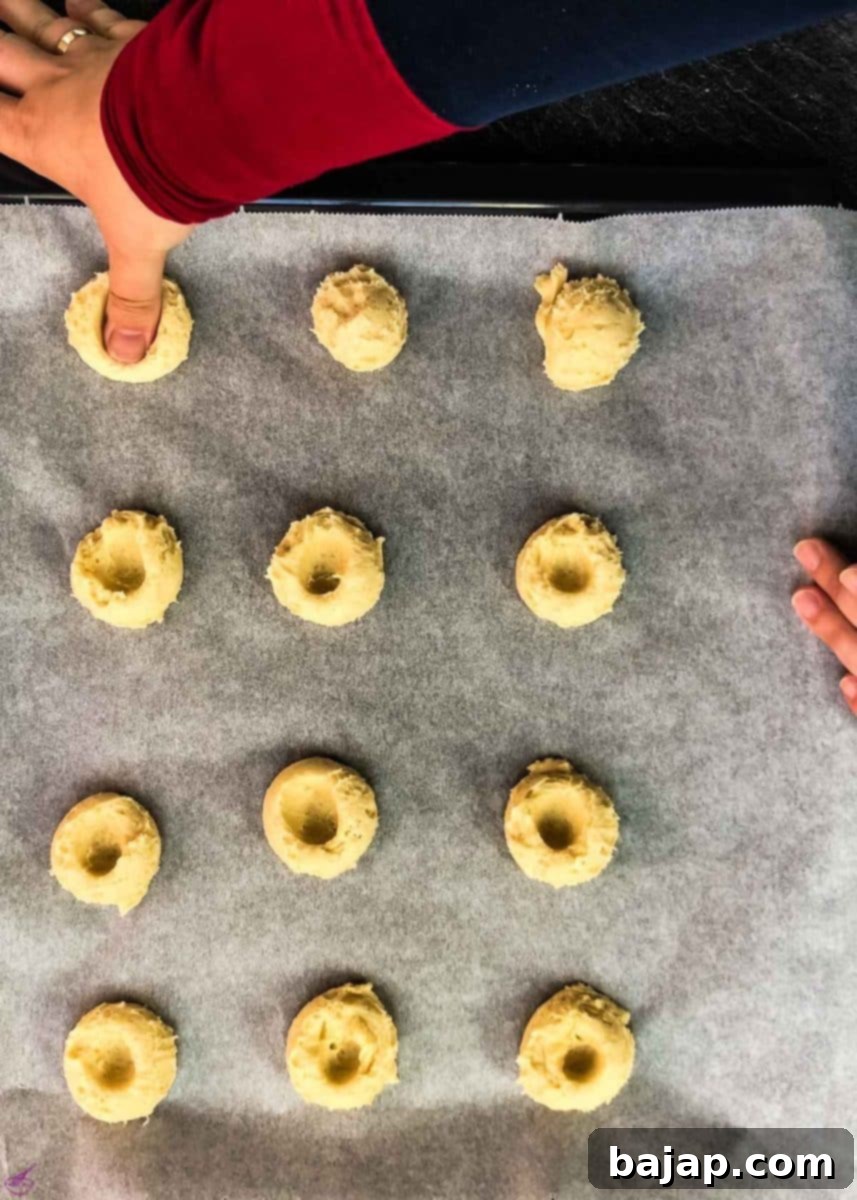
Once your dough is perfectly mixed, it’s time to portion out your cookies. Line a baking sheet with parchment paper or a silicone mat to prevent sticking. For uniformly sized cookies that bake evenly, I highly recommend using a small ice cream scoop or a cookie scoop. Scoop out portions of dough and place them onto the prepared baking sheet. Remember to leave approximately 2 cm or 1-inch space between each cookie and from the edge of the pan. This prevents overcrowding, allowing the cookies to spread slightly and bake properly without touching.
Now comes the signature step! With your dough portions on the baking sheet, gently make an impression in the middle of each cookie using your thumb. Don’t press too hard, just enough to create a small well for the future jam filling. If the edges crack slightly, gently smooth them with your fingers. This indentation will cradle the delicious raspberry jam once the cookies are baked.
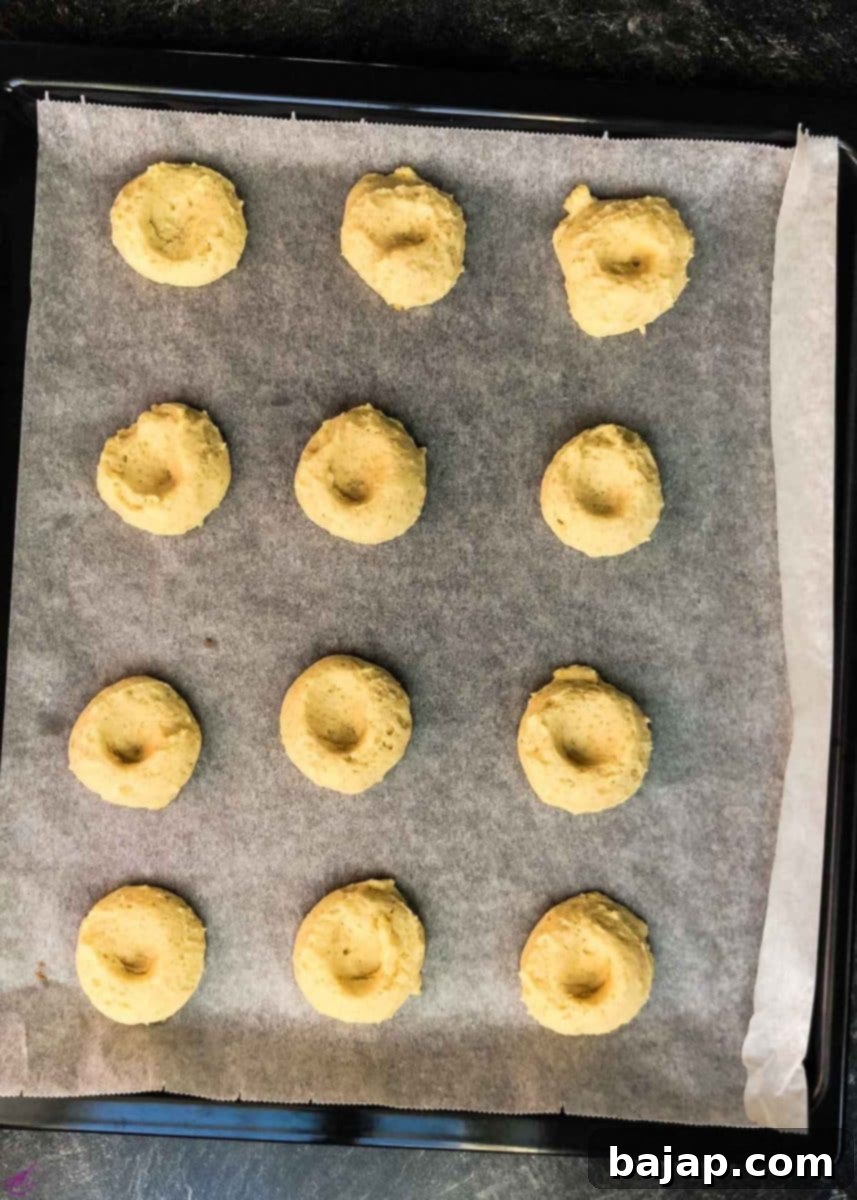
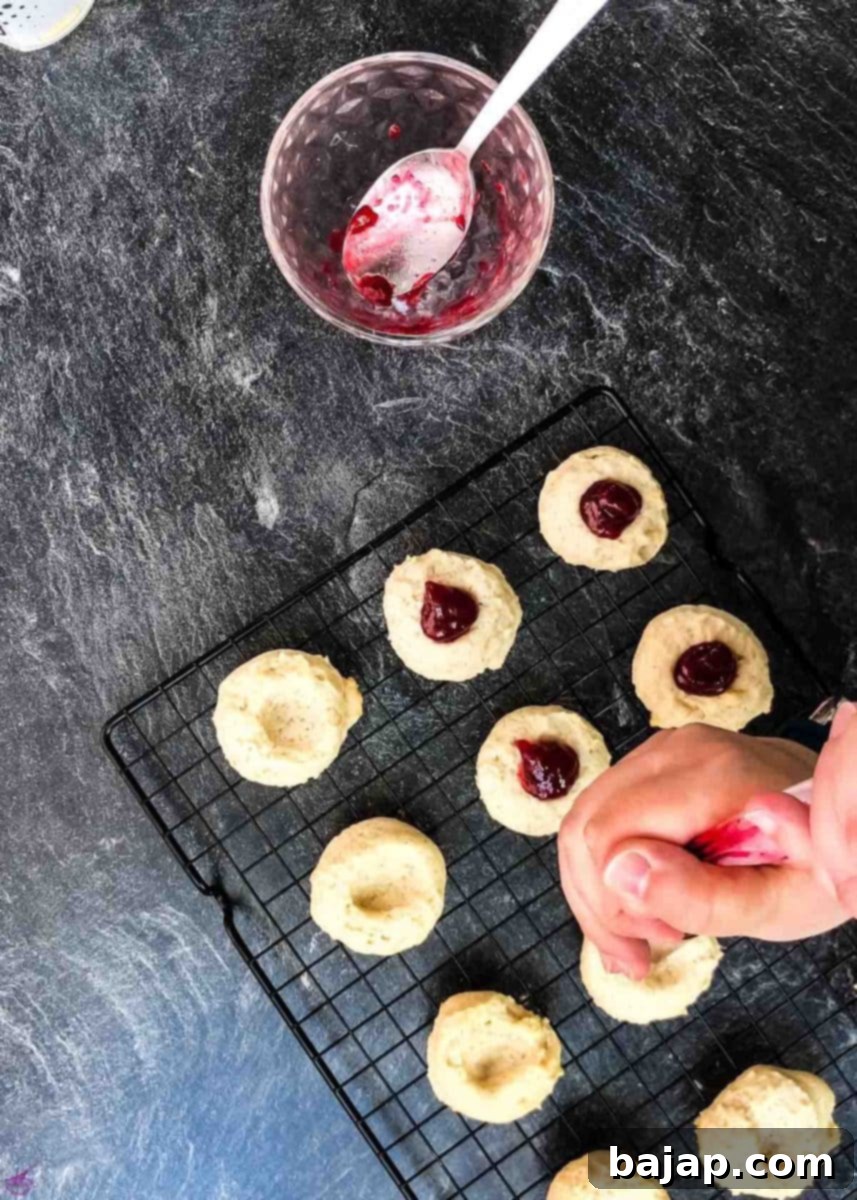
These thumbprint cookies will need to bake for approximately 15 minutes in a preheated oven at 180 C / 356 F. Keep a close eye on them; they are ready when the edges begin to turn a light golden brown. Overbaking can lead to dry cookies, so pull them out as soon as they reach this stage. Once baked, allow them to cool on the baking sheet for a few minutes before transferring them to a wire rack to cool completely. This cooling process helps them firm up and prevents them from breaking. After they’ve had the chance to cool down, you can lovingly fill the small indents with about 1⁄2 teaspoon of your chosen jam. For a neater and more professional look, you can also use a small piping bag or a ziplock bag with a corner snipped off!
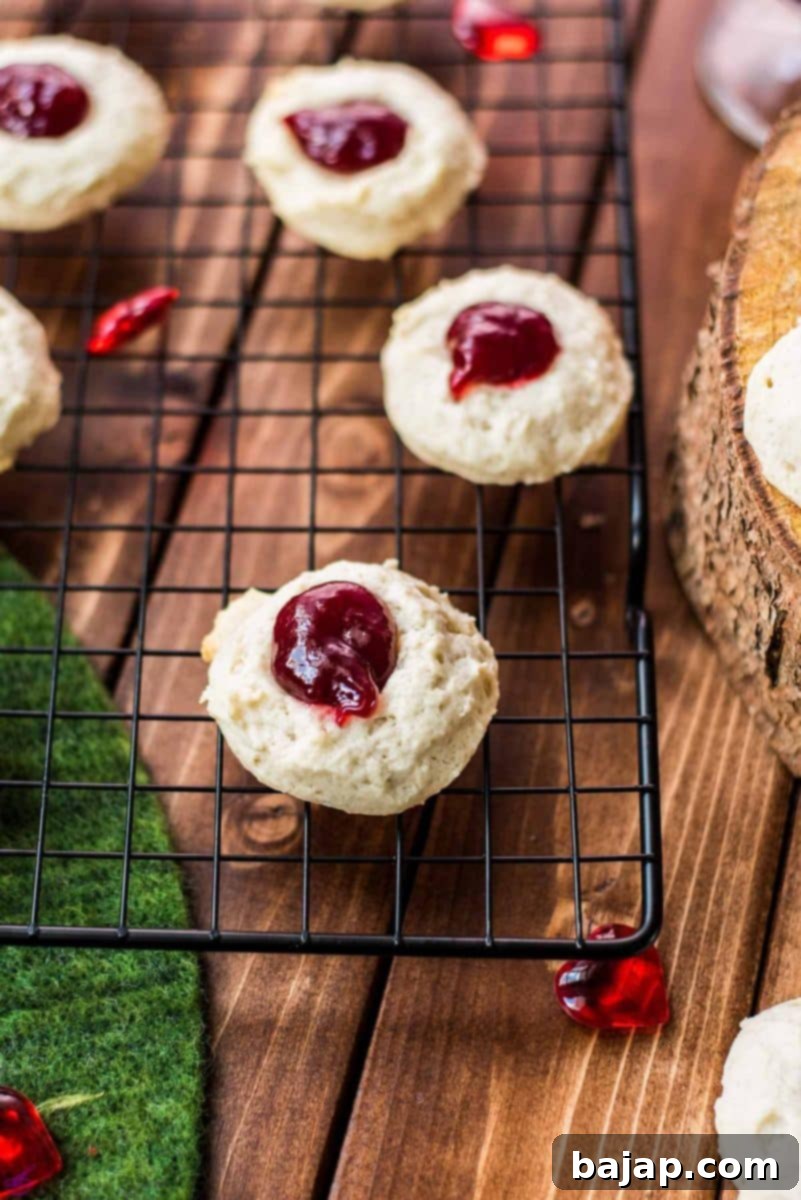
As mentioned, the magic truly lies in the cookie dough – its subtle sweetness and brioche-like richness create a truly special base. This delicate flavor profile perfectly complements the bright, fruity notes of raspberry jam, making for a harmonious and incredibly satisfying bite. Each cookie offers a delightful contrast: the tender, buttery dough yielding to a luscious, sweet-tart center.
If you’re a fan of cookies generously filled with delicious jam, much like these delightful thumbprint cookies, then you’ll absolutely love exploring other classic recipes. For another fantastic option, try out these wonderful Hamantaschen cookies! They offer a similar joy of a tender pastry encasing a sweet, fruity filling, perfect for any occasion.
Substitutions
The beauty of these thumbprint cheesecake cookies lies in their adaptability. While raspberry jam is a classic choice, there’s a whole world of delicious fillings to explore if you want to switch things up. If raspberry isn’t your top pick, you can effortlessly substitute it with almost any other jam or even a creamy custard. Imagine the sweet tang of a high-quality strawberry jam, adding a familiar yet equally delightful flavor. For those seeking a brighter, more zesty experience, reaching for some homemade lemon curd or a rich cherry curd would be an excellent choice, providing a wonderful contrast to the cookie’s sweetness.
Beyond traditional jams and curds, don’t hesitate to venture into even sweeter territory. This recipe is incredibly versatile and pairs wonderfully with a variety of indulgent fillings. Think about filling the thumbprints with mini chocolate chips before baking for a melty chocolate surprise, or drizzling them with a luscious caramel sauce after cooling. Nutella, dulce de leche, or even a homemade pecan praline could elevate these cookies to an even more decadent level. The impression you lovingly leave on your cookies truly is a blank canvas, ready to be filled with anything sweet that captures your fancy!
Variations
These cream cheese thumbprint cookies offer a fantastic foundation for various delightful variations, catering to different tastes and dietary needs. If you’re looking to make these delightful treats suitable for a vegan diet, simple swaps can transform the recipe without sacrificing flavor or texture. You can easily replace the traditional dairy butter with a high-quality vegan butter, a delicate coconut butter, or even coconut oil. When using these substitutes, ensure they are at room temperature, just like their dairy counterparts, to achieve the perfect creamy consistency in your dough. This attention to temperature is key for a successful bake.
Furthermore, for a fully vegan version, you can readily swap out the regular cream cheese for a vegan cream cheese alternative. Many excellent plant-based cream cheeses are available, often made from cashews or other nuts, which contribute a subtle nutty undertone. This slightly nutty flavor from vegan cream cheese pairs exceptionally well with fruit jams, especially a vibrant strawberry or even a rich apricot, creating a unique and delicious flavor profile. Beyond vegan options, consider adding citrus zest (lemon or orange) to the dough for an extra layer of brightness, or a hint of almond extract to complement the fruit filling. A sprinkle of flaky sea salt on top of the jam before serving can also enhance the flavors beautifully!
Equipment
- Baking Sheet: Essential for baking your cookies evenly.
- Hand Mixer / Stand Mixer / Electric Mixer: Crucial for creaming the butter, sugar, and cream cheese to the perfect fluffy consistency.
- Large Bowl: To mix all your ingredients comfortably.
- Parchment Paper/Silicone Mat: Prevents sticking and ensures easy cleanup.
- Ice Cream Scoop: Helps in portioning out uniform cookie dough balls for consistent baking.
Storage
To keep your delicious raspberry cheesecake thumbprint cookies fresh and enjoyable, proper storage is key. When stored in an airtight container at room temperature, these cookies will typically maintain their quality for three to five days. To prevent them from sticking together or the jam from smudging, you can place a piece of parchment paper between layers of cookies. If you want to extend their shelf life significantly, these cookies freeze beautifully. Simply arrange them in a single layer on a baking sheet to flash freeze them until solid, then transfer them to an airtight, freezer-safe container or a heavy-duty freezer bag. They can be stored in the freezer for up to a month. When you’re ready to enjoy them, simply thaw them at room temperature for a few hours, and they’ll taste as fresh as the day they were baked!
Top tip
The key to achieving wonderfully tender and crack-free thumbprint cookies lies in the temperature of your ingredients, especially the butter and cream cheese. Ensure they are both at true room temperature (soft to the touch, but not melted) before you begin mixing. This allows them to cream together perfectly, creating a smooth, cohesive dough. Furthermore, avoid overmixing once you add the flour, as this can develop gluten and lead to a tough cookie. Mix just until the flour is incorporated for that desirable delicate texture.
Frequently Asked Questions (FAQ)
Cracking or crumbling in thumbprint cookies is often a sign that your dough is too stiff or cold. To prevent this, ensure your butter and cream cheese are at proper room temperature before mixing. After preparing the dough, allow it to sit at room temperature for at least 15 minutes before portioning and making the thumbprint indentations. This extra time helps the dough relax and become more pliable, reducing the likelihood of cracks.
These popular and beloved cookies go by various names across different cultures. In Sweden, they are famously known as Hallongrottor, which literally translates to “raspberry caves.” This delightful name perfectly captures the essence of the cookie with its jam-filled center.
If your thumbprint cookies spread out excessively or flatten too much on the baking sheet, the most common reason is that your butter was not incorporated at the correct temperature. Using butter that is too cold will result in a crumbly dough, while using melted butter can lead to a greasy, spreading dough. Always ensure your butter is softened to room temperature – soft enough to leave an indent, but not oily – for the ideal cookie consistency and shape.
The name “thumbprint cookies” is quite literal and descriptive! These cookies earn their name from the distinctive indentation you create in the center of each dough ball, typically using your thumb. This little “well” is specifically designed to be filled with delicious jams, custards, or other sweet fillings, making them a unique and customizable treat.
Crumbly thumbprint cookies are often the result of chilled dough that hasn’t had adequate time to warm up to room temperature before baking. Chilling dough is sometimes recommended for certain cookie types, but for these cream cheese thumbprint cookies, it can make them too stiff. To prevent crumbliness, let your dough sit out for at least 15 minutes (or even longer if it was refrigerated) before shaping and baking. Also, ensure you’re not over-measuring your flour, as too much flour can also lead to a dry, crumbly texture.
Other Delicious Cookie Recipes for You to Try
- Austrian Coconut “Busserl” Cookies
- Zesty Lemon White Chocolate Chip Cookies
- Divine Leftover Egg Yolk Cookies
- How To Make Delicious Linzer Cookies With Egg Liqueur
- How To Bake Delicious Walnut Meringue Cookies
If you decide to make this delightful recipe, I would absolutely love to hear how you liked it! Please consider leaving a ★★★★★ star rating and a comment below. Your feedback means the world and helps others discover these wonderful treats! You can also sign up for our Newsletter to receive weekly delicious homemade recipes directly in your inbox, or follow me on Pinterest or Instagram and share your beautiful creations with me. Just tag me @combinegoodflavors and use the hashtag #combinegoodflavors, so I don’t miss it!
Recipe

5 Ingredients Raspberry Cheesecake Thumbprint Cookies
Nora
Save RecipeSaved!
Pin Recipe
Equipment
-
Baking pan
-
Hand mixer or stand mixer
-
Bowl
-
Parchment Paper or silicone mat
-
Ice cream scoop
Ingredients
- ¼ cup Butter unsalted, softened, at room temperature
- ½ cup Granulated sugar
- ½ cup Cream cheese
- 1 cup Cake Flour
- ½ cup Raspberry jam
Instructions
-
Using a hand mixer, combine the ¼ cup Butter, ½ cup Cream cheese, and ½ cup Granulated sugar for 2-3 minutes, starting at medium speed and gradually going to high speed.¼ cup Butter, ½ cup Granulated sugar, ½ cup Cream cheese
-
Keep mixing while adding spoon by spoon of 1 cup Cake Flour. Make sure to stop as soon as the flour gets evenly incorporated into the dough.1 cup Cake Flour
-
Portion the cookie dough onto a parchment paper-covered baking pan using an ice cream scoop.
-
Press in the middle of the dough using your thumb, making an indent to fill the cookies with raspberry jam.
-
Bake for about 15 minutes in a preheated oven at 180 C / 356 F until they start to brown.
-
Fill the small indents with 1⁄2 teaspoon of ½ cup Raspberry jam (or use a piping bag) after the cookies are baked and cooled down.½ cup Raspberry jam
Nutrition values are estimates only, using online calculators. Please verify using your own data.

🤎 You might also like
- Easy Cut-Out Sugar Cookies {no chill}
- Matcha White Chocolate Chip Cookies
- Chocolate Chip Cookies with Chestnut Flour
- Sour Cream Cookies with Pearl Sugar
Food Safety
- Cook all food to a minimum internal temperature of 165 °F (74 °C) to ensure it is safe to eat.
- To prevent cross-contamination, always use separate utensils, cutting boards, and plates for raw and cooked food. Never use the same utensils on cooked food that previously touched raw meat.
- Thoroughly wash your hands with soap and water before and after handling raw meat or any food preparation.
- Avoid leaving cooked food sitting out at room temperature for extended periods, as this can allow harmful bacteria to multiply rapidly. Refrigerate perishable foods promptly.
- Never leave cooking food unattended on the stovetop or in the oven. Always be present to monitor the cooking process.
- When cooking, use oils with a high smoking point, especially for high-heat methods like frying, to prevent the formation of harmful compounds and off-flavors.
- Always ensure good ventilation when using a gas stove to prevent the buildup of carbon monoxide and other fumes.
For further comprehensive information and guidelines on safe food handling practices, please check the resources provided by the Safe Food Handling – FDA.
