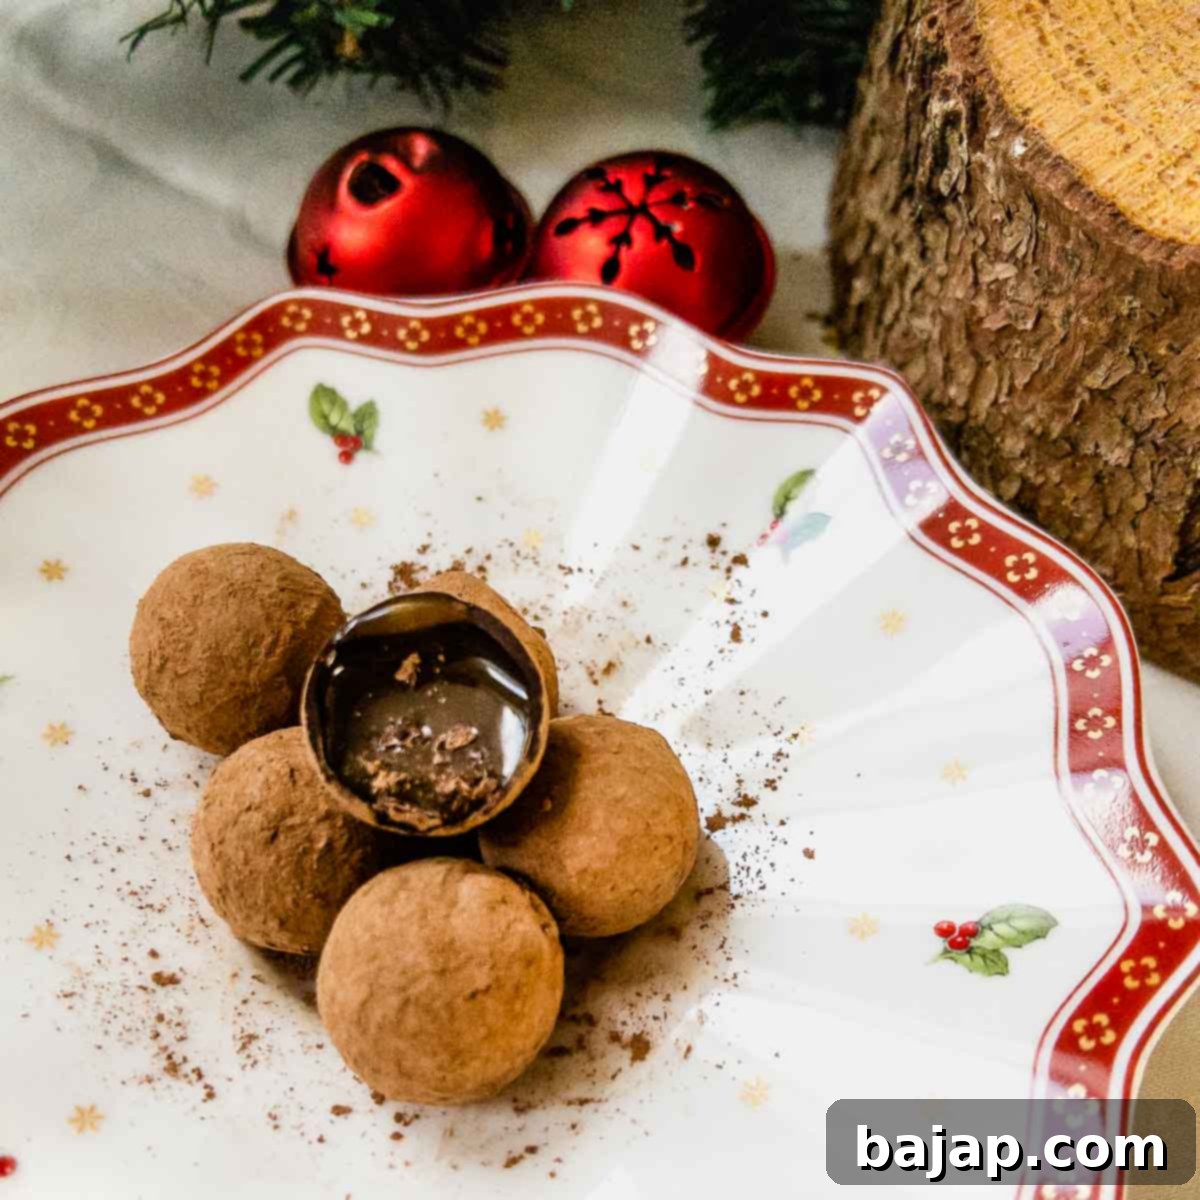
Master the Art of Homemade Salted Caramel Truffles: A Delectable Recipe
Imagine a tiny bite of heaven: luscious, liquid salted caramel, perfectly encased in rich milk chocolate, and then delicately rolled in exquisite Criollo cocoa powder. These aren’t just any truffles; they are a gourmet delight, and with this comprehensive and easy-to-follow recipe, you can effortlessly prepare them in your own kitchen. Elevate your dessert game and impress everyone with these homemade salted caramel truffles that boast a professional finish and an unforgettable taste.
These exquisite treats are incredibly versatile. They make an ideal hostess gift, a thoughtful welcome gesture for guests, or simply a luxurious festive snack to share with family and friends. Be warned, though: once you taste their divine combination of sweet, salty, and chocolatey goodness, it will be incredibly hard to stop at just one! Your taste buds are in for a truly delightful experience.
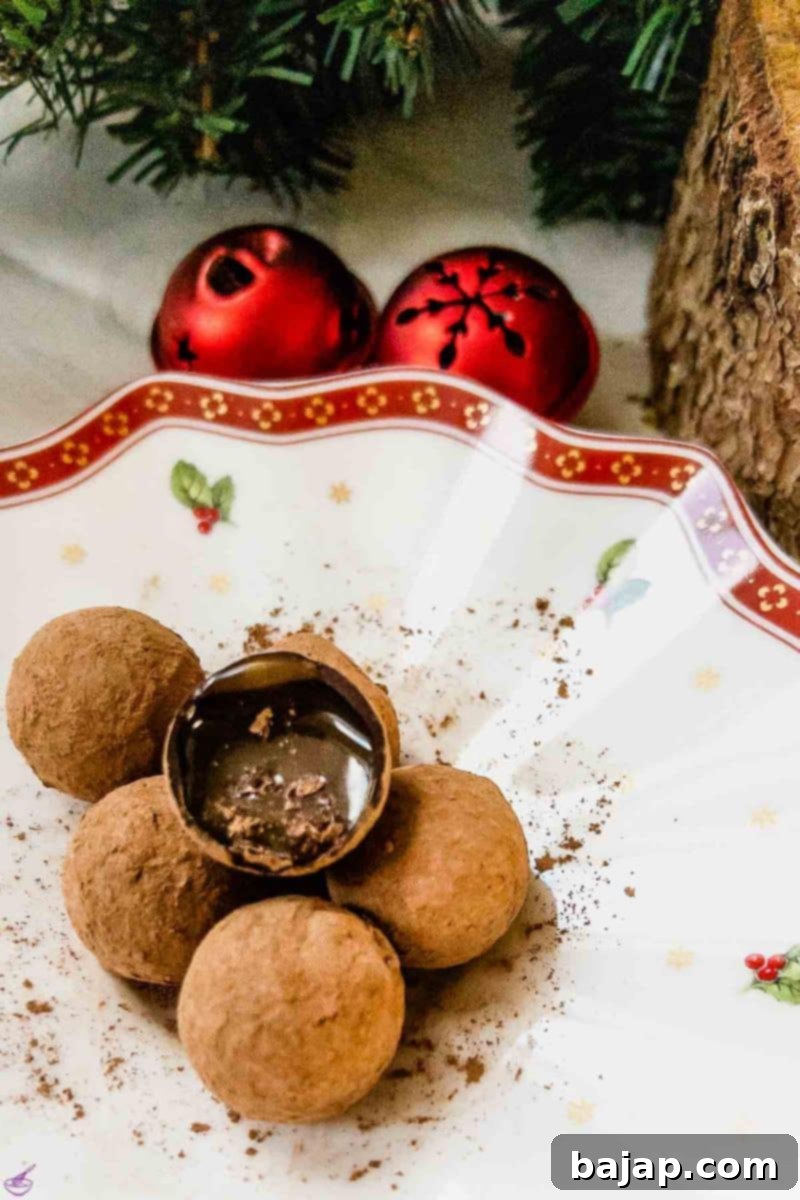
Beyond their divine taste and luxurious texture, these salted caramel chocolate truffles offer an added benefit for those with dietary considerations: they are both fructose-free and gluten-free. This makes them a perfect indulgent treat that nearly everyone can enjoy without worry.
One of the most satisfying aspects of this recipe is how straightforward it is to prepare the salted caramel yourself. Our homemade salted caramel recipe is a personal favorite, delivering a rich, buttery, and perfectly balanced sweet-and-salty flavor that far surpasses most store-bought alternatives. By making the caramel at home, you not only ensure the highest quality ingredients but also enjoy significant cost savings. No more lengthy searches for the perfect gourmet caramel at the grocery store; you’ll have a superior product right at your fingertips.
If you’re planning to craft a selection of exquisite homemade truffles, preparing them simultaneously can streamline the process. Explore these other fantastic homemade candy recipes to create a diverse and delightful assortment:
- Eggnog Truffles with White Chocolate Coating
- Eggnog Truffles Rolled in Cocoa Powder
- Orange Marmalade Chocolates with Rum
- Dark Chocolate Truffles with Cinnamon
- Matcha Chocolates
- Baileys Chocolates
- Biscoff Truffles
[feast_advanced_jump_to]
🥘 Essential Ingredients for Salted Caramel Truffles
To create these decadent salted caramel truffles, gather the following high-quality ingredients. The careful selection of each component contributes to the exquisite flavor and texture of the final product:
- Salted Caramel: You can either use a store-bought version (ensure it’s of good quality) or follow our simple recipe for a superior homemade caramel. Homemade offers better flavor control and is more cost-effective.
- Granulated Sugar: The foundation for our rich caramel sauce, transforming into a golden liquid that defines the truffle’s core.
- Unsalted Butter: Adds richness and a smooth, creamy texture to the caramel, balancing the sweetness.
- Heavy Cream: Essential for achieving that silky, flowing consistency in the caramel, preventing it from becoming too stiff.
- Fleur de Sel (Coarse Sea Salt): This premium sea salt is crucial for the “salted” aspect, providing a delicate crunch and enhancing the caramel’s depth of flavor.
- Glucose: A key ingredient for professional-grade truffles. Glucose helps stabilize the caramel, prevents crystallization, and extends the shelf life of your filling. It can be replaced by high-quality liquid honey for a similar effect.
- Optional: Rum: A splash of rum adds a sophisticated, warming note that beautifully complements the caramel and chocolate.
- Dark Hollow Spheres: Pre-formed chocolate shells that simplify the truffle-making process, ready to be filled with your homemade caramel.
- Dark Chocolate Chips: Used for both sealing the hollow spheres and creating the final outer coating. Opt for a high-quality dark chocolate couverture for the best results in flavor and temper.
- Criollo Cocoa Powder: The finishing touch. This fine, less bitter cocoa powder provides a smooth, elegant coating and an aromatic depth that perfectly complements the truffles.
Refer to the recipe card below for precise quantities and measurements.
For convenience, you can purchase pre-made chocolate hollow spheres from PrimeChocolate and enjoy a 10% discount with the coupon code ThankYouNora.
🔪 Step-by-Step Instructions for Your Gourmet Truffles
Crafting Your Homemade Salted Caramel Sauce
The heart of these truffles is the exquisite salted caramel. Making it from scratch ensures unparalleled flavor and quality. Follow these steps carefully to achieve a perfect, liquid caramel core:
Begin by melting the granulated sugar in a large, heavy-bottomed saucepan over low to medium heat. This is a process that requires patience; it can take up to 20 minutes for the sugar to fully transform into a beautiful, light golden caramel. It’s crucial not to stir the sugar with any utensils during this stage. You may gently shake or swirl the pan to encourage even melting, but resist the urge to stir. Stirring can cause the sugar to crystallize, resulting in a grainy caramel. Also, be vigilant to prevent the caramel from becoming too dark, as this will lead to a bitter, unpleasant taste. A perfect caramel should be a rich, amber hue.
Once the sugar has fully caramelized into a smooth, golden liquid, remove it from the heat. Gradually stir in the unsalted butter, adding it in small pieces. Continue stirring until the butter is fully incorporated and the mixture forms a creamy, cohesive caramel sauce. At this point, add two generous pinches of fleur de sel. The sea salt will enhance the caramel’s flavor, providing that essential salty counterpoint.
In a separate small saucepan, gently heat the heavy cream until it is warm but not boiling. Boiling the cream can cause it to separate when combined with the hot caramel. Carefully and slowly pour the warmed cream into the caramel mixture while continuously stirring. Be cautious, as the mixture will bubble vigorously. Continue to stir until smooth.
Return the saucepan to low heat and let the caramel boil gently for two minutes, ensuring all ingredients are well combined and the mixture is homogenous. Next, stir in the glucose (or honey, if substituting) until it is completely dissolved. Glucose is vital here, as it helps prevent sugar crystallization, ensuring a smooth, stable, and long-lasting caramel filling.
Finally, remove the caramel sauce from the heat and allow it to cool down significantly. The ideal temperature for working with the caramel filling is 80.6 °F (27 °C). Cooling it to this specific temperature ensures it has the perfect consistency for piping into the chocolate shells without melting them.
Pro Tip for Flavor Variation: If you wish to infuse your truffles with a hint of rum, now is the perfect moment. Once the caramel cream has cooled to the desired temperature, stir in the rum and mix it thoroughly for an extra layer of sophisticated flavor.
Using Store-Bought Caramel: For those opting for a store-bought salted caramel, the process is simplified. Combine one cup of your chosen salted caramel with five teaspoons of glucose in a microwave-safe bowl. Heat gently, to a maximum of 89.6 °F (32 °C), just enough to dissolve the glucose. Then, let this mixture cool to 80.6 °F (27 °C). If adding rum, stir it in now. Once cooled, transfer the caramel into a piping bag, ready for filling.
Filling Your Salted Caramel Truffles
With your perfectly prepared salted caramel, it’s time to fill the chocolate shells, transforming them into decadent truffles. This step requires a steady hand and attention to detail:
Pour the cooled caramel filling into a piping bag. Carefully fill each dark hollow chocolate sphere, ensuring you stop just below the rim. This leaves enough space for the chocolate seal. After filling a few spheres, gently swirl them back and forth. This motion helps to release any trapped air bubbles, ensuring a completely filled, void-free caramel core.
Once all spheres are filled, take a moment to double-check that each is filled evenly. Consistency is key for a professional finish. Transfer the filled hollow spheres to the refrigerator and allow them to crystallize and set for a minimum of 12 hours. For the best, most stable results, a 24-hour chilling period is highly recommended. This crucial step ensures the caramel is firm enough to be sealed without oozing.
As the chilling time nears its end, begin the process of tempering your chocolate coating. Tempering is essential for chocolate to set with a beautiful shine, a crisp snap, and to prevent “sugar bloom” (the formation of white streaks). This can be achieved using either a water bath or a dedicated tempering device.
Water Bath Method: To temper chocolate using a water bath (bain-marie), you’ll need two pots of different sizes. Fill the larger pot with about 3-4 finger-widths of water and bring it to a gentle simmer. Place the smaller pot on top, ensuring its bottom does not touch the simmering water. Add your chocolate (chips or finely chopped) to the smaller pot. The chocolate will melt slowly and evenly from the rising steam. Stir continuously until the chocolate is fully melted and smooth. For dark chocolate, aim for a melting temperature of 122°F (50°C), milk chocolate and white chocolate to 104°F (40°C). Then, remove from heat and allow it to cool, stirring frequently, to the working temperature (around 88-91°F / 31-32°C for dark, 86-88°F / 30-31°C for milk/white).
Tempering Unit Method: A tempering unit simplifies the process significantly. Add your chocolate to the unit and set it to the appropriate melting temperature: 122°F (50°C) for dark chocolate, or 104°F (40°C) for white and milk chocolate. The device will then automatically bring the chocolate down to its optimal working temperature, maintaining it for consistent results.
🍫 Download Your Free Chocolate Workbook
Sealing Your Exquisite Chocolates
Once your caramel-filled spheres are thoroughly chilled and the chocolate is perfectly tempered, it’s time to seal them. This step creates a robust barrier, ensuring the liquid caramel remains securely inside.
Carefully pour a small amount of the tempered chocolate into a squeeze bottle. Take a chilled, caramel-filled hollow sphere and apply a small dot of chocolate from the squeeze bottle to its opening. Gently shake or swirl the truffle to allow the chocolate to spread evenly and form a thin, complete seal over the caramel. This method helps achieve a smooth, professional finish without excess chocolate.
Once sealed, place the truffles back into the refrigerator for a quick chill, approximately 15 minutes. This allows the newly applied chocolate seal to set firmly and quickly. While the sealed truffles are chilling, place any remaining chocolate in the squeeze bottle, along with the bottle itself, into the refrigerator as well. This prevents the chocolate from hardening inside the nozzle, making it easier to clean.
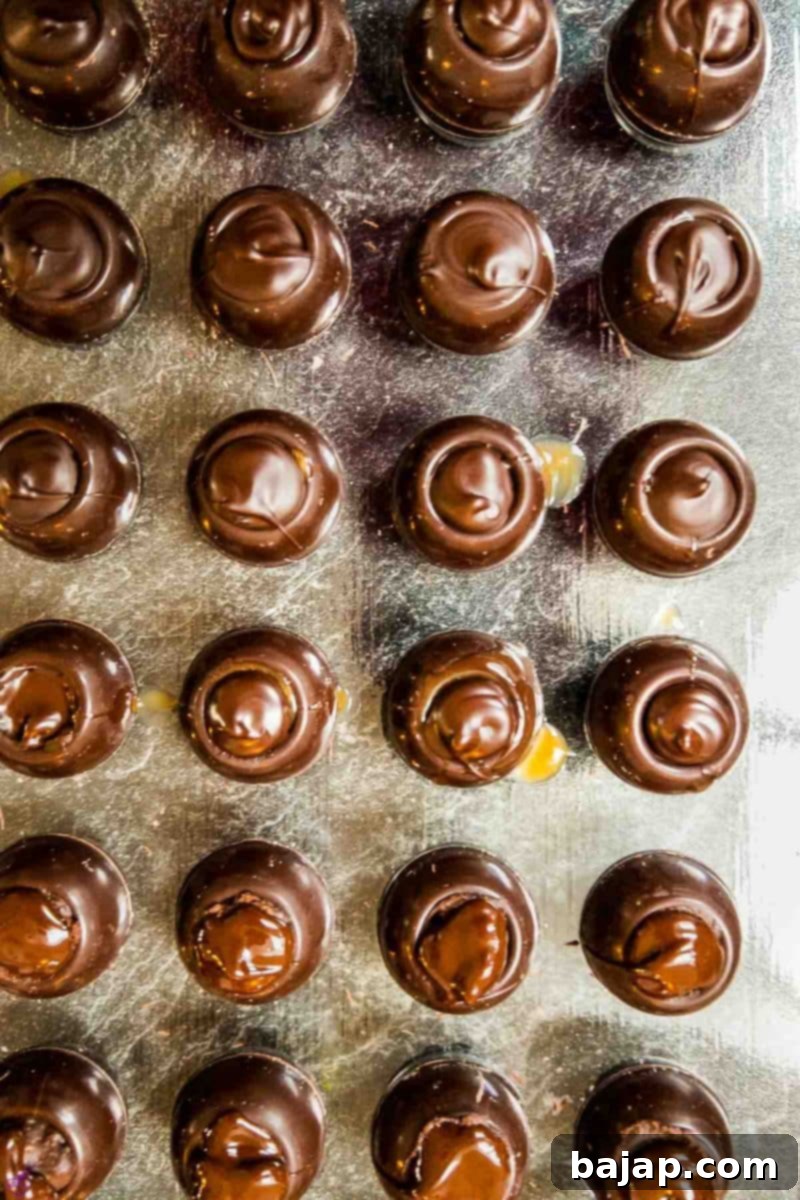
Perfectly Sealed Caramel Chocolate Truffles
After the chocolate in the squeeze bottle has solidified in the fridge, you can easily remove it by squeezing the bottle. This hardened chocolate can then be added back to your main batch of tempered chocolate for coating, minimizing waste.
Coating Your Decadent Caramel Truffles
The final step in crafting your gourmet salted caramel truffles is to give them their characteristic coating of rich Criollo cocoa powder. This adds both visual appeal and a delightful aromatic finish:
Before you begin coating, prepare your workstation. Set up a medium-sized bowl or a shallow loaf pan. Using a small sieve, finely sift the Criollo cocoa powder into the bowl. Sifting ensures a smooth, lump-free coating. Additionally, arrange 20 chocolate paper molds (or a sheet of parchment paper) nearby. This way, you can immediately transfer your freshly coated truffles to their individual resting places.
With everything in place, it’s time to enrobe. For a cleaner process and to avoid sticky fingers, we highly recommend wearing disposable gloves during this stage. Retrieve your sealed chocolate truffles from the refrigerator. Take 1 to 4 truffles in one hand, depending on your comfort and dexterity. Dip the fingers of your other hand into the remaining tempered chocolate couverture. Use your chocolate-dipped fingers to gently coat and roll the small balls, ensuring an even layer of chocolate covers each truffle. The goal is a thin, uniform coating that will act as an adhesive for the cocoa powder.
As soon as each caramel truffle is beautifully coated with the couverture, carefully transfer it to the bowl of sifted Criollo cocoa powder. Gently swirl the bowl back and forth, allowing the truffles to roll around and become thoroughly and evenly coated with the cocoa powder. The rich dark cocoa provides a stunning contrast to the sweet caramel and chocolate within.
Once coated, immediately place each truffle into a prepared paper mold or onto your parchment paper. Continue this process for all the remaining truffles, working efficiently to ensure the chocolate remains at a workable temperature.
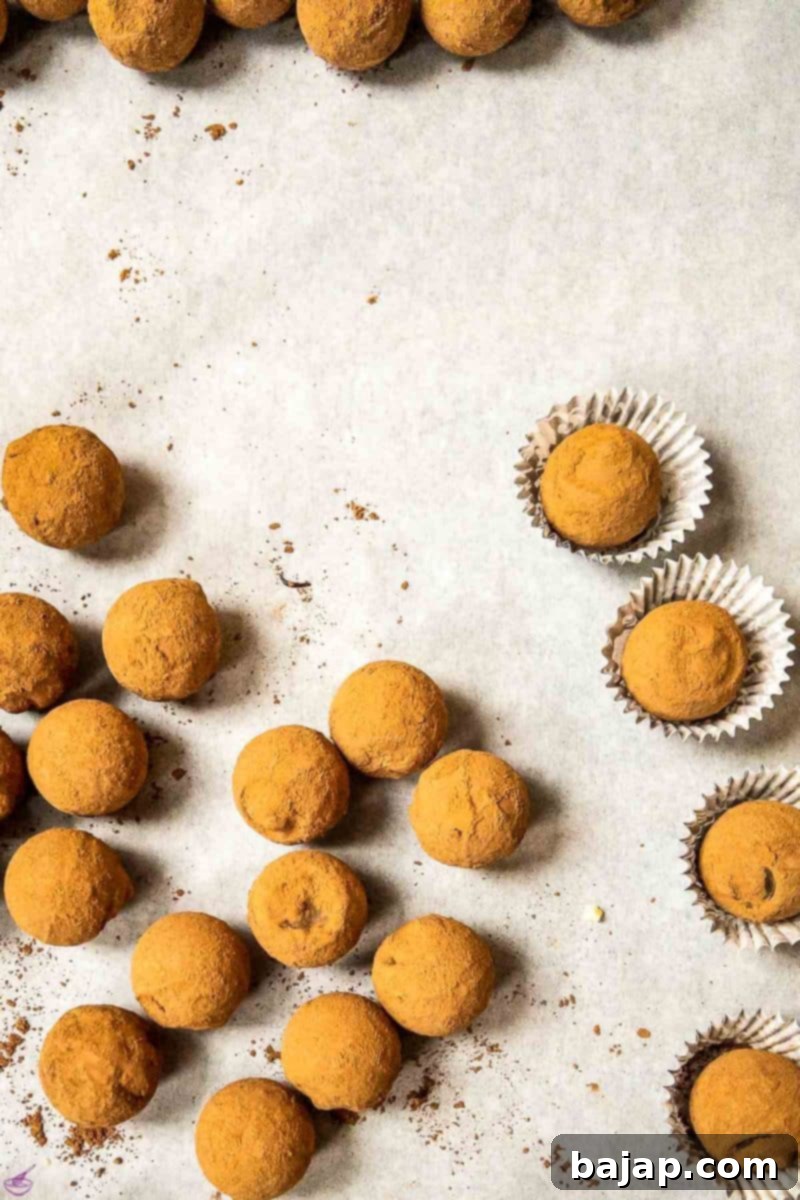
Congratulations! Your homemade salted caramel truffles are now complete and ready to be enjoyed. Store these precious delights in a cool, dry place in an airtight container to maintain their freshness and texture.
If you’re planning to present these delicious creations as a gift, we suggest arranging them in elegant small praline bags or decorative boxes. They make a thoughtful and impressive homemade present for any occasion.
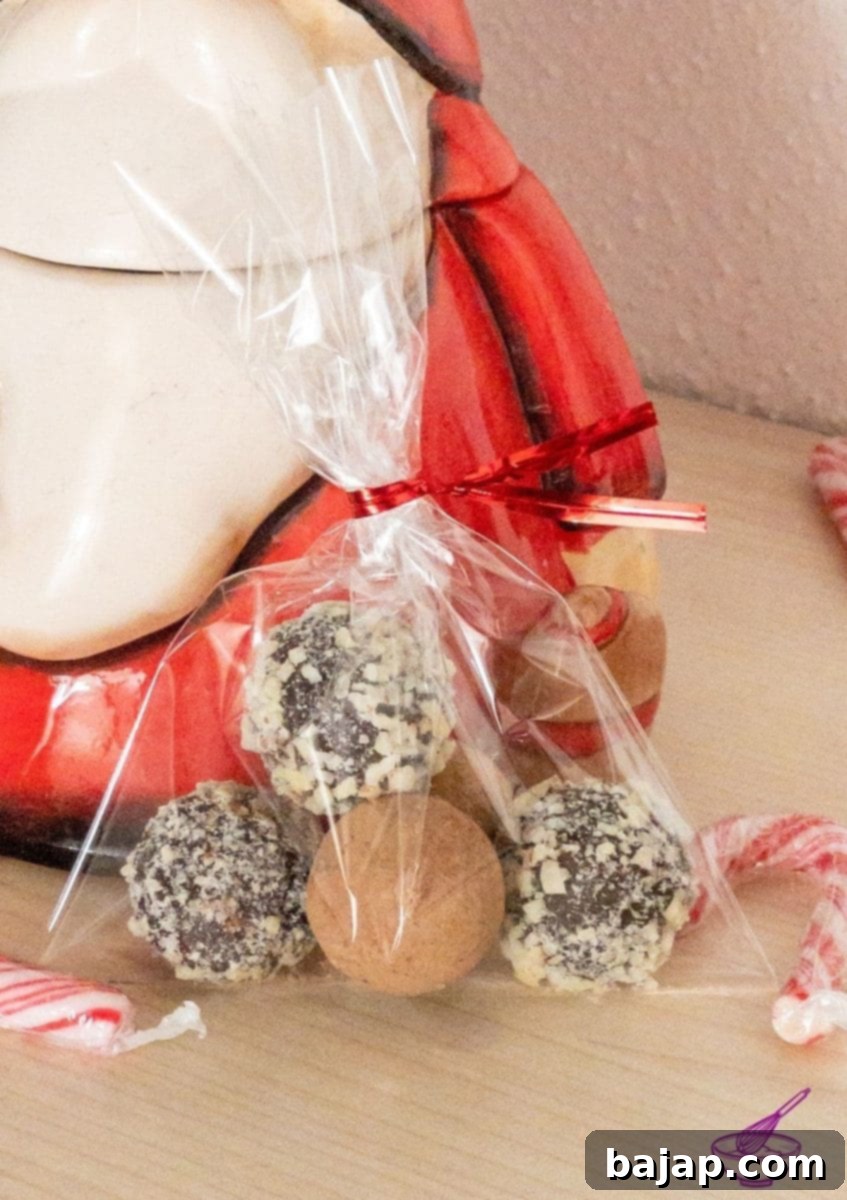
For another delightful Christmas candy gift idea, consider making this homemade Torrone – a classic Italian nougat filled with roasted nuts!
🥜 Smart Substitutions for Your Truffles
While the recipe specifies certain ingredients for optimal results, a few substitutions can be made if needed:
Glucose Alternative: If you don’t have glucose on hand, liquid honey can be a suitable 1:1 replacement. However, it’s crucial to use liquid honey to prevent crystallization in the ganache, which would compromise the smooth texture of your caramel. Furthermore, avoid using organic honey for this particular application, as it tends to ferment more quickly and can lead to mold, especially in longer-lasting confectionery. Industrial honey, which is typically more processed, provides better stability for truffle fillings.
🍫 Download Your Free Chocolate Workbook
🍽 Essential Equipment for Truffle Making
Having the right tools makes the truffle-making process smoother and more enjoyable. Here’s what you’ll need:
- Water Bath (Bain-Marie) or Tempering Device: Essential for melting and properly tempering your chocolate, ensuring a glossy finish and crisp texture.
- Small Saucepan: For heating the heavy cream and for preparing the homemade salted caramel.
- Kitchen Scale: For precise measurement of ingredients, especially butter and glucose, which is crucial in confectionery.
- Thermometer: A digital thermometer is indispensable for accurately monitoring chocolate temperatures during tempering and caramel temperatures during cooling.
- Squeeze Bottle: Ideal for carefully sealing the hollow chocolate spheres with precision, minimizing mess.
- Piping Bag: For neatly filling the hollow spheres with the liquid salted caramel without spills.
- Small Sieve: Crucial for sifting the Criollo cocoa powder, ensuring a smooth, even, and lump-free coating on your truffles.
- Medium Bowl or Loaf Pan: To hold the sifted cocoa powder for rolling the coated truffles.
- Chocolate Paper Molds: For presenting and storing your finished truffles beautifully.
- Disposable Gloves: Highly recommended for handling the chocolates during coating to prevent fingerprints and stickiness.
- Well-Sealed Box: An airtight container for optimal storage of your finished truffles.
- Optional: Parchment Paper: Useful for placing the coated chocolates on if you don’t have enough paper molds, preventing sticking.
🌡 Proper Storage for Lasting Freshness
To ensure your homemade salted caramel truffles retain their exquisite taste and texture for as long as possible, proper storage is paramount:
Always store your truffles in a cool, dark place within an airtight container. The enemy of chocolate is moisture, temperature fluctuations, and direct sunlight. While cool temperatures are favorable, it’s important to differentiate between cool and damp cold.
The optimum storage temperature for chocolates and truffles is around 62.6 °F (17 °C). At this ideal temperature, your finished salted caramel truffles will remain fresh and delicious for up to three months. This extended shelf life makes them perfect for making ahead as gifts or for enjoying over an extended period.
At typical room temperature (e.g., 68-72°F or 20-22°C), the shelf life significantly decreases to approximately one week. The warmer temperature can cause the chocolate to soften, the caramel to become too runny, and potentially accelerate spoilage.
If you live in a warm climate or cannot find a suitable cool, dry spot, you may store the airtight container in the refrigerator as a last resort. However, this is not ideal for chocolate. If refrigerating, ensure the container is truly airtight to prevent the truffles from absorbing odors from other foods or developing “sugar bloom” (a white film caused by condensation). Allow them to come to room temperature for about 15-20 minutes before serving to fully appreciate their texture and flavor.
💭 Top Tips for Truffle Perfection
Achieving truly professional-looking and tasting truffles involves a few key considerations:
The Magic of Glucose: Glucose is a hidden hero in praline making. Its inclusion in your caramel filling is not merely optional; it leads to a superior, more stable result with an extended shelf life. Glucose actively inhibits sugar crystallization, ensuring your caramel remains wonderfully smooth and liquid. For this reason, it’s always a good idea to keep a small supply of glucose on hand if you frequently make confectionery. Given its long shelf life, it’s a worthwhile investment for any home chocolatier. While this is the professional approach, the recipe can still work without glucose, though the results may be slightly less stable over time.
Perfect Cocoa Coating: Sometimes, after rolling your truffles in cocoa powder, they might end up with a slightly excessive coating. To achieve that elegant, thin veil of cocoa, we recommend a simple trick: gently swirl the truffles briefly in a fine-mesh sieve before placing them in their individual praline molds. This will effectively remove any excess cocoa powder, leaving a refined and attractive finish.
🙋🏻 Frequently Asked Questions About Truffles
Criollo cocoa is a rare and highly prized variety of cocoa bean, originally from Venezuela. It is considered one of the finest cocoa types in the world due to its delicate and complex flavor profile. Known for its barely bitter taste, low acidity, and pronounced secondary aromas (often described as nutty, floral, or fruity), Criollo cocoa offers a mild and sophisticated chocolate experience. Its rarity and specific cultivation requirements make it more expensive than other cocoa varieties, but its superior quality makes it an ideal choice for coating gourmet truffles like these salted caramel delights.
Yes, truffles can indeed be frozen! To freeze, place them in a single layer on a parchment-lined baking sheet and freeze until solid. Once frozen, transfer them to an airtight, freezer-safe container or bag, separating layers with parchment paper. They can be stored in the freezer for up to 3-4 months. When ready to enjoy, thaw them slowly in the refrigerator overnight, then bring them to room temperature before serving to fully appreciate their texture and flavor.
For the best possible results, especially for the coating of your truffles, we highly recommend using high-quality chocolate couverture. Couverture chocolate has a higher cocoa butter content, which makes it melt more smoothly, temper more easily, and gives it a superior shine and snap when set. Avoid using standard baking chocolate chips if possible, as they often contain stabilizers that make tempering difficult. For exceptional quality, we favor brands like Felchlin, renowned for its exquisite flavor and workability. Callebaut is another very popular and reliable brand widely available to home chocolatiers.
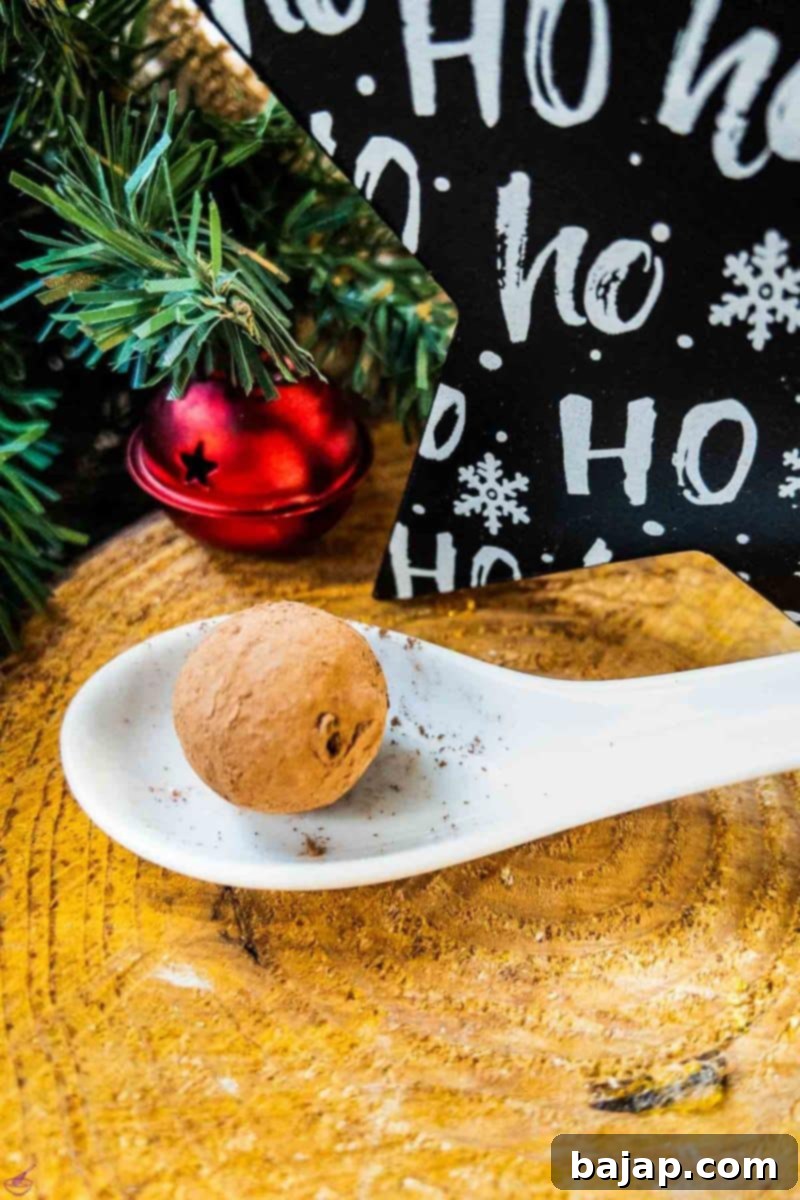
If you’re as passionate about caramel as we are, you simply must try this utterly delicious Leche Flan recipe for another caramel-infused delight!
More Delectable Chocolate Candy Recipes
Explore a world of chocolate possibilities with these additional tempting candy recipes:
- No Bake Cornflake Clusters with Dark Chocolate
- The Essential Chocolate Making Tools Every Home Chocolatier Needs
- Easy Peppermint Bark Recipe with White and Dark Chocolate
- White Chocolate Coconut Truffles
If you create this recipe, we’d love to hear how you enjoyed it! Please consider leaving a ★★★★★ star rating and a comment below. Your feedback is greatly appreciated and helps others discover delicious recipes. You can also subscribe to our newsletter or follow us on Pinterest or Instagram. Don’t forget to share your culinary creations with us by tagging @combinegoodflavors and using the hashtag #combinegoodflavors, so we don’t miss them!
📖 Recipe: Easy Salted Caramel Truffles
Decadent Easy Salted Caramel Truffles
By Nora
Save RecipeSaved!
Pin Recipe
Equipment
-
Water bath or tempering device for melting the chocolate
-
Small Saucepan
-
Kitchen scale
-
Thermometer for tempering the chocolate
-
Squeeze Bottle for sealing the hollow balls
-
Piping bag for filling the hollow spheres
-
Small Sieve for sieving the cocoa
-
Medium bowl or loaf pan for rolling the chocolates
-
Chocolate paper molds
-
Disposable gloves
-
Well-sealed box
-
Parchment Paper optional
Ingredients
Homemade Salted Caramel
- 1 cup Granulated sugar
- 3.53 oz Unsalted butter
- ¾ cup Heavy cream
- 2 pinch Fleur de sel coarse sea salt
- 5 teaspoon Glucose
- 20 Dark hollow spheres
- ¾ cup Dark chocolate chips for sealing and coating
- Criollo Cocoa powder for final rolling of the chocolates
Optional
- 1 tablespoon Rum
Instructions
Salted Caramel Sauce
-
Melt the granulated sugar in a large saucepan over low to medium heat until a light golden caramel forms. This can take up to 20 minutes. Do not stir the sugar with any objects during this time, though gentle swirling of the pan is fine. Ensure the caramel does not get too dark, as it will taste bitter.1 cup Granulated sugar
-
Once a beautiful caramel has formed, remove from heat and stir in the unsalted butter in small pieces until a creamy sauce has formed.3.53 oz Unsalted butter
-
Then, add two pinches of coarse sea salt.2 pinch Fleur de sel
-
In the meantime, gently heat the heavy cream (do not boil!) and carefully stir it into the caramel mixture.¾ cup Heavy cream
-
Let the caramel boil gently for two minutes. Then stir in the glucose until completely dissolved in the hot caramel cream.5 teaspoon Glucose
-
Allow the salted caramel sauce to cool to a working temperature of 80.6 °F (27 °C).
-
If you choose to add rum, do so now. Stir the rum into the cooled caramel cream and mix thoroughly.1 tablespoon Rum
-
Transfer the caramel filling to a piping bag and fill the dark hollow chocolate spheres just below the rim. Gently swirl the spheres to remove any air voids.20 Dark hollow spheres
-
Place them in the refrigerator to chill and crystallize for 12 hours (ideally 24 hours for best results).
-
Once the chilling period is complete, begin melting and tempering the dark chocolate chips for the coating.¾ cup Dark chocolate chips
Seal and Coat the Chocolates
-
Pour a small amount of the tempered chocolate into a squeeze bottle. Seal the opening of each caramel-filled sphere with a small dot of chocolate. Gently shake each sphere to spread the chocolate evenly and create a smooth seal.
-
Place the sealed truffles in the refrigerator for 15 minutes to allow the chocolate seal to set.
-
Prepare a bowl or loaf pan by sifting the Criollo cocoa powder into it. Set aside.Criollo Cocoa powder
-
Arrange 20 chocolate paper molds (or parchment paper) to place the coated truffles immediately.
-
Retrieve your sealed chocolates from the fridge. Wear disposable gloves. Take 1-4 chocolates in one hand, dip the fingers of your other hand into the melted couverture, and use your chocolate-dipped hands to coat and roll the truffles evenly.
-
Once each caramel truffle is nicely coated with couverture, place it into the prepared bowl of cocoa powder.
-
Swirl the bowl gently back and forth to ensure the chocolates are evenly covered with cocoa powder.
-
After coating, immediately place the truffles into the paper molds. Repeat this process for all remaining truffles.
-
Store the finished truffles in a cool place within an airtight container.
Nutrition values are estimates only, using online calculators. Please verify using your own data.

🤎 You Might Also Enjoy These
- Boozy Marzipan Candy
- Homemade Caramel Truffles
- Boozy Eggnog Truffles with Cocoa Powder Coating
- Biscoff Truffles without Cream Cheese
⛑️ Important Food Safety Guidelines
Ensuring food safety is paramount when preparing any recipe. Please adhere to these guidelines to prevent foodborne illness and ensure a safe and enjoyable culinary experience:
- Always cook ingredients to a minimum safe internal temperature, typically 165 °F (74 °C), especially if dealing with any components that could be cross-contaminated. For confectionery, maintaining proper temperatures during cooling and storage is key.
- Avoid using the same utensils or cutting boards on cooked food that have previously touched raw ingredients. Practice diligent cross-contamination prevention.
- Wash hands thoroughly with soap and warm water for at least 20 seconds after handling any raw food items or ingredients.
- Never leave perishable foods, particularly those containing dairy or other sensitive ingredients, sitting out at room temperature for extended periods. This encourages bacterial growth.
- Always supervise cooking food. Never leave a stove, oven, or other cooking appliances unattended while in use.
- When cooking with oils, choose those with a high smoking point to avoid the formation of harmful compounds and maintain flavor integrity.
- Ensure good ventilation when using a gas stove to prevent the buildup of fumes and maintain air quality.
For further comprehensive information and best practices on food safety, please consult resources from trusted authorities such as Safe Food Handling – FDA.
