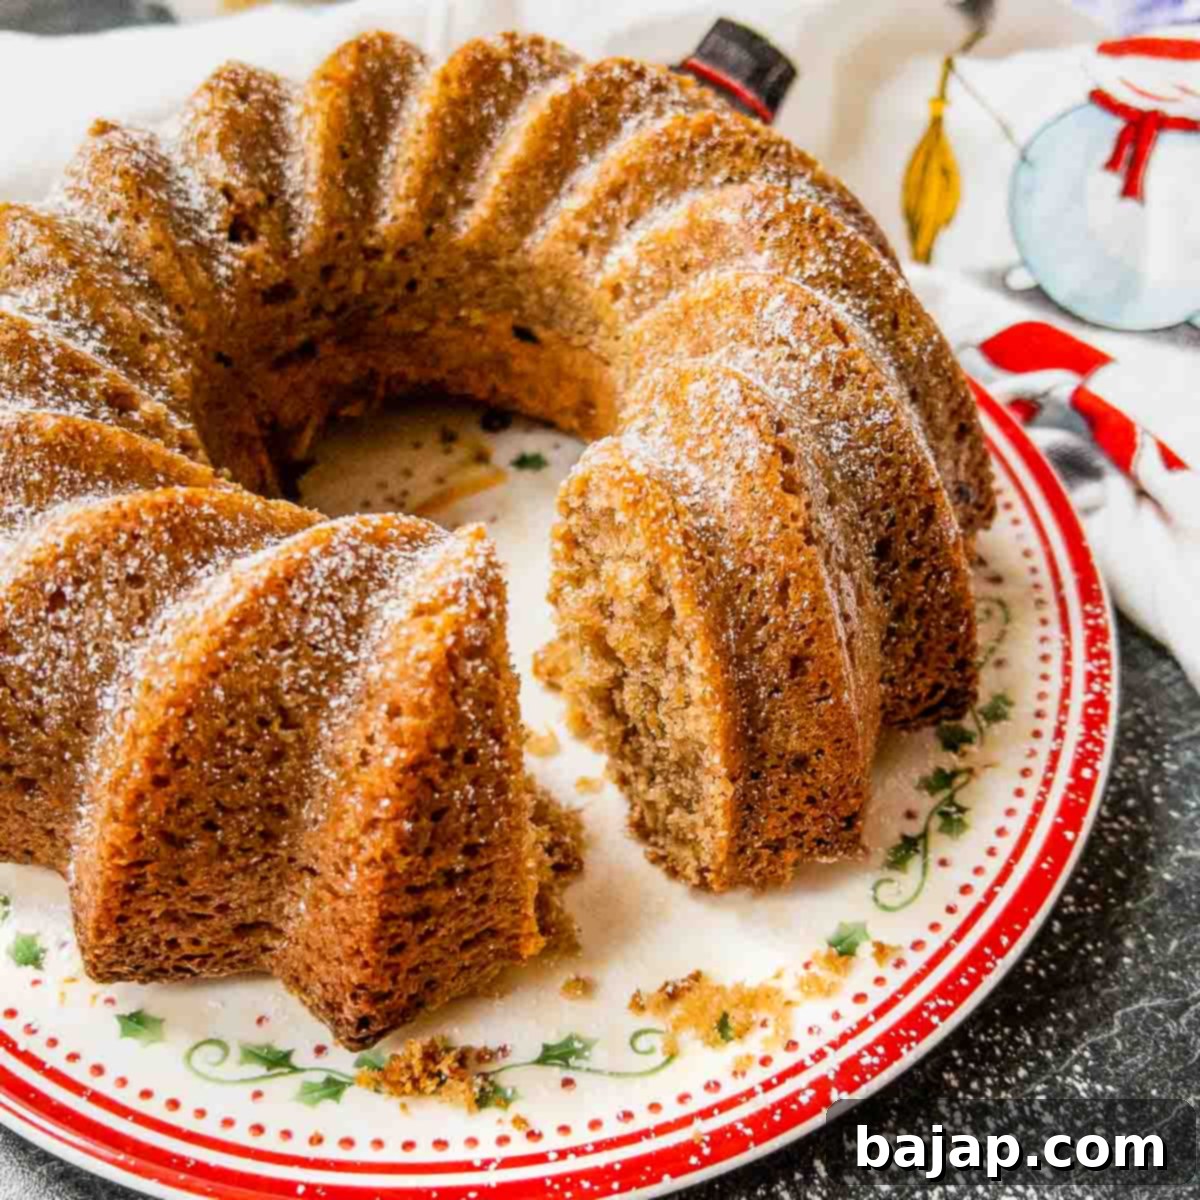
Irresistibly Moist Chestnut Bundt Cake Recipe: Easy & Delicious with Chestnut Flour
Discover the exquisite delight of our Chestnut Bundt Cake, a truly irresistible treat that promises to elevate any occasion. This cake isn’t just a dessert; it’s an experience, featuring a perfect harmony of smooth, moist texture and an intensely aromatic chestnut flavor. Crafted with a thoughtful blend of delicate chestnut flour and versatile all-purpose flour, each bite of this bundt cake is a testament to its deliciousness and unique character.
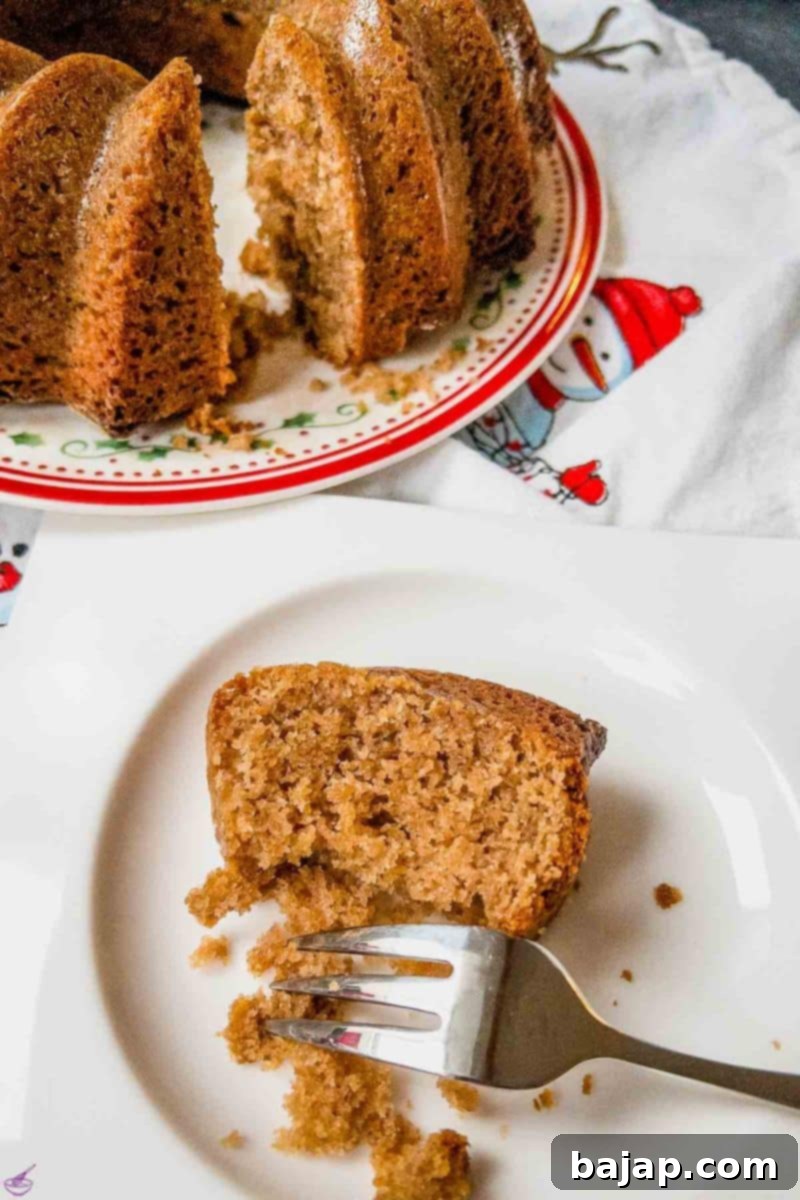
Whether you’re hosting a sophisticated dinner party, enjoying a quiet afternoon coffee, or simply craving something sweet and comforting, this chestnut cake is an impeccable choice. Its marvelous texture, which is both tender and velvety, coupled with the rich, earthy notes of chestnut, creates a flavor profile that is both unique and universally loved. It’s the perfect sweet companion for holiday gatherings, autumn celebrations, or simply a cozy treat at home.
Beyond its incredible taste, this recipe stands out for its remarkable simplicity. In just two straightforward steps for preparation and a baking time of approximately 45 minutes, you can effortlessly create a show-stopping cake that tastes like it took hours of intricate work. Forget complicated techniques and endless fuss; this easy chestnut bundt cake is designed for bakers of all levels, delivering impressive results with minimal effort and maximum flavor.
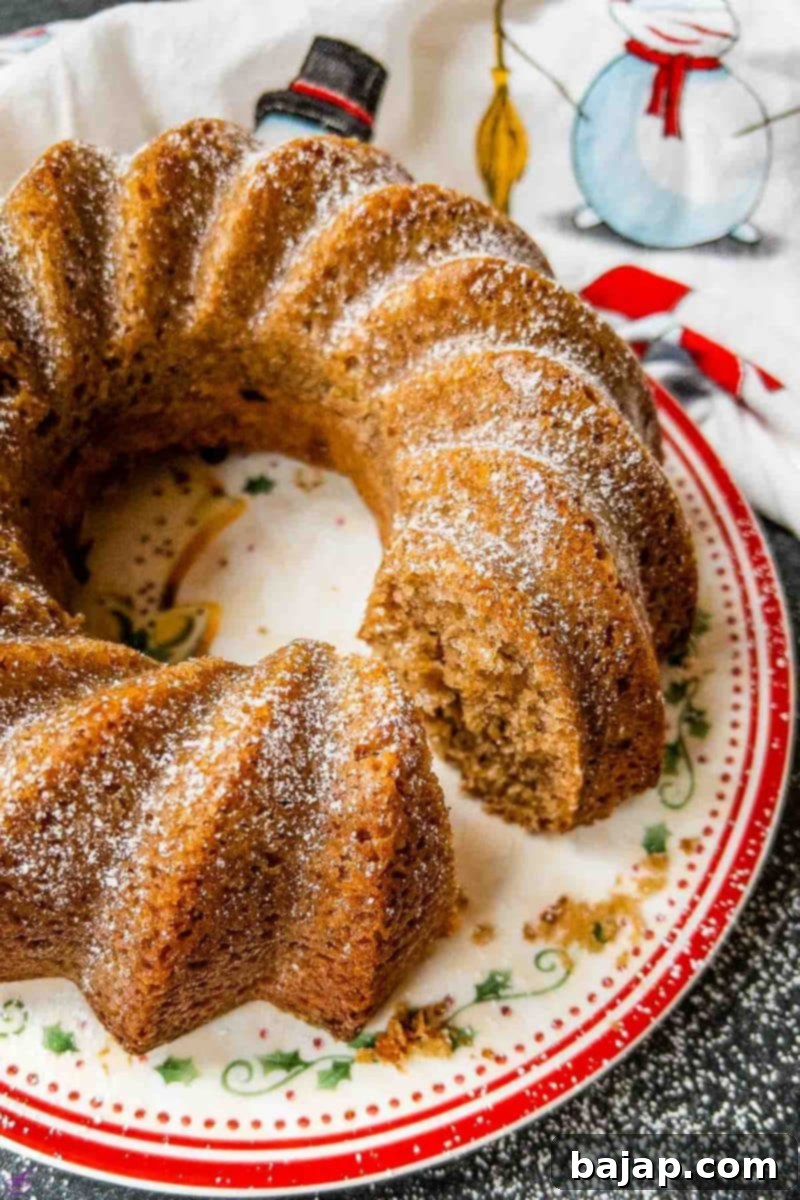
The ideal accompaniment to this delicious dessert is a delightful eggnog coffee or a luxurious hot chocolate with rum! For those who adore the unique taste of chestnuts, we also recommend exploring more of our delicious chestnut-infused recipes. Dive into our waffle blossoms with homemade chestnut purée or indulge in our delightful chocolate chip cookies with chestnut flour for even more culinary chestnut adventures.
🥘 Essential Ingredients for Your Chestnut Bundt Cake
Crafting this exquisite chestnut bundt cake requires a selection of simple, high-quality ingredients that come together to create its signature flavor and texture. Here’s a detailed look at what you’ll need:
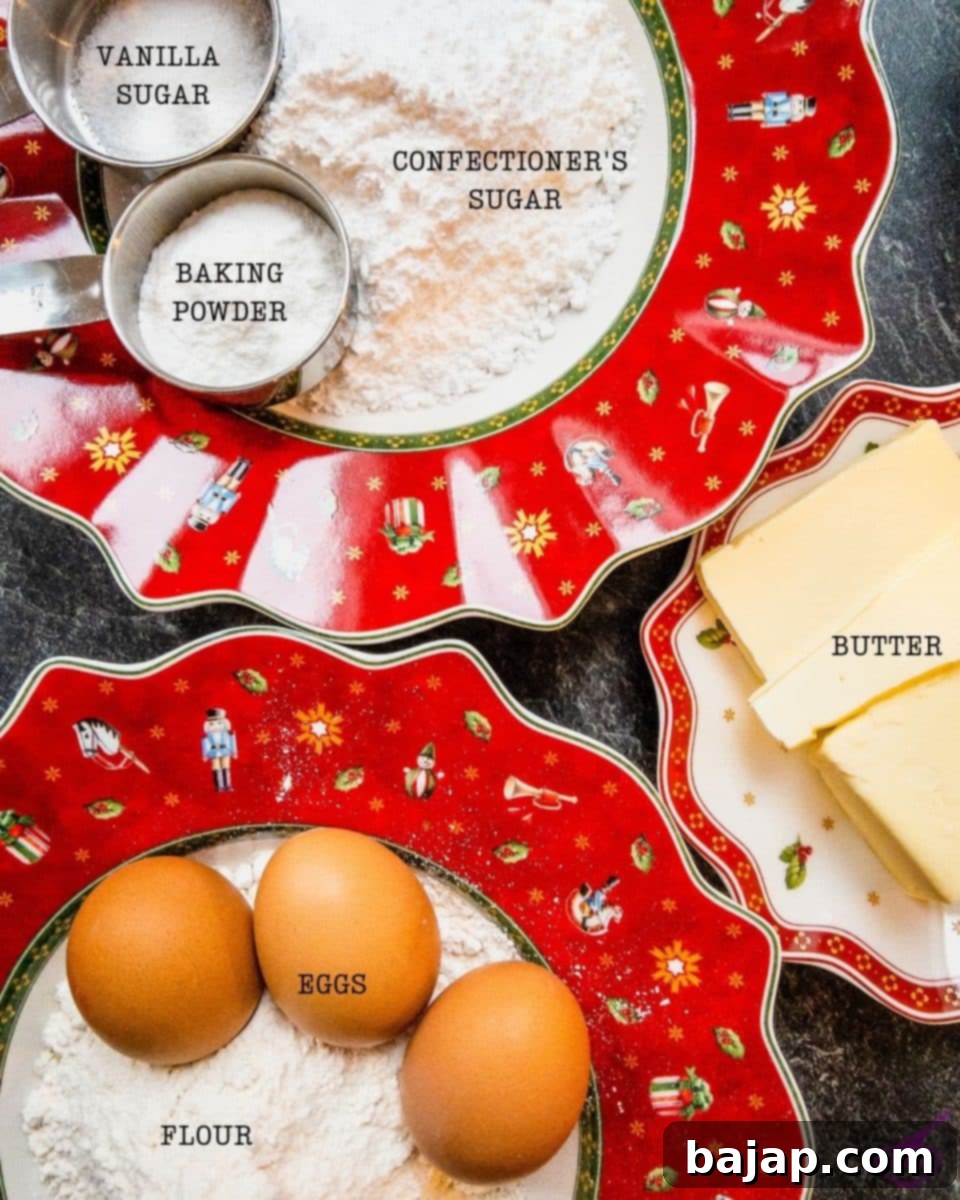
- Unsalted butter: Essential for that rich, tender crumb and delightful flavor. Using unsalted butter allows you to control the exact salt content of your cake. Ensure it’s softened to room temperature for optimal creaming.
- All-purpose flour: Provides the foundational structure for our cake, ensuring it holds together beautifully while remaining light.
- Chestnut flour: The true star ingredient! Chestnut flour imparts a distinct, earthy, and naturally sweet flavor, along with a unique moistness that makes this cake so special. It’s naturally gluten-free and adds a delightful depth that traditional flours can’t quite match.
- Confectioner’s sugar: Also known as powdered sugar, this finely ground sugar blends seamlessly into the batter, contributing to the cake’s incredibly smooth texture and perfectly balanced sweetness.
- Eggs: Use organic, room-temperature eggs for the best results. Room temperature eggs emulsify better with butter and sugar, creating a smoother batter and a more uniform, tender cake crumb. Organic eggs often boast richer yolks and superior flavor.
- Baking powder: As our primary leavening agent, baking powder is crucial for giving the cake its beautiful lift and airy texture. It reacts when mixed with liquid and heat, creating bubbles that make the cake light and fluffy. It’s the number one raising agent in cake baking.
- Vanilla sugar: (Homemade or store-bought) Infuses the cake with a warm, inviting vanilla aroma and subtle sweetness. Homemade vanilla sugar is simple to prepare and offers a more intense, authentic flavor, but a good quality store-bought option works perfectly.
- Powdered sugar for sprinkling: A simple yet elegant finishing touch, a dusting of powdered sugar adds a delicate sweetness and a beautiful, snowy presentation to your finished bundt cake.
- Optional: chocolate chips: For the ultimate indulgence, stirring in a handful of your favorite chocolate chips introduces delightful pockets of melted chocolate, perfectly complementing the earthy chestnut flavor.
For precise quantities of each ingredient, please refer to the detailed recipe card below.
🔪 Step-by-Step Instructions for Your Perfect Chestnut Bundt Cake
This delightful chestnut bundt cake comes together in just two easy steps, making it an accessible recipe for bakers of all skill levels. Follow these clear instructions to achieve a perfectly moist and flavorful cake every time.
Step 1: Prepare the Batter
Before you begin mixing, ensure your oven is preheated to 356 °F (180 °C) with both top and bottom heat. This crucial first step ensures your cake starts baking immediately once in the oven, preventing a dense or uneven rise. An adequately preheated oven is key to a perfectly baked cake.
Next, take a large mixing bowl or the bowl of your trusty food processor. Add the softened unsalted butter, confectioner’s sugar, fragrant vanilla sugar, and the room-temperature eggs. The temperature of your eggs is vital here as it helps create a smooth, emulsified mixture that traps more air, leading to a lighter cake. If your butter isn’t soft enough, you can gently warm it for a few seconds in the microwave.
Begin whisking these ingredients together, gradually increasing speed until the mixture transforms into a light, airy, and fluffy consistency. This creaming process incorporates air, which contributes significantly to the cake’s final, tender texture. Once light and fluffy, gently fold in the dry ingredients: the all-purpose flour, chestnut flour, and baking powder. Be careful not to overmix at this stage, as overmixing can develop the gluten in the all-purpose flour, leading to a tough or dense cake.
Continue mixing with your food processor or a spatula until all ingredients are just combined and no streaks of dry flour remain, forming a beautifully creamy and smooth batter. The consistency should be neither too wet nor too dry, perfect for a moist bundt cake. If you’re looking to add an extra layer of decadence and an irresistible chocolatey crunch, now is the time to carefully fold in a generous handful of chocolate chips. They melt wonderfully into the chestnut batter, creating delightful surprises in every slice.
Step 2: Bake to Golden Perfection & Serve
Prepare your Bundt cake pan by generously coating it with baking spray or softened butter, ensuring every crevice and nook is covered. This step is paramount for a clean release after baking, preventing your beautiful cake from sticking. For extra assurance, a light dusting of flour or cocoa powder after buttering can further guarantee a perfect unmolding, especially with intricate Bundt designs.
Carefully pour the creamy chestnut batter into the prepared Bundt pan, distributing it evenly. Gently tap the pan on your counter a few times to release any trapped air bubbles, which helps achieve an even texture and prevents large holes in your finished cake. Transfer the pan to your preheated oven and bake for approximately 45 minutes at 180 °C (356 °F).
Towards the end of the baking time, perform the classic toothpick test: insert a clean toothpick into the thickest part of the cake. If it comes out clean or with only a few moist crumbs attached, your cake is perfectly baked. If wet batter clings to the toothpick, return the cake to the oven for a few more minutes and test again. Avoid opening the oven door too early, as this can cause the cake to sink.
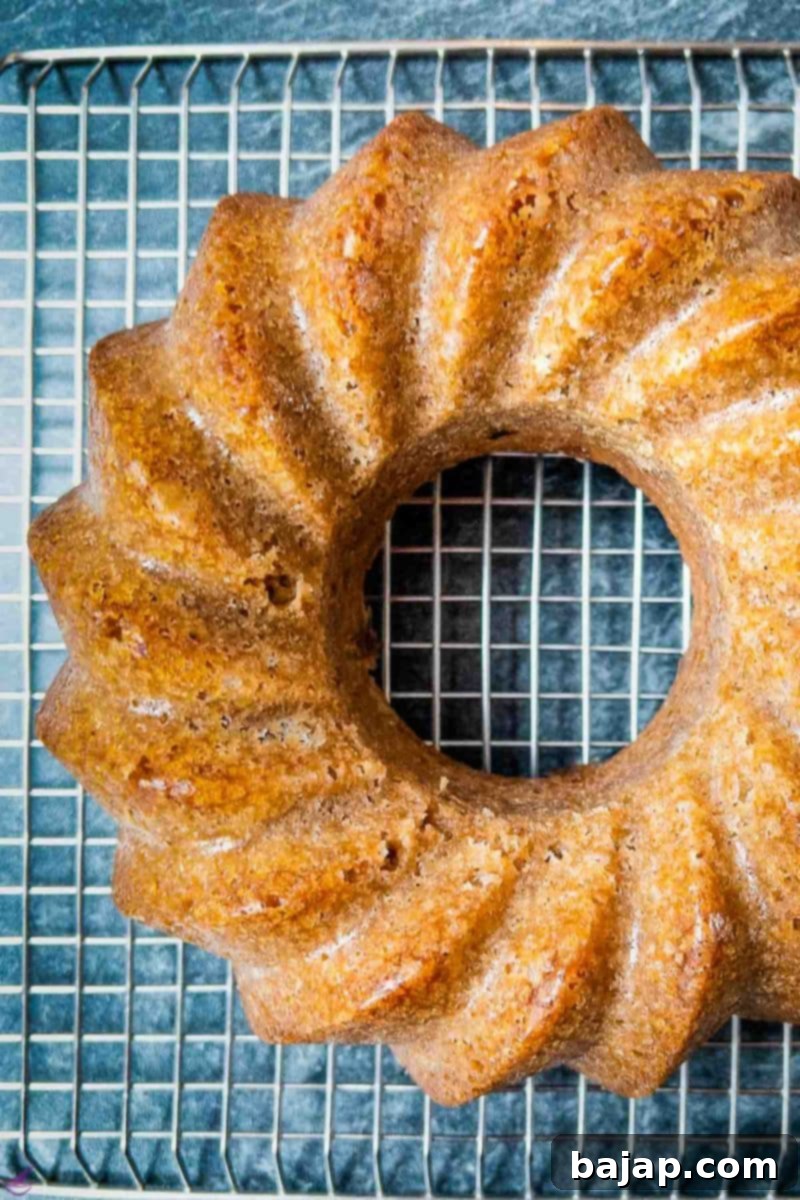
Once baked to golden perfection, remove the Bundt cake from the oven. Allow it to cool in the pan on a wire rack for about 10-15 minutes. This initial cooling period is crucial, as it allows the cake to firm up slightly and pull away from the sides of the pan before you attempt to invert it. After this crucial resting time, carefully invert the cake onto the cooling rack to cool completely. This prevents condensation from making the bottom of the cake soggy and ensures a beautifully moist texture throughout.
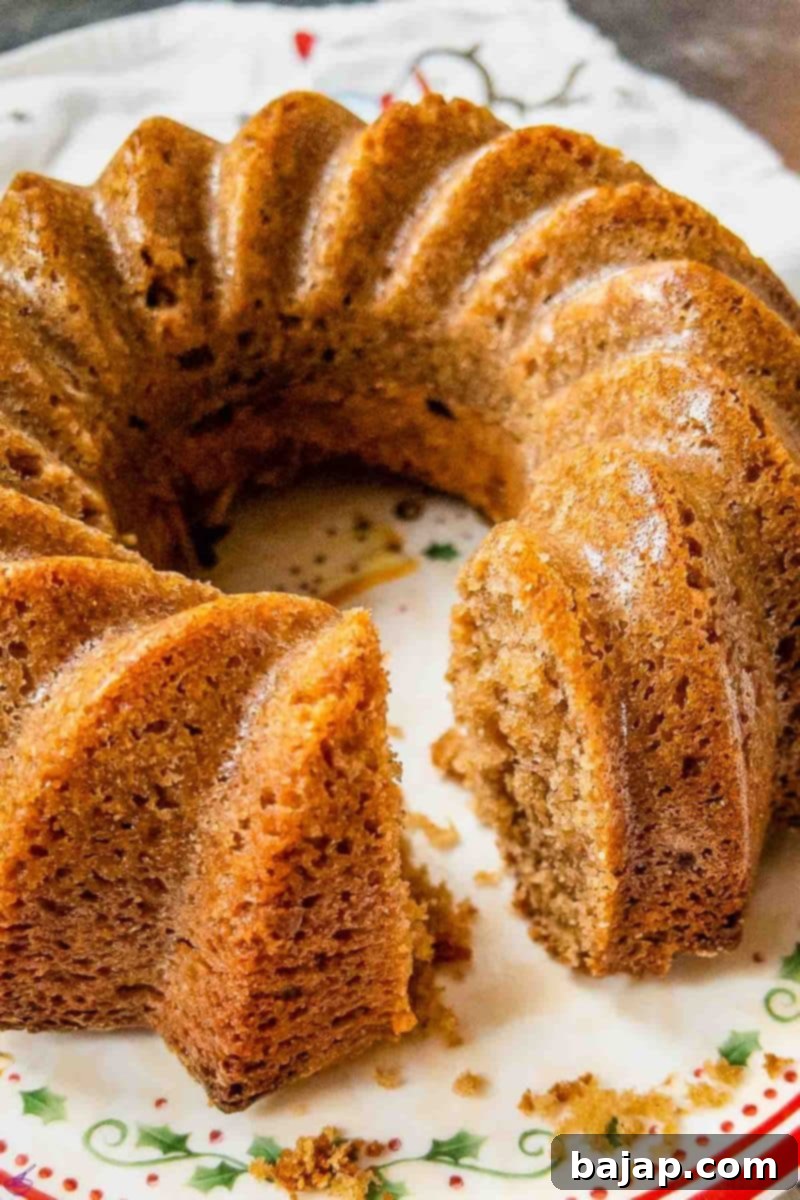
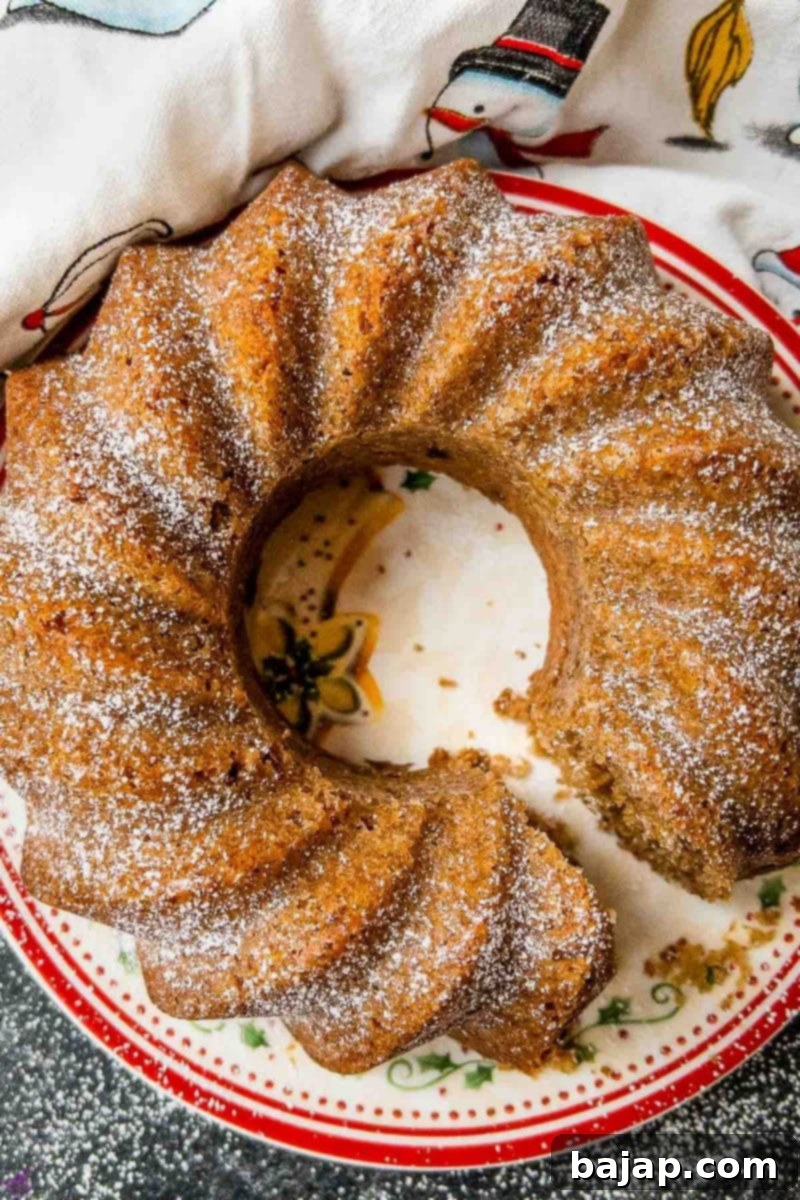
Once completely cooled, store your Bundt cake under a cake cover to maintain its freshness and moisture. Just before serving, give it a generous dusting of powdered sugar for an elegant presentation and an extra touch of sweetness. If you fancy, elevate this delicious dessert even further by serving it with a dollop of freshly whipped cream, a scoop of creamy vanilla ice cream, or a drizzle of warm chocolate sauce. Enjoy every exquisite bite!
🥜 Gluten-Free & Other Creative Substitutions for Your Chestnut Bundt Cake
This chestnut bundt cake is already a delightful treat, but it’s also incredibly versatile! Whether you have dietary restrictions or simply want to experiment with different flavors and textures, here are some ideas for substitutions, with a special focus on making this cake wonderfully gluten-free.
Making it Gluten-Free: For those with gluten sensitivities or simply preferring a gluten-free diet, adapting this exquisite chestnut cake is wonderfully straightforward. While chestnut flour is naturally gluten-free, this recipe also uses all-purpose wheat flour. To make it completely gluten-free, simply substitute the all-purpose flour with a suitable gluten-free flour blend. A general guideline for gluten-free baking is to substitute wheat flour with a blend consisting of two parts gluten-free flour, one part gluten-free starch flour, and a small amount of a binding agent. This combination helps to replicate the structure, texture, and moisture that gluten typically provides in traditional baking.
Recommended Gluten-Free Flours for Your Blend:
These flours form the base of your blend, providing flavor and bulk. Choose one or a combination for a balanced taste.
- Buckwheat Flour: Despite its name, buckwheat is gluten-free and offers an earthy, slightly nutty flavor that complements chestnuts beautifully.
- Amaranth Flour: A highly nutritious flour with a slightly sweet, grassy flavor, adding protein and fiber to your cake.
- Millet Flour: Mildly sweet and easily digestible, millet flour is great for adding a tender crumb and a delicate texture.
- Quinoa Flour: Known for its distinctive, slightly bitter flavor. If using, we recommend blending it with milder flours to ensure the taste doesn’t overpower the delicate chestnut.
- Almond Flour: Adds moisture, richness, and a delicate nutty flavor. Excellent for creating tender, moist cakes and a finer crumb.
- Soy Flour: High in protein, it can add richness and moisture, but use sparingly due to its distinct flavor profile.
- Chickpea (Garbanzo Bean) Flour: Offers a dense, earthy quality. Best used in combination with other lighter flours to avoid a heavy texture.
Essential Starch Flours for Gluten-Free Baking:
Starches are crucial for tenderness, lightness, and moisture retention in gluten-free baking. They help achieve a soft, appealing crumb.
- Potato Starch: Provides a very light, fine texture and helps the cake retain moisture, contributing to a wonderfully soft crumb.
- Rice Flour (White or Brown): A versatile, neutral-tasting flour that adds structure without being too heavy. White rice flour yields a lighter texture, while brown rice flour adds more fiber and a slightly nutty note.
- Corn Starch: An excellent thickener and tenderizer, contributing to a smooth cake texture and preventing dryness.
- Tapioca Flour (or Starch): Adds chewiness and helps create a slightly crispy crust, improving the overall mouthfeel in gluten-free baked goods.
Binding Agents (Crucial for Gluten-Free Structure):
Without gluten, binders are essential to prevent crumbling and give the cake the necessary structure and elasticity.
- Chia Seeds (ground): When mixed with liquid, they form a gel, acting as an excellent egg substitute and binder for a plant-based option.
- Flax Seeds (ground): Similar to chia seeds, ‘flax eggs’ (1 tbsp ground flaxseed + 3 tbsp water) provide binding properties and add healthy fats and fiber.
- Locust Bean Gum (Carob Gum): A natural thickener and stabilizer, often used in gluten-free recipes to improve texture and prevent crumbling.
- Guar Gum: Works synergistically with other gums and starches to improve texture, elasticity, and crumb structure in gluten-free baking.
- Xanthan Gum: One of the most common and effective gluten-free binders, it mimics the elasticity of gluten. Use a tiny amount (e.g., ¼ teaspoon per cup of flour blend) as too much can make baked goods gummy.
- Eggs: Naturally serve as powerful binders, adding structure, richness, and moisture to the cake.
- Gelatin or Agar Agar: Used as gelling agents, they can help bind ingredients and add structure, though they are less commonly found in simple cake recipes.
When experimenting with gluten-free flour blends, remember that achieving the perfect texture might require a bit of trial and error, as different blends absorb liquids differently. Start with a reputable commercial gluten-free all-purpose blend that already contains a binder, or craft your own using the guidelines above, always adjusting liquid content if necessary to reach the desired creamy batter consistency. Happy gluten-free baking!
🍽 Essential Equipment for Baking Your Chestnut Bundt Cake
Having the right tools makes baking this delicious chestnut bundt cake a breeze. Here’s a list of the equipment you’ll need:
- Food processor: This is highly recommended for efficiently mixing the batter until it’s perfectly smooth and creamy. A stand mixer with a paddle attachment or even a hand mixer will also work well.
- Large bowl: Essential for combining your ingredients comfortably, especially if you’re mixing by hand.
- Bundt pan: The star equipment that gives this cake its signature elegant shape. A 10-12 cup Bundt pan is ideal. Ensure it’s non-stick or properly prepared.
- Baking spray or butter: Crucial for greasing your Bundt pan thoroughly to ensure a clean release of the cake after baking.
- Cooling rack: Allows air to circulate around the cake as it cools, preventing sogginess and ensuring an even texture throughout.
- Toothpicks or cake tester: For checking the cake’s doneness during the last stages of baking.
🌡 Maximizing Freshness: Storage Tips for Your Chestnut Bundt Cake
One of the many wonderful qualities of this Chestnut Bundt Cake is its excellent shelf life, allowing you to savor its flavors for days. Proper storage is key to maintaining its delightful texture and intense chestnut aroma. Here’s how to keep your cake fresh and moist:
Room Temperature Storage: When stored correctly, your Chestnut Bundt Cake will remain wonderfully fresh, moist, and utterly delicious for up to a week. To preserve its delightful texture and rich aroma, we highly recommend storing the cake under a domed cake cover or in an airtight container. This protects it from drying out and maintains its tender crumb, keeping it perfect for spontaneous coffee breaks or unexpected guests.
Freezing for Longer Enjoyment: Should you wish to enjoy this delightful treat beyond a week, or if you prefer to have a ready-made dessert on hand for future occasions, freezing is an excellent option. Once the cake has completely cooled to room temperature, slice it into individual portions. This makes thawing and serving much more convenient, allowing you to enjoy a single slice without having to thaw the entire cake.
To freeze, arrange the individual slices in a single layer on a baking sheet and freeze until they are firm (this prevents them from sticking together). Once firm, transfer the slices to an airtight freezer-safe container, layering them with parchment paper, or wrap them individually first in plastic wrap and then in aluminum foil for maximum protection against freezer burn. When properly frozen, the chestnut bundt cake can maintain its quality for up to 3 months. To enjoy, simply thaw individual slices at room temperature for an hour or two, or gently warm them in the microwave for a few seconds for a freshly baked feel.
🙋🏻 Frequently Asked Questions About Chestnut Bundt Cake
Absolutely! Chestnut flour is not only a fantastic gluten-free alternative to traditional wheat flour but also boasts an impressive nutritional profile, making it a healthy and flavorful choice for baking. Beyond its natural sweetness and unique taste, chestnut flour is rich in complex carbohydrates, which provide sustained energy and help regulate blood sugar levels, keeping you feeling fuller for longer. It’s also packed with beneficial dietary fibers, crucial for maintaining a healthy digestive system and promoting gut health.
What truly sets chestnut flour apart is its high content of essential vitamins and minerals. It is an exceptional source of Vitamin C, a powerful antioxidant known for boosting the immune system, and a good source of potassium, vital for heart health and maintaining proper fluid balance in the body. Furthermore, chestnut flour is considered an alkaline food, which can contribute to a balanced diet, and as mentioned, it is naturally gluten-free, making it suitable for those with celiac disease or gluten sensitivities. Incorporating it into your baking adds both flavor and significant nutritional value.
While it might not be as ubiquitous as all-purpose flour, chestnut flour is becoming increasingly accessible due to its growing popularity in health-conscious and gourmet baking. You can typically find it in select ethnic markets, particularly those specializing in Italian or European ingredients, as chestnuts are a staple in many traditional cuisines. Health food stores and organic supermarkets are also increasingly stocking specialty flours like chestnut flour.
For convenience and often the widest selection, online retailers such as Amazon are your best bet, offering various brands and quantities. When purchasing, always look for finely ground, high-quality chestnut flour from reputable suppliers for the best baking results and flavor.
Yes, this recipe can be easily adapted to be entirely gluten-free. While chestnut flour is naturally gluten-free, this particular recipe also uses all-purpose wheat flour. To make it completely gluten-free, simply substitute the all-purpose flour with a suitable gluten-free flour blend. For best results, use a blend that combines different gluten-free flours (like rice, almond, or oat flour) with a small amount of starch (such as tapioca or cornstarch) and a binder (like xanthan gum or psyllium husk) to mimic the properties of wheat flour.
Refer to the ‘Substitutions’ section above for detailed guidance on creating your perfect gluten-free flour blend. With the right adjustments, you can achieve a delicious and perfectly textured gluten-free chestnut bundt cake that everyone can enjoy!
Discover more delicious cake recipes for you to try:
- Flourless Chocolate Cake
- Egg White Chocolate Cake
- Austrian Strawberry Sponge Cake
- Potato Flour Cake with Eggnog
- Whipping Cream Bundt Cake
- Chocolate Chip Ricotta Loaf Cake
- Double Chocolate Bundt Cake
If you make this irresistible Chestnut Bundt Cake recipe, I would love to hear how you liked it! Please let me know by giving it a ★★★★★ star rating and leaving a comment below. Your feedback is truly awesome and helps others discover delicious recipes! You can also sign up for our Newsletter to get weekly recipe inspiration delivered straight to your inbox, or follow me on Pinterest or Instagram. Don’t forget to share your delicious creation with me by tagging me @combinegoodflavors and using the hashtag #combinegoodflavors, so I don’t miss it!
📖 Recipe Card: Easy Chestnut Bundt Cake
Easy Chestnut Bundt Cake
Nora
Save RecipeSaved!
Pin Recipe
Equipment
-
Food processor
-
Large bowl
-
Bundt Pan
-
Baking spray or butter
-
Cooling Rack
Ingredients
- 5.64 oz Unsalted butter
- ¾ cup All purpose flour
- ½ cup Chestnut flour
- 1 ¼ cups Confectioner’s sugar
- 3 Eggs room temperature
- 1 tablespoon Baking powder
- ¾ tablespoon Vanilla sugar
- Powdered sugar for sprinkling
Instructions
-
Preheat your oven to 356 °F // 180 °C top and bottom heat.
-
Take a large bowl or the mixing bowl of your food processor and add the vanilla sugar, butter, powdered sugar, and eggs.1 ¼ cups Confectioner’s sugar, 3 Eggs, ¾ tablespoon Vanilla sugar, 5.64 oz Unsalted butter
-
Whisk until the mixture is fluffy, then add the all purpose flour, chestnut flour, and baking powder.¾ cup All purpose flour, ½ cup Chestnut flour, 1 tablespoon Baking powder
-
Mix all ingredients together with the food processor until well combined.
-
Coat your Bundt pan with baking spray or butter.
-
Pour the prepared dough into the cake pan and bake at 180 °C for 45 minutes.
-
Place the Bundt cake on a cooling rack and let it cool completely before removing it from the pan.
-
Store under a cake cover and sprinkle with powdered sugar before serving.Powdered sugar
Nutrition values are estimates only, using online calculators. Please verify using your own data.

🌰 You Might Also Love These Chestnut Delights
If you’re enchanted by the rich, earthy flavor of chestnuts in this bundt cake, you’ll be thrilled to explore our other beloved recipes featuring this versatile ingredient. From sweet treats to savory soups, chestnuts bring a unique depth to every dish:
- Chocolate Chip Cookies with Chestnut Flour
- Waffle Blossoms with Chestnut Purée
- Chestnut and Porcini Mushroom Soup {Dutch Oven}
- Brussels Sprouts with Chestnuts and Bacon {20 minutes}
⛑️ Important Food Safety Guidelines for Baking
Ensuring food safety is paramount when preparing any meal, especially when baking. Follow these essential guidelines to protect yourself and your loved ones:
- Cook to a minimum temperature: Always ensure that cakes and other baked goods are cooked to a minimum internal temperature of 165 °F (74 °C) to eliminate any potential harmful bacteria, especially if ingredients like eggs are present.
- Prevent cross-contamination: Do not use the same utensils or cutting boards on cooked food that previously touched raw ingredients like eggs or unbaked batter, without proper cleaning in between.
- Wash hands thoroughly: Always wash your hands with soap and warm water for at least 20 seconds after handling raw eggs, flour, or any unbaked dough, and before touching cooked food.
- Avoid extended room temperature exposure: Don’t leave perishable ingredients or finished baked goods sitting out at room temperature for extended periods. Refrigerate promptly if they contain ingredients that can spoil.
- Never leave cooking food unattended: Always stay in the kitchen and monitor your oven while baking to prevent burning or other hazards.
- Use appropriate oils: If frying or greasing pans, use oils with a high smoking point to avoid producing harmful compounds. For baking, butter or baking spray are typically used at lower temperatures.
- Ensure good ventilation: Always have good ventilation, especially when using a gas stove or oven, to prevent the buildup of fumes.
For further comprehensive information on safe food handling practices, please check the official guidelines from the U.S. Food and Drug Administration (FDA).
