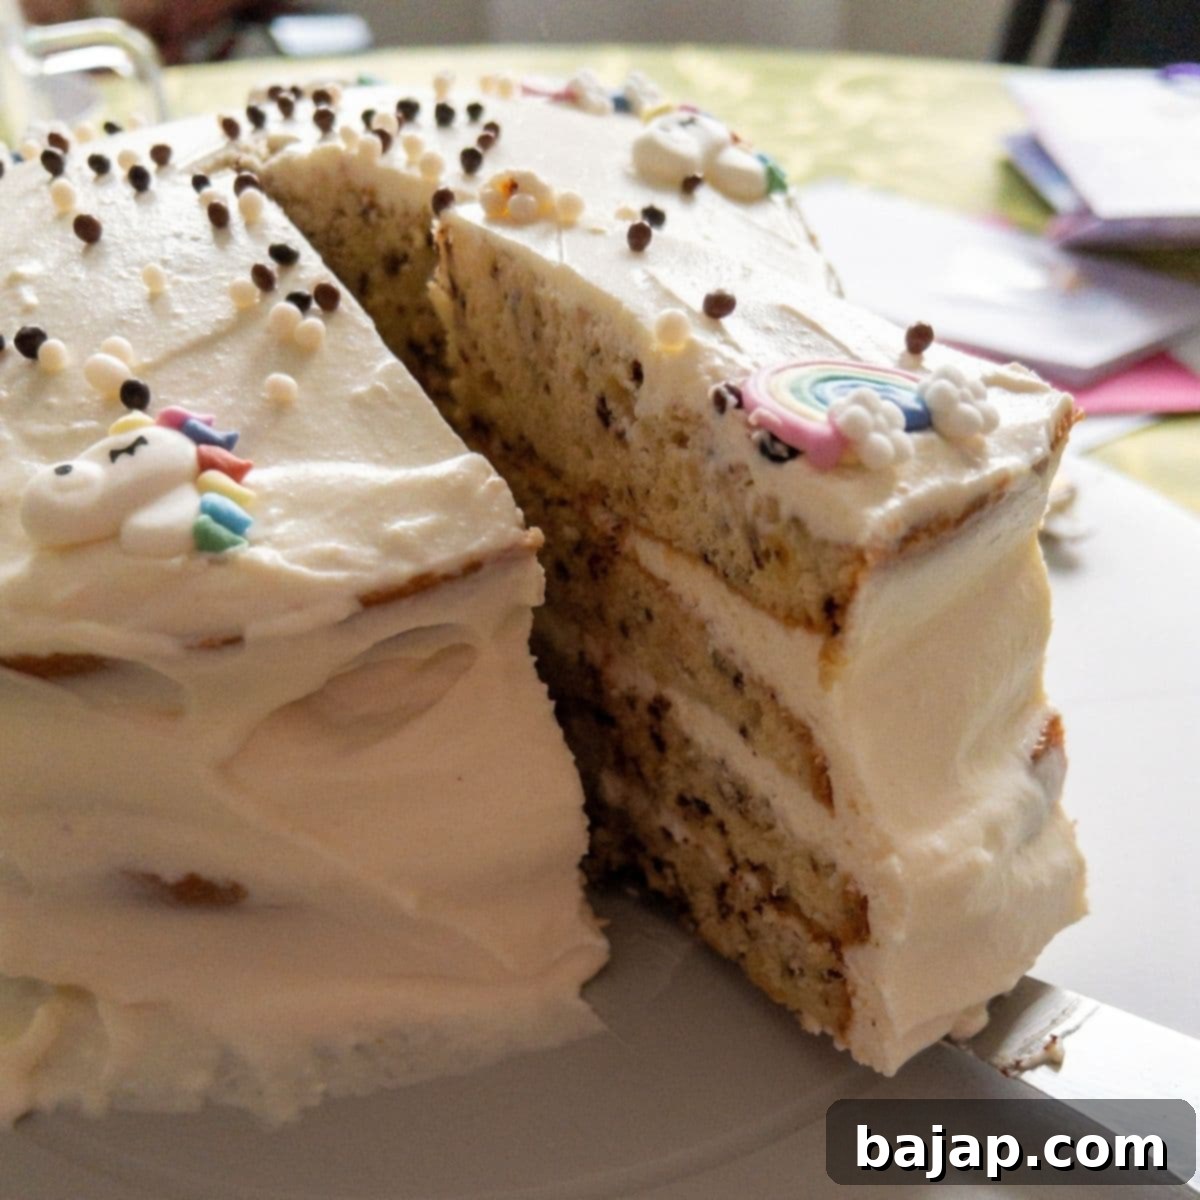
The Ultimate Ricotta Vanilla Cake Recipe: Light, Creamy & Easy to Make
Prepare to be enchanted by this utterly delicious Ricotta Vanilla Cake, a dessert that masterfully combines a wonderfully light vanilla sponge with a refreshingly creamy ricotta vanilla filling. Each slice promises a delightful experience, where the subtle sweetness of the vanilla cream perfectly complements the gorgeous, tender cake layers.
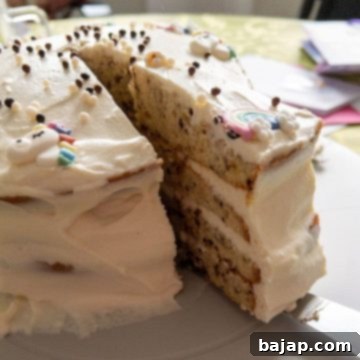
What truly sets this cake apart is the distinctive taste of ricotta, which brings a unique freshness to every bite. The vanilla cake dough itself is not just any plain vanilla; it’s thoughtfully enriched with tiny, delicate chocolate flakes. These not only add an excellent depth of flavor but also create a visually appealing speckled texture within the cake, making it truly special.
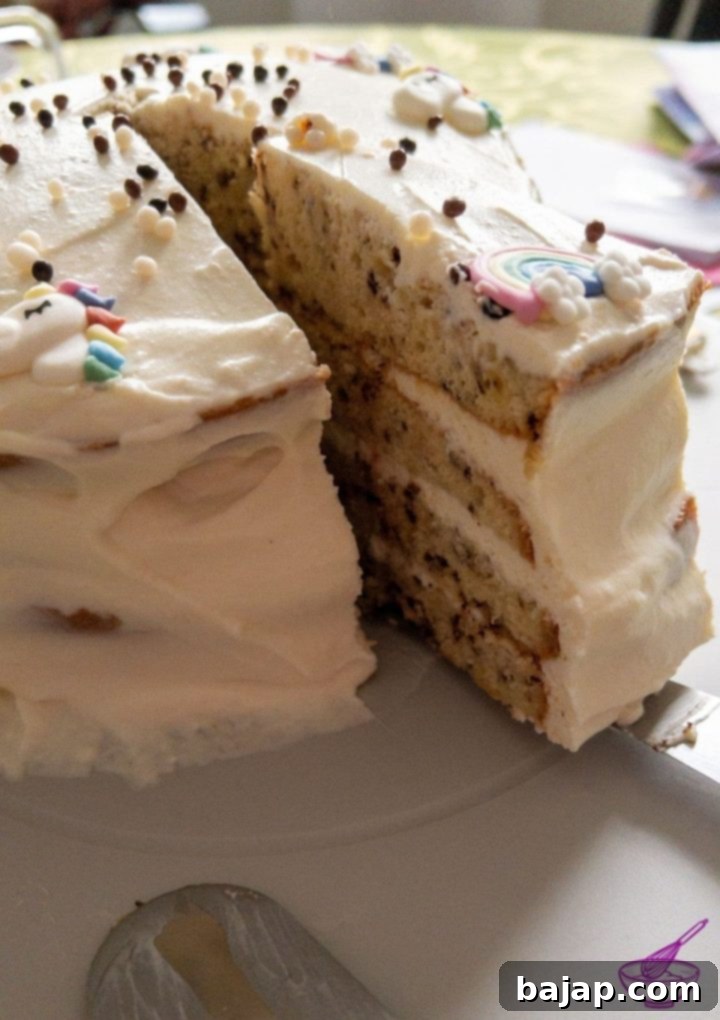
Why This Ricotta Vanilla Cake Will Be Your New Favorite
This delightful vanilla cake, generously filled and frosted with our signature ricotta vanilla cream, is an absolute showstopper for any occasion. Whether it’s a festive family gathering, a special treat just for yourself, or a perfect weekend dessert to share with friends and loved ones, this cake never disappoints. Its balance of flavors and textures makes it universally appealing and incredibly satisfying.
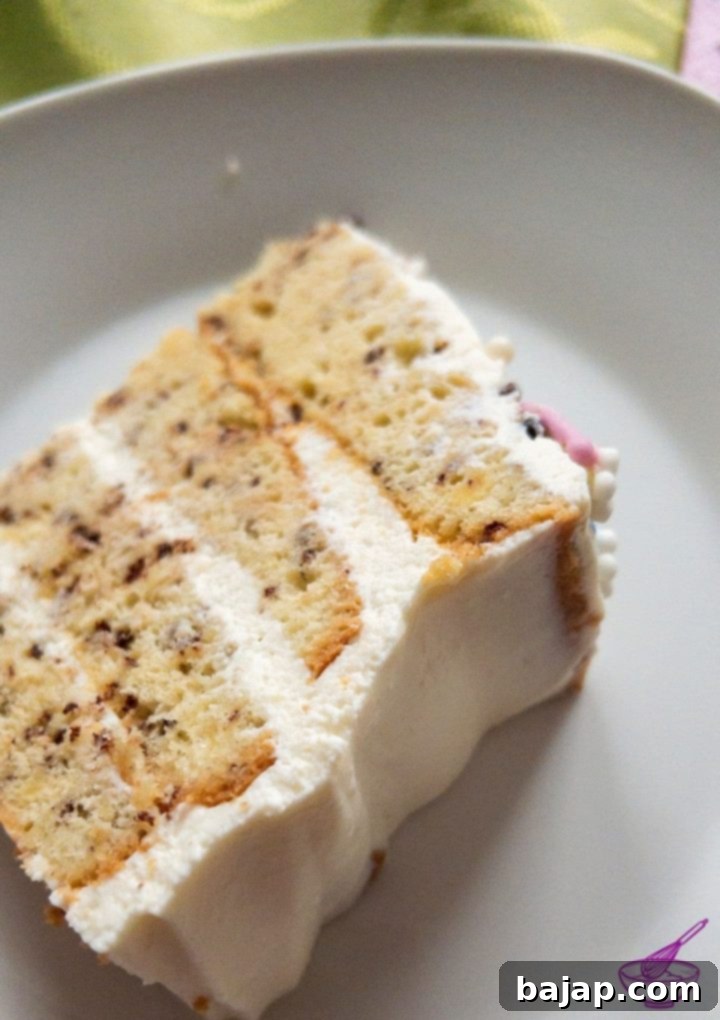
If you’re already a fan of baking with ricotta, like me, or if you’re curious to explore the magic this versatile cheese brings to desserts, you’re in for a treat! Ricotta adds a wonderful moisture and a subtle tang that can elevate a simple cake into something extraordinary. Its creamy texture makes for an incredibly smooth and luscious filling, contrasting beautifully with the airy cake layers.
For those eager to dive deeper into the world of ricotta baking, I wholeheartedly recommend trying some of my other beloved recipes: my no-bake ricotta cheesecake, which is effortlessly decadent; the wonderfully moist Chocolate Chip Ricotta Loaf Cake, perfect for an afternoon snack; and my charming strawberry ricotta cupcakes, a fruity twist on a classic. Each recipe showcases ricotta’s ability to create moist, flavorful, and incredibly satisfying baked goods.
But for now, let’s focus on this heavenly Ricotta Vanilla Cake. You’ll find that its rich flavor profile and elegant appearance make it an instant classic in your baking repertoire.
[feast_advanced_jump_to]
🥘 Essential Ingredients for Your Ricotta Vanilla Cake
Crafting this exquisite Ricotta Vanilla Cake starts with selecting the right ingredients. Each component plays a crucial role in achieving the perfect texture and flavor profile for both the cake layers and the luscious cream.
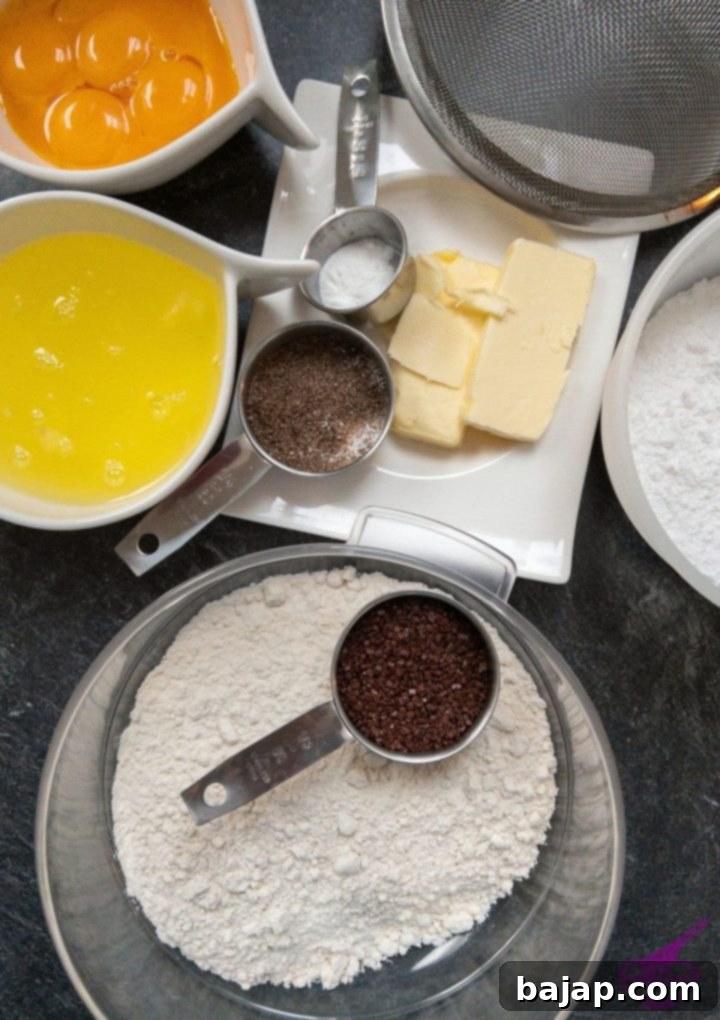
For the Vanilla Cake Dough:
- Eggs: Fresh, large eggs are essential for structure and richness. Separating them correctly is key!
- Powdered Sugar: Ensures a smooth batter and a delicate sweetness. Sifting is recommended to avoid lumps.
- Butter: Unsalted butter at room temperature will cream beautifully with the sugar and yolks, contributing to the cake’s tender crumb.
- Bourbon Vanilla Sugar or Homemade Vanilla Sugar: For that unmistakable, rich vanilla aroma and flavor.
- Baking Powder: The leavening agent that gives the cake its lovely lift and airy texture.
- Cake Flour: Lighter than all-purpose flour, cake flour contributes to a finer, more tender crumb, which is ideal for delicate layered cakes.
- Chocolate Flakes: These tiny additions melt slightly during baking, creating pockets of chocolatey goodness and an appealing visual effect.
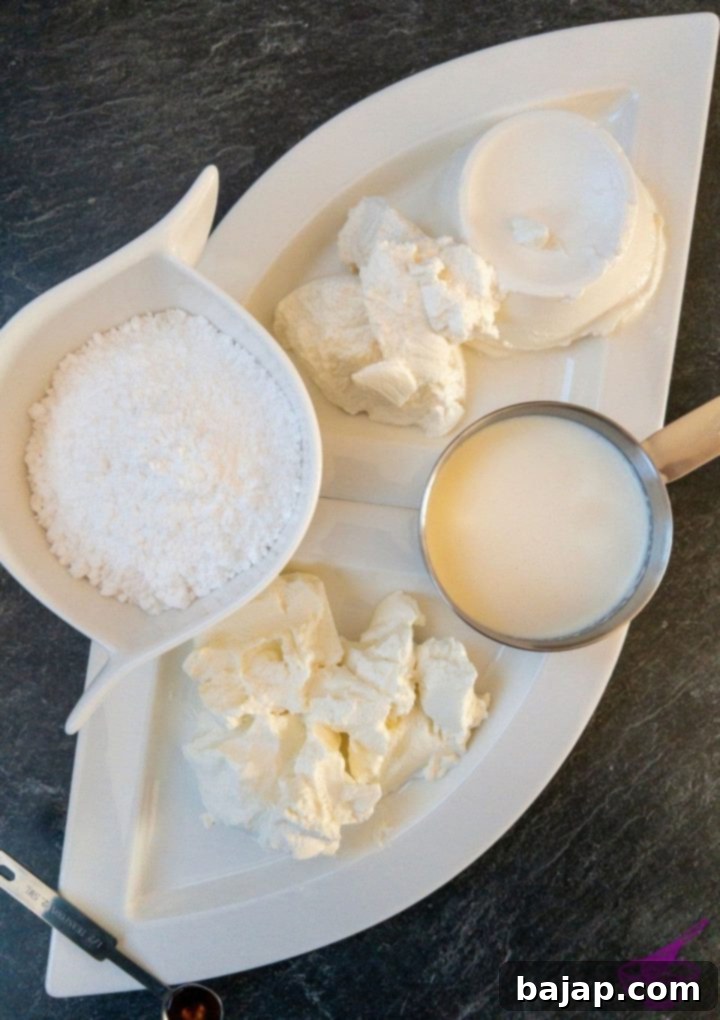
For the Ricotta Vanilla Cream:
- Ricotta Cheese: Opt for a good quality, full-fat ricotta for the richest, most refreshing flavor and best texture. Drain any excess liquid if necessary.
- Powdered Sugar: For a smooth, lump-free cream. Adjust to your desired sweetness.
- Vanilla Extract: High-quality vanilla extract will enhance the overall vanilla notes in the cream.
- Low-Fat Curd Cheese: This ingredient adds a delightful tang and helps to lighten the richness of the ricotta, contributing to the cream’s signature refreshing quality.
- Whipped Cream: Freshly whipped cream provides airiness and volume, making the ricotta cream incredibly light and fluffy.
Optional Decorations:
- White and Dark Chocolate Pearls: For a touch of elegance and varied texture.
- Sugar Unicorns and Rainbows – Icing decoration: A whimsical touch, especially if baking for a child’s birthday!
See the full recipe card below for exact quantities and detailed measurements.
🍽 Essential Equipment for Baking Success
Having the right tools at hand will make the baking process for this Ricotta Vanilla Cake much smoother and more enjoyable. Here’s what you’ll need to ensure perfect results:
- 2 Springform Pans (18 cm // 7 inch): Using two pans allows you to bake cake layers simultaneously, saving time and ensuring even baking for each layer.
- Electric Mixer (Handheld or Stand Mixer): Absolutely essential for creaming butter and sugar, and for whipping egg whites and heavy cream to perfection. A stand mixer will make the process almost effortless, especially for the cream.
- Close-Meshed Sieve: For sifting powdered sugar and flour, preventing lumps and ensuring a smooth, airy batter and cream.
- Mixing Bowls: Several bowls are needed for separating ingredients and mixing different components.
- Cooling Rack: Crucial for allowing your cake layers to cool completely and evenly, preventing sogginess.
- Kitchen Machine: While an electric mixer is sufficient, a stand mixer (often referred to as a kitchen machine) makes light work of both the cake batter and the cream, ensuring consistency and saving your arm muscles!
With these tools ready, you’re well-equipped to bake a professional-looking and tasting cake right in your own kitchen.
🔪 Step-by-Step Instructions for the Perfect Ricotta Vanilla Cake
Baking this cake is a rewarding process, and by following these detailed steps, you’ll achieve a magnificent dessert that tastes as good as it looks.
Part 1: Preparing the Vanilla Cake Dough
- Preheat Oven: Before you begin any mixing, preheat your oven to 160 °C (320 °F) with the circulating air (fan-assisted) function. This ensures the oven is at the correct temperature when your batter is ready, crucial for even baking.
- Separate Eggs: Next, carefully separate the eggs. This step can sometimes be a test of patience, but a clean separation of yolks and whites is essential for the cake’s texture. The yolks will add richness, while the whipped whites will give the cake its airy lightness.
- Creaming Mixture: Sieve the powdered sugar through a fine-meshed sieve directly into a large mixing bowl. This prevents any lumps and makes for a smoother batter. Add the egg yolks and softened butter to the sifted sugar. Using an electric mixer, beat these ingredients together until the mixture is light, fluffy, and pale in color. This creaming process incorporates air, contributing to a tender cake.
- Add Dry Ingredients & Flavor: To the egg yolk mixture, incorporate the vanilla sugar, baking powder, chocolate flakes, and cake flour. Mix everything gently until just combined. Be careful not to overmix at this stage, as it can lead to a tough cake.
- Fold in Egg Whites: In a separate, clean mixing bowl, beat the egg whites with your electric hand mixer until stiff peaks form. The stiff egg whites are what will give your cake its incredible lift. Gently fold these beaten egg whites into the egg yolk mixture. Use a spatula and a light hand, folding in batches to preserve as much air as possible. You want a homogeneous, somewhat viscous mixture that still feels light.
- Fill Pans: Divide the prepared dough evenly between your two 18 cm (7-inch) springform pans. This step is critical for ensuring you have four uniform cake layers later. Uneven filling will result in layers of different thicknesses.
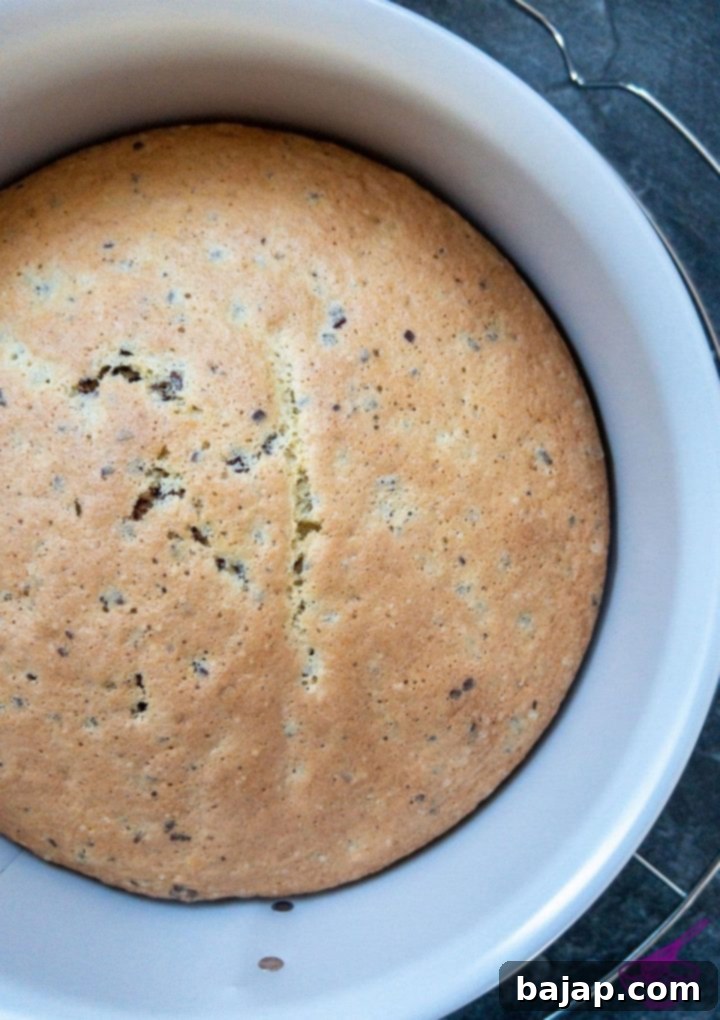
- Bake the Layers: Place the pans on the second rack from the bottom in your preheated oven. Bake for approximately 25-30 minutes. To check for doneness, insert a wooden skewer or toothpick into the center of the cake. If it comes out clean, the cake is ready.
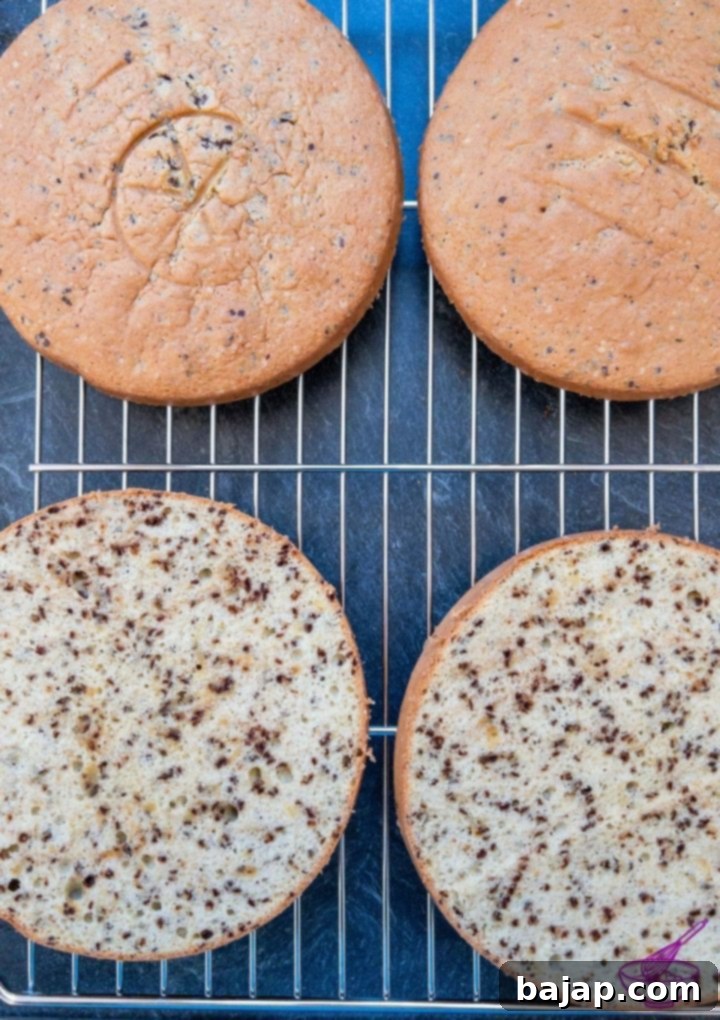
- Cool & Slice: Once baked, remove the cakes from the oven and allow them to cool completely on a wire rack. This is a vital step; attempting to cut a warm cake can result in crumbling. Once fully cooled, carefully remove each cake from its springform pan. Using a long, serrated knife, slice each cake horizontally in half. This will give you a total of four beautiful cake layers, ready for assembly.
Part 2: Crafting the Refreshing Ricotta Vanilla Cream
With your cake layers cooling, it’s time to create the star of the show: the incredibly light and refreshing ricotta vanilla cream. This cream is quick to prepare and provides the perfect counterpoint to the cake.
- Combine Ricotta Base: If you have a kitchen machine, now is the perfect time to use it. Its power and consistency will ensure a wonderfully smooth cream. In the mixing bowl of your kitchen machine (or a large mixing bowl with a handheld electric mixer), combine the ricotta cheese, sifted powdered sugar, and vanilla extract. Beat these ingredients together until they are well combined and smooth.
- Add Curd Cheese: Gradually add the low-fat curd cheese, spoonful by spoonful, continuing to mix until fully incorporated. The curd cheese adds a delightful tang and helps to lighten the texture of the cream.
- Fold in Whipped Cream: In a separate, clean bowl, whip the heavy cream until it forms stiff peaks. Once whipped, gently fold this into the ricotta mixture using a spatula. This step adds airiness and creates a beautifully light and fluffy cream that is easy to spread and wonderfully indulgent.
And just like that, your exquisite ricotta vanilla cream is ready! It truly is a testament to how fast and simple creating something so delicious can be.
Part 3: Assembling and Chilling Your Masterpiece
Now comes the exciting part – bringing all the components together to create your stunning Ricotta Vanilla Cake!
- Reserve Cream: Before you start layering, set aside approximately six tablespoons of your freshly made ricotta vanilla cream. This reserved portion will be used later for a final, smooth coating around the exterior edges of your cake, giving it a polished finish.
- Layer by Layer: Begin by placing one cake layer on your serving platter or cake stand. Spread an even layer of the delicious vanilla cream over it. Continue this process, alternating a cake layer with a layer of cream, until all four cake layers are stacked high and beautifully coated with the cream. Aim for consistent layers of cream for a professional look.
- Coat the Sides: Once the internal layers are complete, use the reserved ricotta vanilla cream to generously spread around the entire exterior of the cake – the top and all sides. This creates a neat finish and locks in moisture. For best results and an even coating, I highly recommend using a rotating cake stand. It makes smoothing the cream around the edges significantly easier and allows for a much cleaner finish.
- Chill for Perfection: After coating, place your cake in the freezer for about 60 minutes. Alternatively, if time allows, you can refrigerate it overnight. Chilling is a crucial step as it allows the cream to firm up and the flavors to meld beautifully. This also makes the cake much easier to slice and serve.
Tips for a Flawless Finish (And Learning Along the Way!)
Baking is a journey, and mastering cake decoration takes practice. While my cakes are always delicious, I’m continually honing my skills to ensure:
- Each cake layer is perfectly even and stable.
- The cream is flawlessly smooth and evenly distributed across all parts of the cake.
- The cream adheres beautifully to the cake dough, creating a seamless look.
- The final creation stands tall and proud, without any wobbles!
Remember, no one is born a master baker, and every attempt is a step towards perfection. The most important thing is that this cake is incredibly delicious, and that’s a guarantee! I will continue to practice and refine my techniques to bring you even prettier cakes in the future.
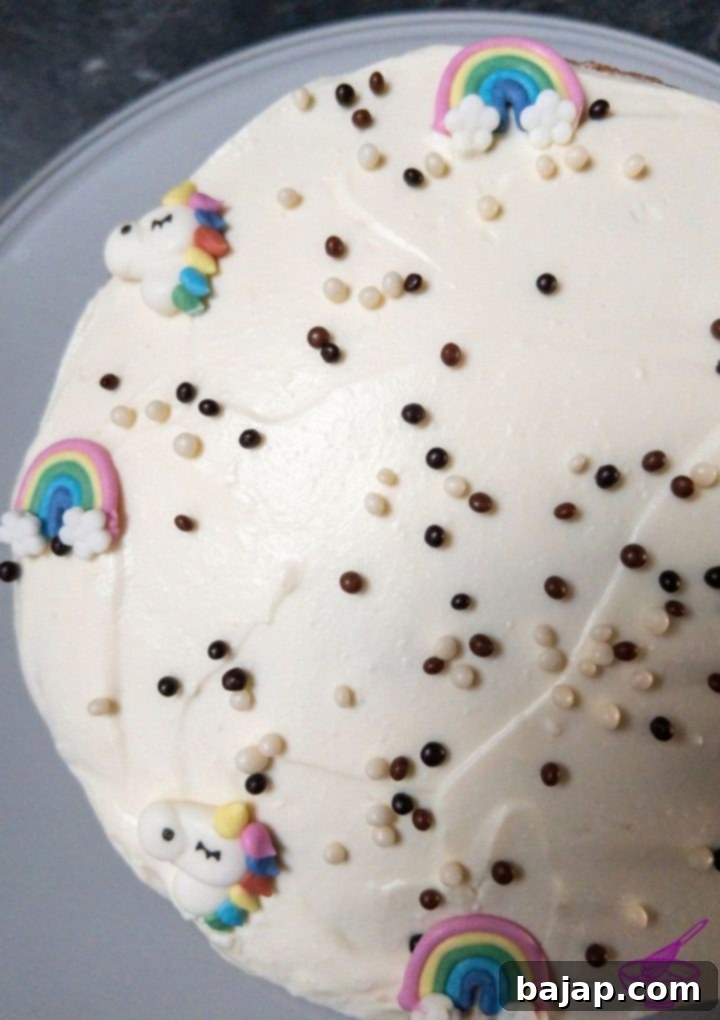
Decorating Your Cake: Before serving, you have the wonderful opportunity to add your personal touch with decorations. For this particular cake, I chose a playful theme, opting for white and dark chocolate pearls for texture and store-bought sugar icing decorations – charming unicorns and rainbows. These were a special request from my daughter for her fifth birthday, adding a magical touch to her celebration! If your little one adores mermaids, you might also want to check out this fantastic Mermaid Sheet Cake idea.
Once decorated and perfectly chilled, slice into this exquisite dessert. Enjoy this perfect treat with friends, perhaps alongside a refreshing snowball cocktail for an extra festive touch!
Pro Tip for Presentation: Beyond decorating, consider how you’ll present your cake. A rotating cake stand is not just for decorating; it also makes for a beautiful display when serving. For an even more elegant presentation, you can transfer the finished cake to a stunning cake bell. This visually appealing touch will truly elevate your dessert table.
🥜 Substitutions for Dietary Needs & Preferences
One of the great things about this Ricotta Vanilla Cream Cake is its versatility. The base recipe is naturally low in fructose and free of nuts, making it a wonderful option for many. Furthermore, it can be easily adapted to accommodate specific dietary requirements:
- Lactose Intolerance: For those with lactose intolerance, simply swap out the dairy products for their lactose-free counterparts. Lactose-free ricotta, curd cheese, and whipped cream are readily available and will work just as well, allowing everyone to enjoy a slice of this delicious cake without compromise.
- Gluten-Free: While not explicitly mentioned in the original recipe, many readers successfully use a 1:1 gluten-free baking flour blend as a substitute for cake flour. Ensure the blend contains xanthan gum for structure.
📖 Exciting Variations to Try
While the classic Ricotta Vanilla Cake is divine, feel free to experiment with these delicious variations to suit your taste or occasion:
- Mascarpone Cream: Instead of ricotta, the vanilla cream can also be prepared with mascarpone cheese. This will result in a cream that is a little firmer, richer, and less liquid than with ricotta. However, keep in mind that using mascarpone will alter the distinctive, refreshing ricotta taste, leaning towards a more traditional, indulgent cream cheese frosting profile.
- Fruity Ricotta Cream: Incorporate fresh fruit purees (like strawberry or raspberry) into the ricotta cream for a burst of fruity flavor and a beautiful color.
- Citrus Zest: Add lemon or orange zest to either the cake batter or the ricotta cream for a bright, zesty twist that pairs wonderfully with vanilla.
- Nutty Crunch: While the original is nut-free, for those who enjoy nuts, adding a layer of finely chopped toasted almonds or pistachios between the cake layers could add a delightful crunch and flavor.
🌡️ Storage & Shelf Life
Proper storage is key to enjoying your Ricotta Vanilla Cake for as long as possible:
- Refrigerator: This cake keeps beautifully in the refrigerator for at least 3-4 days when stored in an airtight container. The flavors tend to meld and deepen over time, often tasting even better the next day!
- Freezing: The Ricotta Vanilla Cake can also be wonderfully frozen. For best results, freeze individual slices or the entire cake (un-decorated, if possible, for sugar decorations – see tip below) tightly wrapped in plastic wrap and then in aluminum foil. It can be stored in the freezer for up to 1-2 months. Thaw overnight in the refrigerator before serving.
💭 Top Tip for Sugar Decorations
A crucial tip regarding sugar decorations:
- If you choose to use delicate sugar decorations, such as the unicorns and rainbows mentioned earlier, they will unfortunately not keep well in the refrigerator or freezer for extended periods. The humidity during storage and the natural moisture of the ricotta vanilla cream will, over time, cause the sugar decorations to liquefy or become sticky and lose their shape.
- Solution: To maintain their pristine appearance, it’s best to add any sugar icing decorations just before serving the cake. This ensures they look fresh and vibrant for your guests.
More Delicious Cake Recipes for You to Try:
- Six Egg White Chocolate Cake
- Old-Fashioned Whipping Cream Bundt Cake
- Austrian Strawberry Sponge Cake
- Ultimate Double Chocolate Bundt Cake
- Chocolate Chip Ricotta Loaf Cake
- Flourless Chocolate Cake
- Pink Cake (created by spatuladesserts.com)
- Strawberry Ricotta Cake (created by theunlikelybaker.com)
If you make this scrumptious Ricotta Vanilla Cake recipe, I would absolutely love to hear from you! Please let me know how you liked it by giving it a ★★★★★ star rating and leaving a comment below. Your feedback is invaluable and would be awesome! You can also sign up for our Newsletter to receive delicious homemade recipes weekly, or follow me on Pinterest or Instagram and share your delightful creation with me. Just tag me @combinegoodflavors and use the hashtag #combinegoodflavors, so I don’t miss it. Happy baking!
📖 Recipe Card: Easy Ricotta Vanilla Cake
Easy Ricotta Vanilla Cake
Nora
Prevent your screen from going dark
Save Recipe
Saved!
Pin Recipe
Equipment
-
Kitchen machine
-
Handheld Mixer
-
Mixing bowls
-
Cooling Rack
-
Close meshed sieve
-
2 Springform pans 18 cm / 7 inch Ø
Ingredients
Vanilla Cake Dough
- 6 eggs
- 2 cups powdered sugar
- ¼ cup butter
- 1 tablespoon Vanilla Sugar
- 2 pinches baking powder
- 1 ¼ cups cake flour
- 5 tablespoon chocolate flakes
Ricotta Vanilla Cream
- 1 ½ cups ricotta cheese
- 1 ¼ cups powdered sugar
- 1 teaspoon vanilla extract
- 1 cup low-fat curd cheese
- ¾ cup whipped cream
Decorating (optional)
- White and dark chocolate pearls
- sugar unicorns and rainbows icing decoration
Instructions
Vanilla Cake Dough
-
Preheat the oven to 160 °C //320 °F, circulating air.
-
Separate 6 eggs.6 eggs
-
Sieve 2 cups powdered sugar through a close-meshed sieve into a mixing bowl, and add the yolks and ¼ cup butter. Stir everything together until fluffy.2 cups powdered sugar, ¼ cup butter
-
Add t1 tablespoon Vanilla Sugar, 2 pinches baking powder, 5 tablespoon chocolate flakes, and 1 ¼ cups cake flour and mix with the egg yolk mixture.1 tablespoon Vanilla Sugar, 2 pinches baking powder, 5 tablespoon chocolate flakes, 1 ¼ cups cake flour
-
Beat the egg whites in a separate mixing bowl, and then fold the beaten egg whites into the egg yolk mixture.
-
Divide the dough evenly between two springform pans.
-
Now bake the dough on the second rack from the bottom at 160 °C // 320 °F circulating air for 25-30 minutes.
-
Allow the cake to cool on a cake rack, and cut it in half horizontally afterward.
Ricotta Vanilla Cream
-
In your kitchen machine’s mixing bowl, add 1 ½ cups ricotta cheese, 1 ¼ cups powdered sugar (sifted), and 1 teaspoon vanilla extract, and mix them well.1 ½ cups ricotta cheese, 1 ¼ cups powdered sugar, 1 teaspoon vanilla extract
-
Then add the 1 cup low-fat curd cheese by the spoonful.1 cup low-fat curd cheese
-
Whip ¾ cup whipped cream until stiff into a separate bowl and then fold it into the ricotta mixture.¾ cup whipped cream
Assemble the Cake
-
Set aside six tablespoons of the ricotta vanilla ream and save it for later.
-
Now spread the cake layers with the delicious vanilla cream, layer by layer.
-
Finally, spread the cake all around with the ricotta vanilla cream you set aside before.
-
Place the cake either in the freezer for 60 minutes or in the fridge overnight.
-
Decorate with White and dark chocolate pearls and sugar unicorns and rainbows before serving.White and dark chocolate pearls, sugar unicorns and rainbows
Never miss a recipe!
Sign up and let me spoil you weekly with a delicious homemade recipe!
Like this recipe?
Mention @combinegoodflavors or tag #combinegoodflavors!
Nutrition values are estimates only, using online calculators. Please verify using your own data.

🍰 You Might Also Love These Related Recipes
If you’ve enjoyed this Ricotta Vanilla Cake, you’re in for a treat with these other delightful recipes from our kitchen. Expand your baking horizons and find your next favorite dessert!
- Chocolate Chip Ricotta Loaf Cake
- No-Bake Chocolate Ricotta Cheesecake
- Old-fashioned Whipping Cream Bundt Cake
- The Ultimate Double Chocolate Bundt Cake
⛑️ Food Safety Guidelines for Baking
Ensuring food safety is paramount when baking, especially with ingredients like eggs and dairy. Follow these essential guidelines to keep your kitchen and your delicious creations safe:
- Minimum Cooking Temperature: Always ensure your cake is cooked to an internal temperature of at least 165 °F (74 °C) to eliminate any potential pathogens, especially when using raw eggs in the batter.
- Avoid Cross-Contamination: If preparing other dishes alongside your cake, never use the same utensils or cutting boards on cooked food that previously touched raw ingredients (e.g., raw meat or unwashed eggs) without thorough washing and sanitization.
- Hand Washing: Always wash your hands thoroughly with soap and warm water after handling raw eggs or any other raw ingredients, and before touching cooked food or clean utensils.
- Temperature Control: Do not leave ingredients like butter, eggs, or ricotta cheese sitting out at room temperature for extended periods, especially during warmer weather. Prepare your ingredients just before mixing. Once assembled, chill your cake promptly to ensure the cream remains fresh and safe.
- Unattended Cooking: Never leave baking or cooking food unattended, particularly when the oven is on.
- Oils with High Smoking Point: While not directly applicable to this cake recipe, in general cooking, use oils with a high smoking point to avoid producing harmful compounds when frying or sautéing.
- Ventilation: Always ensure good ventilation in your kitchen when using a gas stove or oven to prevent the buildup of fumes.
For further comprehensive information on safe food handling practices, please refer to the guidelines provided by the FDA (Food and Drug Administration).
