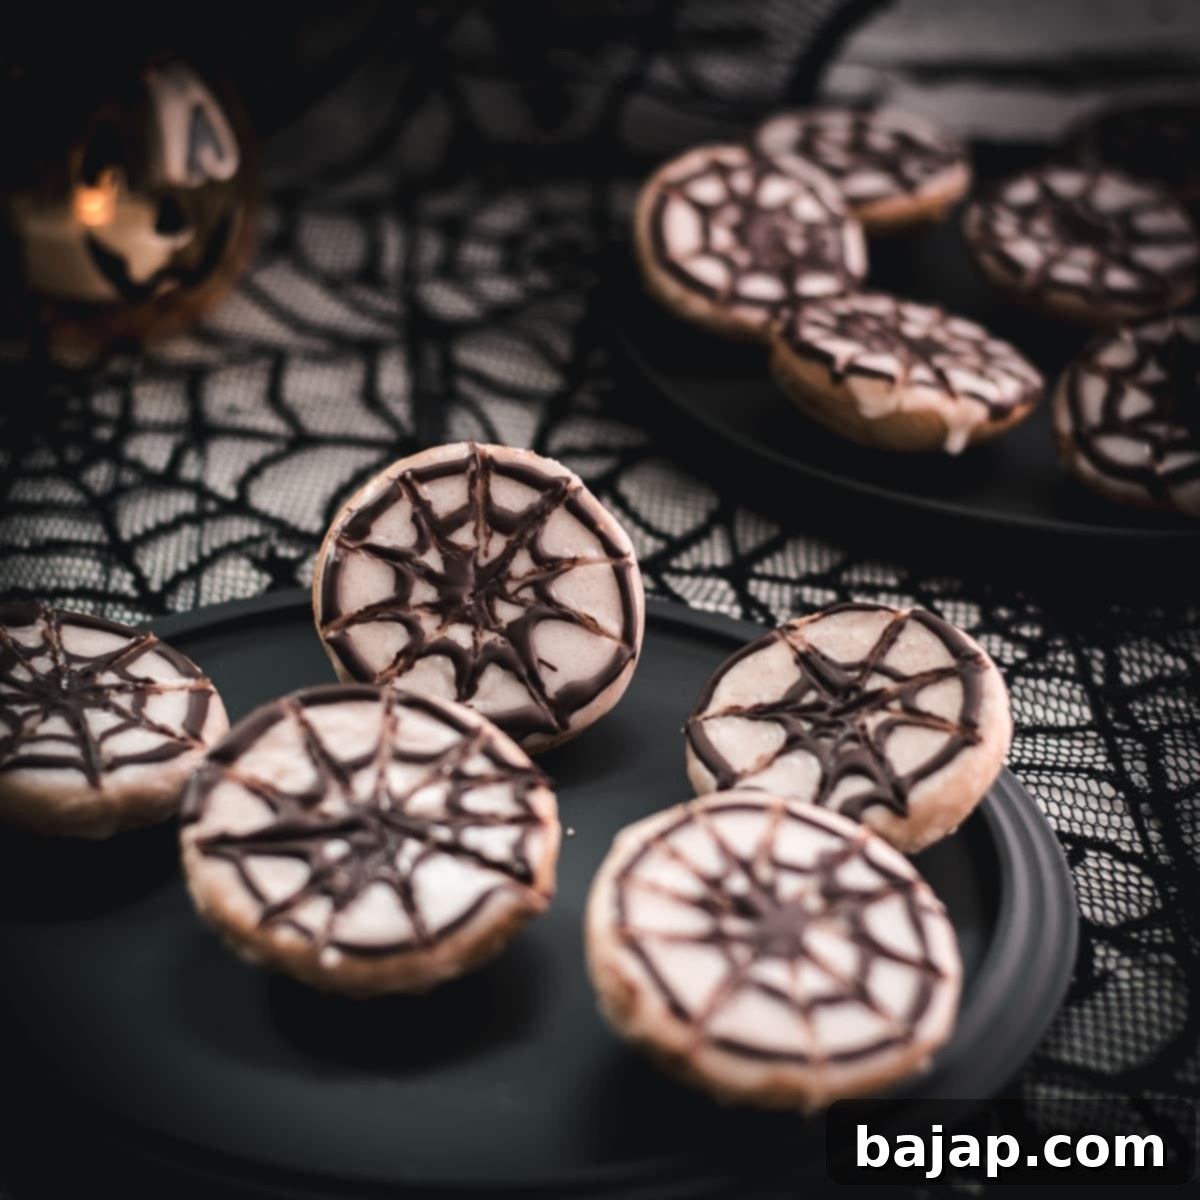
Easy Halloween Spiderweb Cookies: A Deliciously Spooky Recipe for Your Party!
Get ready to cast a delicious spell this Halloween with our incredible spiderweb cookies! These aren’t just any ordinary cookies; they are the ultimate Halloween party treat, guaranteed to impress guests and delight little ghouls and goblins alike. Combining irresistible flavor with a visually striking design, these spooky spiderweb cookies are surprisingly simple to make, making them the perfect project for a fun baking session with the kids. Imagine the joy of piping soft vanilla dough and then watching a magical chocolate web design come to life on top! It’s an edible masterpiece that’s both hauntingly delicious and incredibly satisfying to create.
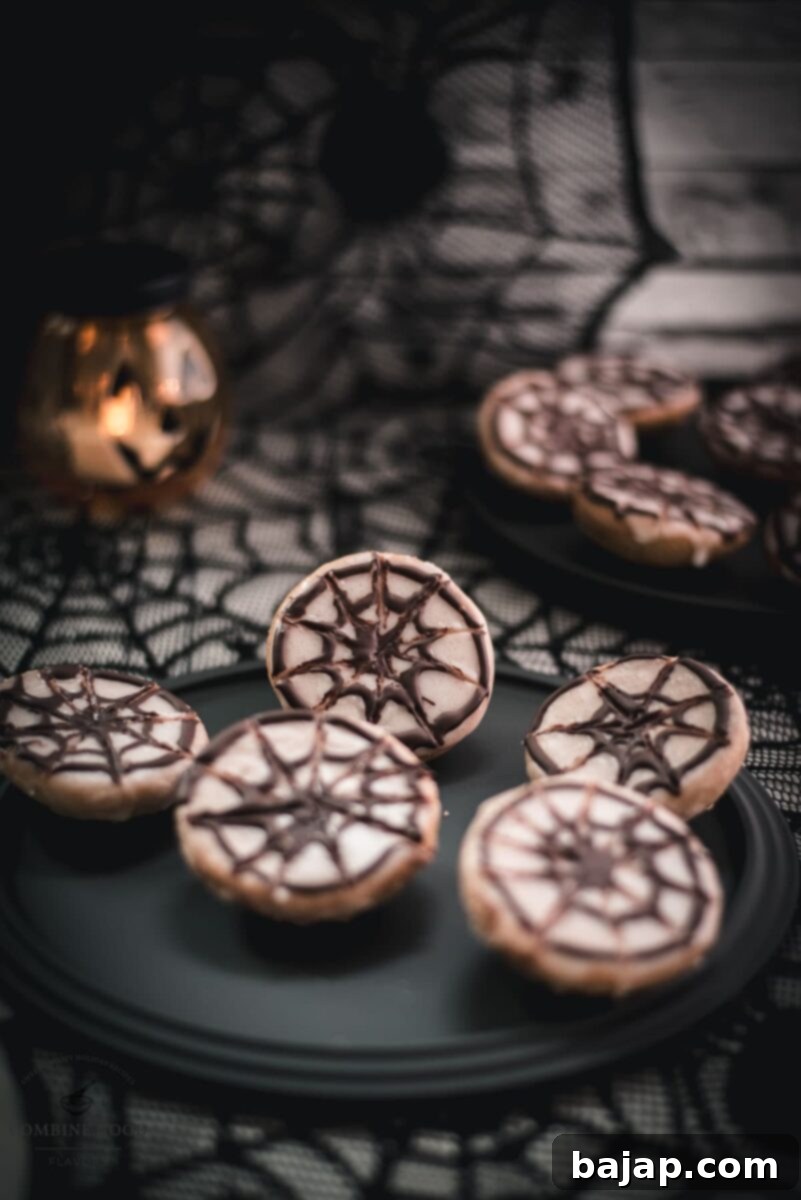
Our easy Halloween spiderweb cookies feature a rich, delectable vanilla custard dough, which is piped delicately onto baking paper before being baked to perfection. Once cooled, each cookie gets a smooth white icing base, setting the stage for the dramatic dark chocolate spiderwebs. The contrast of the dark chocolate against the white icing creates an iconic Halloween motif that’s both elegant and spooky. Whether you’re hosting a grand Halloween bash or just looking for a fun family activity, these spiderweb cookies are a fantastic choice that promises sweet memories and even sweeter treats.
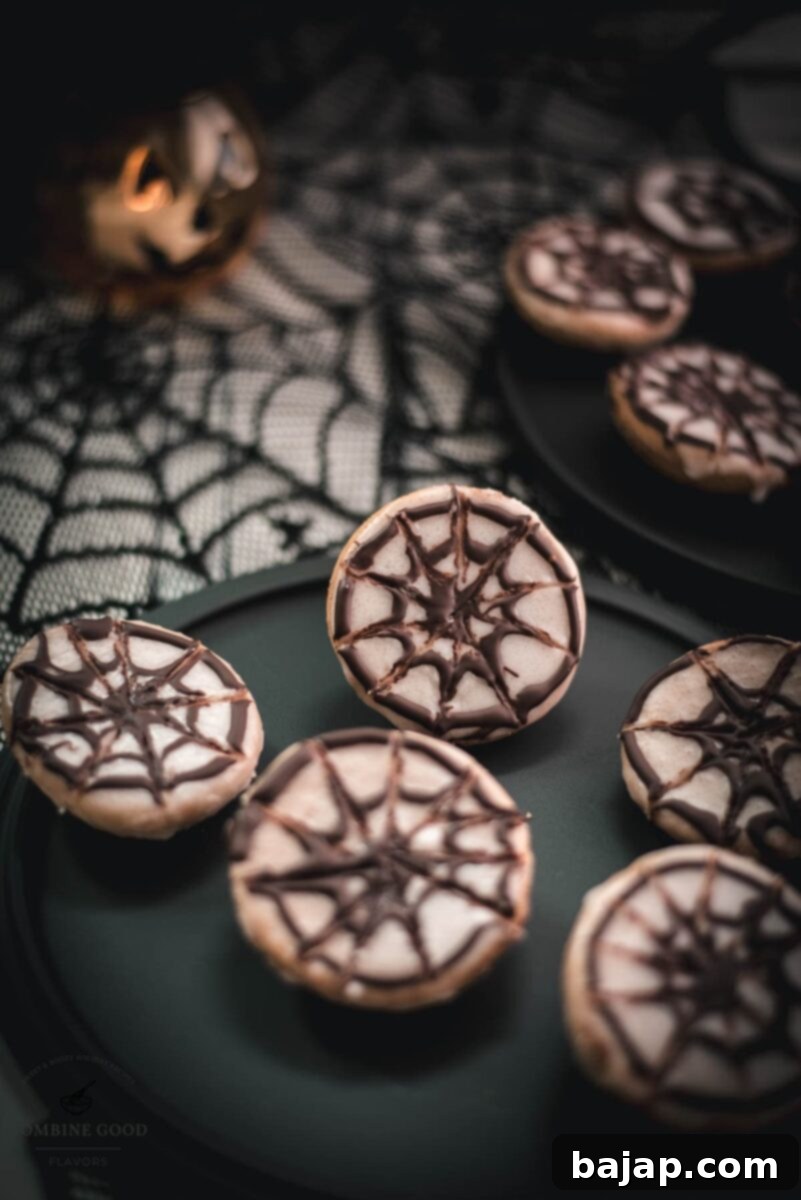
These delightful Halloween cookies are not just a standalone treat; they’re an essential part of any festive spread. Pair them wonderfully with a spider web no-bake cheesecake for a layered dessert experience, and for the adults, elevate the spooky ambiance with a refreshing spooky red spider cocktail. With these additions, you’ve got a complete Halloween menu that’s sure to be a hit! So, gather your ingredients, unleash your inner baker, and let the happy Halloween baking begin!
Why You’ll Love This Easy Spiderweb Cookie Recipe
There are countless reasons why these Halloween spiderweb cookies will quickly become a cherished part of your annual spooky celebrations. Beyond their undeniable visual appeal, this recipe stands out for its simplicity and the sheer joy it brings to the kitchen. Firstly, the vanilla custard dough is incredibly forgiving and a pleasure to work with, even for beginner bakers. It bakes into perfectly soft, melt-in-your-mouth cookies every time.
Secondly, the decorating process is remarkably easy and offers a fantastic creative outlet. Piping a simple white glaze and then drawing concentric chocolate circles, which magically transform into intricate spiderwebs with a quick drag of a toothpick, is genuinely satisfying. Kids especially love this part, making it an ideal family activity that encourages creativity and fine motor skills. Plus, the minimal effort required for such an impressive result means you can spend less time stressing in the kitchen and more time enjoying the festive atmosphere. These spiderweb cookies are not just a dessert; they are an experience, a memory in the making, and a guaranteed crowd-pleaser for any Halloween gathering.
🥘 Ingredients for Spooky Spiderweb Cookies
Crafting the perfect Halloween spiderweb cookies begins with selecting high-quality ingredients. Each component plays a vital role in achieving that wonderfully soft texture and distinctive flavor. Below is a detailed look at what you’ll need for both the rich vanilla custard cookie dough and the enchanting spiderweb glaze. Remember, fresh ingredients always yield the best results!
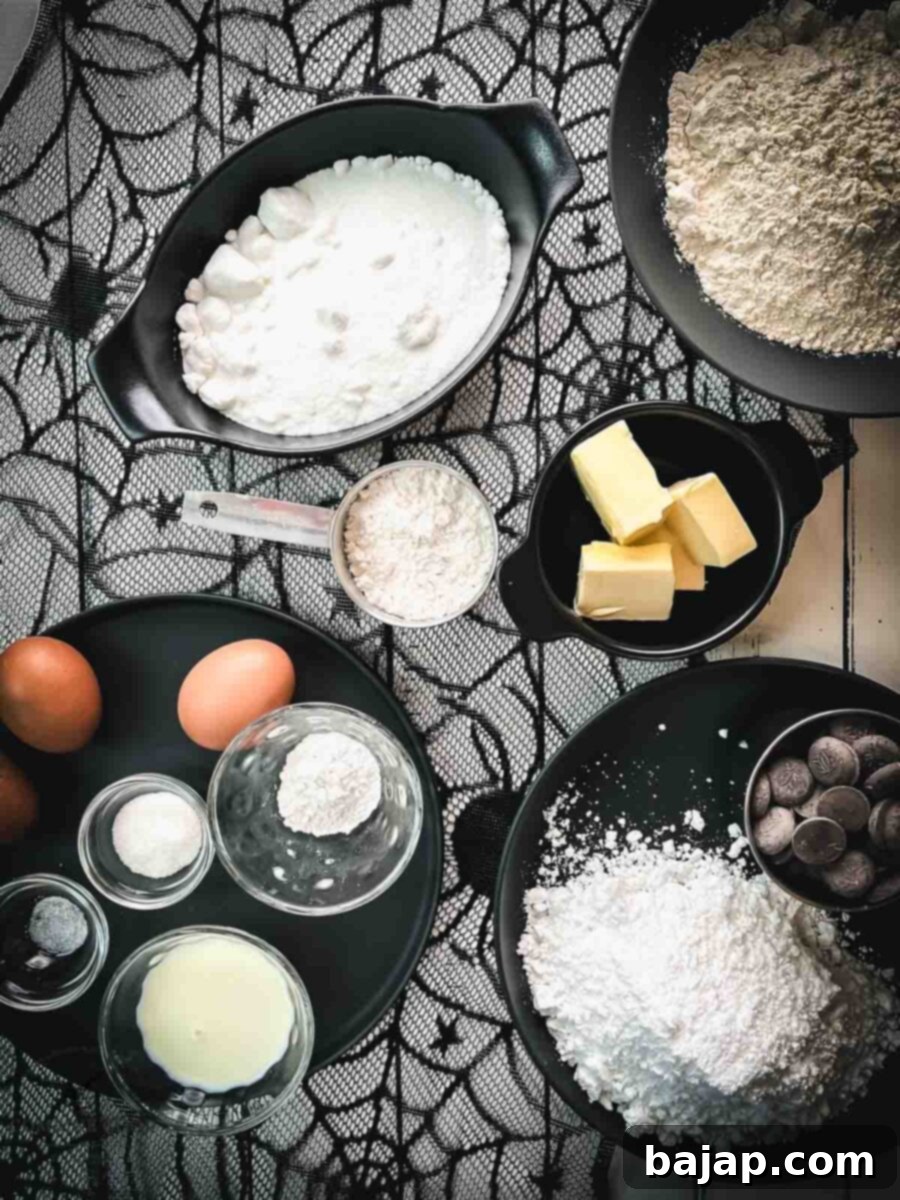
For the Vanilla Custard Cookie Dough
- Softened Butter: The foundation of our tender cookies. Ensuring your butter is perfectly soft (but not melted) is crucial for blending smoothly and creating a light, airy dough. It adds richness and helps with texture.
- Granulated Sugar: Not only sweetens the cookies but also contributes to their structure and helps them achieve that slightly crisp edge while remaining soft in the center.
- Vanilla Sugar: For an exceptional aromatic depth. While you can use vanilla extract, using homemade vanilla sugar infuses a more profound, natural vanilla flavor throughout the dough, making these spiderweb cookies truly special.
- A Pinch of Salt: A little salt goes a long way in baking. It balances the sweetness and enhances all the other wonderful flavors in the dough, making each bite more complex and satisfying.
- Eggs (M): Medium-sized eggs are key binders, providing moisture and helping to emulsify the ingredients. They also add a slight richness and contribute to the cookie’s golden hue.
- Vanilla Pudding Powder: This is our secret ingredient for that incredibly rich, custardy flavor and ultra-tender texture. It elevates a simple vanilla cookie into something extraordinary, making these Halloween treats irresistible.
- Cake Flour: Essential for a tender and soft cookie texture. Cake flour has a lower protein content than all-purpose flour, which results in a lighter, more delicate crumb, perfect for these elegant spiderweb cookies.
- Baking Powder: Our leavening agent, ensuring the cookies rise gently and become delightfully fluffy without spreading too much.
- Milk: Adds the necessary moisture to create a smooth, pliable dough that’s easy to pipe. Any milk works, but for a dairy-free option, plant-based milks are excellent.
For the Spooky Glaze and Dark Chocolate Web
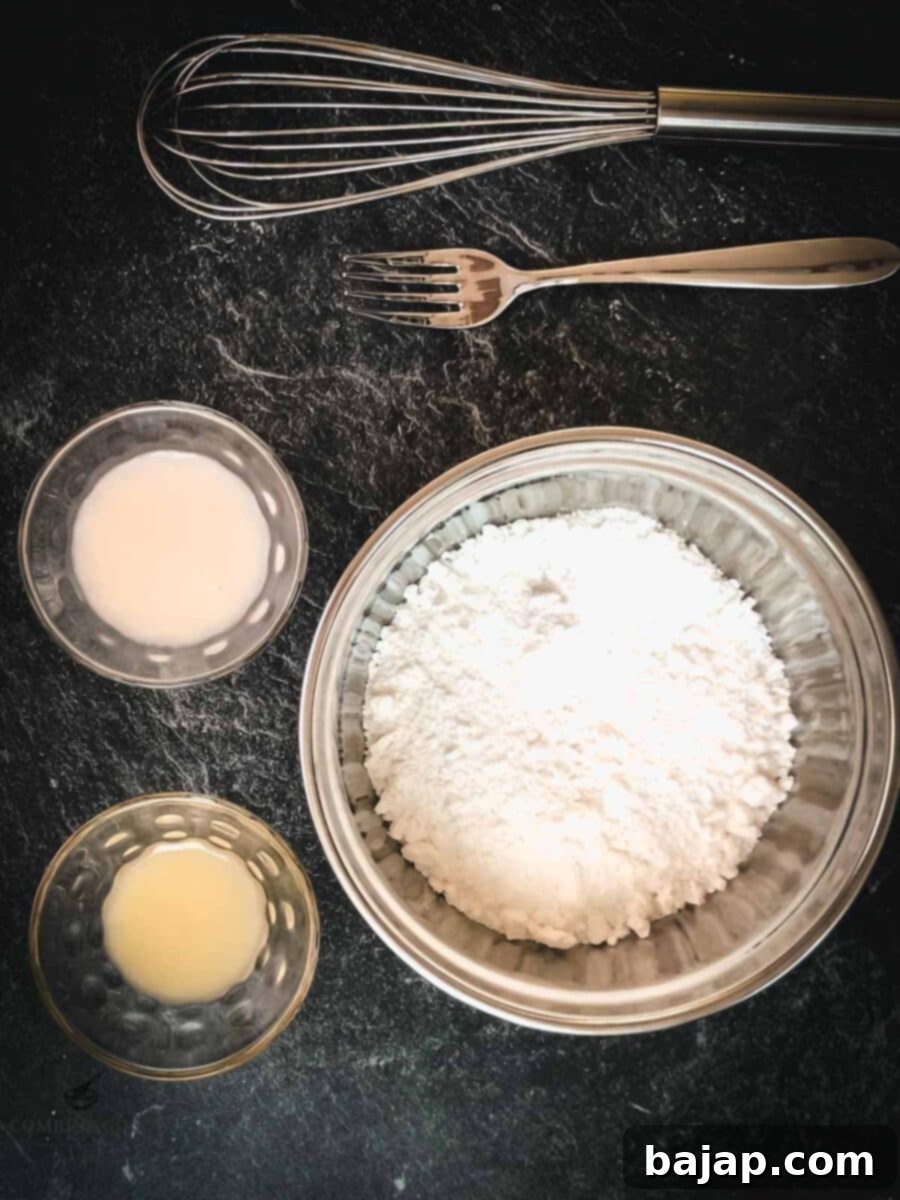
- Powdered Sugar: The base for our smooth, quick-setting white glaze. It dissolves easily, creating a silky-smooth canvas for your spiderweb design.
- Fresh Lemon Juice: Adds a delightful tanginess that perfectly balances the sweetness of the glaze, preventing it from being overly cloying. For the best flavor, I highly recommend using freshly squeezed lemon juice. If you’re wondering “how much lemon juice is in one lemon” or want a detailed guide to “freshly squeezed lemon juice”, check out my dedicated posts.
- Rice Milk: Used to thin the glaze to the perfect consistency while keeping it dairy-free. You can substitute with other plant-based milks or regular milk if preferred.
- Dark Chocolate Couverture (for the spider’s web): High-quality dark chocolate is crucial for drawing intricate, striking spider web designs. Its rich flavor complements the vanilla cookies beautifully and provides a crisp line when set.
For precise measurements and an easy-to-follow format, see the full recipe card below.
🔪 Step-by-Step Instructions for Spooky Spiderweb Cookies
Creating these enchanting Halloween spiderweb cookies is an enjoyable and straightforward process. Follow these detailed steps to bake and decorate your way to a frightfully fantastic treat that will be the talk of your Halloween gathering!
Step 1: Prepare Your Oven and Trays. Begin by preheating your oven to 338°F (170°C) fan mode. Line two standard baking trays with parchment paper. This ensures your cookies don’t stick and cook evenly, making cleanup a breeze.
Step 2: Cream Butter and Sugars. In a food processor fitted with a whisk attachment (or using a stand mixer), combine the softened butter, granulated sugar, vanilla sugar, and a pinch of salt. Beat these ingredients together until the mixture is light, fluffy, and creamy. This creaming process incorporates air, which contributes to the cookies’ tender texture.
Step 3: Add Wet and Dry Ingredients. Gradually mix in the eggs, adding them one at a time and beating well after each addition until fully incorporated. Then, gently fold in the vanilla custard powder, cake flour, and baking powder. Finally, add the milk and mix until just combined. Be careful not to overmix the dough; a few lumps are okay and help keep the cookies tender.
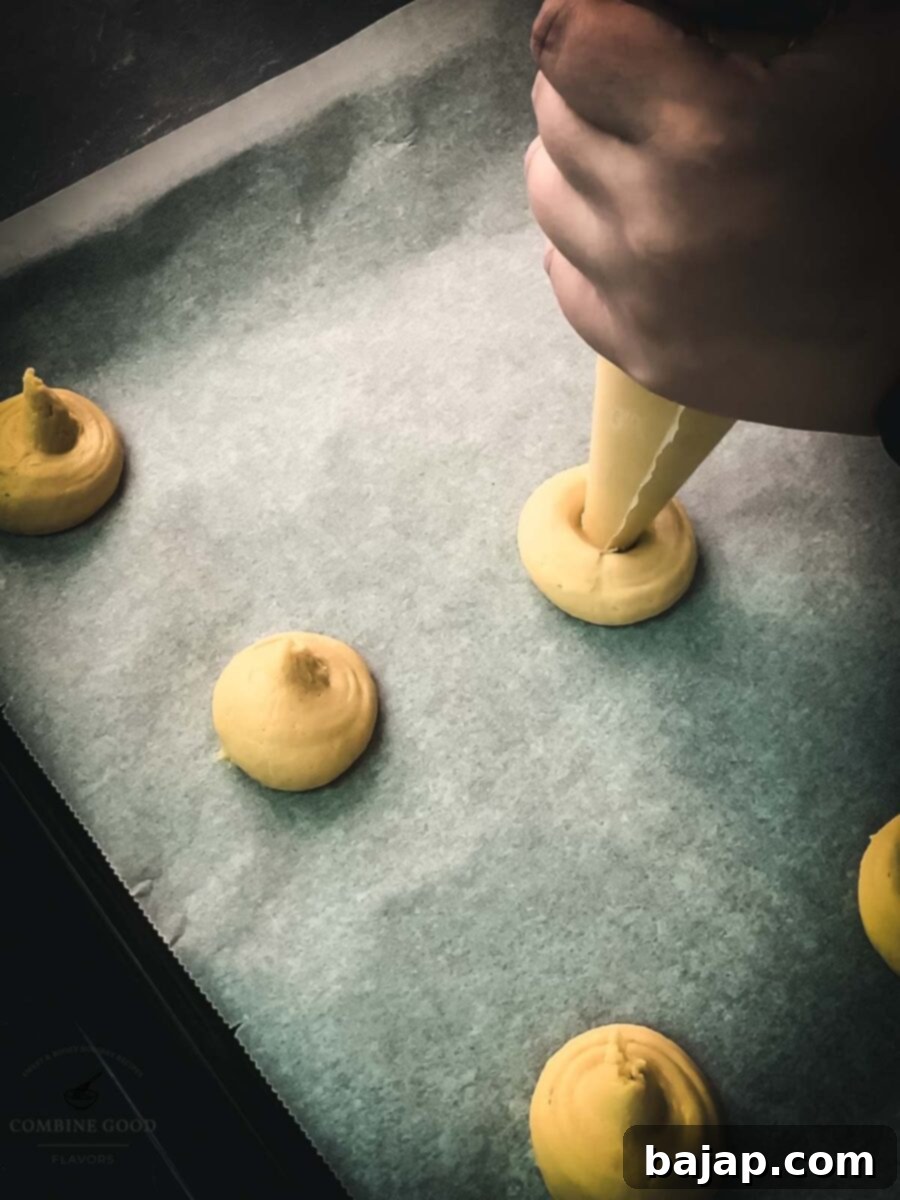
Step 4: Pipe the Cookie Dough. Transfer the prepared cookie dough into a piping bag. You don’t need a special tip; simply cut off a small piece of the pointy end of the bag (about 1.5 cm or ½ inch opening). Pipe 1.5-inch (4cm) round mounds of dough onto your lined baking trays, leaving a little space between each cookie to allow for slight spreading.
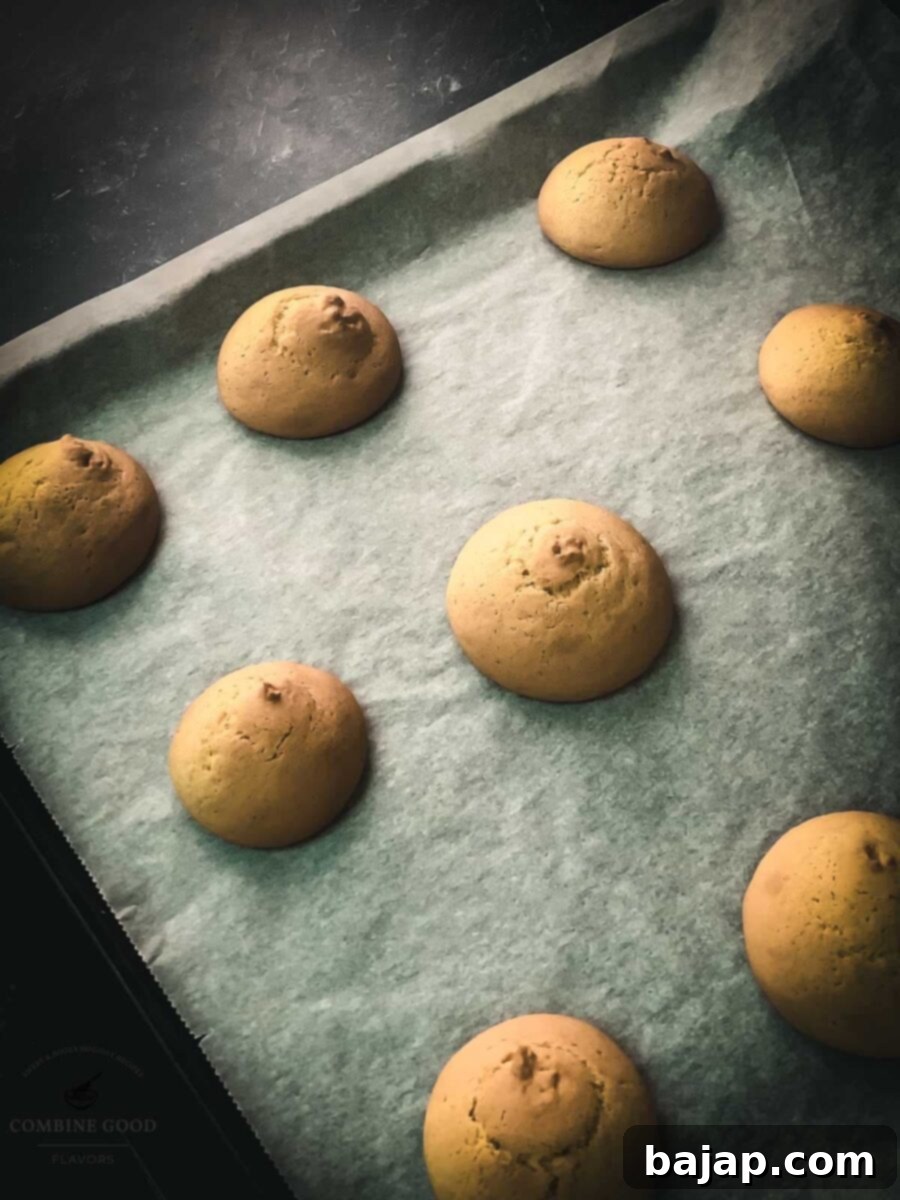
Step 5: Bake and Cool. Bake the cookies in the preheated oven for approximately 15 minutes, or until the edges are lightly golden. Once baked, remove from the oven and transfer them to a wire cooling rack. Allow them to cool completely before decorating. {Note: Don’t worry if the cookies aren’t perfectly flat on both sides. The beautiful spider web decoration will be applied to the flatter, underside of the cookie for a smoother finish.}
Step 6: Melt the Dark Chocolate. While the cookies are cooling, melt the dark chocolate couverture. You can do this using a double boiler (water bath method) or a specialized tempering unit. Ensure the chocolate is smooth and free of lumps. Keep it warm enough to work with, but not too hot to handle.
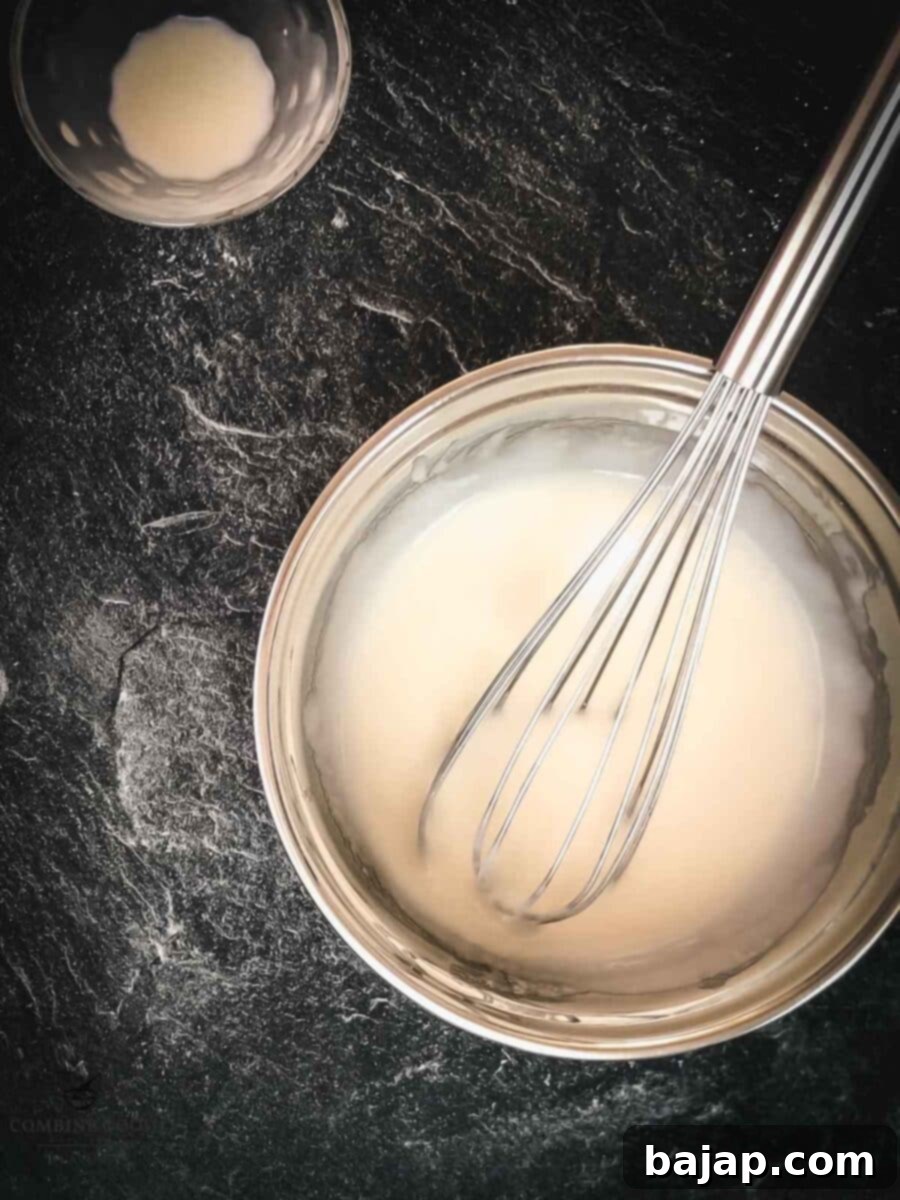
Step 7: Prepare the Icing. In a separate mixing bowl, whisk together the powdered sugar, freshly squeezed lemon juice, and rice milk until you achieve a smooth, pourable icing consistency. If it’s too thick, add a tiny bit more milk; if too thin, add a bit more powdered sugar. This white base is essential for the spiderweb effect.
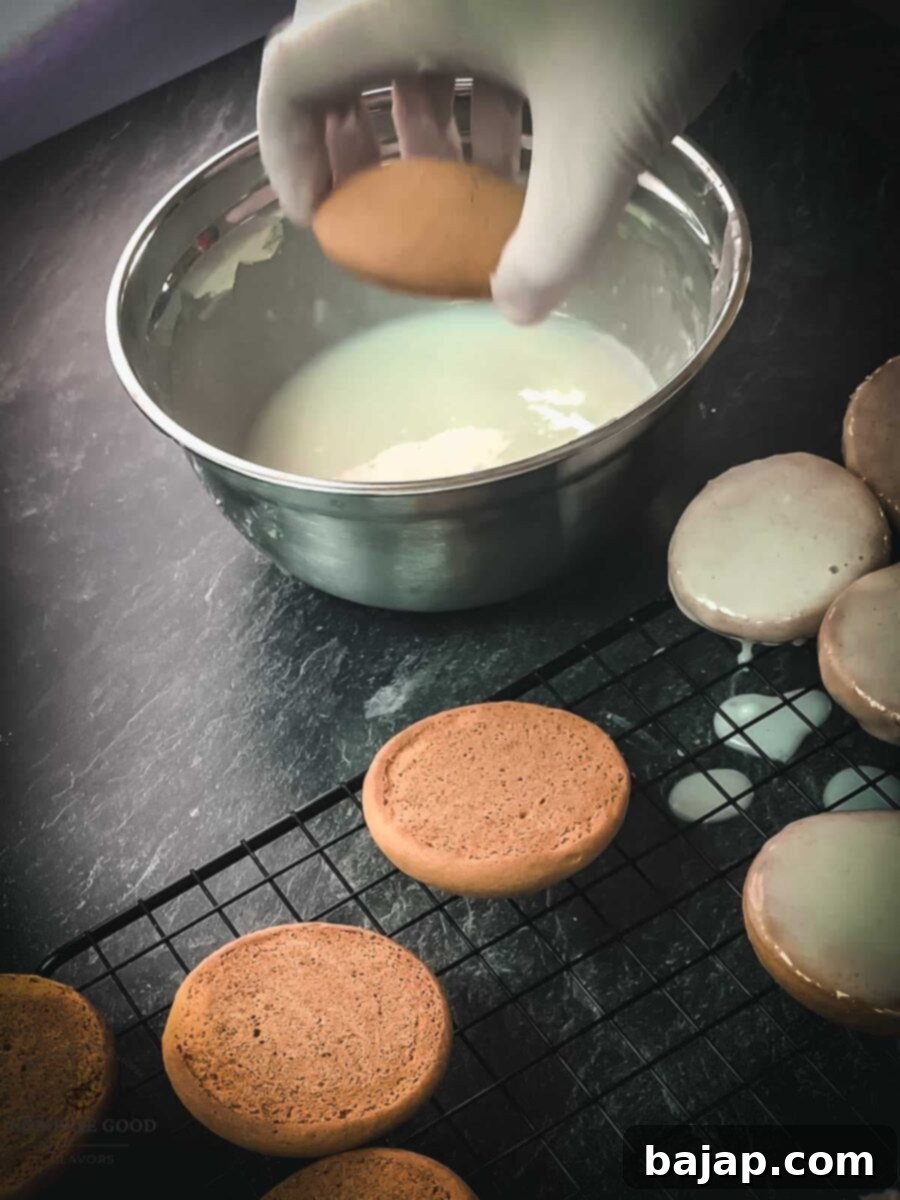
Step 8: Ice and Dot. Carefully dip the flat side of each cooled Halloween cookie into the smooth white icing, allowing any excess to drip off. Place the iced cookie onto a clean cooling rack. While the icing is still wet, use the melted dark chocolate (you can use a small piping bag, a cake decorating pen, or even a spoon) to make a dot in the center of the cookie and then draw 2-3 concentric circles around it. Speed is key here before the white icing sets!
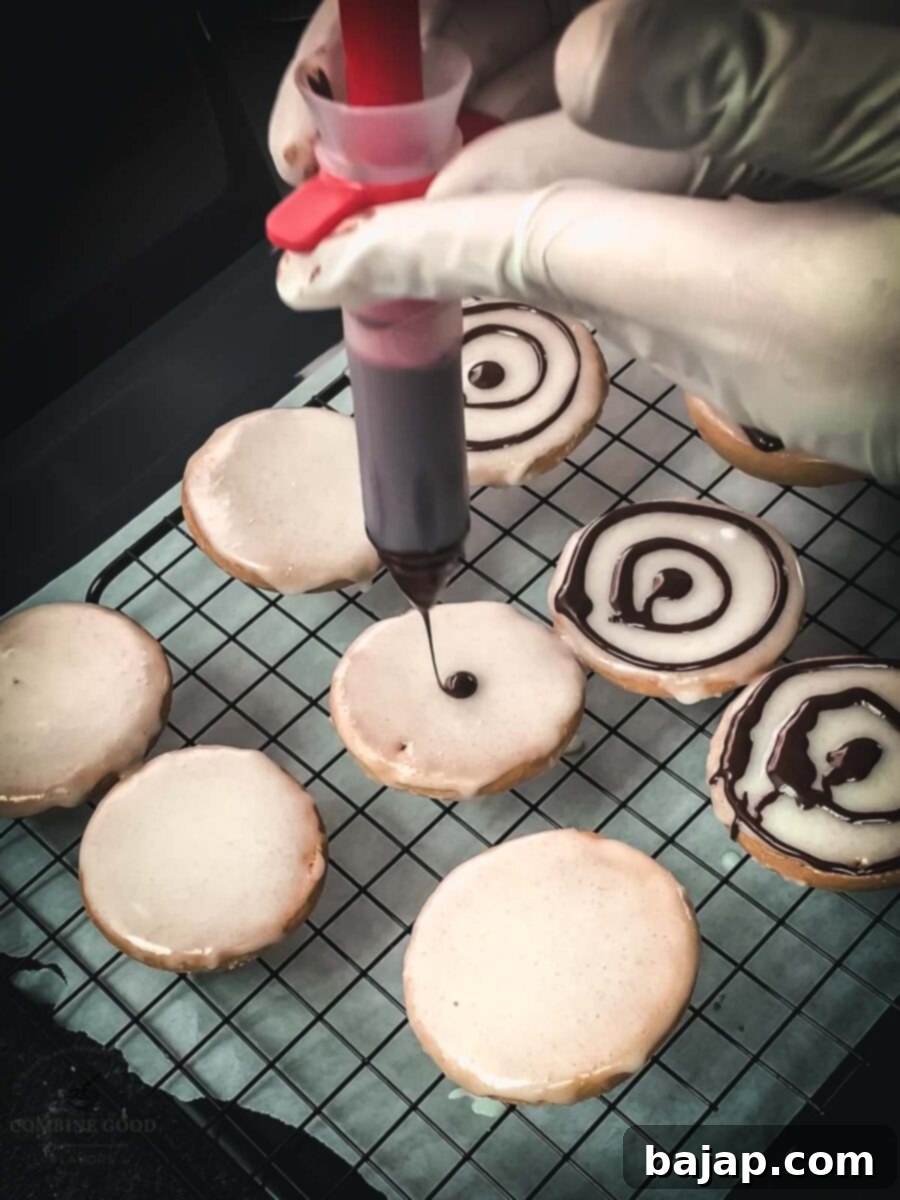
Step 9: Create the Spider Web Pattern. This is where the magic happens! While the chocolate dots and circles are still wet, take a clean toothpick and gently drag it from the center chocolate dot outwards, through all the circles, towards the edge of the cookie. Repeat this process several times around the cookie to create the iconic spider web pattern. Each drag will pull the chocolate through the wet icing, forming beautiful, intricate lines.
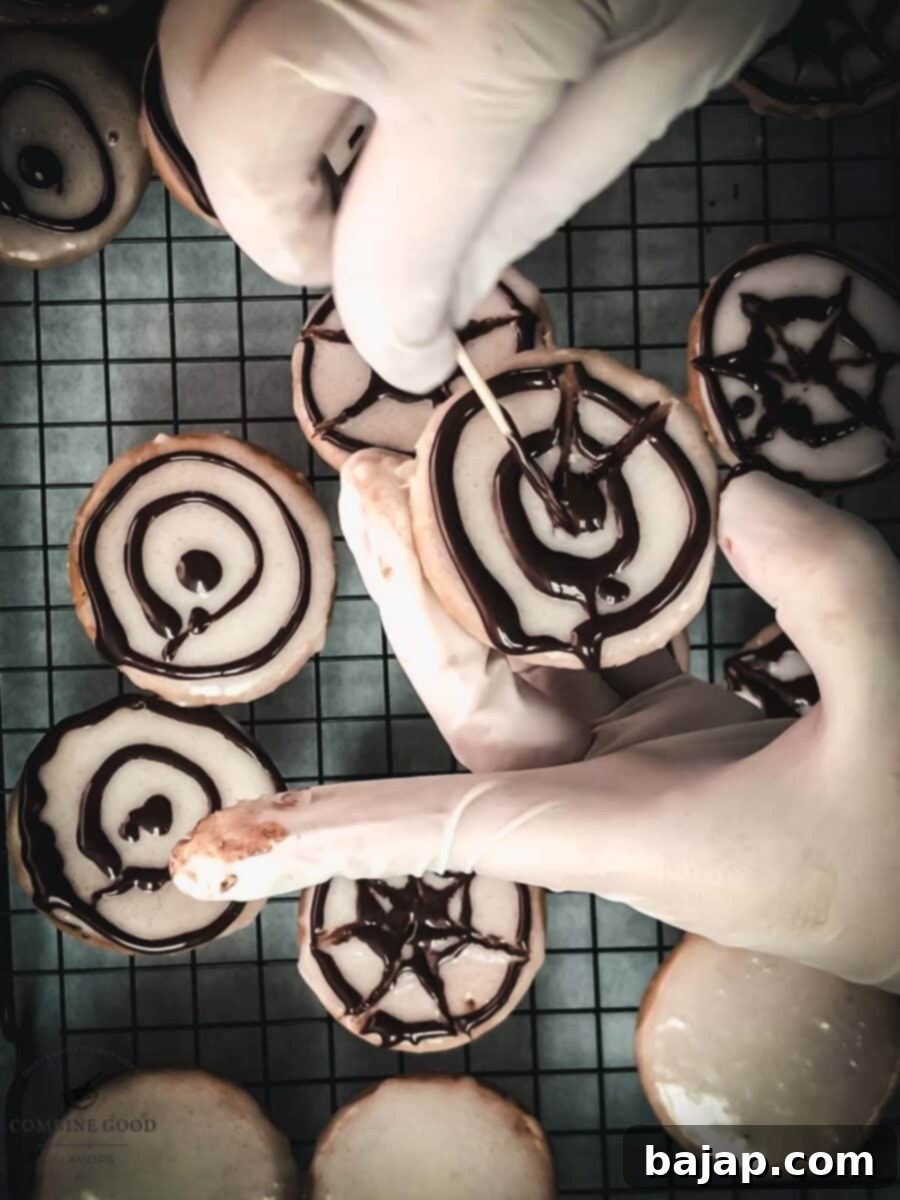
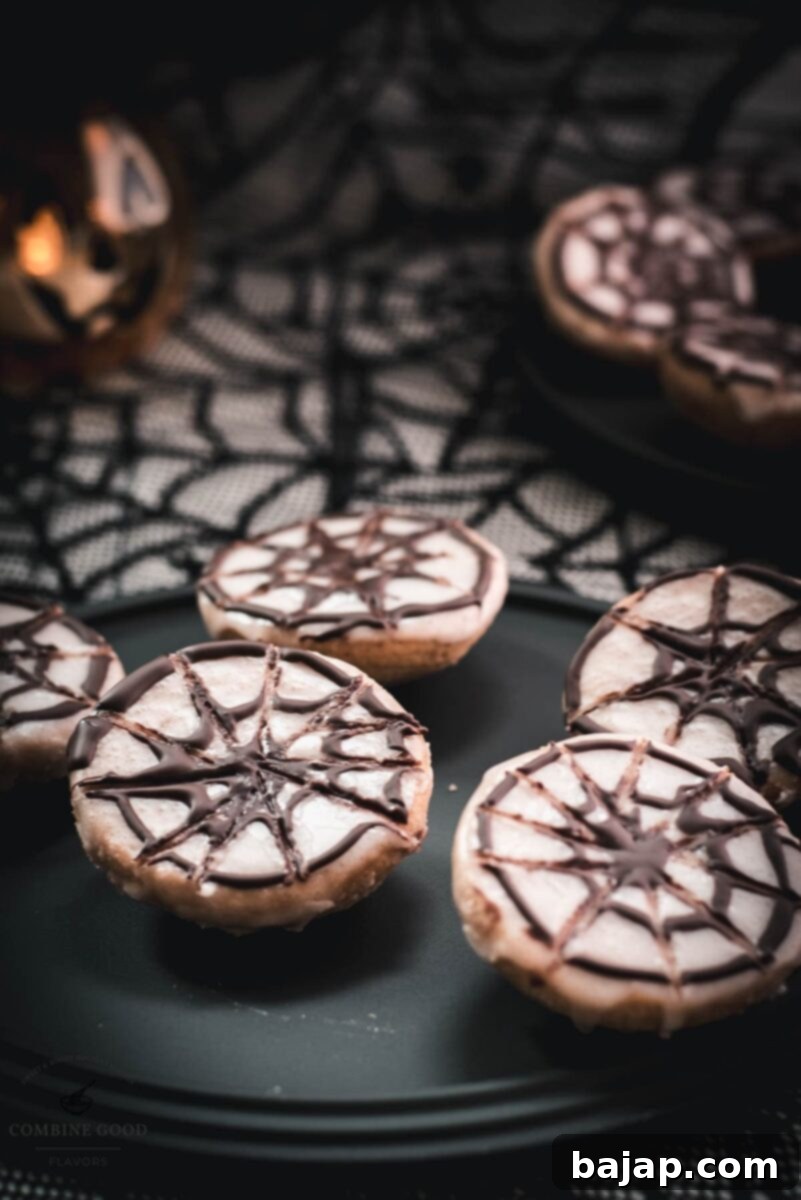
Step 10: Allow to Dry. Once all your Halloween spiderweb cookies are decorated, carefully place them back on the cooling rack and allow them to dry completely for about an hour, or until the icing and chocolate have fully set. This will prevent smudging and ensure your beautiful designs stay intact. Once dry, they are ready to serve and impress!
🍽 Essential Equipment for Baking Spiderweb Cookies
Having the right tools can make all the difference in your baking experience, especially when creating something as fun and decorative as these Halloween spiderweb cookies. Here’s a list of the essential equipment that will help you achieve perfect results:
- Kitchen Machine with Whisk Attachment: A stand mixer, such as a KitchenAid stand mixer, is invaluable for creaming butter and sugar, ensuring your cookie dough is smooth and aerated. Its whisk attachment will handle the job perfectly.
- Mixing Bowls: You’ll need at least two – one for your cookie dough and another for preparing the glaze. Choose bowls of various sizes for convenience.
- Two Baking Trays & Parchment Paper: Essential for baking multiple batches of cookies evenly without sticking. Parchment paper also makes cleanup effortless.
- Piping Bag: A simple piping bag (no fancy tip required!) is perfect for portioning out your cookie dough. Just snip off a small piece from the pointy end with scissors to create an opening.
- Cooling Rack: Crucial for allowing your baked cookies to cool completely before decorating, and for letting the glaze and chocolate set without smudging.
- Toothpicks: The star tool for creating the intricate spider web pattern. Keep a few handy!
- Whisk & a Fork: A whisk is needed for achieving a smooth, lump-free glaze, and a fork can be useful for minor adjustments or for gently stirring melted chocolate.
- Cake Decorating Pen: While not strictly necessary (a small piping bag or even a spoon can work), a cake decorating pen makes drawing the chocolate dots and circles for the spiderwebs incredibly precise and easy.
💭 Top Tips for Perfect Spiderweb Cookies
Achieving picture-perfect Halloween spiderweb cookies is easier than you think with a few insider tricks. Here are some top tips to ensure your spooky treats turn out flawlessly every time:
- Butter Temperature is Key: For the cookie dough, make sure your butter is truly softened, but not melted. It should give slightly when pressed. This allows it to cream properly with the sugar, incorporating air for a light texture.
- Don’t Overmix the Dough: Once you add the flour and baking powder, mix only until just combined. Overmixing develops the gluten in the flour, leading to tough cookies instead of tender ones.
- Piping Bag Trick: If you don’t have a specific piping tip, a simple piping bag with the end snipped off works perfectly. The size of the opening will determine the size of your cookies, so start small and enlarge if needed.
- Flat Side for Decorating: Remember the note in the instructions: the spiderweb design goes on the flatter side of the baked cookie. Sometimes, the bottom side becomes the flatter, smoother surface after baking.
- Work Quickly with the Glaze: When applying the chocolate for the web design, work efficiently. The white icing can start to set quickly, especially in cooler environments. If it sets before you can drag the toothpick, the web effect won’t be as clean.
- Toothpick Technique: For the spiderweb, drag the toothpick from the center *outwards* to create lines that resemble spokes. For a more intricate web, you can also drag a toothpick from the outer circles *inwards* between the outward lines.
- Cleaning Decorating Pens: If using a silicone decorating pen for chocolate, clean it immediately after use. While often dishwasher safe, hand-washing off the chocolate first will prevent residue from hardening and getting stuck in crevices, making future use much easier.
🍫 Mastering the Art of Melting Chocolate
Melting chocolate properly is a crucial step for achieving those perfectly crisp and distinct spiderwebs on your Halloween cookies. Using dark chocolate couverture provides the best results due to its higher cocoa butter content, which allows for a smoother melt and a better finish. Here are the two most common and effective methods:
Water Bath (Bain-Marie) Method:
This classic method ensures gentle, even heating, preventing the chocolate from burning or seizing. You’ll need two pots of different sizes: one larger pot and one smaller pot that can sit snugly on top without touching the water. Fill the larger pot with about 3-4 finger-widths of water and bring it to a gentle simmer. Place the chocolate to be melted into the upper, smaller pot. Ensure the bottom of the smaller pot does not touch the simmering water; it should be heated by the steam. Stir the chocolate continuously over moderate heat until it’s completely melted and smooth. Remove from heat immediately once melted.
Tempering Unit Method:
For professional results and larger quantities, a tempering unit offers precise temperature control. Add the chocolate couverture to the tempering unit and set it to the appropriate melting temperature for your specific type of chocolate. Generally, white and milk chocolate melt best around 40 °C (104 °F), while dark chocolate requires a slightly higher temperature of 50 °C (122 °F). The unit will maintain this temperature, keeping your chocolate perfectly melted and ready for decorating without the risk of burning.
Regardless of the method, ensure no water gets into your melting chocolate, as this can cause it to seize and become unusable for fine decorating.
🍫 Download Your Free Chocolate Workbook
🍪 Substitutions & Variations for Your Spiderweb Cookies
Whether you have dietary restrictions, are missing an ingredient, or simply want to experiment, these Halloween spiderweb cookies are quite adaptable. Here are some clever substitutions and exciting variations to make this recipe truly your own:
Cookie Dough Substitutions
- Butter, soft: Easily substitute with plant-based margarine or a dairy-free butter alternative to make these cookies vegan-friendly. The texture will remain similar.
- Granulated Sugar: For a different flavor profile or to reduce refined sugar, opt for coconut sugar (which adds a slight caramel note), light brown sugar, or your preferred granulated sugar substitute like erythritol or stevia blends. Adjust quantities according to sweetness preference.
- Vanilla Sugar: If you don’t have vanilla sugar, simply use an equal amount of regular granulated sugar and add a splash (about 1 teaspoon) of good quality vanilla extract or vanilla bean paste for that essential vanilla flavor.
- Salt: While a pinch of table salt works, sea salt or kosher salt can also be used. They perform the same function of enhancing flavors.
- Eggs (M): To make the cookies vegan, use flax eggs (mix 1 tablespoon flaxseed meal with 3 tablespoons water per egg and let sit for 5 minutes to thicken) or a commercial egg replacer, following package directions.
- Vanilla Pudding Powder: An instant vanilla pudding mix or any brand of custard powder can be used interchangeably to achieve that signature custardy flavor and tender crumb.
- Cake Flour: If cake flour isn’t available, you can create a suitable substitute using all-purpose flour. For every cup of cake flour needed, use 1 cup of all-purpose flour minus 2 tablespoons, then add 2 tablespoons of cornstarch back in. Sift well to combine.
- Baking Powder: In a pinch, a combination of baking soda and cream of tartar can act as a baking powder substitute. Use a 1:2 ratio (e.g., ½ teaspoon baking soda plus 1 teaspoon cream of tartar for 1.5 teaspoons of baking powder).
- Milk: Any plant-based milk (almond, soy, oat, cashew) works wonderfully in this recipe, maintaining the same consistency and moistness. Regular dairy milk is also perfectly fine if preferred.
Glaze Substitutions
- Powdered Sugar: For a sugar-free glaze, use a powdered sugar substitute like erythritol-based sweeteners or monk fruit sweetener. Ensure it’s powdered to prevent a grainy texture.
- Lemon Juice: If you’re out of lemons, lime juice can provide a similar tangy balance. In a pinch, a tiny dash of apple cider vinegar can offer a slight acidity, but lemon is highly recommended for flavor.
- Rice Milk: Feel free to use any other plant-based milk (almond, oat, soy) or regular cow’s milk if you don’t need a dairy-free option. Adjust the quantity slightly to achieve the desired consistency.
Dark Chocolate Coating Substitutions
- Dark Chocolate Couverture: You can substitute with dairy-free dark chocolate chips or bars for a vegan option. Milk chocolate or white chocolate can also be used for a different color contrast, though the “spooky” effect might be slightly less pronounced. Just ensure it melts smoothly for drawing.
Creative Variations to Try
- Colored Icing: Add a drop or two of gel food coloring to the white icing to create vibrant backgrounds for your spiderwebs. Orange, green, or purple would be fantastic for Halloween!
- Spiders & Ghosts: Instead of just spiderwebs, use small chocolate candies or mini Reese’s Pieces for spider bodies, attaching them to the web with a dab of melted chocolate. You could also pipe tiny ghost shapes on top of the glaze before it sets for an extra spooky touch.
- Spice It Up: Add a pinch of cinnamon or nutmeg to the cookie dough for a warm, autumnal flavor that perfectly complements the vanilla.
- Different Chocolate Flavors: Experiment with flavored chocolates for the web – perhaps an orange-flavored white chocolate for a bright contrast, or even a deep red chocolate for a “bloody” web effect.
- Toppings: Before the glaze sets, sprinkle some Halloween-themed sprinkles around the edges, or a touch of edible glitter for a shimmering, mystical look.
Storing Your Spiderweb Cookies and Make-Ahead Tips
To keep your Halloween spiderweb cookies fresh and delicious for as long as possible, proper storage is key. You can also prepare elements of this recipe in advance to make your baking day smoother and less stressful.
Storage Instructions:
- Room Temperature: Once the icing and chocolate are completely set, store the cookies in an airtight container at room temperature for up to 5-7 days. Layer them with parchment paper between layers to prevent them from sticking or smudging.
- Freezing Dough: The unbaked cookie dough can be frozen for up to 3 months. Wrap it tightly in plastic wrap, then place it in a freezer-safe bag. Thaw in the refrigerator overnight before piping and baking.
- Freezing Baked Cookies: You can also freeze the plain, un-iced baked cookies for up to 2-3 months. Allow them to cool completely, then place them in an airtight freezer-safe container or bag. Thaw at room temperature before icing and decorating. It’s generally best to decorate them fresh for the best look.
Make-Ahead Tips:
- Bake Cookies in Advance: The cookies themselves can be baked 2-3 days ahead of time and stored in an airtight container at room temperature. Decorate them closer to your event for the freshest appearance.
- Prepare Glaze Components: You can measure out your powdered sugar and have your lemon juice and milk ready a day in advance. Whisk the glaze fresh just before decorating to ensure the best consistency.
- Melt Chocolate Just Before Use: Chocolate for decorating should always be melted right before you plan to use it to ensure it’s fluid and easy to work with for the intricate web designs.
Other Halloween Recipes for You to Try
Looking to complete your Halloween feast? Here are some other spooktacular recipes from our kitchen that pair perfectly with these spiderweb cookies or can stand alone as delightful additions to your holiday celebration:
- Halloween Cocktails and Drinks {Roundup} – A collection of eerie and delicious beverages.
- Spooktacular Cheesecake with “Bloody” Raspberry Filling – A creamy, hauntingly good dessert.
- Limoncello Vodka – A vibrant and zesty spirit for adult concoctions.
- Red Halloween Cocktail – A vibrant, chilling drink perfect for any party.
- Gosling’s Dark & Stormy – A classic, dark and mysterious cocktail.
- Kraken Cola – A simple yet potent rum-based drink.
- Kraken Ginger Beer – A spicy and refreshing ginger beer cocktail.
- Spooky Tarts – Quick and easy no-bake delights.
- Sloe Screw – A fruity and colorful cocktail.
- Kramble Cocktail – Another intriguing rum cocktail for your themed party.
We hope you love making and sharing these easy Halloween spiderweb cookies as much as we do! If you whip up this recipe, don’t forget to let me know how you liked it by giving it a ★★★★★ star rating and leaving a comment below. Your feedback is truly awesome and helps other bakers! You can also sign up for our Newsletter for more delicious recipes, or follow me on Pinterest or Instagram and share your festive creations with our community. Just tag me @combinegoodflavors and use the hashtag #combinegoodflavors, so I don’t miss your spooky masterpieces!
📖 Recipe: Halloween Spiderweb Cookies

Halloween Spiderweb Cookies
Nora
Save RecipeSaved!
Pin Recipe
