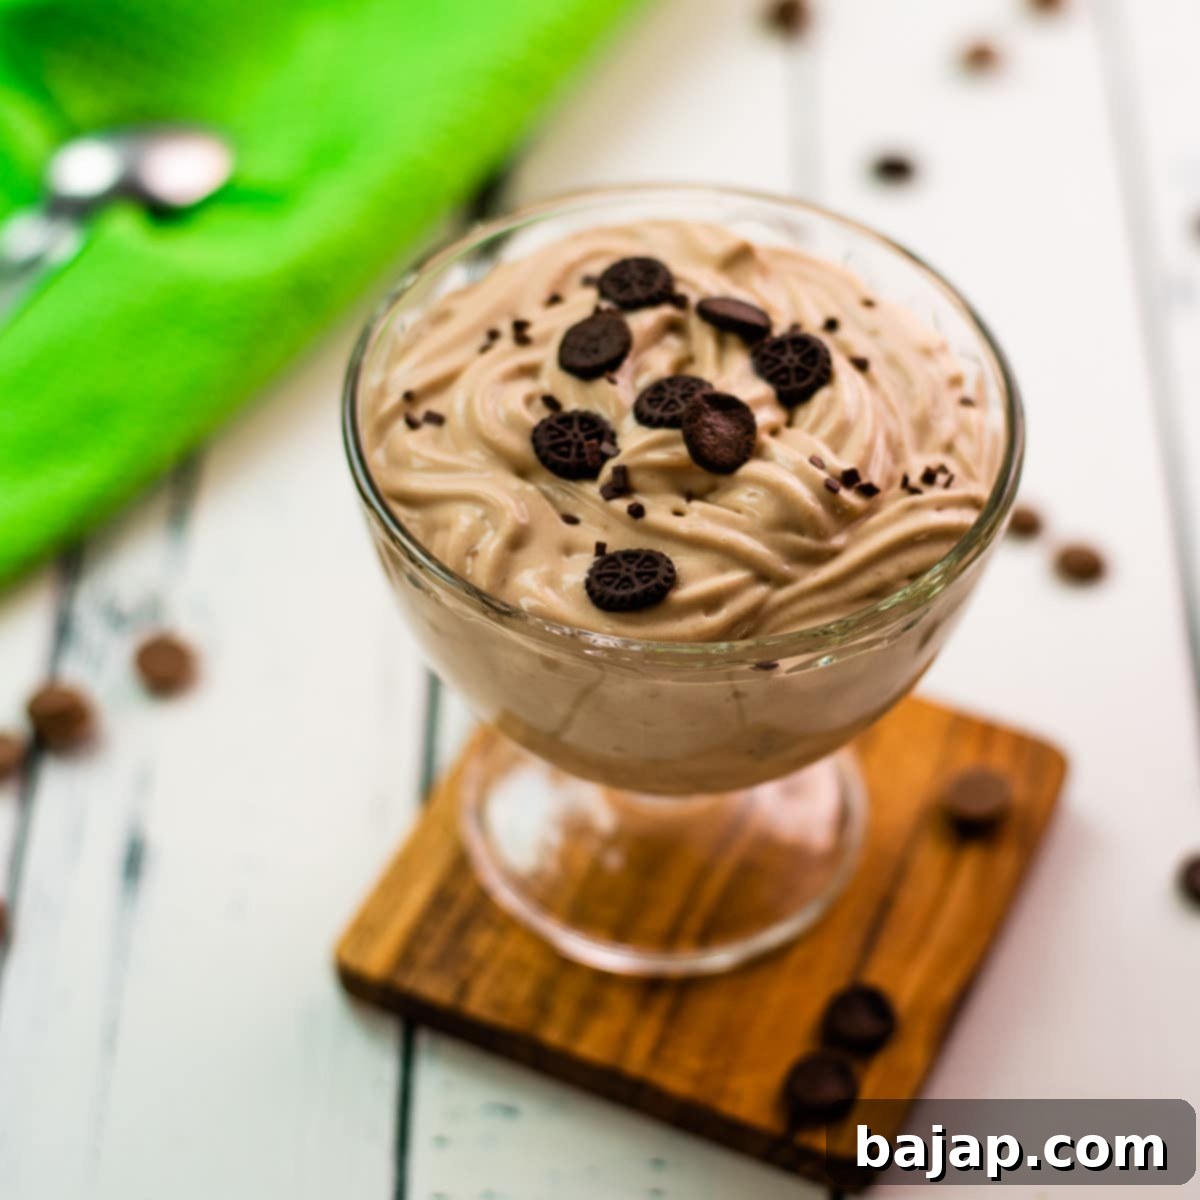
Velvety Smooth 5-Ingredient Chocolate Cornstarch Pudding: Your New Favorite Easy Dessert
Prepare to be enchanted, all you chocolate lovers out there! This simple yet utterly delicious chocolate cornstarch pudding is about to become your new go-to dessert. Forget complicated recipes and long ingredient lists; this velvety smooth treat requires just five basic ingredients and minimal hands-on prep time. The hardest part will truly be waiting for it to chill to perfection!
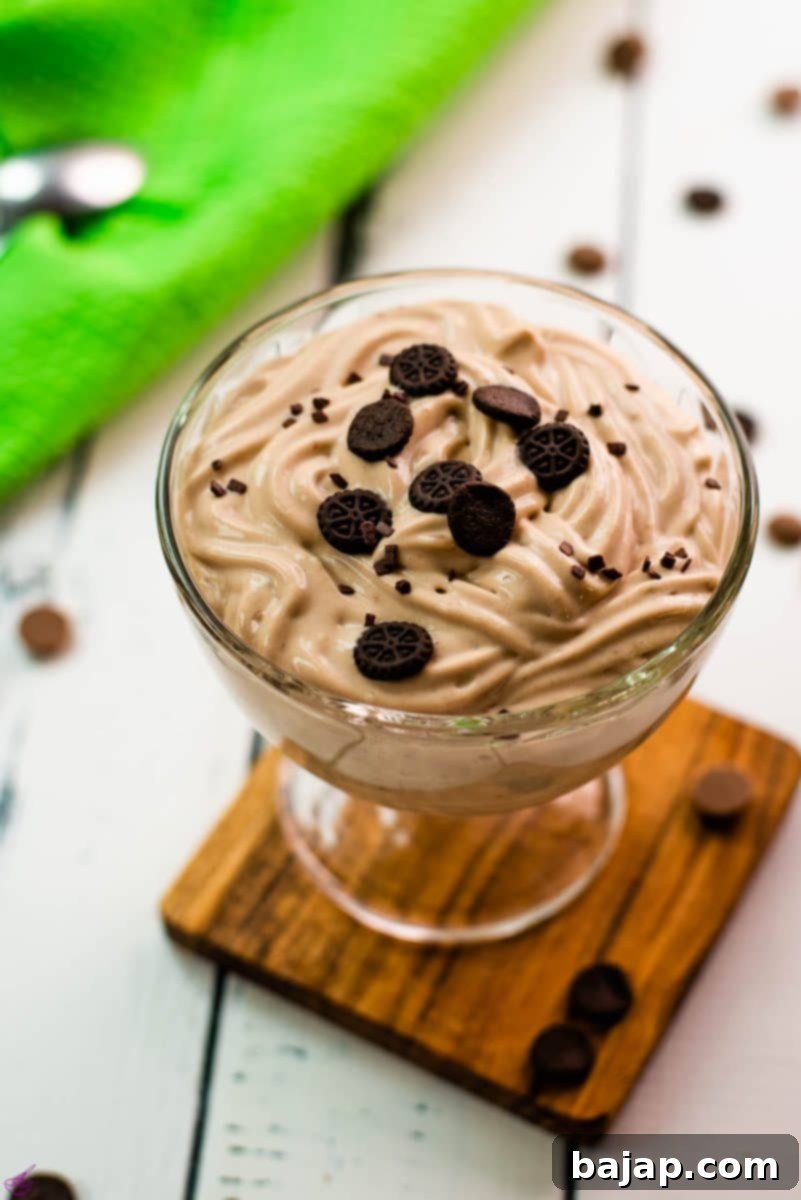
And let me assure you, the wait is absolutely worth it. While it’s an ideal, refreshing dessert for a warm summer day, its rich, comforting flavor profile means you’ll crave it just as much in the cozy depths of winter. This creamy, delightful pudding is fantastic served on its own, allowing its pure chocolate goodness to shine. However, it’s also incredibly versatile and makes an exquisite dip for your favorite cookies or fresh fruit, elevating any party spread or casual gathering. Get ready to impress with minimal effort!
Why You’ll Adore This Easy Chocolate Cornstarch Pudding
There are countless reasons why this 5-ingredient chocolate cornstarch pudding will quickly become a staple in your dessert repertoire:
- Effortlessly Simple: With just five common ingredients, this recipe is designed for ease. Perfect for beginners or seasoned bakers looking for a quick, rewarding treat.
- Velvety Smooth Texture: Thanks to the magic of cornstarch, this pudding boasts a wonderfully smooth, luxurious texture that melts in your mouth without being gummy or thick.
- Rich Chocolate Flavor: Using high-quality milk chocolate couverture ensures a deeply satisfying and authentic chocolate taste that’s a step above typical boxed mixes.
- Incredibly Versatile: Serve it as a classic dessert, layer it in parfaits, use it as a filling for tarts, or transform it into a fantastic dip for fresh fruit, pretzels, or an assortment of cookies.
- Make-Ahead Friendly: It requires chilling time, making it an ideal candidate for preparing in advance. Whip it up the night before a gathering and enjoy a stress-free dessert presentation.
- Customizable: Easily adapt the recipe to use different types of chocolate, or add your favorite flavorings and toppings to create endless variations.
[feast_advanced_jump_to]
🥘 Key Ingredients for Your Homemade Chocolate Pudding
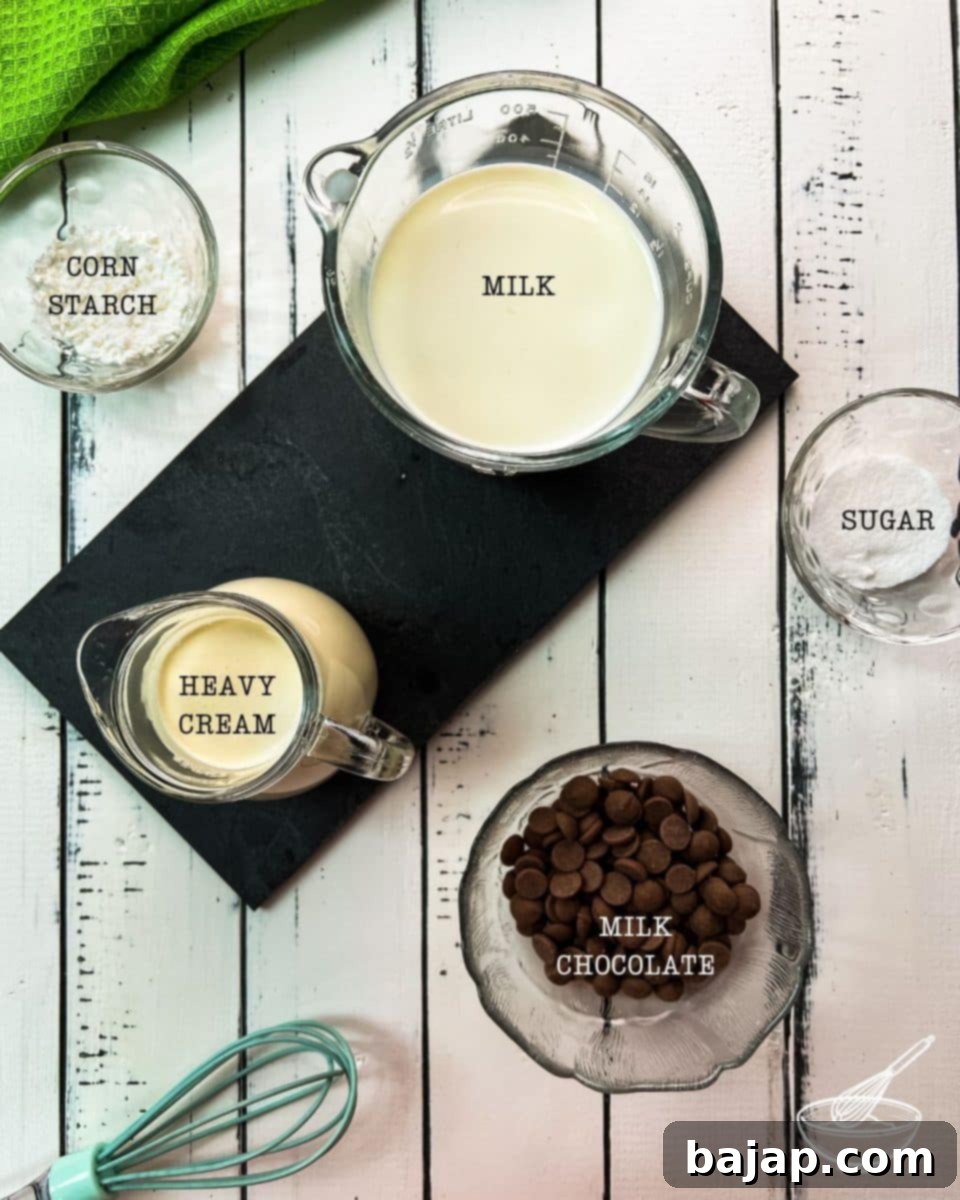
The beauty of this recipe lies in its simplicity and the quality of its core components. Here’s what you’ll need and why each ingredient plays a crucial role:
- Milk Chocolate Couverture: This is key for that premium, melt-in-your-mouth chocolate flavor and smooth texture. Couverture chocolate has a higher cocoa butter content, which helps it melt more smoothly and provides a richer mouthfeel. Opt for high-quality brands for the best results. If couverture is unavailable, good quality milk chocolate baking bars or chips (not regular chocolate chips, which contain stabilizers) can be substituted.
- Whole Milk: The base of our pudding, whole milk provides the necessary fat content for a truly creamy and luxurious texture. While you can use 2% milk, whole milk will yield a richer, more decadent pudding. For a dairy-free alternative, full-fat coconut milk or almond milk can work, though the final texture and flavor will be slightly different.
- Granulated Sugar: This provides the sweetness, balancing the richness of the chocolate. The amount can be adjusted slightly to your preference, depending on the sweetness of your chocolate.
- Cornstarch: The essential thickening agent! Cornstarch is what gives this pudding its signature velvety, slightly translucent, and lump-free consistency. It works by forming a gel when heated in liquid, providing structure without the grainy texture that flour can sometimes impart.
- Heavy Cream: Whipped into a light and airy topping, heavy cream adds another layer of indulgence and balances the rich pudding. It can also be gently folded into the cooled pudding for an even lighter, mousse-like dessert.
For precise quantities, please refer to the detailed recipe card below.
🔪 Step-by-Step Instructions for Perfect Chocolate Pudding
Creating this delicious chocolate cornstarch pudding is a straightforward process. Follow these steps for a perfectly smooth and irresistible dessert:
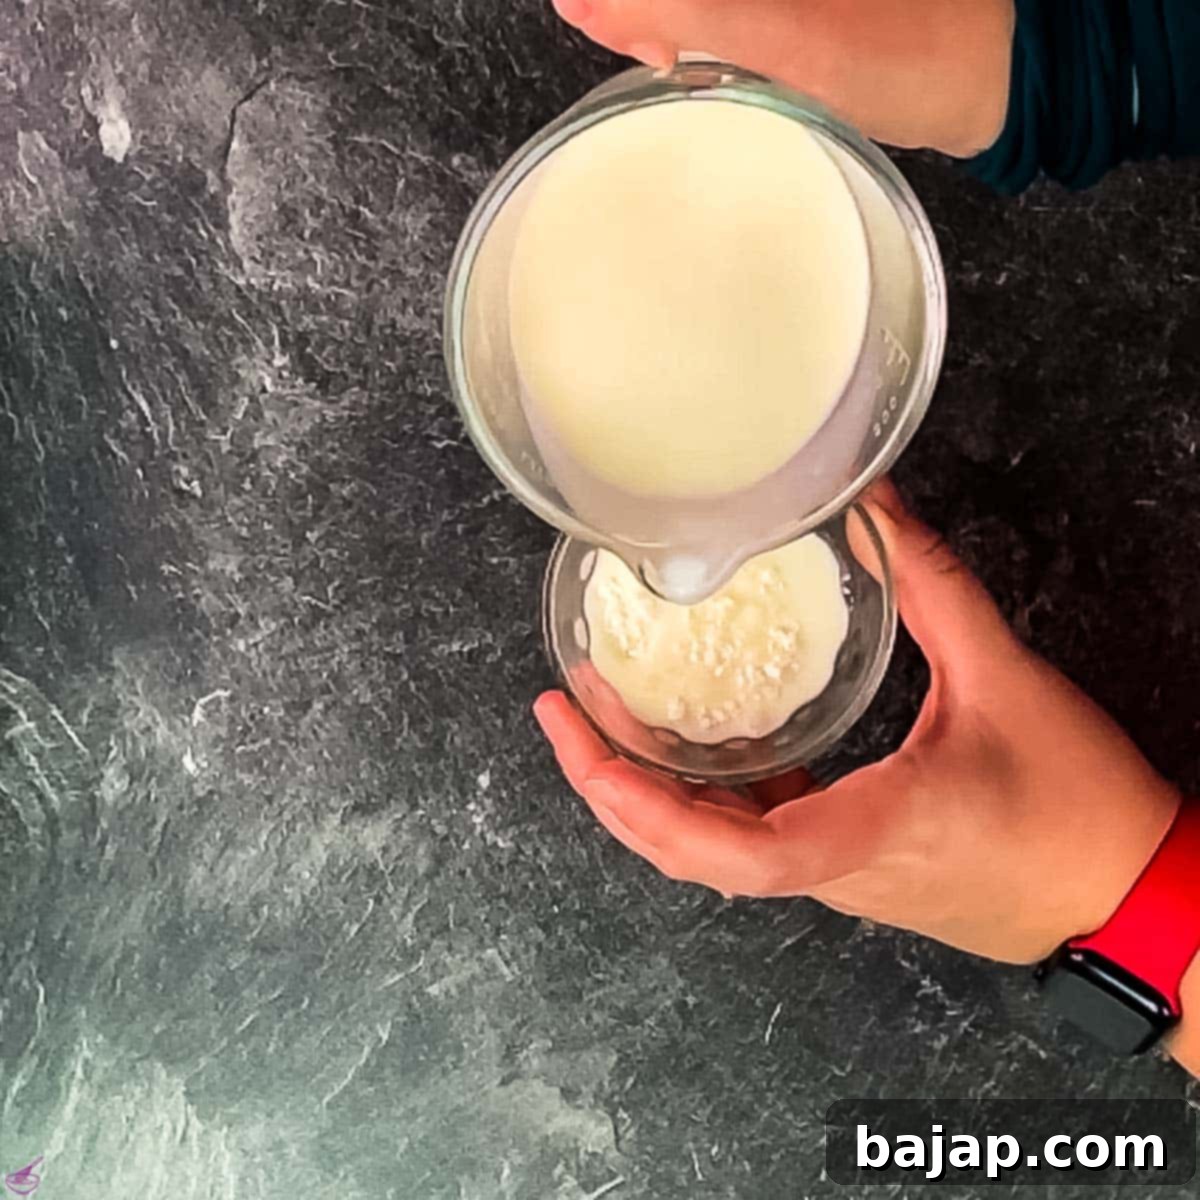
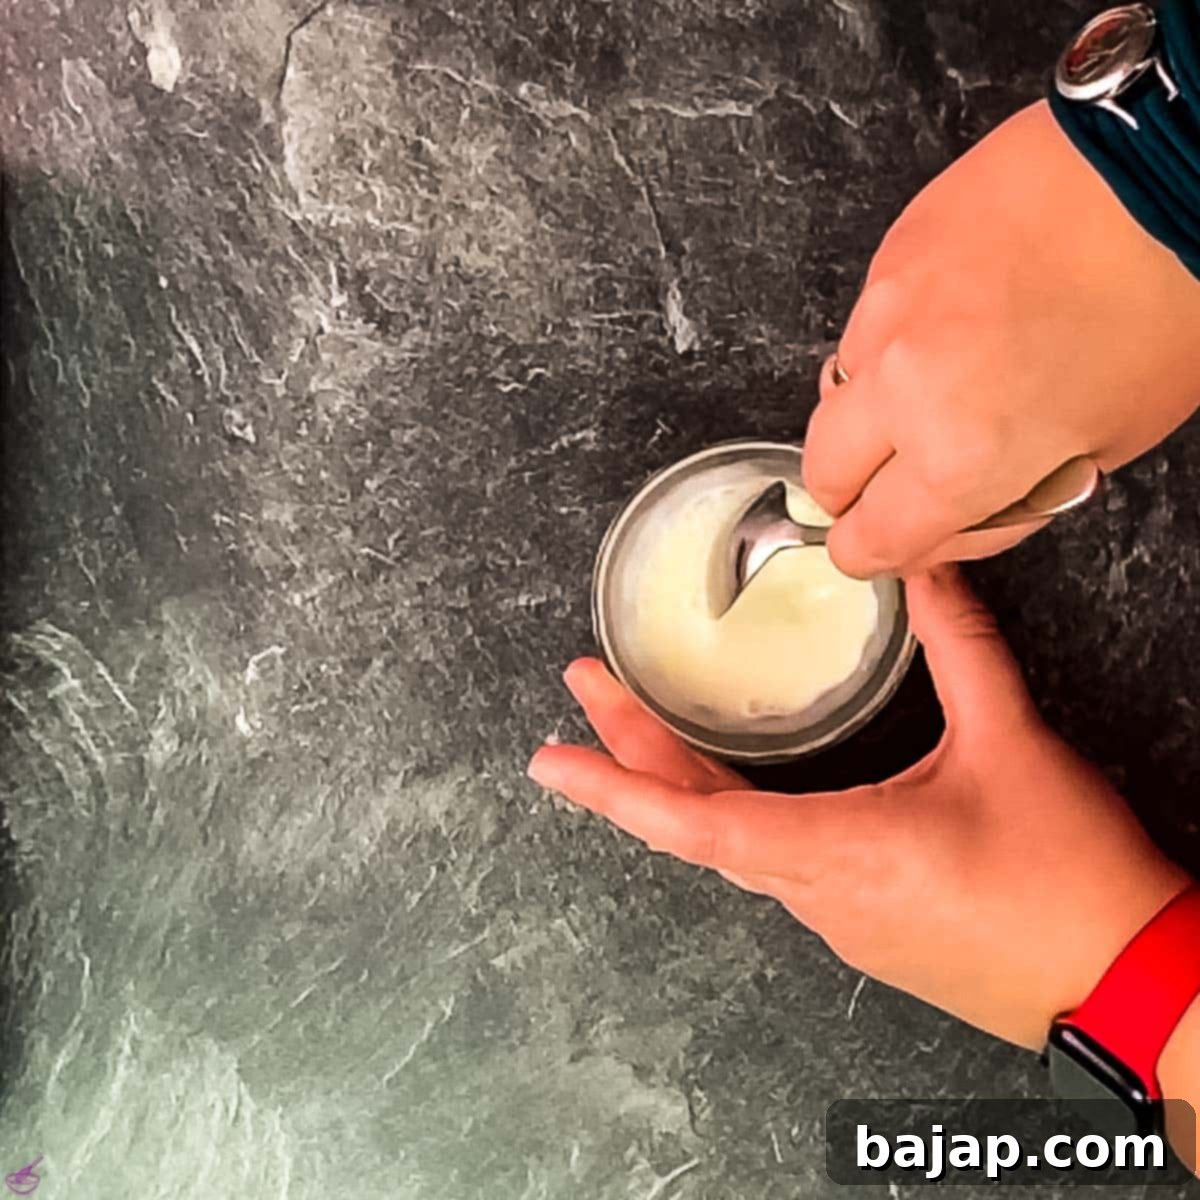
- Prepare the Cornstarch Slurry: The very first step is crucial for a lump-free pudding. In a small bowl, thoroughly mix your cornstarch with just a tablespoon of milk until a smooth paste forms. It’s vital to ensure there are absolutely no clumps. This slurry technique prevents the cornstarch from clumping when added to the hot liquid, ensuring a silky-smooth pudding.
- Combine and Heat Main Ingredients: In a medium saucepan, combine the milk chocolate couverture, the rest of the whole milk, and the granulated sugar. Place the saucepan over medium heat and stir constantly with a whisk to help the chocolate melt evenly and prevent the milk from scorching. Bring the mixture to a gentle boil – you’ll see small bubbles forming around the edges and on the surface.
- Thicken the Pudding: Once the chocolate mixture reaches a gentle boil, slowly whisk in your prepared cornstarch slurry. Continue to stir constantly with your whisk. The mixture will begin to thicken quite quickly. Bring it back to a full boil, stirring vigorously for at least one minute to ensure the cornstarch fully activates and thickens the pudding properly. The pudding should be thick enough to coat the back of a spoon.
- Cool Down: Immediately remove the saucepan from the heat to prevent overcooking. Pour your hot, thickened pudding into a clean bowl, preferably one with a lid. To prevent a “skin” from forming on top, you can place a piece of plastic wrap directly onto the surface of the hot pudding before covering the bowl.
- Chill to Perfection: Transfer the covered bowl to the refrigerator and allow it to chill for at least three hours. This chilling time is essential for the pudding to fully set and achieve its proper firm, yet creamy, consistency. For the absolute best results and a truly firm pudding, I highly recommend making this dessert the night before and letting it chill overnight.
- Prepare Whipped Cream: After your pudding has thoroughly chilled, it’s time for the crowning glory! Using an electric hand mixer, whip the heavy cream in a separate bowl until stiff peaks form. You’ll know it’s ready when the cream holds its shape beautifully on the whisk or mixer beaters.
- Combine and Serve: Gently fold the cold, set chocolate cornstarch pudding with the freshly-whipped heavy cream. This step adds an extra layer of lightness and creaminess. You can then spoon the pudding directly into serving bowls.
- Elegant Presentation (Optional but Recommended): For a truly beautiful presentation, spoon the combined pudding into a pastry bag fitted with a star tip. Pipe the creamy chocolate pudding into individual serving bowls or smaller dipping bowls if you’re planning to serve it with accompaniments. While this doesn’t alter the taste, it significantly enhances the visual appeal, making your homemade dessert look professionally prepared.
- Garnish and Enjoy: If you’re serving the pudding as a dip, enhance its appeal by decorating with small pieces of cookies, fresh berries, or even a sprinkle of chocolate shavings. For individual servings, a dollop of extra whipped cream, a few chocolate curls, or a sprig of mint makes a lovely finish.
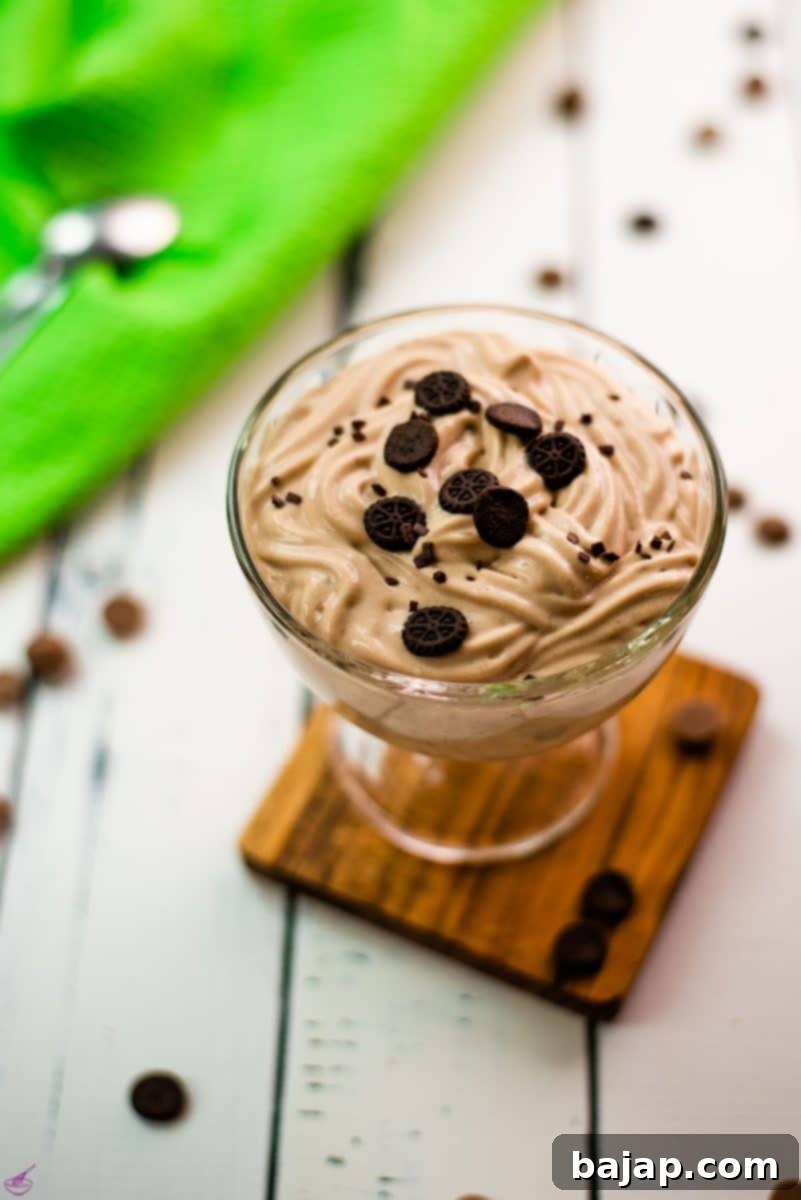
Whether enjoyed with a spoon or as a dip, this homemade chocolate cornstarch pudding is sure to be a delightful treat!
🍫 Variations & Serving Suggestions
This basic chocolate cornstarch pudding recipe is a fantastic canvas for your culinary creativity. While delicious on its own, don’t hesitate to experiment with different chocolates and additional flavorings to suit any palate or occasion.
Chocolate Variations:
- Dark Chocolate: For a more intense and less sweet chocolate experience, you can easily prepare this recipe with dark chocolate. This creates a wonderfully decadent and sophisticated pudding. You might consider adding a tiny bit more sugar if your dark chocolate is very bitter.
- White Chocolate: If you prefer a sweeter, creamier, and distinct flavor profile, try using white chocolate. This variation is particularly popular with younger guests and offers a delightful change of pace.
My family once served all three versions – milk, dark, and white chocolate puddings – as delightful dips at Christmas, accompanied by an array of treats like homemade sugar cookies, fresh berries, and pretzel sticks. It was an absolute hit and added a fun, interactive element to our festive spread!
Flavor Enhancements:
- Vanilla Extract: A splash of good quality vanilla extract (½ teaspoon) can enhance the chocolate flavor. Add it after removing the pudding from the heat.
- Coffee/Espresso: A teaspoon of instant espresso powder or a tablespoon of strong brewed coffee can deepen the chocolate notes without adding a distinct coffee flavor.
- Liqueurs: For an adult twist, stir in a tablespoon of your favorite liqueur after the pudding has cooked and been removed from heat. Grand Marnier, Kahlua, or a dash of rum would be fantastic.
- Spices: A pinch of cinnamon, nutmeg, or even a tiny amount of chili powder (for a Mexican hot chocolate vibe) can add an interesting layer of flavor.
Topping & Garnish Ideas:
- Fresh berries (raspberries, strawberries, blueberries)
- Shaved chocolate or chocolate curls
- Toasted nuts (pecans, almonds, walnuts)
- Whipped cream (as instructed in the recipe)
- A sprinkle of sea salt (enhances chocolate flavor)
- Crushed cookies or Graham crackers
- Caramel or hot fudge sauce drizzle
- Mini marshmallows
🍽 Essential Equipment
Gathering your tools before you start cooking makes the process even smoother. Here’s what you’ll need for this chocolate cornstarch pudding:
- Small or medium-sized Saucepan: For cooking the pudding base. A non-stick saucepan is ideal to prevent scorching.
- Whisk: Absolutely crucial for achieving a smooth, lump-free consistency and for constant stirring.
- Small Bowl: For creating the cornstarch slurry.
- Tablespoon: For measuring the milk for the cornstarch slurry.
- Large Bowl (with lid): To transfer and chill the hot pudding. A lid or plastic wrap is important to prevent a skin from forming.
- Electric Hand Mixer: For whipping the heavy cream to perfection.
- Piping Bag with Star Tip (Optional): For elegant presentation, especially if serving in individual glasses or as a dip.
- Glass Bowls or Small Dipping Bowls: For serving your beautiful pudding.
🌡 Storage & Make-Ahead Tips
This delightful homemade chocolate cornstarch pudding is fantastic for meal prepping or making ahead for parties. When properly stored, it maintains its creamy texture and rich flavor for several days.
To ensure optimal freshness and prevent it from drying out or absorbing refrigerator odors, transfer any leftover pudding into an airtight container. Make sure the container is sealed tightly. Stored in the refrigerator, this chocolate cornstarch pudding will remain fresh and delicious for up to three days. For best results, if you plan to store it, gently press a piece of plastic wrap directly onto the surface of the pudding before covering the container. This prevents a rubbery ‘skin’ from forming on top.
💭 Top Tip for Success
While this recipe only strictly requires three hours of chilling time in the refrigerator to set, my absolute top tip is to make this chocolate cornstarch pudding ahead of time – ideally, the night before you plan to serve it! Trust me, any less than three hours, and you’ll end up with a delicious but soupy chocolate concoction rather than a perfectly set pudding.
Allowing it to chill overnight not only guarantees the best possible firm and creamy consistency, but it also takes immense pressure off you, especially if you’re preparing for a party or a special occasion. This homemade chocolate pudding recipe can be prepped and cooked in 20 minutes or less, but having it fully chilled and ready to go means one less thing to worry about on the day of your event. A little planning goes a long way in ensuring a stress-free and delicious dessert experience!
🙋🏻 Frequently Asked Questions About Cornstarch Pudding
Curious about the science behind your perfect pudding? Here are some common questions answered:
In homemade puddings, especially those not relying on boxed mixes, cornstarch acts as the primary thickening agent. When heated in a liquid, the starch granules absorb water and swell, a process known as gelatinization. This creates a viscous, gel-like structure that gives your pudding its characteristic thick, velvety, and smooth consistency. Without cornstarch, your pudding would remain a thin, liquid chocolate milk.
While flour can also act as a thickener, it’s generally not recommended for puddings where a truly smooth and glossy finish is desired. Flour tends to give a more opaque, slightly less refined texture and can sometimes leave a floury taste if not cooked long enough. If you absolutely need to substitute flour for cornstarch in a pudding recipe, you would typically use a 2:1 ratio: two tablespoons of all-purpose flour for every one tablespoon of cornstarch. However, expect a slightly different texture.
Yes, cornstarch pudding thickens in two main stages. First, it thickens significantly while you’re cooking it over medium heat on the stovetop, as the cornstarch gelatinizes. The second, and crucial, stage of thickening and setting occurs during the chilling process in the refrigerator. As the pudding cools, the starch molecules form a stronger gel network, resulting in a firm yet creamy texture. If your chocolate pudding still appears more like chocolate soup after the initial cooking, it might need a bit more time on the stove, stirring constantly, until it reaches a visibly thicker consistency before chilling. Patience during chilling is key!
The best way to thicken pudding with cornstarch and avoid lumps is by first creating a “slurry.” This involves mixing the cornstarch with a small amount of cold liquid (like milk or water, as specified in the recipe) until it forms a smooth, lump-free paste. Once your main liquid ingredients are hot and simmering, you slowly whisk in this cornstarch slurry. The cold liquid in the slurry prevents the cornstarch from clumping when it hits the hot mixture, allowing it to dissolve and thicken smoothly as it comes back to a boil. This method ensures that delightful, consistent texture we all love in a good pudding.
More Delicious Recipes for You to Explore
If you loved this easy chocolate pudding, be sure to check out some of our other delightful recipes:
- Baking Basics for Christmas Cookies
- Irresistible Chocolate Dipped Butter Cookies
- Divine Leftover Egg Yolk Cookies
- Authentic Best Homemade Sacher Torte
- No Bake Mint Chocolate Cheesecake
If you try this incredible chocolate cornstarch pudding recipe, please let me know how much you enjoyed it by leaving a ★★★★★ star rating and a comment below. Your feedback is truly awesome and helps others discover these great flavors! You can also sign up for our Newsletter or follow me on Pinterest or Instagram and share your delightful creation with me. Just tag me @combinegoodflavors and use the hashtag #combinegoodflavors, so I don’t miss it!
📖 Recipe
Easy Chocolate Cornstarch Pudding
Nora
Save RecipeSaved!
Pin Recipe
Equipment
-
Saucepan small
-
Whisk
-
Small bowl
-
Tablespoon
-
Mixing bowl with a lid
-
Electric hand mixer
-
Piping bag with a star tip
-
Glass bowl for serving or small dipping bowls
Ingredients
- ½ Cup Milk chocolate couverture high quality
- 1 ¼ Cups Whole milk
- 1 ¼ tablespoon Granulated Sugar
- 1 ¾ tablespoon Cornstarch
- ½ Cup Heavy cream
Instructions
-
In a small bowl, mix 1 ¾ tablespoon Cornstarch with a tablespoon of milk until completely smooth and lump-free.1 ¾ tablespoon Cornstarch
-
In a medium saucepan, combine ½ Cup Milk chocolate couverture, 1 ¼ Cups Whole milk, and 1 ¼ tablespoon Granulated Sugar. Bring the mixture to a gentle boil over medium heat, stirring frequently to melt the chocolate and prevent scorching.½ Cup Milk chocolate couverture, 1 ¼ Cups Whole milk, 1 ¼ tablespoon Granulated Sugar
-
Once gently boiling, slowly whisk in the prepared cornstarch slurry, stirring constantly. Continue to whisk and bring the mixture to a full boil again for one minute to ensure it thickens properly.
-
Remove the pan from the heat immediately. Pour your hot pudding into a clean bowl with a lid. To prevent a skin from forming, you can press plastic wrap directly onto the surface of the pudding before covering.
-
Allow the pudding to cool completely in the refrigerator for at least three hours, or ideally, overnight for the best set consistency.
-
After the pudding has thoroughly chilled, whip ½ Cup Heavy cream with an electric hand mixer until stiff peaks form.½ Cup Heavy cream
-
Gently fold the cold, set chocolate cornstarch pudding with the freshly whipped cream until just combined.
-
For an elegant touch, fill the pudding mixture into a pastry bag with a star tip and pipe it into individual serving bowls or dipping bowls. This technique creates a beautiful shape, perfect for presentation.
-
Serve chilled. It’s perfect for dipping with fresh fruit or cookies, or enjoyed with a spoon from a glass bowl, decorated with small pieces of cookies or chocolate shavings.
Nutrition values are estimates only, using online calculators. Please verify using your own data.

🤎 You Might Also Like These Sweet Treats
- Peach Moscow Mule with Homemade Peach Purée
- Peach Purée for Bellini (and More!)
- Bourbon Highball
- Can You Mix Chambord and Coke?
⛑️ Food Safety Guidelines
Always prioritize food safety when preparing any recipe. Following these guidelines will help ensure your delicious chocolate cornstarch pudding is safe to enjoy:
- Minimum Cooking Temperature: Ensure that food is cooked to a minimum internal temperature of 165 °F (74 °C) where applicable. For puddings, bringing the mixture to a full boil helps ensure proper thickening and eliminates potential bacteria.
- Prevent Cross-Contamination: Do not use the same utensils on cooked food that previously touched raw meat or unwashed ingredients.
- Hand Washing: Always wash hands thoroughly with soap and warm water before and after handling food, especially after touching raw ingredients.
- Temperature Control: Avoid leaving perishable food, such as milk-based puddings, sitting out at room temperature for extended periods. Promptly refrigerate leftovers.
- Supervise Cooking: Never leave cooking food unattended, especially when heating liquids to a boil, as they can boil over or scorch quickly.
- Cooking Oils: If you were to sauté anything (not in this recipe, but generally), use oils with high smoking points to avoid producing harmful compounds.
- Ventilation: Always ensure good ventilation when using a gas stove to prevent the buildup of fumes.
For further comprehensive information on safe food handling practices, please refer to the official guidelines from the FDA (Food and Drug Administration).
