5-Ingredient Raspberry Cheesecake Thumbprint Cookies: Your New Go-To Easy Dessert
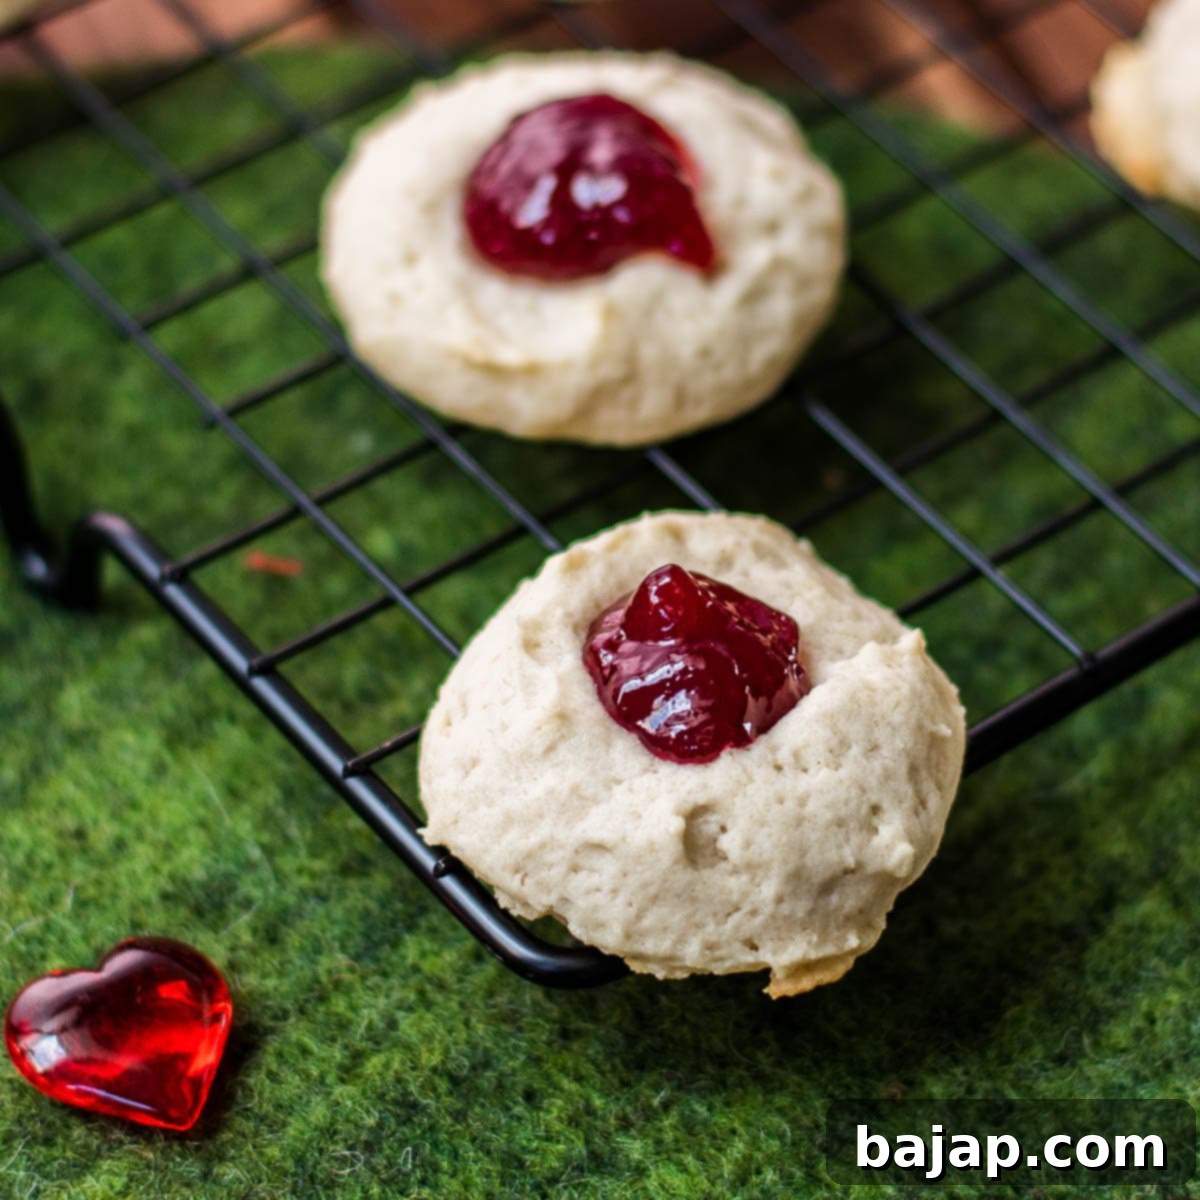
Get ready to bake a batch of truly scrumptious cookies that are unbelievably simple to make! These raspberry cheesecake thumbprint cookies require just five core ingredients and about ten minutes of active preparation time. Before you know it, you’ll be enjoying these delightful, bite-sized treats that perfectly blend a tender, buttery dough with a sweet, tangy raspberry filling. They’re ideal for last-minute cravings, casual gatherings, or simply when you want a quick and impressive homemade dessert without all the fuss.

What makes these cookies truly special, beyond their ease, is the exquisite cookie dough itself. It possesses a delicate sweetness and a wonderfully tender texture that many liken to a brioche bun. This rich, slightly sweet base creates the perfect counterpoint to a vibrant, fruity jam. While raspberry jam is a classic choice and undeniably delicious, the beauty of this recipe lies in its adaptability. You’re not limited to just raspberry!
Feel free to get creative with your fillings! If raspberry isn’t quite your “jam,” consider trying a sweet strawberry preserve, a bright and zesty apricot jam, or even a tangy lemon or cherry curd for a different flavor profile. For those who prefer an even sweeter indulgence, a dollop of melted chocolate or a swirl of luscious caramel can transform these into an entirely new delight. The “thumbprint” indentation is your canvas for endless sweet possibilities!
This recipe is also a fantastic way to utilize leftover cream cheese from other baking projects, like when you’ve made a delectable no-bake cheesecake. It’s a smart and delicious way to ensure nothing goes to waste in your kitchen, turning forgotten ingredients into a fresh, satisfying treat.
🥘 Simple Ingredients for Stellar Cookies
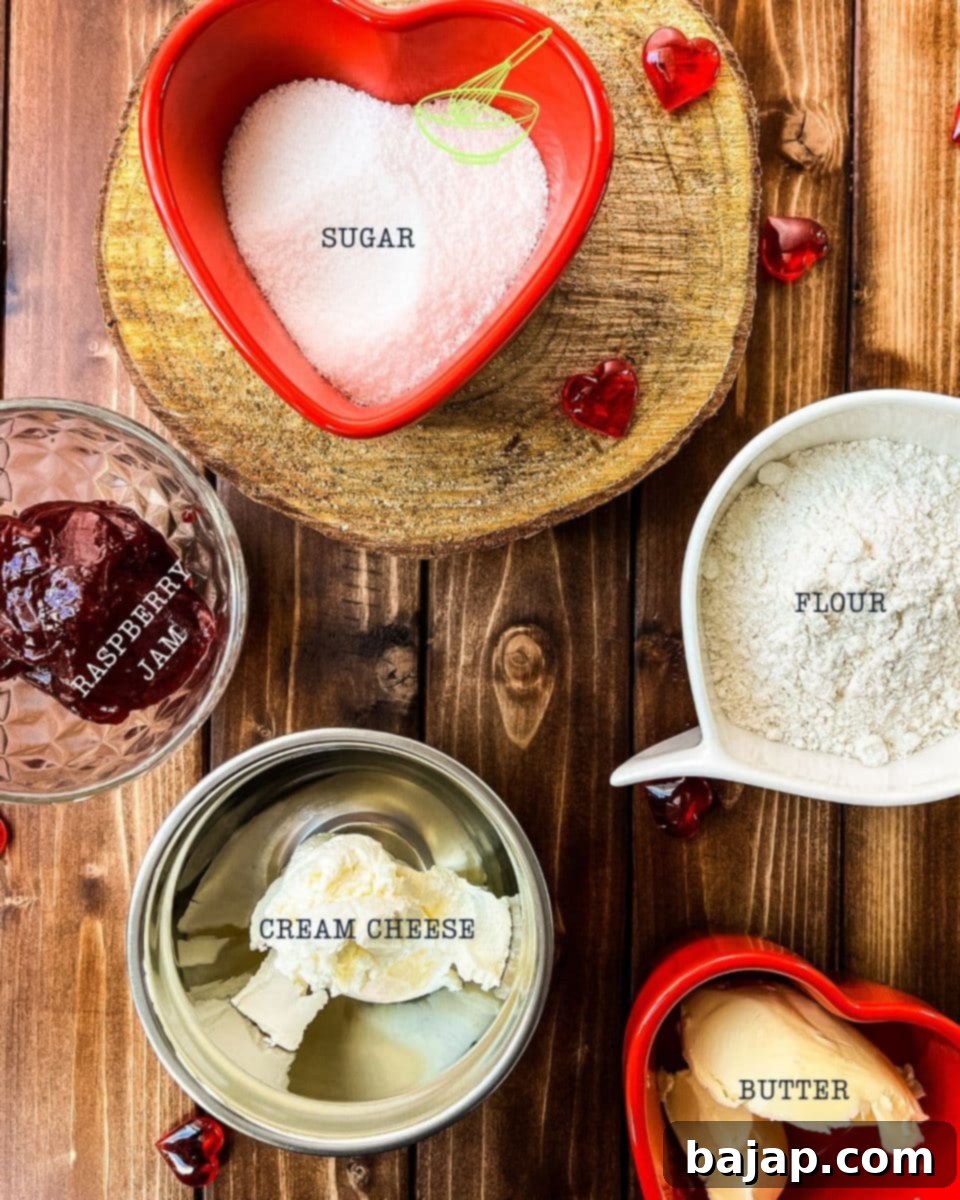
Creating these delightful thumbprint cookies is surprisingly easy, thanks to a short and sweet ingredient list. Each component plays a vital role in achieving that perfect texture and flavor. Here’s what you’ll need:
- Unsalted Butter: Make sure it’s softened to room temperature. This is crucial for achieving a smooth, well-incorporated dough. Unsalted butter gives you control over the overall saltiness of your cookies.
- Granulated Sugar: Provides the perfect level of sweetness, complementing the richness of the cream cheese and the tang of the jam.
- Cream Cheese: The star ingredient that gives these cookies their signature cheesecake-like richness and incredibly tender crumb. Like the butter, ensure it’s at room temperature for optimal mixing.
- Cake Flour: This type of flour has a lower protein content than all-purpose flour, resulting in a much more tender and delicate cookie. It’s key to the melt-in-your-mouth texture.
- Raspberry Jam: Offers a burst of fruity, tangy flavor that beautifully contrasts with the sweet cookie dough. Choose a high-quality jam for the best results.
For the exact quantities and detailed measurements, please refer to the recipe card below. Precision is key in baking, but with only five ingredients, it’s hard to go wrong!
🔪 Step-by-Step Instructions for Perfect Thumbprint Cookies
Making these gorgeous raspberry cheesecake thumbprint cookies is a straightforward process. Follow these simple steps for a truly rewarding baking experience:
Step 1: Cream the Wet Ingredients. Begin by gathering your unsalted butter, cream cheese, and granulated sugar. It’s absolutely essential that both your butter and cream cheese are softened to room temperature. This ensures they blend smoothly and evenly, preventing a lumpy dough and promoting a consistent texture in your final cookies. Use a hand mixer (or a stand mixer fitted with the paddle attachment) to combine these ingredients on medium speed for about 2-3 minutes. You want the mixture to be light, fluffy, and well-creamed.
Step 2: Incorporate the Flour. Once your wet ingredients are perfectly creamed, gradually add the cake flour. Continue mixing on medium speed, adding the flour spoonful by spoonful. This slow addition helps prevent the flour from flying everywhere and ensures it’s properly incorporated. As the dough comes together, it might become quite thick. If your mixer struggles or the dough becomes too tough to mix effectively, don’t hesitate to switch to kneading by hand. The key here is to mix or knead *just until* the flour is evenly incorporated and no streaks remain. Overmixing can develop the gluten in the flour, leading to tough cookies, so stop as soon as it’s combined.
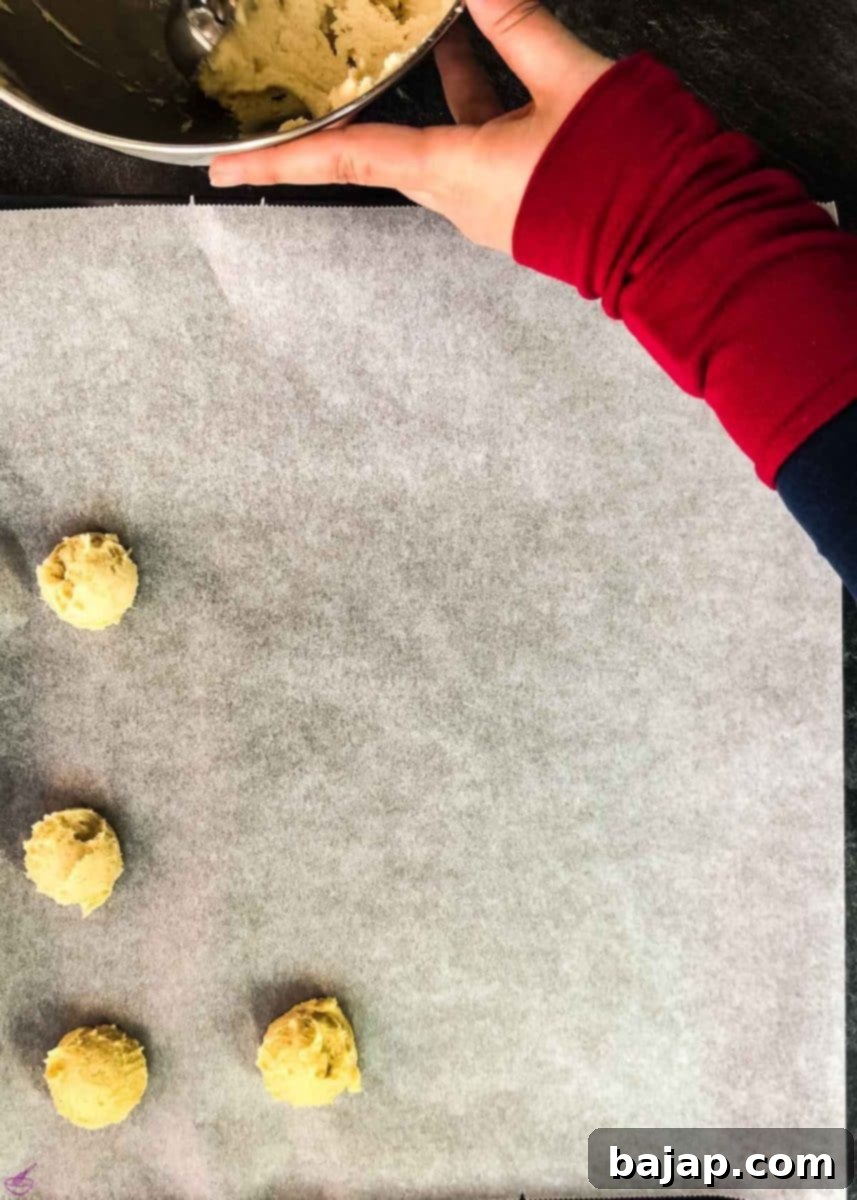
Step 3: Portion the Dough. Prepare a baking sheet by lining it with parchment paper or a silicone mat. This prevents sticking and makes cleanup a breeze. To achieve uniformly sized cookies, which helps them bake evenly, I highly recommend using an ice cream scoop (a 1.5-2 tablespoon scoop works well). Scoop out portions of dough and arrange them on your prepared baking sheet, leaving approximately 2 cm (or 1 inch) of space between each cookie. This prevents overcrowding and allows air to circulate, ensuring each cookie bakes perfectly golden.
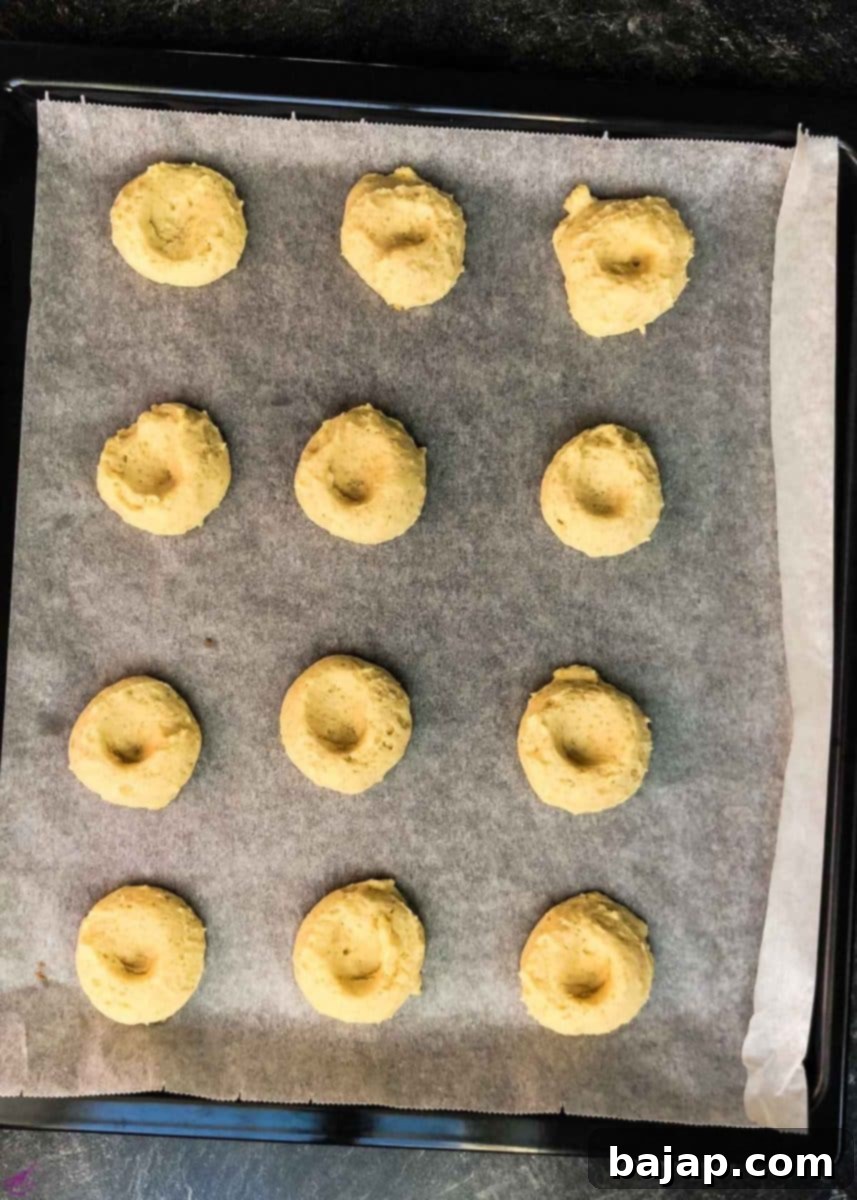
Step 4: Create the Thumbprints. Now for the signature step! Using your thumb (or the back of a small measuring spoon), gently press an indentation into the center of each cookie dough ball. Be careful not to press all the way through to the baking sheet. This creates a little “nest” for your delicious jam filling later. If the edges of your indentations crack, simply smooth them out with your fingers.

Step 5: Bake to Golden Perfection. Preheat your oven to 180°C (356°F). Bake the thumbprint cookies for approximately 15 minutes, or until their edges begin to turn a delicate golden brown. The centers should still be soft, but set. Avoid overbaking, as this can make the cookies dry. Once baked, remove them from the oven and let them cool on the baking sheet for a few minutes before carefully transferring them to a wire rack to cool completely. Cooling is important before filling to prevent the jam from sinking or making the cookies soggy.
Step 6: Fill with Raspberry Jam. Once the cookies have cooled down sufficiently on a wire rack, it’s time for the delicious filling! Spoon about ½ teaspoon of raspberry jam into each indent. For a cleaner and more professional look, you can also use a piping bag with a small round tip to fill the centers. The tartness of the raspberry jam beautifully complements the tender, slightly sweet, brioche-like cookie dough, creating a harmonious and utterly addictive treat.
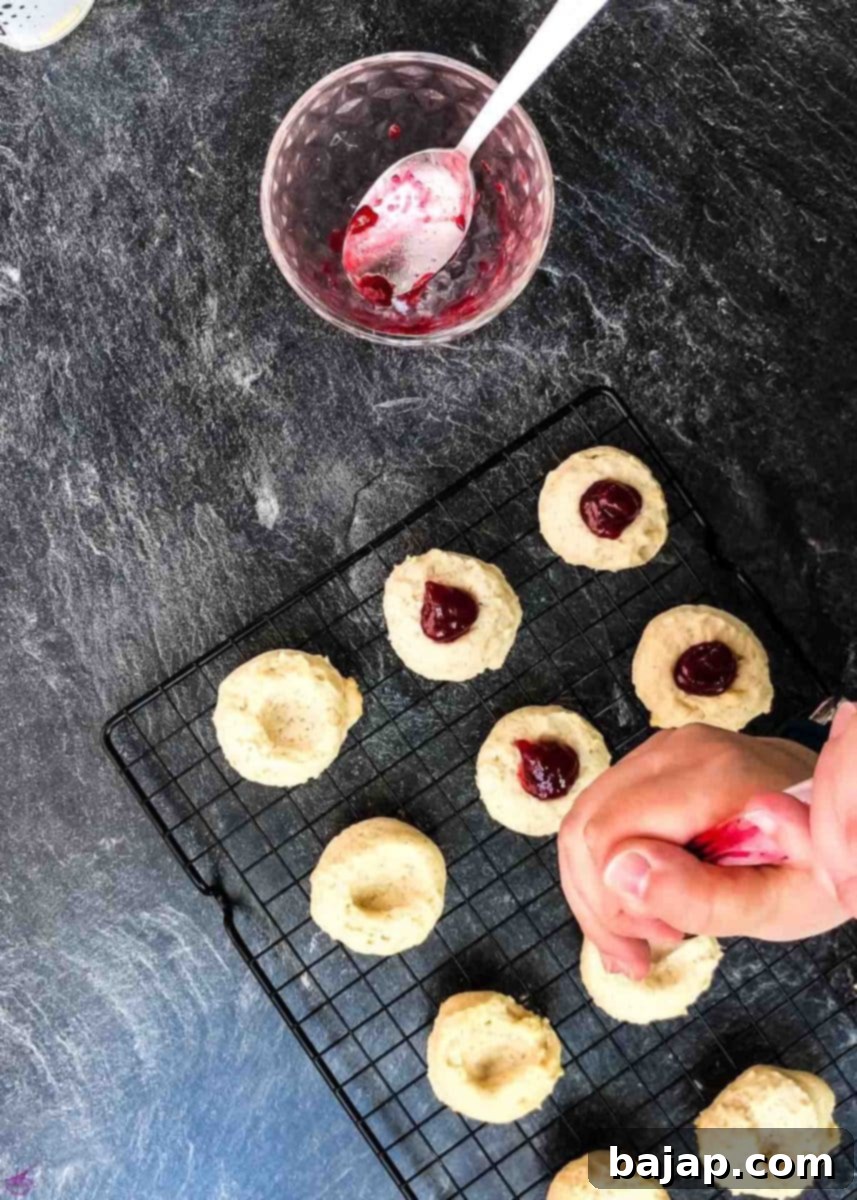
This cookie dough is truly a standout – subtly sweet, with a richness reminiscent of brioche, making it the perfect partner for a generous dollop of fruit jam. The cream cheese adds an incredible tenderness and a slight tang that elevates the entire experience.

If you’re a fan of cookies generously filled with delicious jam, you might also love exploring other traditional treats like these wonderful Hamantaschen cookies!
🥜 Creative Substitutions for Your Thumbprint Cookies
One of the best features of this thumbprint cheesecake cookie recipe is its incredible flexibility. While raspberry jam is a classic, don’t hesitate to experiment with other flavors if you’re looking for something different or simply want to use what you have on hand. These cookies are wonderfully versatile!
For a different fruity twist, try substituting raspberry jam with:
- Strawberry Jam: A timeless favorite that offers a sweet and slightly tart flavor.
- Apricot Jam: Provides a delicate sweetness with a hint of tartness, creating a sophisticated cookie.
- Lemon Curd: If you crave a more vibrant and tangy flavor, lemon curd delivers a delightful citrusy punch.
- Cherry Curd: Offers a rich, sweet, and slightly tart cherry flavor that pairs beautifully with the creamy cookie base.
- Blueberry or Peach Preserves: Seasonal options that add a burst of fresh fruit flavor.
And the fun doesn’t stop at jams and curds! If you’re in the mood for an even sweeter, more decadent treat, the thumbprint impression can be filled with virtually anything sweet:
- Melted Chocolate: A simple drizzle of melted dark, milk, or white chocolate adds a rich dimension.
- Caramel Sauce: A gooey, buttery caramel filling turns these into a truly indulgent dessert.
- Nutella or other Chocolate Hazelnut Spreads: For a rich, nutty, chocolatey flavor that’s always a hit.
- Peanut Butter: A small dollop of creamy peanut butter before baking can create a delightful sweet and savory combination.
The possibilities are truly endless, making these cookies a joy to customize for any occasion or palate!
🍑 Exciting Variations to Try
Beyond simply changing the filling, you can also adapt the cookie base itself to suit different dietary needs or preferences. These minor tweaks can open up a whole new world of delicious thumbprint cookie experiences:
- Vegan Delight: To make these thumbprint cookies entirely vegan, simply swap out the dairy butter for a high-quality vegan butter substitute, coconut butter, or even refined coconut oil. Ensure these alternatives are also at room temperature to achieve the correct dough consistency. Similarly, replace the cream cheese with a vegan cream cheese alternative. Many vegan cream cheeses are cashew-based, and their slightly nutty flavor often pairs exceptionally well with a bright strawberry or blueberry jam.
- Gluten-Free Option: For a gluten-free version, substitute the cake flour with a good quality 1:1 gluten-free baking flour blend. Look for blends that contain xanthan gum, or add about ½ teaspoon per cup of flour to help with binding and texture. The tender nature of these cookies makes them quite adaptable to gluten-free flours, often maintaining a lovely crumb.
- Spiced Dough: Add a pinch of cinnamon, nutmeg, or cardamom to the flour mixture for a warm, spiced cookie dough. These spices complement fruit jams beautifully, especially in the fall or winter months.
- Citrus Zest: Grate a teaspoon of lemon or orange zest into the butter and sugar mixture for a subtle, fragrant citrus note in the cookie dough. This brightens the flavor profile and enhances any fruit filling.
With these variations, you can enjoy these delightful thumbprint cookies in many forms, catering to diverse tastes and dietary requirements.
🍽 Essential Equipment for Baking Success
You don’t need a kitchen full of fancy gadgets to make these delicious thumbprint cookies. A few basic tools will make the process smooth and enjoyable:
- Baking Sheet: A sturdy baking sheet is essential for even baking.
- Hand Mixer / Stand Mixer / Electric Mixer: Crucial for creaming the butter, sugar, and cream cheese until light and fluffy, ensuring a tender dough.
- Mixing Bowl: A medium to large mixing bowl for combining your ingredients.
- Parchment Paper/Silicone Mat: To line your baking sheet, preventing sticking and making cleanup much easier.
- Ice Cream Scoop: While optional, an ice cream scoop helps ensure uniform cookie sizes, which leads to more consistent baking.
- Wire Rack: For cooling your cookies evenly after baking.
Having these simple tools ready will ensure your baking process is efficient and your cookies turn out perfectly.
🌡 Storage Tips for Freshness
Once baked and cooled, these delicious thumbprint cookies can be stored to maintain their freshness for several days. Proper storage ensures you can enjoy them longer:
- Room Temperature: Store your cookies in an airtight container at room temperature for up to three to five days. Make sure they are completely cooled before storing to prevent condensation, which can make them soggy.
- Refrigeration: While not strictly necessary, if your kitchen is particularly warm or if your jam filling is prone to spoilage (like certain homemade custards), you can refrigerate them. Place them in an airtight container and they will last for about a week.
- Freezing for Longer Shelf Life: To extend their shelf life significantly, you can freeze these cookies.
- Baked Cookies: Arrange fully cooled, filled cookies in a single layer on a baking sheet and freeze until solid. Then transfer them to an airtight freezer-safe container or bag. They will keep for up to a month. Thaw at room temperature or in the refrigerator before serving.
- Unbaked Dough: You can also prepare the dough balls and make the thumbprints, then freeze them on a baking sheet until solid. Transfer to a freezer bag and bake from frozen (add a few extra minutes to the baking time). Fill with jam after baking and cooling.
Always ensure your container is truly airtight to prevent the cookies from drying out or absorbing freezer odors.
💭 Top Tip for Perfect Thumbprint Cookies
The key to making these thumbprint cookies well is ensuring your butter and cream cheese are at **perfect room temperature**. If they’re too cold, your dough will be lumpy and hard to mix, leading to tough cookies. If they’re too warm (melted), the dough will be greasy and spread excessively during baking. Aim for soft, pliable ingredients that cream together effortlessly, creating a smooth, cohesive dough that holds its shape and bakes evenly for that melt-in-your-mouth texture.

🙋🏻 Frequently Asked Questions About Thumbprint Cookies
Cracked or crumbling thumbprint cookies often indicate that your dough is too stiff or cold. The best way to prevent this is by ensuring your butter and cream cheese are truly at room temperature before you start mixing. If your dough has been refrigerated, let it sit out for at least 15-30 minutes before shaping. Gentle handling when making the thumbprint indentation also helps; if you see small cracks, simply smooth them over with your fingers.
These popular cookies are known by various names across different cultures. In Sweden, they are famously called Hallongrottor, which literally translates to “raspberry caves.” This name beautifully describes their appearance, with the jam-filled indentation resembling a tiny cave.
If your thumbprint cookies spread out or flatten excessively on the baking sheet, it’s typically due to the butter (or cream cheese) not being at the correct temperature. Using cold butter will result in a crumbly dough that doesn’t bind well, while butter that is too soft or melted will cause the dough to spread rapidly in the oven. Always use softened, but still firm, room-temperature butter and cream cheese for the ideal dough consistency.
The name “thumbprint cookies” comes from the distinctive indentation you make in the center of each cookie dough ball, traditionally using your thumb. This depression creates a perfect little well designed to hold a variety of delicious fillings, most commonly jams, custards, or melted chocolate.
Crumbly cookies often result from a dough that is too cold or has been overmixed. If you chilled your dough before baking, ensure you allow it sufficient time (at least 15-20 minutes) to come to room temperature before shaping and baking. Overmixing can also lead to a dry, crumbly texture by over-developing the gluten and not allowing enough fat to tenderize the dough. Mix only until ingredients are just combined.
Other Delicious Cookie Recipes for You to Try
If you’ve enjoyed baking these simple yet elegant thumbprint cookies, you’ll surely love exploring more delightful cookie recipes from our collection. Expand your baking repertoire with these other favorites:
- Austrian Coconut “Busserl” Cookies
- Zesty Lemon White Chocolate Chip Cookies
- Divine Leftover Egg Yolk Cookies
- How To Make Delicious Linzer Cookies With Egg Liqueur
- How To Bake Delicious Walnut Meringue Cookies
We hope you thoroughly enjoy making and sharing these incredible Raspberry Cheesecake Thumbprint Cookies! If you whip up a batch, please let us know how much you loved them by giving them a ★★★★★ star rating and leaving a comment below. Your feedback is truly appreciated! Don’t forget to sign up for our Newsletter to receive weekly delicious homemade recipes directly in your inbox. You can also follow us on Pinterest or Instagram and share your beautiful creations with us. Just tag us @combinegoodflavors and use the hashtag #combinegoodflavors so we don’t miss them!
📖 Recipe Card: Raspberry Cheesecake Thumbprint Cookies

5 Ingredients Raspberry Cheesecake Thumbprint Cookies
Nora
Save RecipeSaved!
Pin Recipe
Equipment
-
Baking pan
-
Hand mixer or stand mixer
-
Bowl
-
Parchment Paper or silicone mat
-
Ice cream scoop
Ingredients
- ¼ cup Butter unsalted, softened, at room temperature
- ½ cup Granulated sugar
- ½ cup Cream cheese
- 1 cup Cake Flour
- ½ cup Raspberry jam
Instructions
-
Using a hand mixer, combine the ¼ cup Butter, ½ cup Cream cheese, and ½ cup Granulated sugar for 2-3 minutes, starting at medium speed and gradually going to high speed. Ensure ingredients are at room temperature for optimal creaminess.¼ cup Butter, ½ cup Granulated sugar, ½ cup Cream cheese
-
Continue mixing while adding 1 cup Cake Flour spoon by spoon. If the dough becomes too thick for your mixer, knead the remaining flour in by hand. Stop mixing as soon as the flour is just evenly incorporated into the dough to avoid toughness.1 cup Cake Flour
-
Using an ice cream scoop (for consistent size), portion the cookie dough onto a baking pan lined with parchment paper, ensuring about 1 inch (2 cm) of space between each cookie.
-
Gently press your thumb into the middle of each dough ball to create an indent, preparing it for the delicious raspberry jam filling.
-
Bake the cookies in a preheated oven at 180°C (356°F) for approximately 15 minutes, or until the edges begin to turn a light golden brown.
-
Once baked, allow the cookies to cool completely on a wire rack. Then, fill each small indent with about ½ teaspoon of ½ cup Raspberry jam. A piping bag can be used for a neater finish if desired.½ cup Raspberry jam
Nutrition values are estimates only, using online calculators. Please verify using your own data.

🤎 You Might Also Enjoy These Cookie Creations
- Easy Cut-Out Sugar Cookies {no chill}
- Matcha White Chocolate Chip Cookies
- Chocolate Chip Cookies with Chestnut Flour
- Sour Cream Cookies with Pearl Sugar
⛑️ Important Food Safety Guidelines
Ensuring food safety is paramount when preparing any recipe. Please keep these general guidelines in mind for a safe and enjoyable baking experience:
- Maintain Cleanliness: Always wash your hands thoroughly with soap and warm water before and after handling food, especially raw ingredients.
- Prevent Cross-Contamination: Use separate cutting boards and utensils for raw ingredients (like any raw meat in other recipes, though not applicable here) and cooked food to prevent the transfer of harmful bacteria.
- Temperature Control: Do not leave perishable foods sitting out at room temperature for extended periods. When baking, ensure ingredients like butter and cream cheese are at room temperature as specified in the recipe, but avoid leaving them out for hours.
- Monitor Baking: Always keep an eye on food while it’s baking to prevent burning or uneven cooking.
- Proper Ventilation: Ensure good ventilation in your kitchen, especially when using a gas stove, to prevent the buildup of fumes.
For further comprehensive information on safe food handling practices, please consult the Safe Food Handling guide from the FDA.
