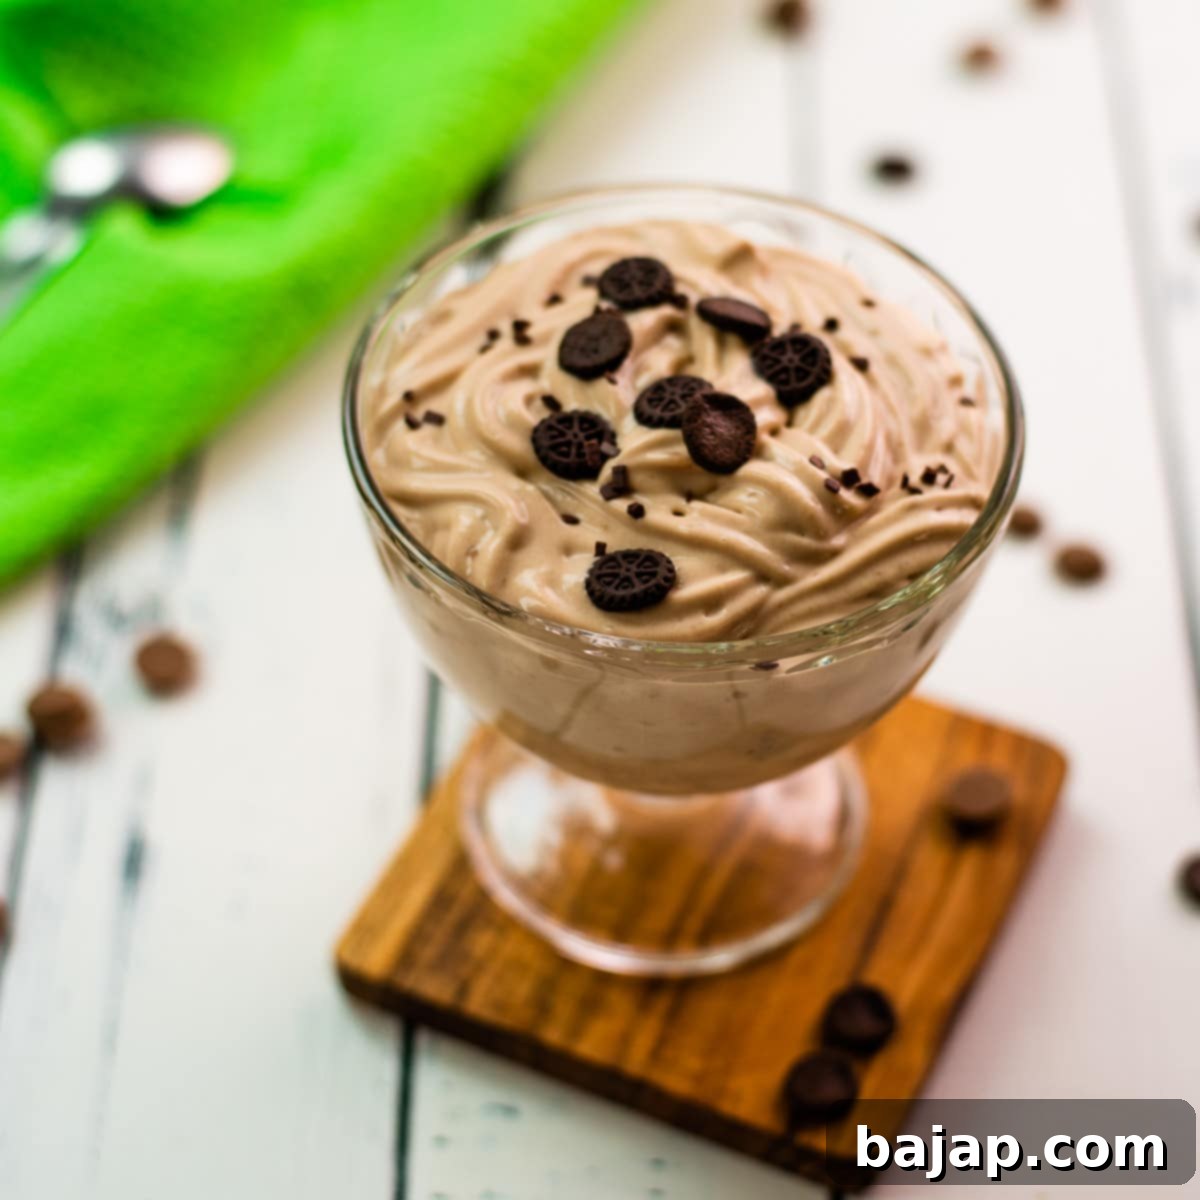
Velvety Smooth 5-Ingredient Chocolate Cornstarch Pudding: Your Ultimate Easy Dessert Guide
Prepare your taste buds for an absolute treat that will have you falling in love at first spoonful! For all chocolate enthusiasts out there, this incredibly simple yet utterly delicious chocolate cornstarch pudding is about to become your new favorite dessert. What makes it so irresistible? It requires only five basic ingredients and minimal hands-on time, making the most challenging part simply waiting for it to chill to perfection.
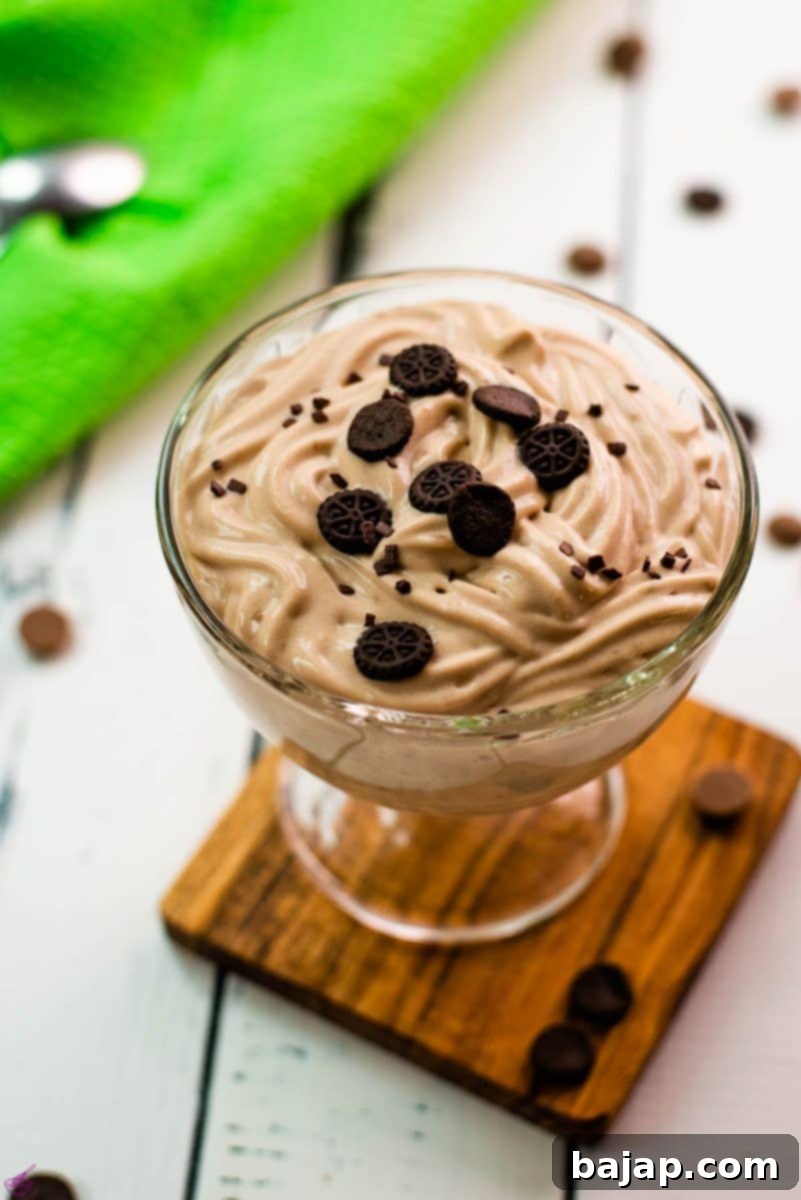
While the anticipation might be tough, we promise it’s well worth the wait. This luscious dessert is a fantastic cool-down treat for a warm summer day, yet its comforting creaminess ensures you’ll crave it even in the depths of winter. Its versatility knows no bounds; enjoy it as a standalone dessert, or elevate your party spread by serving it as a decadent dip for fresh fruit and an assortment of cookies. Let’s dive into how you can create this masterpiece in your own kitchen!
Why This 5-Ingredient Chocolate Pudding Recipe Works
You might wonder what makes this particular chocolate cornstarch pudding stand out. The secret lies in its elegant simplicity and the harmonious balance of its few, high-quality ingredients. Unlike more complex recipes, this pudding focuses on maximizing flavor and texture with minimal effort. Cornstarch acts as a superb thickening agent, delivering that signature smooth, jiggly consistency without the need for eggs or gelatin, making it a truly fuss-free option.
Furthermore, using milk chocolate couverture ensures a rich, authentic chocolate flavor that melts beautifully into the creamy base. This recipe is designed to be approachable for beginner cooks but also satisfying for seasoned dessert makers looking for a quick and reliable sweet fix. It’s a classic for a reason, and this version perfects the art of simplicity.
Understanding Cornstarch Pudding
Before we jump into the steps, let’s briefly talk about cornstarch pudding. At its heart, it’s a creamy dessert thickened with cornstarch. This humble ingredient is a gluten-free starch derived from corn, and it’s a fantastic thickener because it creates a clear, glossy, and stable texture when heated with liquid. This is distinct from puddings thickened with flour (which can sometimes taste starchy or have a cloudier appearance) or eggs (which result in a custard-like texture and require more careful temperature control).
The magic of cornstarch is in its ability to swell and trap water molecules, creating a thick, smooth consistency. When done right, a cornstarch pudding is wonderfully silky and holds its shape beautifully once chilled. It’s a testament to how simple ingredients can create extraordinary results.
🥘 The 5 Magical Ingredients for Perfect Chocolate Pudding
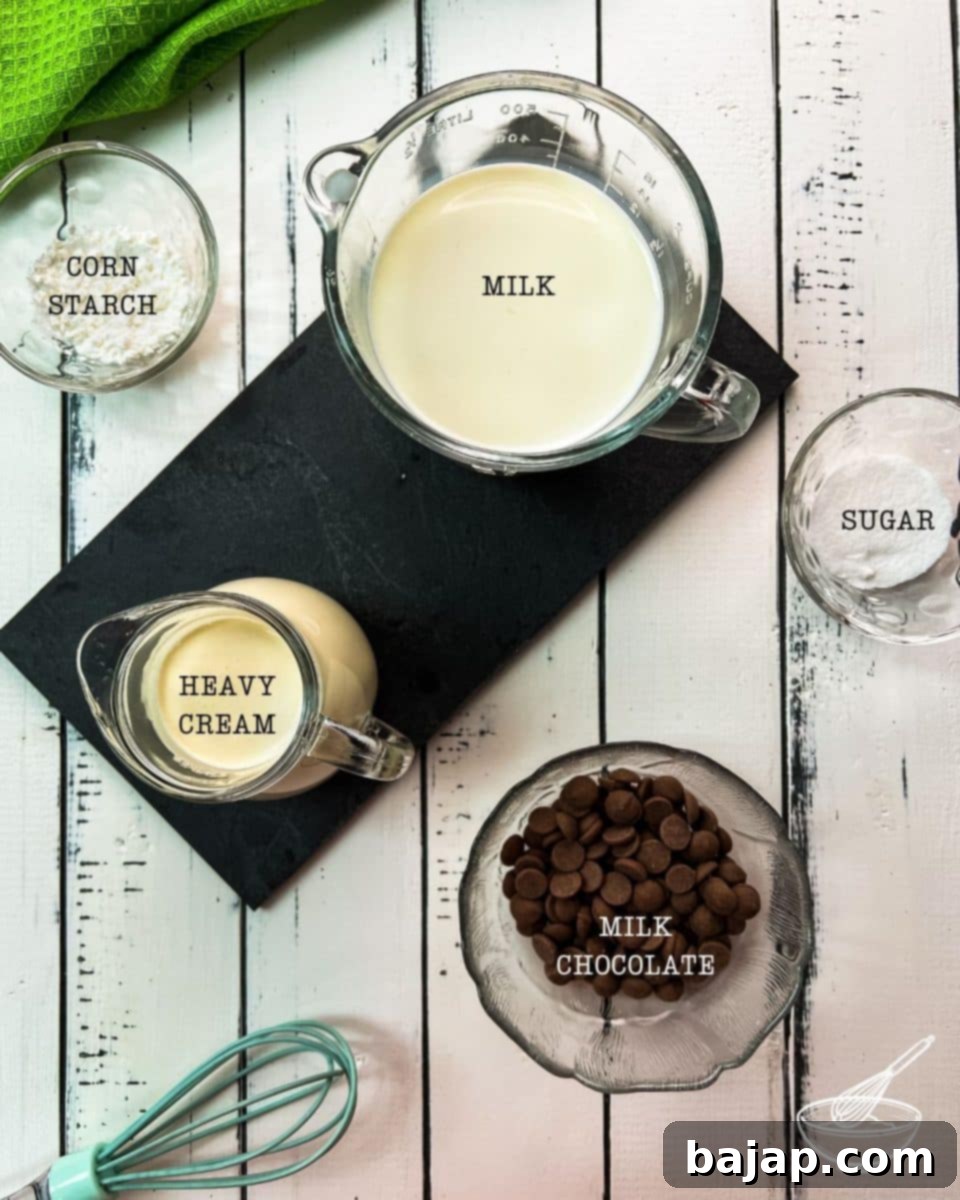
The beauty of this chocolate cornstarch pudding lies in its minimal ingredient list. Each component plays a crucial role in achieving the desired flavor and creamy texture. Here’s a closer look at what you’ll need and why:
- Milk Chocolate Couverture (High Quality): This is the star of the show. Couverture chocolate has a higher cocoa butter content, which gives it a smoother melt and a richer, more luxurious flavor compared to regular baking chocolate chips. Opting for high-quality milk chocolate will truly elevate your pudding, delivering a creamy, sweet, and deeply satisfying chocolate taste.
- Whole Milk: The base of our pudding. Whole milk provides essential fat content, contributing to the rich, creamy texture and full-bodied mouthfeel that is characteristic of a good pudding. While you could use lower-fat milk, the richness might be slightly compromised.
- Granulated Sugar: For sweetness, of course! This balances the bitterness of the chocolate and enhances the overall dessert experience. The amount can be adjusted slightly to your personal preference, but the recipe provides a great starting point for a perfectly sweet treat.
- Cornstarch: The thickening agent. As discussed, cornstarch is crucial for achieving that signature velvety, spoonable consistency. It ensures your pudding sets properly without any lumps, giving it a professional finish.
- Heavy Cream: This is primarily for the decadent topping, transforming the pudding into an even more indulgent dessert. Whipped to stiff peaks, it adds a light, airy contrast to the dense chocolate pudding. It can also be incorporated into the pudding itself for an ultra-rich base if desired.
For precise quantities and measurements, please refer to the detailed recipe card below.
🔪 Step-by-Step Instructions for Perfect Chocolate Pudding
Crafting this delightful chocolate cornstarch pudding is a straightforward process. Follow these detailed steps to ensure a perfectly smooth and luscious dessert every time:
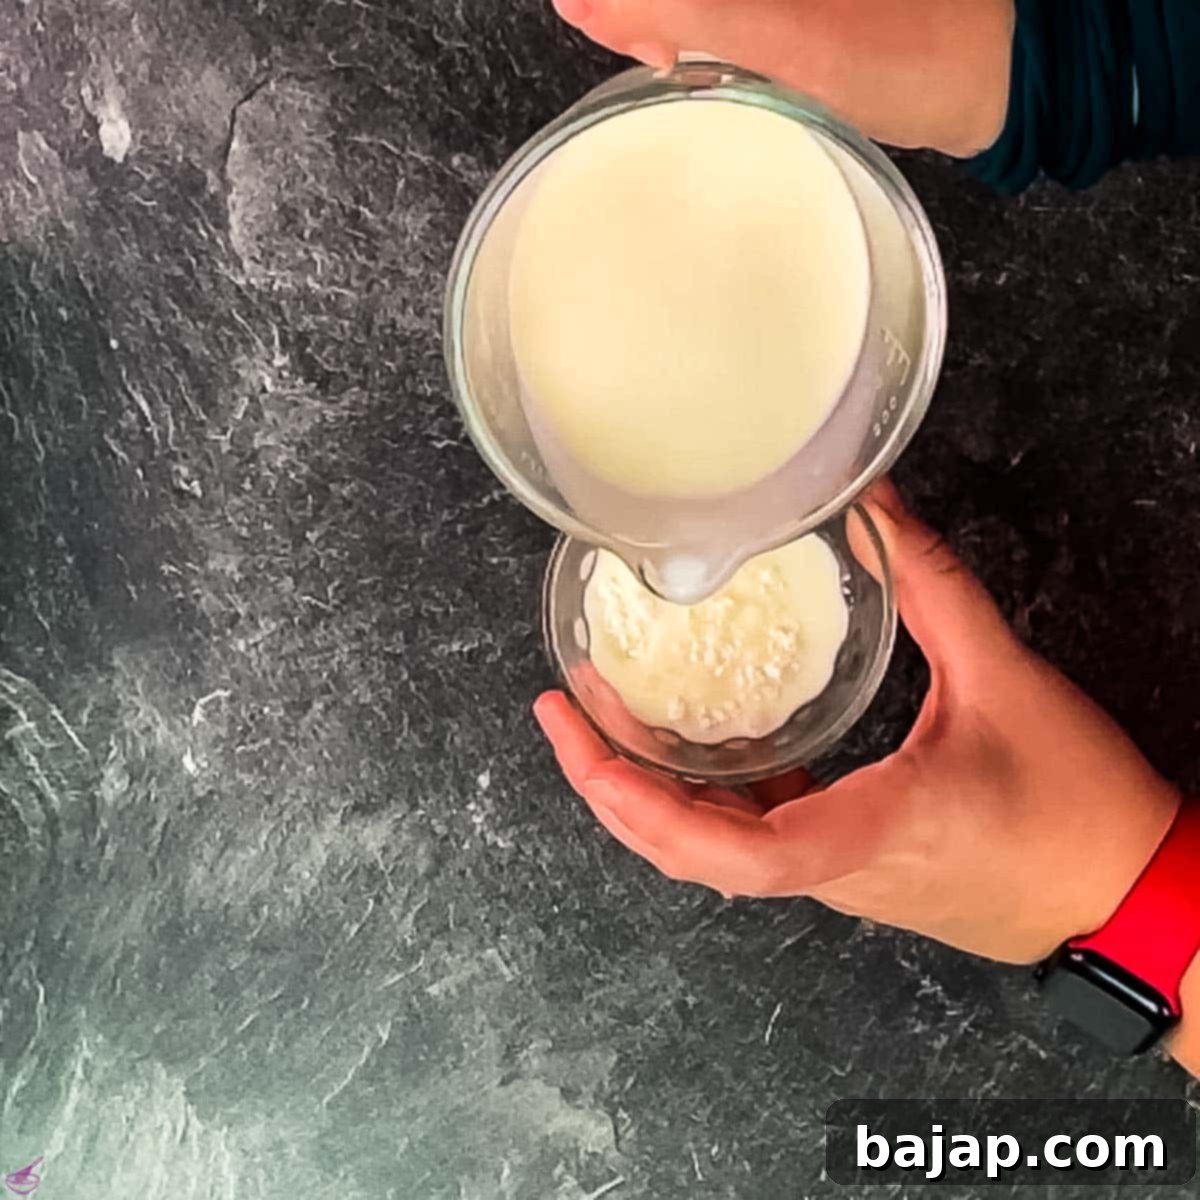
1. Prepare the Cornstarch Slurry
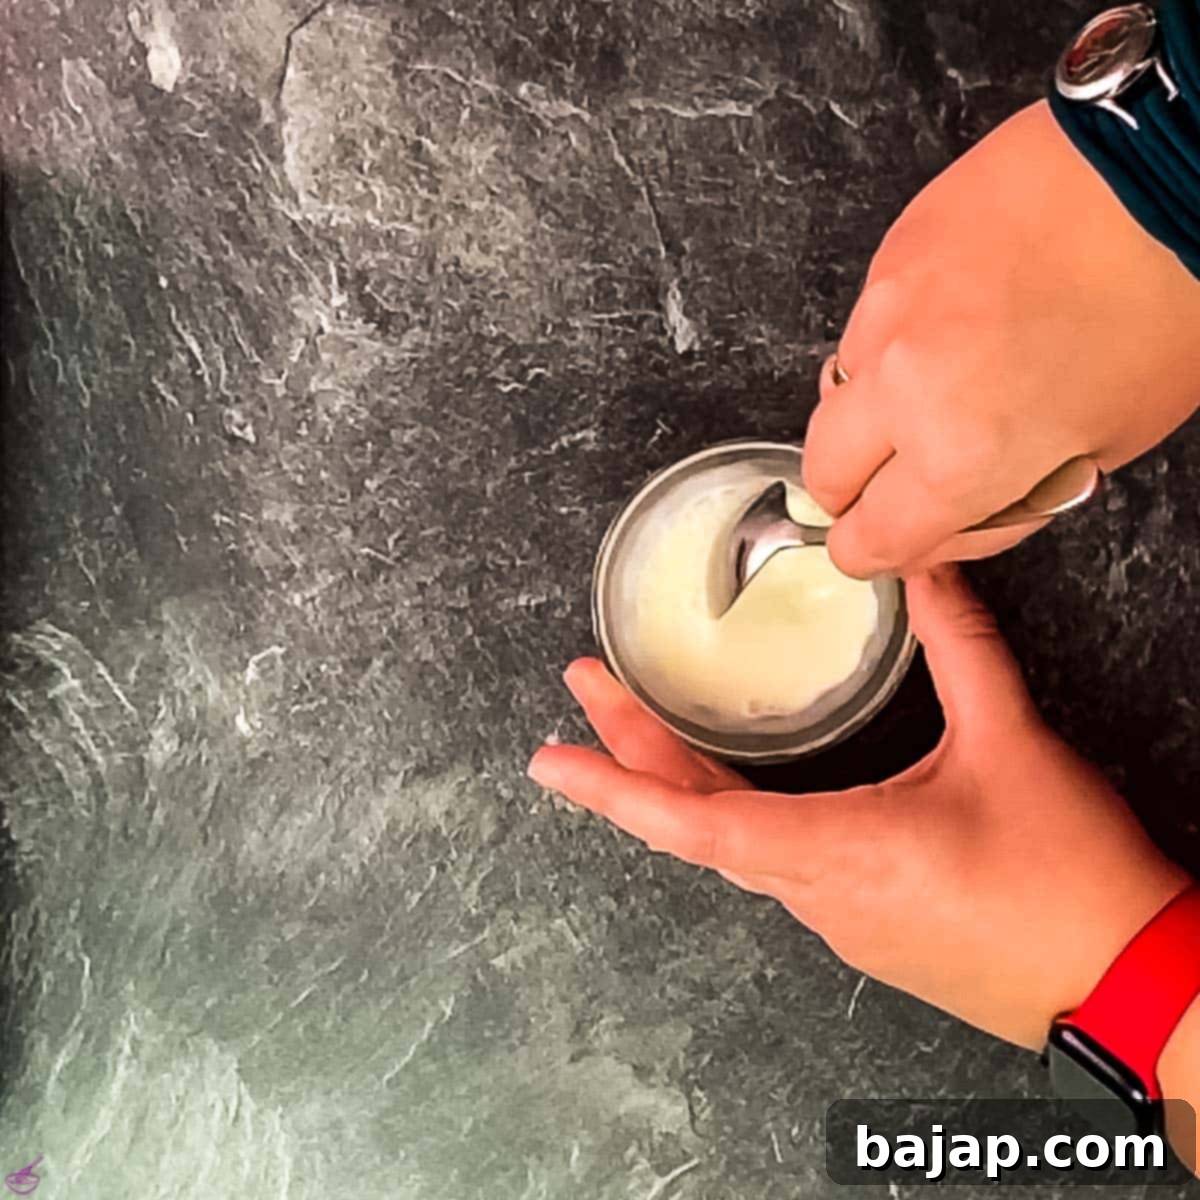
The first crucial step is to create a cornstarch slurry. In a small bowl, mix your cornstarch with just a tablespoon or two of cold milk (taken from the total amount in the recipe). Whisk thoroughly until the cornstarch is completely dissolved and there are absolutely no clumps. This step is vital because adding dry cornstarch directly to hot liquid can cause it to clump irreversibly, leading to a lumpy pudding. A smooth slurry ensures even thickening.
2. Combine and Heat the Main Ingredients
Next, in a medium-sized saucepan, combine the chopped milk chocolate couverture, the remaining whole milk, and the granulated sugar. Place the saucepan over medium heat. Stir the mixture continuously with a whisk as it heats up to ensure the chocolate melts evenly and the sugar dissolves completely without scorching the bottom. Bring this mixture to a gentle boil, just until you see small bubbles forming around the edges.
3. Thicken the Pudding
Once the chocolate mixture is gently boiling, it’s time to add your cornstarch slurry. Pour the slurry into the saucepan while continuously whisking vigorously. This rapid stirring is key to preventing lumps and ensuring the cornstarch distributes evenly. Continue whisking and bring the mixture back to a boil. You’ll notice the pudding thickening considerably as it reaches this second boil. Let it boil for about 1 minute while stirring to ensure the cornstarch is fully cooked and activated for maximum thickening power.
4. Chill for Perfection
Immediately remove the pan from the heat. Pour your hot, thickened chocolate pudding into a large bowl. For best results, cover the surface of the pudding directly with plastic wrap to prevent a “skin” from forming as it cools. Place the bowl in the refrigerator to chill for at least three hours. While three hours will get it set, for the most luxurious, firm texture and deepest flavor, I highly recommend letting your pudding chill overnight. This extended cooling period truly allows the flavors to meld and the pudding to set completely.
5. Prepare and Combine Whipped Cream Topping
After your pudding has sufficiently chilled (and preferably overnight), it’s time to prepare the topping. Pour the heavy cream into a clean, cold mixing bowl. Using an electric hand mixer, whip the cream on medium-high speed until it forms stiff peaks. You’ll know it’s ready when the cream holds its shape firmly when you lift the beaters. Gently fold the freshly-whipped heavy cream into your cold chocolate cornstarch pudding. This step adds an incredible lightness and extra creaminess, transforming the pudding into an even more decadent experience.
6. Serve and Garnish
For an elegant presentation, spoon the combined pudding and whipped cream mixture into a pastry bag fitted with a star tip. Pipe the creamy delight into individual serving bowls or small dipping bowls if you’re planning a party. While this step doesn’t alter the taste, it certainly enhances the visual appeal, making your homemade pudding look like it came from a gourmet dessert shop.
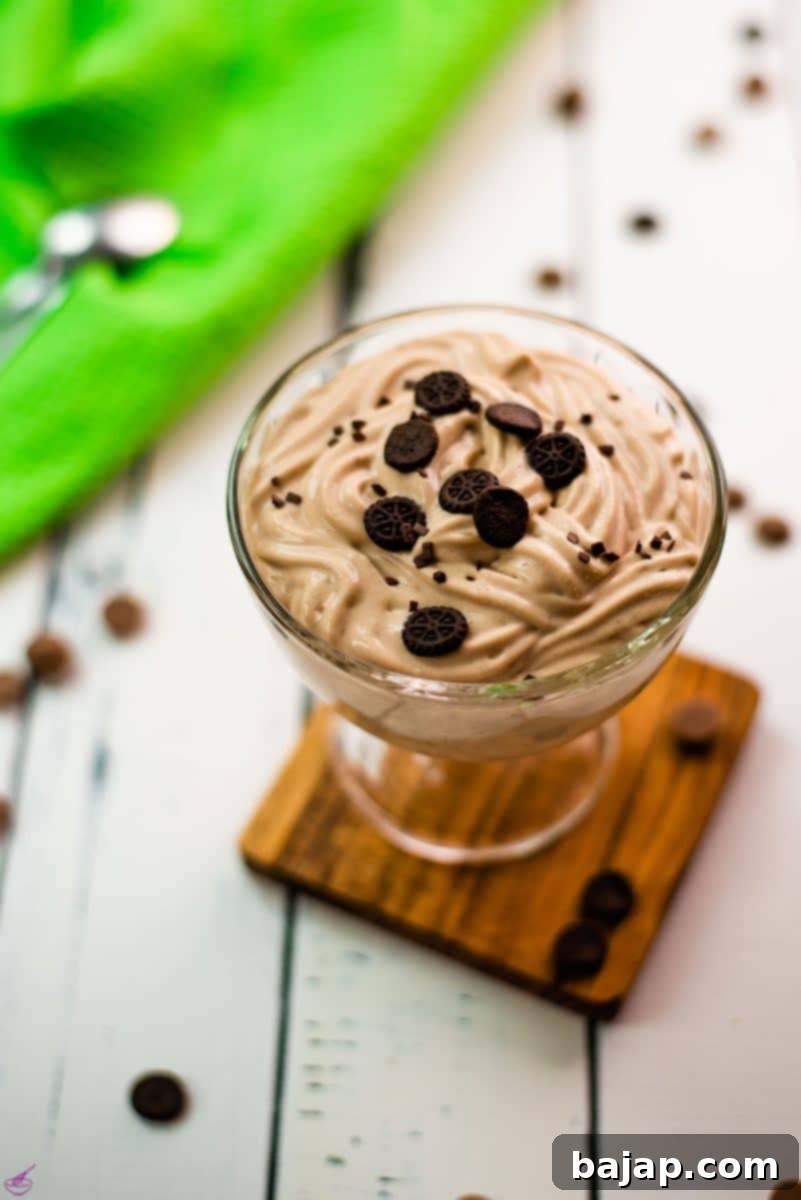
If you’re serving this as a dip, a wonderful finishing touch is to decorate the surface with small pieces of your favorite cookies and fresh fruit. This adds texture, color, and an extra layer of flavor that guests will adore. Enjoy your perfectly prepared, velvety smooth chocolate cornstarch pudding!
🍫 Variations to Satisfy Every Craving
While the classic milk chocolate cornstarch pudding is undeniably delicious, this recipe is incredibly adaptable! Don’t be afraid to experiment and tailor it to your personal preferences or what you have on hand. Here are some fantastic variations to try:
- Dark Chocolate Decadence: For those who prefer a richer, more intense chocolate flavor, simply substitute the milk chocolate couverture with dark chocolate couverture. This creates a deeply satisfying and less sweet dessert that true dark chocolate aficionados will adore.
- Sweet White Chocolate: Looking for something different? Swap the milk chocolate for white chocolate couverture. This yields a wonderfully creamy, sweet, and mild pudding that pairs beautifully with berries.
- Flavor Boosters: A splash of vanilla extract (added at the end of cooking), a pinch of cinnamon, a hint of espresso powder, or even a tiny dash of chili powder can add surprising depth and complexity to your chocolate pudding.
- Nutty Crunch: Stir in finely chopped nuts (like pecans, walnuts, or almonds) into the pudding mixture after it’s cooked, or sprinkle them on top for added texture.
- Boozy Bliss: For an adult-only treat, a tablespoon of rum, brandy, or a coffee liqueur can be folded into the cooled pudding before adding the whipped cream.
- Mint Chocolate: Add a few drops of peppermint extract along with the chocolate for a refreshing mint-chocolate twist.
My family loved serving all three versions (milk, dark, and white chocolate) as sweet dips at Christmas, accompanied by homemade sugar cookies. It was an absolute hit among our guests and made for a stunning dessert display!
Serving Suggestions Beyond the Bowl
While this chocolate cornstarch pudding is magnificent on its own, its creamy texture makes it incredibly versatile for various serving styles and pairings:
- The Ultimate Dip: As mentioned, this pudding makes an outstanding sweet dip. Pair it with an array of dippables like crispy sugar cookies, shortbread, graham crackers, pretzels (for a sweet and salty combo!), or even churros.
- Fresh Fruit Medley: The rich chocolate complements a wide range of fruits beautifully. Think sliced strawberries, raspberries, banana slices, orange segments, or even apple wedges.
- Elegant Parfaits: Layer the chocolate pudding with whipped cream, crumbled cookies, fresh berries, or granola in clear glasses for a visually appealing and delightful parfait.
- Cake or Brownie Topping/Filling: Use the pudding as a luscious filling between cake layers, or spread it generously over brownies for an extra layer of indulgence.
- Mini Tart Filling: Spoon the pudding into pre-baked mini tart shells for individual chocolate tarts. Garnish with a raspberry or a sprig of mint.
- Breakfast Indulgence: A small dollop can even be added to overnight oats or a yogurt bowl for a touch of morning decadence!
🍽 Essential Equipment for Pudding Perfection
You won’t need a lot of specialized kitchen tools to make this delicious chocolate cornstarch pudding, which is another reason it’s so easy to love! Here’s a list of the basic equipment that will make your pudding-making experience smooth and enjoyable:
- Small or Medium-sized Saucepan: Essential for combining and heating your milk, chocolate, and sugar, and then thickening the pudding. A non-stick pan is ideal for preventing scorching.
- Whisk: Your best friend for mixing the cornstarch slurry and ensuring constant stirring of the pudding base to prevent lumps and promote even thickening.
- Small Bowl: For preparing the crucial cornstarch slurry.
- Tablespoon: For measuring the milk for the slurry and the sugar.
- Large Bowl (with lid or plastic wrap): To cool your hot pudding in the refrigerator. A lid or plastic wrap is important to cover the surface directly and prevent a skin from forming.
- Electric Hand Mixer: While not strictly essential (you could whisk by hand), an electric mixer makes whipping the heavy cream to stiff peaks much quicker and easier.
- Piping Bag with Star Tip (Optional): For an elegant presentation, a pastry bag with a star tip allows you to pipe the pudding beautifully into serving dishes.
- Glass Bowls or Small Dipping Bowls: For serving your finished pudding, whether individually or as part of a dipping platter.
🌡 Storage Tips for Freshness
Once you’ve made this delectable chocolate cornstarch pudding, proper storage is key to maintaining its freshness and creamy texture. Here are some tips:
- Refrigeration is Key: Always store your chocolate cornstarch pudding in the refrigerator. The cold temperature helps it set firmly and prevents spoilage.
- Airtight Container: Transfer any leftover pudding to an airtight container. This prevents it from absorbing odors from other foods in the fridge and keeps it from drying out or forming a thick skin on top.
- Shelf Life: When stored correctly in an airtight container in the refrigerator, this homemade chocolate cornstarch pudding will remain fresh and delicious for up to three days. Beyond that, the texture and flavor might start to diminish.
- Avoid Freezing: Generally, cornstarch puddings do not freeze well. The cornstarch can break down during the freezing and thawing process, resulting in a watery, grainy, or separated texture. It’s best enjoyed fresh from the fridge.
💭 Pro Tip for Pudding Success
While this chocolate cornstarch pudding recipe only requires a minimum of three hours to chill and set in the refrigerator, I cannot stress enough how much better it is when made ahead of time and allowed to chill overnight. This extended cooling period does wonders for the texture, allowing it to become truly firm and velvety smooth, and also deepens the chocolate flavor as the ingredients meld together.
This homemade chocolate pudding recipe can be prepped in 20 minutes or less, but planning to make it the night before any event or party will significantly reduce stress. You’ll thank yourself for having a delicious, perfectly set dessert ready to go, freeing up your time for other preparations!
🙋🏻 Common Questions About Cornstarch Pudding
In homemade pudding, especially recipes that don’t rely on eggs or pre-packaged mixes, cornstarch is the primary thickening agent. When heated in a liquid, cornstarch molecules absorb water and swell, creating a viscous, smooth, and creamy texture. It’s what transforms a liquid mixture into that familiar, spoonable pudding consistency.
Absolutely! In fact, cornstarch is often preferred over flour for puddings because it creates a clearer, glossier, and more delicate texture without any starchy aftertaste. If a recipe calls for flour but you want to use cornstarch, you generally use half the amount of cornstarch. So, if a recipe suggests one tablespoon of flour, you would use about half a tablespoon of cornstarch. For this specific recipe, cornstarch is already the star thickener.
Yes, cornstarch pudding thickens significantly as it cools. While it will achieve a noticeable thickness during the cooking process over medium-low heat, the true setting and firming happen in the refrigerator. The starch molecules continue to bond and create a more solid structure as the temperature drops. If your chocolate pudding still resembles chocolate soup even after cooking, it means it likely didn’t reach a full boil or wasn’t cooked long enough for the cornstarch to fully activate. A bit more time on the stove with constant stirring should resolve this before chilling.
To thicken pudding with cornstarch, you first need to create a “slurry.” This involves mixing the cornstarch with a small amount of cold liquid (like milk or water) until it forms a smooth paste without any lumps. This slurry is then whisked into the hot liquid base of your pudding. The mixture is then brought to a boil while continuously stirring. The boiling temperature activates the cornstarch, causing the pudding to thicken. Once thickened, it’s removed from the heat and chilled, which further aids in setting the desired consistency.
To prevent a “skin” from forming on top of your pudding as it cools, immediately after pouring the hot pudding into its cooling bowl, press a piece of plastic wrap directly onto the surface of the pudding. Ensure the plastic wrap touches every part of the surface. This creates an airtight seal that prevents air from drying out the top layer, thus avoiding the formation of an undesirable skin.
While this recipe uses whole milk and heavy cream, you can experiment with dairy-free alternatives. Use a rich plant-based milk like full-fat coconut milk or oat milk for the pudding base. For the whipped topping, a chilled can of full-fat coconut cream (the thick cream scooped from the top) can be whipped to create a dairy-free whipped cream. Ensure your chocolate couverture is also dairy-free to make the entire pudding dairy-free.
Other Delicious Recipes for You to Try
If you loved this simple and delightful chocolate cornstarch pudding, you’re in for a treat with these other fantastic recipes from our collection:
- Baking Basics for Christmas Cookies
- Decadent Chocolate Dipped Butter Cookies
- Divine Leftover Egg Yolk Cookies
- The Best Homemade Sacher Torte
- Refreshing No-Bake Mint Chocolate Cheesecake
If you give this recipe a try, please let me know how you liked it by leaving a ★★★★★ star rating and a comment below. Your feedback is incredibly valuable and always appreciated! You can also sign up for our Newsletter to receive weekly delicious homemade recipes, or follow me on Pinterest or Instagram and share your creation with me. Just tag me @combinegoodflavors and use the hashtag #combinegoodflavors, so I don’t miss it!
📖 Recipe
Easy Chocolate Cornstarch Pudding
Nora
Save RecipeSaved!
Pin Recipe
Equipment
-
Saucepan small
-
Whisk
-
Small bowl
-
Tablespoon
-
Mixing bowl with a lid
-
Electric hand mixer
-
Piping bag with a star tip
-
Glass bowl for serving or small dipping bowls
Ingredients
- ½ Cup Milk chocolate couverture high quality
- 1 ¼ Cups Whole milk
- 1 ¼ tablespoon Granulated Sugar
- 1 ¾ tablespoon Cornstarch
- ½ Cup Heavy cream
Instructions
-
Mix 1 ¾ tablespoon Cornstarch with a tablespoon of milk until lump-free to create a slurry.1 ¾ tablespoon Cornstarch
-
In a medium saucepan, combine ½ Cup Milk chocolate couverture, 1 ¼ Cups Whole milk, and 1 ¼ tablespoon Granulated Sugar. Heat over medium heat, stirring constantly, until the chocolate is melted and the mixture comes to a gentle boil.½ Cup Milk chocolate couverture, 1 ¼ Cups Whole milk, 1 ¼ tablespoon Granulated Sugar
-
Whisk in the prepared cornstarch slurry, stirring constantly, and bring the mixture to a full boil again. Cook for 1 minute while stirring to ensure proper thickening.
-
Remove from heat and pour the hot pudding into a clean bowl. Cover the surface directly with plastic wrap to prevent a skin from forming.
-
Allow to cool in the refrigerator for at least three hours, or preferably overnight, until fully set and chilled.
-
After chilling, whip ½ Cup Heavy cream with an electric hand mixer until stiff peaks form.½ Cup Heavy cream
-
Gently fold the cold chocolate cornstarch pudding with the freshly whipped cream until combined.
-
For an elegant touch, fill the pudding into a pastry bag with a star tip and pipe the cream into serving bowls or dipping bowls. This method gives the pudding a beautiful, professional shape.
-
Serve as a delightful dip with fresh fruit or cookies, or enjoy spooned from a glass bowl, decorated with small pieces of cookies or chocolate shavings.
Nutrition values are estimates only, using online calculators. Please verify using your own data.

🤎 You might also like
- Peach Moscow Mule with Homemade Peach Purée
- Peach Purée for Bellini (and More!)
- Bourbon Highball
- Can You Mix Chambord and Coke?
⛑️ Food Safety
Ensuring food safety is paramount when preparing any meal or dessert. Please keep these guidelines in mind:
- Cook all ingredients to a minimum safe internal temperature of 165 °F (74 °C) to eliminate harmful bacteria.
- Avoid cross-contamination: Do not use the same utensils on cooked food that previously touched raw ingredients.
- Always wash your hands thoroughly with soap and water after handling any raw ingredients.
- Do not leave perishable food, like pudding, sitting out at room temperature for extended periods. Refrigerate promptly.
- Never leave cooking food unattended on the stovetop or in the oven.
- When cooking with oils, use those with a high smoking point to avoid the creation of harmful compounds.
- Ensure good ventilation in your kitchen, especially when using a gas stove, to prevent the buildup of fumes.
For further comprehensive information on safe food handling practices, please check the official guidelines from the FDA (Food and Drug Administration).
