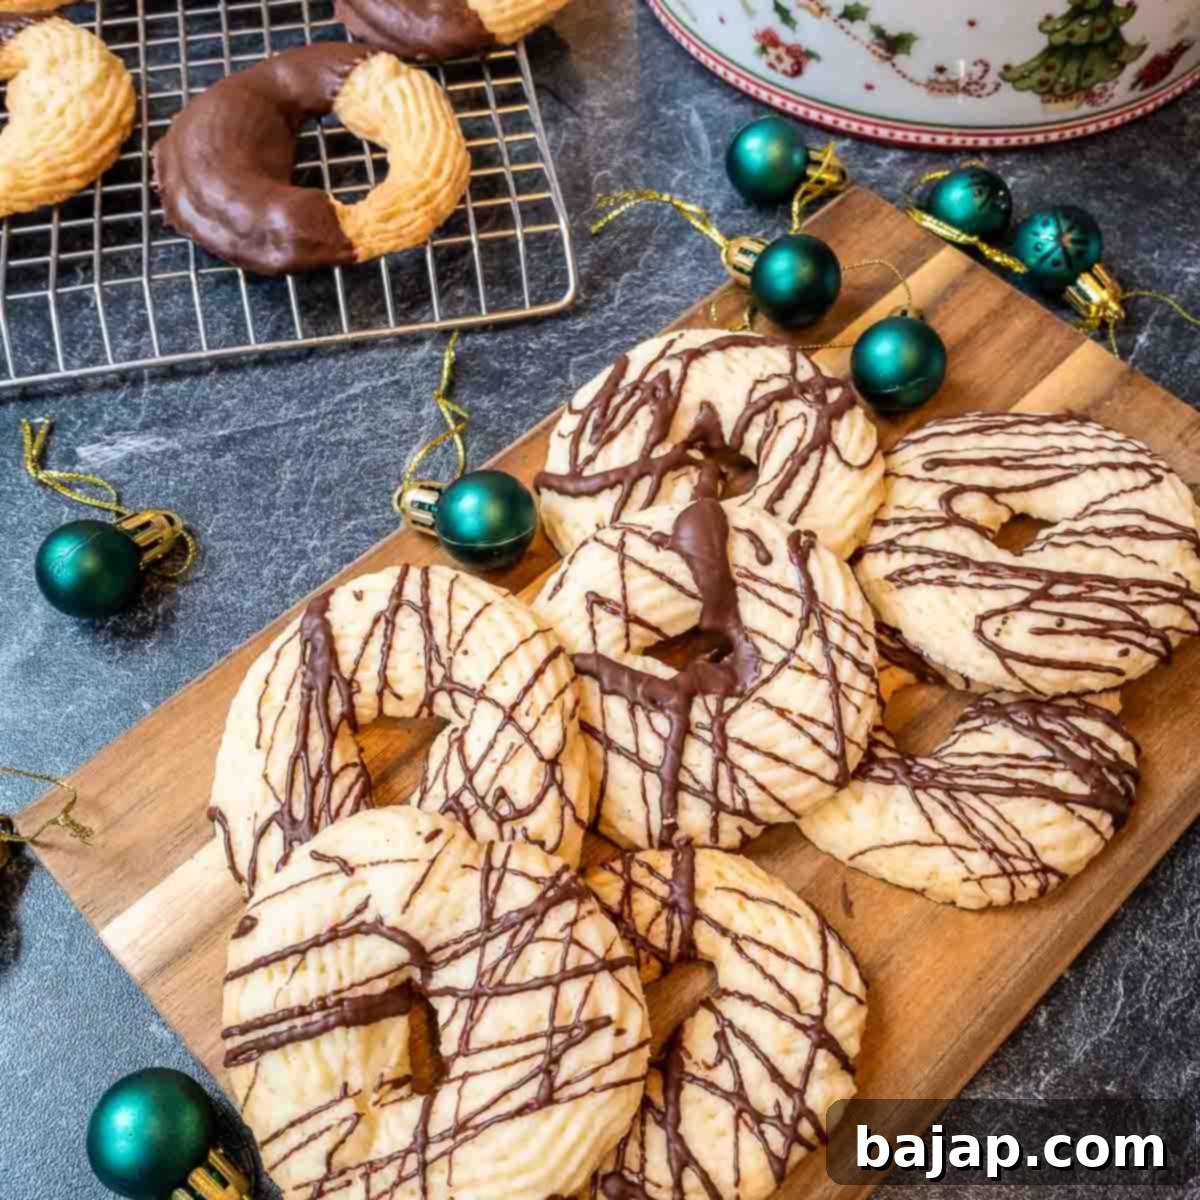
Indulgent Chocolate-Dipped Butter Cookies: A Recipe for Every Occasion
Butter cookies hold a special place in our hearts – a symbol of simple, comforting goodness. But what if we told you that this beloved classic could be elevated to an even more irresistible treat? This recipe for **Chocolate-Dipped Butter Cookies** does exactly that, transforming a delightful cookie into an extraordinary indulgence that will make you fall deeply in love with every bite!
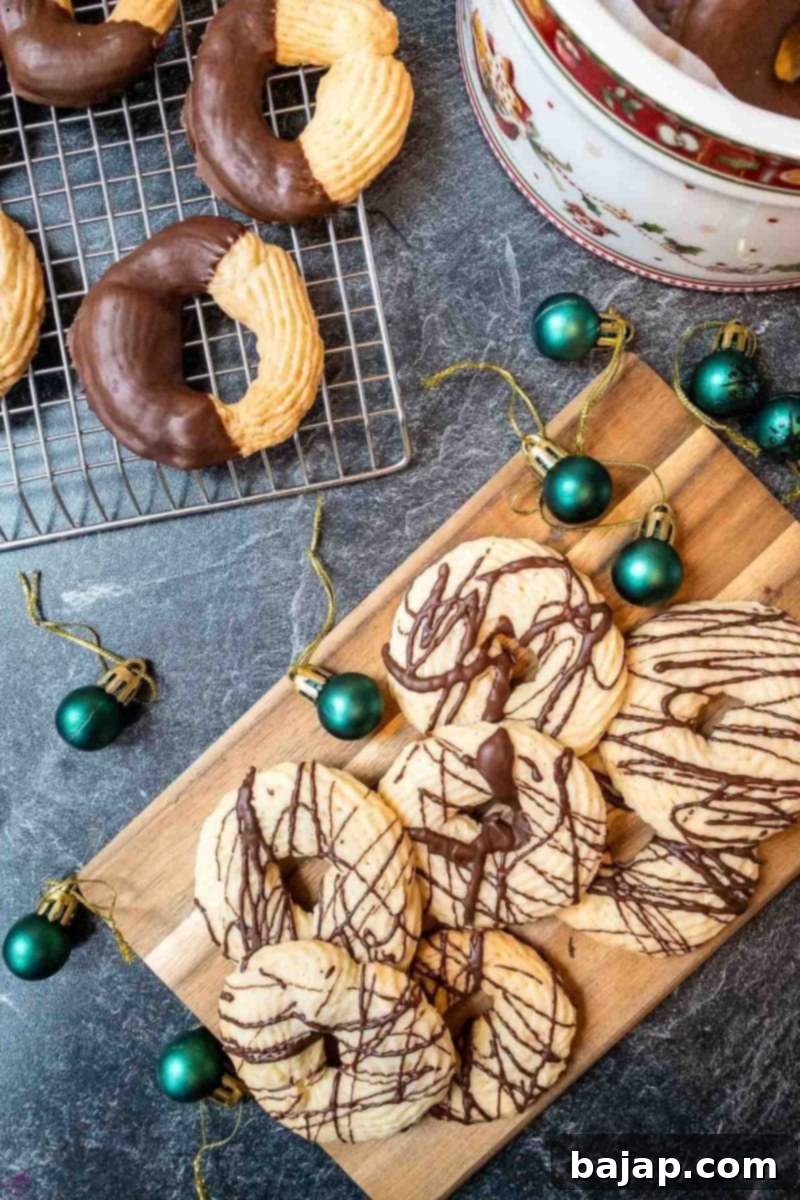
If you’re searching for an easy-to-make dessert that consistently wins over everyone, from casual snackers to discerning dessert connoisseurs, then look no further. While classic butter cookies are undeniably delicious, the addition of a rich chocolate coating takes them to a whole new level of decadence. These **chocolate-covered butter cookies** are more than just a treat; they’re a celebration of flavor and texture, perfect for any gathering or a quiet moment of self-indulgence.
These quintessential cookies are a holiday must-have, a show-stopping hit at parties, or simply a delightful everyday indulgence. I absolutely adore the buttery, melt-in-your-mouth texture and rich vanilla flavor of these cookies on their own, but I simply couldn’t resist the temptation to enhance them further by dipping them in luxurious melted chocolate. The crisp, tender cookie combined with the smooth, slightly bitter notes of dark chocolate creates a symphony of tastes that is truly unforgettable.
Are you ready to bake something truly special? Try this simple yet sophisticated recipe and discover for yourself how effortlessly you can create these tasty, classic sweets that are sure to impress! Whether you’re a seasoned baker or just starting, our detailed guide will help you achieve perfect **homemade chocolate-dipped butter cookies** every time.
Why You’ll Love This Chocolate-Dipped Butter Cookies Recipe
- Effortlessly Elegant: These cookies look fancy enough for a special occasion but are surprisingly simple to make, making them perfect for last-minute entertaining or gifting.
- Perfect Texture Contrast: Enjoy the delicate, tender crumb of the butter cookie perfectly complemented by the crisp snap and smooth melt of the chocolate coating.
- Flavor Harmony: The rich, creamy butter and aromatic vanilla pair beautifully with the deep, complex notes of dark chocolate, creating a perfectly balanced flavor profile.
- Customizable: Easily adapt this recipe with different types of chocolate, toppings, or flavorings to suit your personal preferences or seasonal themes.
- Crowd-Pleaser: From holiday cookie platters to afternoon tea, these **chocolate butter cookies** are universally loved and guaranteed to disappear fast!
- Make-Ahead Friendly: The cookies keep well, and the chocolate coating sets firmly, making them an ideal treat to prepare in advance.
[feast_advanced_jump_to]
🥘 Ingredients for Chocolate-Dipped Butter Cookies
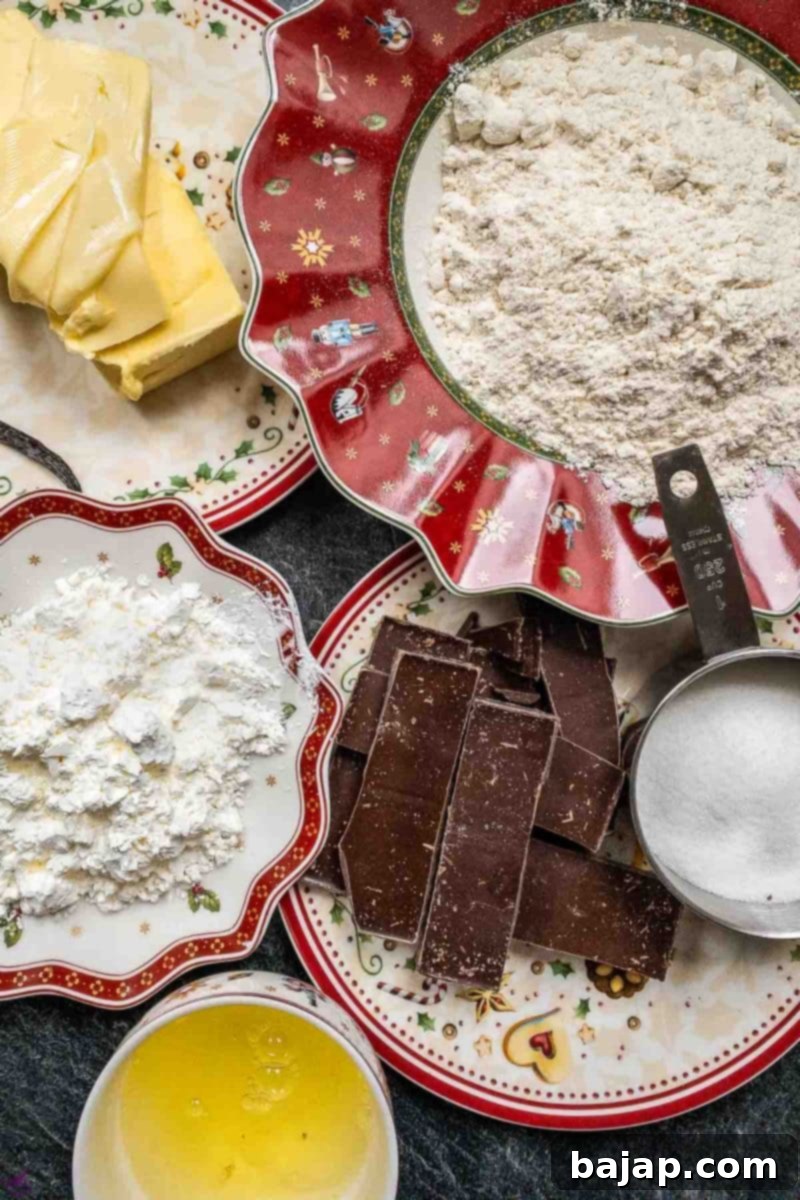
- Unsalted Butter: This is the star of our **butter cookies recipe**! Using unsalted butter allows you to control the total salt content in your cookies. Remember to take the butter out of the fridge about an hour before baking to allow it to soften slightly. Room temperature butter creams beautifully with sugar, resulting in a light and airy dough and a tender cookie.
- Sugar: Fine white granulated sugar gives these classic butter cookies their signature sandy-sweet texture and delicate crunch. It also helps to keep the cookies crisp and contributes to their golden-brown edges.
- Vanilla Bean: For the most exquisite and authentic vanilla taste, fresh scrapings from a vanilla bean are unmatched. The tiny black flecks also add a gourmet visual appeal. If a vanilla bean isn’t accessible, high-quality vanilla bean paste or pure vanilla extract are excellent and readily available substitutes, though you might miss a bit of that intense aroma.
- Egg White: The egg whites play a crucial role in giving these cookies a slight rise and a deliciously light, crisp texture without making them too rich. This recipe specifically calls for egg whites, so you can either separate a few eggs and save the yolks for another recipe (like a custard or a rich breakfast scramble) or opt for a convenient container of liquid egg whites.
- Cake Flour: This is key to achieving that melt-in-your-mouth tenderness! Cake flour has a lower protein content compared to all-purpose flour, which means less gluten development. This results in cookies that are exceptionally buttery, soft, and crumbly, rather than tough or chewy.
- Cornstarch: A secret ingredient for ultimate melt-in-your-mouth goodness! Cornstarch further inhibits gluten formation and contributes to a delicate, almost powdery texture, ensuring your **chocolate butter cookies** are irresistibly soft.
- Dark Chocolate Couverture: This particular type of chocolate is specifically formulated for melting and coating, offering a smooth, glossy finish and a professional snap once set. Its higher cocoa butter content makes it ideal for dipping. If you prefer a sweeter profile, feel free to use your favorite variety of chocolate, such as milk chocolate, white chocolate, or even ruby chocolate for a colorful twist. Just ensure it’s good quality chocolate for the best results.
See the recipe card below for precise quantities and detailed measurements.
🔪 Instructions: How to Make Chocolate-Dipped Butter Cookies
Crafting these delectable **chocolate-dipped butter cookies** is a straightforward and enjoyable process. Follow these detailed steps to achieve perfect results every time.
Step One: Prepare Your Workspace and Oven
Begin by preheating your oven to 170 °C (338 °F). Line two large baking sheets with parchment paper or silicone baking mats. This prevents sticking and ensures even baking. Also, prepare your piping bag by fitting it with a star tip (a Wilton 1M or 32 is ideal for classic butter cookie shapes) and setting it aside, ready to be filled.
Step Two: Cream Butter, Sugar, and Vanilla
In the bowl of your food processor or electric stand mixer, combine the softened unsalted butter, granulated sugar, and the fragrant pulp scraped from your vanilla bean. Beat on medium speed for about 5 minutes, or until the mixture is light, fluffy, and visibly creamy. This creaming process incorporates air, which contributes to the cookies’ delicate texture.
Step Three: Incorporate Egg Whites
Once your butter mixture is light and creamy, gradually blend in the egg whites. Continue mixing until they are fully incorporated and the batter is smooth and well combined. The egg whites help bind the dough and provide a slight lift.
Step Four: Add Dry Ingredients
Reduce the mixer speed to low. Gradually add the cake flour and cornstarch to the wet ingredients. Mix just until the dry ingredients are fully incorporated and a soft, cohesive dough forms. Be careful not to overmix, as this can develop the gluten in the flour, leading to tougher cookies.
Step Five: Fill the Piping Bag
Carefully transfer the butter cookie dough into your prepared piping bag fitted with the star tip. Ensure the dough is packed snugly to avoid air pockets, which can make piping difficult.
Step Six: Pipe the Cookie Shapes
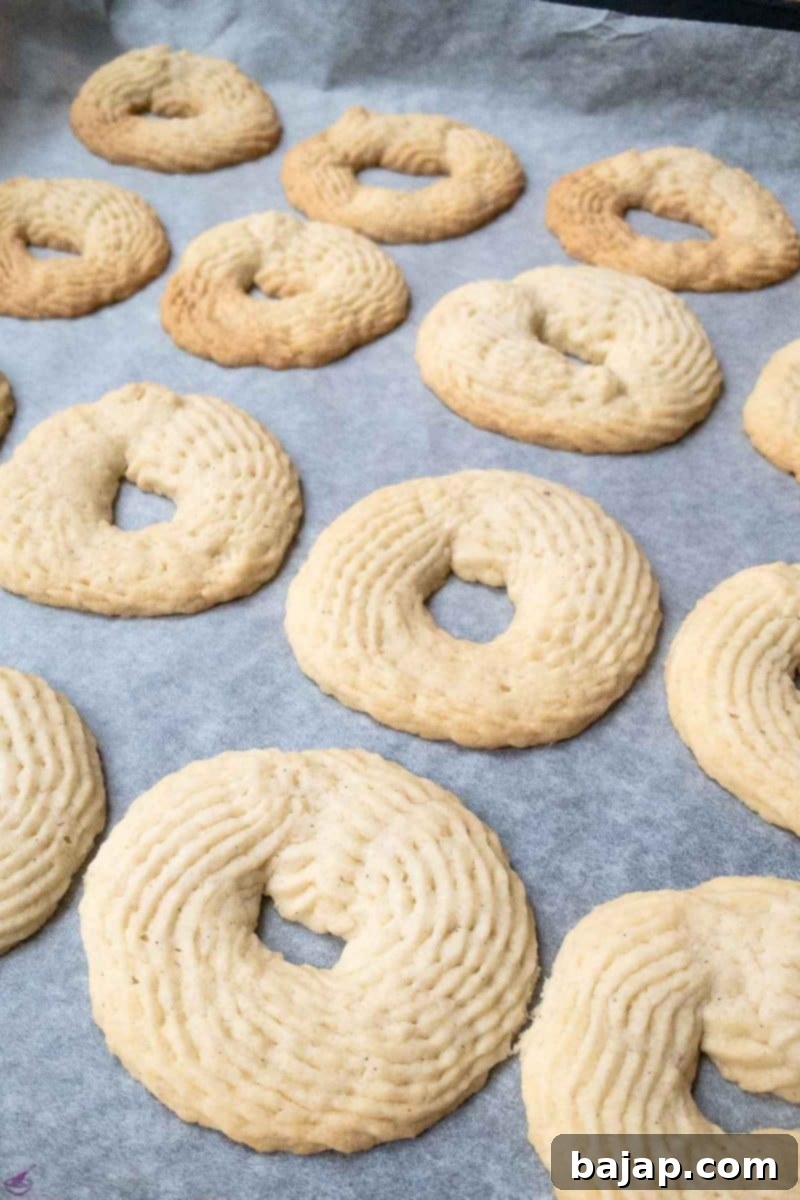
Pipe the dough in decorative circles or S-shapes onto the prepared baking sheets. Leave about an inch of space between each cookie to allow for slight spreading during baking. Aim for consistent sizes to ensure even baking. The classic rosette or swirl is always a favorite!
Step Seven: Bake to Golden Perfection
Bake the butter cookies in your preheated oven for approximately 20 minutes. Baking times can vary depending on your oven, so keep a close eye on them. The key is to bake these cookies until they are just pale golden at the edges, not deeply browned. This ensures they remain tender and delicate. Remove from the oven and transfer them to a wire rack to cool completely before dipping. This step is crucial for the chocolate to adhere properly.
Step Eight: Melt the Chocolate
While the cookies are cooling, prepare your dark chocolate couverture. Proper melting is essential for a smooth, glossy coating. Choose your preferred method:
Water Bath (Bain-Marie): This is a gentle and effective method. You will need two pots of different sizes. Fill the larger pot with about 3-4 finger-widths of water and bring it to a gentle simmer over medium heat. Place the smaller pot on top, ensuring its bottom does not touch the simmering water. Add your chocolate couverture to the smaller pot. Stir continuously as the chocolate slowly melts from the rising steam. This gradual heat prevents the chocolate from scorching or seizing, giving you a perfectly smooth consistency.
Tempering Unit/Melting Device: If you have a dedicated chocolate tempering unit or a chocolate melting pot, follow the manufacturer’s instructions. These devices provide precise temperature control, which is ideal for couverture. Set the unit to the appropriate melting temperature:
- White and Milk Chocolate: 40 °C (104 °F)
- Dark Chocolate: 50 °C (122 °F)
Stir occasionally until completely melted and smooth.
Step Nine: Dip and Dry
Once the cookies are completely cool and the chocolate is perfectly melted and smooth, it’s time for the fun part! Take each butter cookie and dip it halfway into the melted chocolate coating. Allow any excess chocolate to drip off back into the bowl before carefully placing the dipped cookie onto a sheet of parchment paper or a silicone mat. This allows the chocolate to set without sticking.
Step Ten: Allow Chocolate to Set and Enjoy!
Let the chocolate-dipped butter cookies rest at room temperature until the chocolate is fully set and firm, which can take anywhere from 30 minutes to a couple of hours depending on your room’s temperature and humidity. For a quicker set, you can carefully place them in the refrigerator for 10-15 minutes. Once the chocolate has set, your delicious **chocolate-covered butter cookies** are ready to be savored! Enjoy them with a cup of tea, coffee, or a glass of milk.
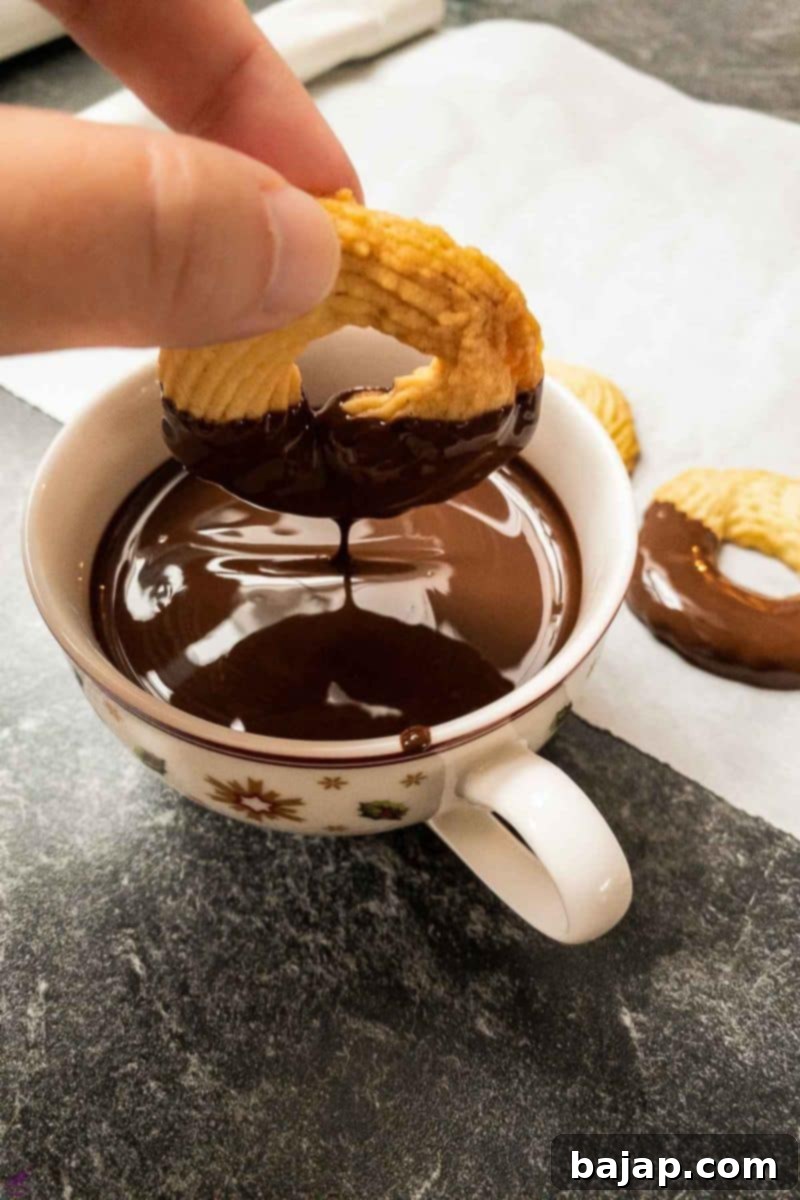
Dip the butter cookies halfway into the chocolate for a perfect coating.
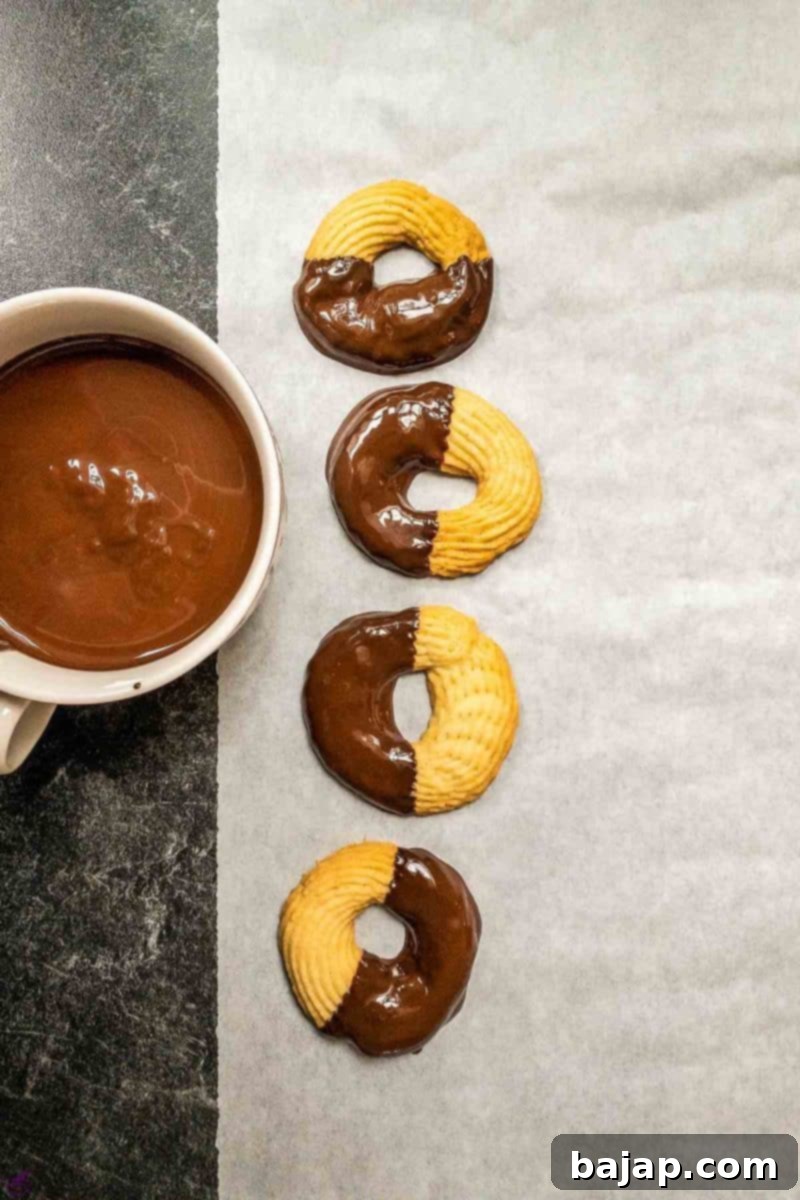
Place the cookies on a sheet of baking paper to dry and set.
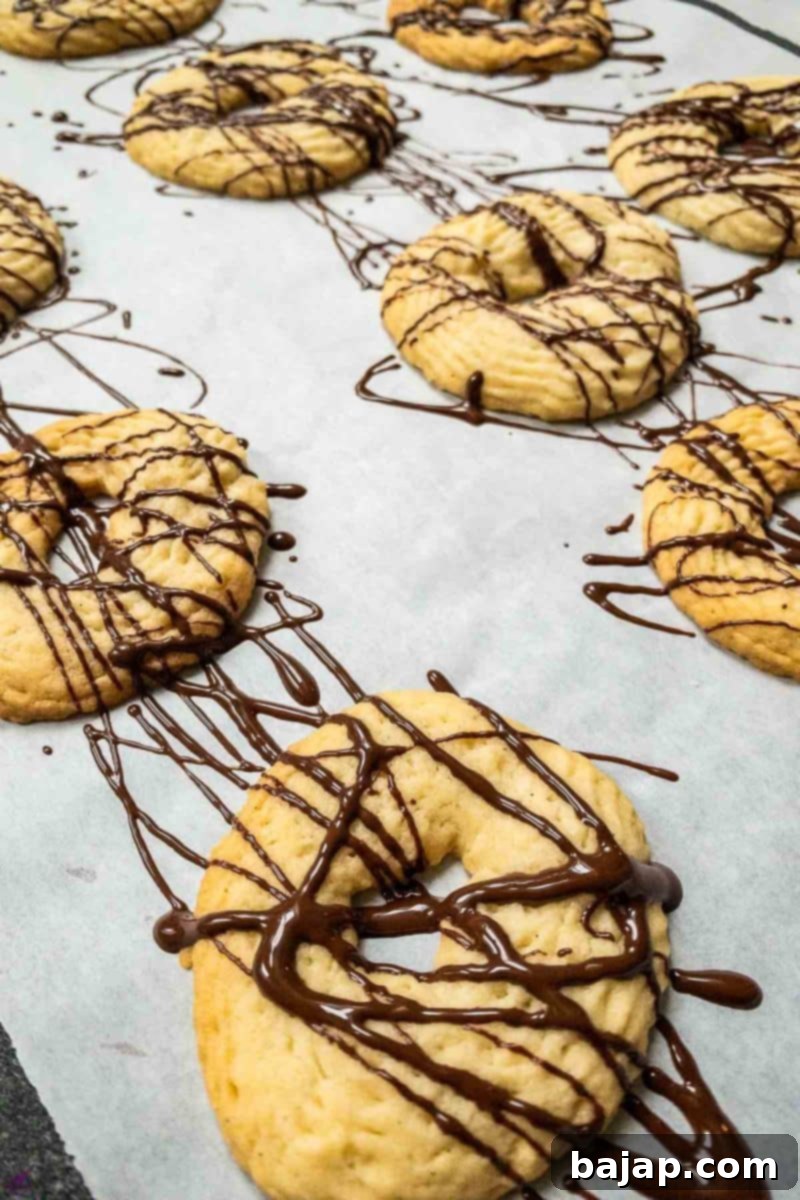
For an artistic flair, drizzle chocolate over the cookies.
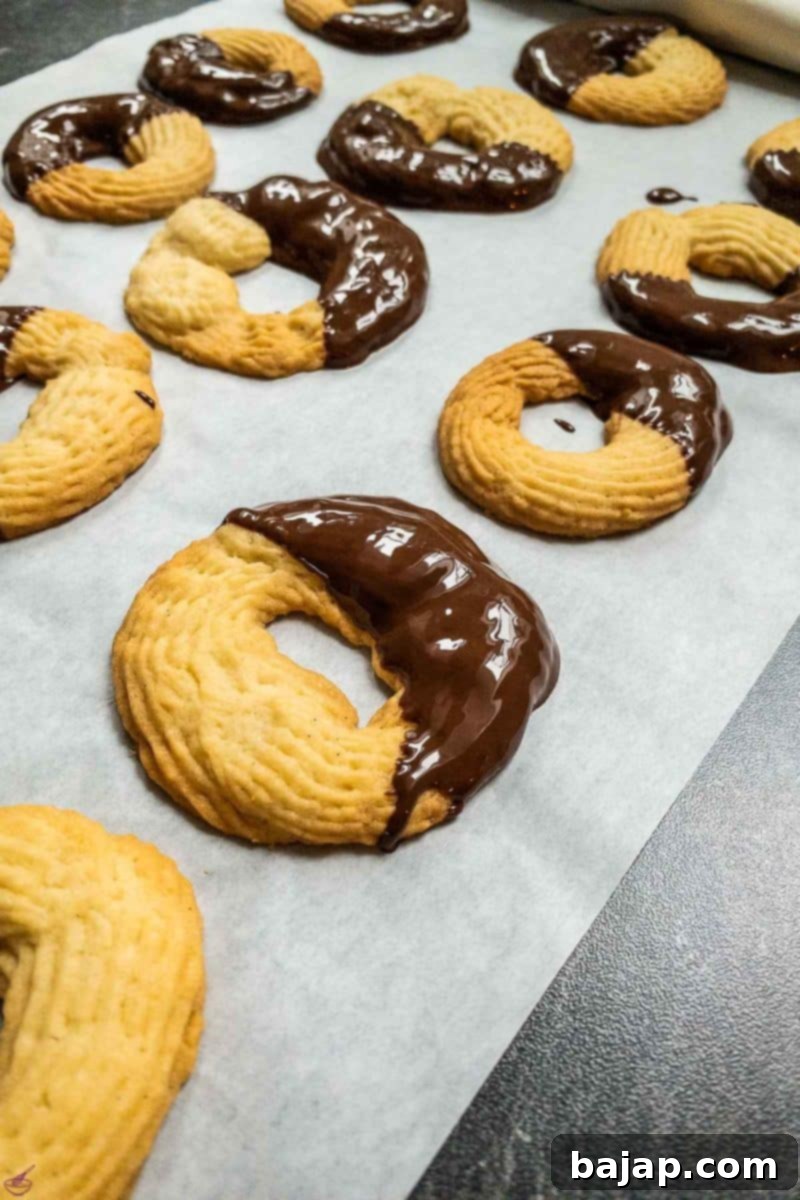
The traditional half-dipped style for a classic look and taste.
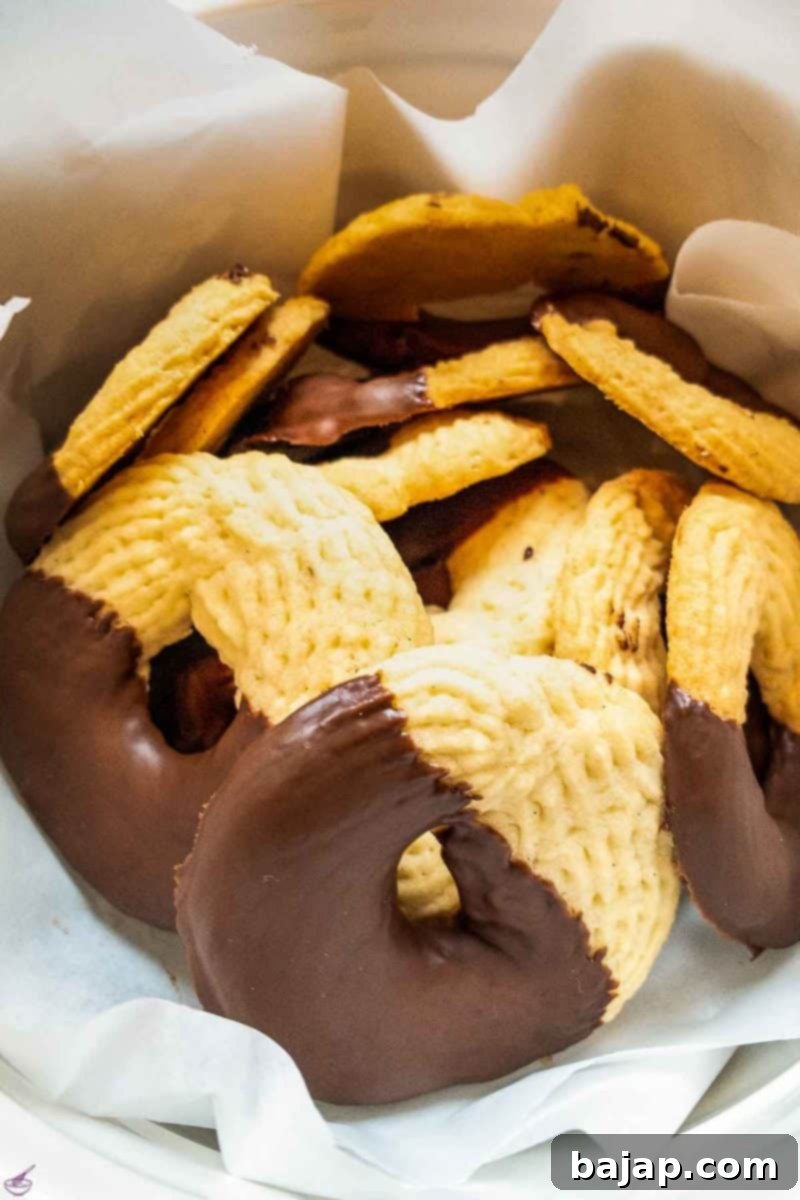
Line the cookie jar with parchment paper for optimal freshness.
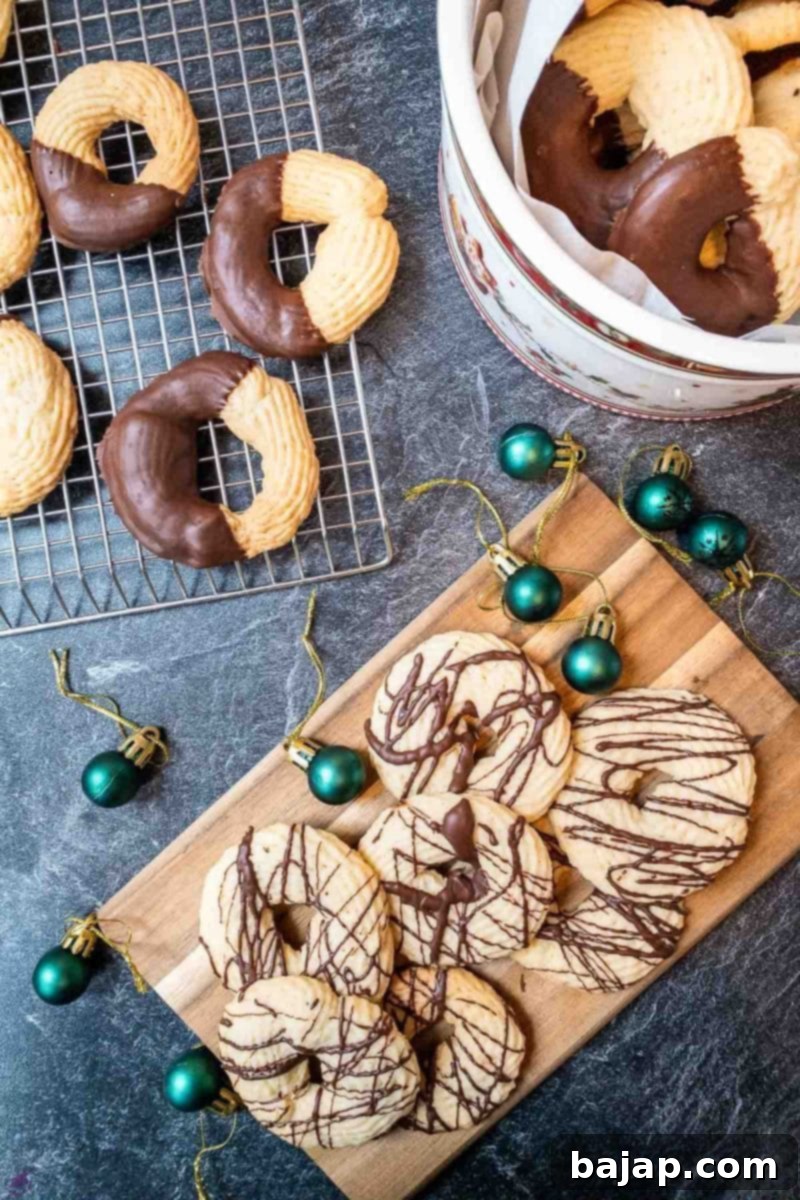
Enjoy these delightful treats with your favorite beverage!
🍫 Variations for Your Chocolate-Dipped Butter Cookies
The beauty of this **easy butter cookie recipe** lies in its versatility. You can easily tweak these cookies to create a range of delightful treats. Here are some ideas to inspire your creativity:
- Chocolate Choices: While dark chocolate couverture provides a sophisticated contrast, feel free to experiment with other types.
- Milk Chocolate: For a sweeter, creamier coating that’s especially popular with kids.
- White Chocolate: Offers a delicate sweetness and a beautiful visual contrast. You can even tint it with food coloring for themed events!
- Blonde Chocolate (Dulcey): A caramelized white chocolate with notes of shortbread and toffee, adding a unique depth of flavor.
- Ruby Chocolate: A naturally pink chocolate with a berry-like, slightly tart flavor, perfect for a vibrant and unusual twist.
- Add Toppings: Immediately after dipping the cookies in wet chocolate, sprinkle them with a variety of toppings for extra flavor and decor:
- Chopped Nuts: Almonds, pistachios, walnuts, or pecans add a lovely crunch and nutty flavor.
- Sprinkles: Essential for a festive flair, especially for holidays like Christmas or birthdays.
- Sea Salt Flakes: A sprinkle of flaky sea salt on dark chocolate enhances its flavor and provides a sophisticated sweet-and-salty balance.
- Shredded Coconut: Toasted or untoasted coconut flakes offer a tropical twist.
- Crushed Peppermint: Perfect for a festive holiday treat.
- Mini Chocolate Chips: An extra layer of chocolatey goodness.
- Flavor Infusions: Another tasty way to switch things up is to alter the base cookie flavor:
- Almond Extract: Swap out the vanilla bean for a little almond extract or almond paste (use sparingly, as it’s potent). This trick gives the cookies a vibrant, nutty taste that will surprise and delight your taste buds!
- Citrus Zest: Add finely grated lemon, orange, or lime zest to the dough for a bright, aromatic cookie.
- Spices: A pinch of cinnamon, cardamom, or nutmeg can add warmth, making them perfect for autumn or winter.
- Espresso Powder: A small amount of instant espresso powder can deepen the chocolate flavor without making the cookies taste like coffee.
- Drizzled vs. Dipped: Instead of fully dipping, you can use a fork to drizzle patterns of chocolate over the cooled cookies for a lighter touch and elegant presentation.
🍽 Essential Equipment for Baking Butter Cookies
Having the right tools can make your baking experience smoother and more enjoyable, especially when creating these delicious **chocolate-dipped butter cookies**.
- Food Processor or Electric Mixer: This is the ideal tool for mixing this thick, rich, buttery dough. A stand mixer with a paddle attachment or a robust food processor ensures that your butter and sugar are perfectly creamed, leading to a light and tender cookie. Hand mixing can be quite strenuous and may not achieve the same airy texture.
- Piping Bag and Number 32 Star Tip (or Wilton 1M): To make perfectly shaped and evenly sized cookies that look professional, a piping bag with a large star tip is essential. The star tip creates those classic ridges. If you don’t have a piping bag, you can improvise by cutting a small hole in the corner of a sturdy plastic freezer bag and attaching the tip at that opening (or just snip the corner for a simpler cookie shape).
- Mixing Bowl: If using a hand mixer, you’ll need a large, sturdy mixing bowl. Even with a stand mixer, an extra bowl is always handy for separating ingredients or melting chocolate.
- Lined Baking Sheets: You will need at least two baking sheets, preferably lined with parchment paper or reusable silicone baking mats. This ensures the cookies don’t stick, bake evenly, and are easy to remove without breaking. It also makes cleanup a breeze!
- Water Bath (Double-Boiler) or Tempering Device: To melt the chocolate smoothly and keep it at a consistent, warm temperature for dipping, one of these is crucial. A water bath (bain-marie) involves placing a heatproof bowl over a pot of simmering water. A tempering device offers precise temperature control, ideal for maintaining chocolate’s temper for a shiny, stable coating.
- Wire Rack: For cooling the baked cookies evenly and thoroughly before dipping.
- Spatula/Scraper: Useful for scraping down the sides of the mixing bowl and transferring dough.
🌡 Storage Tips for Chocolate-Dipped Butter Cookies
Unless these delicious **chocolate-dipped butter cookies** are devoured in an instant (which is highly likely!), proper storage will ensure they stay fresh and delightful for an extended period.
- At Room Temperature: Store your cooled and fully set chocolate-dipped butter cookies in an airtight container or a well-sealed cookie tin at room temperature. They will maintain their freshness and texture for up to three weeks. To prevent the chocolate from sticking to the bottom or to each other, it’s best to line the container with parchment paper and place a piece of parchment paper between each layer of cookies.
- Freezing for Longer Storage: These cookies freeze beautifully! Once the chocolate has completely set, arrange them in a single layer on a baking sheet and freeze for about an hour until firm. Then, transfer the frozen cookies to a freezer-safe, airtight container or heavy-duty freezer bag, again with parchment paper between layers to prevent sticking. They can be frozen for up to six months.
- Thawing Frozen Cookies: To enjoy frozen cookies, simply transfer them from the freezer to the refrigerator overnight, or let them sit at room temperature for a couple of hours until thawed. The chocolate may develop a slight condensation as it thaws, which is normal and will evaporate.
💭 Top Tips for Perfect Chocolate-Dipped Butter Cookies
Achieving bakery-quality **homemade butter cookies** dipped in chocolate is easier than you think with these expert tips:
- Room Temperature Ingredients: Always ensure your butter and egg whites are at room temperature. This is crucial for creating a smooth, emulsified dough that will pipe beautifully and bake evenly. Cold ingredients will result in a lumpy batter and a denser cookie.
- Don’t Chill the Dough: Unlike many cookie doughs, this butter-rich dough should not be chilled. If you chill it, it will become very hard and almost impossible to pipe through a pastry bag. Work with the dough immediately after mixing for the best results.
- Bake Until Pale: These cookies are meant to be pale in color, not deeply golden brown. The edges should appear set and just slightly crisp, but the center should still be light. Overbaking will make them dry and crumbly. Keep a close eye on your oven, as baking times can vary.
- Quality Chocolate Matters: For the best dipping experience and flavor, invest in good quality dark chocolate couverture. It melts more smoothly and sets with a beautiful shine and snap.
- Cool Completely: Ensure your butter cookies are completely cooled before dipping them in chocolate. If the cookies are even slightly warm, the chocolate will melt or not set properly, leading to a messy finish.
- Piping Consistency: If your dough feels too stiff to pipe easily, try warming it slightly in your hands or let it sit at room temperature for a few extra minutes. If it’s too soft and runny, it might be due to overly warm butter; if so, refrigerate the *butter* for a few minutes before creaming.
- Clean Piping Bag: Always use a clean piping bag. Any grease residue can affect the texture of the dough and the ease of piping.
- Homemade Vanilla Sugar: Don’t discard the scraped vanilla bean! You can save it and place it in a jar of granulated sugar to make homemade vanilla sugar, infusing your sugar with a delightful aroma for future baking projects.
- Experiment with Design: Beyond dipping, consider drizzling chocolate with a spoon or piping small patterns for an elegant touch.
🙋🏻 Frequently Asked Questions About Chocolate-Dipped Butter Cookies
Here are answers to some common questions you might have about making these delightful **chocolate butter cookies**:
You absolutely can! Dying the dough is a fun and creative way to add some vibrant, colorful flair to your butter cookies, making them perfect for themed parties or holidays. You can either paint food coloring gel in stripes onto the inside of your piping bag before filling it with dough for a beautiful swirled effect, or you can gently fold the dye directly into the batter until evenly colored before filling your piping bags. Just be sure to use gel food coloring, as liquid coloring can alter the dough’s consistency.
These delicious **homemade butter cookies** can be kept in an airtight container at room temperature for up to three weeks. For longer storage, you can also place the cooled, set cookies in a freezer-safe bag or container and freeze them for up to six months. To thaw frozen cookies, simply place them in the fridge overnight or allow them to come to room temperature on the counter for a few hours. Always ensure the chocolate is completely set before storing to prevent sticking.
Yes, absolutely! If you have a cookie press, it’s a fantastic tool for this recipe. You can use it to create a variety of intricate shapes and styles of butter cookies with ease. Just follow the instructions for your specific cookie press. However, a cookie press is not a necessary tool; if you don’t have one, you can simply pipe the cookies as directed with a piping bag, achieving beautiful results nonetheless.
While cake flour is recommended for its low protein content, which yields a tender, melt-in-your-mouth cookie, you can substitute all-purpose flour in a pinch. If you do, consider removing 2 tablespoons of all-purpose flour per cup and replacing them with 2 tablespoons of cornstarch (in addition to the cornstarch already in the recipe). This will help to reduce the gluten and achieve a softer texture, closer to what cake flour provides.
Chocolate seizes (becomes thick, lumpy, and unusable) when it comes into contact with even a tiny amount of water. When melting chocolate over a water bath, ensure the bowl is perfectly dry and does not touch the simmering water below, only the steam. Also, use a clean, dry spatula for stirring. High heat can also cause chocolate to seize, so always melt it gently over low to moderate heat.

Christmas CookieBook!
Snag that Recipe eBook!
Discover 20 delicious and festive Christmas Cookie recipes to sweeten your holidays!
Yes, please!
More Gorgeous Cookie Recipes for You to Try:
- M and M Cookies
- Egg Yolk Cookies
- Sour Cream Cookies
- Cinnamon Cookies {Zimtsterne}
- Chocolate Chip Cookies with Chestnut Flour
- Chocolate Espresso Crinkle Cookies
- Walnut Meringue Cookies
- Linzer Cookies with Egg Liqueur Ganache
- Walnut Cookies
- Coconut Cookies
- Lacy Oatmeal Cookies
If you make this recipe, let me know how you liked it by ★★★★★ star rating it and leaving a comment below. Your feedback would be absolutely awesome! You can also sign up for our Newsletter to receive weekly delicious homemade recipes, or follow me on Pinterest or Instagram and share your creation with me. Just tag me @combinegoodflavors and use the hashtag #combinegoodflavors, so I don’t miss your beautiful baking!
📖 Recipe
Chocolate Dipped Butter Cookies
Nora
Save RecipeSaved!
Pin Recipe
Equipment
-
Kitchen machine (Food Processor or Electric Mixer)
-
Piping bag with a star tip (e.g., Wilton Star Tip 32 or 1M)
-
Mixing bowl
-
2 Baking trays
-
Baking Paper (or silicone mats)
-
Water bath (double-boiler) or tempering device
Ingredients
- 7.05 oz Unsalted butter room temperature
- ½ cup Sugar
- 1 Vanilla bean (or 1 tsp vanilla bean paste / 2 tsp vanilla extract)
- 2 Egg white
- 1¾ cups Cake flour
- ¾ cup Cornstarch
- 1¼ cups Dark chocolate couverture (or preferred chocolate, chopped)
Instructions
-
Preheat the oven to 170 °C (338 °F). Line baking trays with baking paper or silicone mats.
-
Prepare a piping bag with a star-shaped tip (e.g., Wilton 32 or 1M).
-
In your food processor or stand mixer, cream the softened butter, sugar, and vanilla pulp until light and creamy (about 5 minutes).7.05 oz Unsalted butter, ½ cup Sugar, 1 Vanilla bean
-
Blend in the egg whites until fully incorporated.2 Egg white
-
Mix in the cake flour and cornstarch on low speed until just combined. Do not overmix.1¾ cups Cake flour, ¾ cup Cornstarch
-
Fill the dough into the pastry bag.
-
Pipe dough in circles or desired shapes onto the prepared baking trays, leaving space between each.
-
Bake for about 20 minutes on the middle rack. Cookies should be pale with slightly golden edges.
-
Remove from oven and let them cool completely on a wire rack.
-
Melt the dark chocolate couverture using a water bath (double-boiler) or tempering device.1¼ cups Dark chocolate couverture
-
Once chocolate is ready, dip cooled butter cookies halfway into the chocolate. Allow excess to drip off, then place on baking paper to dry.
-
Allow the chocolate to set completely at room temperature or in the refrigerator (10-15 minutes) before serving. Enjoy your homemade **chocolate-dipped butter cookies**!
Nutrition values are estimates only, using online calculators. Please verify using your own data.

🎄 You might also like
If you loved these **chocolate-dipped butter cookies**, be sure to explore our other festive and delicious recipes for more baking inspiration!
⛑️ Food Safety Guidelines for Baking
Ensuring food safety in your kitchen is paramount, especially when baking. Please keep these important guidelines in mind:
- Always wash your hands thoroughly with soap and water before and after handling food, especially raw ingredients like eggs.
- Ensure all your cooking utensils, bowls, and surfaces are clean before starting your preparation.
- Avoid cross-contamination. Use separate cutting boards and utensils for raw ingredients and ready-to-eat foods.
- While these cookies do not contain raw meat, general kitchen hygiene is important.
- Do not leave perishable ingredients (like butter and eggs) sitting out at room temperature for extended periods beyond what is needed for softening.
- Always follow baking temperatures and times carefully. The suggested oven temperature of 170 °C (338 °F) is optimal for these cookies.
- Store ingredients properly: butter and eggs in the refrigerator, flour and sugar in airtight containers in a cool, dry place.
- If you’re making other recipes that involve cooking meat, always ensure it is cooked to a minimum safe internal temperature of 165 °F (74 °C).
- Never leave cooking food unattended, especially if using a gas stove or oven, to prevent accidents.
- Always ensure good ventilation when using a gas stove to avoid the buildup of harmful gases.
For further information on safe food handling practices, check the Safe Food Handling – FDA guidelines.
