Indulge in Homemade Bliss: The Ultimate 5-Ingredient Cookies ‘n Cream Blossom Cookies with Hershey’s Kisses
There’s an undeniable magic in biting into a freshly baked cookie – a perfect blend of warmth, sweetness, and comfort that brings a little joy to any moment. And when that cookie comes with a delightful “kiss” of chocolatey goodness, it’s simply irresistible! That’s precisely what you’ll find with these enchanting Cookies ‘n Cream Blossom Cookies. Petite, perfectly sweet, and incredibly easy to make, they are sure to become a cherished recipe in your baking repertoire. Whether you’re a seasoned baker or just starting, this simple 5-ingredient recipe promises a delicious treat that tastes like it took hours, but comes together in a flash!
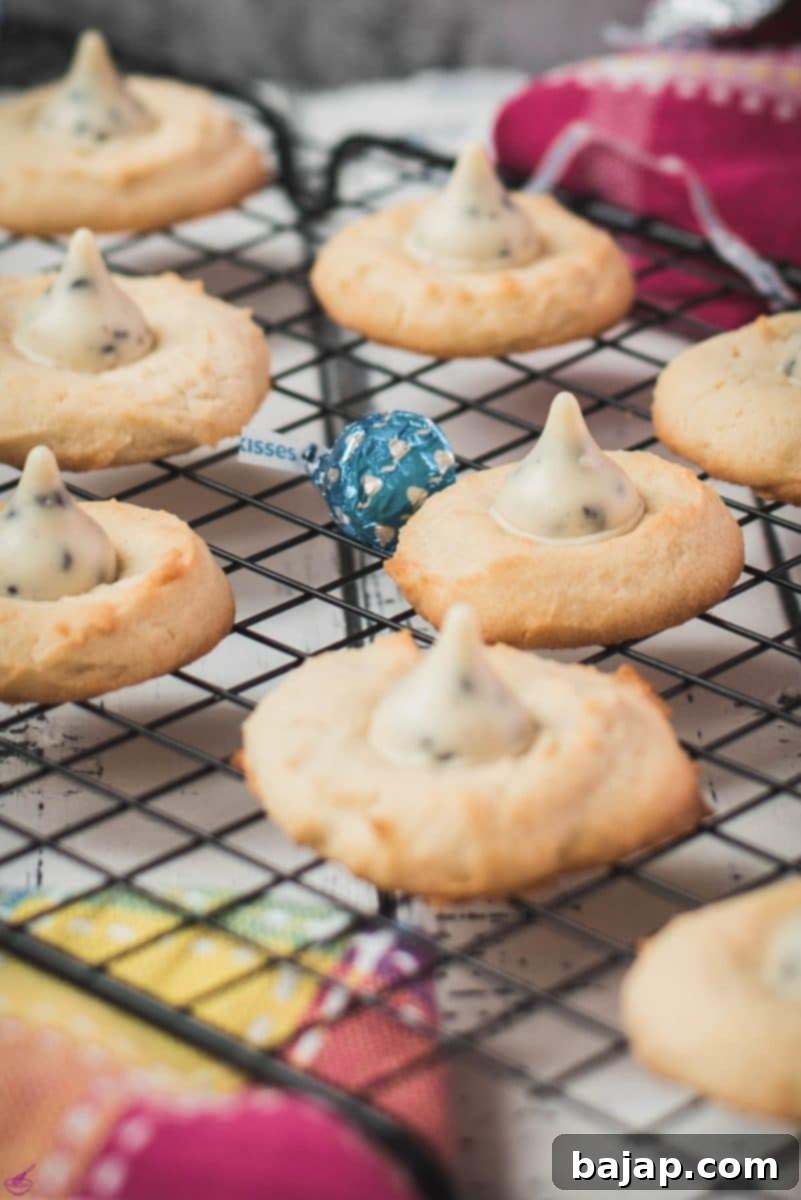
These delightful Cookies ‘n Cream Blossoms are an absolute joy to bake and even more so to eat. They stand out from other cookie recipes for several fantastic reasons. Here’s why you’ll fall in love with them from the very first bite:
Why You’ll Adore These Easy Cookies ‘n Cream Blossom Cookies
- Rich & Creamy Cookie Base: The foundation of these homemade blossom cookies is a wonderfully buttery and rich dough, boasting a texture so exquisite it’s almost brioche-like. This decadent base perfectly complements the sweet and crunchy Hershey’s Kisses, creating a harmonious blend of flavors and textures that will make your taste buds sing. The secret ingredient, cream cheese, ensures a soft, tender crumb that truly melts in your mouth with every bite. It elevates the classic cookie experience to something truly special.
- Effortlessly Simple & Sweet: With just five common ingredients, these treats are a dream for any baker, especially those looking for an easy, egg-free dessert. The simplicity of the recipe doesn’t compromise on flavor; in fact, it highlights the quality of each component, resulting in a naturally sweet and deeply satisfying cookie. Less time in the kitchen means more time enjoying your delicious creations! These cookies prove that gourmet taste doesn’t require a long ingredient list.
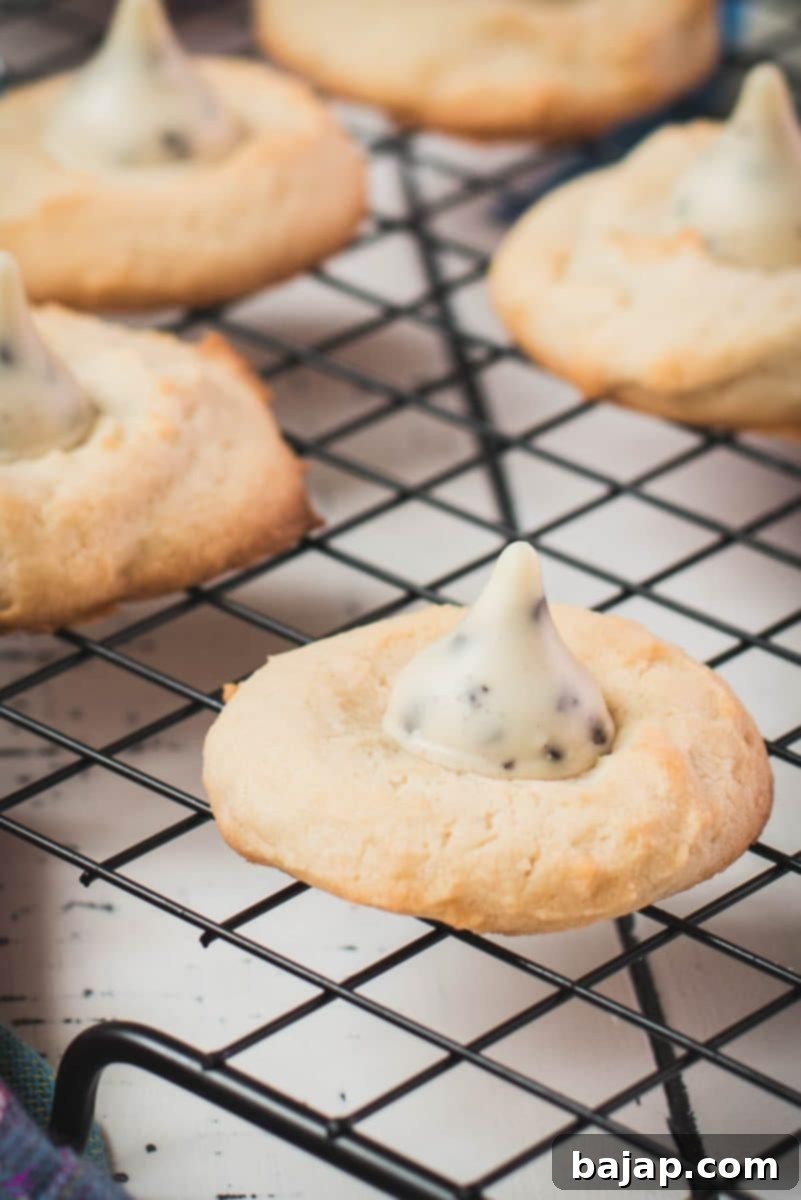
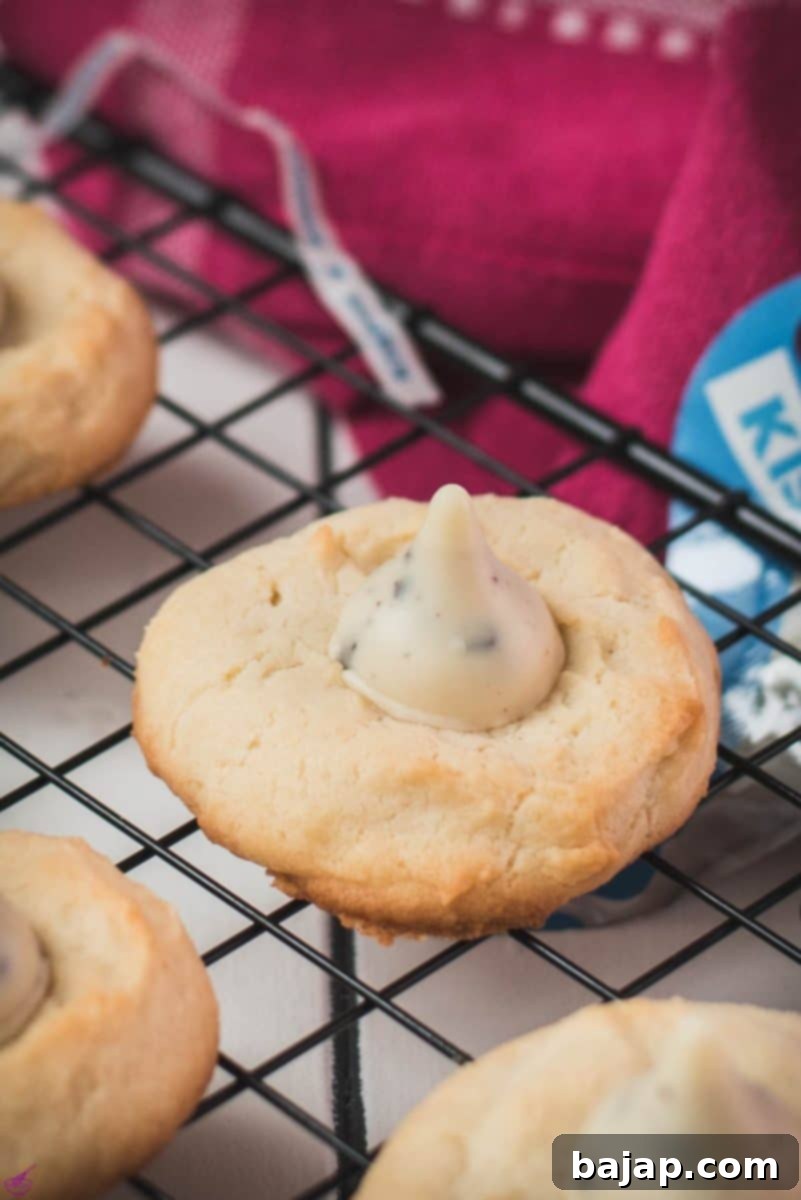
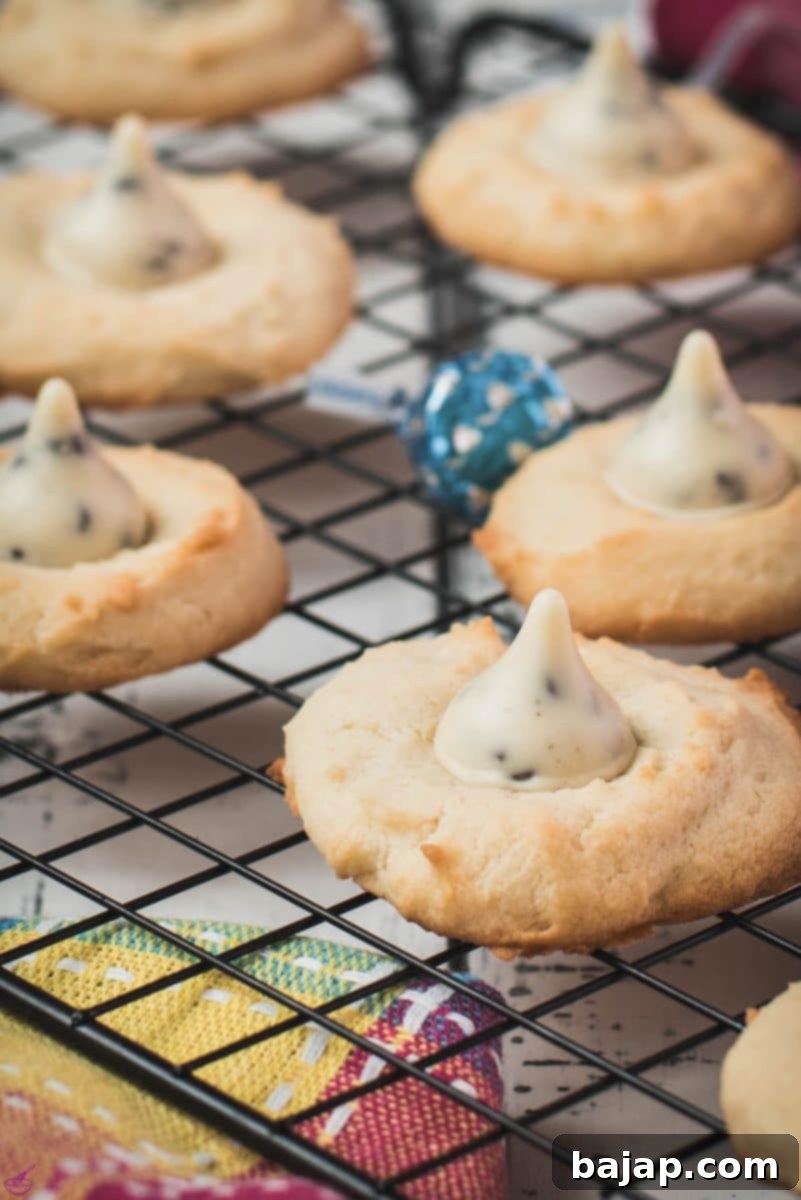
- Picture-Perfect Presentation: These cookies are truly a feast for the eyes, looking like “love at first sight.” Their beautiful golden-brown hue, achieved through perfect baking, provides a lovely contrast to the speckled white and dark tones of the Hershey’s Cookies ‘n’ Creme Kisses pressed into their centers. They’re elegant enough for a special occasion yet charmingly rustic for everyday enjoyment, guaranteed to make mouths water and impress anyone who sees them.
- Lightning-Fast Favorite: When a dessert craving strikes or you need a last-minute treat for guests, these cookies are your go-to. They only require about 30 minutes from start to finish, including prep and baking time. Despite their quick preparation, they disappear from plates in mere seconds – a testament to how utterly delicious they are! You’ll be amazed at how quickly you can whip up a batch of these Hershey kiss cookies.
- Incredibly Versatile & Customizable: These blossom cookies are incredibly adaptable, fitting seamlessly into any occasion. They’re a guaranteed hit at holiday gatherings, potlucks, birthday parties, or simply as an everyday treat with your afternoon coffee. Plus, they offer endless customization opportunities. Feel free to swap out the Hershey’s Kisses for other candies, add sprinkles, or experiment with different extracts to suit your taste and theme, making them unique every time.
- Smart Solution for Leftovers: A fantastic benefit of this recipe is its ability to help prevent food waste. If you often find yourself with a bit of leftover cream cheese after making a delicious dessert like a cheesecake or a savory dip, these cookies are the perfect solution! Instead of letting that small amount go to waste, turn it into another batch of these delightful cream cheese cookies. It’s an efficient, economical, and incredibly tasty way to ensure every ingredient is put to good use.
Jump to: Ingredients | Instructions | Variations | Equipment | Top Tips | FAQ | Other Recipes | Recipe Card
🥘 Essential Ingredients for Your Delicious Cookies ‘n Cream Blossom Cookies
Creating these divine Cookies ‘n Cream Blossom Cookies requires just a handful of straightforward ingredients. Each one plays a crucial role in achieving the perfect flavor and texture. Here’s a closer look at what you’ll need and some tips for best results:

- Butter: This is the cornerstone of our creamy cookie dough, providing rich flavor and a tender texture. For the cleanest, sweetest taste, opt for unsalted butter. It’s essential that your butter is cold but softened to room temperature before you begin mixing. This allows it to cream properly with the sugar and cream cheese, creating a light and airy base for your cookies and contributing significantly to their melt-in-your-mouth quality.
- Granulated Sugar: Sugar isn’t just for sweetness; it also contributes to the delightful golden-brown color and a subtle, satisfying crunch around the edges of your baked cookies. It works in tandem with the butter and cream cheese to form the tender dough, and its fine crystals help to aerate the mixture, resulting in a lighter cookie.
- Cream Cheese: This is the “secret ingredient” that truly elevates these treats, making them extraordinarily decadent and imparting a wonderful tang, richness, and moistness. Always remember to take your cream cheese out of the refrigerator well in advance to allow it to soften completely. Softened cream cheese blends smoothly, preventing lumps in your dough and ensuring a uniform, velvety texture. While full-fat cream cheese offers the richest flavor, you can certainly use a low-fat variety if you prefer, with only a slight difference in richness.
- Cake Flour: Unlike all-purpose flour, cake flour has a lower protein content, typically around 7-9%. This characteristic is key to achieving a beautifully light, delicate, and tender texture in your cookies. It ensures they aren’t dense or overly chewy but rather wonderfully soft and crumbly, which is ideal for blossom-style cookies. If you don’t have cake flour, you can create a suitable substitute by removing 2 tablespoons of all-purpose flour from one cup and replacing it with 2 tablespoons of cornstarch, then sifting it twice to ensure thorough mixing.
- Hershey’s Cookies ‘n’ Creme Kisses: These iconic candies are the star of our “blossom” cookie! They offer a delightful blend of creamy white chocolate speckled with crunchy chocolate cookie bits, providing both texture and a burst of flavor. Their unique crunch and rich, sweet profile perfectly complement the buttery cookie dough, adding a fun, signature touch and that irresistible “kiss” to each cookie. Make sure to unwrap them before you start baking for easy, quick placement.
For precise measurements and full step-by-step instructions, please refer to the comprehensive recipe card provided at the end of this post.
🔪 Step-by-Step Baking Instructions for Perfect Blossom Cookies
Baking these Cookies ‘n Cream Blossom Cookies is a straightforward and enjoyable process. Follow these simple steps to create a batch of perfectly delicious treats that will impress everyone:
Step One: Cream the Wet Ingredients. In a large mixing bowl, combine the softened butter, cream cheese, and granulated sugar. Using an electric mixer (either a hand mixer or a stand mixer fitted with a paddle attachment), begin mixing at medium speed. Continue mixing for 2-3 minutes, gradually increasing the speed to high until the mixture is light, fluffy, and well-combined. It’s important to ensure there are no visible lumps of butter or cream cheese for a smooth dough consistency. Scrape down the sides of the bowl frequently to ensure all ingredients are thoroughly incorporated.
Step Two: Incorporate the Flour. With the mixer running at a very low speed, gradually add the cake flour, one tablespoon at a time. Mix just until all the flour is incorporated into the wet ingredients and no dry streaks remain. It’s crucial not to overmix the dough at this stage, as overmixing can develop the gluten in the flour, leading to a tough, less tender cookie. Stop immediately once the flour is just combined. If the dough becomes too stiff for your mixer, you can gently fold in the last bits of flour by hand.
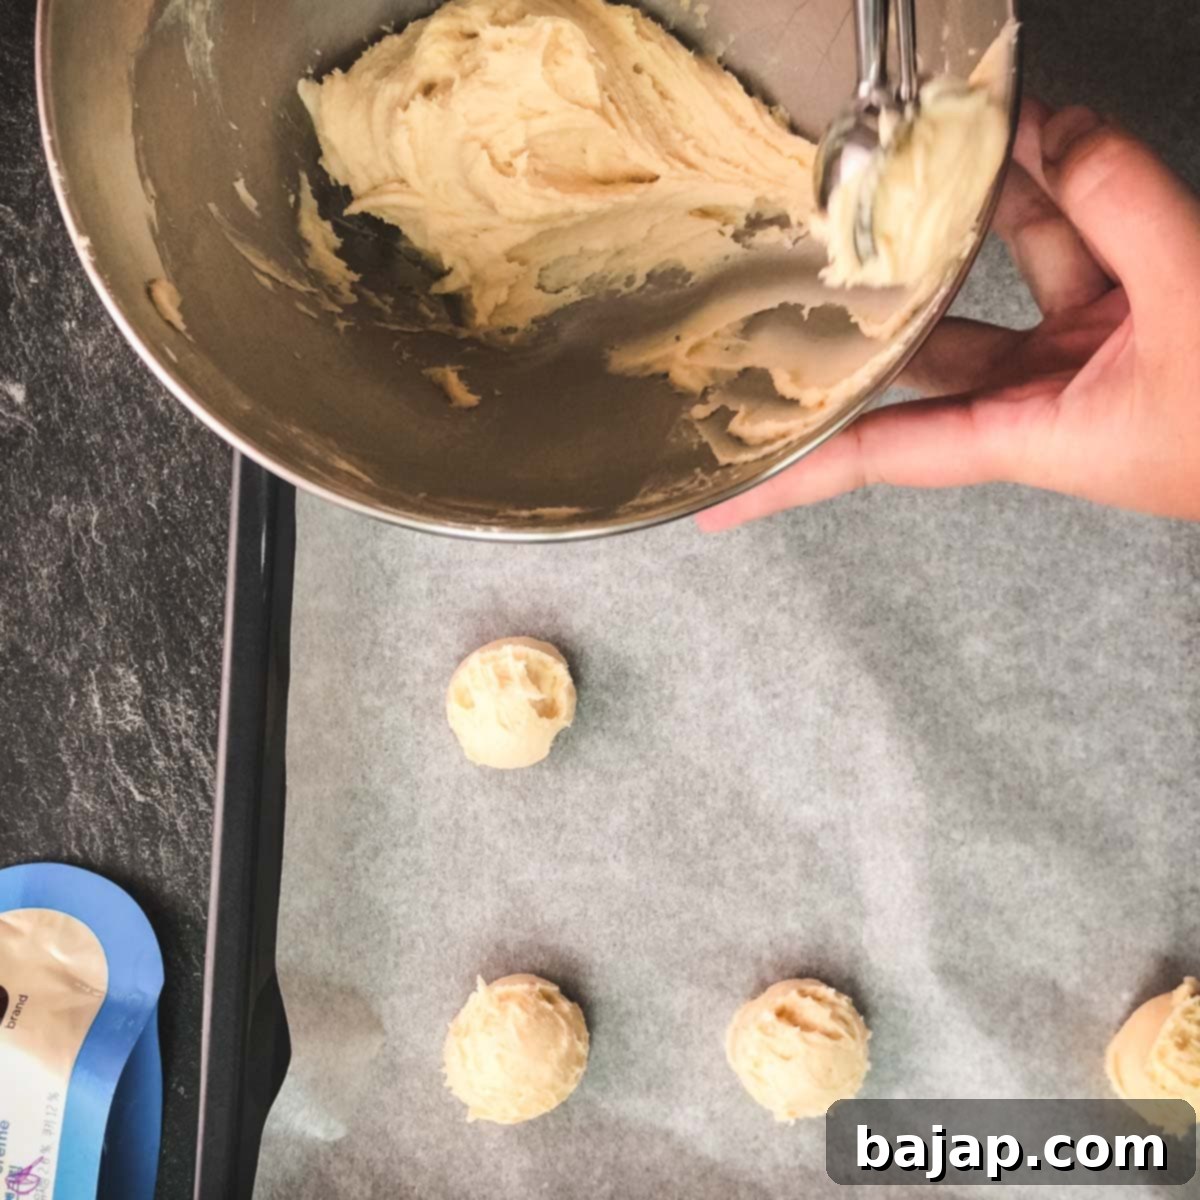
Step Three: Portion the Dough. Preheat your oven to 180°C (356°F). Prepare a baking sheet by lining it with parchment paper or a silicone baking mat. This not only prevents sticking but also aids in easy cleanup and promotes even baking. Use a small ice cream scoop or a cookie disher to portion the cookie dough onto the prepared pan. Aim for evenly sized balls, placing them about 1-inch apart to allow for proper spreading during baking without merging.
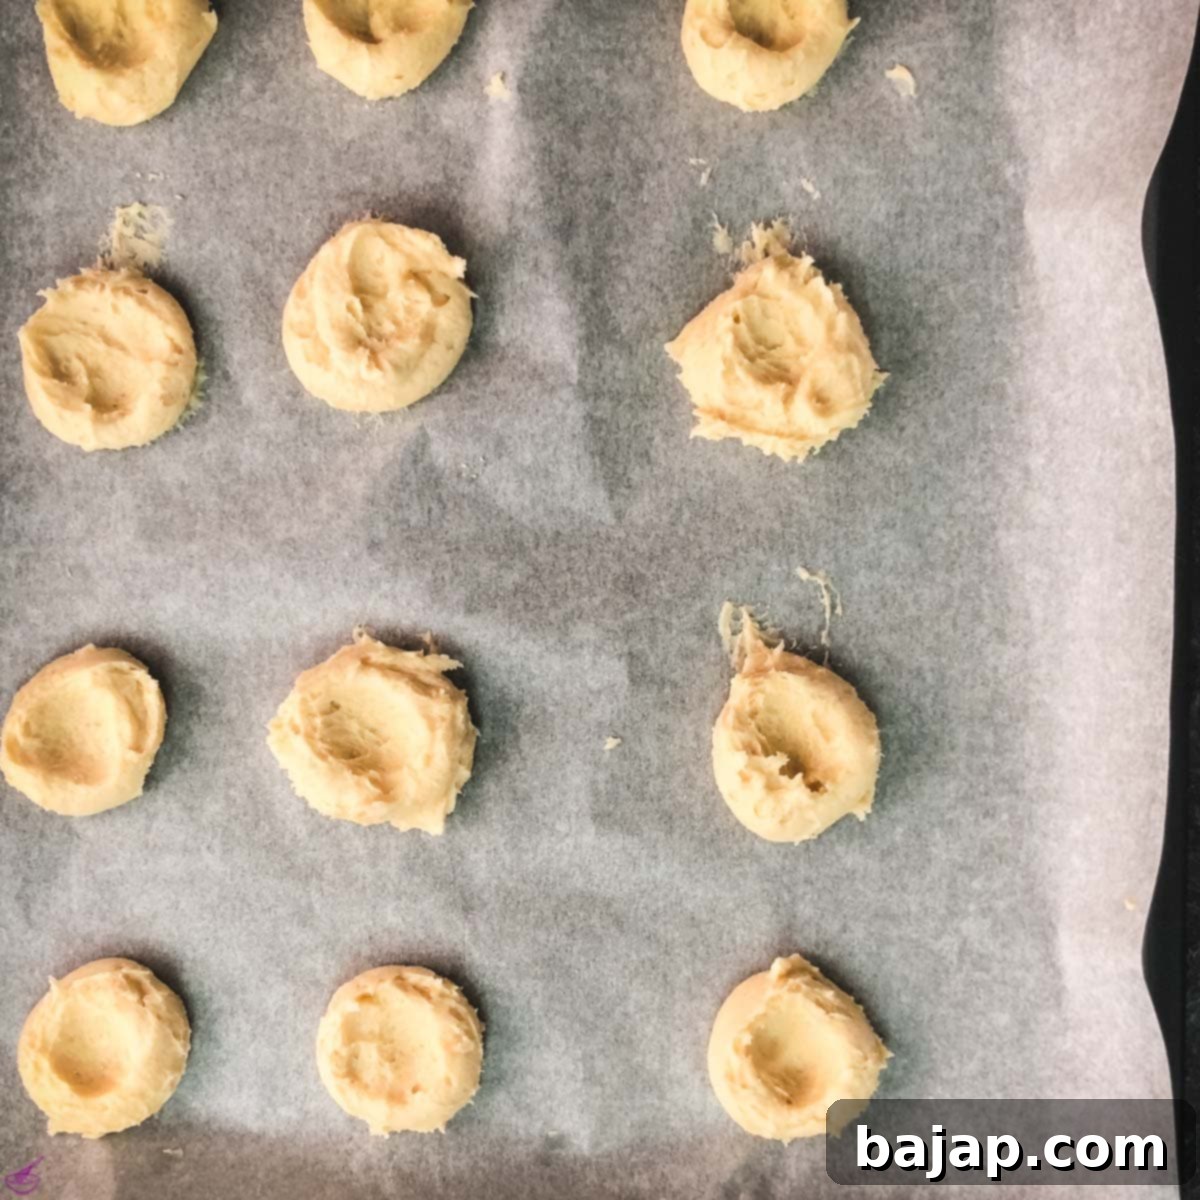
Step Four: Create the Indent. Lightly press the center of each dough ball down with your thumb or the back of a small, rounded spoon. This indentation will be the perfect spot for your Hershey’s Kiss after the cookies are baked, ensuring it sits nicely, looks appealing, and doesn’t roll off as the cookie cools. This also helps create that classic “blossom” shape.
Step Five: Bake to Golden Perfection. Place the baking sheet with the portioned dough into the preheated oven. Bake for approximately 15 minutes, or until the edges of the cookies begin to turn a beautiful golden brown. The centers may still look slightly soft, but they will firm up as they cool. Avoid overbaking to keep them wonderfully tender and moist. Once baked, carefully remove the hot pan from the oven.
Step Six: Add the Hershey’s Kisses. This step requires speed! Immediately after taking the cookies out of the oven, while they are still hot and soft, press one unwrapped Cookies ‘n Cream Hershey Kiss firmly into the indent of each cookie. The residual heat from the cookie will slightly melt the base of the Kiss, helping it adhere securely to the cookie and creating that iconic “blossom” effect as it sets. Have all your Kisses unwrapped and ready to go before you start this step!
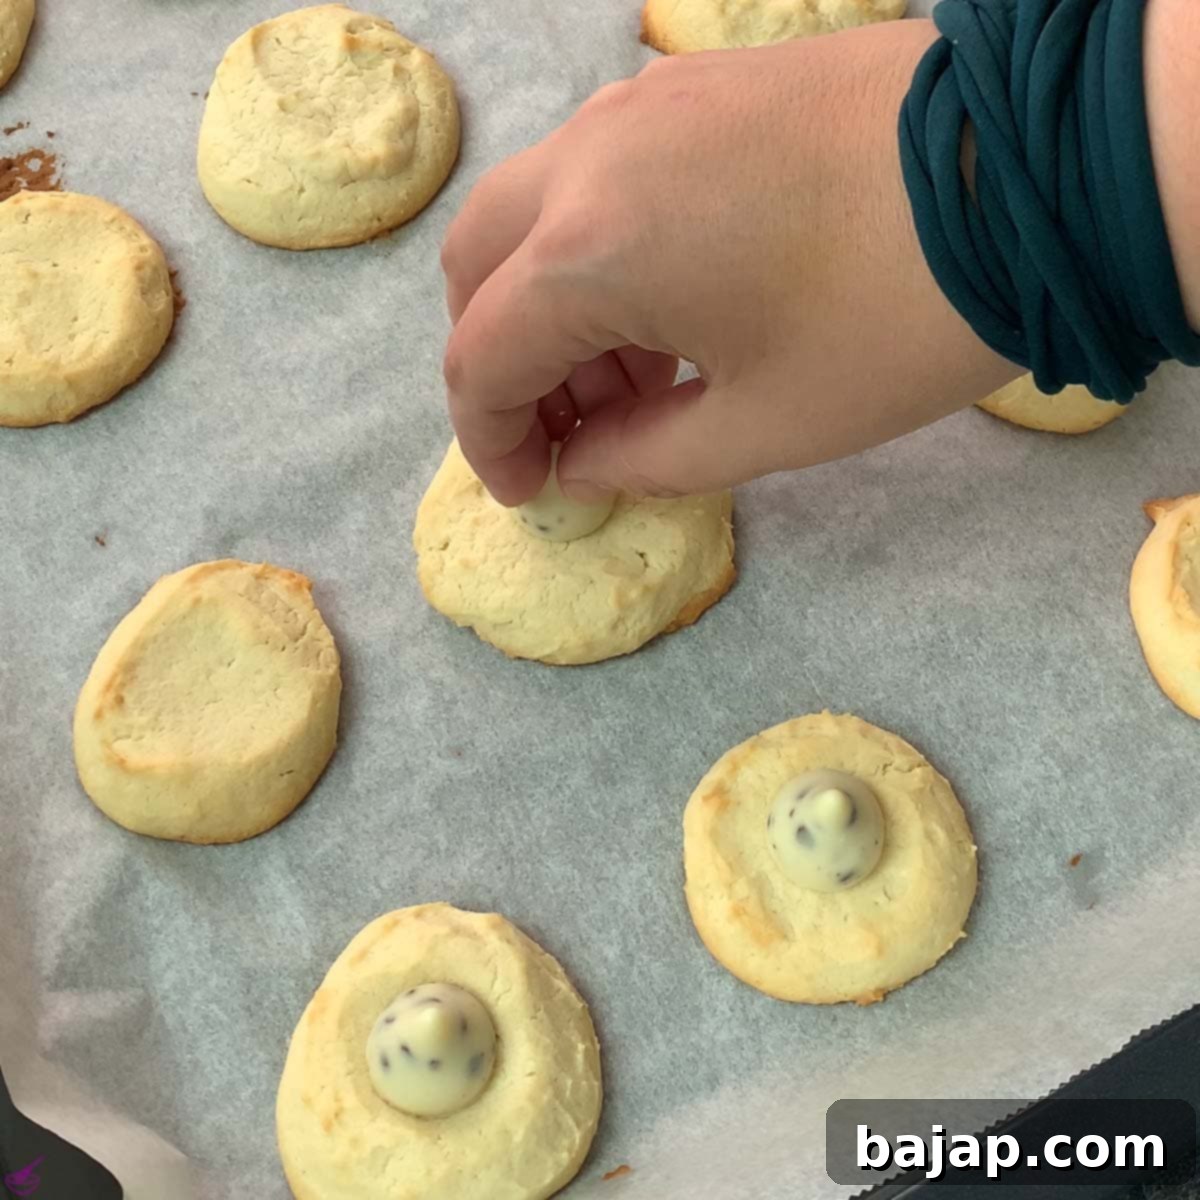
Step Seven: Cool and Enjoy! Allow the cookies to rest on the baking sheet for about 5 minutes to set slightly. This prevents them from breaking apart when moved. Then, carefully transfer them to a wire cooling rack to cool completely. This crucial step allows the cookies to fully firm up and ensures the Hershey’s Kisses solidify, providing the best texture and preventing them from falling off. Once cooled, they’re ready to be devoured and shared!
🍪 Creative Variations & Customization Ideas for Your Blossom Cookies
While these Cookies ‘n Cream Blossom Cookies are perfect as they are, one of their best qualities is how easily they can be customized! Feel free to get creative and experiment with different flavors and additions to make them truly your own. Here are some delightful variations to inspire you:
- Cheesecake Craze: If you love the creamy tang that cream cheese brings to these cookies, you absolutely must try my amazingly easy recipe for Cheesecake Thumbprint Cookies! They offer a similar delightful texture with a burst of fruity cheesecake flavor, making them another fantastic option for cream cheese lovers and a great way to use up more cream cheese if you have it.
- Crazy Kisses (Candy Swaps): Don’t limit yourself to just Cookies ‘n’ Creme Kisses! You can truly go wild with the vast variety of Hershey’s Kisses available. Swap them for traditional milk chocolate Kisses for a classic chocolate-on-chocolate experience, try seasonal flavors like peppermint Kisses during the holidays, or even birthday cake flavored Kisses for a festive twist. Any small, soft candy that can be pressed into the center of a warm cookie would work beautifully here, such as mini peanut butter cups, Rolos, or even soft caramel squares for a gooey center.
- Funky Fruit Fillings: For a burst of fruity brightness and a beautiful visual pop, consider trading the Kisses for your favorite fruit jam or curd. A dollop of raspberry, apricot, strawberry, or lemon curd pressed into the warm cookie center would create a beautiful contrast of flavors and colors. This variation transforms the cookie into a delightful jam thumbprint with a tender, creamy base.
- Candied & Chocolatey Cookies: If you’re a fan of rich chocolate or gooey caramel, you can easily adapt these blossom cookies. Instead of a Kiss, press a mini chocolate square (like a Ghirardelli square) into the warm cookie for an intense chocolate center. Or, once the cookies are cooled, drizzle them with melted chocolate (white, milk, or dark) or a decadent caramel sauce for an extra layer of sweetness and visual appeal. You could also sprinkle mini chocolate chips over the still-warm cookies before cooling.
- Nutty Additions: For an extra layer of flavor and crunch, you could incorporate finely chopped nuts into your cookie dough, such as pecans, walnuts, or almonds (if not avoiding nuts for allergies). Alternatively, once the Hershey’s Kiss is pressed into the warm cookie, sprinkle a few chopped nuts around the base of the Kiss for a lovely textural contrast. Toasted nuts work exceptionally well for added depth of flavor.
- Citrus Zest: Add a bright, aromatic note to your cookie dough by incorporating a teaspoon of finely grated lemon or orange zest when you cream the butter and sugar. The citrus will provide a subtle tang that beautifully complements the sweetness of the Cookies ‘n’ Creme Kiss, creating a more complex flavor profile.
- Spice it Up: For a warmer, cozier cookie, consider adding a pinch of ground cinnamon or a tiny dash of nutmeg to your dry ingredients. This is especially lovely during the autumn or winter months and pairs well with the creamy base.
🍽 Essential Baking Equipment for Easy Cookies ‘n Cream Blossom Cookies
Having the right tools can make your baking experience much smoother and more enjoyable. For these Cookies ‘n Cream Blossom Cookies, you’ll need a few standard kitchen items that most home bakers already possess:
- Lined Baking Sheet: A good quality baking sheet is essential. Always line it with parchment paper or a silicone baking mat. This not only prevents your cookies from sticking to the pan but also ensures that they bake evenly and release cleanly, making cleanup a breeze. Using a light-colored baking sheet can also help prevent over-browning on the bottom.
- Electric Mixer (Hand or Stand): A hand mixer or a stand mixer (ideally equipped with a flat beater attachment) is highly recommended for effectively creaming the butter, cream cheese, and sugar until light and fluffy. While you could technically mix the dough by hand for a good arm workout, an electric mixer will achieve a much lighter, fluffier, and more consistent dough in less time, ensuring the perfect cookie texture.
- Large Mixing Bowls: You’ll need at least one large mixing bowl for combining your ingredients. Using a sturdy bowl that can accommodate your mixer and the growing dough volume, while minimizing splatters, is helpful. Stainless steel or glass bowls are good choices.
- Ice Cream Scoop or Cookie Disher: For perfectly uniform cookies, an ice cream scoop (typically 1.5 to 2 tablespoons in size, often labeled as a #40 or #50 scoop) or a dedicated cookie disher is your best friend. This ensures that all your cookies are the same size, leading to consistent baking times and a professional-looking batch.
- Wire Cooling Rack: Once your cookies come out of the oven, a wire cooling rack is crucial. It allows air to circulate around the cookies from all sides, cooling them evenly and preventing them from becoming soggy on the bottom from residual heat. Ensure you have enough space for your entire batch.
- Rubber or Silicone Spatula: A flexible spatula is incredibly useful for scraping down the sides of your mixing bowl, ensuring all ingredients are fully incorporated, and for gently folding in the last of the flour if needed. It’s also handy for carefully transferring baked cookies.
- Measuring Cups and Spoons: Accurate measurements are key in baking, so make sure you have a complete set of dry measuring cups and liquid measuring cups, along with a full set of measuring spoons, to ensure precision for the best results.
💭 Top Tips for Perfect Cookies ‘n Cream Blossom Cookies Every Time
Achieving the perfect Cookies ‘n Cream Blossom Cookies is easy when you keep these expert tips in mind:
- Avoid Overmixing the Flour: When adding the cake flour, mix only until the flour is just incorporated and no dry streaks remain. Overmixing develops the gluten in the flour, which can lead to tough, dense cookies. This dough is meant to be tender, so resist the urge to keep beating! If your mixer struggles or the dough becomes too stiff for a traditional mixer, turn it out onto a lightly floured surface and gently knead it together by hand just until combined. This quick knead ensures even flour distribution without overworking the dough.
- Press Kisses While Hot: This is a crucial step! The residual heat from the freshly baked cookies is essential for the Hershey’s Kisses to slightly melt and adhere firmly to the cookie. If you wait too long, the cookies will cool and harden, and the Kisses won’t stick properly and might just fall off. Be ready with your unwrapped Kisses as soon as the cookies come out of the oven.
- Room Temperature Ingredients are Key: Ensure your butter and cream cheese are truly softened to room temperature before you begin. This allows them to cream together smoothly with the sugar, creating an emulsified, airy, and uniform base for your cookie dough. Cold ingredients won’t combine properly and can result in a lumpy, dense dough with an inconsistent texture. Take them out of the fridge at least 30-60 minutes before you start.
- Don’t Overcrowd the Baking Sheet: Give your cookies space to spread! Placing them about 1-inch apart on the baking sheet ensures even airflow around each cookie, promoting uniform baking, golden edges, and preventing them from merging into one giant cookie blob. Bake in batches if necessary.
- Chill for Better Shape (Optional but Recommended): If you find your dough a bit too soft or sticky to handle, or if you want to prevent excessive spreading and achieve a thicker cookie, you can chill the scooped cookie dough balls for 20-30 minutes in the refrigerator before baking. This helps firm up the butter, resulting in cookies that hold their shape a little better.
- Store Hershey’s Kisses Properly: Keep your Hershey’s Kisses in a cool, dry place until you’re ready to use them. If they get too warm before you’ve even unwrapped them, they might melt or become too soft and sticky, making them difficult to handle and place neatly in the cookies.
- Cool Completely for Best Texture: While it’s incredibly tempting to eat them warm, these cookies, especially with the melting chocolate, benefit greatly from cooling completely on a wire rack. This allows them to fully set, develop their ideal tender-chewy texture, and ensures the Hershey’s Kiss is firm and doesn’t create a gooey mess when handled.
🙋🏻 Frequently Asked Questions (FAQ) About Cookies ‘n Cream Blossom Cookies
Here are some common questions about making and storing these delightful Cookies ‘n Cream Blossom Cookies to help you on your baking journey:
To maintain their freshness and delicious taste, ensure the cookies have cooled completely before storing. Once cooled, place them in an airtight container at room temperature. They will keep well on your counter for up to five days, remaining soft and flavorful. For longer storage, you can freeze the baked cookies for up to 2-3 months. Simply place them in a single layer on a baking sheet to flash freeze, then transfer to a freezer-safe container or bag, separating layers with parchment paper to prevent sticking. Thaw at room temperature before serving.
Absolutely! The original recipe is designed to yield about twelve delicious cookies, which is perfect for a small gathering or a quick treat. However, if you’re hosting a larger crowd, planning a party, or simply want to have more on hand, feel free to easily double (or even triple) all the ingredients. Just remember to use an additional baking sheet (or bake in multiple rounds) to ensure proper spacing and even baking for the larger batch. You might also need to increase mixing times slightly to ensure all ingredients are well combined.
This particular recipe for Cookies ‘n Cream Blossom Cookies is wonderfully nut-free and egg-free, making it a suitable option for those with nut or egg allergies. However, please be aware that the recipe does contain dairy (from butter, cream cheese, and Hershey’s Kisses) and wheat flour. Always check ingredient labels carefully if you or your guests have specific dietary concerns or allergies, as ingredients can vary by brand.
Yes, you can use all-purpose flour as a substitute, but the texture of your cookies might be slightly different. Cake flour has a lower protein content, which results in a softer, more tender, and delicate cookie. If you use all-purpose flour, your cookies might be a bit chewier and less delicate. For a closer substitute to cake flour, you can make your own by removing 2 tablespoons of all-purpose flour from a 1-cup measure, then replacing it with 2 tablespoons of cornstarch, and sifting them together twice to ensure the cornstarch is evenly distributed.
Yes, you can! This dough is fantastic for making ahead, which can be a real time-saver. You can prepare the dough, form it into balls, and even press the indents. Then, arrange the dough balls on a baking sheet, cover tightly with plastic wrap, and refrigerate for up to 2-3 days before baking. You can also freeze the raw dough balls for up to a month. If baking from frozen, you might need to add a couple of extra minutes to the baking time, and it’s best to press the Kisses in after they’ve baked for about 10 minutes to ensure they still melt and adhere well.
If your Kisses melt entirely or become too runny, it usually means the cookies were still too hot when you placed them, or the Kisses themselves were already very soft from a warm environment. To avoid this, ensure your Kisses are firm and chilled if your kitchen is warm. When placing them on the hot cookies, work quickly. If they do melt too much, don’t worry! The cookies will still be delicious. You can let them cool completely, and the melted chocolate will re-solidify, creating a lovely chocolate swirl. For a cleaner look next time, you can also let the cookies cool for about 5 minutes on the hot baking sheet before adding the Kisses, or even place the Kisses in the freezer for 10-15 minutes before pressing them into the cookies.
More Delicious Cookie Recipes to Explore
If you’ve enjoyed baking these delightful blossom cookies, you might be eager to discover more irresistible cookie recipes. Here are some other fantastic options from our kitchen that are sure to satisfy your sweet tooth and expand your baking horizons:
- 5 Ingredients Raspberry Cheesecake Thumbprint Cookies – Another incredibly easy and delicious cream cheese cookie, this time with a fruity twist!
- Raspberry Almond Thumbprint Cookies – A classic with a lovely blend of fruit and nutty flavors.
- Bright & Zesty Lemon Sugar Cookies – For those who love a hint of citrus in their sweet treats.
- Clever Leftover Egg Yolk Cookies – A resourceful and delicious recipe for using up extra egg yolks.
- Colorful M & M Cookies – A fun, classic cookie that’s always a hit with kids and adults alike.
- Rich Coffee Chocolate Chip Cookies – A sophisticated twist on the classic chocolate chip, perfect for coffee lovers.
- Unique Matcha White Chocolate Chip Cookies – An adventurous and vibrant cookie with a subtle earthy flavor.
We absolutely love seeing your creations! If you decide to make this recipe, please let us know how much you enjoyed it by leaving a ★★★★★ star rating and a comment below. Your feedback means the world to us and helps other bakers discover great recipes! You can also sign up for our Newsletter to receive weekly delicious homemade recipes straight to your inbox. Don’t forget to follow us on Pinterest or Instagram and share your baking journey with us! Just tag us @combinegoodflavors and use the hashtag #combinegoodflavors so we don’t miss your masterpieces.
📖 Recipe Card: Delicious Cookies ‘n Cream Blossom Cookies

Delicious Cookies ‘n Cream Blossom Cookies
By Nora
Save RecipeSaved!
Pin Recipe
Equipment
-
Baking pan
-
Hand mixer or stand mixer
-
Bowl
-
Parchment Paper or silicone mat
-
Ice cream scoop
