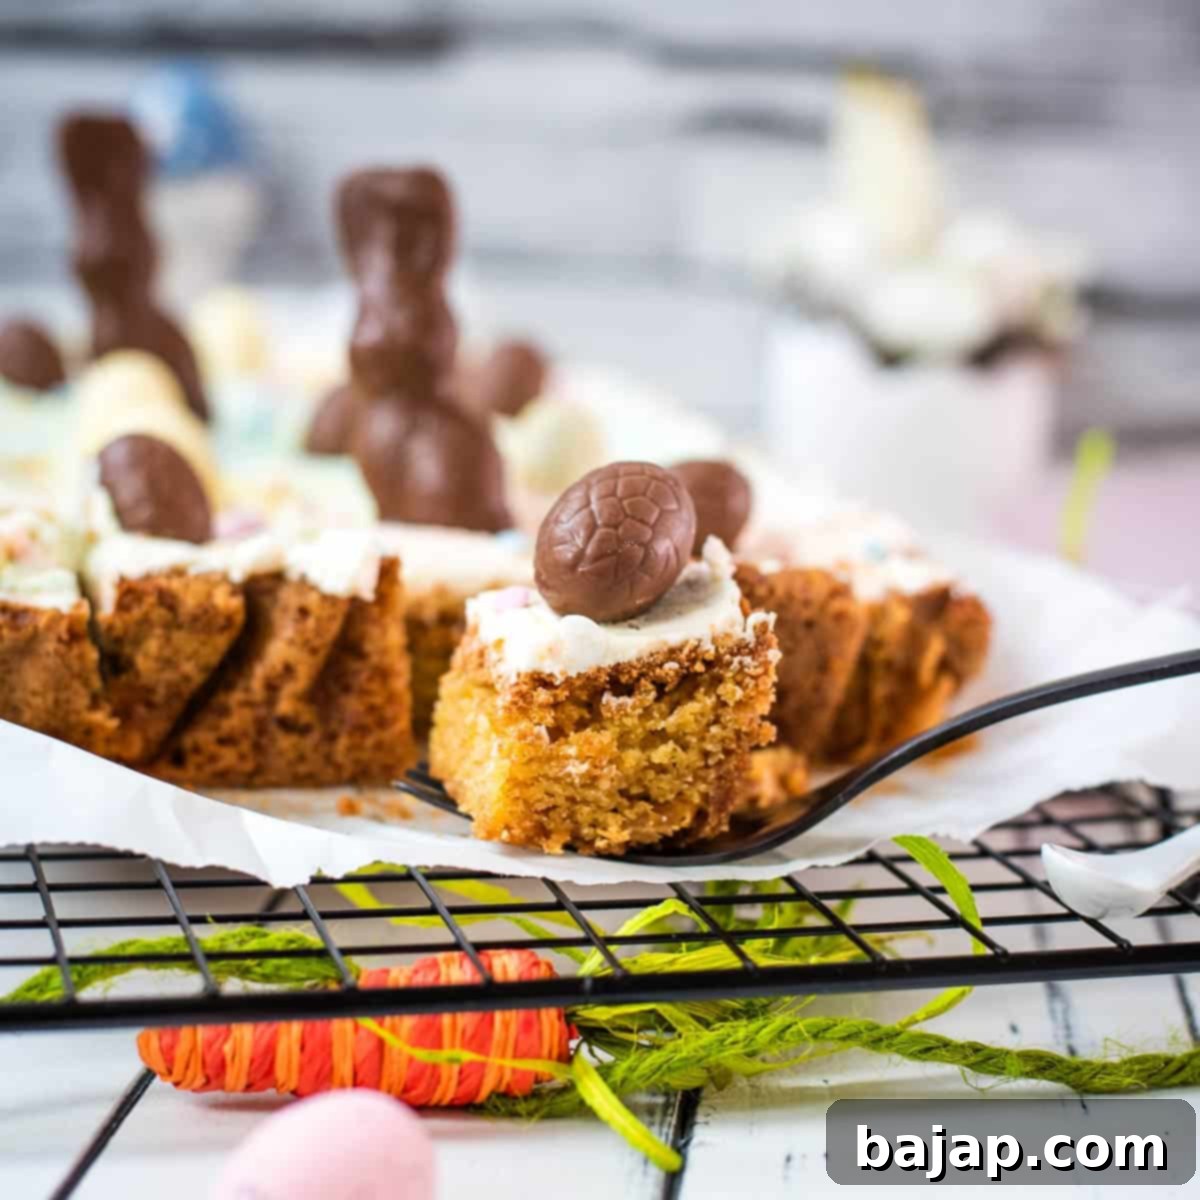
Delightful Funfetti Easter Sugar Cookie Bars with Marbled Pastel Buttercream: Your Ultimate Spring Dessert Recipe
Marbled Magic: Funfetti Easter Sugar Cookie Bars
The air is filled with the sweet promise of spring, and with it, the anticipation of Easter celebrations! As daffodils bloom and the world awakens in a symphony of soft hues, my kitchen too found itself immersed in a vibrant pastel mood this year. Drawing inspiration from nature’s gentle awakening, the playful colors of Easter eggs, and the sheer joy of the season, I set out to create a dessert that embodies all this magic. The result? These utterly charming Funfetti Easter Sugar Cookie Bars – a treat so delightful, they might just become your new springtime tradition. Imagine a buttery, sweet, and irresistibly soft sugar cookie base, baked to perfection with just the right amount of chewiness, and studded with a rainbow of sprinkles. But the magic doesn’t stop there. Each bar is generously crowned with a dreamy, pastel marbled buttercream frosting, making every bite a celebration of flavor and color. These aren’t just cookies; they’re edible canvases of springtime joy, perfect for sharing with loved ones or savoring solo.
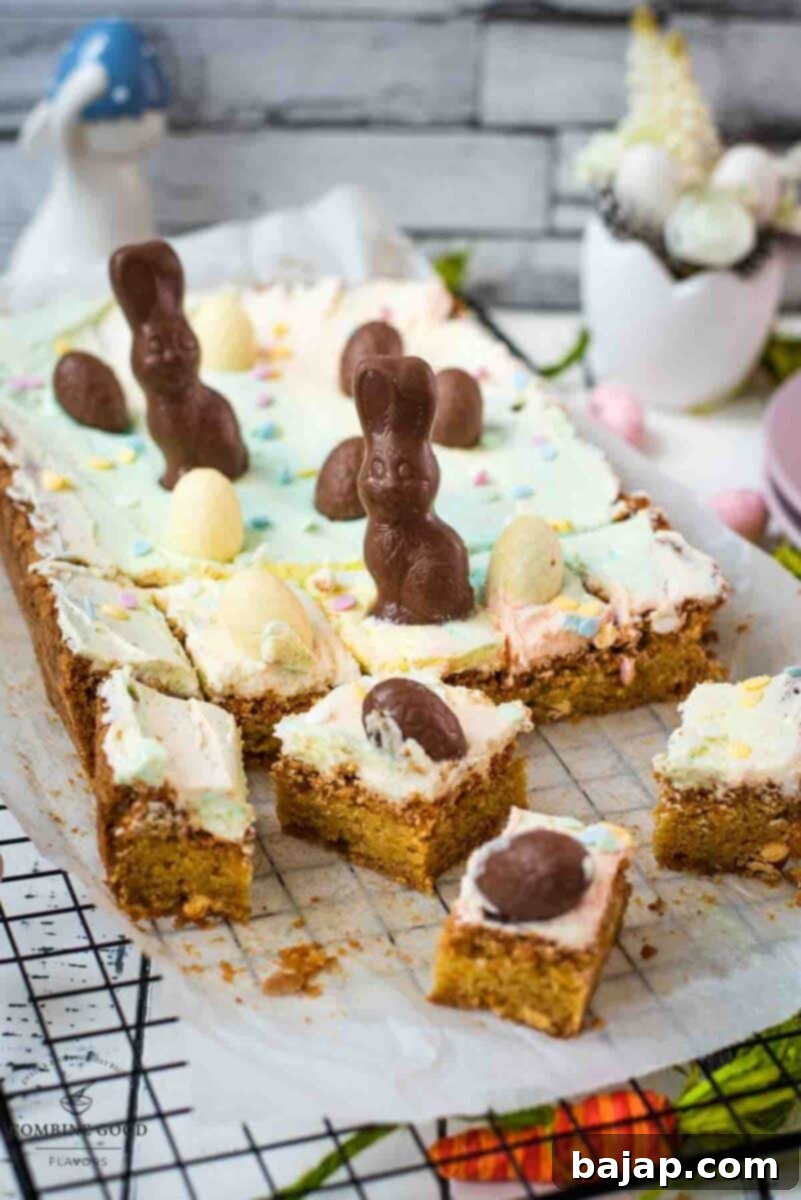
🎉 But what makes this Funfetti cookie bars recipe extra special (and irresistibly cute)? Let me tell you!
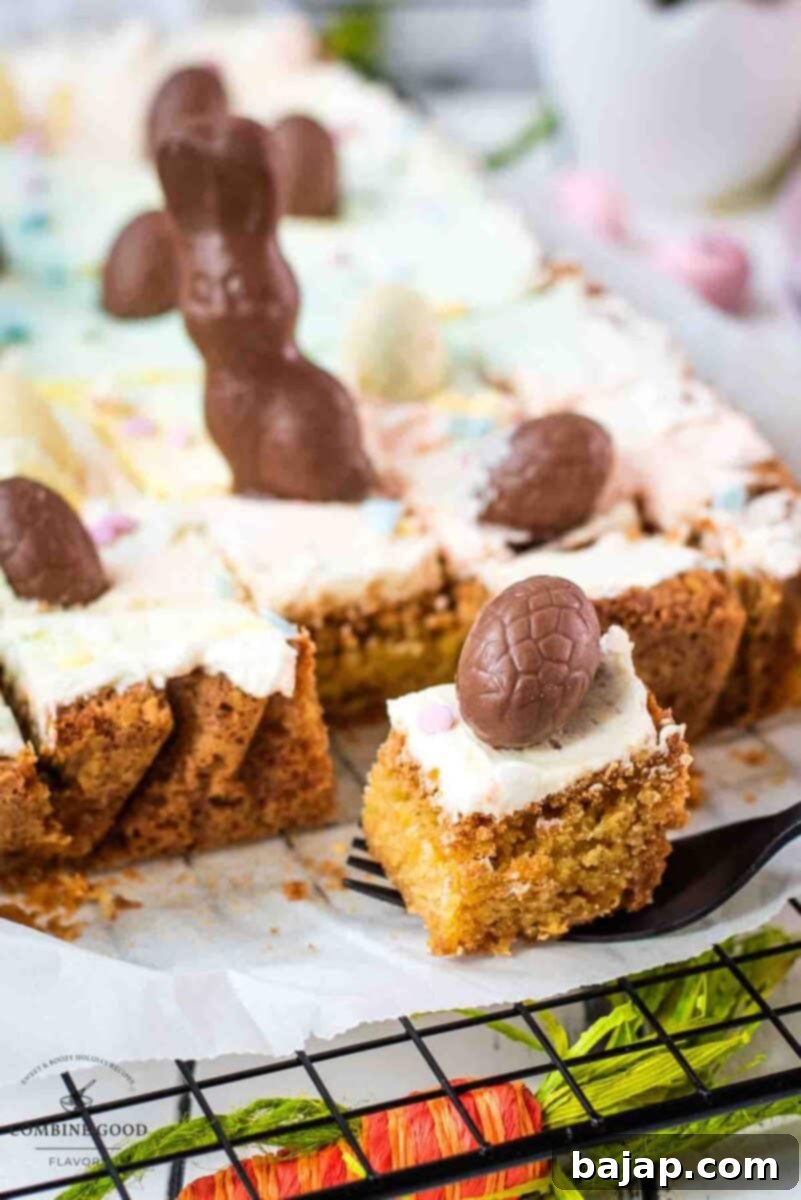
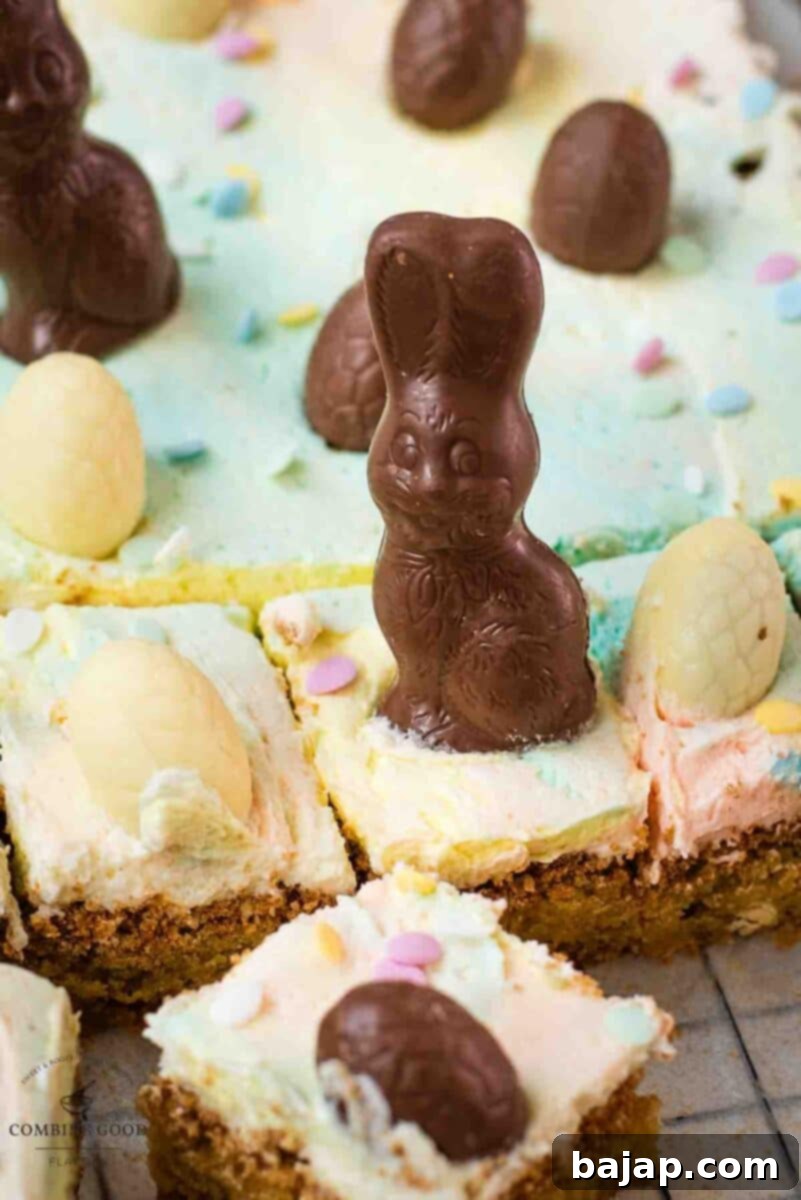
So, what elevates these Funfetti cookie bars from simple treats to a truly special Easter indulgence? It’s a combination of perfect textures, vibrant flavors, and an undeniable visual charm. Our journey begins with a homemade sugar cookie dough that’s anything but ordinary. We aim for a supremely soft, sweet, and slightly chewy consistency – a golden ratio that prevents them from being too dry or crumbly. The dough is infused with playful Funfetti sprinkles and creamy white chocolate chips, adding delightful bursts of color and melty goodness within each bite. Once baked to a tender, slightly golden perfection (achieving that coveted “just enough” baked texture that makes them so addictive), these bars become the ideal canvas for our artistic frosting. The true showstopper, however, is the cloud-like marbled buttercream. Crafted in an array of delicate pastel shades – think blush pink, sky blue, sunny yellow, and soft lilac – it mimics the gentle brushstrokes of a spring painting. To complete this edible masterpiece, we adorn each bar with a cheerful medley of extra colorful sugar sprinkles, enchanting mini chocolate eggs, and adorable chocolate bunnies, playfully peeking out from the pastel swirls. It’s a whimsical presentation that captures the essence of Easter, making it feel as though the Easter bunny himself delivered these sweet delights.
These Funfetti sugar cookie bars are more than just a recipe; they’re an invitation to create joyful memories. Whether you’re hosting a grand Easter brunch, contributing to a potluck dessert table, or simply looking for a delightful activity to enjoy with your family, these bars are an absolute must-bake. Their bright colors and irresistible flavor make them an instant crowd-pleaser for any spring gathering. They’re sweet enough to bring a smile to little faces when paired with a cold glass of milk, and sophisticated enough to be a welcome accompaniment to a warm cup of coffee or tea for the adults. Imagine serving these at an outdoor garden party, a baby shower, or as a vibrant centerpiece on your Easter spread. They’re also surprisingly easy to transport, making them perfect for sharing with neighbors or bringing to school events. Let these cookie bars be the sweet highlight of your spring season.
Ready to infuse your kitchen with the delightful aromas of baking and fill your home with colorful cheer? Let’s gather our ingredients and hop into the kitchen to bring this sweet Easter magic to life! 🐰✨ You’ll be amazed at how simple it is to create such an impressive and delicious treat.
🥘 Ingredients
Before we dive into the delightful process of baking, let’s ensure we have all our ingredients ready. Using high-quality ingredients can truly elevate the flavor of your Funfetti Easter Sugar Cookie Bars, making them even more irresistible. Most of these are pantry staples, but for the best results, remember to use softened butter and large eggs at room temperature – these small details make a big difference in the final texture of your cookie bars and the creaminess of your frosting.
For the Cookie Bar Base
- All-purpose flour
- Baking powder
- Baking soda
- Salt
- Unsalted butter, softened
- Granulated sugar
- Light brown sugar
- Large eggs
- Milk
- Vanilla extract
- Almond extract (optional, for extra flavor)
- Pastel sprinkles (jimmies work best)
- White chocolate chips
For the Frosting
- Unsalted butter, softened
- Powdered sugar
- Milk
- Vanilla extract
- Pinch of salt
- Food coloring (pastel shades: pink, blue, yellow, etc.)
- Additional sprinkles and mini chocolate eggs for decorating
See the recipe card for exact quantities.
🔪 Instructions
Step 1: Prepare Your Pan and Oven
Achieving perfectly baked cookie bars starts with proper oven temperature and pan preparation. Preheat your oven precisely to 350°F (175°C) and take a moment to grease your 9×13-inch (23×33 cm) baking pan, then line it with parchment paper. This extra step, with the parchment paper extending over the sides, creates “handles” that will allow you to lift the entire slab of cooled cookie bars out of the pan with incredible ease, making slicing and frosting a breeze and ensuring not a single crumb is left behind.
Step 2: Whisk Dry Ingredients
In a medium-sized bowl, combine all your dry ingredients: the all-purpose flour, baking powder, baking soda, and salt. Whisk them thoroughly for about 30 seconds until they are well combined. This ensures that the leavening agents and salt are evenly distributed throughout the dough, guaranteeing a consistent rise and flavor in every bite. Set this mixture aside for now.
Step 3: Cream Butter and Sugars
Now for the heart of our cookie bars – the wet ingredients. In a large mixing bowl, preferably using a stand mixer with a paddle attachment or a hand mixer, beat the softened unsalted butter, granulated sugar, and light brown sugar. Cream these together on medium-high speed for 2-3 minutes until the mixture transforms into a light, pale, and wonderfully fluffy consistency. This creaming process incorporates air, which is crucial for achieving that desirable soft and chewy texture in your finished cookie bars.
Step 4: Add Wet Ingredients
Reduce the mixer speed to low and add in the large eggs one at a time, mixing well after each addition until fully incorporated. Then, pour in the milk and both vanilla extract and, if you’re looking for that extra depth of flavor, the almond extract. Continue to mix on low speed just until everything is smoothly combined. Be careful not to overmix at this stage.
Step 5: Combine and Fold
With the mixer still on low speed, gradually add the whisked dry ingredients to the wet mixture, mixing only until the flour streaks have *just* disappeared. Overmixing can lead to tough cookie bars, so stop as soon as the dough comes together. Finally, gently fold in the vibrant pastel sprinkles and creamy white chocolate chips using a spatula. This gentle folding ensures the sprinkles retain their color and don’t bleed into the dough, and the chocolate chips are evenly distributed for maximum deliciousness.
Step 6: Bake to Perfection
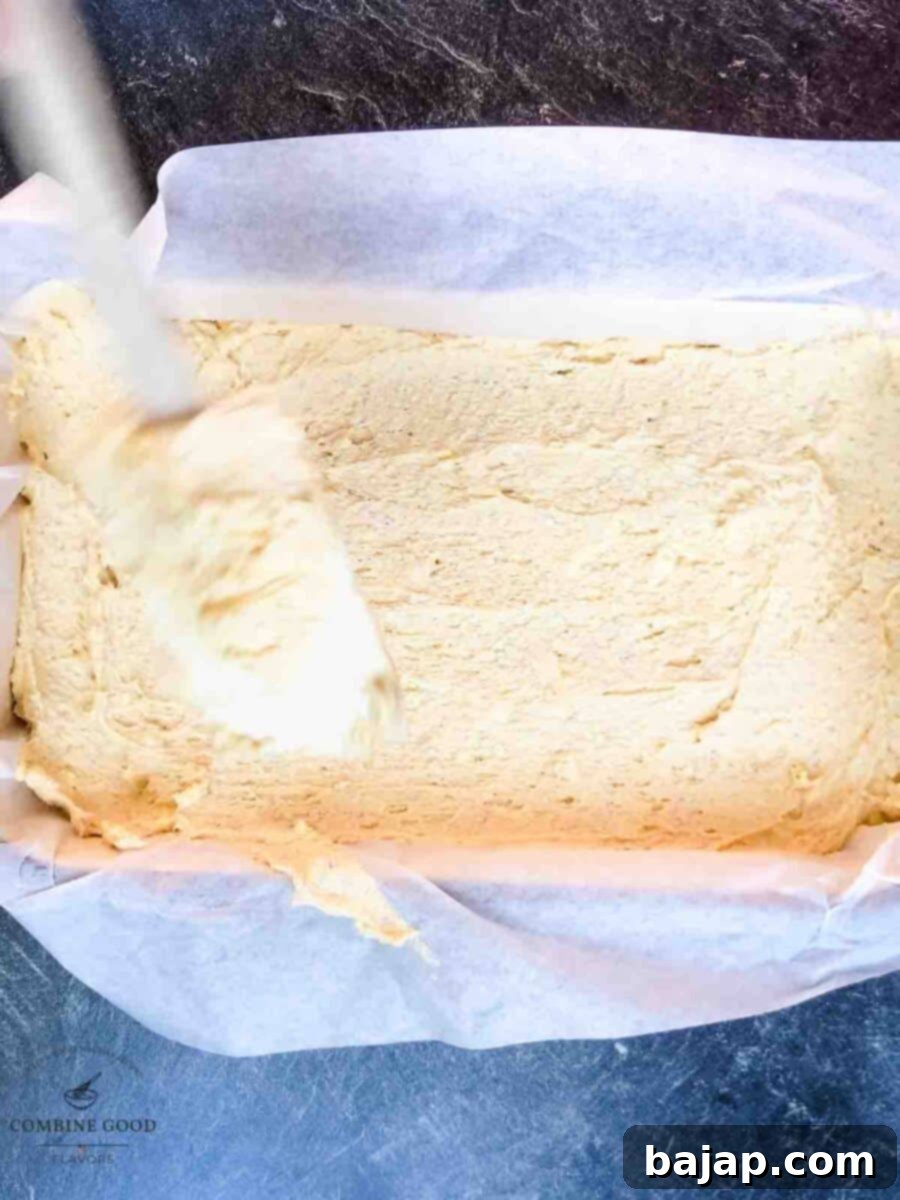
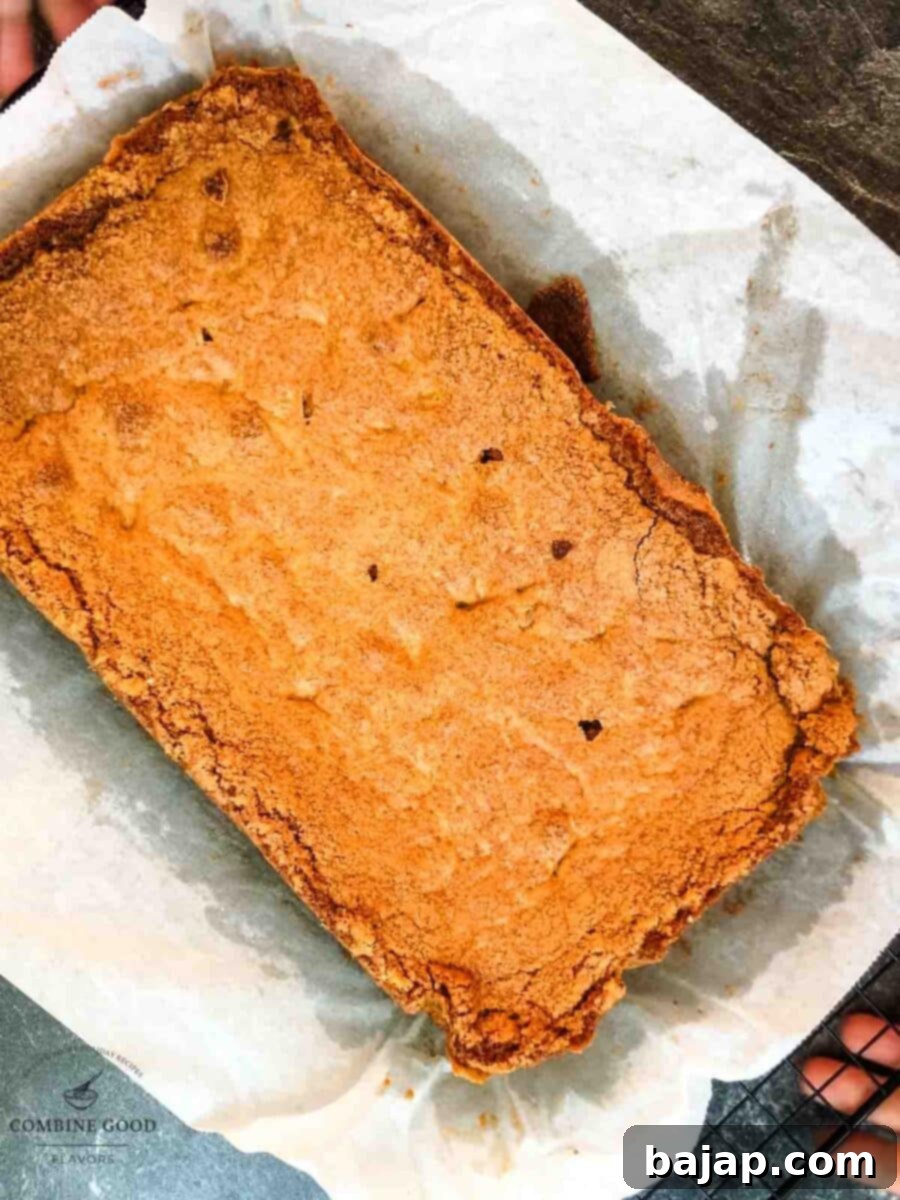
Press the prepared cookie dough evenly into your parchment-lined baking pan. Use an offset spatula or the back of a spoon to smooth the top, ensuring it reaches all corners for uniform baking. Bake for 25-35 minutes, or until the edges are lightly golden and the center appears set, though it might still look slightly soft – this is the secret to a gooey middle! A toothpick inserted into the center should come out with moist crumbs, not wet batter. Once baked, remove the pan from the oven and allow the cookie bars to cool *completely* on a wire rack before attempting to frost them. Rushing this step will result in melted frosting and a messy situation.
Step 7: Prepare the Buttercream Frosting
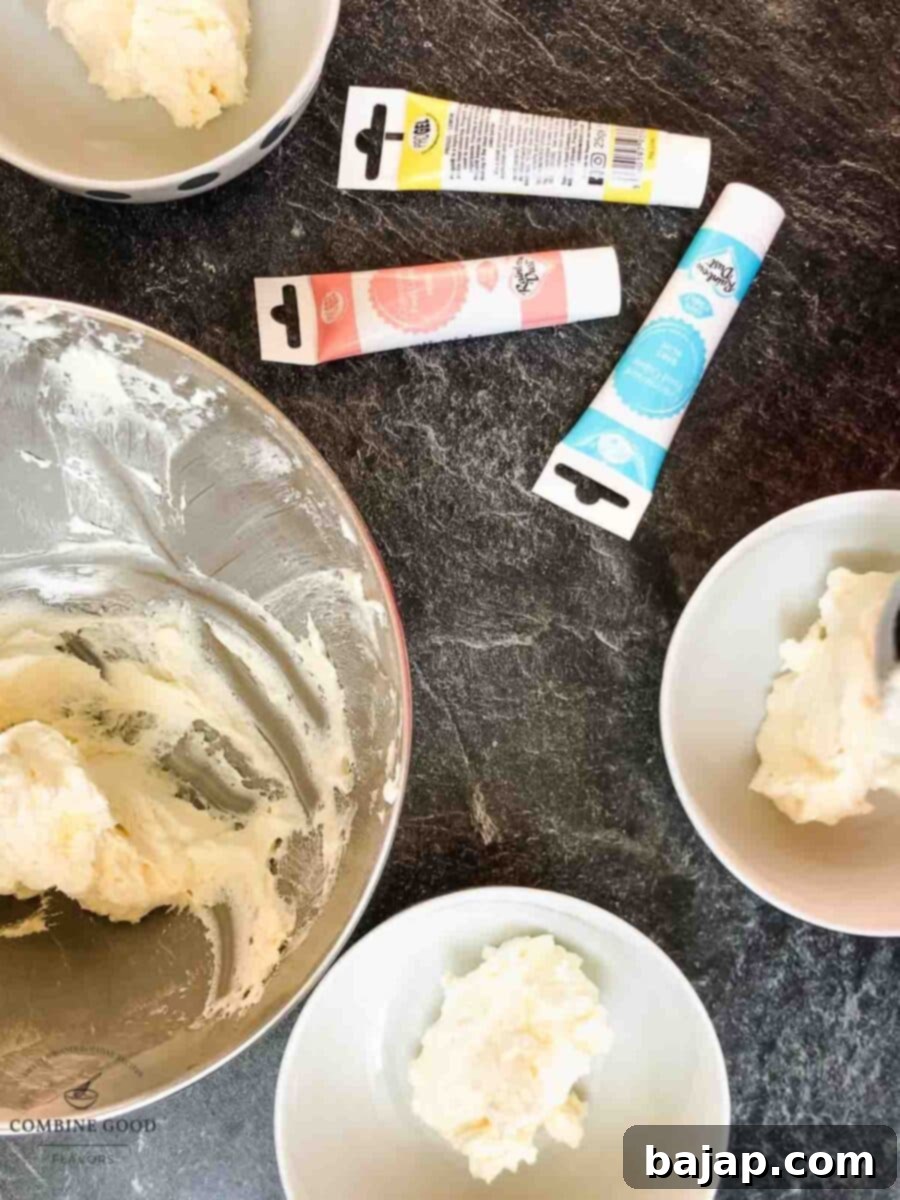
While your cookie bars are cooling, it’s time to whip up the dreamy pastel buttercream frosting. In a clean, large mixing bowl, beat the softened unsalted butter with your stand mixer or hand mixer until it’s incredibly smooth and creamy, about 2-3 minutes. Gradually add in the powdered sugar, one cup at a time, mixing on low speed until combined. Then, pour in the milk, vanilla extract, and a pinch of salt. Increase the speed to medium-high and whip for another 3-5 minutes until the buttercream is light, airy, and wonderfully fluffy. The salt helps to balance the sweetness, preventing the frosting from being overly cloying.
Step 8: Tint Your Pastel Colors
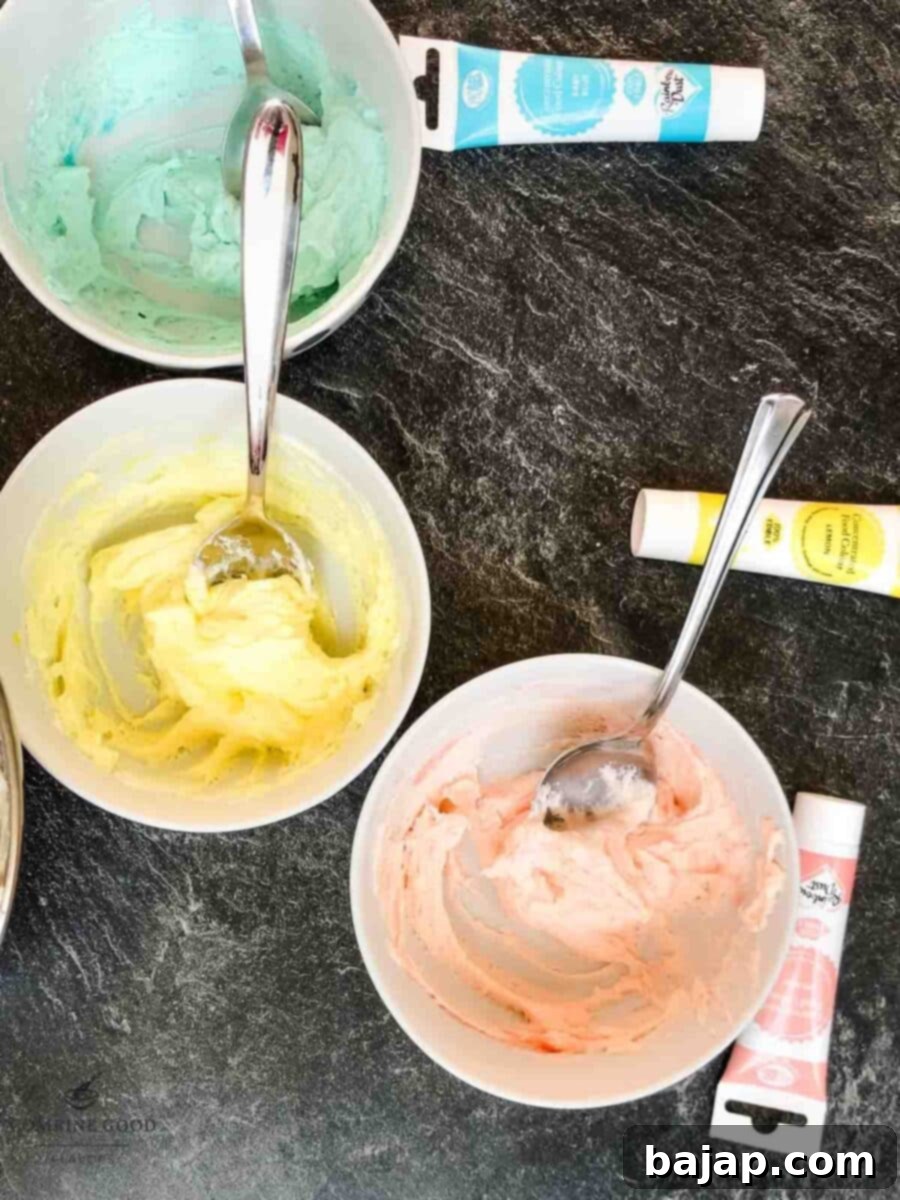
Now comes the fun part: coloring your buttercream! Divide the freshly made buttercream evenly into 3-5 small separate bowls, depending on how many pastel colors you’d like to use. Add a few drops of your chosen food coloring (gel food coloring works best for vibrant hues without thinning the frosting) to each bowl – think soft pink, sunny yellow, sky blue, delicate lilac, or even a pale mint green. Mix each color thoroughly until you achieve your desired pastel shade. Don’t be shy; create your very own Easter rainbow palette!
Step 9: Create the Marbled Effect
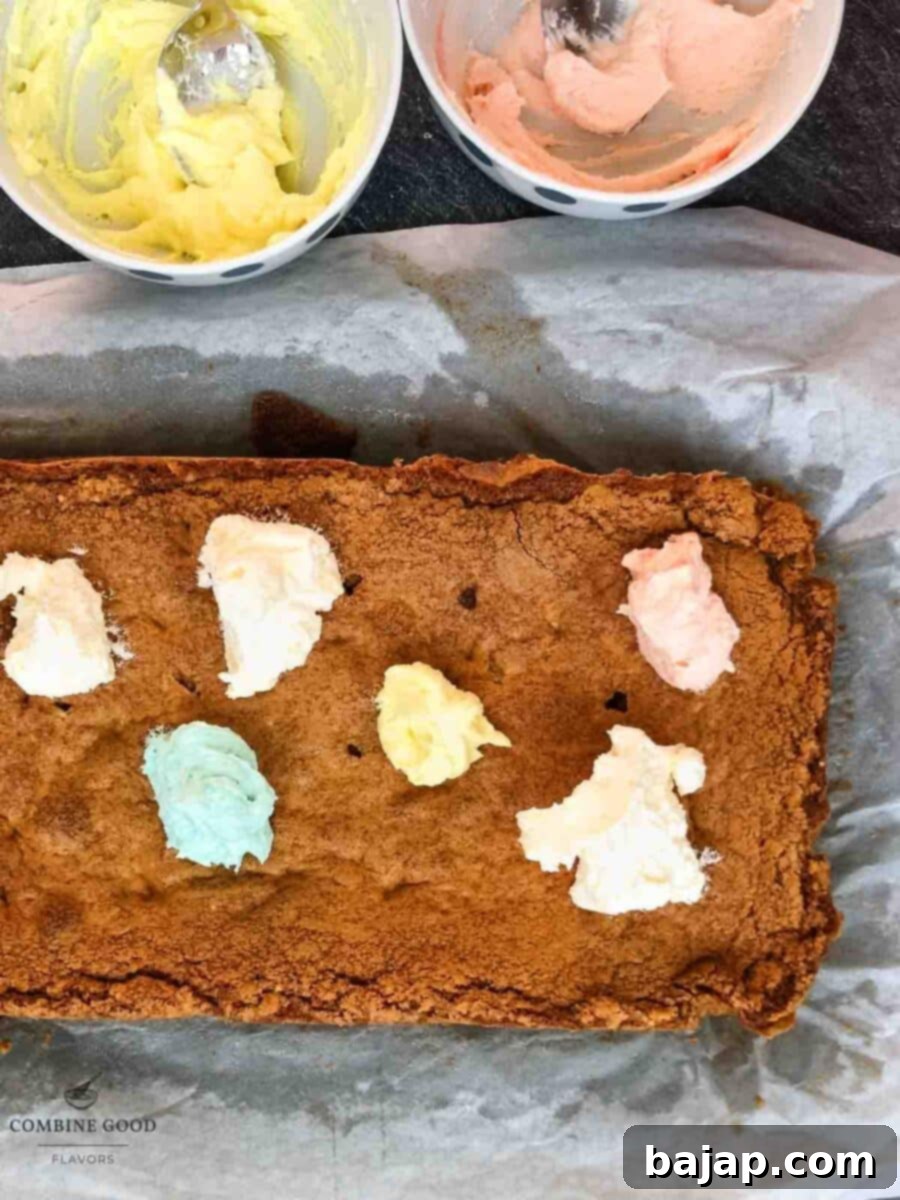
Once your cookie bars are entirely cool, retrieve your colorful buttercream bowls. Using a spoon or small spatula, generously dollop spoonfuls of each pastel frosting color randomly across the top of the cooled cookie bars. Don’t worry about perfection at this stage; embrace the artistic chaos! Then, take a clean spatula or offset spatula and gently spread and swirl the dollops together, allowing the colors to softly blend and create a beautiful marbled effect. The trick is to avoid overworking it – a few gentle passes are all you need to achieve those stunning, ethereal swirls. (For a more in-depth guide on the marbling technique, check out our “Top Tips” section below!).
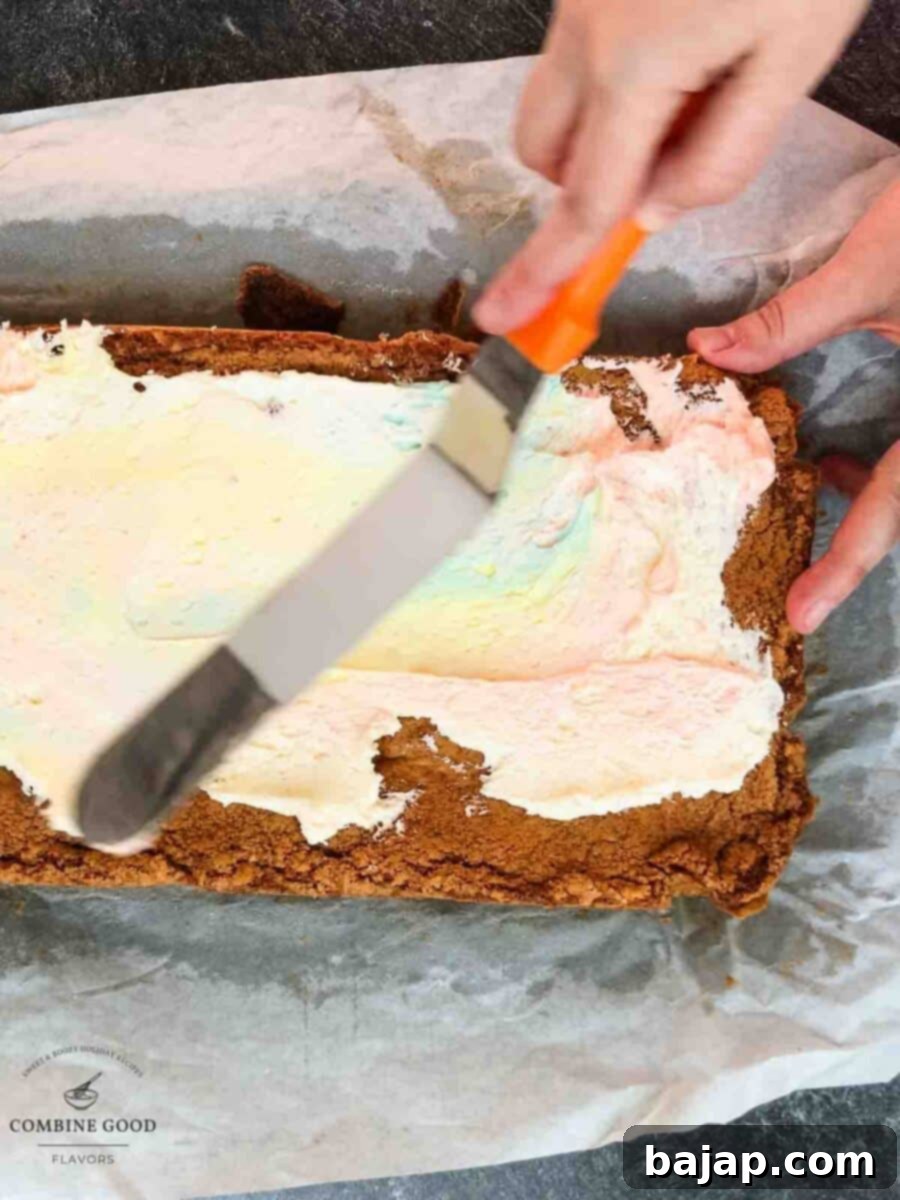
Step 10: Decorate with Easter Magic
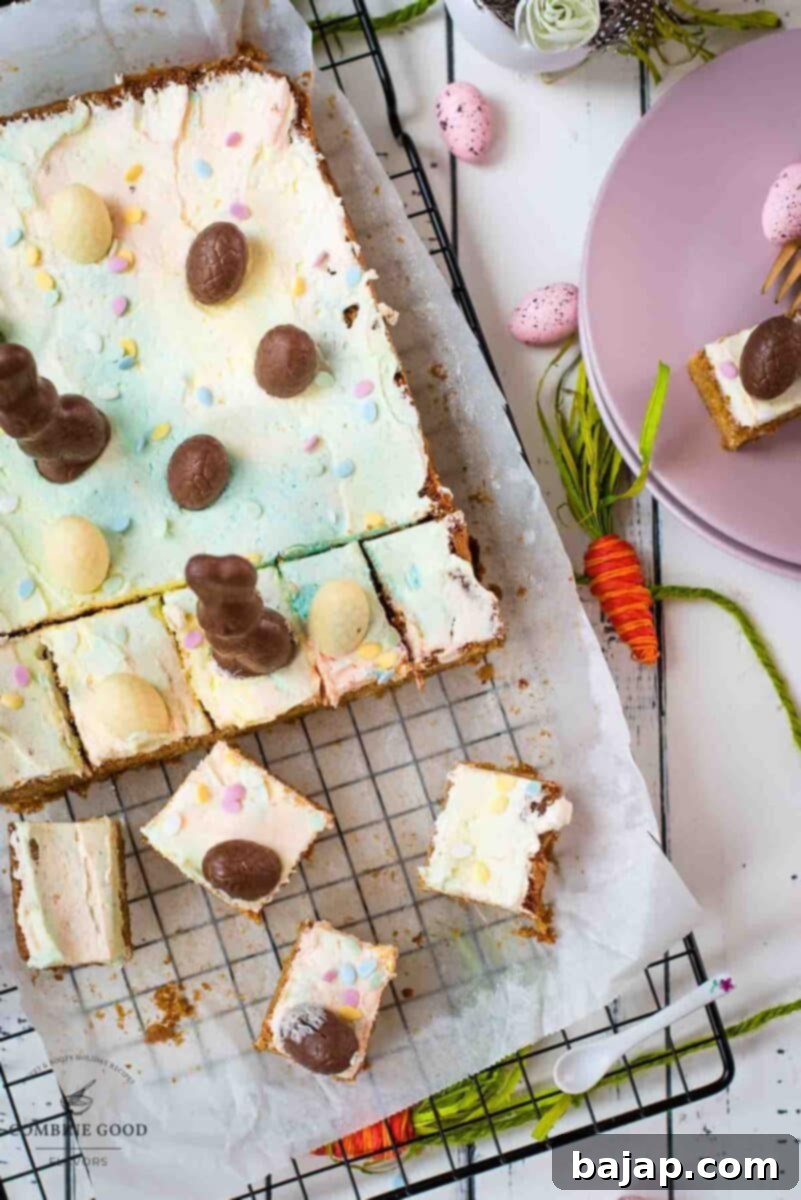
Immediately after marbling the frosting, it’s time for the final celebratory touches! Shower the entire surface of the frosted cookie bars with an generous amount of extra pastel sugar sprinkles. If you can find charming egg-shaped sprinkles or delicate pastel nonpareils, even better – they truly enhance the Easter theme! Then, gently press a scattering of mini chocolate eggs and adorable chocolate bunnies into the soft frosting. This not only adds more texture and chocolatey goodness but also brings that unmistakable touch of Easter magic to every square.
Step 11: Slice, Serve, and Enjoy!
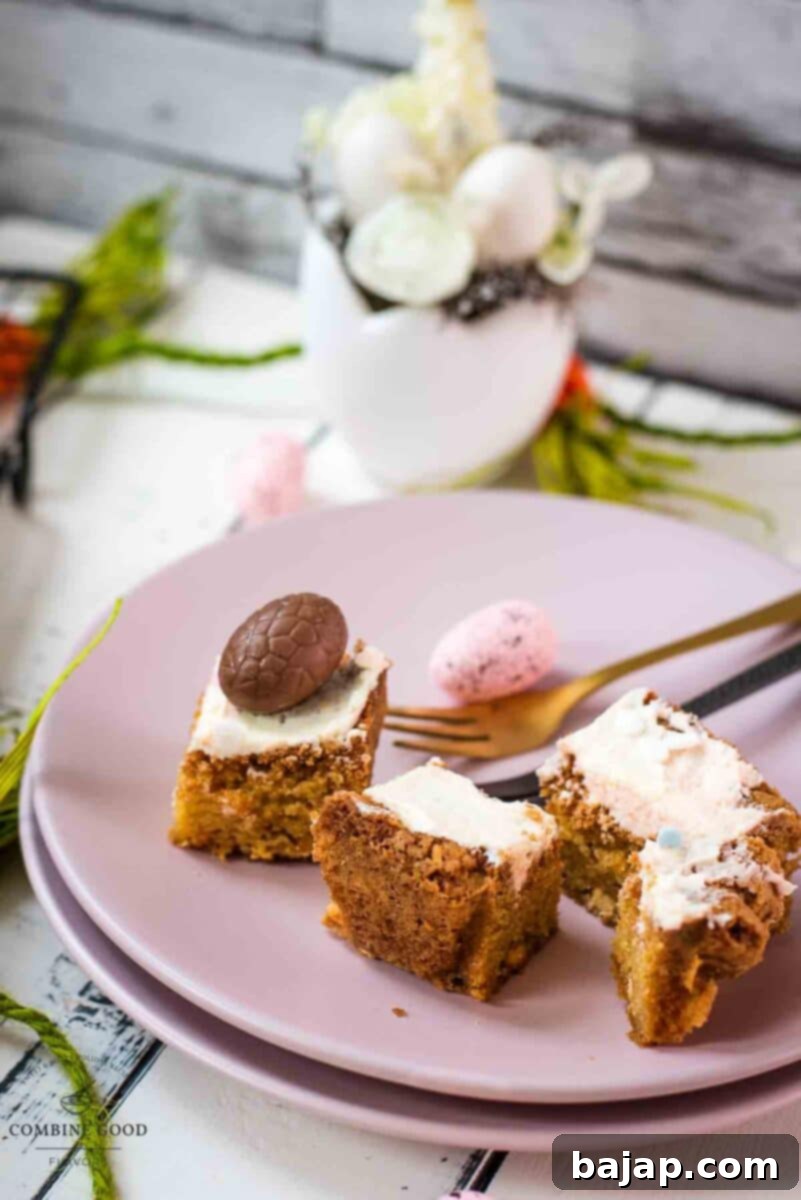
Using a sharp knife, carefully slice the finished cookie bars into individual squares or rectangles. For clean cuts, wipe your knife with a warm, damp cloth between each slice. Arrange them beautifully on a platter, serve them alongside a frosty glass of milk for the kids or a comforting cup of coffee or tea for the adults, and savor your delightful homemade Easter moment. These cookie bars are best enjoyed with loved ones and a heart full of springtime cheer! 🌸💕
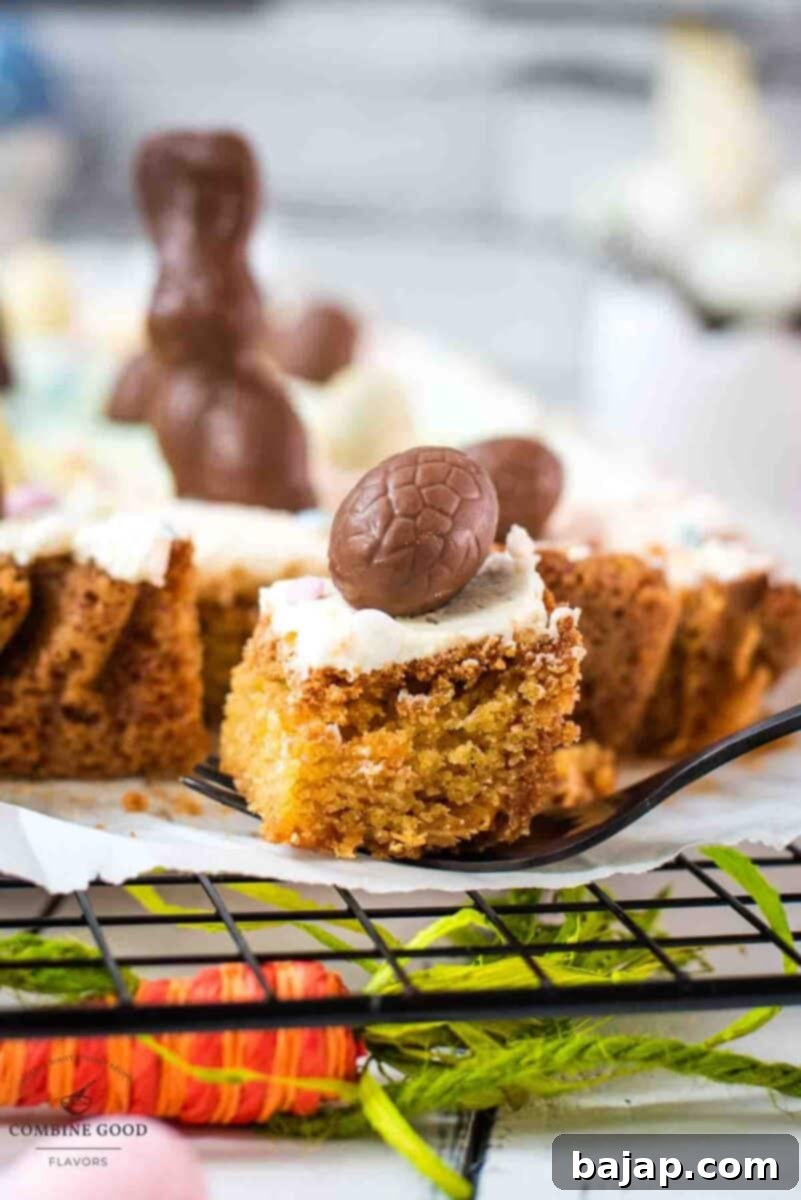
For more sprinkle fun, try this delicious sprinkles ice cream!
💭 Top tips for a Perfect Marbled Frosting Look
Achieving that stunning marbled effect on your Funfetti Easter Sugar Cookie Bars is simpler than you might think, and you certainly don’t need fancy tools! Here’s how to master the technique with just a spatula:
- Prepare Your Canvas: Ensure your sugar cookie bars are completely cooled. This is paramount! If the bars are even slightly warm, your beautiful buttercream will melt and become a messy puddle.
- Dollop Your Colors: Once your pastel buttercream colors are ready in separate bowls, use a clean spoon or small spatula to place random dollops of each color across the entire surface of the cooled cookie bars. Don’t overthink the placement; a scattered, organic approach works best. You don’t need to cover every inch with individual dollops; leaving some gaps will allow the colors to spread naturally.
- The Gentle Swirl: Take a clean offset spatula or a regular dinner knife (the blunt side can work well too) and begin to gently spread and swirl the dollops. Move your spatula across the frosting in slow, deliberate, S-shaped motions. The key here is a light hand. You want the colors to intertwine and blend softly, creating distinct streaks and swirls rather than fully mixing into a single, uniform color. Imagine painting with soft watercolors – you’re aiming for a gentle ebb and flow of color.
- Avoid Overworking: This is the most crucial tip! The moment you see the colors start to blur into one shade, stop. Less is definitely more when it comes to marbling. If you keep going, you’ll lose the beautiful contrast and definition of the pastel swirls. A few passes are usually sufficient to achieve the desired effect.
- Final Flourish: Immediately after marbling, sprinkle your extra festive toppings. This includes a generous shower of pastel sugar sprinkles (egg-shaped sprinkles are always a hit for Easter!), and then carefully press in your mini chocolate eggs and charming chocolate bunnies. The soft frosting will hold them perfectly in place, creating a truly festive and inviting presentation.
This technique results in a playful, pretty, and effortlessly elegant finish that’s absolutely perfect for Easter and will surely impress everyone who takes a bite!
🌡️ Storage
Proper storage is key to keeping your Funfetti Easter Sugar Cookie Bars fresh and delicious for as long as possible. Here’s how to best store them:
1. Room Temperature (Best for 3-4 Days)
- Store in an airtight container at room temperature for up to 3-4 days.
- Keep them in a cool, dry place, away from direct sunlight or heat, which can affect the frosting.
- If stacking, place parchment paper between layers to prevent sticking and preserve the delicate frosting and decorations. However, due to the chocolate decorations, it’s generally best to store them in a single layer if possible.
2. Refrigerator (Up to 1 Week)
- To prolong their shelf life, especially if your kitchen is warm, store them in the fridge in an airtight container.
- The bars will firm up in the fridge, so for the best soft and chewy texture, let them sit at room temperature for 15-20 minutes before serving. This allows the butter in the frosting and cookie base to soften slightly.
3. Freezer (Up to 3 Months)
- These cookie bars freeze beautifully! For best results, allow them to cool completely and for the frosting to set.
- Wrap each individual bar tightly in plastic wrap, then place them in a freezer-safe bag or airtight container. This double-layer protection helps prevent freezer burn.
- Thaw at room temperature for 30-60 minutes before serving. They’ll be just as delicious as when they were freshly baked!
🥚 Egg Swap SOS: What to Do If You Only Have Medium Eggs!
We all know the frustration: you’re ready to bake, you have all your ingredients, but then you realize you only have medium-sized eggs when the recipe calls for large! Don’t let this minor setback derail your plans for these delicious Funfetti Easter Sugar Cookie Bars. This recipe specifically calls for two large eggs to ensure the perfect balance of moisture, richness, and structure, contributing significantly to that desirable soft and chewy texture.
When faced with this exact dilemma, I discovered a simple hack that works like a charm: instead of using two large eggs, use two medium eggs plus one extra egg yolk. The results were simply divine – perfectly sweet, soft, and moist cookie bars, just as intended!
Why this “egg-swap” strategy is so effective:
- Size Difference: A large egg typically weighs around 57 grams (2 ounces) out of its shell, whereas a medium egg is slightly smaller, weighing approximately 50 grams (1.75 ounces). While the difference might seem small for one egg, when a recipe calls for multiple, it can affect the overall liquid content and structure of your bake.
- The Power of the Yolk: The egg yolk is primarily responsible for richness, flavor, and emulsification in baked goods. It contains most of the fat and adds a tenderizing quality. By adding an extra yolk from a medium egg, you’re not only compensating for the slight reduction in overall liquid from using smaller eggs but also boosting the richness and ensuring your cookie bars remain wonderfully moist and tender.
- Avoiding Too Much Liquid: While you could technically use three whole medium eggs to reach a similar weight, this would introduce too much egg white, which can sometimes make baked goods tougher or drier (due to the protein content) and might require a slight reduction in other liquids, like milk, which complicates things. The “two medium eggs + one extra yolk” method keeps the liquid content just right and enhances the texture.
So, next time your fridge is only stocked with medium eggs, don’t fret! Simply grab two medium eggs, separate the yolk from a third medium egg, and add that extra yolk to your mixture. You’ll be on your way to baking impeccably delicious Funfetti Easter Sugar Cookie Bars without missing a beat. This clever trick ensures your Easter baking is always a success! 🧁💕
🍽 Equipment
Gathering all your equipment before you start baking will make the process smooth and enjoyable. Here’s what you’ll need to create these beautiful Funfetti Easter Sugar Cookie Bars:
- Hand or Stand mixer (essential for creamy butter and fluffy frosting!)
- Mixing bowls for the mixer (one large for the dough, another for the frosting)
- 3-4 small mixing bowls for dividing and tinting the buttercream
- Spatula (for scraping bowls and folding ingredients)
- Spoons (for dolloping frosting)
- Sieve (for sifting dry ingredients, if preferred, though not strictly necessary if whisking well)
- 9×13-inch (23×33 cm) pan (the perfect size for these bars)
- Parchment paper (for easy removal)
- Cooling rack (crucial for even cooling before frosting)
- Sharp knife (for clean, neat slices)
🍽️ Serving Suggestions & Creative Variations
These Funfetti Easter Sugar Cookie Bars are already a showstopper on their own, but a few thoughtful additions can make them even more special or tailor them to different tastes. Here are some ideas:
Serving Suggestions:
- Dessert Platter: Arrange them artfully on a large platter with other spring treats like fresh berries, chocolate-covered strawberries, or small floral garnishes for a stunning display.
- Ice Cream Treat: Serve a warm (or slightly warmed) cookie bar with a scoop of vanilla bean ice cream. The contrast of warm cookie and cold ice cream is heavenly!
- Coffee Break Companion: Pair a bar with your favorite coffee, latte, or a delicate herbal tea for an afternoon treat.
- Milk & Cookies: For a classic, comforting experience, serve with a tall glass of cold milk – perfect for both kids and adults who are young at heart.
- Brunch Addition: These are a fantastic addition to any Easter or spring brunch spread, offering a sweet, colorful option alongside savory dishes.
Creative Variations:
- Change the Sprinkles: While pastel jimmies are classic for Easter, feel free to experiment with different sprinkle mixes for other holidays or themes. Rainbow nonpareils, seasonal shapes, or even metallic sprinkles can add a unique touch.
- Different Chocolate Chips: Swap white chocolate chips for milk chocolate, dark chocolate, or even pastel-colored candy melts chopped into pieces for a different flavor profile.
- Citrus Zest: For a brighter, zesty flavor, add 1-2 teaspoons of finely grated lemon or orange zest to the cookie dough. This complements the sweetness beautifully.
- Cream Cheese Frosting: If you prefer a tangier frosting, a cream cheese buttercream would also be delicious! Just ensure it’s not too soft for marbling.
- Nutty Addition: Fold in ½ cup of finely chopped toasted pecans or walnuts with the sprinkles for a hint of crunch and nutty flavor.
- Extract Experimentation: Besides vanilla and almond, consider a touch of lemon extract for brightness or even a hint of coconut extract for a tropical twist in your cookie base.
- Drizzle Fun: Instead of marbling, consider a simple white buttercream base, then drizzle contrasting colored melted candy melts or chocolate over the top in zig-zag patterns.
Don’t be afraid to get creative and make these Funfetti Easter Sugar Cookie Bars uniquely yours! They are wonderfully versatile and forgiving.
Other Easter Recipes for You to Try
Looking for more delightful treats to complete your Easter menu or simply to celebrate spring? Here are some other festive recipes from our kitchen that you might love:
- Vegan Easter Cookies with Apricot Jam – A delightful option for those seeking plant-based treats.
- Easter Cut Out Cookies with Pistachio Ganache – Beautifully decorated cookies perfect for a creative baking session.
- Chocolate Chip Vanilla Ice Cream – A classic crowd-pleaser that pairs wonderfully with any cookie.
- Braided Bread Wreath – A stunning and delicious centerpiece for your Easter brunch table.
- Berry Wine Spritzer – A refreshing beverage perfect for spring gatherings.
- Delicious Linzer Cookies with Egg Liqueur – A sophisticated treat with a delightful hint of liqueur.
- Simple Layered Eggnog Vanilla Pudding Dessert – An easy yet elegant dessert for any occasion.
- Potato Flour Cake with Eggnog – A unique and surprisingly delicious cake.
- Classic Mimosa Recipe – The quintessential brunch cocktail to brighten your Easter morning.
If you make this recipe, let me know how you liked it by ★★★★★ star rating it and leaving a comment below. This would be awesome! You can also sign up for our Newsletter or follow me on Pinterest or Instagram and share your creation with me. Just tag me @combinegoodflavors and hashtag #combinegoodflavors, so I don’t miss it.
📖 Recipe
Easter Sugar Cookie Bars
Nora
Save RecipeSaved!
Pin Recipe
Equipment
-
Hand or stand mixer
-
Mixing bowls for the mixer
-
3-4 Small mixing bowls for the buttercream
-
Spatula
-
Spoons
-
Sieve
-
9×13-inch (23×33 cm) pan
-
Parchment Paper
-
Cooling Rack
-
Sharp knife
Ingredients
For the Cookie Bar Base
- 2 ½ cups All-purpose flour
- 1 teaspoon Baking powder
- ½ teaspoon Baking soda
- ½ teaspoon Salt
- ¾ cup Unsalted butter softened
- 1 cup Granulated sugar
- ½ cup Light brown sugar
- 2 Eggs large
- 1 tablespoon Milk
- 1 teaspoon Vanilla extract
- ½ teaspoon Almond extract optional, for extra flavor
- ½ cup Pastel sprinkles (jimmies work best)
- ½ cup White chocolate chips
For the Frosting
- ½ cup Unsalted butter softened
- 2 cups Powdered sugar
- 2 tablespoon Milk
- 1 teaspoon vanilla extract
- 1 Pinch Salt
- Food coloring pastel shades: pink, blue, yellow, etc.
- Additional sprinkles, chocolate bunnies, and mini chocolate eggs for decorating
Instructions
For the Dough
-
Preheat oven to 350°F (175°C). Grease and line a 9×13-inch (23×33 cm) pan with parchment paper.
-
In a bowl, whisk together 2 ½ cups All-purpose flour, 1 teaspoon Baking powder, ½ teaspoon Baking soda, and ½ teaspoon Salt.2 ½ cups All-purpose flour, 1 teaspoon Baking powder, ½ teaspoon Baking soda, ½ teaspoon Salt
-
In another bowl, beat ¾ cup Unsalted butter, 1 cup Granulated sugar, and ½ cup Light brown sugar until light and fluffy.¾ cup Unsalted butter, 1 cup Granulated sugar, ½ cup Light brown sugar
-
Mix in 2 Eggs, 1 tablespoon Milk, 1 teaspoon Vanilla extract, and ½ teaspoon Almond extract (optional).2 Eggs, 1 tablespoon Milk, 1 teaspoon Vanilla extract, ½ teaspoon Almond extract
-
Gradually add dry ingredients and mix until just combined.
-
Fold in ½ cup Pastel sprinkles and ½ cup White chocolate chips.½ cup Pastel sprinkles, ½ cup White chocolate chips
-
Spread dough evenly into prepared pan and bake for 25-35 minutes, until lightly golden. Let cool completely.
For the Buttercream
-
Beat ½ cup Unsalted butter until smooth.½ cup Unsalted butter
-
Add 2 cups Powdered sugar, 2 tablespoon Milk, 1 teaspoon vanilla extract, and 1 Pinch Salt. Beat until fluffy.2 cups Powdered sugar, 2 tablespoon Milk, 1 teaspoon vanilla extract, 1 Pinch Salt
-
Divide frosting into bowls and tint with pastel Food coloring.Food coloring
To Decorate
-
Dollop pastel buttercream across cooled bars.
-
Gently swirl frosting with a spatula to create a marbled look.
-
Add Additional sprinkles, chocolate bunnies, and mini chocolate eggs for decoratingAdditional sprinkles, chocolate bunnies, and mini chocolate eggs for decorating
-
Slice, serve, and enjoy!
Nutrition values are estimates only, using online calculators. Please verify using your own data.

⛑️ Food Safety
Ensuring food safety is paramount when preparing any recipe, especially when baking for loved ones. Please keep the following guidelines in mind:
- Cooking Temperature: Always ensure your cookie bars are baked to a minimum internal temperature of 165 °F (74 °C) to eliminate any potential pathogens, particularly if your eggs are not pasteurized.
- Cross-Contamination: Do not use the same utensils on cooked food that previously touched raw ingredients (e.g., raw cookie dough or eggs) without thoroughly washing them in between.
- Hand Washing: Wash your hands thoroughly with soap and warm water for at least 20 seconds after handling raw eggs or any other raw ingredients.
- Temperature Danger Zone: Don’t leave perishable food, like cookie bars with buttercream frosting (especially in warmer climates), sitting out at room temperature for extended periods (generally no more than 2 hours).
- Unattended Cooking: Never leave cooking food unattended. Stay in the kitchen while the cookie bars are baking to prevent over-baking or potential fire hazards.
- High Smoke Point Oils: While this recipe primarily uses butter, if you incorporate any oils for other parts of your meal, choose oils with a high smoking point to avoid harmful compounds from forming during high-heat cooking.
- Ventilation: Always ensure good ventilation in your kitchen, especially when using a gas stove, to prevent the buildup of fumes.
For further comprehensive information and guidelines on safe food handling practices, please check resources like the Safe Food Handling – FDA website. Your health and safety are always our top priority!
