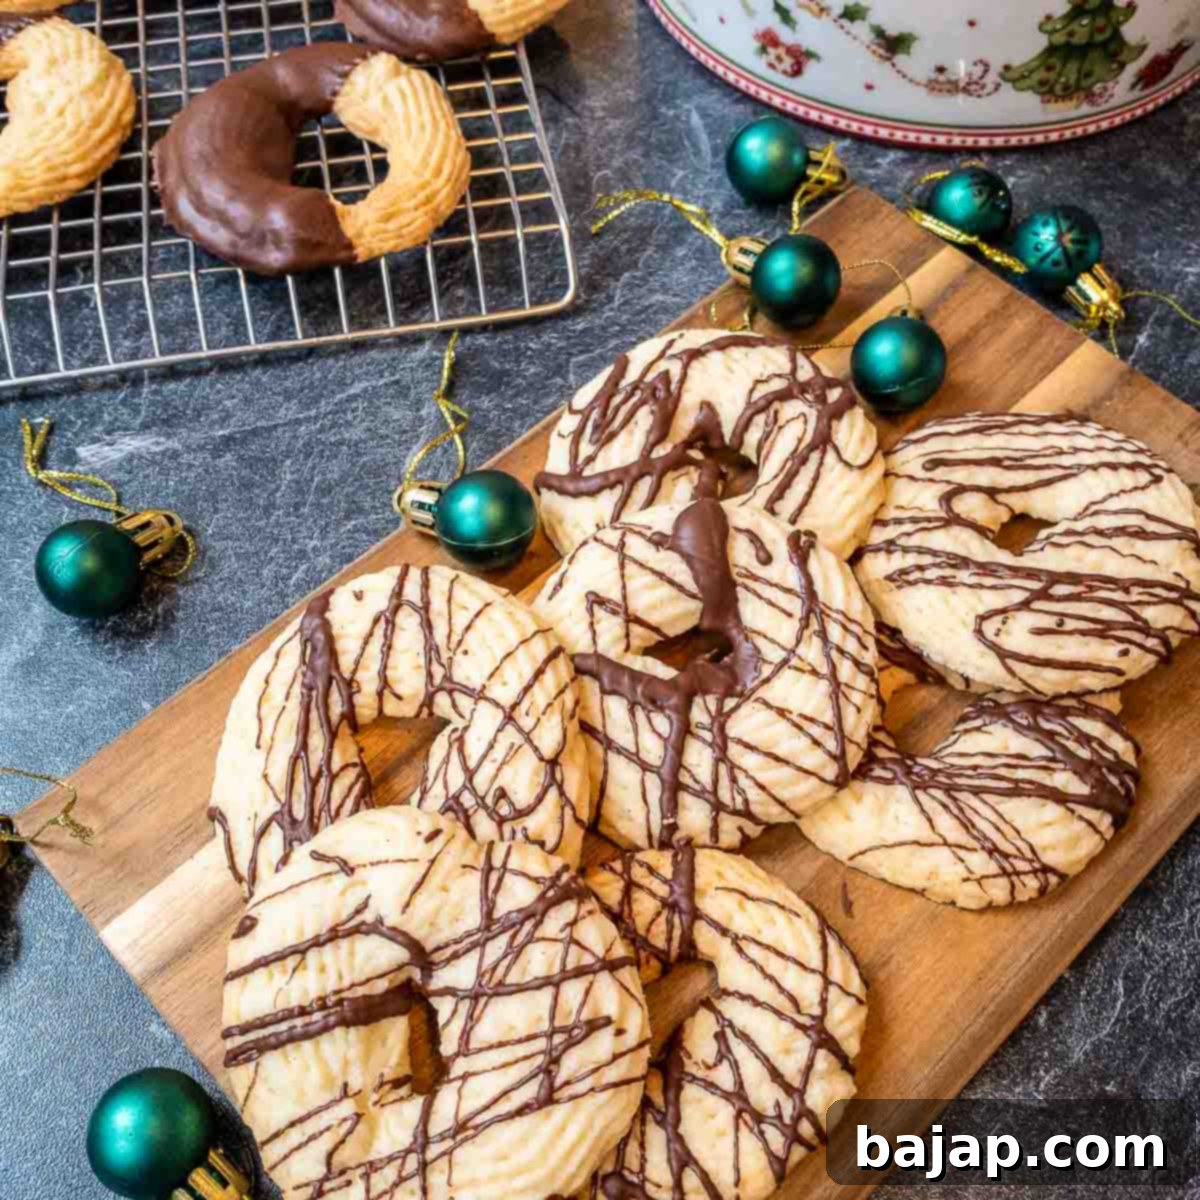
Irresistible Chocolate-Dipped Butter Cookies: Your New Favorite Homemade Treat
There’s something undeniably comforting and classic about a buttery, melt-in-your-mouth cookie. But what if you could take that simple pleasure and elevate it to an extraordinary experience? Our recipe for Chocolate-Dipped Butter Cookies does exactly that, transforming a beloved classic into a truly indulgent delight that will have everyone falling deeply in love with every bite. These exquisite cookies combine the rich, tender texture of a traditional butter cookie with a luxurious coating of your favorite chocolate, creating a treat that’s perfect for any occasion – from festive holiday gatherings to a cozy afternoon tea.
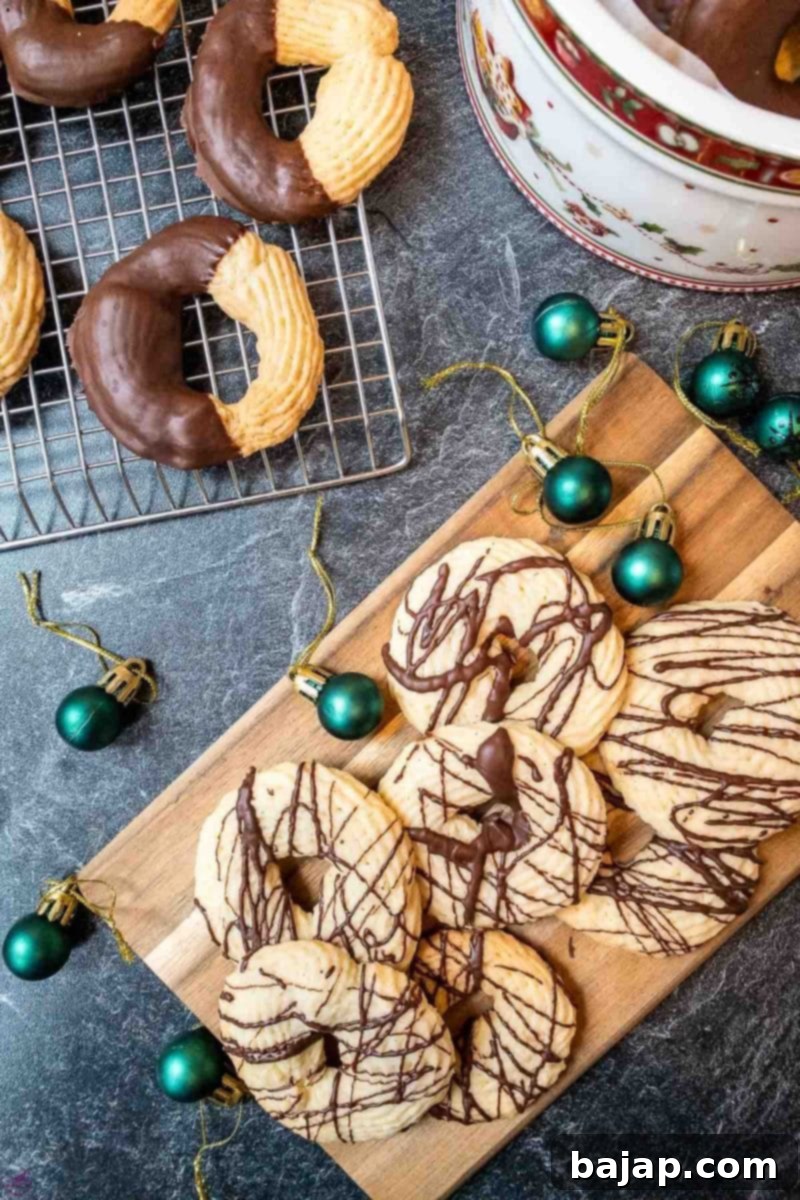
When it comes to easy-to-make treats that garner universal adoration, few things can truly rival the simple butter cookie. Its delicate sweetness and tender crumb make it a timeless favorite. However, when you introduce the magic of chocolate, particularly a high-quality dark chocolate couverture, you create something even more special: Chocolate-Dipped Butter Cookies. These aren’t just cookies; they’re an experience, a perfect marriage of textures and flavors that captivates from the very first taste.
These quintessential cookies are an absolute must-have for holidays and special occasions, yet they’re simple enough to whip up for an everyday indulgence. I am utterly captivated by their buttery texture and the pure, authentic vanilla flavor that shines through, and honestly, who could resist the temptation of dipping them into a pool of luscious, melted chocolate? The contrast of the crisp, yet tender cookie with the smooth, slightly bitter notes of dark chocolate is simply divine. This recipe promises an effortless baking journey, proving that creating classic, gourmet sweets at home can be both straightforward and incredibly rewarding.
So, whether you’re an experienced baker or just starting out, prepare to fall in love with the process and the exquisite results. This straightforward recipe will guide you through every step, ensuring your homemade chocolate butter cookies are nothing short of perfection. Get ready to bake, dip, and savor these truly irresistible treats!
🥘 Essential Ingredients for Perfect Butter Cookies
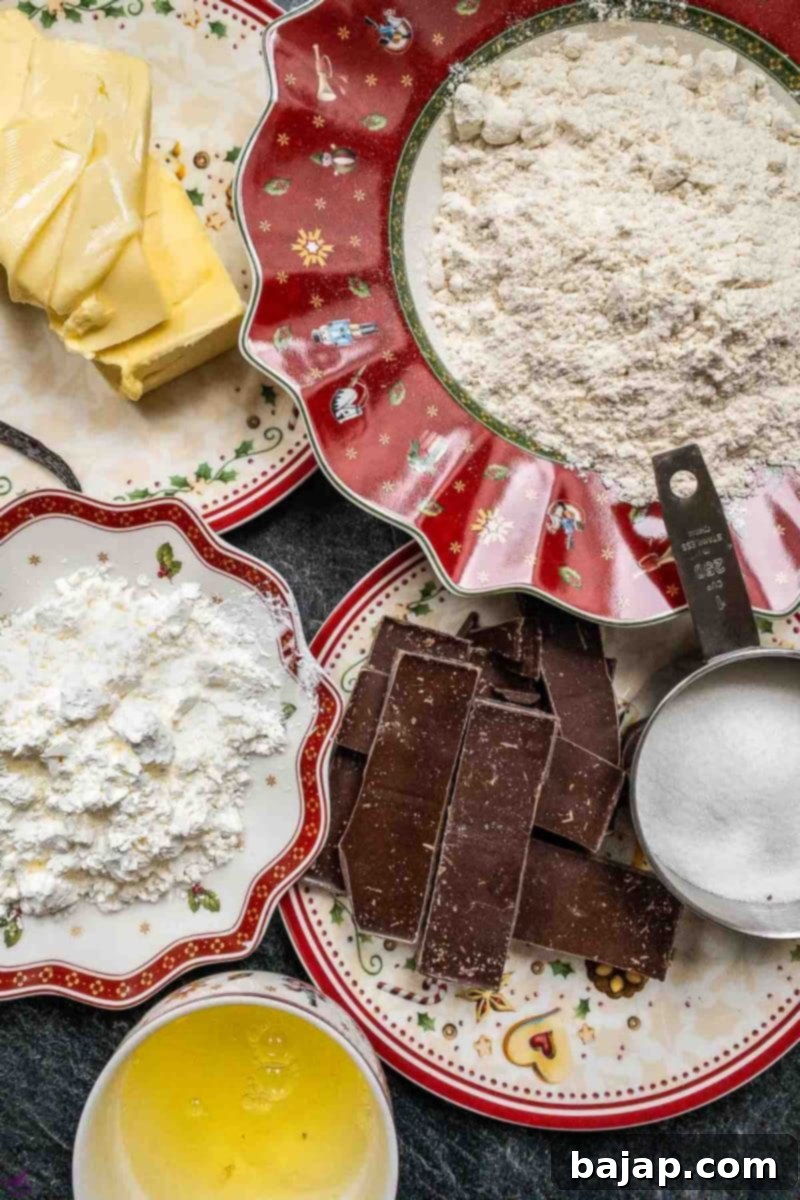
Crafting exceptional chocolate dipped butter cookies begins with selecting the right ingredients. Each component plays a crucial role in achieving that perfect texture and unforgettable flavor profile. Here’s a closer look at what you’ll need and why:
- Unsalted Butter: The cornerstone of any great butter cookie! Using unsalted butter is always the first choice for experienced bakers because it gives you complete control over the salt content in your recipe. Remember, for the best results and a perfectly creamy dough, always allow your butter to come to a soft, room temperature state before baking. This makes it easier to cream with the sugar and ensures a smooth, uniform texture in your cookies.
- Sugar: Simple white granulated sugar is key to giving these butter cookies their signature sandy, yet tender, texture and a perfectly balanced sweetness that truly cannot be beaten. It also helps with the crispness around the edges.
- Vanilla Bean: For the most profound and authentic vanilla taste, fresh scrapings from a vanilla bean are unparalleled. The tiny black specks from the bean add both visual appeal and an incredibly rich, aromatic depth to your cookies. However, if a vanilla bean isn’t readily available, high-quality vanilla bean paste or pure vanilla extract are perfectly suitable substitutes, just be sure to use a good brand for the best flavor.
- Egg White: The egg whites are instrumental in giving these cookies a slight rise and a deliciously light, delicate texture. This recipe specifically calls for just the whites, so you can either purchase a carton of liquid egg whites for convenience or carefully separate a few eggs, saving the yolks for another culinary creation like a rich custard or a morning scramble.
- Cake Flour: This is a crucial ingredient for achieving truly tender, melt-in-your-mouth butter cookies. Cake flour has a lower protein content compared to all-purpose or bread flour, which means less gluten development. This results in a softer, more delicate crumb that distinguishes these treats from chewier cookie varieties, making them buttery, soft, and utterly irresistible.
- Cornstarch: A secret weapon for texture! Cornstarch helps to further tenderize the dough and contributes significantly to that desirable melt-in-your-mouth feel that makes these cookies so addictive. It works by reducing the formation of gluten, ensuring a wonderfully soft result.
- Dark Chocolate Couverture: This particular type of chocolate is specifically formulated for melting and coating, offering a superior shine and snap once set. Its higher cocoa butter content makes it ideal for dipping, providing a smooth, flawless finish. While dark chocolate offers a sophisticated, slightly bitter contrast to the sweet butter cookie, you can certainly use your preferred variety, such as creamy milk chocolate or sweet white chocolate, as delicious substitutes.
For precise measurements and detailed instructions, please refer to the full recipe card below.
🔪 Step-by-Step Instructions: Baking and Dipping Your Masterpiece
Creating these delightful chocolate-dipped butter cookies is a straightforward and enjoyable process. Follow these detailed steps to achieve perfect results every time:
Step One: Prepare Your Workspace and Oven
Begin by preheating your oven to the specified temperature (170 °C // 338 °F). While the oven heats, prepare your baking sheets by lining them with parchment paper or silicone mats. This prevents sticking and ensures easy cleanup. Also, get your piping bag ready by fitting it with a star tip (a Wilton #32 or similar large star tip works wonderfully for classic butter cookie shapes).
Step Two: Cream the Butter, Sugar, and Vanilla
In the bowl of your food processor or electric mixer, add the softened unsalted butter, granulated sugar, and the fragrant pulp scraped from your vanilla bean. Mix these ingredients on medium speed until they are light, fluffy, and wonderfully creamy. This process typically takes about 5 minutes. Proper creaming incorporates air, which contributes to the cookies’ light texture.
Step Three: Incorporate the Egg Whites
With the mixer still running, gradually blend in the egg whites until they are fully incorporated into the butter mixture. The mixture should remain smooth and homogenous.
Step Four: Add Dry Ingredients
Reduce the mixer speed to low and gently mix in the cake flour and cornstarch until just combined. Be careful not to overmix, as this can develop the gluten in the flour too much, leading to tougher cookies. Mix only until no streaks of dry ingredients remain.
Step Five: Fill the Piping Bag
Carefully transfer the cookie dough into your prepared piping bag fitted with the star tip. If you’re finding the dough a bit stiff, you can let it sit at room temperature for a few extra minutes to soften slightly, but avoid chilling it too much as it can become very difficult to pipe.
Step Six: Pipe the Cookies
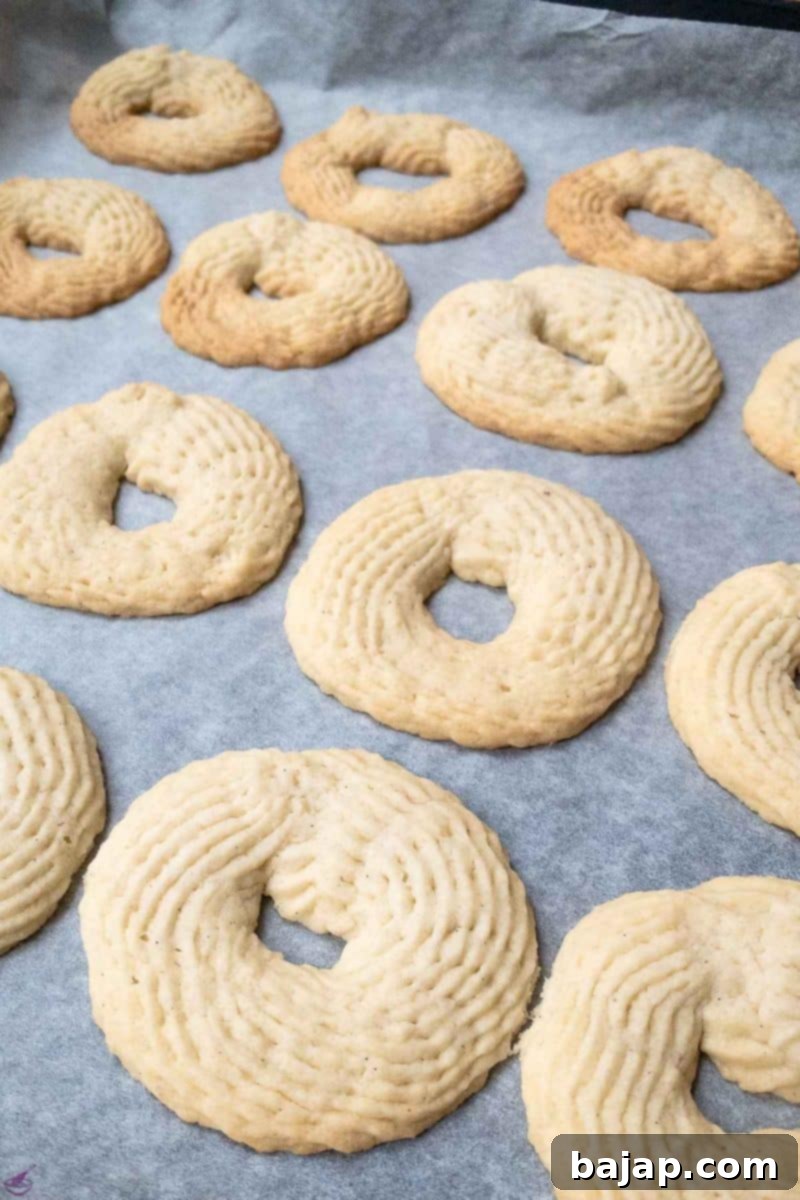
On your lined baking sheets, pipe the dough into uniform circles or your desired shapes. Aim for consistent size to ensure even baking. Leave a little space between each cookie as they will spread slightly.
Step Seven: Bake to Golden Perfection
Bake the butter cookies in your preheated oven for approximately 20 minutes, or until the edges are just barely golden and the centers are still pale. The key to a tender butter cookie is to avoid over-baking. You want them to retain their soft texture while still being fully cooked. Remove them from the oven and transfer them to a wire rack to cool completely. They must be entirely cool before dipping in chocolate.
Step Eight: Melt the Chocolate
While your cookies are cooling, it’s time to prepare the luscious chocolate coating. Melting chocolate correctly is essential for a smooth, glossy finish without burning or seizing. You have a couple of options:
Water Bath (Bain-Marie) Method: This classic technique ensures gentle, even melting. You’ll need two pots of different sizes. Fill the larger pot with about 3-4 finger-widths of water and bring it to a gentle simmer. Place the smaller pot inside the larger one, ensuring the bottom of the smaller pot does not touch the simmering water (this prevents the chocolate from overheating). Add your chocolate couverture to the upper, smaller pot and melt it over moderate heat, stirring continuously, until it’s smooth and completely melted. The steam from the water will gently heat the chocolate without direct contact, preventing scorching.
Tempering Unit/Melting Device: If you have a dedicated chocolate tempering unit or a chocolate melting pot, follow the manufacturer’s instructions. Add the chocolate to be melted to the unit and set it to the appropriate melting temperature. For white and milk chocolate, this is typically around 40 °C (104 °F). For dark chocolate, a slightly higher temperature of 50 °C (122 °F) is usually recommended. This method offers precise temperature control for a perfectly tempered chocolate.
Step Nine: Dip and Dry
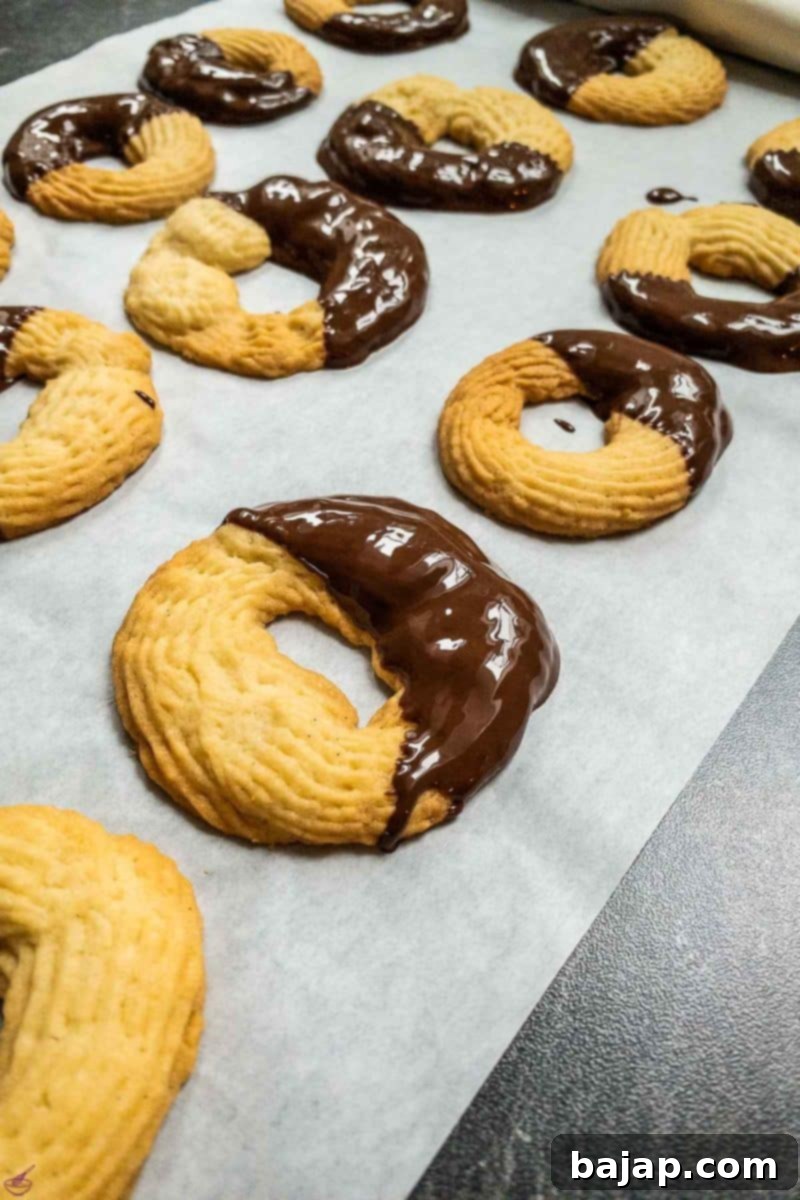
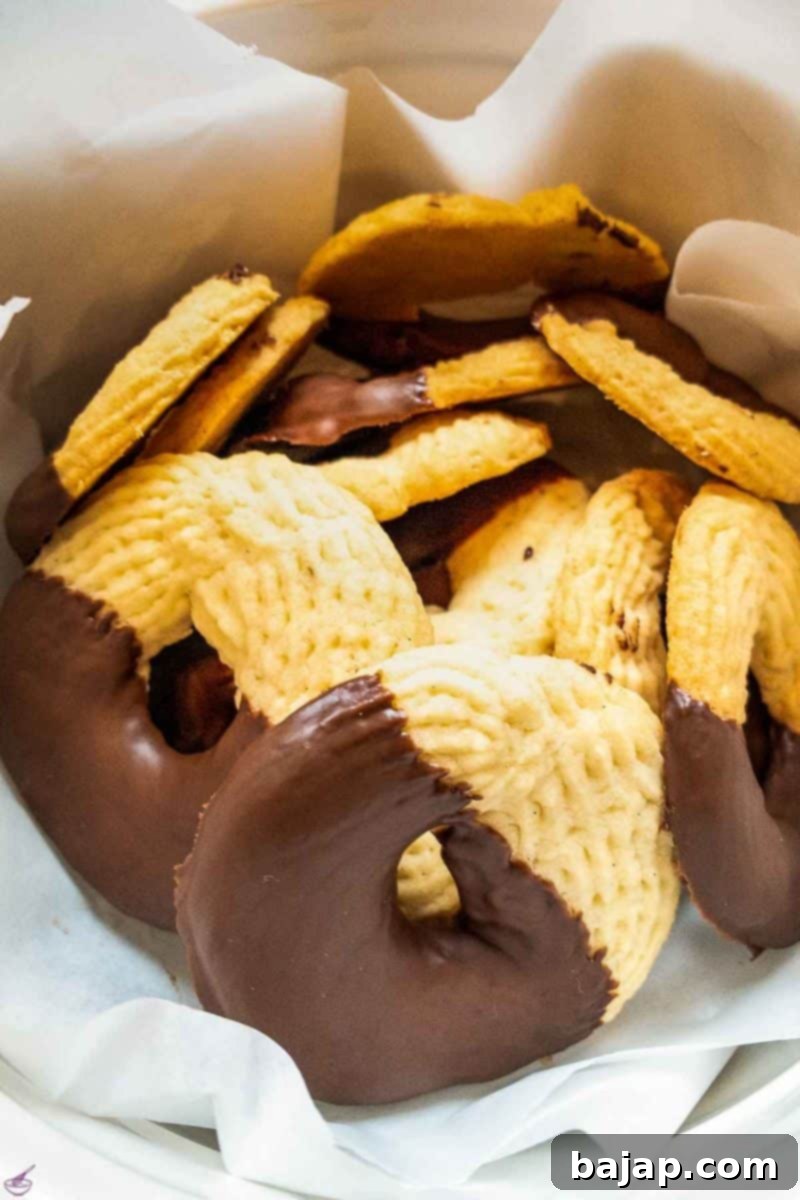
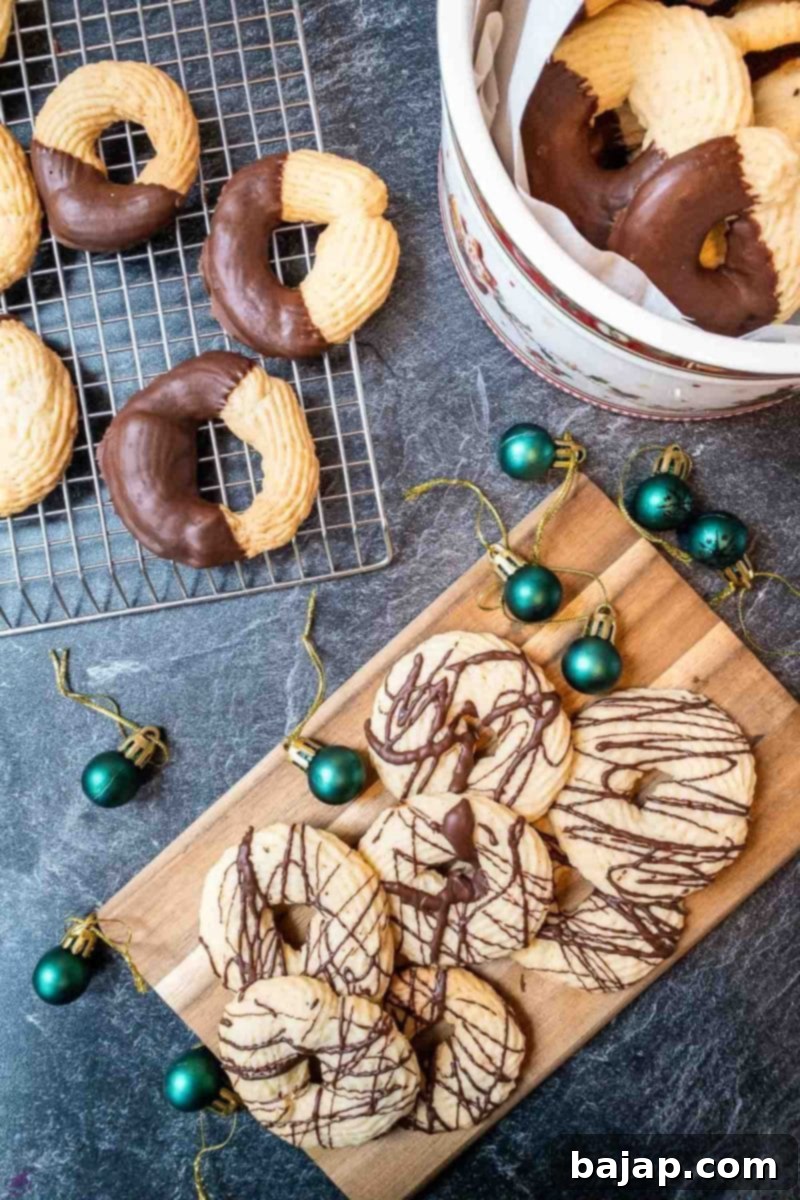
Once the chocolate is perfectly melted and smooth, and the cookies are completely cool, it’s time for the final magical step. Dip each butter cookie halfway into the melted chocolate coating. Allow any excess chocolate to drip off for a clean finish. Then, gently place the dipped cookies onto a fresh sheet of baking paper to dry and set. This will take some time, especially if your kitchen is warm. You can also place them in the refrigerator for about 15-20 minutes to speed up the setting process.
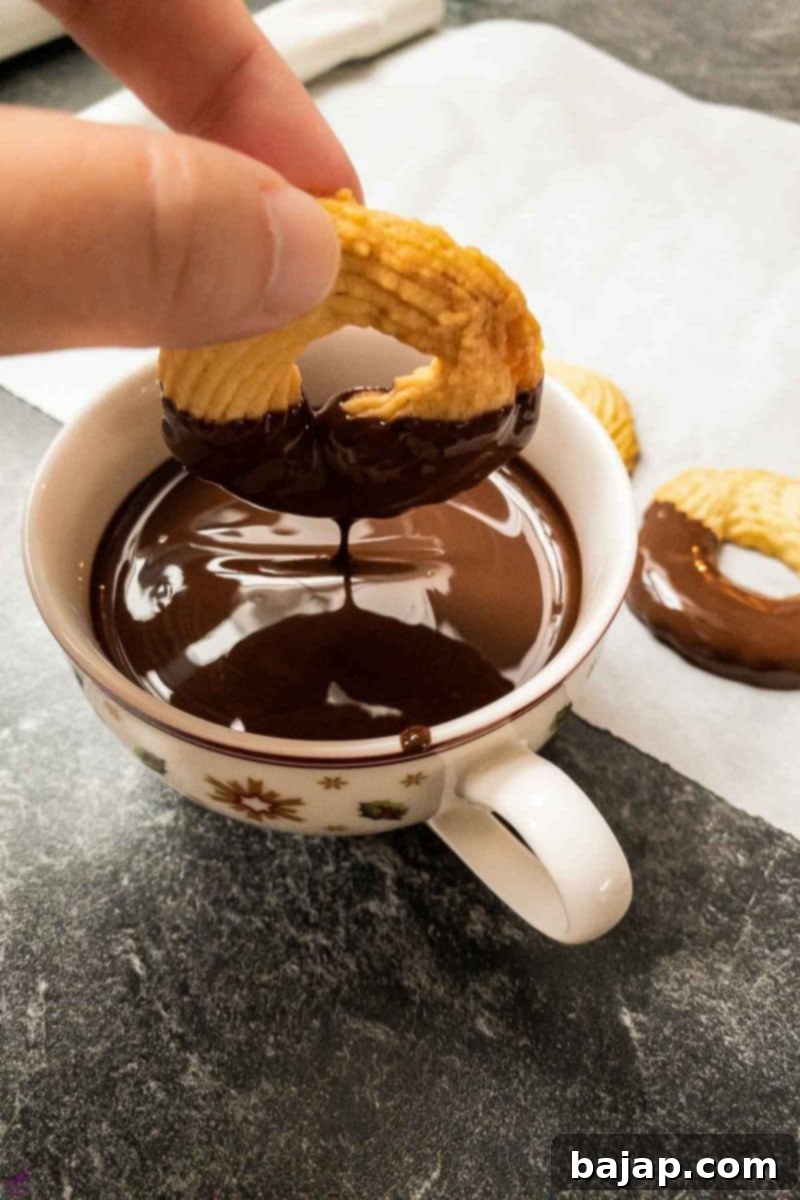
Dip the butter cookies halfway into the chocolate for a classic look.
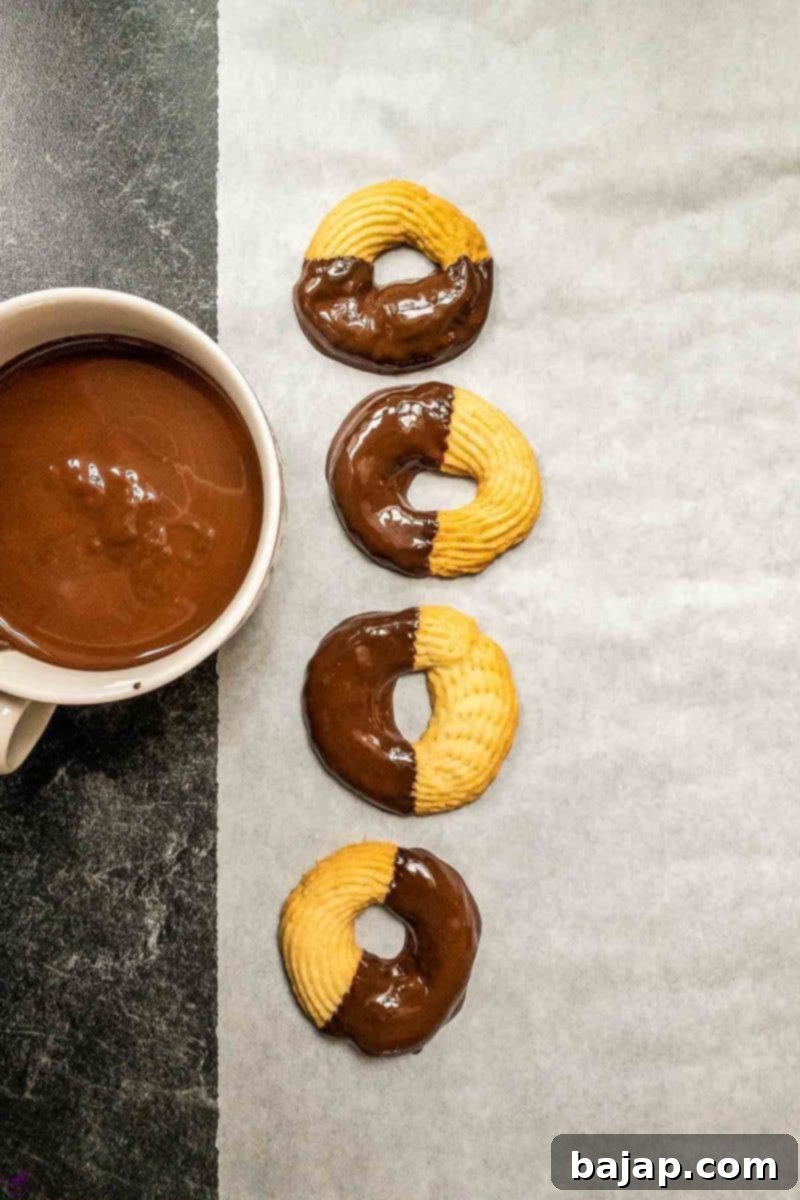
Allow the chocolate to set completely on a sheet of baking paper.
Once the chocolate has completely set and is firm to the touch, your magnificent chocolate butter cookies are ready to be enjoyed! Serve them with a cup of hot tea, coffee, or a rich hot chocolate for the ultimate treat.
🍫 Creative Variations & Flavor Enhancements
While these chocolate-dipped butter cookies are perfect as is, they are also incredibly versatile! You can easily tweak this recipe to create a wide array of flavors and festive designs, making them truly your own:
- Chocolate Choices: Don’t limit yourself to dark chocolate! Experiment with creamy milk chocolate for a sweeter profile, elegant white chocolate for a delicate flavor, or even adventurous ruby chocolate for a fruity, vibrant twist. Blonde chocolate (caramelized white chocolate) also offers a wonderful depth of flavor.
- Delightful Toppings: Amp up both the flavor and visual appeal by adding various toppings to the wet chocolate coating. Finely chopped nuts (almonds, pistachios, hazelnuts, walnuts) add a satisfying crunch. Sprinkles, nonpareils, or edible glitter can give your cookies a festive flair for any holiday or celebration. Consider a sprinkle of sea salt flakes for a sophisticated sweet-and-salty contrast, or even a dusting of cocoa powder for extra chocolatey goodness. Shredded coconut or finely crushed dried fruit (like cranberries or orange peel) can also add unique textures and flavors.
- Dough Flavor Infusions: Another tasty way to switch things up is to swap a portion of the vanilla bean for other extracts or pastes. A touch of almond extract or almond paste gives the cookies a vibrant, nutty taste that will surprise and delight your taste buds. Lemon or orange zest can brighten the flavor, while a hint of espresso powder can deepen the chocolate notes.
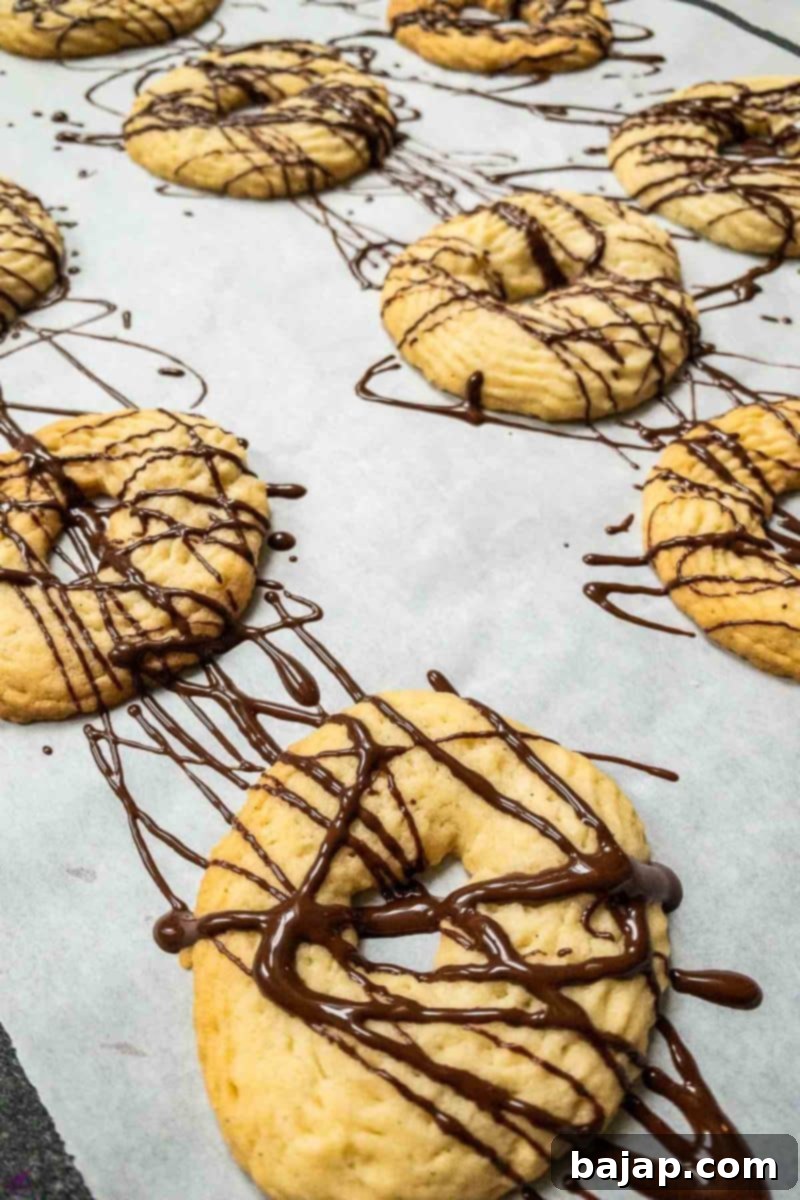
- Decorative Drizzles: Instead of dipping, or in addition to it, use a contrasting chocolate (e.g., white chocolate drizzle on dark chocolate-dipped cookies) to create beautiful patterns. Simply melt a small amount of chocolate, transfer it to a piping bag with a tiny hole (or a Ziploc bag with a snipped corner), and drizzle over the set chocolate coating.
- Shape & Size: While piping circles is traditional, feel free to experiment with different piping tips to create various patterns like rosettes, shells, or even S-shapes. If you prefer, a cookie press can also be used to create intricate designs.
🍽 Essential Equipment for Effortless Baking
Having the right tools makes the baking process smoother and more enjoyable. Here’s the equipment you’ll need to create these fantastic chocolate-dipped butter cookies:
- Food Processor or Electric Mixer: This is your best friend for achieving a perfectly smooth and creamy dough. The thick, rich, buttery dough can be quite dense, and an electric mixer (stand mixer or handheld) or food processor will make quick work of creaming the butter and sugar, ensuring consistent results.
- Piping Bag and Number 32 Star Tip: To make beautifully shaped and evenly sized cookies, a piping bag fitted with a large star tip (like a Wilton #32) is ideal. The star tip creates those classic ridges that give butter cookies their signature look. If you don’t have a dedicated piping bag, a sturdy plastic freezer bag with one corner snipped off (after attaching the tip) can work in a pinch.
- Mixing Bowl: A sturdy mixing bowl is essential for combining your ingredients. If you’re using a stand mixer, the bowl comes with it; otherwise, a large, comfortable bowl for hand-mixing or using with a handheld mixer is perfect.
- Lined Baking Sheets: You will need at least two baking sheets, preferably lined with parchment paper or reusable silicone baking mats. These liners prevent the cookies from sticking, promote even baking, and make for easy cleanup.
- Wire Cooling Rack: An often-overlooked but crucial piece of equipment! A wire rack allows air to circulate around the cookies as they cool, preventing them from becoming soggy on the bottom and helping them retain their crisp edges.
- Water Bath, Double Boiler, or Tempering Device: You’ll need a method to melt your chocolate gently and keep it warm and fluid while you dip your cookies. A traditional water bath (bain-marie) with two pots, a dedicated double boiler, or an electric tempering device will all do the trick effectively. This prevents the chocolate from seizing or burning, ensuring a smooth, glossy coating.
🌡 Storage & Freshness Tips
Unless these delightful chocolate butter cookies disappear in an instant (which is highly likely!), proper storage is key to keeping them fresh and delicious for as long as possible:
- Room Temperature Storage: Once the chocolate coating has fully set, these cookies will maintain their optimal freshness and flavor for up to three weeks when stored in an airtight container or a well-sealed cookie tin at room temperature. To prevent them from sticking to the bottom or to each other, line the container with parchment paper and place a layer of parchment paper between each stack of cookies.
- Freezing for Longer Storage: For extended enjoyment, these cookies freeze beautifully! Once the chocolate is completely set, arrange the cookies in a single layer on a baking sheet and flash freeze them for about 30 minutes until firm. Then, transfer the frozen cookies to a freezer-safe, airtight container or a heavy-duty freezer bag. They can be frozen for up to six months.
- Thawing Frozen Cookies: To thaw frozen cookies, simply remove them from the freezer and arrange them in a single layer on a plate or wire rack. Let them come to room temperature naturally, which usually takes a few hours or overnight in the refrigerator. Avoid microwaving, as this can melt the chocolate and alter the cookie’s texture.
- Maintaining Texture: The airtight container is vital to prevent the cookies from becoming stale or absorbing odors from other foods. Always ensure the chocolate is completely set before stacking or storing to prevent sticking and smudging.
💭 Expert Baking Tips for Success
Achieving perfectly tender and delicious chocolate-dipped butter cookies is easy with these insider tips:
- Don’t Overbake: These cookies are meant to be pale! Their edges should just begin to look slightly crispy and golden, but the centers should remain light in color. Over-baking will result in dry, tough cookies, so keep a close eye on them towards the end of the baking time.
- Avoid Chilling the Dough: Unlike some cookie doughs, this butter cookie dough is very rich in butter. Chilling it will make it extremely hard and almost impossible to pipe smoothly. It’s best used at room temperature, or slightly cooled if your kitchen is very warm, but avoid extended chilling.
- Repurpose Your Vanilla Bean: Don’t throw away that scraped vanilla bean! You can save it and tuck it into a jar of granulated sugar to make homemade vanilla sugar, infusing your next batch of baked goods with a wonderful aroma.
- Quality Ingredients Matter: Since butter and vanilla are the stars of these cookies, using high-quality ingredients will significantly impact the final flavor. Invest in good unsalted butter and genuine vanilla beans or pure extract for the best results.
- Cool Completely Before Dipping: This cannot be stressed enough! If your cookies are even slightly warm when dipped, the chocolate will not set properly, it might melt off, or it will create a dull, streaky finish. Patience here leads to perfection.
- Even Piping for Even Baking: Try to pipe your cookies as uniformly as possible in size and thickness. This ensures they bake evenly, preventing some from being underdone while others are overdone.
🙋🏻 Frequently Asked Questions About Chocolate-Dipped Butter Cookies
You absolutely can! Dying the dough is a super fun way to add some colorful flair, especially for holidays or themed parties. For a subtle swirl, you can paint thin stripes of food coloring gel onto the inside of your piping bag before filling it with dough. Alternatively, you can fold a few drops of gel food coloring directly into the batter until you achieve your desired hue before transferring it to the piping bags. Start with a small amount of dye and add more as needed.
These delicious butter cookies, once dipped in chocolate and fully set, can be kept in an airtight container at room temperature for up to three weeks. For longer storage, you can place the cookies in a freezer-safe bag or container and freeze them for up to six months. To thaw frozen cookies, simply transfer them to the fridge overnight or allow them to come to room temperature on the counter.
Yes, absolutely! If you own a cookie press, it’s a fantastic tool to use for this recipe. The dough’s consistency is perfect for a cookie press, allowing you to create beautiful, intricate shapes and styles of butter cookies with ease. While a cookie press is certainly convenient and can yield stunning results, it is not a necessary tool. You can simply pipe the cookies as directed in the instructions if you don’t have a press, or even roll and cut them for a simpler shape.
Excessive spreading can happen for a few reasons. Ensure your butter is at room temperature but not melted or greasy. Too much moisture in the butter can cause spreading. Also, make sure your oven is accurately preheated to the correct temperature. An oven that isn’t hot enough can cause cookies to spread before they set. Using cake flour and cornstarch as specified also helps prevent spreading by reducing gluten development.
While you can technically substitute all-purpose flour, it’s not recommended for the best texture. Cake flour’s lower protein content is crucial for the tender, melt-in-your-mouth quality of these butter cookies. Using all-purpose flour might result in a slightly chewier or tougher cookie. If you must use it, you might try replacing a small portion (about 2 tablespoons per cup) with cornstarch to mimic cake flour’s effect, but the results may still vary.
The setting time for the chocolate can vary depending on the type of chocolate used, the thickness of the coating, and your kitchen’s ambient temperature. Generally, it can take anywhere from 30 minutes to a couple of hours at room temperature. To speed up the process, you can carefully place the dipped cookies in the refrigerator for about 15-20 minutes. Just be sure not to leave them in the fridge for too long, as condensation can form.

Christmas CookieBook!
Snag that Recipe eBook!
Unlock 20 delicious Christmas Cookie recipes and delight your loved ones!
Yes, please!
More Gorgeous Cookie Recipes for You to Try:
- M and M Cookies
- Egg Yolk Cookies
- Sour Cream Cookies
- Cinnamon Cookies {Zimtsterne}
- Chocolate Chip Cookies with Chestnut Flour
- Chocolate Espresso Crinkle Cookies
- Walnut Meringue Cookies
- Linzer Cookies with Egg Liqueur Ganache
- Walnut Cookies
- Coconut Cookies
- Lacy Oatmeal Cookies
If you make this irresistible Chocolate-Dipped Butter Cookies recipe, please let me know how you liked it by giving it a ★★★★★ star rating and leaving a comment below. Your feedback would be awesome! You can also sign up for our Newsletter to receive delicious homemade recipes weekly, or follow me on Pinterest or Instagram and share your creation with me. Just tag me @combinegoodflavors and use the hashtag #combinegoodflavors, so I don’t miss seeing your beautiful treats!
📖 Recipe Card: Chocolate Dipped Butter Cookies

Chocolate Dipped Butter Cookies
Nora
Save RecipeSaved!
Pin Recipe
Equipment
-
Kitchen machine
-
Piping bag with a star tip Wilton Star Tip 32
-
Mixing bowl
-
2 Baking tray
-
Baking Paper
-
Water bath or tempering device
Ingredients
- 7.05 oz Unsalted butter room temperature
- ½ cup Sugar
- 1 Vanilla bean
- 2 Egg white
- 1¾ cups Cake flour
- ¾ cup Cornstarch
- 1¼ cups Dark chocolate couverture
Instructions
-
Preheat your oven to 170 °C (338 °F).
-
Line your baking trays with parchment paper or silicone mats, and set aside a piping bag fitted with a star-shaped tip for easy access.
-
In the mixing bowl of your food processor or electric mixer, combine the softened unsalted butter, granulated sugar, and the vanilla pulp. Mix until the mixture is light, fluffy, and has a creamy consistency, about 5 minutes.7.05 oz Unsalted butter, ½ cup Sugar, 1 Vanilla bean
-
Once you have a creamy mixture, blend in the egg whites until fully incorporated.2 Egg white
-
Gently mix in the cake flour and cornstarch until just combined. Do not overmix.1¾ cups Cake flour, ¾ cup Cornstarch
-
Fill the dough into the pastry bag fitted with the star-shaped nozzle.
-
Use the piping bag to pipe the dough in uniform circles or your preferred shapes onto the baking trays covered with baking paper.
-
Bake the butter cookies in the preheated oven on the middle rack for about 20 minutes (baking time may vary depending on your oven). You want these cookies to be pale in color with just slightly golden edges.
-
Once baked, remove them from the oven and transfer to a wire rack to cool completely. They must be entirely cool before dipping.
-
Melt the dark chocolate couverture using a water bath (bain-marie) or a tempering device, ensuring it’s smooth and fluid.1¼ cups Dark chocolate couverture
-
Once the chocolate is ready and the cookies are cool, dip each butter cookie halfway into the chocolate coating. Allow any excess to drip off, then place them on a sheet of baking paper to dry and set.
-
Once the chocolate has completely set and is firm to the touch, enjoy these finished cookies with tea, coffee, or hot chocolate!
Nutrition values are estimates only, using online calculators. Please verify using your own data.

🎄 Explore More Delicious Treats
If you loved these Chocolate-Dipped Butter Cookies, you might also enjoy these other delightful cookie recipes and baking inspiration from our collection:
⛑️ Food Safety Guidelines
Ensuring food safety is paramount when baking. Please adhere to these essential guidelines:
- Cook to a minimum internal temperature of 165 °F (74 °C) for any ingredients that require it.
- Avoid using the same utensils on cooked food that previously touched raw ingredients without proper cleaning.
- Always wash your hands thoroughly after handling raw ingredients like eggs or flour.
- Do not leave perishable food items sitting out at room temperature for extended periods.
- Never leave cooking food unattended, especially when melting chocolate or baking.
- When cooking with oils, use varieties with a high smoking point to prevent the formation of harmful compounds.
- Always ensure good ventilation in your kitchen, particularly when using a gas stove.
For comprehensive information on safe food handling practices, please refer to the official Safe Food Handling guide from the FDA.
