Bake the Best Braided Easter Bread Wreaths: A Festive & Fluffy Recipe Guide
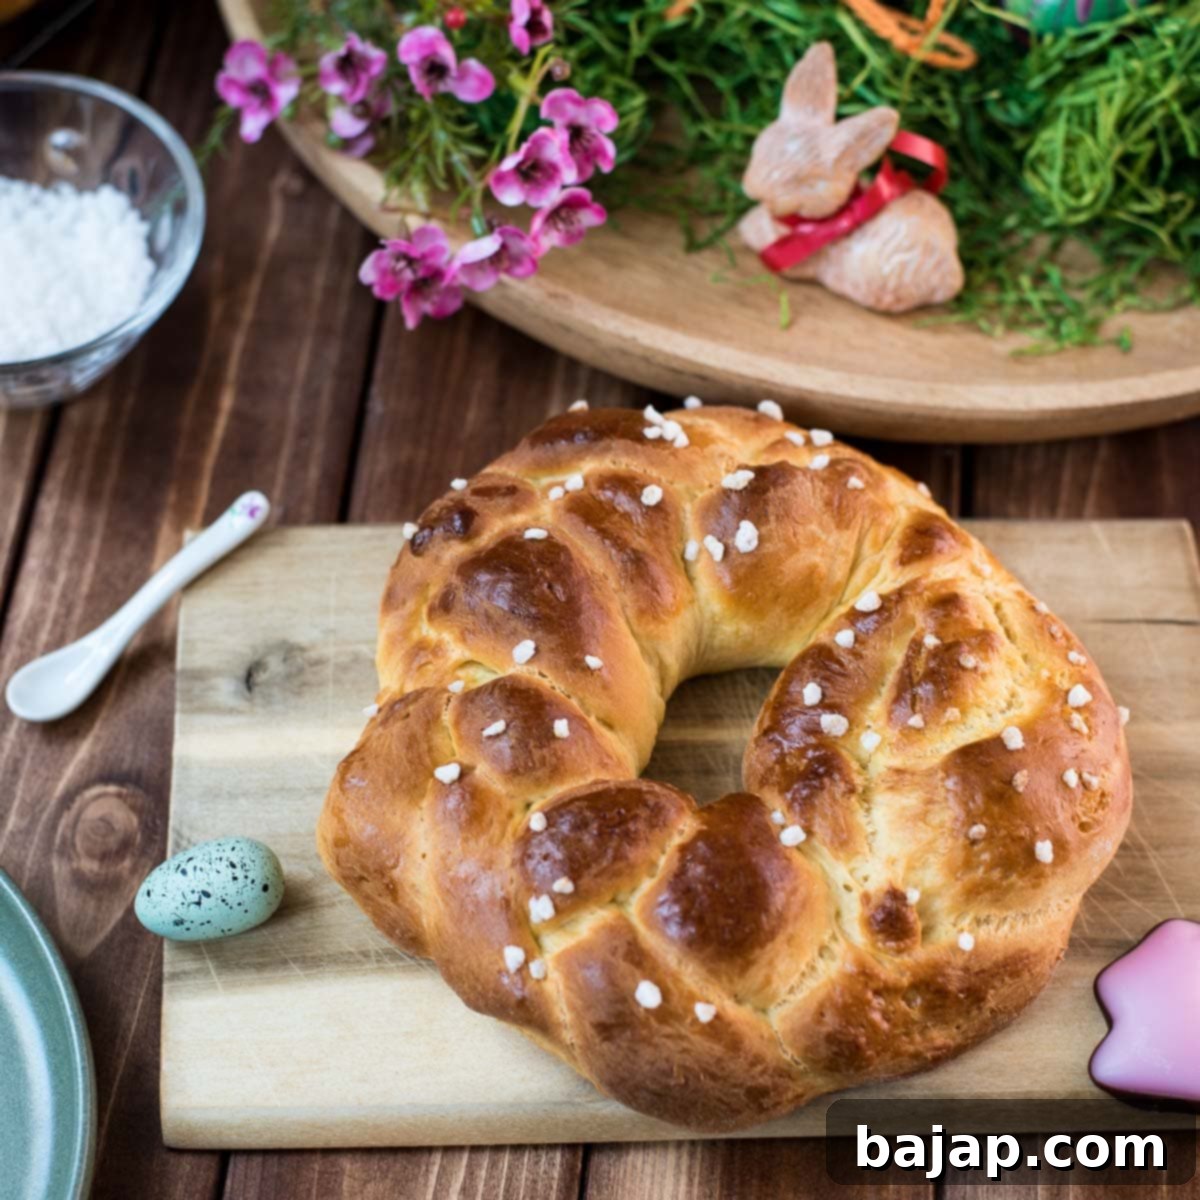
Easter is more than just a holiday; it’s a vibrant celebration of spring, family, and cherished traditions. And what better way to bring joy to your Easter table than with these delightful Easter Bread Wreaths? These aren’t just any ordinary bread rolls; they are tiny, golden circles of soft, fluffy dough, intricately braided and baked to perfection. Each wreath is a visual treat, promising a delicious experience that’s as charming to look at as it is to taste.

Whether you prefer them simply slathered with butter and your favorite jam, or you’re adventurous enough to explore a savory twist with slices of Easter ham and a dollop of horseradish, these enchanting Braided Easter Bread Wreaths will undoubtedly become the star of your brunch spread. Imagine pairing their delicate sweetness with a refreshing Aperol Mimosa or a sparkling Blackberry Raspberry White Wine. It’s not just a meal; it’s an Easter feast designed to create lasting memories.
For many, Easter is synonymous with family traditions and heartwarming gatherings. For me, ever since my daughter was born, our Easter morning tradition has involved a joyful trip to Carinthia to celebrate with my mother-in-law. There, the day begins with a bountiful brunch, eagerly anticipating the consecrated Easter ham – a true culinary highlight. And, of course, no authentic Carinthian Easter table would be complete without a generous slice of Reindling, a sweet, spiraled yeast cake bursting with cinnamon, sugar, and raisins, baked until golden brown and utterly irresistible.
These homemade Easter Bread Wreaths capture that same spirit of tradition and home-baked goodness. The best part? They are incredibly easy to make, and you can even prepare them the day before, ensuring a stress-free and enjoyable holiday morning. This guide will walk you through every step to bake your own batch of these fluffy, lightly sweet braided delights. So, let’s don our aprons and start baking to add a touch of extra joy and tradition to your Easter celebration! 💛🐣✨
🥘 Essential Ingredients for Your Braided Easter Bread
Crafting these delicious Easter bread wreaths requires a selection of fresh, high-quality ingredients. Each component plays a crucial role in achieving the perfect texture and flavor – from the bright zest of lemon to the rich softness of butter, and the magic of yeast that brings it all to life. Here’s what you’ll need to create these golden, fluffy masterpieces:
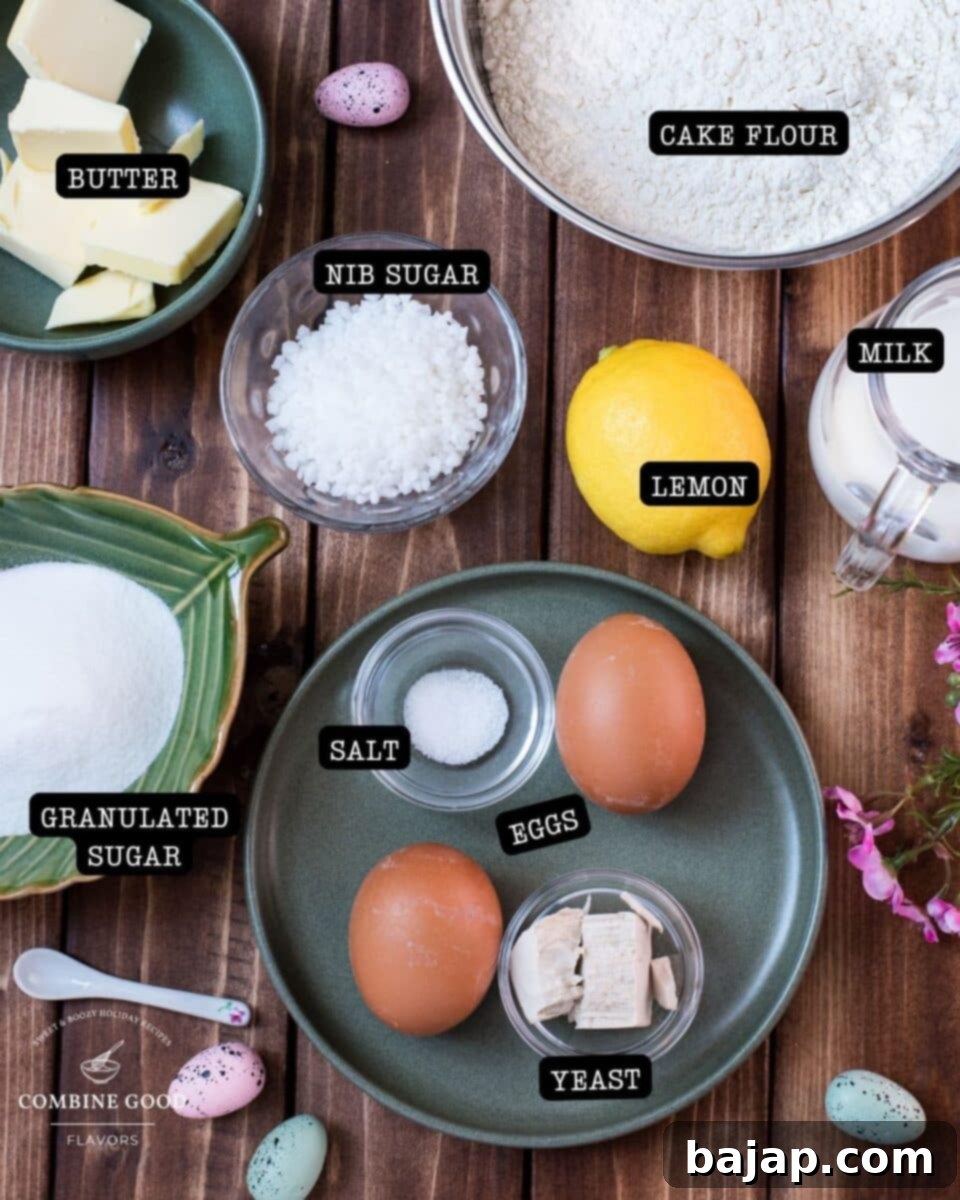
- Lemon (zest only, for a bright citrus note)
- Milk (warm, to activate the yeast and keep the dough tender)
- Fresh yeast or active dry yeast (essential for that wonderful rise and fluffy texture – see note below for conversions!)
- Granulated sugar (to sweeten the bread and feed the yeast)
- Cake flour (for a softer, finer crumb, perfect for sweet breads)
- Salt (balances the sweetness and enhances flavor)
- Eggs (size M, for richness and binding the dough)
- Butter, soft (adds incredible flavor and tenderness)
- Nib sugar (or pearl sugar, for a delightful crunch and sparkle on top)
- Egg wash (for a beautiful golden-brown crust)
For precise quantities and measurements, please refer to the detailed recipe card further down.
🔪 Step-by-Step Instructions for Perfect Braided Easter Bread
Follow these detailed steps to bake your own batch of soft, golden, and utterly delicious Easter bread wreaths. Precision in baking, especially with yeast, ensures the best results!
Step 1: Prep the Lemon 🍋
Begin by giving your lemon a thorough hot water bath, then pat it dry. Using a fine grater, meticulously grate the zest, being careful to avoid the white pith, which can be bitter. Set this fragrant zest aside; it’s key to adding that perfect hint of citrusy magic and brightness to your Easter bread.
Step 2: Warm the Milk 🥛
Gently heat the milk in a small saucepan over low heat or in the microwave until it’s just warm to the touch, approximately 38-43°C (100-110°F). It’s crucial that the milk is warm but not hot, as excessive heat will kill the yeast. This optimal temperature is essential for activating the yeast, ensuring your Easter bread wreaths will be wonderfully light and fluffy.
Step 3: Make the Starter Dough (Also Known as Steam Dough / Pre-Dough / Poolish / Tangzhong!) 🌟
In a medium mixing bowl, crumble the fresh yeast into the warmed milk. Add a small pinch of granulated sugar and three tablespoons of the measured cake flour. Stir this mixture until it’s smooth and lump-free. Cover the bowl and let this starter dough rest in a warm place for about 10-15 minutes, or until it visibly doubles in size and becomes frothy. This step, often referred to by various names like poolish or Tangzhong in different baking traditions, significantly boosts the dough’s flavor, texture, and shelf life.
Step 4: Combine Dry Ingredients 🌿
While your starter dough is activating, sift the remaining cake flour into a large separate bowl. This step helps aerate the flour, preventing lumps and resulting in a lighter bread. Whisk in the rest of the granulated sugar, salt, and your fragrant lemon zest. Ensure these dry ingredients are well combined, distributing the flavors evenly.
Step 5: Mix & Knead the Dough 🏋️♀️
Once your starter dough has beautifully doubled in size and shows a bubbly surface, add it to the bowl of dry ingredients. Using a stand mixer fitted with a dough hook attachment (or a hand mixer with dough hooks), begin mixing on low speed until just combined. Next, add the eggs and the softened butter. Increase the speed to medium-high and knead the dough for about 8-10 minutes. The dough should become smooth, elastic, and will start to pull away cleanly from the sides of the bowl. Proper kneading is vital for developing the gluten, which gives the bread its characteristic chewy yet tender texture.
Step 6: First Rise ⏳
Lightly grease a clean bowl, place the kneaded dough inside, and turn it once to coat. Cover the bowl tightly with plastic wrap or a clean kitchen towel. Find a warm, cozy, draft-free spot (like a slightly warmed oven, or simply on your kitchen counter on a warm day) and let the dough rise for approximately 50 minutes. It should proudly double in size and become wonderfully puffy – this is a sign your yeast is working its magic!
Step 7: Divide & Rest the Dough Portions 🔪
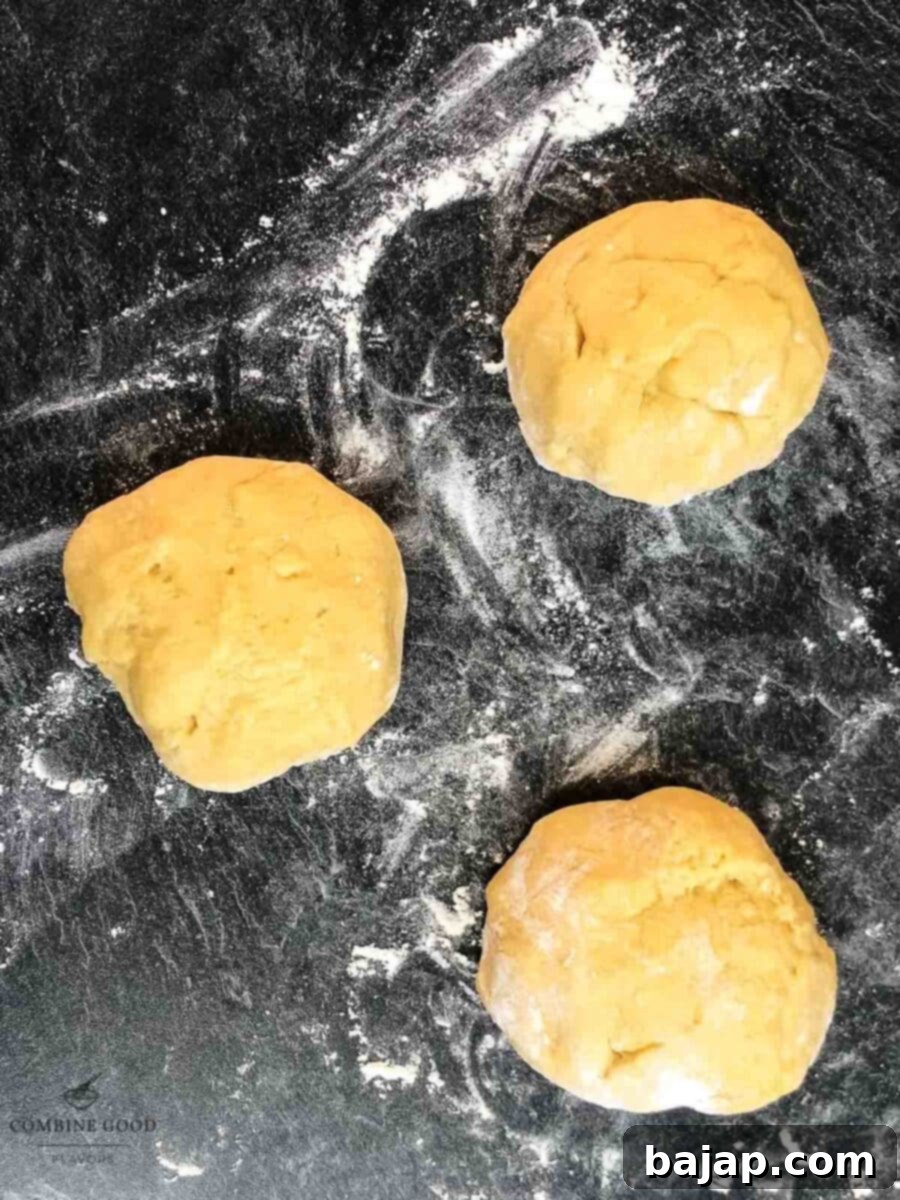
Gently punch down the risen dough to release the air. Transfer it to a lightly floured surface. Divide the dough into three equal pieces. To make individual wreaths, you’ll then divide each of these three pieces into three smaller, equal portions, resulting in a total of 9 equal parts. This ensures each braided wreath will be uniform in size. Cover these smaller dough portions and let them rest for another 10-15 minutes. This brief rest period, known as bench rest, allows the gluten to relax, making the dough easier to roll and shape without resistance.
Step 8: Shape the Wreaths 🌸
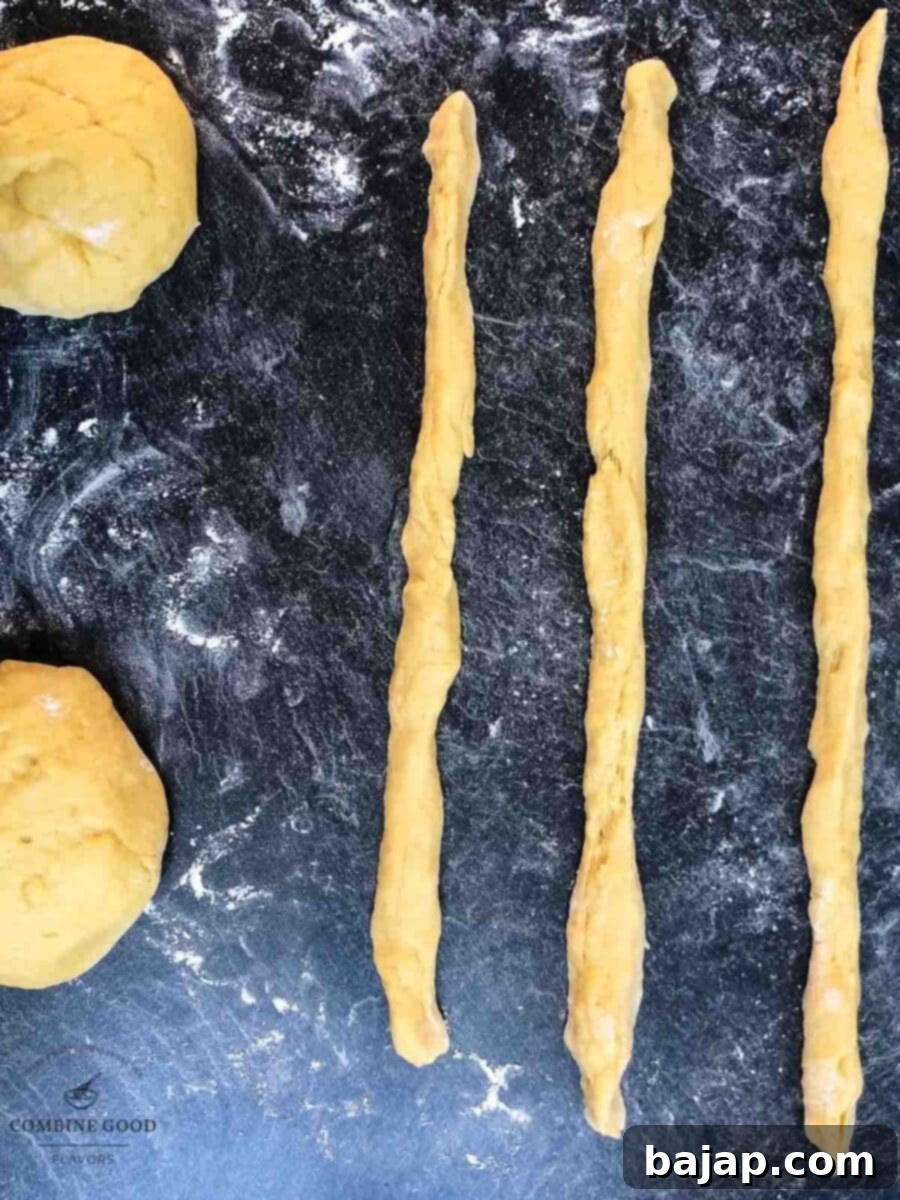
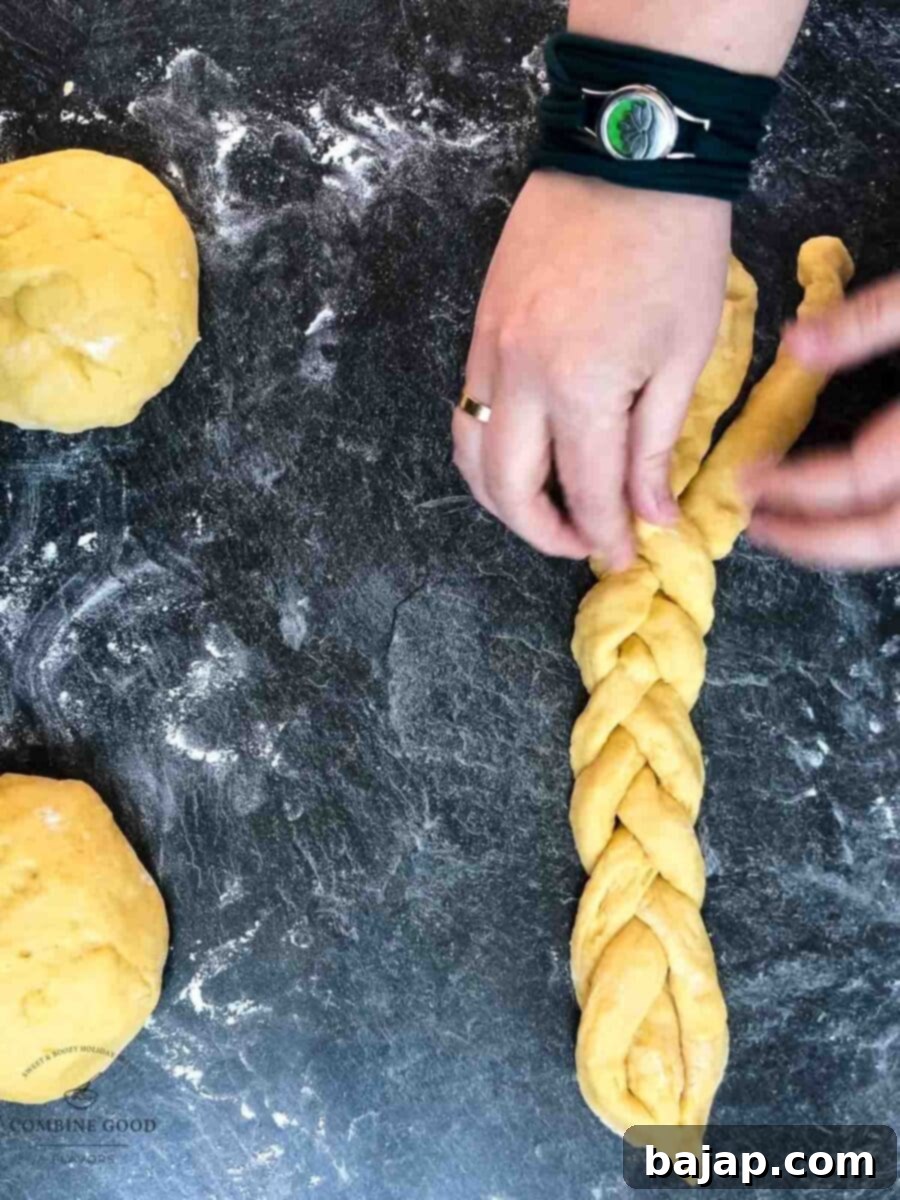
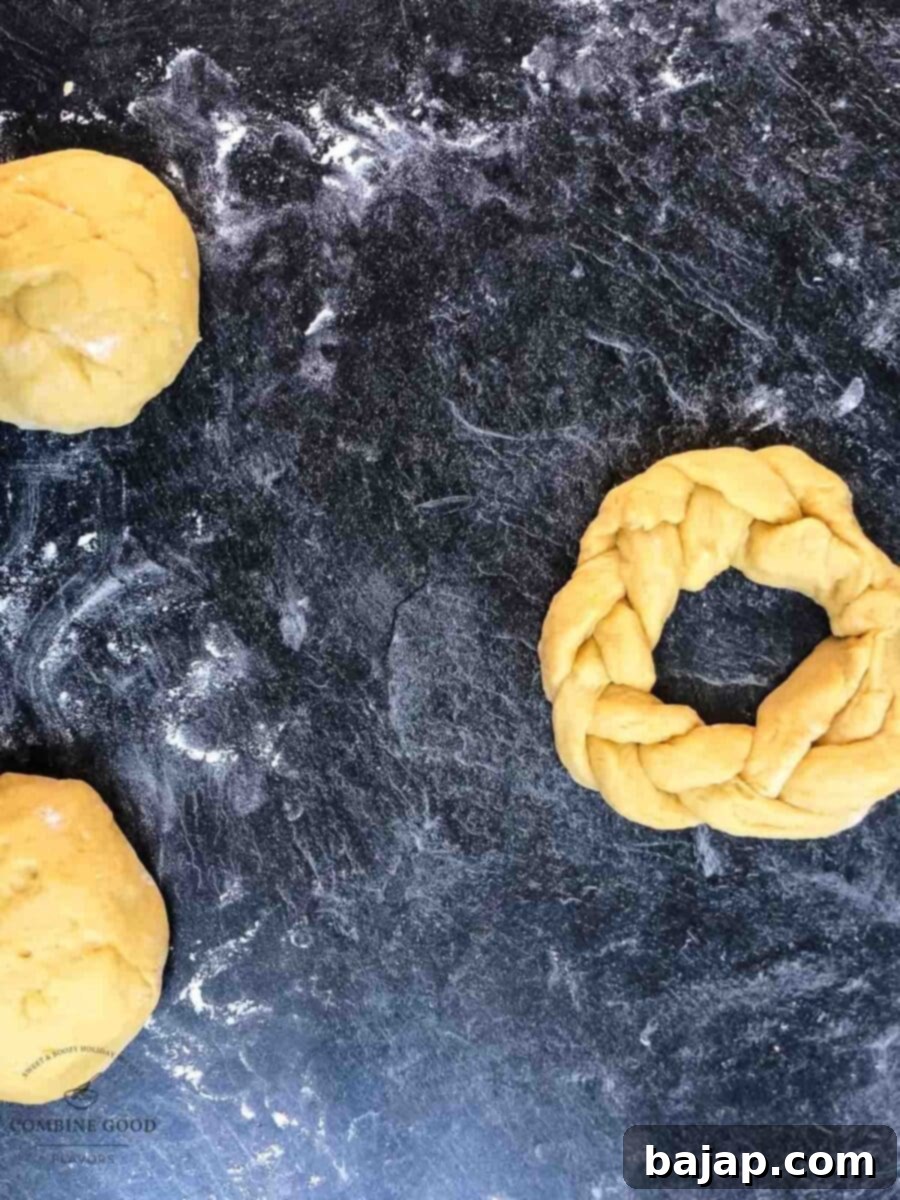
Now for the fun part! Take one small dough portion and roll it into a long, even strand, approximately 30 cm (about 11.8 inches) in length. Repeat with two more portions, so you have three strands ready for braiding. Braid these three strands together to form a beautiful plait. Once braided, carefully form it into a festive wreath shape, gently pressing the ends together firmly to ensure they hold during baking. Repeat this process with the remaining dough portions to create a total of three braided wreaths.
Step 9: Second Rise & Topping ✨
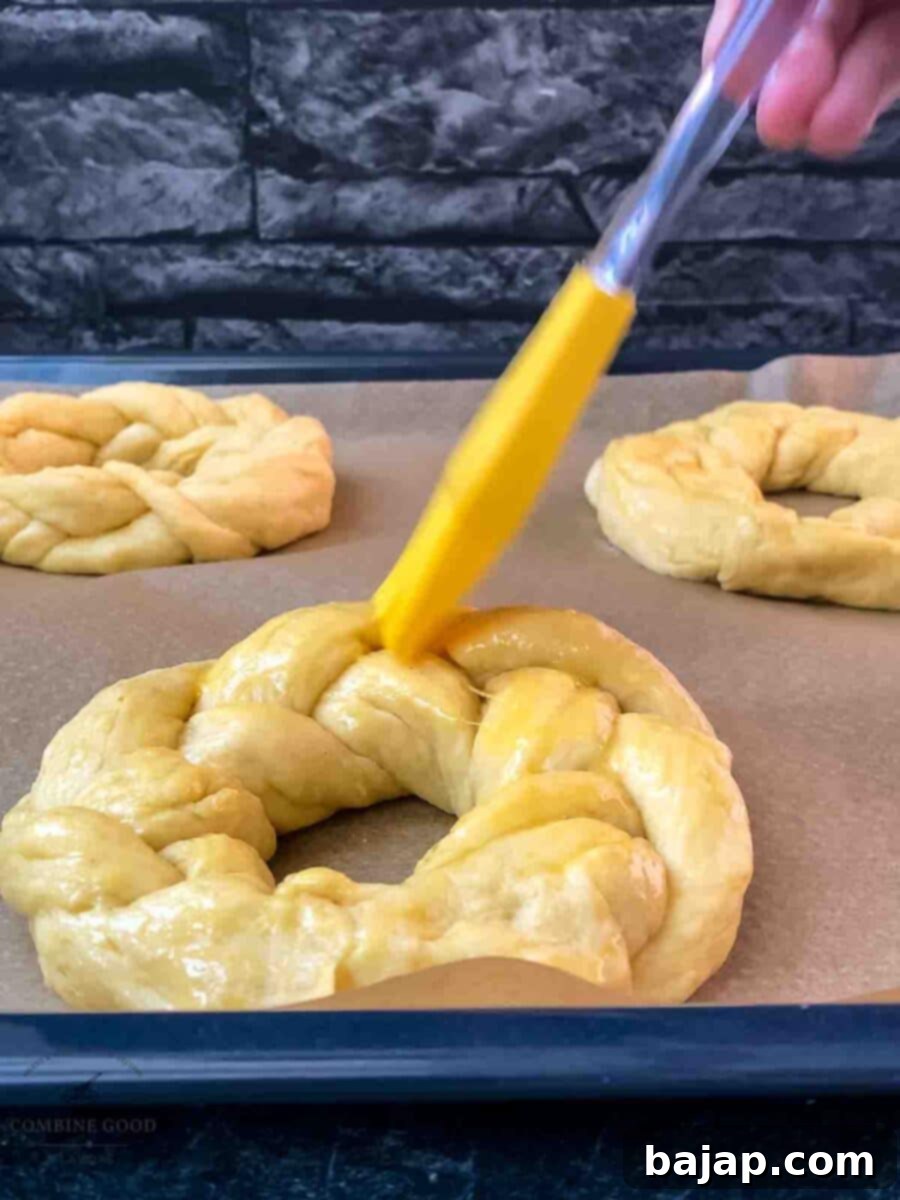
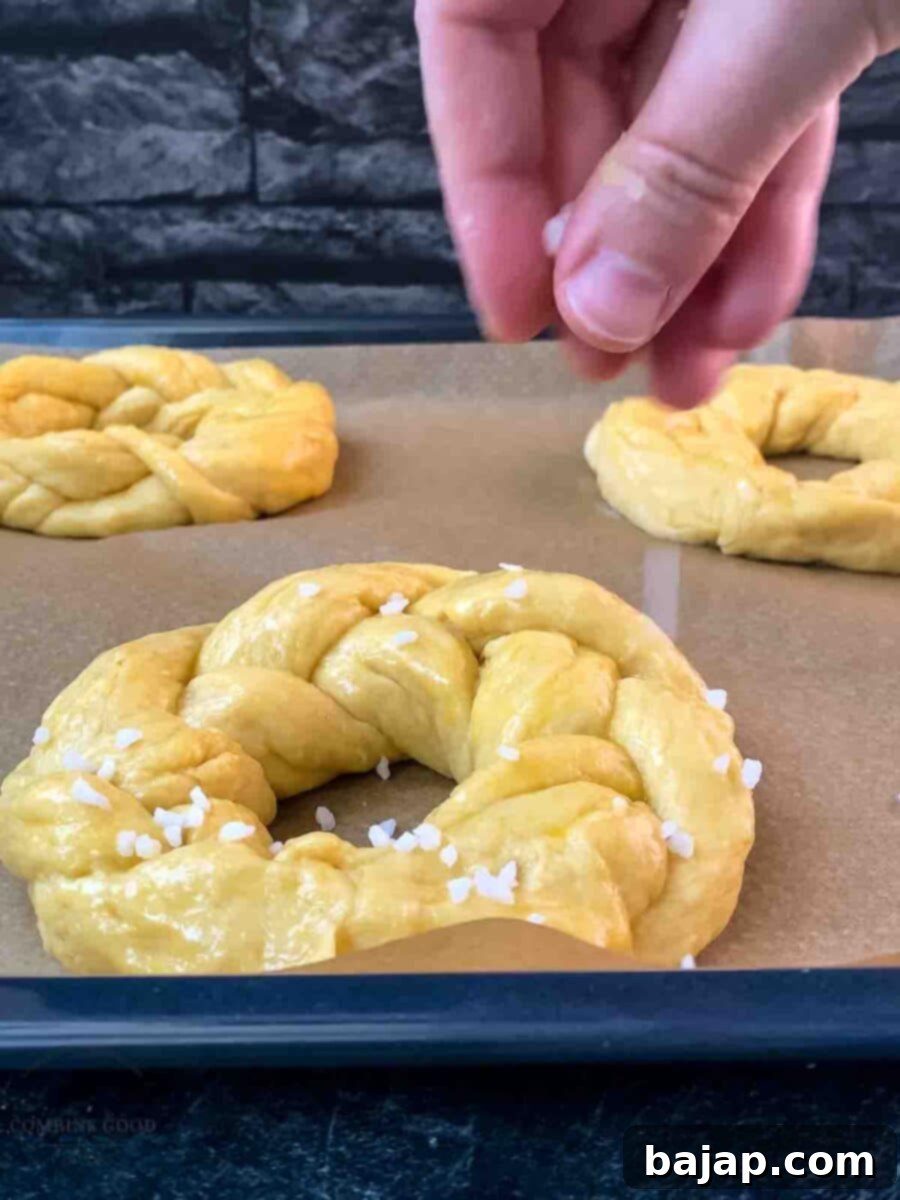
Carefully transfer your three beautifully shaped wreaths onto a baking sheet lined with parchment paper, ensuring there is enough space between them for their final rise. In a small bowl, beat the remaining egg to create an egg wash. Gently brush this egg wash generously over the surface of each wreath; this will give them a gorgeous golden sheen and help the toppings adhere. For that extra sparkle and crunch, liberally sprinkle the wreaths with nib sugar (pearl sugar). Cover loosely and let them rise for another 30 minutes in a warm place. This final proofing ensures a light and airy texture.
Step 10: Bake to Golden Perfection 🔥
While the wreaths are on their second rise, preheat your oven to 160°C (320°F) using the convection setting. If your oven doesn’t have convection, use standard bake at 180°C (350°F) and adjust baking time as needed. Bake the wreaths for approximately 25 minutes, or until they achieve a gorgeous, deep golden-brown color and sound hollow when tapped on the bottom. The irresistible aroma filling your kitchen will be a testament to your baking prowess!
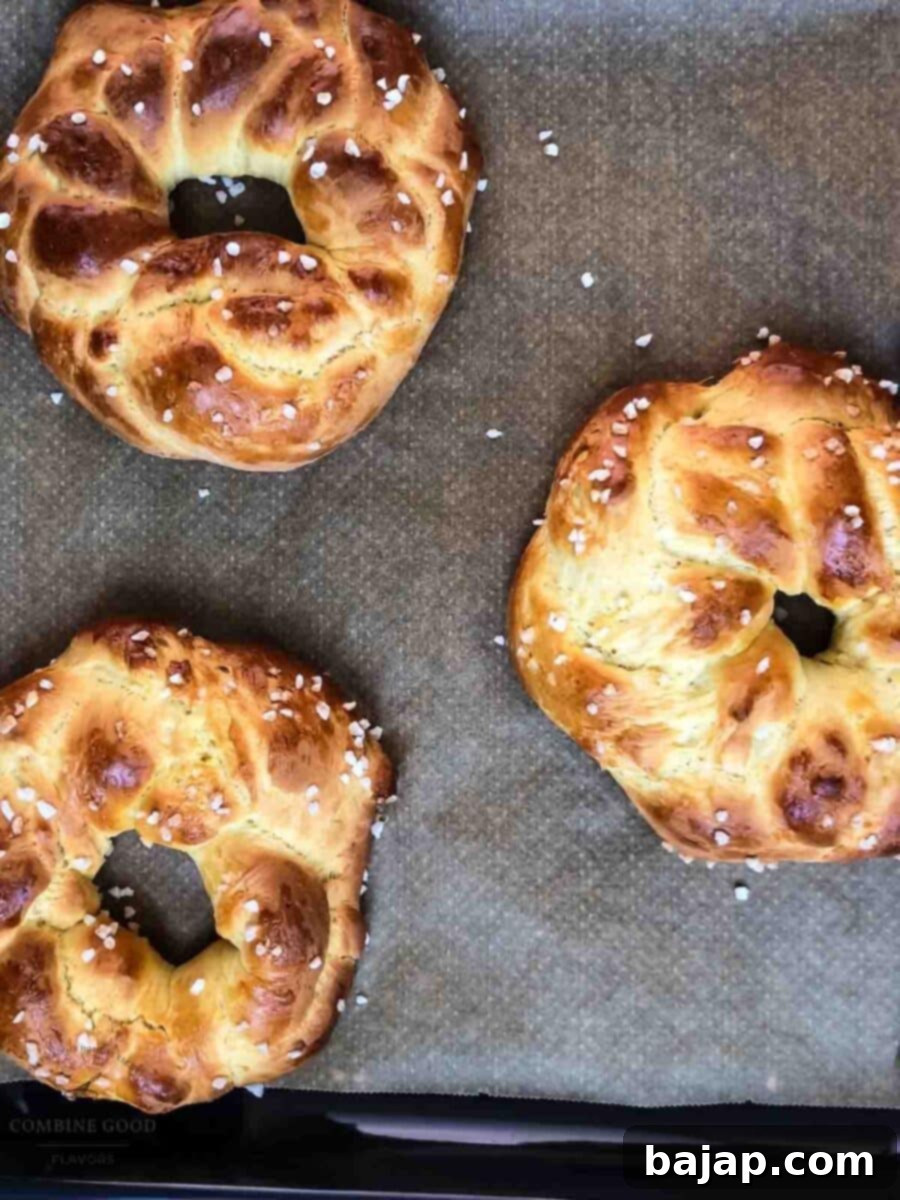
Step 11: Serve & Enjoy! 🎉
Your homemade Easter bread wreaths are best devoured immediately after baking, while still warm from the oven. The soft, fluffy interior and lightly crisp crust are simply divine. Arrange them attractively on your Easter brunch table and watch them disappear in minutes – a true sign of a well-loved treat!
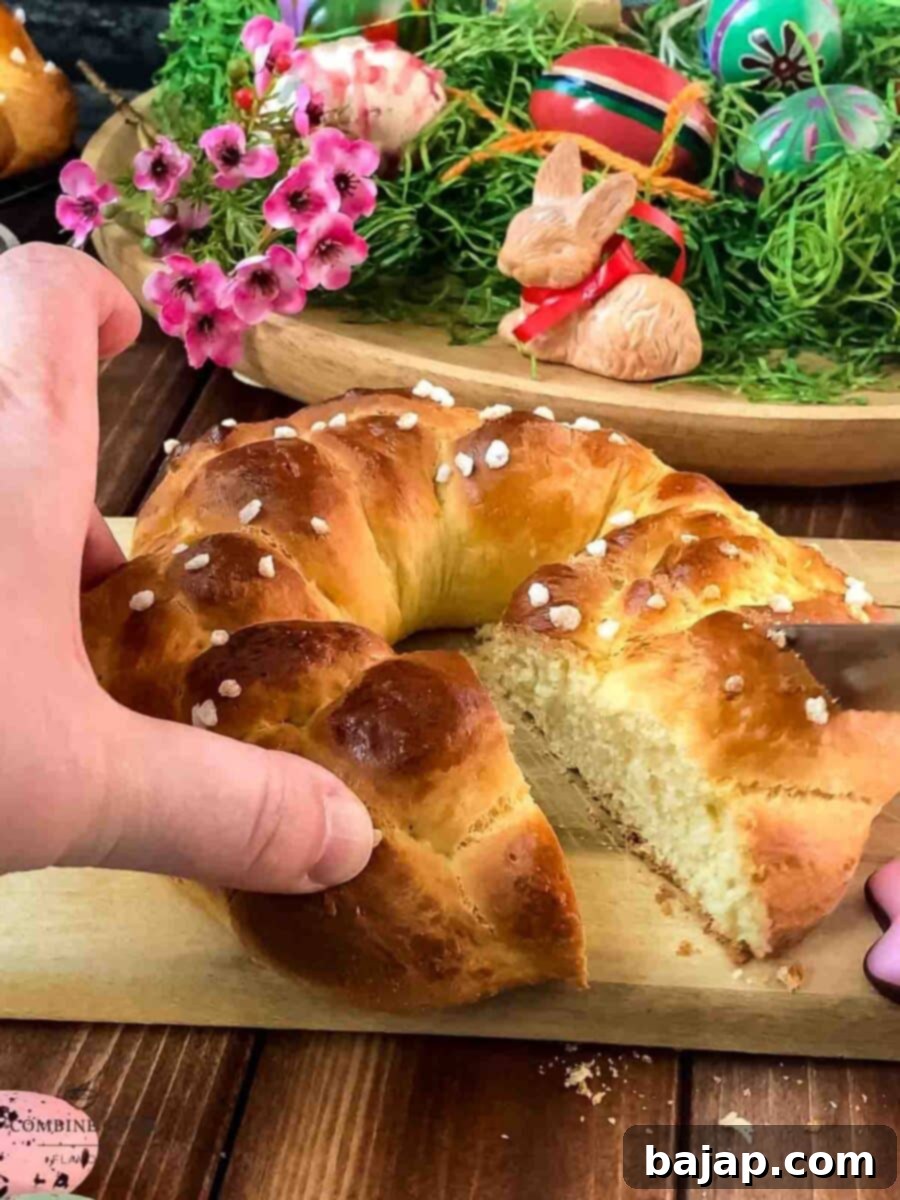
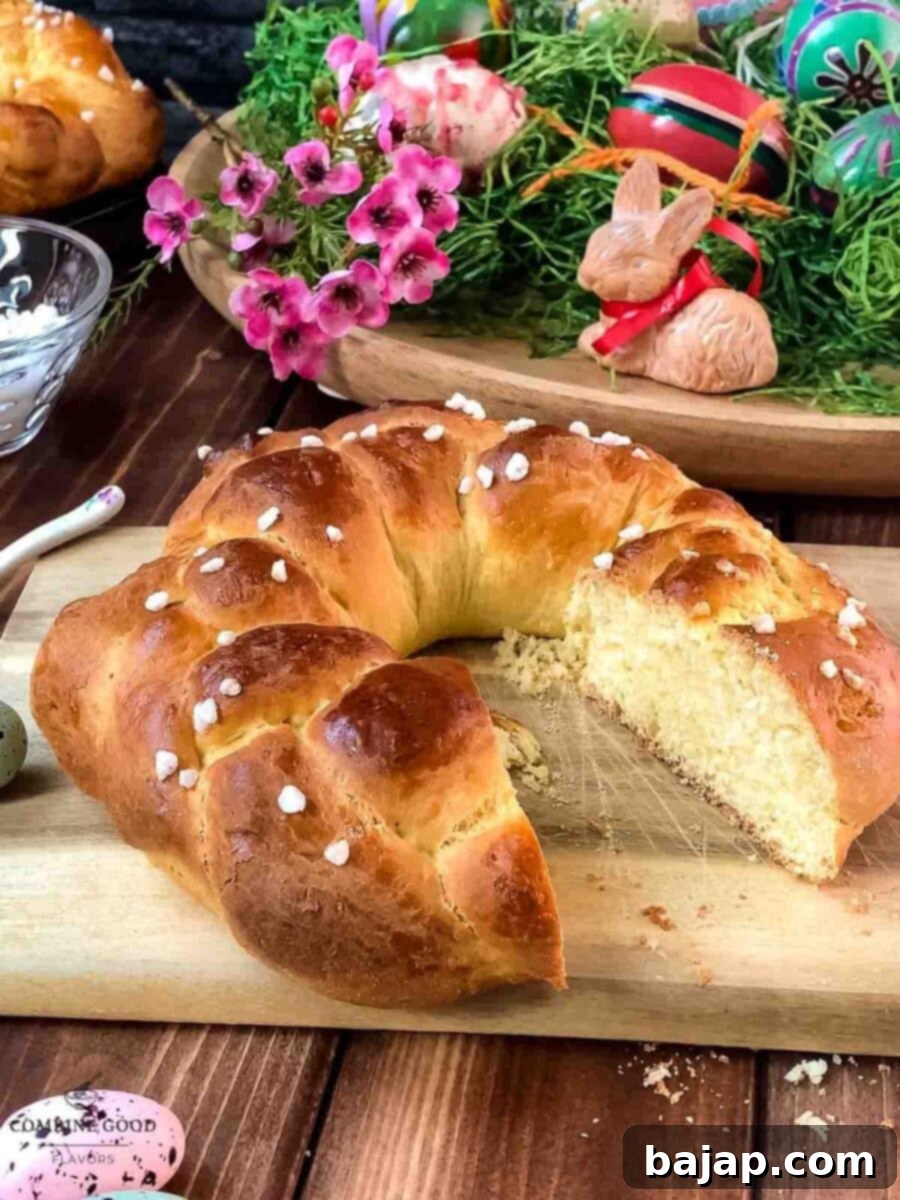

🐰 Delicious Variations for Your Easter Bread Wreaths
While these braided Easter bread wreaths are perfect as is, they also offer a fantastic canvas for creative variations. Feel free to customize them to suit your taste or complement your Easter menu:
- **Nutty Topping:** Instead of (or in addition to) the nib sugar, sprinkle the wreaths with flaked almonds, chopped walnuts, or pecans before baking. The nuts will toast beautifully in the oven, adding a lovely crunch and depth of flavor.
- **Citrus Glaze:** For an extra burst of freshness and sweetness, once the wreaths have cooled slightly, drizzle them with a simple lemon or orange glaze. Mix powdered sugar with a small amount of citrus juice until you reach a pourable consistency.
- **Cinnamon Sugar Swirl:** Before braiding, spread a thin layer of softened butter and a generous sprinkle of cinnamon-sugar mixture over each rolled-out dough strand. This will create a delightful swirl of flavor inside your bread.
- **Savory Herb Wreaths:** Transform these into savory delights by omitting the lemon zest and nib sugar. Instead, knead in finely chopped fresh herbs like rosemary, thyme, or chives into the dough. After brushing with egg wash, sprinkle with coarse sea salt, poppy seeds, or sesame seeds. These are fantastic with cheese, charcuterie, or alongside soups.
- **Chocolate Chips or Dried Fruit:** For a sweeter, richer bread, gently fold in a handful of mini chocolate chips or finely chopped dried cranberries or raisins into the dough during the last few minutes of kneading.
🍽 Essential Equipment for Baking Success
Having the right tools can make all the difference in your baking experience. Here’s a list of equipment that will help you effortlessly create these beautiful braided Easter bread wreaths:
- Microplane zester: Essential for grating fine lemon zest without including the bitter pith.
- Hand or stand mixer with dough hook attachment: A game-changer for kneading yeast dough, ensuring a smooth, elastic consistency with minimal effort.
- Mixing bowls: You’ll need at least two – one for the starter dough and one for the dry ingredients.
- Baking tray lined with parchment paper: Prevents sticking and makes for easy cleanup.
- Saucepan or microwave-safe bowl: For gently warming the milk.
- Sieve: For sifting the flour, which helps create a lighter, airier dough.
- Measuring cups and spoons: Accuracy is key in baking!
Yeast Note for International Bakers 🇦🇹🇺🇸
Understanding yeast conversions is crucial for successful baking, especially when recipes originate from different regions. In Austria and much of Europe, it’s common to use fresh yeast cubes for baking, typically sold in 42g (1.5 oz) portions. This fresh yeast provides a distinct flavor and texture that many bakers prefer.
If you’re baking in the USA or other regions where fresh yeast is harder to find, don’t worry! You can easily substitute it with dry yeast. Here’s how:
- Active Dry Yeast: This type needs to be “activated” or proofed in warm liquid before being added to the dry ingredients. Use half the amount of fresh yeast. So, for 42g of fresh yeast, you would use 21g of active dry yeast, which is approximately 2 ½ teaspoons. Dissolve it in the warm milk (from Step 2) with a pinch of sugar and let it sit for 5-10 minutes until frothy before proceeding.
- Instant Yeast (also known as Rapid-Rise or Bread Machine Yeast): This type is more potent and doesn’t require proofing; it can be mixed directly with your flour. Use ⅓ of the fresh yeast amount. For 42g of fresh yeast, use approximately 14g of instant yeast, which is about 2 teaspoons.
A helpful tip: if you can find cake yeast in the refrigerated section of a US grocery store, that’s the closest match to fresh yeast and can be used in the same quantity as specified for fresh yeast.
Our recipe calls for ½ cube, 21g (0.75 oz) of fresh yeast.
💡 Expert Tips for Fluffy Easter Bread Wreaths
Achieving perfectly soft and airy yeast bread can sometimes feel like a challenge, but with a few expert tips, you’ll be baking like a pro in no time:
- Don’t Rush the Rise: Yeast doughs thrive on patience. Ensure your rising times are adequate. A warm, draft-free environment is crucial for optimal fermentation. If your kitchen is cool, a slightly warmed (turned off!) oven can work wonders.
- The Windowpane Test: To check if your dough is perfectly kneaded, take a small piece and gently stretch it. If you can stretch it thin enough to see light through it without tearing (like a windowpane), the gluten is well-developed.
- Measure Accurately: Especially with flour, precise measurements are key. Using a kitchen scale for flour is highly recommended for consistent results.
- Make Ahead Option: To enjoy fresh bread on Easter morning without the early wake-up call, you can prepare the dough up to the end of the first rise (Step 6). Punch it down, cover tightly, and refrigerate overnight. On Easter morning, let it come to room temperature for about 30-60 minutes, then proceed with dividing, shaping, and baking from Step 7.
- Storage: These Easter bread wreaths are best enjoyed the day they are baked. However, you can store any leftovers in an airtight container at room temperature for up to 2-3 days. Gently warm them in the oven or microwave before serving to restore some of their freshness.
- Freezing: Baked and cooled wreaths can be frozen for up to 1 month. Wrap them tightly in plastic wrap, then in foil. Thaw at room temperature and warm gently before serving.
Other Easter Recipes for You to Try
- Vegan Easter Cookies with Apricot Jam
- Easter Cut Out Cookies with Pistachio Ganache
- Chocolate Chip Vanilla Ice Cream
- Aperol Mimosa
- Classic Mimosa Recipe
- Pistachio Rolls
- Simple Layered Eggnog Vanilla Pudding Dessert
- Potato Flour Cake with Eggnog
- Delicious Linzer Cookies with Egg Liqueur
- Stracciatella egg liqueur milkshake recipe
If you embark on this delightful baking adventure and make this recipe, I would absolutely love to hear about it! Please let me know how you liked it by giving it a ★★★★★ star rating and leaving a comment below. Your feedback is truly awesome and helps others discover this recipe! You can also sign up for our Newsletter to receive weekly delicious homemade recipes directly in your inbox. Don’t forget to follow me on Pinterest or Instagram and share your beautiful creations with me. Just tag me @combinegoodflavors and use the hashtag #combinegoodflavors, so I don’t miss seeing your amazing work!
📖 Recipe

Easter Bread Wreath
Nora
Save RecipeSaved!
Pin Recipe
Equipment
-
Microplane zester
-
Hand or stand mixer with dough hook attachment
-
Mixing bowls
-
Baking tray lined with parchment paper
-
Saucepan or microwave-safe bowl
-
Sieve
Ingredients
- 1 Lemon
- ⅔ cup Milk
- ½ cube Fresh yeast or active dry yeast
- ½ cup Granulated sugar
- 3 ¼ cup Cake flour + flour for the counter top
- ¼ teaspoon Salt
- 2 Eggs size M
- 4 ¼ tablespoon Butter soft
- Nib sugar for sprinkling
- 1 Egg for brushing on
Instructions
-
Wash 1 Lemon with hot water, dry it, and finely grate the zest. Set aside.1 Lemon
-
Warm ⅔ cup Milk in a saucepan or microwave until just warm (not hot).⅔ cup Milk
-
Prepare the starter dough (pre-dough, poolish, Tangzhong): Crumble ½ cube Fresh yeast (or 1.25 oz active dry yeast) into a mixing bowl, and dissolve it in warm milk with a pinch of sugar and 3 tablespoons of flour. Let it rest until it doubles in size.½ cube Fresh yeast
-
Sift the remaining 3 ¼ cup Cake flour into a large bowl and whisk in the ½ cup Granulated sugar, ¼ teaspoon Salt, and lemon zest.½ cup Granulated sugar, 3 ¼ cup Cake flour, ¼ teaspoon Salt
-
Once the starter dough has doubled in size, add it to the dry mixture and mix briefly.
-
Add 2 Eggs and 4 ¼ tablespoon Butter, then knead on high speed until the dough is smooth and pulls away from the sides of the bowl.2 Eggs, 4 ¼ tablespoon Butter
-
Cover and let the dough rise for 50 minutes in a warm spot.
-
On a lightly floured surface, punch down the dough and divide it into 3 equal pieces. Then, divide each piece into 3 more pieces (for a total of 9). Cover and let them rest for 10-15 minutes.
-
Roll each piece into 30 cm (11.8 inch) strands and braid them into three plaits. Form each plait into a wreath, pressing the ends together firmly.
-
Place the braided bread wreaths on a parchment-lined baking sheet, leaving space between them.
-
Beat 1 Egg and brush it over the wreaths. Sprinkle with Nib sugar and let them rise for another 30 minutes.Nib sugar, 1 Egg
-
Preheat the oven to 160°C (320°F, convection) and bake for 25 minutes, or until golden brown.
-
Serve immediately after baking, warm, or on the next day!
Notes
Instant Yeast (Rapid-Rise / Bread Machine Yeast): Use ⅓ of the fresh yeast amount. (For 42g fresh yeast, use 14g instant yeast ≈ 2 teaspoons.) This type can be mixed directly with the flour.
Nutrition values are estimates only, using online calculators. Please verify using your own data.

⛑️ Important Food Safety Guidelines
Ensuring food safety is paramount when preparing any meal, especially when working with ingredients like eggs and milk. Following these guidelines will help prevent foodborne illnesses and ensure your delicious Easter bread wreaths are safe to enjoy:
- Proper Cooking Temperature: Always cook your bread to a minimum internal temperature of 165 °F (74 °C) to ensure any raw egg or other potential contaminants are thoroughly cooked. You can use a food thermometer for accuracy, though for bread, a golden-brown crust and hollow sound often suffice.
- Cross-Contamination Prevention: Avoid using the same utensils or cutting boards on raw meat (like the consecrated ham often served with Easter bread) that have previously touched other food items without proper cleaning. Always wash utensils and surfaces thoroughly between uses.
- Hand Hygiene: Wash your hands thoroughly with soap and warm water before and after handling raw ingredients, particularly eggs, yeast, and any meat products.
- Temperature Danger Zone: Do not leave perishable food, especially dough containing eggs and milk, sitting out at room temperature for extended periods. Bacteria can multiply rapidly between 40°F (4°C) and 140°F (60°C). If preparing ahead, refrigerate dough promptly.
- Never Leave Cooking Unattended: Always keep an eye on food cooking in the oven or on the stovetop. This prevents burning and potential fire hazards.
- Smoking Point of Oils: If you ever use oils for frying (not typically needed for this recipe, but good general advice), use oils with a high smoking point to avoid producing harmful compounds.
- Ventilation: Always ensure good ventilation in your kitchen when using a gas stove or oven to prevent the buildup of fumes.
For further comprehensive information on safe food handling practices, please consult the Safe Food Handling – FDA guidelines. Your health and safety are always the top priority!
