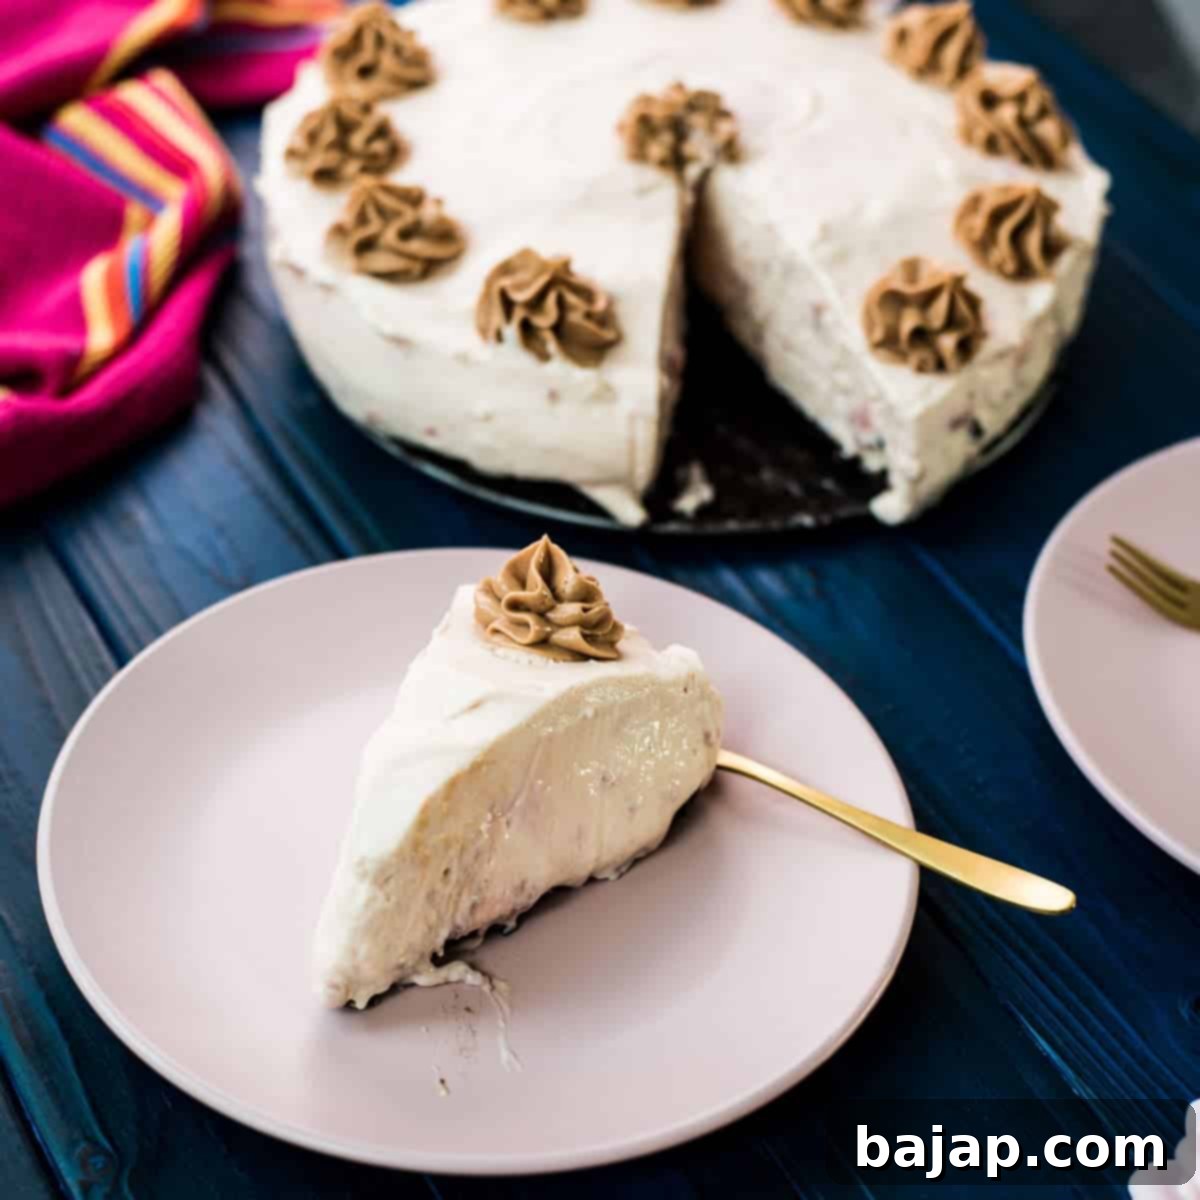
The Best No-Bake Strawberry Cheesecake with Oreo Walnut Crust – Easy Recipe!
Are you searching for a dessert that’s both incredibly delicious and surprisingly simple to make? Look no further! This No-Bake Strawberry Cheesecake is a dream come true for anyone craving a luscious, creamy treat without the fuss of baking. With its intensely vibrant strawberry flavor and an unexpectedly delightful Oreo and walnut crust, this recipe promises to be an instant favorite. But the real secret that elevates this cheesecake to another level? A subtle hint of rum in the filling, tying all the flavors together in perfect harmony. Get ready to impress your friends and family with a dessert that tastes gourmet but is incredibly easy to prepare!
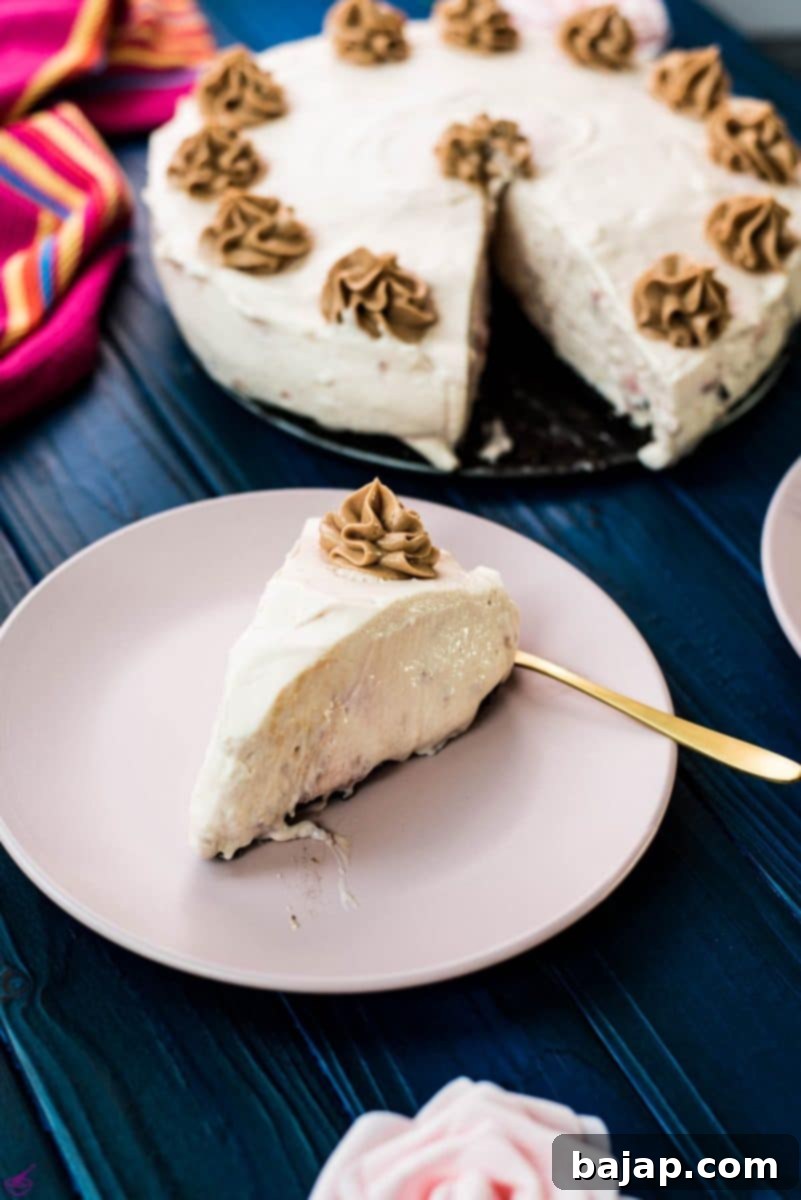
While this delightful dessert is one of my go-to recipes for summertime gatherings, its fruity and refreshing qualities make it a perfect treat to enjoy all year round, regardless of whether strawberries are in season. The beauty of a no-bake cheesecake lies in its minimal effort and maximum reward. You won’t need to turn on your oven, making it ideal for hot days or when you simply want a quick yet impressive dessert. This recipe is guaranteed to be a hit, bringing smiles to everyone who tries a bite!
Why You’ll Love This No-Bake Strawberry Cheesecake
This isn’t just any cheesecake; it’s an experience! Here are a few reasons why this particular recipe stands out and will quickly become a cherished favorite:
- Effortlessly Delicious: No oven, no water bath, just simple mixing and chilling for a truly indulgent dessert.
- Unique Flavor Profile: The classic combination of sweet strawberries and creamy cheesecake is elevated by a surprising Oreo and walnut crust, offering a delightful crunch and depth of flavor.
- Subtle Rum Infusion: A hint of rum in the filling adds a sophisticated warmth that perfectly complements the strawberries, making each bite unforgettable.
- Versatile for Any Occasion: Perfect for summer BBQs, holiday gatherings, birthdays, or simply a treat for yourself.
- Make-Ahead Friendly: It requires ample chilling time, making it an excellent dessert to prepare the day before, freeing up your event day!
- Crowd-Pleasing Presentation: Its vibrant color and beautiful layers make for a stunning centerpiece that’s as pleasing to the eye as it is to the palate.
More Strawberry Delights
If you’re a fan of the sweet, juicy goodness of strawberries, you’ll love exploring these other delightful recipes:
- Austrian Strawberry Sponge Cake
- Strawberry Cupcakes with Ricotta
- Strawberry Flavored Whipped Cream
- Strawberry Cobbler
- Strawberry Simple Syrup
- Strawberry Popsicles
- Strawberry Spritz
- Strawberry Milkshake
- Strawberry Cream
- Strawberry Milk
- Strawberry Moscow Mule
[feast_advanced_jump_to]
🥘 Ingredients
Crafting this sensational no-bake strawberry cheesecake requires a few key ingredients, each playing a vital role in creating its incredible texture and unforgettable flavor. Using high-quality ingredients will always yield the best results!
For the Oreo Walnut Crust
- Oreo Cookies: Or any chocolate sandwich cookie you prefer. These form the base of our unique crust.
- Unsalted Butter: Melted, to bind the crust ingredients together. Unsalted butter allows you to control the overall saltiness.
- Whole Milk: Adds moisture and helps in forming a cohesive crust.
- Ground Walnuts: This is the surprise ingredient that adds a delightful nutty flavor and unique texture, distinguishing this crust from traditional cookie crusts.
- Corn Starch: A crucial ingredient for ensuring the cheesecake releases easily from the pan.
For the Cheesecake Filling
- Mascarpone Cheese: Provides a rich, velvety texture and a subtle tang. Make sure it’s at room temperature for smooth mixing.
- Cream Cheese: The classic cheesecake base, offering that signature creamy and slightly tart flavor. Also best at room temperature.
- Heavy Cream: Whipped to soft peaks, it adds lightness and airiness to the filling, making it super soft.
- Powdered Sugar: Also known as confectioners’ sugar, it sweetens the filling and dissolves easily, preventing a grainy texture.
- Strawberries: Fresh or frozen, these will be cooked down to create an intense, jam-like strawberry layer.
- Vanilla Extract: Enhances the sweet flavors and adds a comforting aroma.
- Rum: The secret ingredient! It adds a warm, complex note that perfectly complements the strawberries without overpowering them.
- Water: Used in the strawberry reduction.
- Sugar: To sweeten the homemade strawberry jam for the filling.
Garnish
- Milk Chocolate Cream Cheese Buttercream: For an elegant and decadent finish.
- Alternatively, fresh strawberries or other fruit.
For precise quantities and detailed measurements, please refer to the complete recipe card below.
🔪 Instructions
Follow these step-by-step instructions to create your masterpiece. Remember, patience with chilling is key to a perfect no-bake cheesecake!
Crafting the Unique Oreo Walnut Crust
The foundation of this extraordinary cheesecake is its crust. This unique combination of Oreo cookies and walnuts provides a delightful crunch and nutty undertone that perfectly balances the creamy strawberry filling.
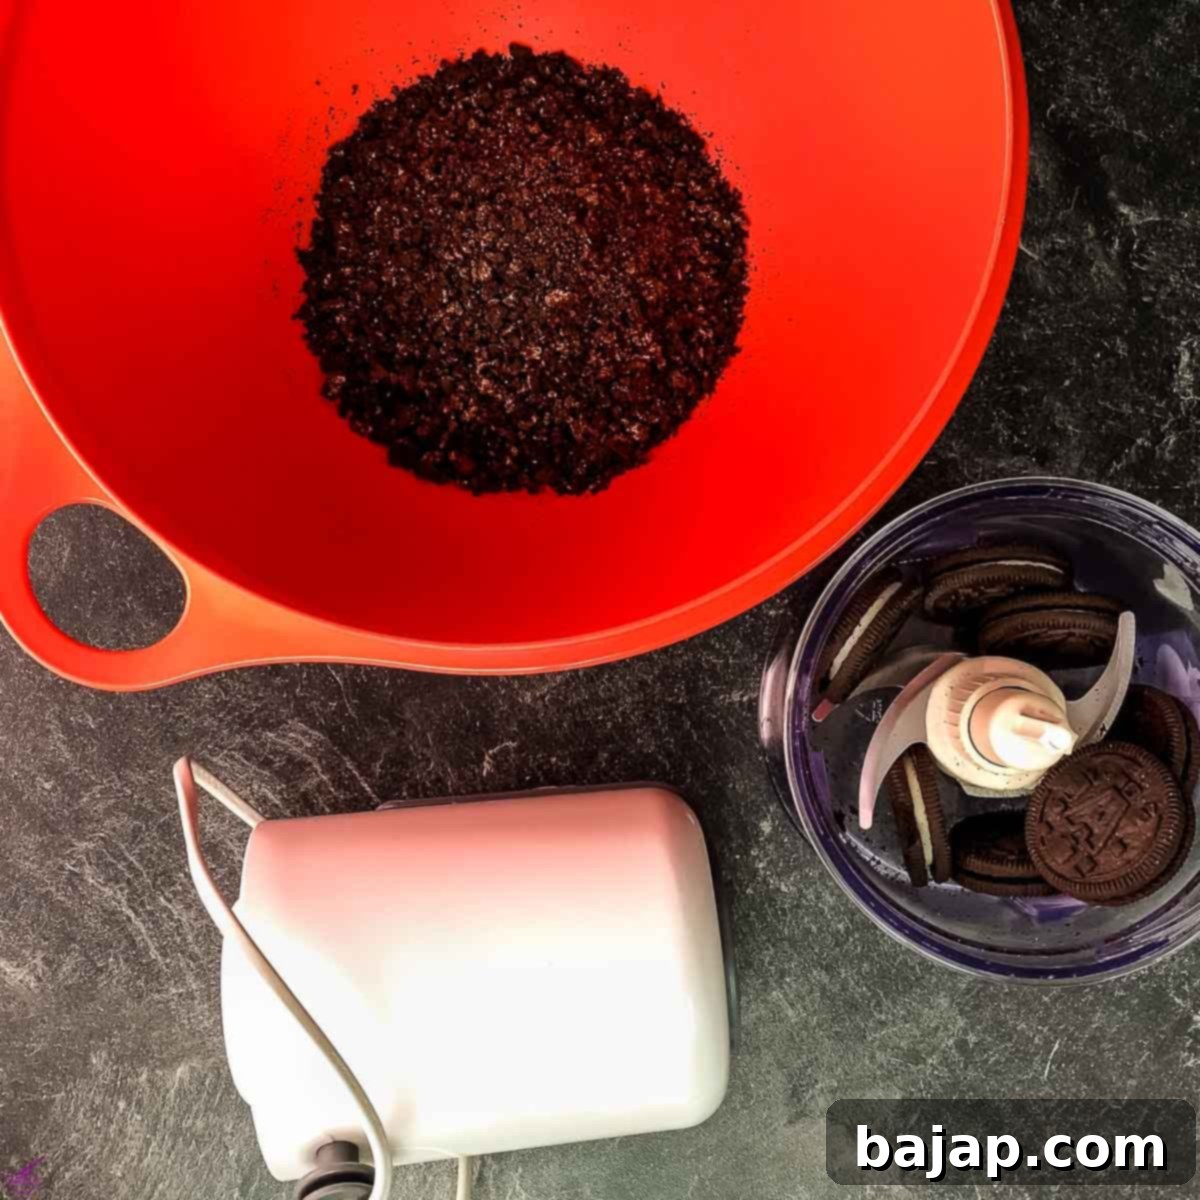
- Prepare the Crumbles: Begin by finely crushing your Oreo cookies and walnuts. For minimal mess and maximum efficiency, place them in a sturdy plastic Ziplock bag and crush them with a rolling pin. Alternatively, an electric chopper or food processor will make this step even easier and yield consistent crumbs. If you can find pre-crushed cookie crumbs in the supermarket, that’s an excellent time-saver!
- Melt the Butter: Gently melt your unsalted butter. You can do this in a microwave (on medium heat until fully molten) or on the stovetop (over a low flame, being careful not to brown it).
- Combine Crust Ingredients: Reserve two tablespoons of the melted butter for later. Mix the remaining melted butter with the whole milk, crushed Oreos, and ground walnuts in a large bowl. Stir thoroughly until all the crumbs are evenly coated. The mixture should feel slightly sticky when pressed together.
- Prepare the Pan for Easy Release: Take your 12-inch/30-cm springform pan. Place a piece of parchment paper on the bottom. Brush the parchment paper with the two tablespoons of reserved melted butter. Then, generously sprinkle corn starch over the buttered parchment paper, shaking the pan to ensure an even coating. Tilt the pan to discard any excess corn starch. This simple but crucial step, along with briefly chilling the pan, will help the cheesecake release effortlessly once firm. Place the prepared pan in the refrigerator for 2-3 minutes.
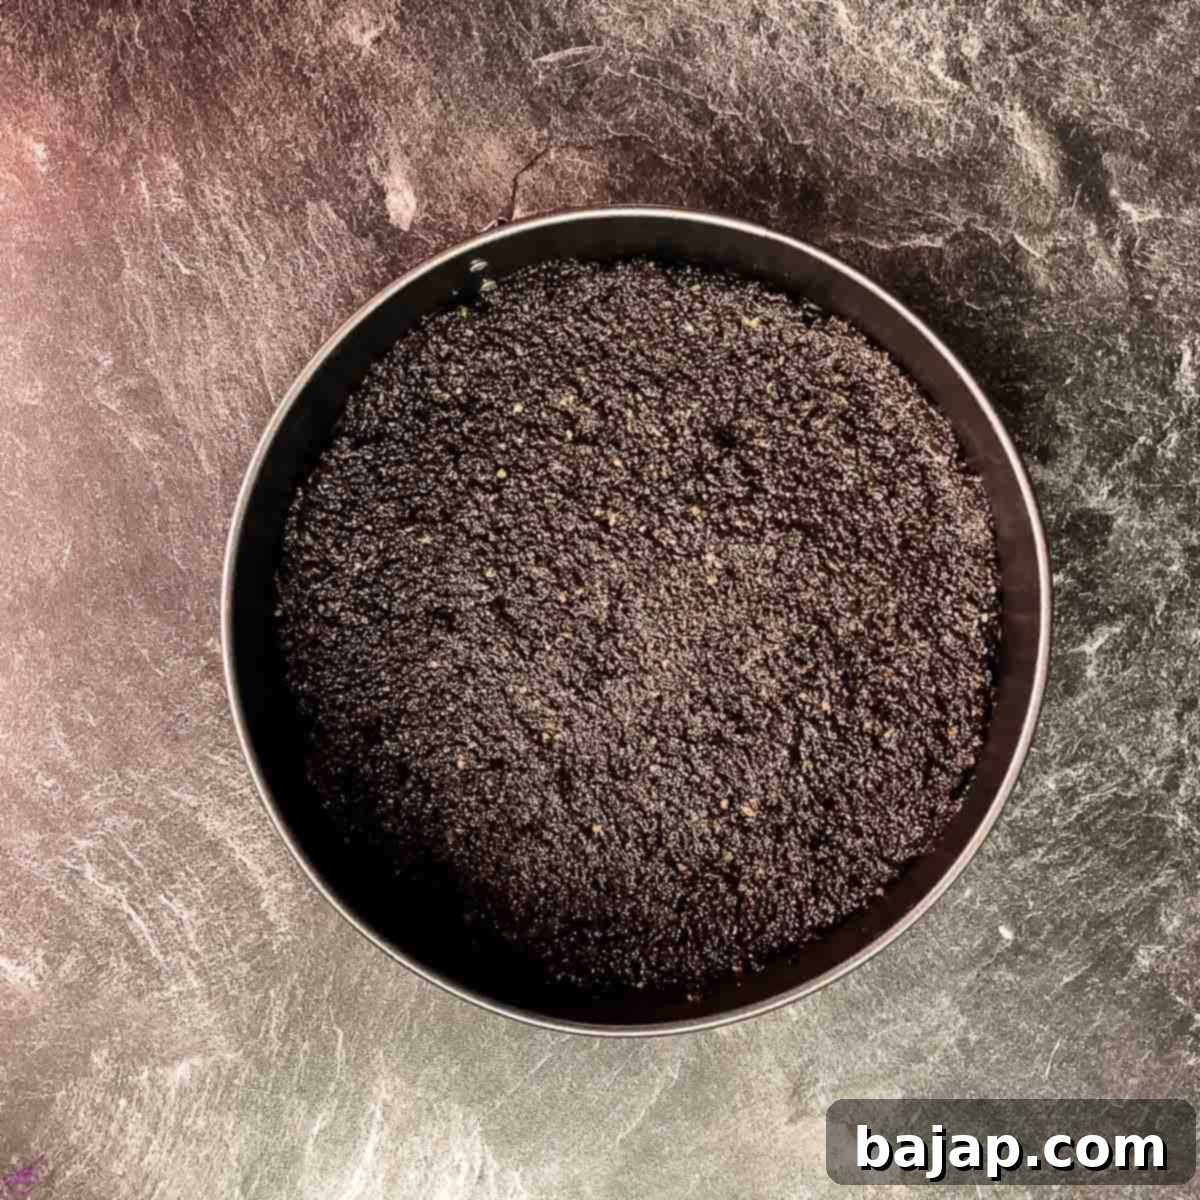
- Press the Crust: Once the pan is lightly chilled, pour the Oreo walnut mixture into it. Using the back of a spoon or your fingers, press the mixture firmly and evenly across the bottom and slightly up the sides of the cake pan. A smooth, compact crust is essential.
- Chill the Crust: Transfer the pan with the pressed crust to the freezer for at least 15 minutes while you prepare the filling. This initial chill helps set the crust and prevents it from crumbling when sliced.
Preparing the Luscious Strawberry Filling
The star of our cheesecake is its creamy, fruity filling, bursting with fresh strawberry flavor and a delightful hint of rum.
- Whip the Mascarpone: In a large mixing bowl, beat the mascarpone cheese with an electric mixer for 3-5 minutes until it becomes soft and smooth.
- Add Flavorings: While continuing to mix on medium speed, gradually incorporate the powdered sugar, followed by the vanilla extract and rum. Once these are well combined, gently mix in the cream cheese until just incorporated. Be careful not to overmix the cream cheese, as this can make the filling less smooth.
- Whip the Heavy Cream: In a separate, clean bowl, whip the heavy cream until soft peaks form. This will give your cheesecake its light, airy texture.
- Fold Together: Carefully fold the whipped heavy cream into the mascarpone and cream cheese mixture by hand, using a circular motion. This preserves the airiness of the whipped cream and keeps the filling light. Avoid using an electric mixer for this step.
- Make the Strawberry Jam: In a small saucepan, combine the sugar, water, and fresh or frozen strawberries. Cook over medium heat, stirring occasionally, until the sugar is completely dissolved and the strawberries soften. Use a spatula or fork to gently crush the strawberries as they cook, creating a jam-like consistency.
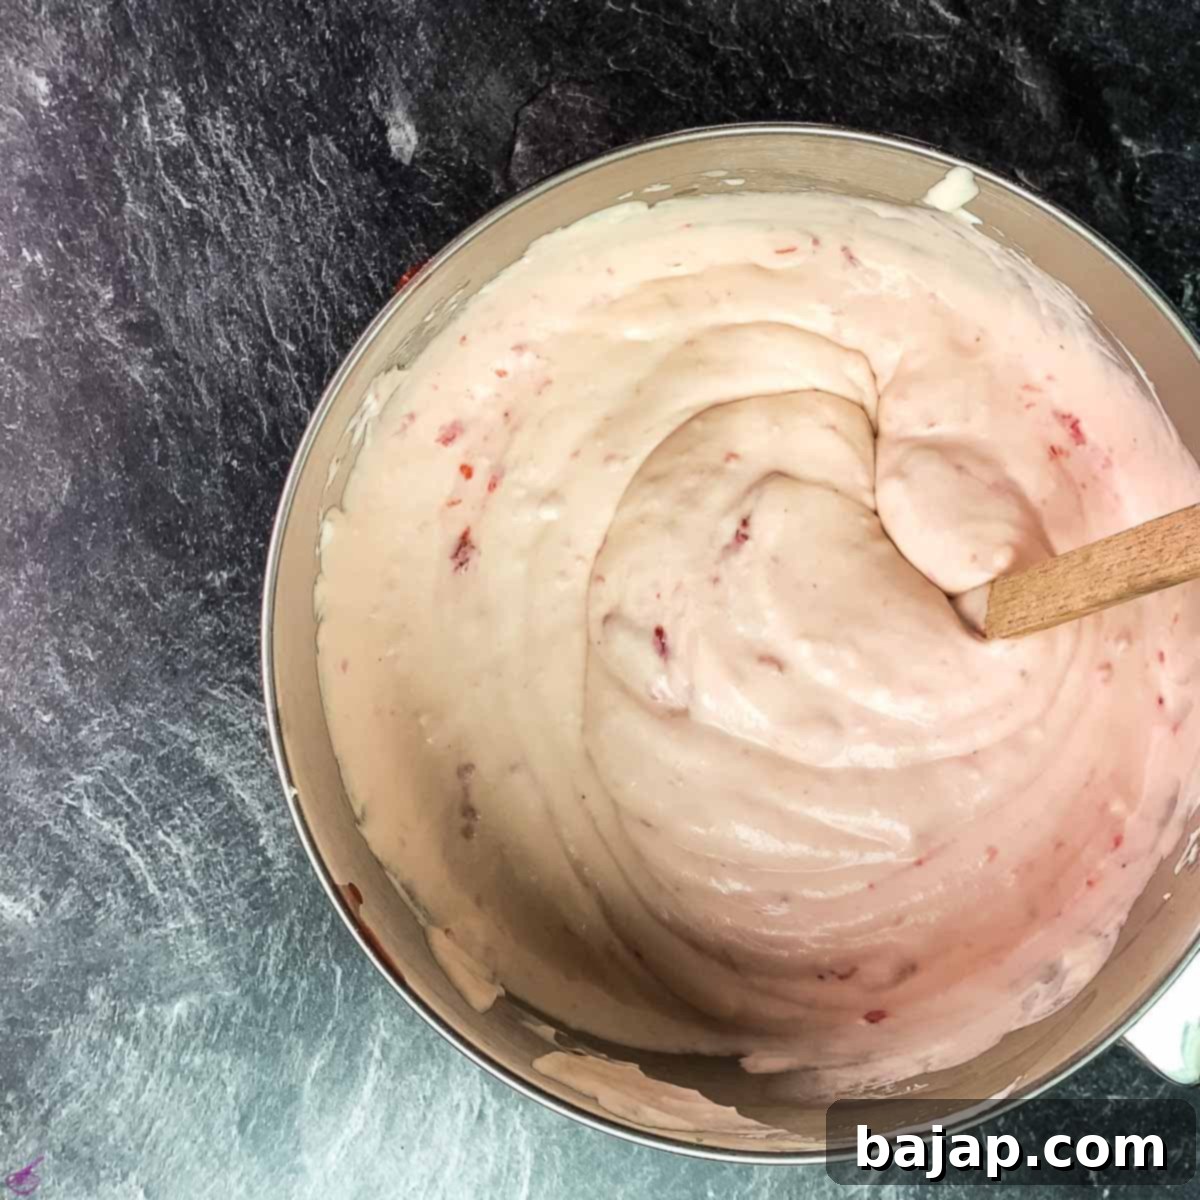
- Incorporate Strawberry Jam: Once your strawberry mixture has reached a jam-like consistency, remove it from the heat and let it cool slightly. Then, gently fold this strawberry jam into the mascarpone and whipped cream mixture by hand. Ensure it’s evenly distributed for that intense strawberry flavor in every bite.
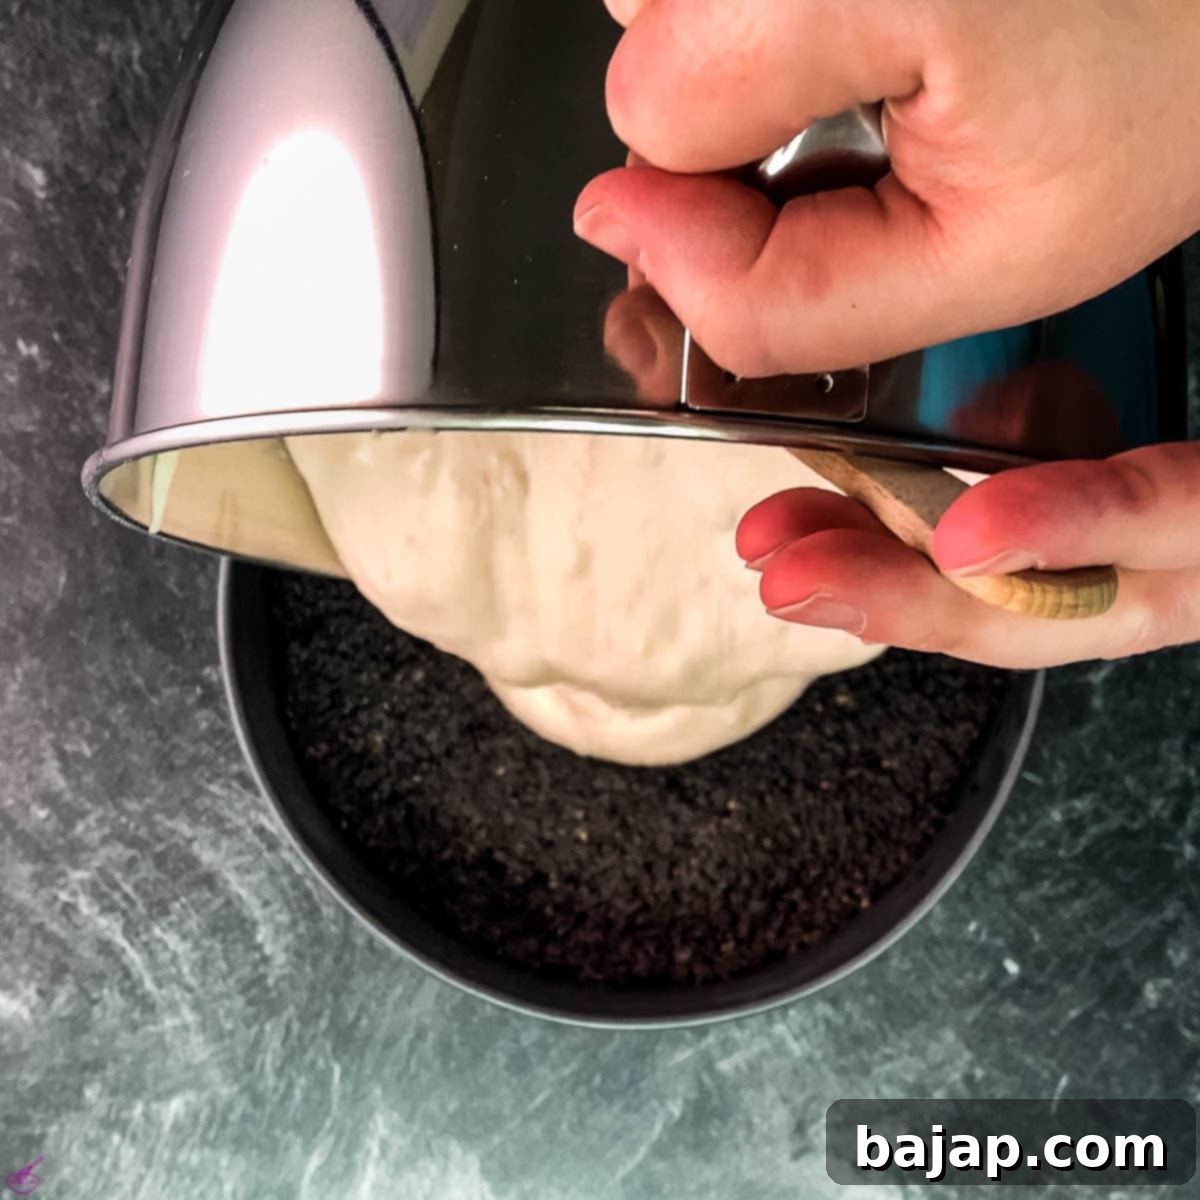
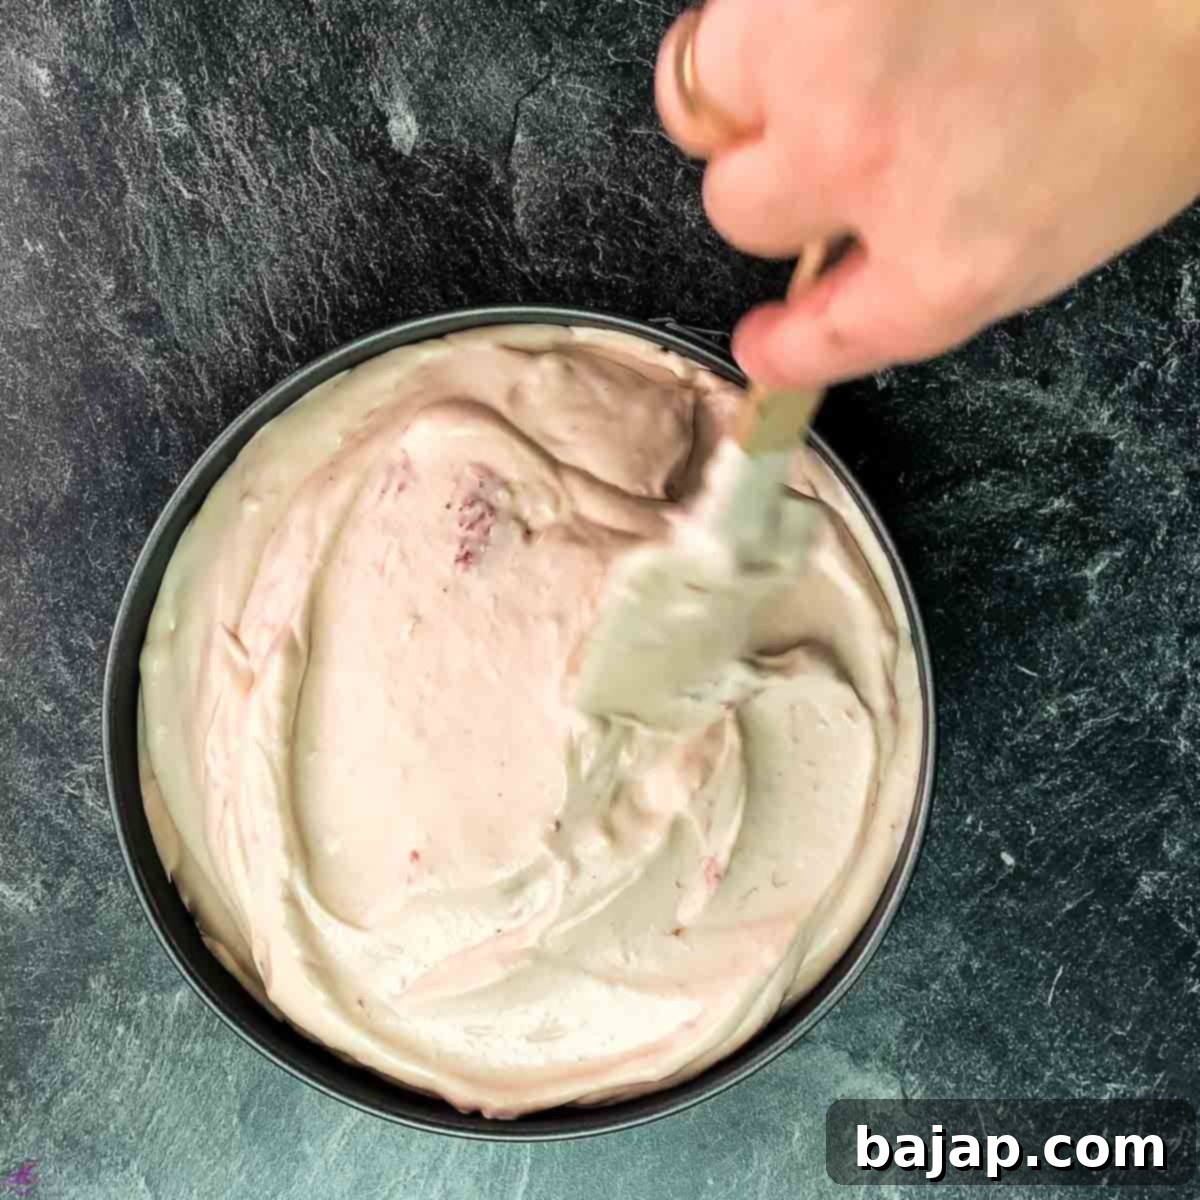
- Assemble the Cheesecake: Retrieve your chilled crust from the freezer. Pour the strawberry filling evenly over the crust. Use a spatula to spread it smoothly across the surface.
Chilling, Unmolding, and Decorating
- Chill Thoroughly: Once the filling is smooth and even, place the cheesecake in the freezer for at least 3 hours. For the best results and a truly firm, sliceable cheesecake, I highly recommend chilling it overnight. This extended chill time is crucial for a no-bake cheesecake to properly set.
- Unmold with Care: When the cheesecake is fully hardened and ready to be served, it’s time to unmold it. To easily release the cheesecake from the springform pan, gently warm the outside edges of the pan. You can do this by using a blow torch on a very low setting, a quick pass with a gas stove flame, or even a lighter. Just a short interval of warmth is enough to loosen the sides.
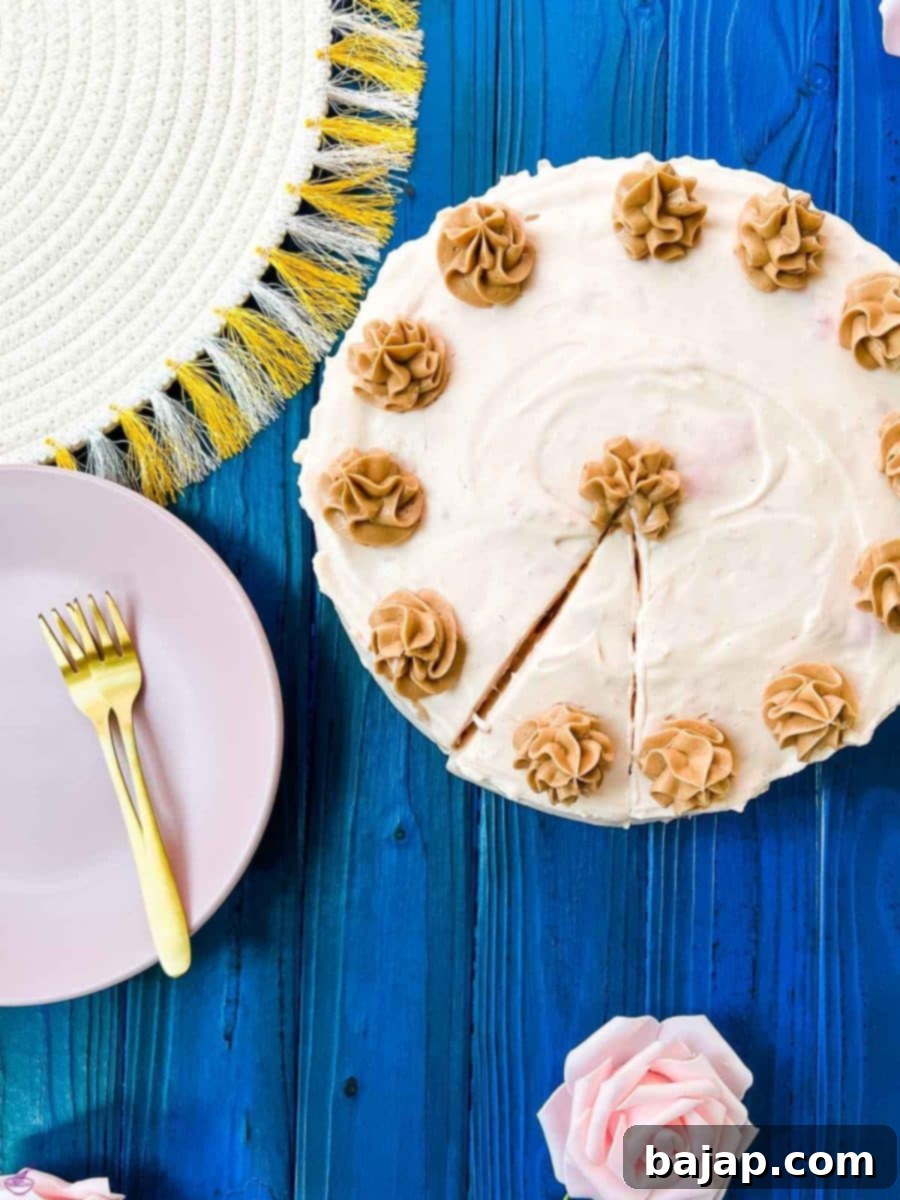
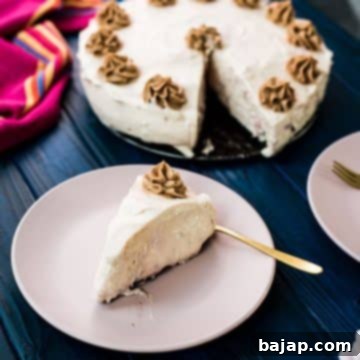
- Decorate and Serve: Once unmolded, your beautiful no-bake strawberry cheesecake is ready for its final touches. Decorate it with a generous swirl of milk chocolate buttercream, fresh strawberries, or any of the variations suggested below. Now, all there’s left to do is say, “Bon Appétit!”
If you’re a fan of strawberry cheesecake, consider trying these delicious strawberry cheesecake cookies for a fun change of pace!
Expert Tips for No-Bake Cheesecake Success
Achieving the perfect no-bake cheesecake is simple with these additional tips:
- Room Temperature Ingredients: Ensure your mascarpone and cream cheese are at room temperature. This is vital for a smooth, lump-free filling that blends beautifully. Cold cream cheese will result in a clumpy texture.
- Don’t Overmix: When combining the mascarpone, cream cheese, and whipped cream, mix until just combined. Overmixing, especially with an electric mixer, can deflate the whipped cream and lead to a less airy, dense filling.
- The Chilling is Crucial: I cannot stress this enough – allow ample chilling time! Overnight is truly best for a firm, sliceable cheesecake. If you cut the chilling time short, you’ll end up with a delicious but messy “cheesecake pudding.”
- Taste and Adjust: Before pouring the filling into the crust, taste a small amount and adjust the sweetness or rum (if using) to your preference. Remember, flavors can become slightly muted when chilled.
- Even Crust: Press your crust firmly and evenly into the pan. An even crust prevents soggy spots and ensures a uniform base for your filling.
- Clean Slices: For perfectly clean slices, dip your knife in hot water and wipe it clean between each cut.
🥜 Substitutions
This recipe is wonderfully adaptable! Feel free to adjust ingredients to suit dietary needs or personal preferences:
- Kid-Friendly Rum Substitute: If you’re making this sweet treat for children or prefer an alcohol-free version, simply swap the rum in the cheesecake filling for an equal amount of strawberry juice, milk, or even a touch more vanilla extract. The strawberry juice will further enhance the berry flavor!
- Nut-Free Crust: For those with nut allergies, the walnut component of the crust can be easily omitted. Simply double down on the amount of Oreo cookie crumbs to create a purely cookie-based crust. You could also use an alternative like graham cracker crumbs for a different flavor profile.
- Alternative Garnishes: Instead of the rich chocolate cream cheese buttercream, consider using one of our delicious flavored whipped cream creations for a lighter finish. The possibilities are endless:
- Coconut-flavored whipped cream
- Almond whipped cream
- Orange-flavored whipped cream
- Vodka-flavored whipped cream
- Irish Cream whipped cream
- Chocolate-flavored whipped cream
- Cinnamon-flavored whipped cream
- Strawberry-flavored whipped cream
🍑 Variations
Beyond substitutions, you can also get creative with variations to customize your no-bake strawberry cheesecake:
- Fresh Strawberry Garnish: For an elegant and dazzling presentation, garnish your chilled cheesecake with fresh strawberry slices. To ensure the strawberries stay fresh and shiny, you can lightly glaze them. Cut about a cup of fresh strawberries into uniform slices. Prepare a small amount of gelatin: put gelatin granules in cold water and let them hydrate for about five minutes. Then, melt the hydrated gelatin in a microwave on medium heat until completely dissolved. Use a pastry brush to lightly brush the melted gelatin over the strawberry slices. Arrange them artfully on top of the cheesecake.
- Mixed Berry Cheesecake: Instead of just strawberries, consider using a mix of berries like raspberries, blueberries, or a combination for the fruit jam layer.
- Chocolate Drizzle: A simple drizzle of melted dark or white chocolate over the finished cheesecake can add another layer of indulgence.
- Citrus Zest: Add a teaspoon of lemon or orange zest to the cheesecake filling along with the vanilla extract for a bright, refreshing twist.
🍽 Equipment
Gathering your tools beforehand will make the preparation process smooth and enjoyable:
- Hand or Stand Mixer: Essential for whipping cream and combining the cheeses smoothly.
- Spatula: For mixing, scraping bowls, and spreading the filling evenly.
- Saucepan: A small one is perfect for making the strawberry jam.
- Mixing Bowls: You’ll need at least two – one for the cheese mixture and one for whipping cream.
- Whisk: For hand mixing or when an electric mixer is too much.
- Parchment Paper: Crucial for easy release of the crust.
- 12-inch/30-cm Springform Pan: The ideal pan for cheesecakes, with its removable bottom.
- Rolling Pin or Food Processor: For crushing cookies and walnuts.
🌡 Storage
This generous no-bake strawberry cheesecake recipe yields about 16-20 servings, so leftovers are likely! Proper storage is key to keeping it fresh and delicious:
- Refrigeration: Once sliced or if you have any leftovers, cover the cheesecake tightly with plastic wrap or aluminum foil. Store it in an airtight container in the refrigerator. It will keep well for 3 to 5 days.
- Freezing: If you want to store it for longer, you can freeze individual slices or the entire cheesecake (if undecoated). Wrap slices tightly in plastic wrap, then a layer of aluminum foil. For a whole cheesecake, ensure it’s fully set, then wrap it securely. It can be frozen for up to 1 month. Thaw in the refrigerator overnight before serving.
- Preventing Odors: Cheesecake can absorb odors from other foods in the fridge, so always ensure it’s well-wrapped.
🙋🏻 FAQ
The “better” choice truly comes down to personal preference! Baked cheesecakes are known for their dense, rich, and often slightly fluffy texture, which is achieved through the use of eggs and slow baking. No-bake cheesecakes, on the other hand, typically contain no eggs and rely on refrigeration or freezing to set, resulting in a lighter, creamier, and sometimes mousse-like consistency. Many people prefer no-bake versions for their ease of preparation (no oven required!) and refreshing feel, especially in warmer weather. Both are absolutely delicious in their own right, offering different but equally delightful experiences.
The most common reason for a no-bake cheesecake not firming up is insufficient chilling time. Unlike baked cheesecakes, no-bake versions depend entirely on cold temperatures to set their structure. You’ll need to keep it in the refrigerator for at least several hours, but for optimal firmness and easy slicing, I strongly recommend preparing your cheesecake the night before and letting it chill overnight in the freezer or fridge. If the issue persists even after adequate chilling, it might be due to overmixing the cream cheese or mascarpone, which can break down their structure, or insufficient heavy cream/stabilizer.
The primary way to thicken a no-bake cheesecake is through extensive chilling – at least three hours in the freezer, but preferably overnight. This allows the fats in the dairy products to solidify and create a firm texture. If you’ve followed this crucial step and are still struggling with firmness, you can incorporate a small amount of gelatin or cornstarch (mixed with a cold liquid first, then heated) into your filling mixture during preparation. Always ensure your heavy cream is whipped to stiff peaks before folding it into the cheese mixture, as this also provides essential structure.
For a true “no-bake” cheesecake, there’s absolutely no need to bake the crust! The beauty of this recipe is that everything is prepared on your kitchen counter, requiring no oven time. The butter in the crust mixture acts as the binder, and chilling in the freezer sets it perfectly. This means you don’t need to buy a pre-baked crust either; making your own no-bake crust is part of the charm and ease of the recipe. Just ensure it’s firmly pressed and adequately chilled to prevent crumbling.
Yes, it is essential to cover your no-bake cheesecake before placing it in the refrigerator or freezer to set. Covering it with plastic wrap or aluminum foil prevents it from absorbing any odors from other foods in your fridge, protects it from drying out, and helps maintain its fresh flavor and moisture. Ensure the wrap doesn’t directly touch the surface of the cheesecake if you want to preserve a perfect top layer, especially if you’re not planning to garnish it immediately.
Fancy more delicious no-bake cheesecake recipes?
- No-bake Ricotta Cheesecake
- No-bake Pumpkin Cheesecake
- No-bake White Chocolate Raspberry Cheesecake {Halloween}
- No-bake Fig Cheesecake {in a Jar}
- Patriotic 4th of July no-bake Cheesecake
- No-bake Mint Cheesecake
- No-bake Eggnog Cheesecake
- 5 ingredient mini Oreo Cheesecakes
If you make this recipe, let me know how you liked it by ★★★★★ star rating it and leaving a comment below. This would be awesome! You can also sign up for our Newsletter or follow me on Pinterest or Instagram and share your creation with me. Just tag me @combinegoodflavors and hashtag #combinegoodflavors, so I don’t miss it.
📖 Recipe
No-bake Strawberry Cheesecake with Oreo Walnut Crust
Nora
Save RecipeSaved!
Pin Recipe
Equipment
-
Hand mixer or stand mixer
-
Spatula
-
Mixing bowl
-
Small sauce pan
-
Whisk
-
Parchment Paper
-
Springform pan 12-inch/30-cm
Ingredients
For the crust
- 28 Oreo biscuits
- 5 oz Unsalted Butter
- ¼ cup Whole milk
- 2 oz Walnut ground
- 1 tablespoon Corn starch
For the cheesecake filling
- 25 oz Mascarpone
- 15 oz Cream cheese
- 1 ⅛ cup Whipping cream
- ¾ cup Icing sugar
- 10 oz Strawberry
- 1 teaspoon Vanilla extract
- 8 teaspoon Rum
- ¼ cup Water
- ½ cup Sugar
Garnish
- Milk Chocolate cream cheese buttercream decor
Instructions
Oreo Walnut Crust
-
Crush the 28 Oreo biscuits and 2 oz Walnuts very finely using a rolling pin (inside a plastic bag) or an electric chopper.28 Oreo biscuits, 2 oz Walnut
-
Place the 5 oz Unsalted Butter and ¼ cup Whole milk in a microwave-safe dish and heat it on a medium setting in your microwave until the butter is completely molten (or melt on low heat on the stovetop).5 oz Unsalted Butter, ¼ cup Whole milk
-
Reserve 2 tablespoons of the melted butter. Mix the rest of the melted butter and milk with the crushed Oreo biscuits and walnuts in a bowl.
-
Mix until all the crumbs are thoroughly combined with the butter, forming a slightly sticky mixture.
-
Place parchment paper on the bottom of a 12-inch/30-cm springform pan and brush it with the reserved molten butter.
-
Sprinkle 1 tablespoon Corn starch evenly over the buttered parchment paper. Shake the pan to distribute the corn starch, then turn it over to remove any excess. Place the pan in the fridge for 2-3 minutes to cool.1 tablespoon Corn starch
-
Once the starch and butter dusting has cooled, pour the Oreo walnut mix on top. Press it firmly and evenly across the bottom and edges of the cake pan to create a compact crust.
-
Place the pan with the pressed crust in the freezer for at least 15 minutes (or until you finish preparing the filling).
Strawberry Filling & Assembly
-
In a large mixing bowl, add all 25 oz Mascarpone cheese (at room temperature) and beat with a mixer for 3-5 minutes until it softens and becomes smooth.25 oz Mascarpone
-
While mixing on medium speed, gradually add ¾ cup Icing sugar to the mascarpone, followed by 1 teaspoon Vanilla extract and 8 teaspoon Rum. Finally, mix in the 15 oz Cream cheese (at room temperature) until just combined. Do not overmix.15 oz Cream cheese, 1 teaspoon Vanilla extract, 8 teaspoon Rum
-
In a separate, clean bowl, whip the 1 ⅛ cup Whipping cream with a mixer until it forms soft peaks.1 ⅛ cup Whipping cream
-
Gently fold the mascarpone mixture and whipped cream together by hand using circular movements until just combined. Be careful not to deflate the cream.
-
In a small saucepan, combine ½ cup Sugar, ¼ cup Water, and the 10 oz Strawberryes (fresh or frozen).¾ cup Icing sugar, 10 oz Strawberry, ¼ cup Water, ½ cup Sugar
-
Cook this mixture over medium heat until the sugar is completely dissolved and the strawberries are soft. Use a spatula or fork to gently crush the strawberries as they cook, creating a thick, jam-like consistency.
-
Allow the strawberry jam mixture to cool slightly. Then, gently fold it into the mascarpone and whipping cream mixture by hand until well combined.
-
Take the cake pan with the chilled crust out of the freezer and pour the strawberry filling over it.
-
Spread the filling evenly with a spatula to create a flat, smooth surface. Place the cheesecake in the freezer for at least 3 hours, or preferably overnight, to allow it to fully set.
-
Once the cake is hardened, gently release the cheesecake from the cake pan. You can use a blow torch, a gas stove flame, or a lighter to briefly warm the outside edges of the springform pan to aid in release.
-
Your cheesecake is now ready to be unmolded and decorated!
-
Decorate the cake with Milk Chocolate cream cheese buttercream, fresh strawberries, or other desired garnishes before serving.Milk Chocolate cream cheese buttercream decor
Nutrition values are estimates only, using online calculators. Please verify using your own data.

🤎 You might also like
- Fig Cheesecake in a Jar {no-bake}
- National Cheesecake Day {July 30th}
- Patriotic Fourth of July no-bake Cheesecake
- No Bake Pumpkin Cheesecake
⛑️ Food Safety
While this is a no-bake recipe, good food safety practices are always important when preparing food, especially when working with dairy products:
- Cook any raw ingredients, if applicable, to a minimum safe internal temperature of 165 °F (74 °C). (This applies to other recipes, not directly this cheesecake as it’s no-bake).
- Do not use the same utensils on cooked food that previously touched raw meat or unwashed produce.
- Wash hands thoroughly with soap and water after handling any raw ingredients or before starting food preparation.
- Avoid leaving the cheesecake mixture or finished cheesecake sitting out at room temperature for extended periods, especially after preparation. Refrigerate promptly.
- Never leave cooking food unattended (applies to other recipes, not this no-bake one).
- Use oils with high smoking points to avoid harmful compounds if you were frying (not applicable here).
- Always ensure good ventilation when using a gas stove (for melting butter or making jam, if applicable).
For further information on safe food handling practices, please check Safe Food Handling – FDA.
