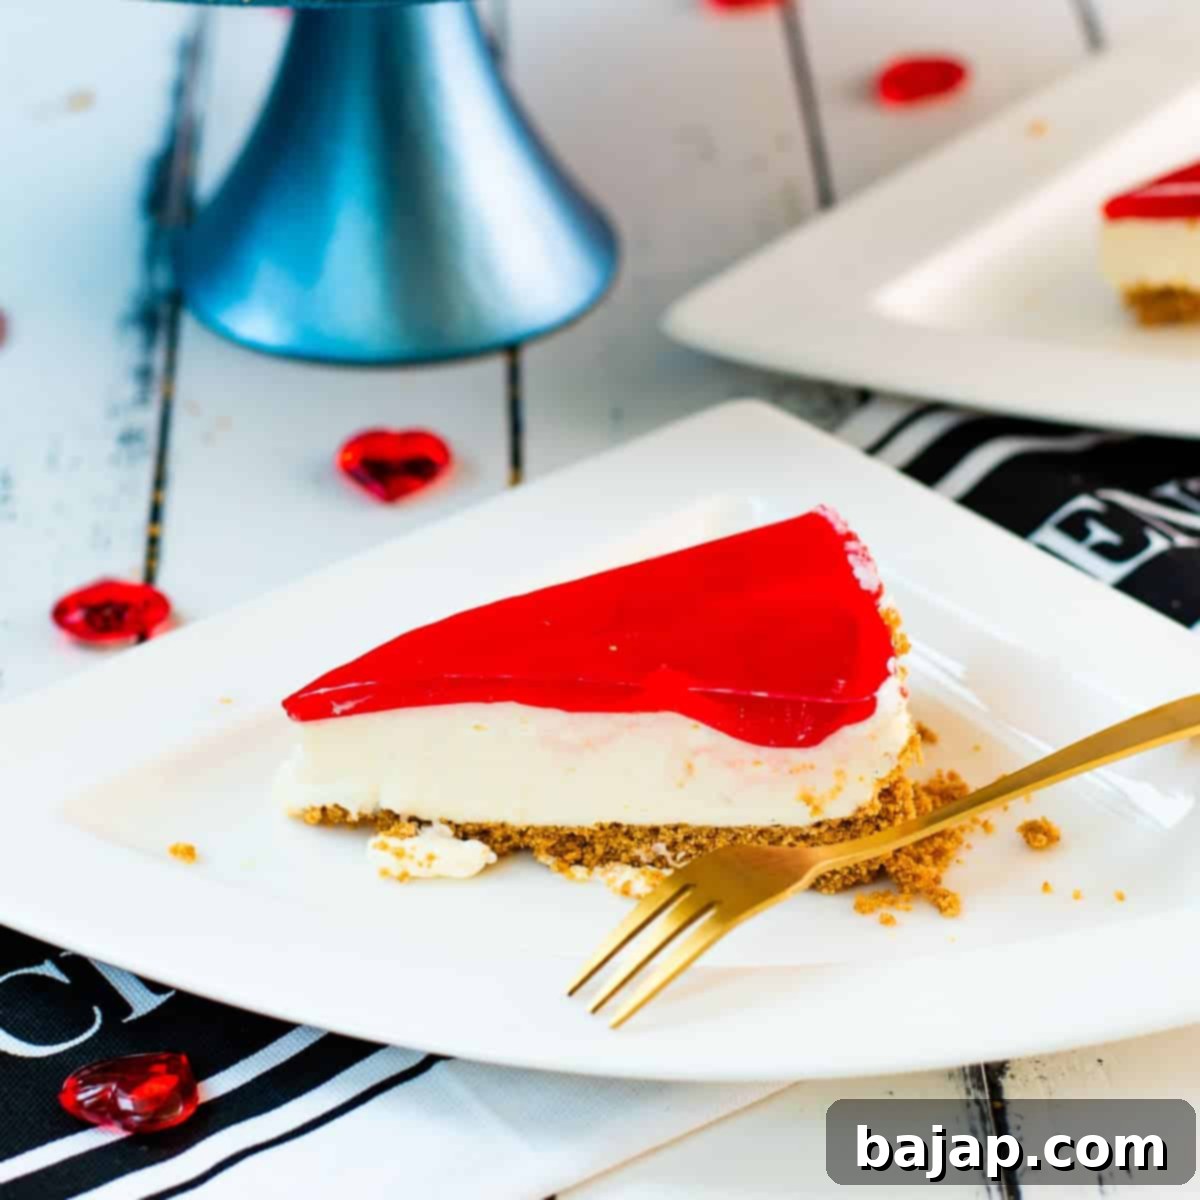
Easy No-Bake Lemon Raspberry Cheesecake Recipe: A Delightful Treat for Any Celebration
When it comes to expressing affection or simply indulging yourself, few things hit the sweet spot quite like a truly decadent dessert. This **irresistibly lovely No-Bake Lemon Raspberry Cheesecake recipe** is designed to impress your special someone—even if that special someone is you! Bursting with vibrant flavors and a luxurious texture, it’s a dessert that speaks volumes without requiring a single minute in the oven. Prepare to wow with this elegant and refreshingly delicious take on a classic.
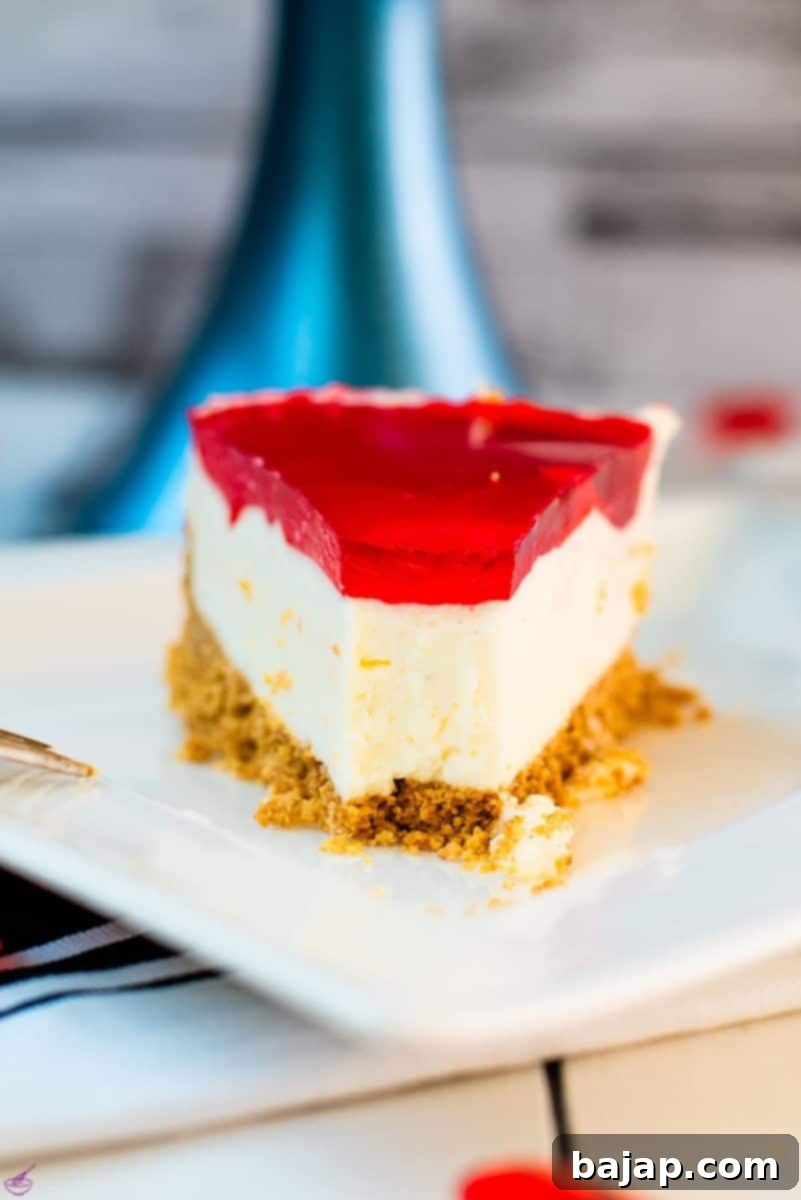
No-bake cheesecake has always held a special place in my heart as an all-time favorite dessert. Its simplicity and delightful texture make it a constant joy to prepare and enjoy. Over the years, I’ve crafted over a dozen recipes for this easy treat, and this particular **Raspberry Cheesecake recipe** consistently stands out from the crowd! The harmonious blend of bright berries and creamy lemon creates an adorable, refreshing, and utterly delicious dessert that elevates the traditional cheesecake experience. It’s perfect for any occasion, from a romantic Valentine’s Day dinner to a casual summer gathering, offering a taste of sophisticated simplicity that everyone will adore.
Why This No-Bake Lemon Raspberry Cheesecake is Your Next Go-To Dessert
This isn’t just another cheesecake recipe; it’s a culinary revelation designed for ease and maximum flavor. If you’re searching for an **easy cheesecake recipe** that delivers gourmet results without the fuss, you’ve found it. Here’s why this **no-bake lemon raspberry cheesecake** deserves a permanent spot in your recipe collection:
- Effortless Preparation: Say goodbye to water baths, cracked tops, and the anxiety of baking. This **no-bake cheesecake** eliminates the oven entirely, making it ideal for novice bakers or anyone seeking a stress-free dessert.
- Vibrant Flavor Profile: The combination of zesty lemon and sweet-tart raspberries creates a symphony of flavors that is both bright and deeply satisfying. The lemon cuts through the richness of the cream cheese, while the raspberry Jell-O topping adds a playful and fruity finish.
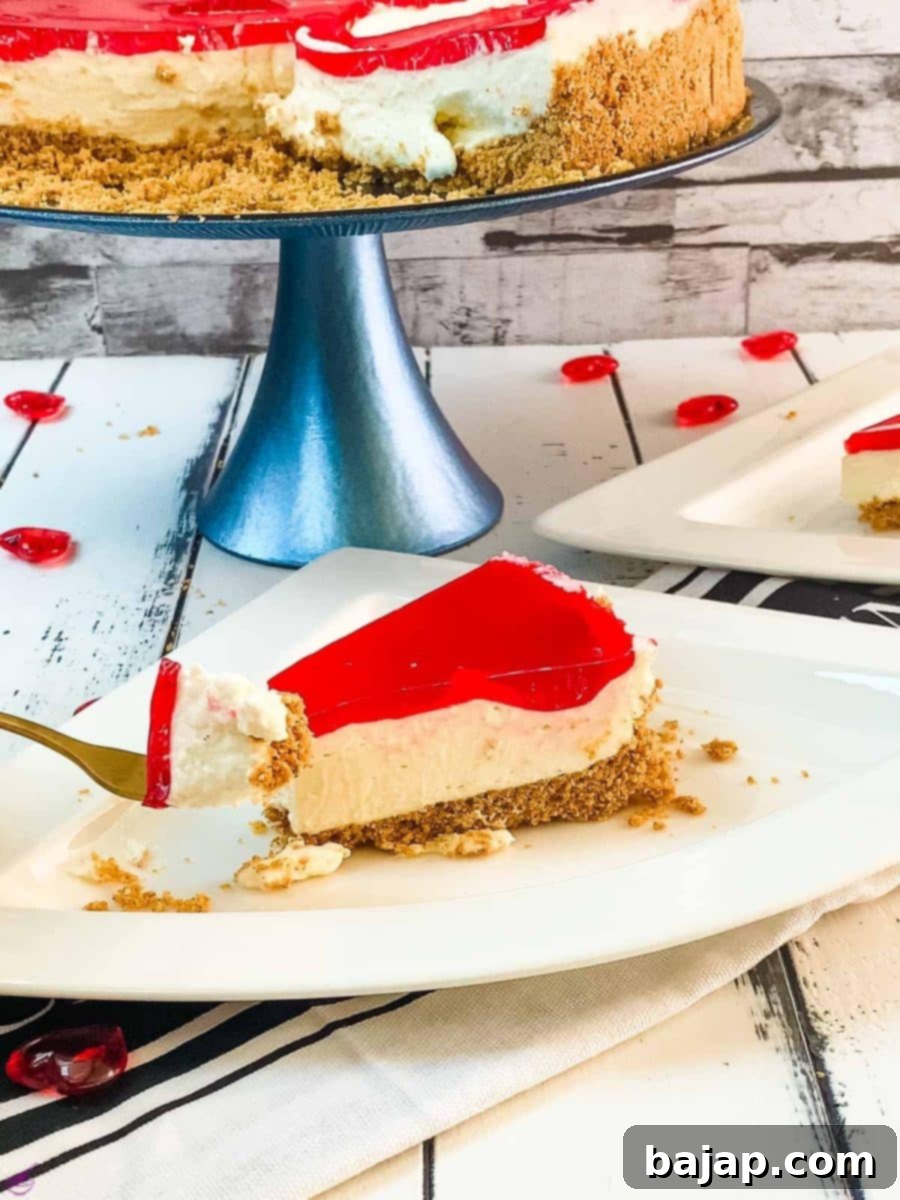
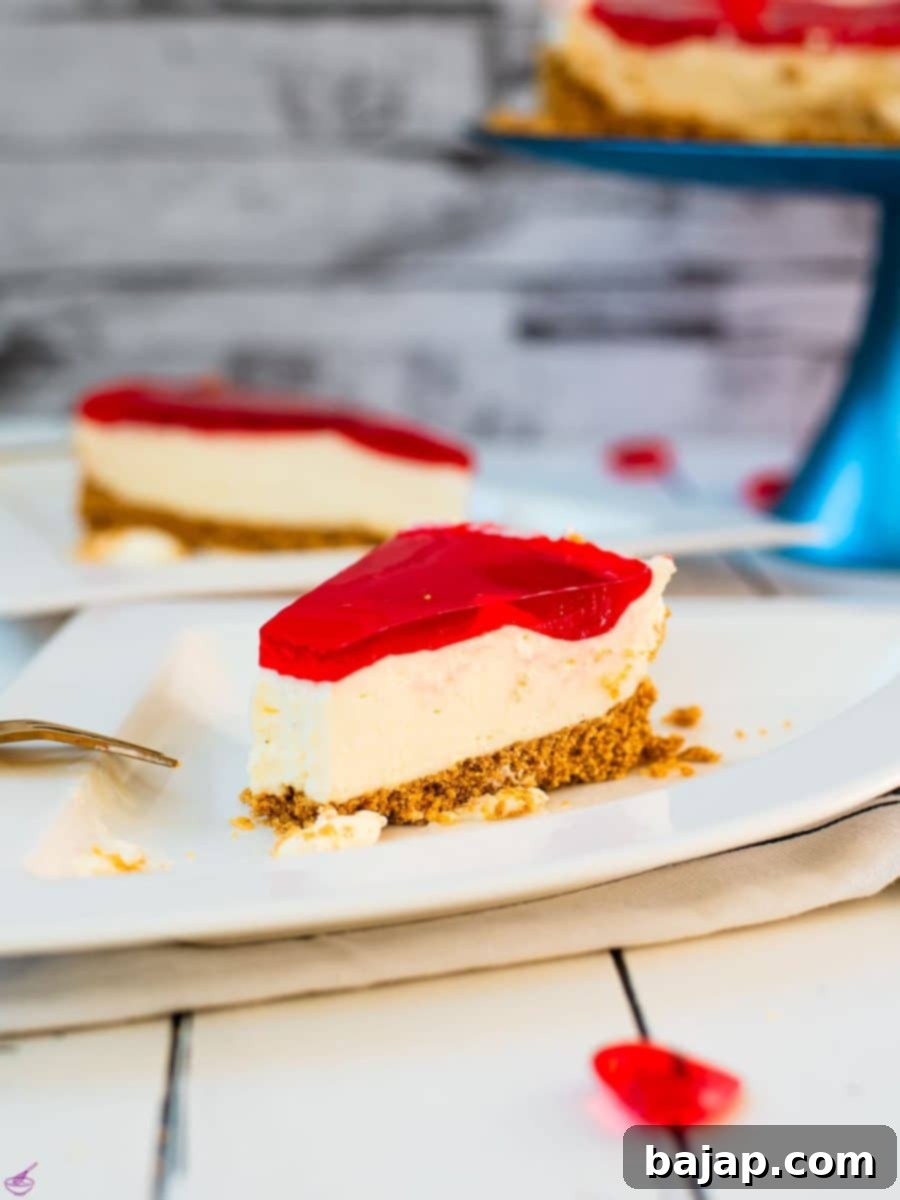
- Luxuriously Creamy Texture: Thanks to the blend of softened cream cheese, confectioners sugar, and heavy whipping cream, each bite is incredibly smooth, light, and airy. The gelatin ensures it sets beautifully, giving it that perfect sliceable consistency without being overly dense.
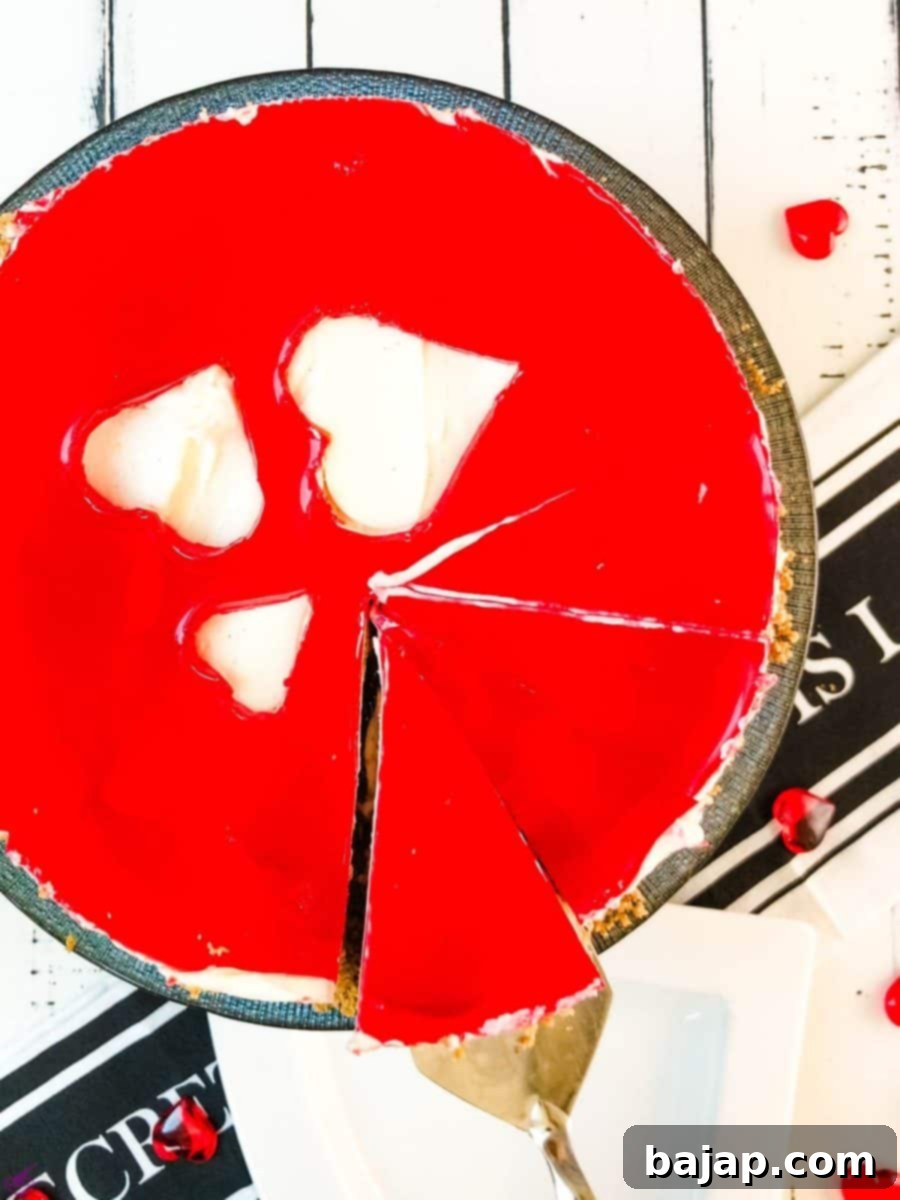
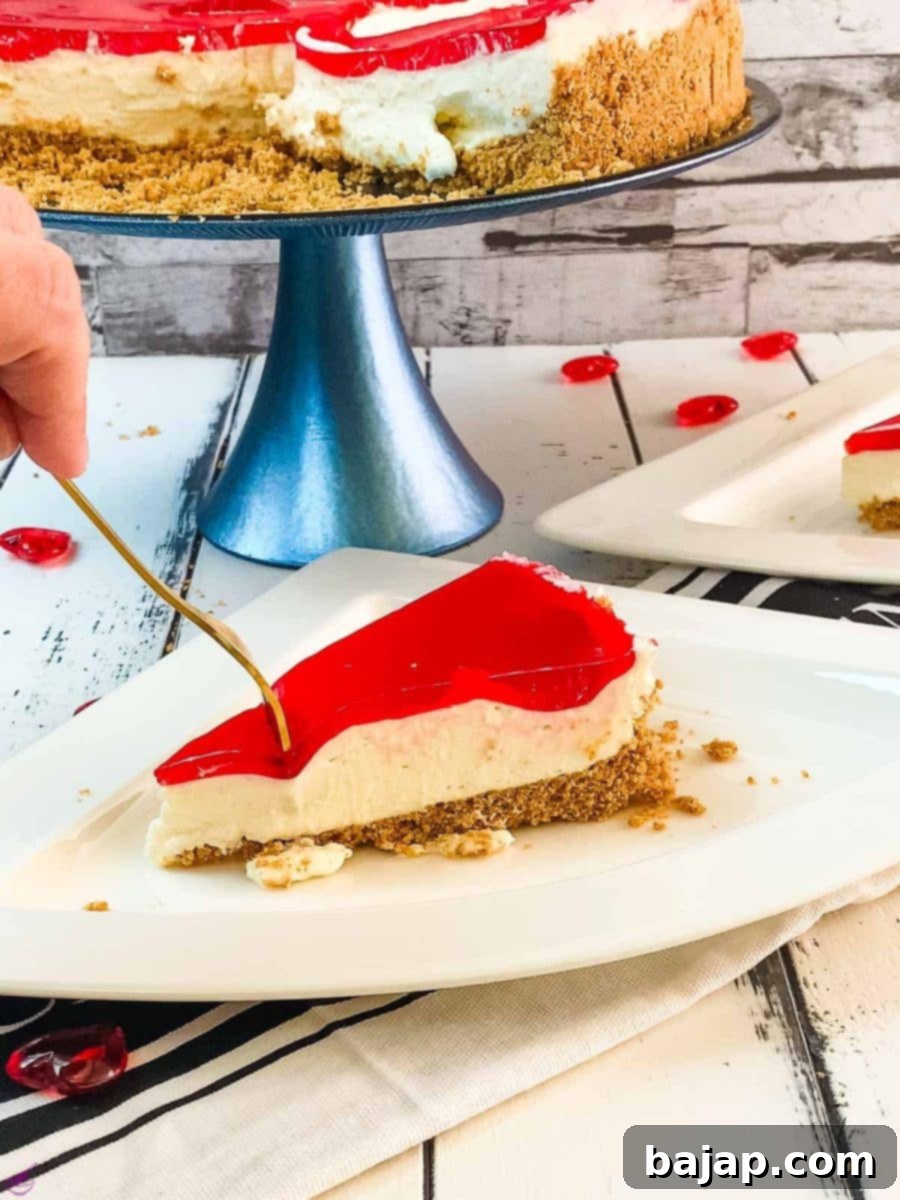
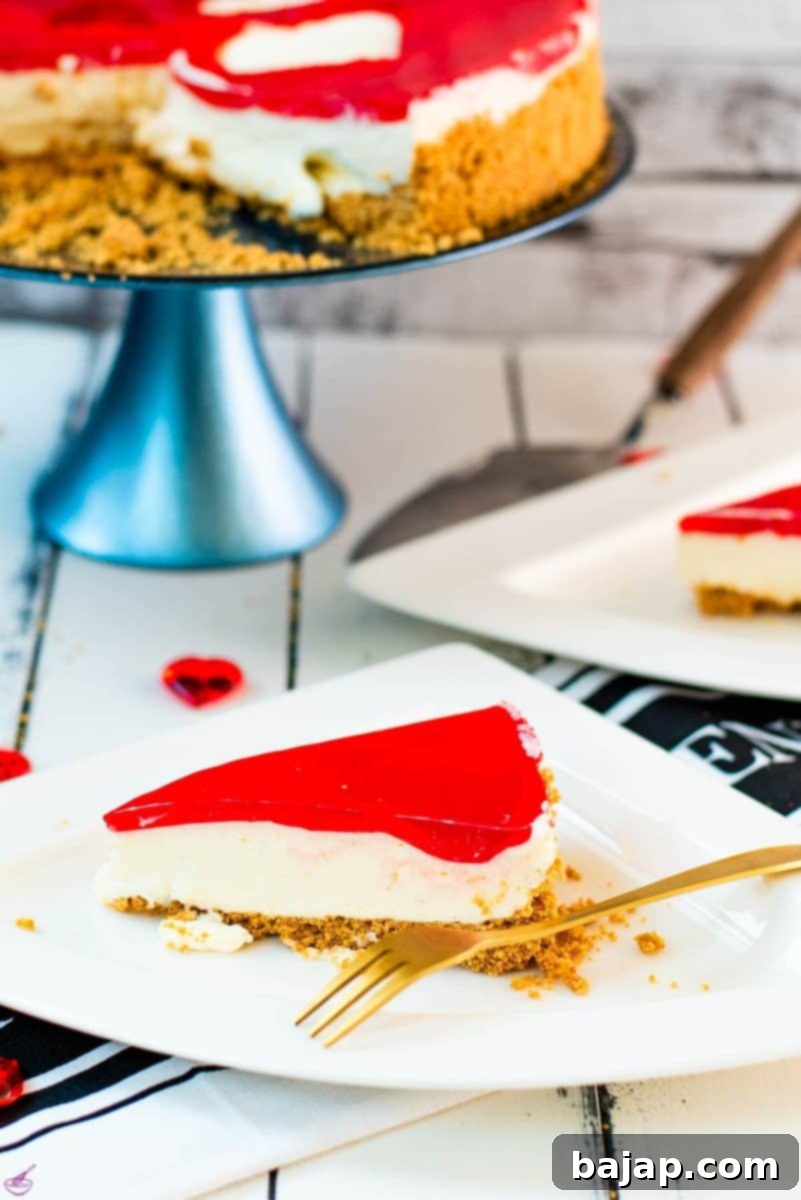
- Visually Stunning: With its distinct layers of golden graham cracker crust, creamy white filling, and vibrant red raspberry topping (especially with the optional heart cut-outs), this cheesecake is a showstopper. It’s an elegant dessert that looks like it took hours, but only takes minutes of active prep.
- Perfect for Any Occasion: While it’s an ideal **Valentine’s Day dessert** with its romantic colors, this **raspberry cheesecake** is versatile enough for birthdays, anniversaries, summer barbecues, or simply as an everyday indulgence. Its refreshing quality makes it particularly wonderful for warmer months.
- Customizable Crust: The graham cracker crust offers a delightful crunch, but you can easily swap it for vanilla wafers, Oreo cookies, or even a gluten-free alternative to suit dietary needs or personal preferences.
Dive into the world of simple yet sophisticated desserts with this incredible **no-bake lemon raspberry cheesecake**. It’s guaranteed to become a household favorite!
[feast_advanced_jump_to]
🥘 Ingredients
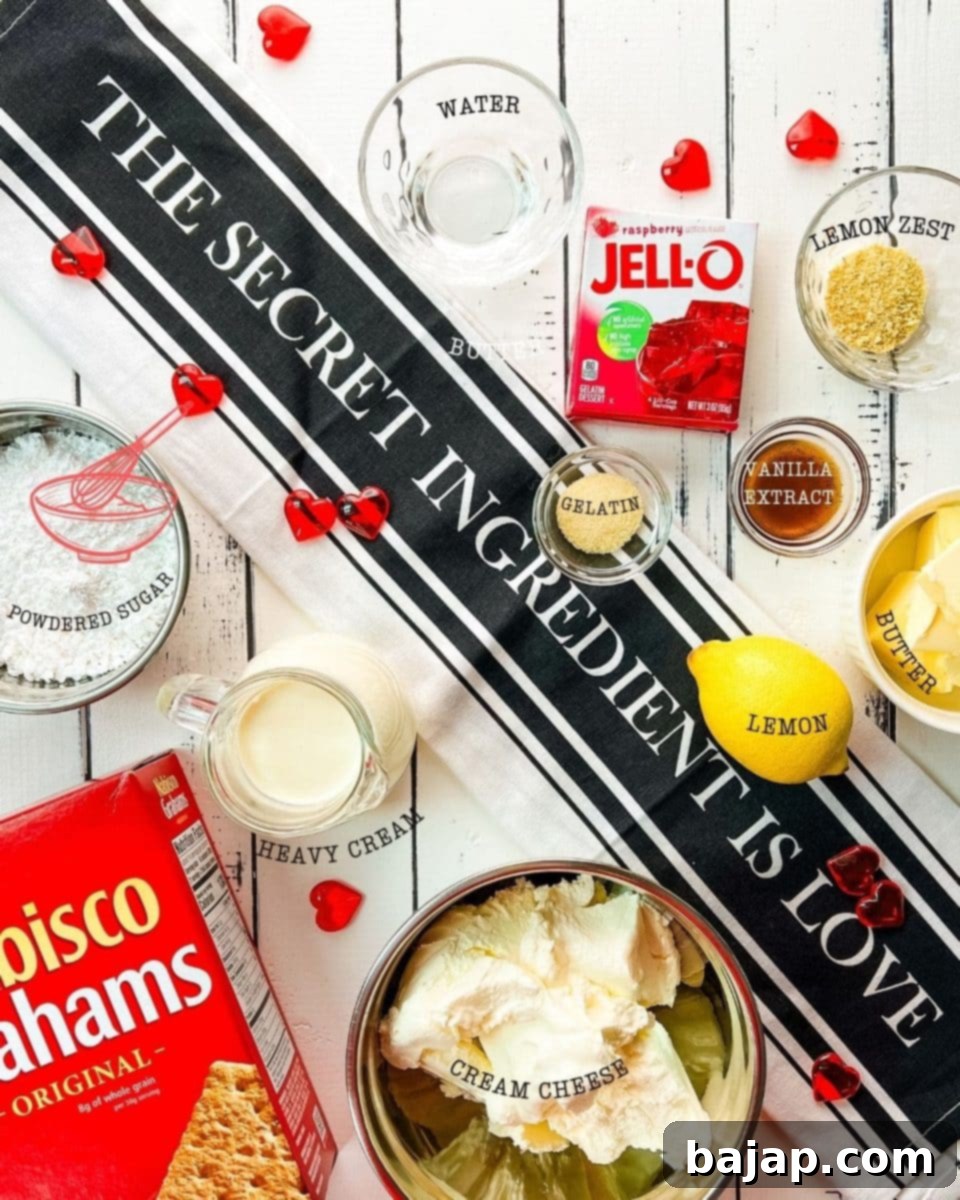
- Graham Cracker Sheets: These form the crunchy, buttery base of our cheesecake. You can also use other crumbly cookies like vanilla wafers or chocolate sandwich cookies. For a gluten-free option, simply choose gluten-free graham crackers.
- Unsalted Butter: Essential for binding the graham cracker crumbs together, creating a firm and delicious crust. Using unsalted butter allows you to control the overall saltiness of the dessert.
- Cream Cheese: The star of any cheesecake! Opt for full-fat, brick-style cream cheese for the richest, creamiest texture and best flavor. Ensure it’s softened to room temperature before mixing to prevent lumps and achieve a smooth consistency. Low-fat cream cheese can be used, but may alter the texture slightly.
- Confectioners Sugar (Powdered Sugar): This fine sugar dissolves easily into the cream cheese mixture, providing sweetness and contributing to the smooth, velvety texture of the filling.
- Lemon Zest: Fresh lemon zest brightens the entire cheesecake with a wonderfully aromatic and tangy flavor. Remember to zest the lemon before juicing!
- Lemon Juice: Freshly squeezed lemon juice is crucial for that vibrant, zesty punch that complements the raspberries so beautifully. Choose a large, brightly colored lemon with some weight to it for maximum juice and flavor. Avoid bottled lemon juice for best results.
- Water: A small amount of cold water is used to “bloom” the gelatin, preparing it to dissolve evenly and thicken the cheesecake filling.
- Unflavored Gelatin: This is our secret weapon for a perfectly set **no-bake cheesecake**. It provides stability, ensuring your cheesecake holds its shape beautifully even on a warm day, without altering the flavor.
- Heavy Whipping Cream: When whipped, heavy cream adds incredible lightness and decadence to the cream cheese base, making the filling airy and luxurious. Ensure it’s very cold for optimal whipping.
- Vanilla Extract: A touch of vanilla extract smooths out the flavors, adding a warm, sweet undertone that enhances the overall taste profile of the cheesecake.
- Raspberry Jell-O and Boiling Water: This combination creates the stunning, fruity, and slightly tart top layer. It’s what gives our cheesecake its distinctive layered look and bold raspberry flavor.
See the recipe card below for precise quantities and detailed instructions.
🔪 Instructions: Crafting Your Perfect No-Bake Lemon Raspberry Cheesecake
Creating this beautiful **lemon raspberry cheesecake** is a straightforward process. Follow these steps carefully to achieve a delightful dessert.
Step One: Prepare the Graham Cracker Crust
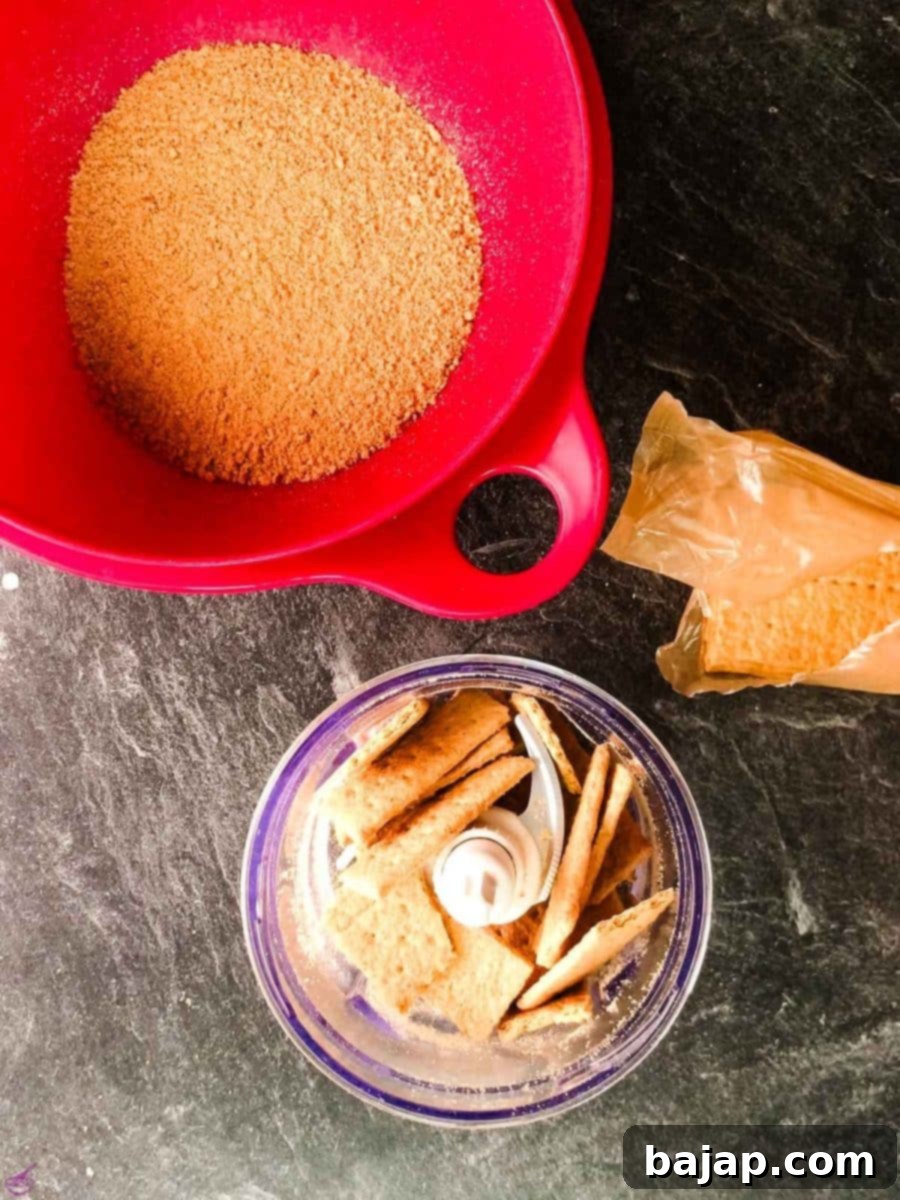
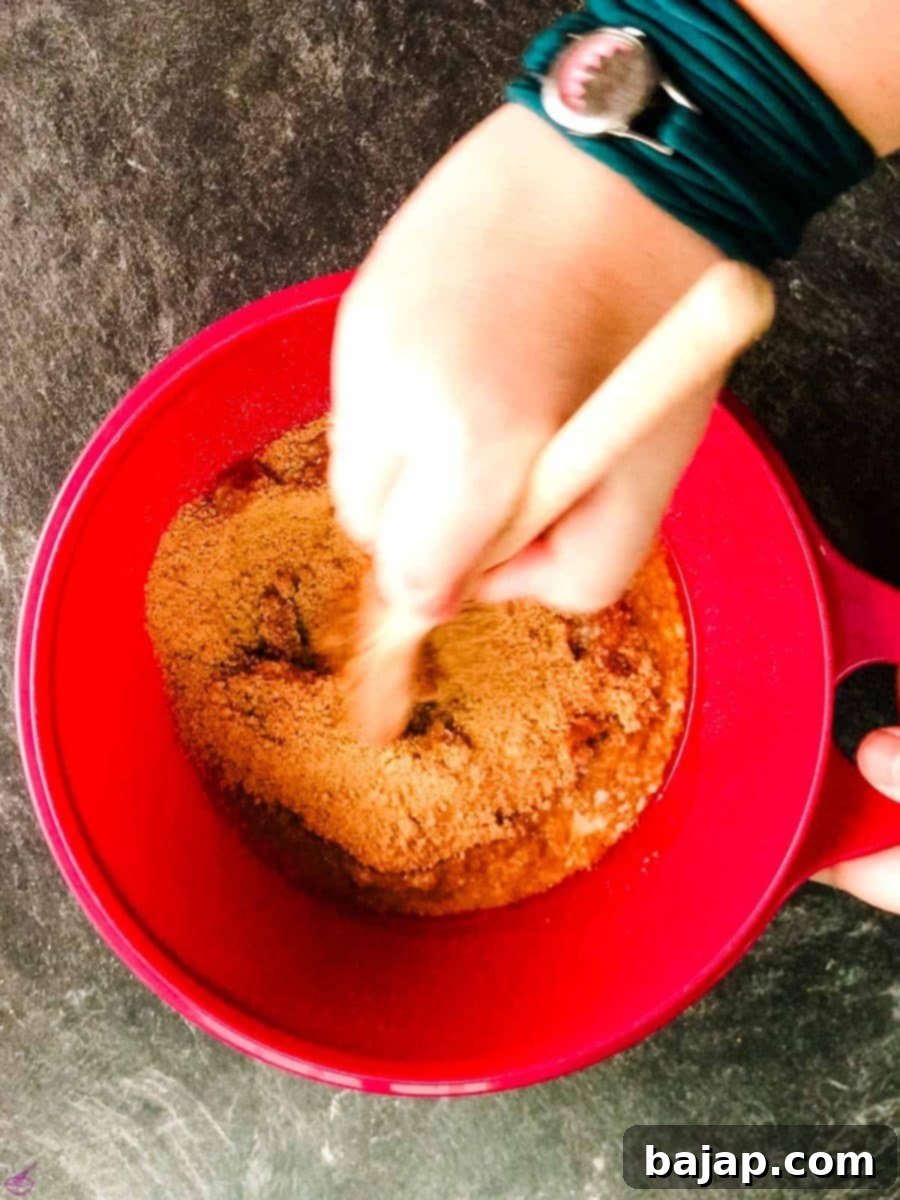
Start by crushing your graham crackers. You can do this efficiently with a food processor until they resemble fine sand. If you don’t have a food processor, place the crackers in a large ziploc bag and crush them with a rolling pin. Once crushed, transfer the crumbs to a mixing bowl and thoroughly combine them with the melted unsalted butter until the mixture is evenly moistened, resembling wet sand.
Step Two: Form the Crust and Chill
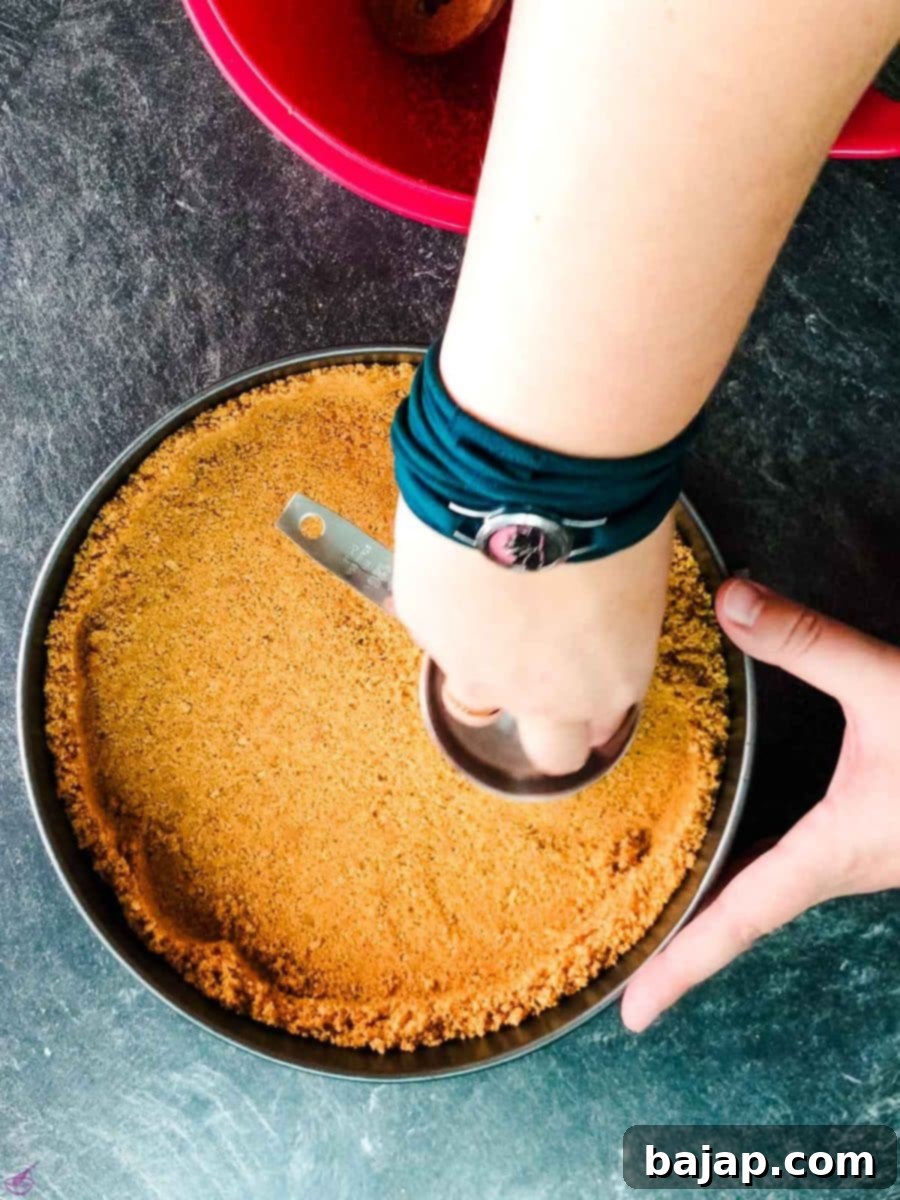
Line the bottom of a 9-inch springform pan with parchment paper. This crucial step ensures easy removal of your finished cheesecake. Transfer the graham cracker mixture into the prepared pan. Using the bottom of a glass or your knuckles, firmly press the crust evenly into the bottom of the pan, and slightly up the sides (about ¼ inch). Place the pan in the refrigerator while you prepare the filling, allowing the butter to solidify and set the crust.
Step Three: Prepare the Cream Cheese Base
In a large mixing bowl, beat the softened cream cheese using an electric mixer until it is completely smooth and free of any lumps, usually about 2-3 minutes. Next, gradually add the confectioners sugar and continue beating for another 2-3 minutes until the mixture is light, fluffy, and perfectly smooth. Stir in the fresh lemon zest and lemon juice, ensuring they are well incorporated for that bright, zesty flavor.
Step Four: Bloom and Dissolve the Gelatin
In a small, microwave-safe bowl, combine the cold water and sprinkle the unflavored gelatin powder evenly over the surface. Let it sit for about 5 minutes, allowing the gelatin granules to “bloom” and absorb the water (they will look like a thick paste). After blooming, microwave the gelatin mixture for about 15-30 seconds until it is completely dissolved and clear. Be careful not to boil it.
Step Five: Prepare the Whipped Cream
In a separate large, chilled bowl, pour the cold heavy whipping cream and vanilla extract. Using your electric mixer (with whisk attachment), whisk the cream on medium-high speed. As it starts to thicken (after about 2-3 minutes), slowly stream in the dissolved gelatin mixture while continuing to whisk. Continue whisking until stiff peaks form. The cream should be thick and hold its shape.
Step Six: Combine and Fill
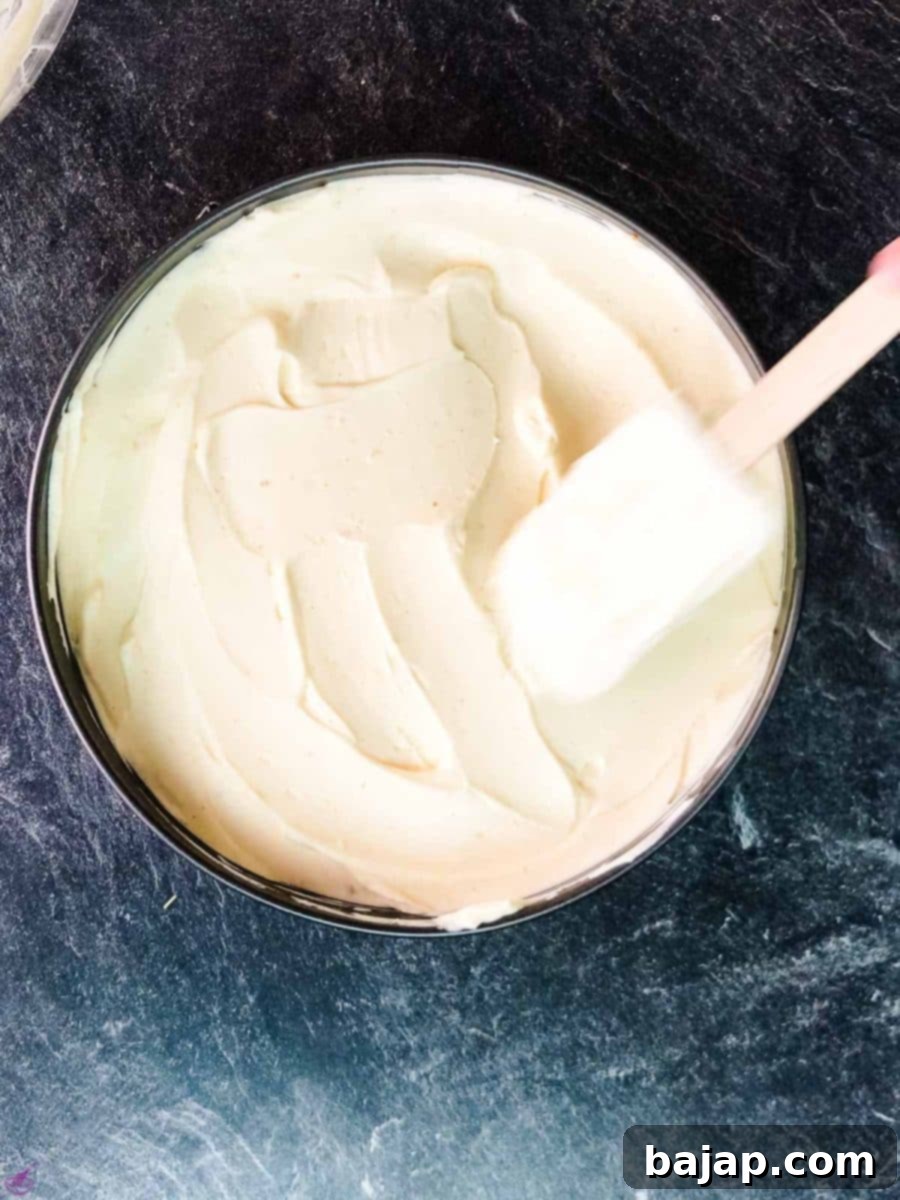
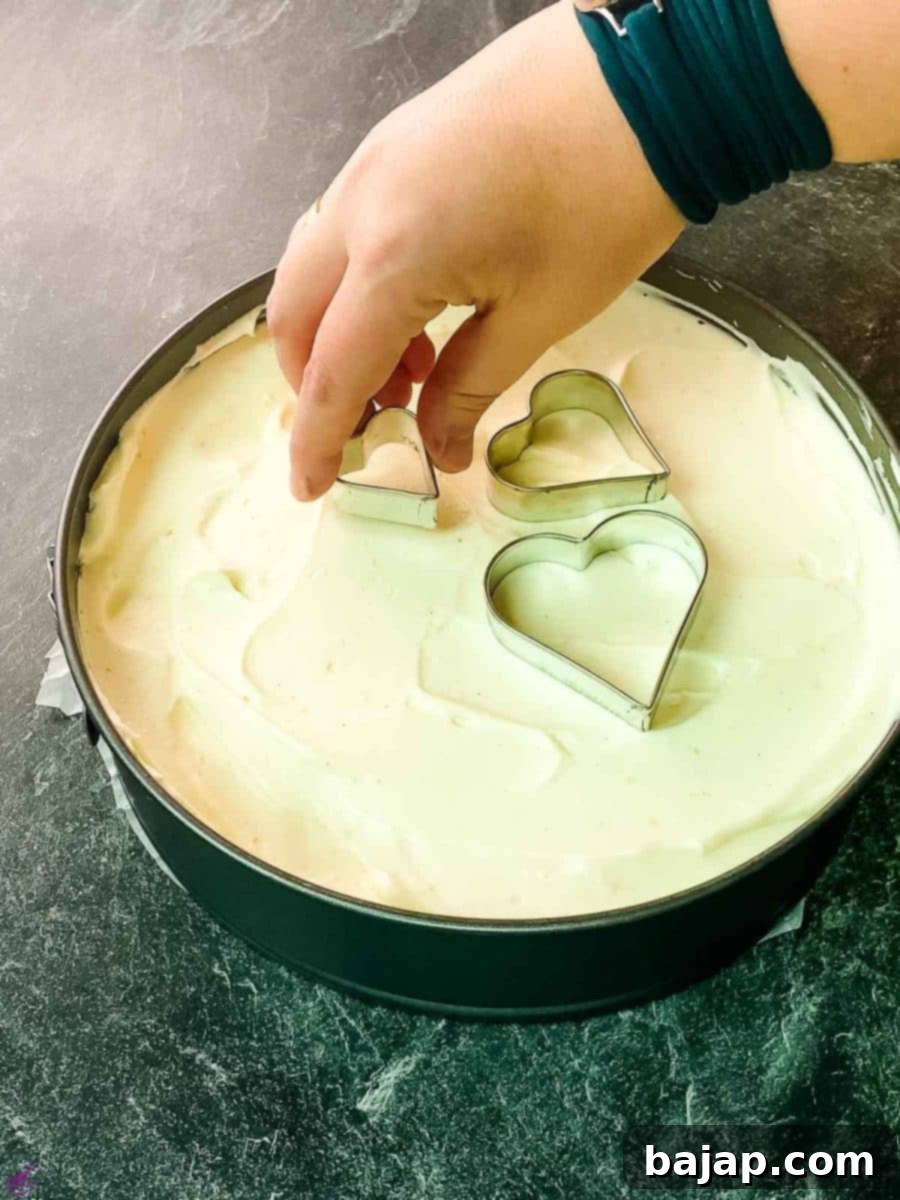
Gently fold the whipped cream mixture into the cream cheese mixture using a spatula. Be careful not to deflate the whipped cream; use a light hand to ensure it’s well incorporated while maintaining its airy texture. Once combined, pour this luscious **cheesecake filling** into your prepared graham cracker crust. Smooth the top with the back of a spoon or an offset spatula. If you plan to create heart-shaped cut-outs, carefully place the heart cookie cutters on top of the filling now, pressing them down slightly.
Step Seven: Prepare the Raspberry Jell-O Topping
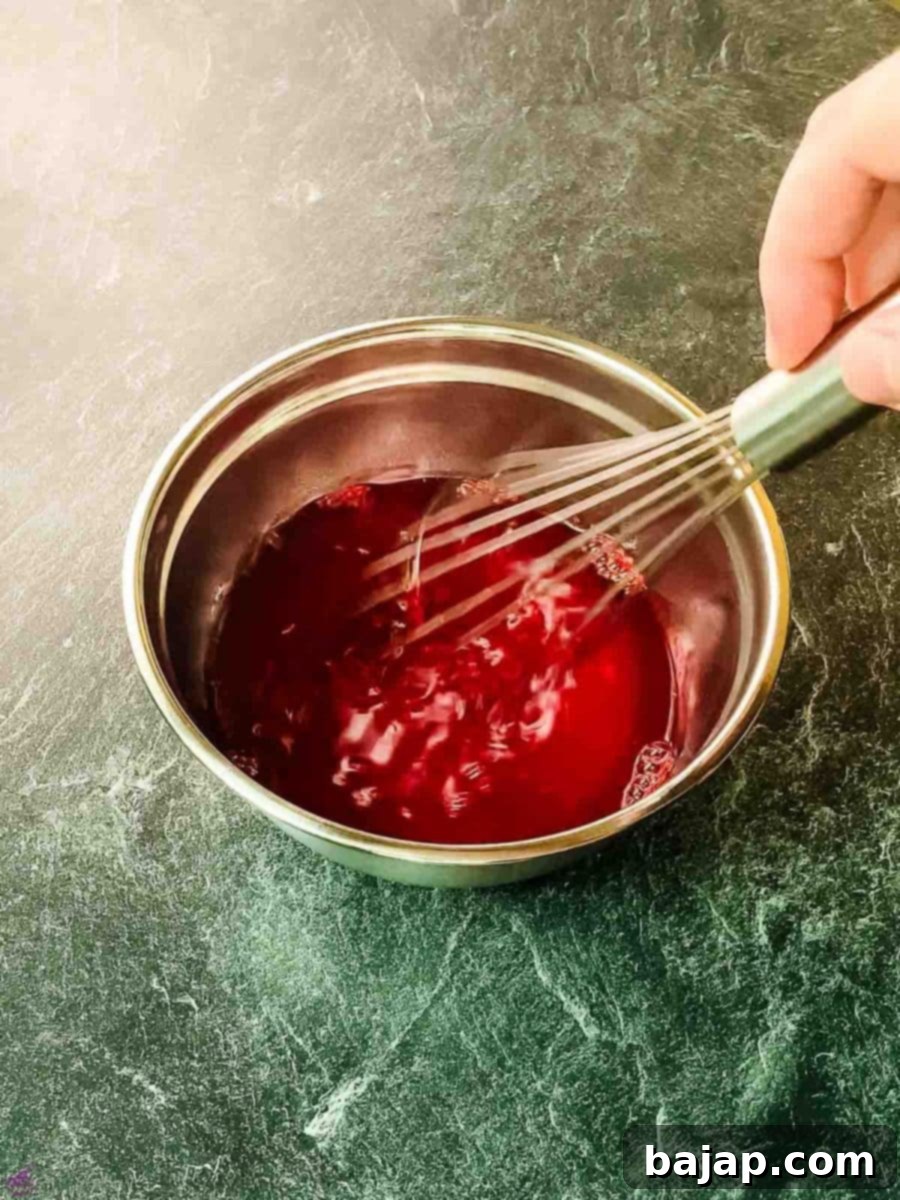
In a clean bowl, whisk together the raspberry Jell-O mix and boiling water until the gelatin crystals are completely dissolved and no lumps remain. Let the Jell-O mixture sit at room temperature for about 20 minutes to cool slightly. It should be cool enough not to melt the cheesecake filling, but still liquid enough to pour smoothly.
Step Eight: Add the Topping and Chill
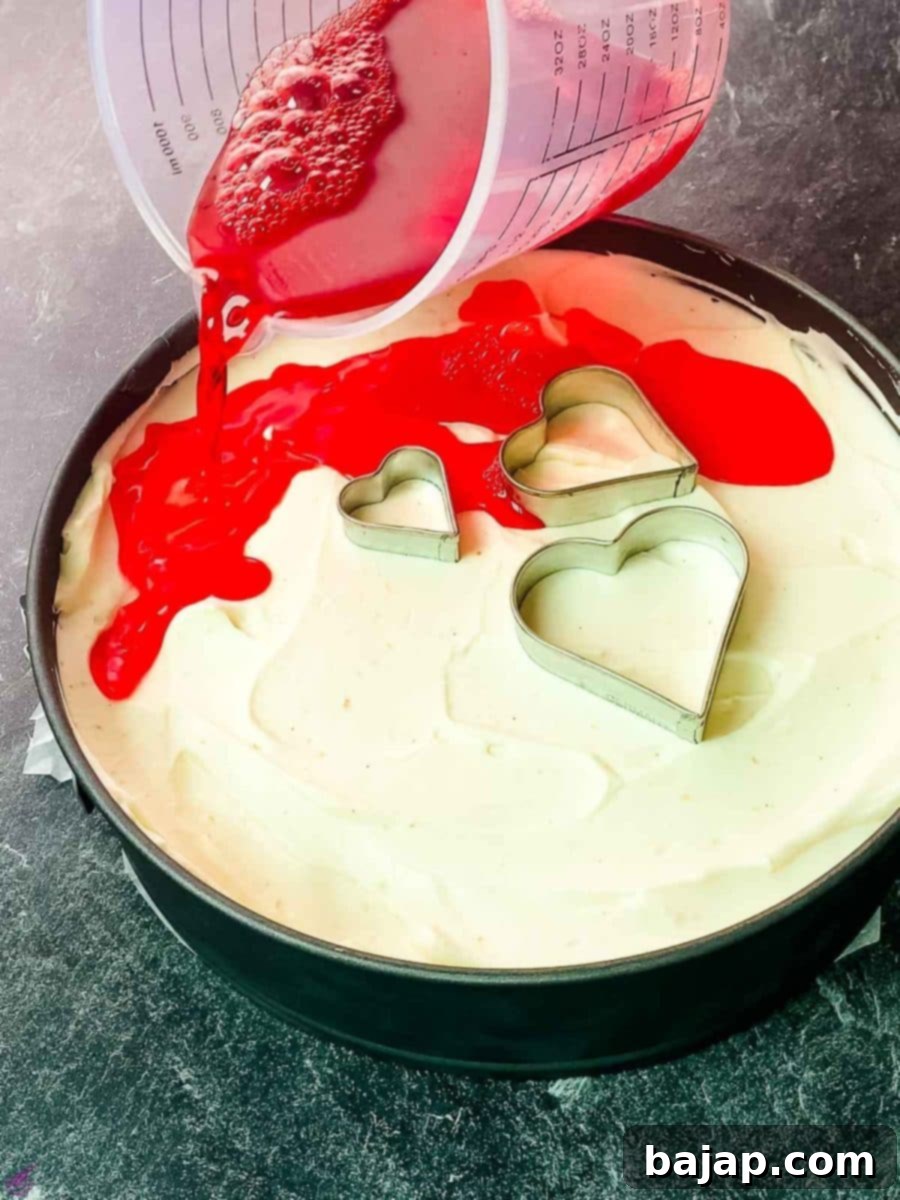
Carefully retrieve your cheesecake from the freezer or refrigerator. Gently pour the slightly cooled raspberry Jell-O mixture over the cream cheese filling. If you’re using heart cookie cutters, be very careful to pour around them, ensuring no Jell-O seeps underneath or into the cut-out areas. Return the cheesecake to the refrigerator and chill for a minimum of 2-3 hours, or preferably overnight, to allow both the filling and the Jell-O topping to set completely.
Step Nine: Final Touches and Serving
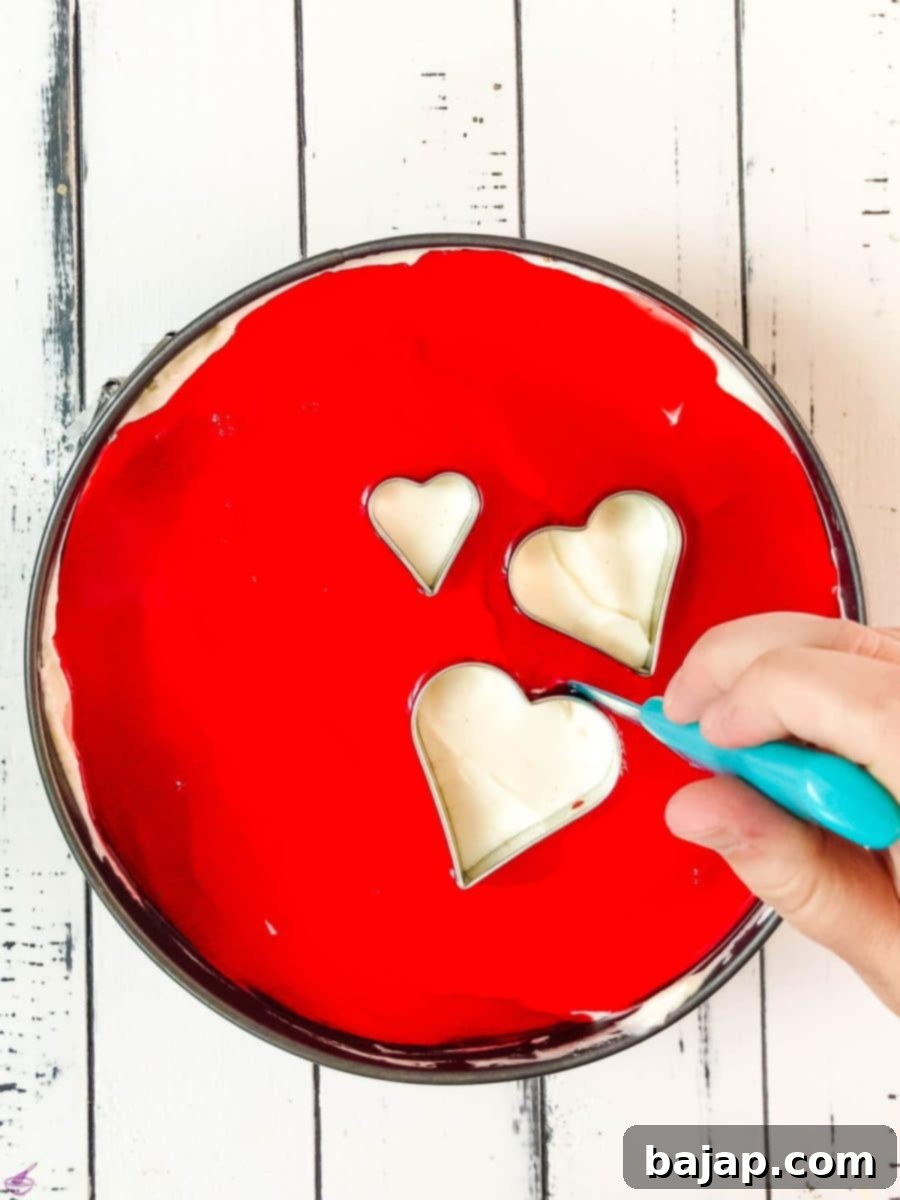
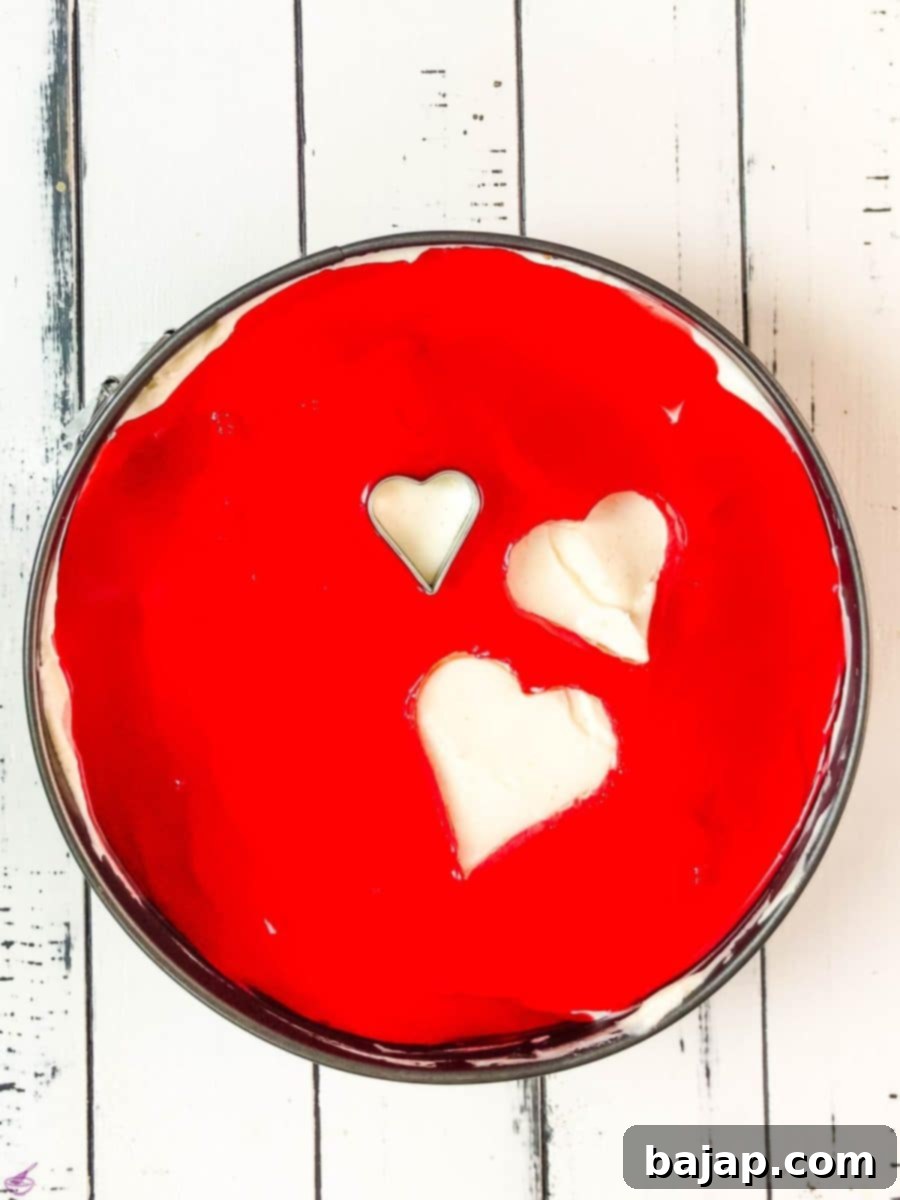
Once completely chilled and set, carefully remove the cheesecake from the refrigerator. If you used heart cookie cutters, gently run a sharp knife around the inside edge of each cutter to loosen the Jell-O, then carefully remove them. This will create lovely heart-shaped openings in your **raspberry Jell-O topping**.
Step Ten: Release from Pan and Slice
Unlock and carefully remove the sides of the springform pan. For neat slices, dip a sharp knife in warm water and wipe it clean between each cut. Cut the cheesecake into desired servings. Garnish with fresh raspberries or a sprig of mint for an extra touch of elegance. Serve cold and enjoy this spectacular homemade **lemon raspberry cheesecake**!
🍽 Essential Equipment for Your No-Bake Cheesecake
Having the right tools can make all the difference in preparing this delightful dessert. Here’s a list of equipment that will make your cheesecake-making process smooth and enjoyable:
- Springform Pan: A 9-inch (23cm) springform pan is indispensable for cheesecakes. Its removable sides allow you to easily release the delicate cheesecake without damaging its beautiful structure.
- Parchment Paper: Crucial for lining the bottom of your springform pan. It guarantees that your crust won’t stick, making the cheesecake incredibly easy to transfer and serve.
- Electric Mixer: Whether a handheld or stand mixer with a paddle and whisk attachment, an electric mixer is ideal for beating the cream cheese to a smooth consistency and whipping the heavy cream to stiff peaks.
- Food Processor: This is the quickest way to grind graham crackers into fine crumbs for a perfectly uniform crust. If you don’t have one, a sturdy ziploc bag and a rolling pin will do the trick – just be patient!
- Spatula: A flexible spatula is handy for scraping bowls, smoothing the cheesecake filling, and gently folding ingredients to maintain an airy texture.
- Saucepan: A small saucepan is needed to boil the water for dissolving the Raspberry Jell-O, creating the vibrant top layer.
- Whisk: A good whisk is essential for dissolving the gelatin and Jell-O mixes smoothly, preventing any clumps.
- Mixing Bowls: You’ll need several mixing bowls of various sizes for combining the crust ingredients, the cream cheese filling, whipping the cream, and preparing the Jell-O.
- Lemon Squeezer: To extract every last drop of fresh, zesty lemon juice without any seeds. Juicing over a small strainer is also a good alternative.
- Heart Cookie Cutters: This is an optional but highly recommended touch, especially if you’re making this as a **Valentine’s Day cheesecake**. These cutters help create charming heart-shaped designs on your topping, adding a festive and romantic flair.
- Sharp Knife: A sharp, clean knife is key for cutting neat slices of your chilled cheesecake. Warming the blade slightly between cuts can help prevent sticking.
💭 Top Tips for Cheesecake Perfection
Achieving a flawless no-bake cheesecake is easier than you think with a few key pointers:
- Room Temperature Ingredients: Ensure your cream cheese is completely softened to room temperature. This is vital for achieving a smooth, lump-free filling. Cold cream cheese will result in a lumpy texture.
- Fresh Lemon is Best: Always use fresh lemon zest and juice. Lemon extract will give the cake an artificial taste and won’t provide the same bright, natural acidity.
- Chill Your Whipping Cream & Bowl: For best results when whipping heavy cream, ensure both the cream and your mixing bowl (and whisk attachment) are very cold. This helps the cream whip up faster and achieve stiffer peaks.
- Don’t Overmix the Cream Cheese: Beat the cream cheese just until smooth. Overmixing can incorporate too much air initially, which can then deflate, leading to a less stable filling.
- Line with Parchment Paper: Be sure to line the bottom of your springform pan with parchment paper! This makes the cheesecake so much easier to remove without any sticking.
- Gentle Folding: When combining the whipped cream with the cream cheese mixture, use a gentle folding technique. This preserves the air in the whipped cream, contributing to the light and airy texture of the filling.
- Proper Chilling Time is Crucial: Do not rush the chilling process. The cheesecake needs at least 2-3 hours (and ideally overnight) in the refrigerator to set properly and allow the flavors to meld.
- Clean Slices: For beautifully clean slices, dip your sharp knife in hot water and wipe it dry between each cut. This will prevent the Jell-O and cream cheese from sticking to the blade.
- Garnish for Elegance: Fresh raspberries, a dusting of confectioners sugar, or a few mint leaves can elevate the presentation of your finished cheesecake.
🙋🏻 Frequently Asked Questions About No-Bake Raspberry Cheesecake
This **no-bake raspberry cheesecake** is best enjoyed cold. For storage, cover any leftovers tightly with plastic wrap and refrigerate for up to one week. It maintains its delicious flavor and texture beautifully.
This delightful **raspberry cheesecake** makes the perfect treat for any special occasion like Valentine’s Day or Christmas, or simply “just because”! Every day is a great day to enjoy this luscious and easy dessert. For an extra special touch, pair it with sparkling wine or a refreshing seltzer for a fresh and fun indulgence!
Absolutely, yes! Chilling is a non-negotiable step for this **no-bake cheesecake**. It needs sufficient time in the refrigerator to allow the gelatin and cream cheese mixture to set properly. Plan for at least four hours of chilling before serving; ideally, an overnight chill will yield the best results for firmness and flavor development.
Yes, for an even quicker preparation, you can definitely use a premade graham cracker crust for this recipe. This will save you about 10-15 minutes of prep time. You can also get creative and opt to trade the traditional graham crust altogether by using crushed vanilla wafers or Oreo cookies instead for a different flavor profile.
Yes, you absolutely can! For a fresh fruit topping, you can create a simple raspberry compote (cook fresh or frozen raspberries with a little sugar and lemon juice until thickened, then cool) or simply arrange fresh raspberries on top of the set cream cheese layer before the final chill. This will give it a different, more natural fruit flavor and texture compared to the Jell-O.
This **no-bake lemon raspberry cheesecake** is an excellent make-ahead dessert! You can prepare the entire cheesecake up to 2-3 days in advance. Ensure it’s tightly covered with plastic wrap to prevent it from absorbing any refrigerator odors and to keep it fresh. The flavors often deepen and improve after a day or two!
More Irresistible Cheesecake Recipes for You to Try
If you’ve fallen in love with the ease and flavor of this **no-bake raspberry cheesecake**, you’re in for a treat! Our collection features a wide variety of cheesecake delights, perfect for every season and celebration. Explore these other fantastic recipes that are just as simple and satisfying:
- No-Bake Chocolate Ricotta Cheesecake: Rich, creamy, and wonderfully indulgent.
- No-Bake Pumpkin Cheesecake: A festive treat perfect for autumn.
- No-Bake White Chocolate Raspberry Cheesecake {Halloween}: Spooky good and utterly delicious.
- No-Bake Fig Cheesecake in a Jar: Individual servings of pure delight.
- No-Bake Eggnog Cheesecake: A creamy, spiced dessert for the holidays.
- No-Bake Mint Chocolate Cheesecake: Refreshing and decadent, a true crowd-pleaser.
- No-Bake Patriotic Cheesecake: Perfect for summer holidays with red, white, and blue.
- No-Bake Strawberry Cheesecake: A classic fruity favorite.
- No-Bake Oreo Cheesecake: Simple, indulgent, and always a hit.
- No-Bake Lemon Cheesecake with Blueberry Topping: Bright, tangy, and bursting with berry flavor.
- No-Bake Biscoff Cheesecake: Caramelized cookie deliciousness in every bite.
- No-Bake Raspberry Cheesecake {Valentine’s Day}: The very recipe you’re enjoying now, ideal for romantic moments.
- No-Bake Lime Cheesecake in a Jar: Zesty and refreshing, perfect for individual servings.
If you make this recipe, let me know how you liked it by ★★★★★ star rating it and leaving a comment below. This would be awesome! You can also sign up for our Newsletter or follow me on Pinterest or Instagram and share your creation with me. Just tag me @combinegoodflavors and hashtag #combinegoodflavors, so I don’t miss it.
📖 Recipe Card: Valentines Lemon Raspberry Cheesecake {No-Bake}
Valentines Lemon Raspberry Cheesecake {no bake}
Nora
Save RecipeSaved!
Pin Recipe
Equipment
-
9-inch (23cm) springform pan
-
Kitchen machine with whisk attachment (or electric hand mixer)
-
Food processor (optional, for crushing graham crackers)
-
Spatula
-
Saucepan
-
Whisk
-
Mixing bowls (several sizes)
-
Lemon squeezer
-
Heart shaped cookie cutters (optional, for decoration)
-
Sharp Knife
Ingredients
Crust
- 16 Graham crackers sheets
- 7 tablespoons Butter unsalted, melted
Filling
- 16 ounces Cream cheese full-fat, softened
- 1 cup Confectioners sugar
- 1 tablespoon Lemon zest
- 2 tablespoons Fresh lemon juice
- 2 tablespoons Cold water
- 1 teaspoon Unflavored gelatin
- 1 cup Heavy whipping cream very cold
- 2 teaspoons Vanilla extract
Topping
- 1 Pack Raspberry Jell-O (3 oz / 85g)
- 1 cup Boiling water
Instructions
Crust Preparation
-
Break 16 Graham crackers sheets into pieces and place them into a food processor. Process for about 20 seconds until the graham crackers are broken down into fine crumbs, resembling sand.16 Graham crackers sheets
-
Empty the crumbs into a medium mixing bowl and pour the 7 tablespoons of melted unsalted Butter on top. Use a wooden spoon or spatula to combine thoroughly until all crumbs are moistened.7 tablespoons Butter
-
Lightly spray a 9-inch (23 cm) springform pan with cooking spray or, even better, place a round of parchment paper on top of the bottom for easy release.
-
Transfer the buttered crumbs into the prepared pan. Firmly press the crust evenly into the bottom of the pan, extending slightly up the sides (about ¼ inch / 6 mm). Place the crust in the fridge to chill and set while you prepare the filling.
Cream Cheese Filling
-
In a large bowl, using an electric mixer, beat the 16 ounces of softened cream cheese until it is completely smooth and creamy, about 3 minutes. Scrape down the sides of the bowl as needed.16 ounces Cream cheese
-
Add 1 cup Confectioners sugar and continue beating for another 2-3 minutes until the mixture is light, fluffy, and smooth. Gently stir in the 1 tablespoon Lemon zest and 2 tablespoons Fresh lemon juice until just combined.1 cup Confectioners sugar, 1 tablespoon Lemon zest, 2 tablespoons Lemon juice
-
Pour 2 tablespoons of cold Water into a small, microwave-safe bowl and sprinkle 1 teaspoon of unflavored Gelatin evenly over the water. Allow it to sit undisturbed for 5 minutes to bloom. Then, microwave for 15-30 seconds until the gelatin has completely melted and is clear (do not boil).2 tablespoons Water, 1 teaspoon Gelatin
-
In a separate, large, chilled bowl, pour 1 cup Heavy whipping cream and 2 teaspoons Vanilla extract. Using an electric mixer with a whisk attachment, whisk the cream until soft peaks begin to form (about 2-3 minutes). While still whisking, slowly stream in the dissolved gelatin mixture. Continue to whisk until stiff peaks form.1 cup Heavy whipping cream, 2 teaspoon Vanilla extract
-
Gently fold the whipped cream mixture into the cream cheese mixture using a spatula until it is well incorporated and no streaks remain. Be careful not to overmix, which can deflate the whipped cream.
-
Carefully scrape the creamy cheesecake mixture into the prepared graham cracker crust and smooth the top evenly with the back of a spoon or an offset spatula. If desired, place heart-shaped cookie cutters gently on top of the cheesecake filling, pressing slightly. Place the entire pan into the freezer for 15-20 minutes to firm up slightly before adding the Jell-O topping.
Raspberry Jell-O Topping & Final Chill
-
In a mixing bowl, combine 1 Pack of Raspberry Jell-O with 1 cup Boiling water.1 Pack Raspberry Jell-O, 1 cup Boiling water
-
Whisk vigorously until no Jell-O crystals remain and the mixture is completely dissolved.
-
Let the prepared Jell-O sit at room temperature for approximately 20 minutes to cool down slightly. It should still be liquid but no longer hot.
-
Remove the cheesecake from the freezer/fridge. Carefully pour the cooled raspberry Jell-O over the cheesecake filling. If using heart cookie cutters, ensure the Jell-O does not flow into the cut-out areas.
-
Place the cheesecake back into the fridge and leave to set for at least 2-3 hours, or preferably overnight, until both layers are firm.
-
Once fully set, carefully cut around the cookie cutters with a sharp, thin knife (wiped clean between cuts). Gently remove the cookie cutters to reveal your decorative hearts.
-
Finally, unlatch and remove the springform pan sides. Slice the cake into 12 servings using a warm, clean knife, and serve immediately. Enjoy your stunning **No-Bake Lemon Raspberry Cheesecake**!
Nutrition values are estimates only, using online calculators. Please verify using your own data.

💕 More Romantic & Delightful Valentine’s Day Recipes
If you’re planning a romantic evening or just looking to spread some love through delicious treats, these recipes are perfect. They’re all designed to be easy, delightful, and sure to impress!
- Puffed Spelt Hearts with Chocolate: A light and crispy treat with a chocolatey touch.
- No-Bake Biscoff Cake Pops: Sweet, portable, and incredibly popular.
- Marzipan Potatoes: A classic, charming German confection.
- Sacher Cake (Sacher Torte): An iconic Austrian chocolate cake for serious chocolate lovers.
- Red Velvet Cupcakes (without buttermilk): Moist, vibrant, and perfectly festive.
- 30 Sweet Valentine’s Day Recipes: A comprehensive collection of ideas to inspire your romantic meal.
⛑️ Important Food Safety Guidelines
Ensuring food safety is paramount when preparing any meal, especially desserts that contain dairy. Please keep these guidelines in mind:
- Maintain a clean working environment. Wash your hands thoroughly before and after handling food, and ensure all utensils and surfaces are clean.
- Although this is a no-bake recipe, if incorporating any ingredients that require cooking (e.g., a homemade fruit compote), cook them to a minimum internal temperature of 165 °F (74 °C) to eliminate harmful bacteria.
- Avoid cross-contamination. Do not use the same utensils or cutting boards for raw ingredients (if applicable) and finished products.
- Do not leave perishable foods, especially those containing dairy like cream cheese and heavy cream, sitting out at room temperature for extended periods. Refrigerate promptly.
- Never leave cooking food (if any part of your prep involves cooking, like melting butter or preparing Jell-O) unattended.
- Store leftovers covered in the refrigerator to maintain freshness and prevent bacterial growth.
For further information and comprehensive food safety practices, always refer to reputable sources like the Safe Food Handling – FDA.
