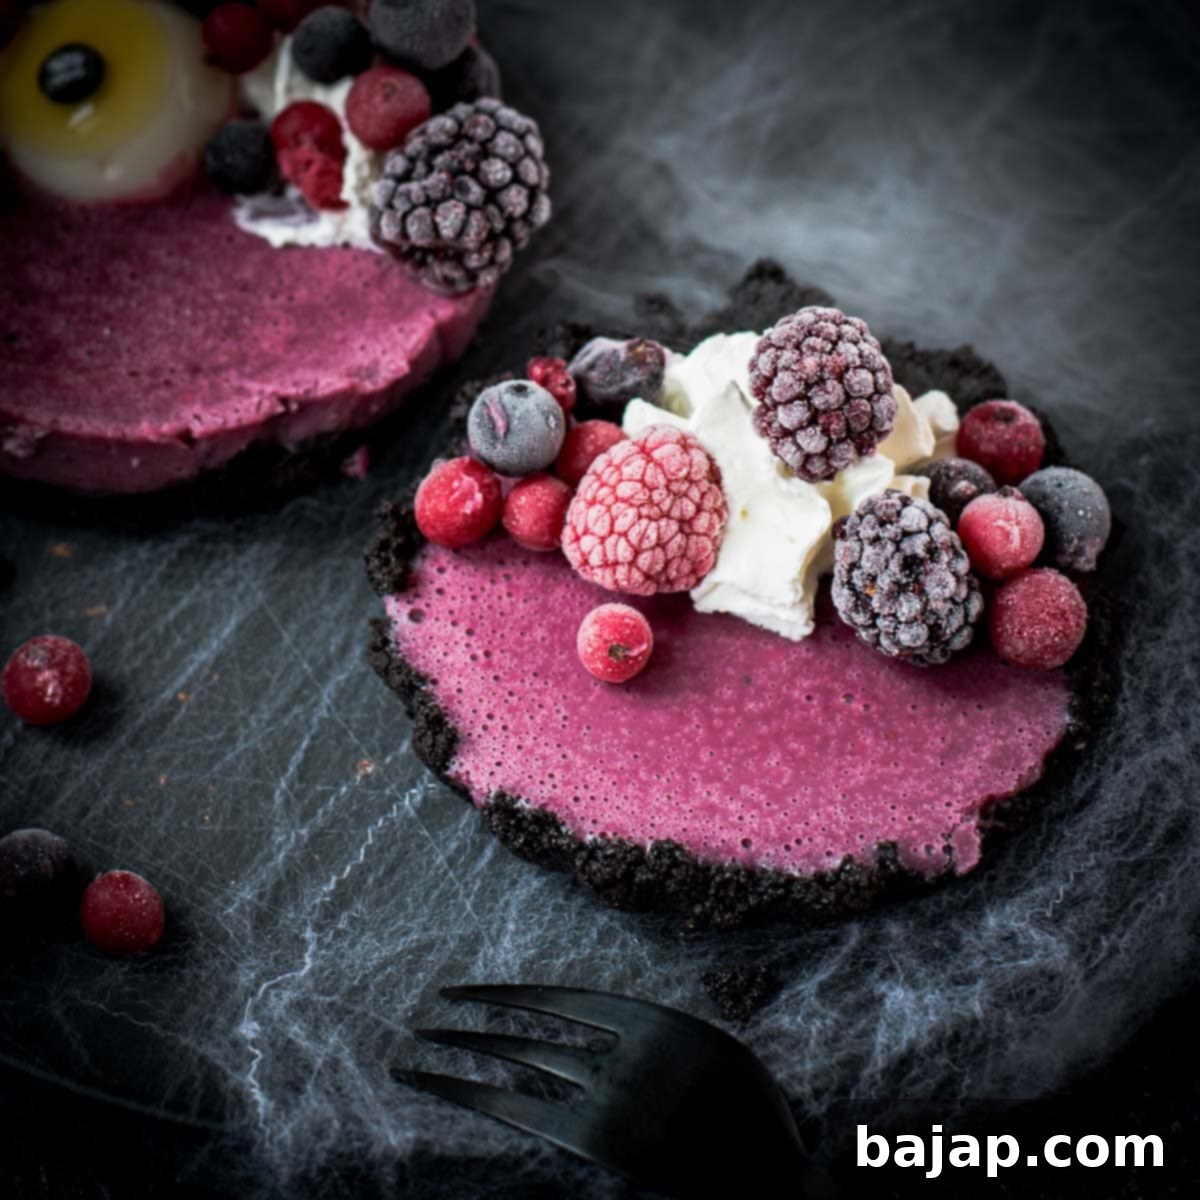
Ultimate No-Bake Halloween Tarts: Spooky Oreo Crust & Haunting Berry Ganache Recipe
Get ready to cast a spell and bewitch your guests this Halloween with these utterly spine-chilling, yet surprisingly simple, no-bake Halloween tarts! Forget the oven and tedious baking; these ghoulishly good treats come together with minimal effort, leaving you more time to perfect your costume or decorate your haunted house. The foundation of these eerie delights is a crust unlike any other – a hauntingly black creation made from crushed Oreo crumbs, promising a dark secret beneath. As your guests take a bite, they’ll uncover a creamy, devilishly concocted filling, a harmonious blend of silky white chocolate and a sinister burst of berry flavors.
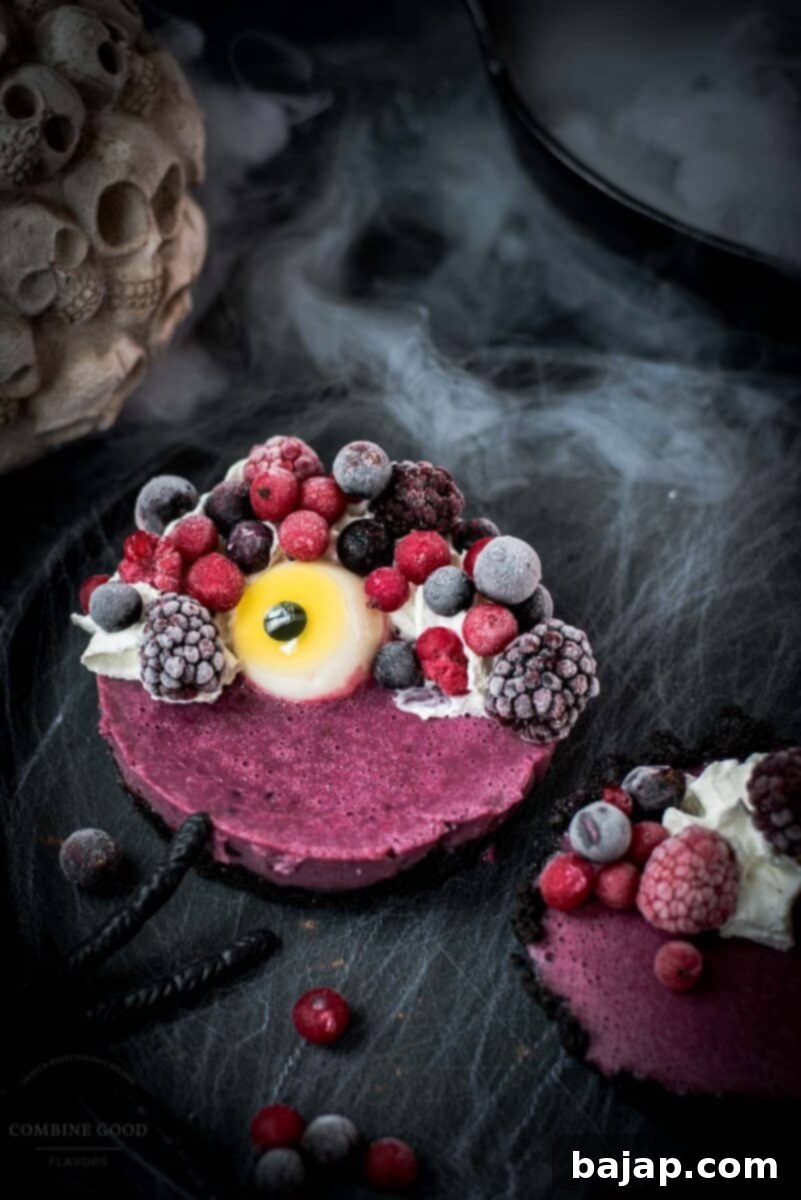
The beauty of these Halloween tarts lies in their customizable creepiness. Want a darker, more mysterious twist? Load up your berry blend with an abundance of blackberries and blueberries. These fruits will lend an intensely dark, shadowy hue to your ganache, reminiscent of a midnight graveyard. If you’re feeling a little more bloodcurdling and want a dessert that looks straight out of a vampire’s feast, toss in a generous amount of raspberries, red currants, or strawberries. These vibrant red berries will conjure a strikingly blood-red filling that is sure to send shivers down spines.
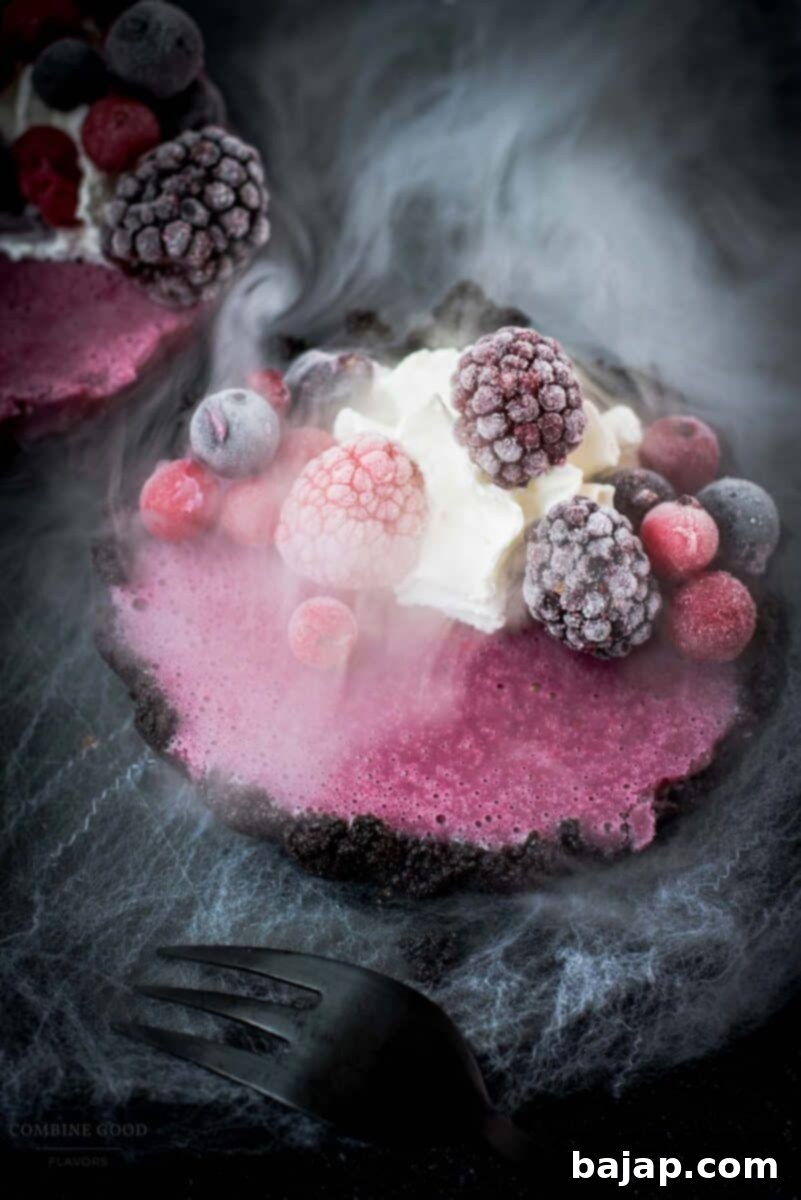
To complete the wicked charm, adorn these mini tarts with a creepy gummy eye for that unsettling, ‘they’re watching you’ finishing touch. For a slightly more subtle, yet still mysterious, presentation, a dollop of fluffy whipped cream and a scattering of icy frozen berries will do the trick, creating an eerie, frost-bitten look. Whether your Halloween guests are ghouls, witches, vampires, or mere mortals, this no-bake dessert is guaranteed to make their hearts race – or at least, what’s left of them! These easy Halloween treats are not just delicious; they’re an experience, a centerpiece, and a conversation starter, perfect for any spooky gathering.
Prepare to delight and fright with these fearfully delicious no-bake Halloween tarts. Happy haunting, and enjoy the magical moments of your spooky celebration… if you dare!
Why You’ll Love These Spooky No-Bake Tarts
These Halloween tarts aren’t just a dessert; they’re a statement. Here’s why they’re destined to become your go-to spooky treat:
- Effortlessly Eerie: The “no-bake” aspect means less time slaving over a hot oven and more time enjoying your Halloween festivities. Perfect for busy hosts!
- Customizable Creepiness: From dark and mysterious to blood-red and gruesome, you can tailor the berry filling to perfectly match your party’s spooky vibe.
- Decadently Delicious: The rich, dark Oreo crust paired with the creamy white chocolate berry ganache creates an irresistible flavor combination that will haunt your taste buds in the best way.
- Visually Striking: These mini tarts are a feast for the eyes, with their deep colors and creepy garnishes, making them a show-stopping centerpiece on any dessert table.
- Kid-Friendly & Fun: Involving kids in crushing the Oreos or placing the gummy eyes adds an extra layer of fun to the Halloween preparation.
🥘 Ingredients for Your Hauntingly Good Tarts
Crafting these delicious no-bake Halloween tarts requires a simple collection of ingredients, each playing a crucial role in creating the ultimate spooky dessert. Pay attention to the berry choices to achieve your desired level of eerie color!
Crust: The Dark Foundation
- Eerily Black Oreos: These iconic chocolate sandwich cookies are not just for their distinct flavor but also for their naturally dark hue, which forms the perfect “haunted ground” for our tarts. Their fine crumbs create a stable, crumbly, and utterly delicious base.
- Melted Butter: The binding agent that transforms those dark Oreo crumbs into a perfectly pressable, sturdy crust. It adds richness and helps the crust set firmly in the fridge.
Filling: The Sinister Berry Blend
- Heavy Cream: This is the heart of our ganache, providing a luxurious, silky texture and rich mouthfeel to the berry filling. It balances the fruit’s tartness and white chocolate’s sweetness.
- Berry Mix: This is where the magic happens for color and flavor.
- For a dark and brooding tart: Lean into blackberries, black currants, and blueberries. These will yield a deep, almost black, purple filling, perfect for a truly eerie, shadowy aesthetic.
- For a gruesome, bloody treat: Go heavy on raspberries, red currants, and strawberries. These vibrant red berries will create a startlingly blood-red ganache, ideal for a vampire’s feast theme or a truly shocking dessert.
Either way, this berry blend will be the vibrant heart of your dark magic.
- Lemon Zest: A hint of bright citrus zest cuts through the richness and adds a fresh, zesty note that elevates the berry flavors, preventing the tart from being overly sweet.
- Butter: Incorporated into the filling, butter contributes to the smooth, creamy texture and adds a touch of richness, ensuring the ganache is incredibly decadent.
- Brown Sugar: This adds a deeper, more molasses-like sweetness compared to white sugar, complementing the fruit and balancing out the tart berries, giving your tarts that sweet, dangerous allure.
- White Chocolate: The creamy canvas for our berry colors. White chocolate melts beautifully into the ganache, adding sweetness and a smooth, luxurious base that allows the berry flavors to shine.
- Gelatine Granules: The secret to a perfectly set, yet still delightfully creamy, no-bake filling. Gelatin ensures the ganache holds its shape without being rubbery, providing that hauntingly smooth texture.
- Water: Used for blooming the gelatin and simmering the berries, ensuring they break down and release their juices and color effectively.
- Orange Cream Extract: A unique touch of citrusy magic to elevate the flavors and give your filling a spooky, seasonal twist that complements the berries beautifully without overpowering them.
Garnish: The Creepy Finishing Touches
- Frozen Berry Mix: Scatter these icy gems atop your tarts for an eerie, frost-bitten look and an additional pop of fresh fruit flavor and texture.
- Creepy Gummy Eyes: The ultimate unsettling detail! One glance at these, and your guests will feel like the tarts are watching them… Don’t blink. These candies are readily available around Halloween and truly complete the spooky aesthetic.
- Whipped Cream: A ghostly swirl of sweetness. Use it from a can for convenience (we’ve all been there, especially during Halloween party prep!) or whip your own for an even richer, airier texture. It provides a lovely contrast to the dark crust and intense berry filling.
See the recipe cardbelow for precise quantities and detailed instructions.
🔪 Instructions: Conjuring Your Spooky Tarts Step-by-Step
Follow these simple steps to bring your no-bake Halloween tarts to life. Remember, precision and a little bit of spooky spirit go a long way!
Step 1: The Dark Crust Begins
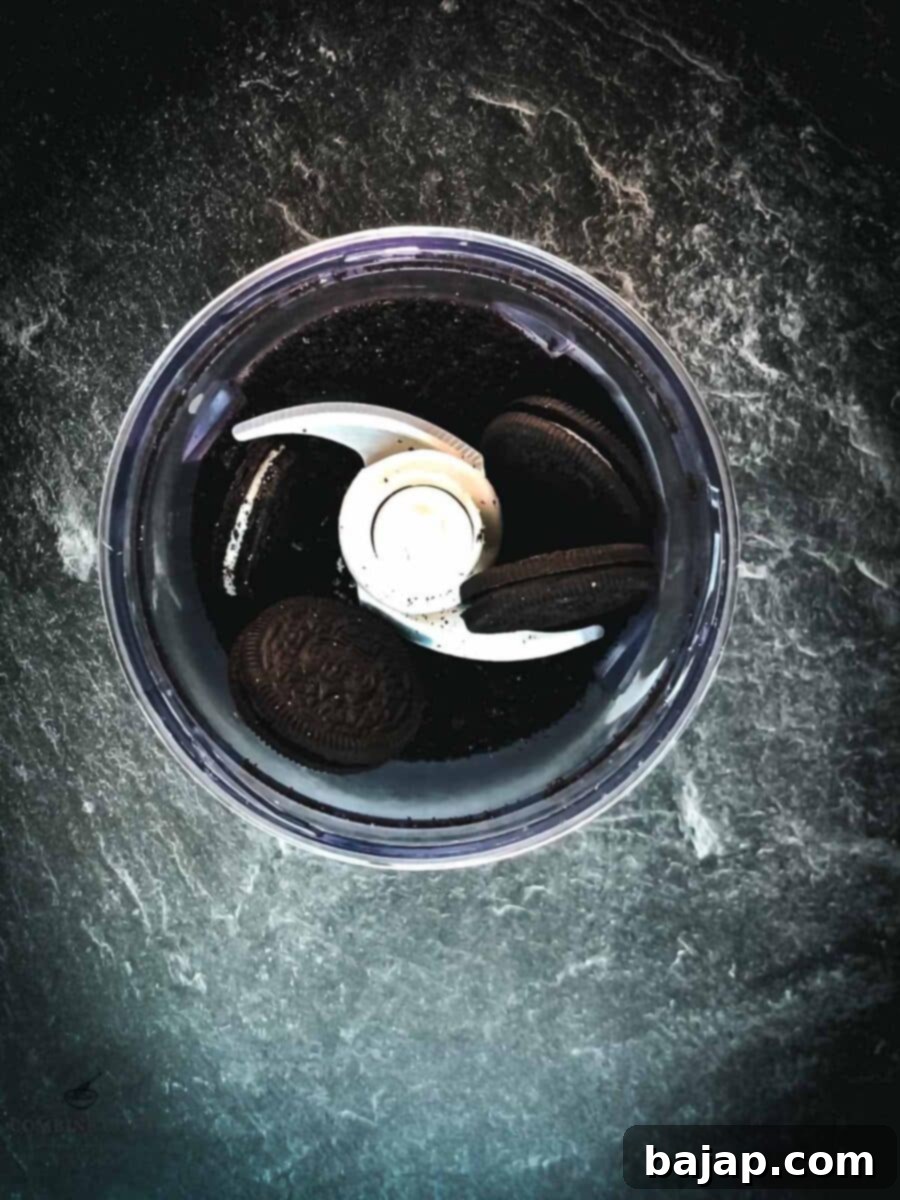
Start by melting your butter until it’s liquid gold – a smooth, clear amber that will bind our dark magic. While the butter melts, begin the transformation of your eerily black Oreos. You can use a sturdy rolling pin and a plastic bag for a therapeutic crushing session, or for quicker, finer results, an electric shredder (food processor) will turn them into uniform, sandy crumbs, resembling dark, fertile soil for our spooky creation.
Step 2: Mixing the Mysterious Base
Once your Oreos are perfectly crumbly and your butter is melted, combine the two. Mix thoroughly until the mixture holds together when pressed firmly between your fingers, but still retains a delightfully crumbly texture – like dark magic taking form in your hands. This is the ideal consistency for a stable yet tender crust.
Step 3: Pressing the Cursed Crusts
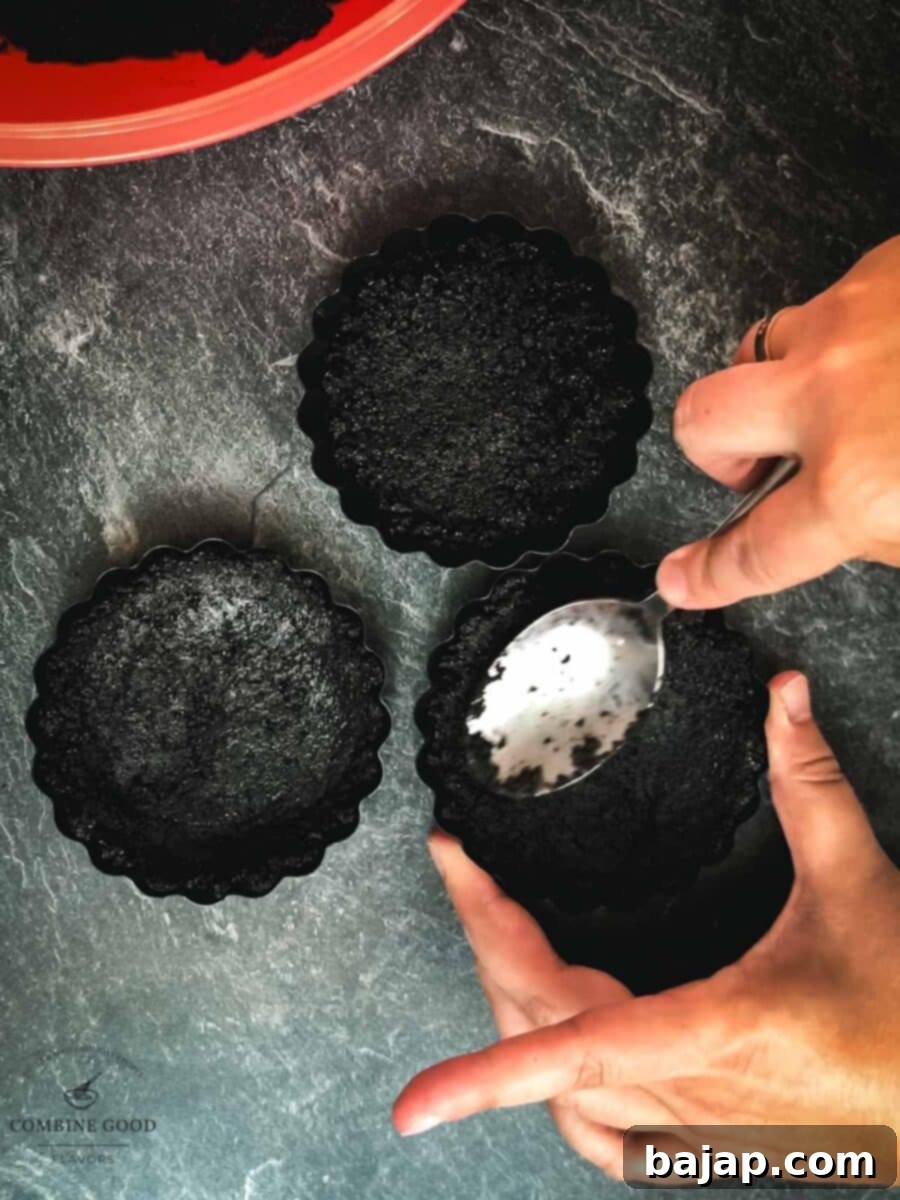
Divide this dark mixture evenly among your chosen vessels. If using small tart tins, aim for about 2 tablespoons per tin. For small springform tins, you’ll need a bit more, around 4-5 tablespoons. Press the crumbs firmly and evenly into the bottom and up the sides of each tin, creating a neat, uniform base. Ensure the edges are well-compacted. Once shaped, let these cursed crusts chill in the fridge for at least 15-20 minutes while you brew up the filling. This chilling time helps the butter solidify, setting the crust in place.
Step 4: Blooming the Gelatin
In a small bowl, sprinkle the gelatin granules over the specified amount of cold water. Let it sit undisturbed for 3-5 minutes. This process, known as “blooming,” allows the gelatin to absorb the water and swell, preparing it to dissolve smoothly into your filling and give it its hauntingly smooth, firm texture.
Step 5: Simmering the Sinister Berries
In a medium saucepan, combine your chosen berry mix (dark or blood-red!), brown sugar, and a bit of water. Place the pan over medium heat and bring the mixture to a gentle simmer. Stir occasionally, allowing the sugar to dissolve completely and the berries to burst open, releasing their juices and intense color. This creates a dark and delicious potion base for your ganache.
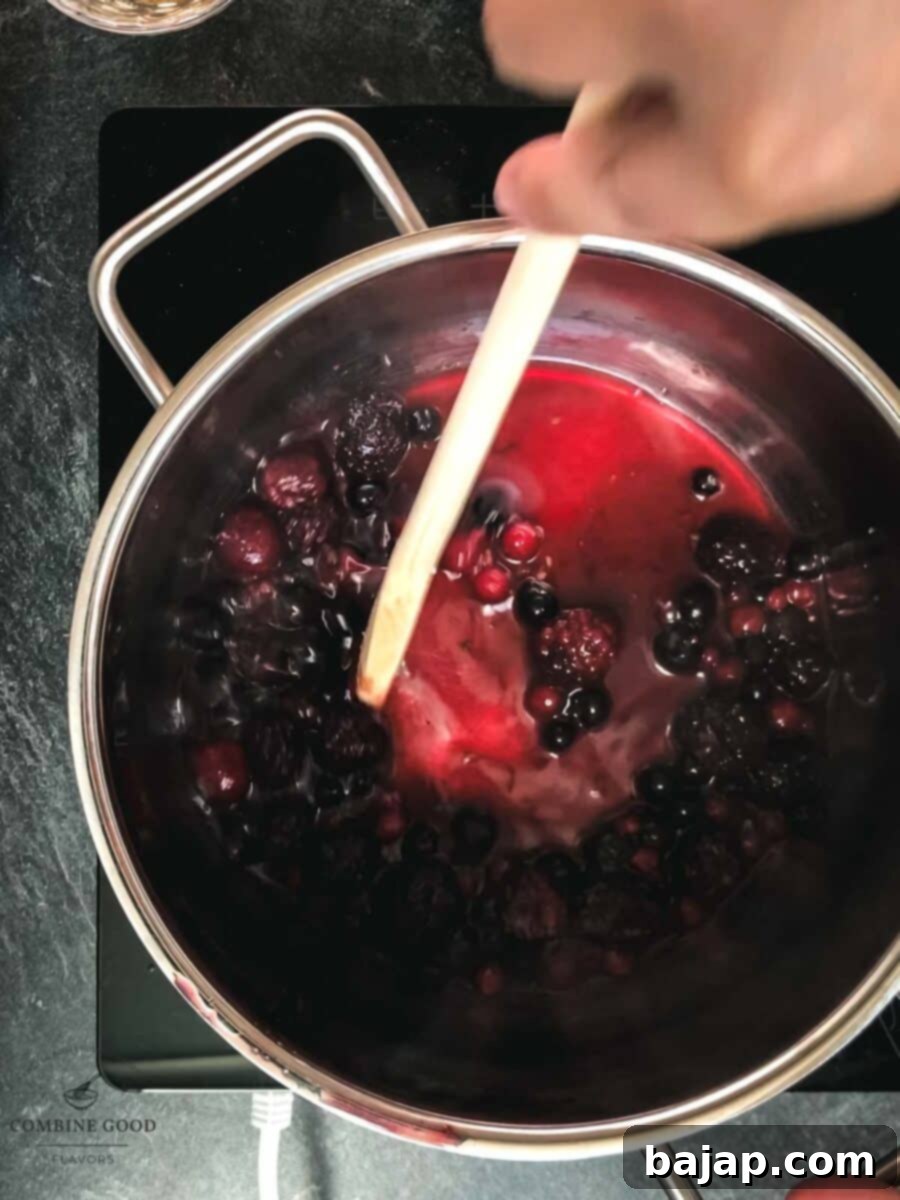
Step 6: Crafting the Creamy Ganache
To the simmering berry mixture, add the heavy cream, fresh lemon zest, and butter. Stir everything together and bring it back to a gentle simmer for another minute or two, allowing all the flavors to meld. Remove the pan from the heat. Immediately stir in the bloomed gelatin (it will melt quickly in the warm mixture), the white chocolate (it will melt into a smooth, glossy consistency), and the orange cream extract. For the smoothest, silkiest filling, use a hand blender (immersion blender) and blend the mixture for 2-3 minutes. This step ensures there are no lumps and the ganache is perfectly emulsified, ready for setting.
Step 7: Filling the Haunted Shells
Retrieve your perfectly chilled Oreo crusts from the fridge. Carefully spoon the berry ganache into each tart shell. Fill them almost to the brim, but be cautious not to overfill, leaving just a tiny space for the garnish. The dark crust against the vibrant ganache will already start to look incredibly tempting and spooky!
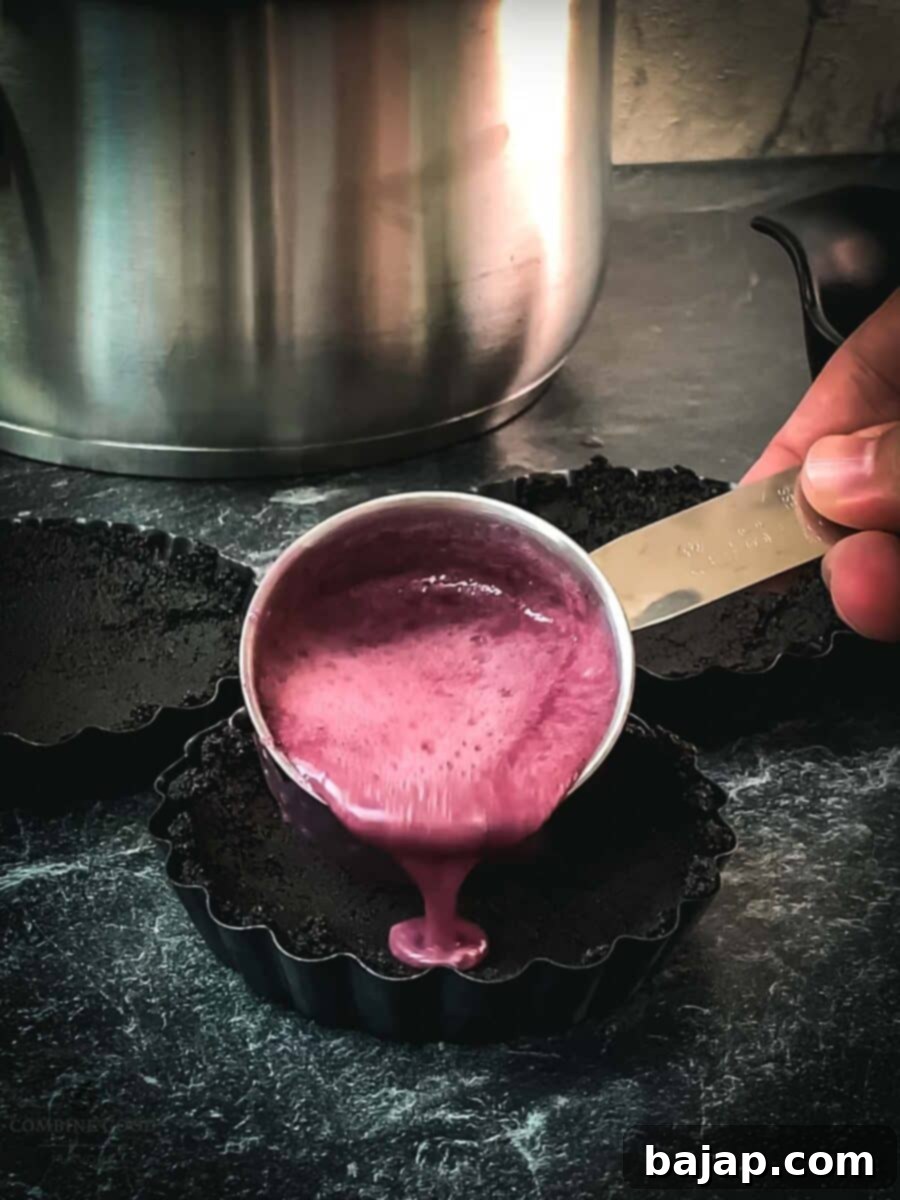
Step 8: The Gaze of the Gummy Eye & Chilling
While the ganache is still liquid, carefully place one creepy gummy eye in the center of each tart. The gummy eye will settle into the ganache as it chills, creating a fixed, unsettling gaze. Allow the ganache to set in the fridge for at least 3 hours. For the ultimate spooky effect and a perfectly firm texture, leaving them to chill overnight is even better. This ensures the tarts are fully set and easy to handle.
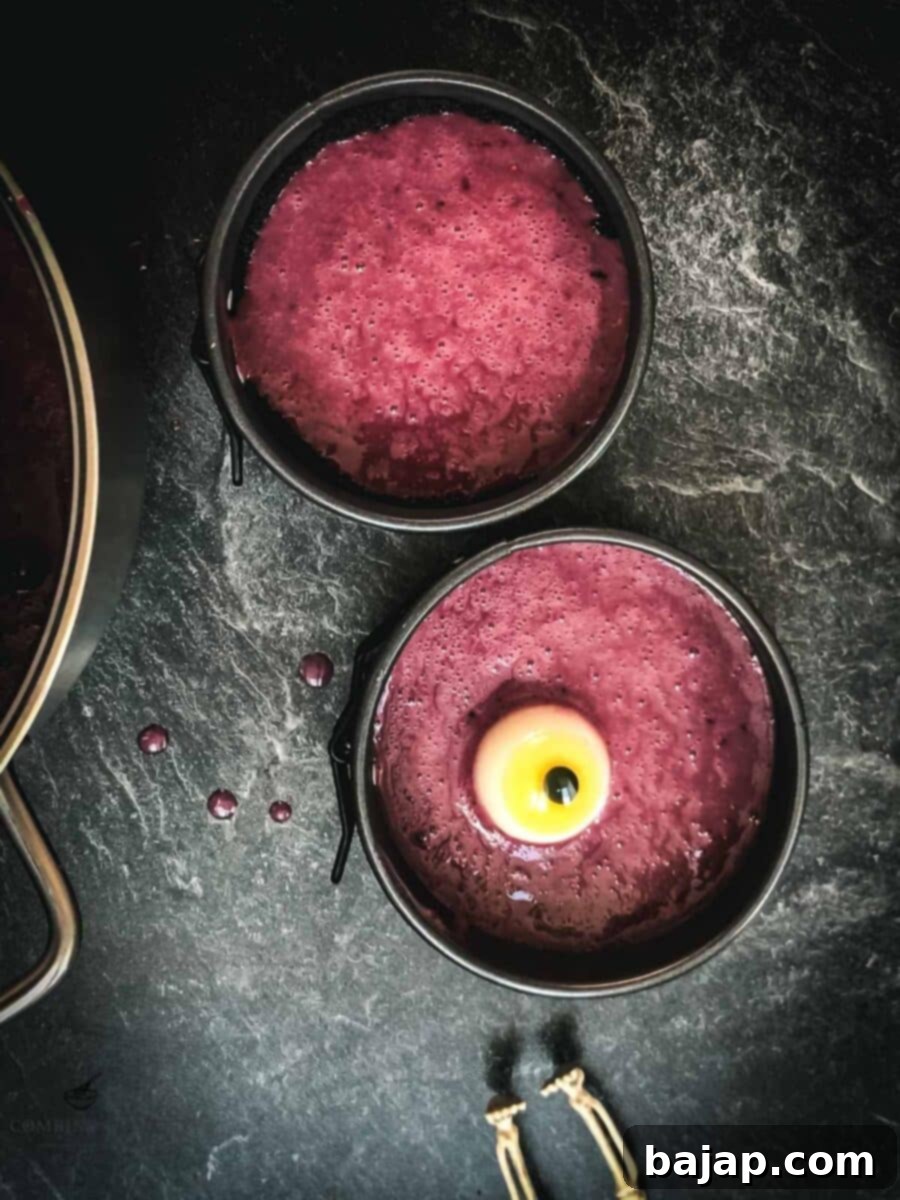
Step 9: The Eerie Final Touches
Once your tarts are perfectly set, it’s time for the final adornments. Pipe or dollop whipped cream around the gummy eye, creating an eerie, swirling shadow effect, as if mist is creeping in. Finish by scattering a few frozen berries on top for that icy, haunted touch and an added textural contrast. These final garnishes will bring your no-bake Halloween tarts to life, making them truly unforgettable.
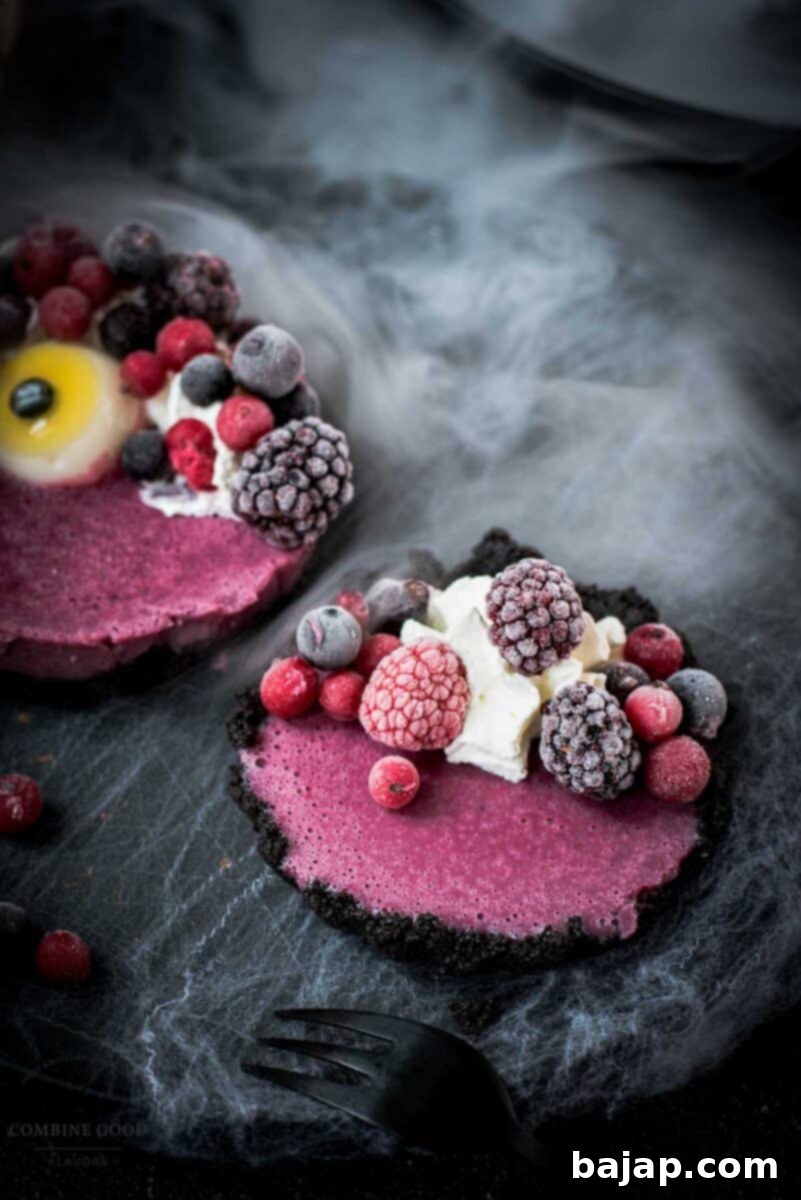
💭 Top Tips for Perfect Spooky Tarts
Achieving the perfect no-bake tart crust is key to a successful spooky treat. Here are some pro tips to ensure your Oreo crust is just right:
- Crust Consistency is King: After combining the Oreo crumbs and melted butter, test the mixture. It should feel like wet sand and hold together when you press it firmly between your fingers.
- Too Dry? Add More Butter: If your crust mixture is too dry and crumbles apart easily, it won’t hold its shape in the tin. Gradually add a tiny bit more melted butter (1-2 teaspoons at a time), mixing well after each addition, until it reaches the desired consistency.
- Too Mushy? Toss in Extra Crumbs: If the mixture feels greasy or too wet and doesn’t hold its form easily (it’s too soft), it has too much butter. Incorporate a few more finely crushed Oreo crumbs to absorb the excess moisture and bring it back from the dead.
- Firm Pressing: When pressing the crust into the tins, use the back of a spoon or your fingertips to ensure it’s firmly packed. This prevents the crust from falling apart when removed from the mold.
- Chilling is Crucial: Don’t skip the chilling steps! It’s vital for both the crust and the ganache to firm up properly, ensuring a clean release from the tins and a stable, delicious tart.
Variations for Your Monstrous Masterpiece
While the classic no-bake Halloween tart recipe is delightfully spooky, don’t hesitate to experiment and make it uniquely yours. Here are some haunting variations to inspire your culinary creativity:
-
Crust Creations:
Instead of Oreos, consider other dark cookie varieties. Chocolate wafer cookies can provide a similar dark base, or for a different flavor profile, try a spiced gingerbread cookie crust for a fall twist.
-
Flavorful Fillings:
- Chocolate Overload: Replace some or all of the white chocolate with dark or milk chocolate for an even richer, more intense ganache.
- Pumpkin Spice: Infuse your ganache with a teaspoon of pumpkin spice or a dash of pumpkin puree (ensure it’s thick and not watery) for a seasonal flavor.
- Apple Cinnamon: Gently simmer diced apples with cinnamon and a touch of sugar, then blend into the ganache for an autumnal twist.
-
Ghoulish Garnishes:
- Spiderweb Effect: Drizzle melted white chocolate (or dark chocolate) in concentric circles on top of the ganache, then drag a toothpick from the center outwards to create a spooky spiderweb pattern.
- Edible Glitter & Sprinkles: A dusting of edible black or orange glitter, or some Halloween-themed sprinkles, can add extra sparkle and festivity.
- Mini Chocolate Chips: Sprinkle mini chocolate chips on top for added texture and a burst of chocolatey goodness.
- Other Creepy Candies: Beyond gummy eyes, consider edible worms, plastic spiders (for decoration only!), or candy corn arranged artistically.
-
Extract Experiments:
Swap the orange cream extract for other spooky seasonal flavors like peppermint extract (for a chilling minty touch), almond extract (for a rich, nutty depth), or even a touch of rum extract for an “adults-only” version.
Storage & Make-Ahead Tips
These no-bake Halloween tarts are excellent for making ahead, which is a huge plus for party planning. Here’s how to store them for optimal freshness and spooky delight:
- Refrigeration: Once fully set and garnished (or before garnishing if you want fresh whipped cream), store the tarts in an airtight container in the refrigerator. They will remain fresh and delicious for up to 3-4 days.
- Make-Ahead: You can prepare the Oreo crusts and store them in the fridge for up to 2 days before filling. The berry ganache can also be made a day in advance and stored in an airtight container in the fridge. Reheat gently over low heat, stirring constantly, until it’s just pourable again, then proceed with filling the crusts.
- Freezing (Crust Only): While the finished tarts don’t freeze well due to the gelatin and fresh garnishes, you can prepare and freeze the pressed Oreo crusts. Wrap them tightly in plastic wrap and then foil, and freeze for up to 1 month. Thaw in the refrigerator before filling.
- Garnish Just Before Serving: For the freshest look and best texture, add whipped cream, frozen berries, and gummy eyes just an hour or two before serving. This prevents the whipped cream from deflating and the gummy eyes from getting too firm or moist.
Frequently Asked Questions (FAQs)
Got questions about these spooky no-bake Halloween tarts? We’ve got answers!
-
Q: Can I use a different cookie for the crust?
A: Absolutely! While Oreos provide the perfect dark color and flavor, you can use other chocolate wafer cookies, graham crackers (though the color won’t be as dark), or even shortbread cookies. Adjust the amount of melted butter as needed to achieve the correct crumb consistency.
-
Q: Can I make these tarts vegan or gluten-free?
A: Yes! For a vegan version, use vegan-friendly chocolate sandwich cookies (like Newman-O’s), dairy-free butter, and plant-based heavy cream (e.g., full-fat coconut cream, chilled). Ensure your white chocolate is dairy-free. For gluten-free, use gluten-free chocolate sandwich cookies and ensure all other ingredients are certified GF.
-
Q: How long do these tarts last?
A: When stored in an airtight container in the refrigerator, these tarts will stay fresh and delicious for 3-4 days. They are best enjoyed within the first 2 days for optimal texture and flavor.
-
Q: Can I skip the gelatin?
A: Gelatin is crucial for the no-bake filling to set properly and hold its shape. Skipping it will result in a much softer, more liquid ganache that won’t form a firm tart. If you prefer not to use gelatin, you would need to explore alternative setting agents like agar-agar for a vegan option, or a different style of filling altogether.
-
Q: What if my ganache doesn’t set?
A: This typically happens if the gelatin didn’t dissolve properly or if there wasn’t enough gelatin for the liquid content. Ensure the gelatin is fully bloomed and dissolved in the warm berry mixture. If your ganache is too warm when you put it in the fridge, it might take longer to set. Give it ample chilling time, ideally overnight.
🍽 Equipment for Your Bewitching Bites
To create these magical no-bake Halloween tarts, you’ll need a few essential kitchen tools:
- Mini Tart Pans or Mini Springform Pans: For shaping your individual tart crusts.
- Electric chopper or a ziplock bag with a rolling pin: For crushing those eerily black Oreos into fine crumbs.
- Immersion blender: Essential for achieving a perfectly smooth and silky ganache filling.
- Saucepan: For simmering your berry mixture and creating the creamy ganache.
- Mixing bowls: For combining ingredients and blooming the gelatin.
👻 More Spooky Recipes for You to Try
Looking for more hauntingly good treats and sips for your Halloween bash? Explore these other eerie recipes from our collection:
- Spiced Rum with Ginger Beer: A warming, spiced concoction perfect for a chilly Halloween night.
- Spiderweb Cookies: Simple sugar cookies decorated with a classic spooky design.
- Red Halloween Cocktail: A vibrant, mysterious drink to add a splash of color to your party.
- Limoncello Vodka: A bright, zesty spirit to awaken your senses.
- Spiderweb Cheesecake: Another impressive spiderweb dessert, this time on a creamy cheesecake!
- Halloween Cocktails {roundup}: A collection of eerie and delightful drinks for any Halloween theme.
- Gosling’s Dark & Stormy: A classic dark and brooding cocktail.
- Kraken Cola: A simple yet potent rum cocktail, perfect for a dark sea theme.
- Kramble: A unique and mysterious drink to intrigue your guests.
- Sloe Screw: A fruity, vibrant cocktail for a lighter, yet still festive, option.
If you conjure up this recipe, please let me know how you liked it by ★★★★★ star rating it and leaving a comment below. Your feedback would be awesome and helps other ghouls find this recipe! You can also sign up for our Newsletter to receive weekly delicious homemade recipes directly to your inbox, or follow me on Pinterest or Instagram and share your spooky creation with me. Just tag me @combinegoodflavors and hashtag #combinegoodflavors, so I don’t miss it. Happy Halloween baking (or in this case, no-baking)!
📖 Recipe
No-bake Halloween Mini Tarts
Nora
Save RecipeSaved!
Pin Recipe
Equipment
-
Mini Tart Pans or Mini Springform Pans
-
Electric chopper or a ziplock bag with a rolling pin
-
Immersion blender
-
Saucepan
-
Mixing bowls
Nutrition values are estimates only, using online calculators. Please verify using your own data.

⛑️ Food Safety First for Your Halloween Treats
While these no-bake Halloween tarts are a breeze to make, it’s always important to keep food safety in mind, especially when serving treats to guests. Follow these general guidelines:
- Maintain Proper Temperatures: Since this recipe includes dairy and fresh berries, ensure all ingredients are handled hygienically. After preparation, keep the tarts refrigerated until just before serving to prevent bacterial growth.
- Cleanliness is Key: Always wash your hands thoroughly before handling food, especially when switching between different ingredients. Clean all utensils and surfaces before and after use.
- Ingredient Freshness: Use fresh, good-quality berries and dairy products. Check expiration dates on all ingredients to ensure they are safe for consumption.
- Avoid Cross-Contamination: While this recipe doesn’t involve raw meat, it’s a good general practice to use separate cutting boards and utensils for different food types to prevent cross-contamination.
- Do Not Leave Food Out: Perishable foods, including these tarts, should not be left at room temperature for more than two hours. If serving outdoors or at a prolonged party, consider using ice baths or refrigerating portions as they are consumed.
- Know Your Allergens: Be mindful of common allergens like dairy, gluten (if not using GF Oreos), and nuts (if using alternative crusts or garnishes). Inform your guests of ingredients if they have dietary restrictions.
For further information on safe food handling, always refer to reputable sources such as Safe Food Handling – FDA. Enjoy your spooky treats responsibly!
