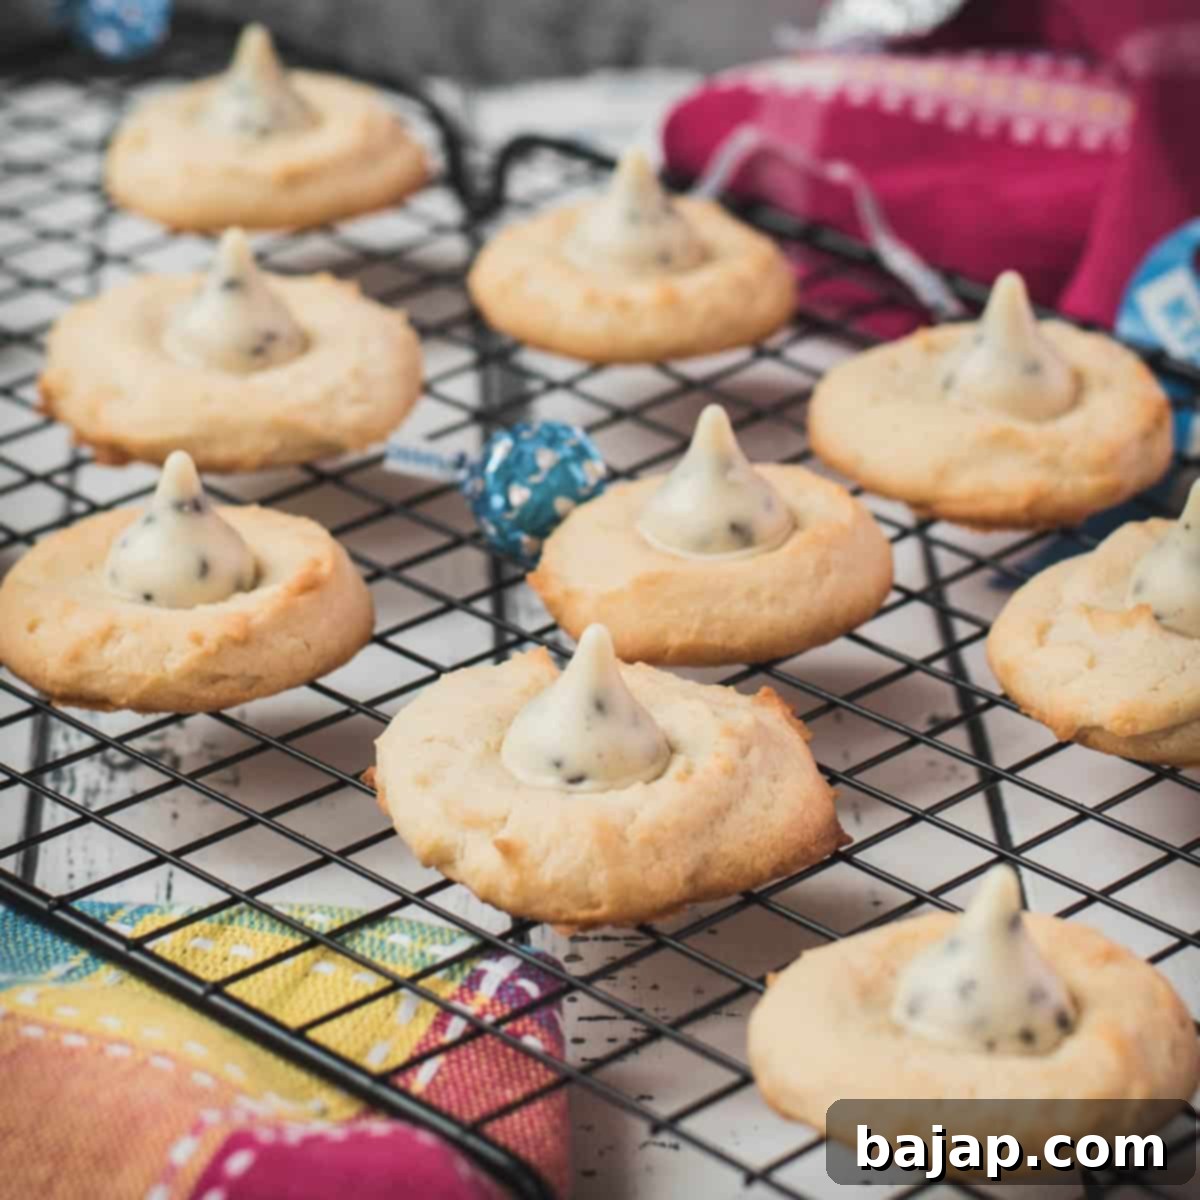
Deliciously Simple Cookies ‘n Cream Blossom Cookies: Your New Favorite 5-Ingredient Treat
There’s an undeniable joy that comes from biting into a perfectly baked cookie – a moment of pure, unadulterated bliss. And sometimes, all you need is a sweet, unexpected kiss! A cookie kiss, that is! That’s precisely why these petite, delightful, and incredibly easy Cookies ‘n Cream Blossom Cookies have captured our hearts (and taste buds).
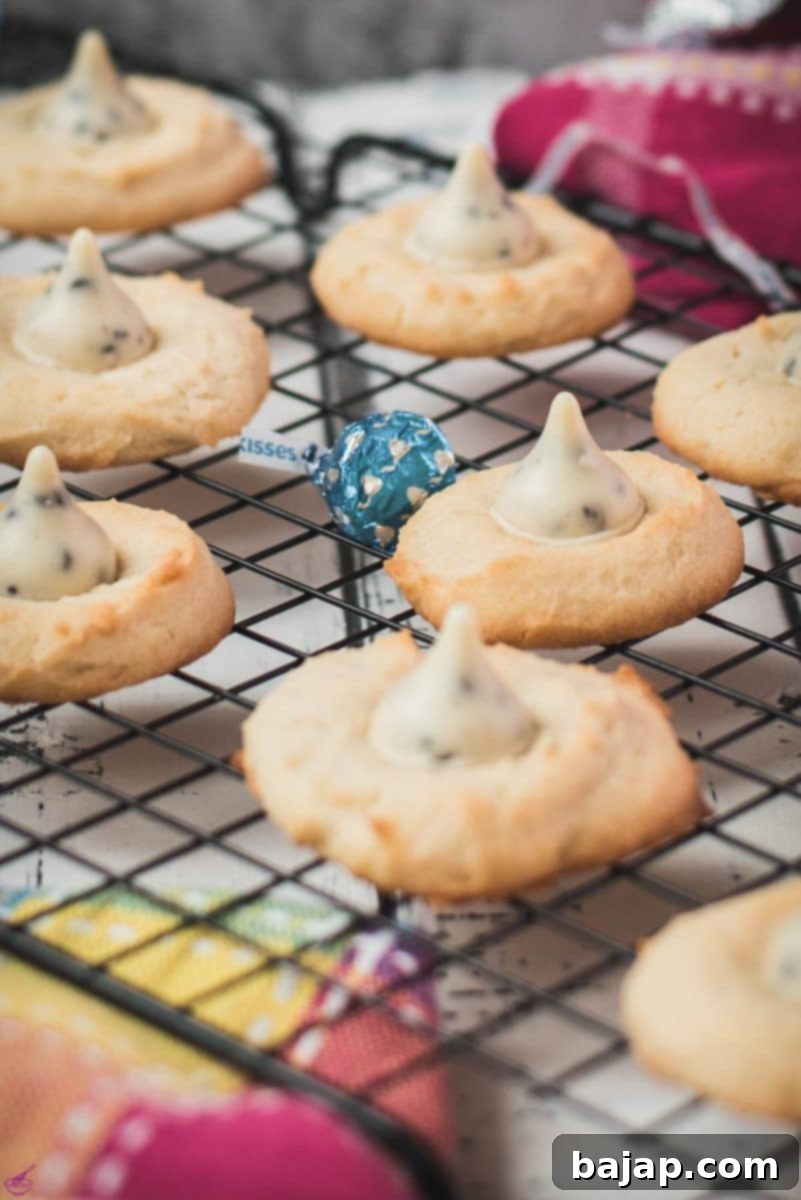
Cookies have a magical way of bringing a little sweetness to any gathering, big or small. From festive holiday platters to a simple afternoon pick-me-up, they are universally loved. And when it comes to combining ease with irresistible flavor, few treats can compare to these delightful Cookies ‘n Cream Blossoms. I absolutely adore baking these cookies, and I’m confident you will too! Here are just a few compelling reasons why this recipe is destined to become a staple in your kitchen:
- Unforgettable Creamy Cookie Taste: Prepare for a truly exquisite experience. The dough for these cookies is wonderfully buttery and rich, almost reminiscent of a delicate brioche. This luxurious base pairs impeccably with the sweet, speckled goodness of Hershey’s Cookies ‘n’ Creme Kisses, creating a flavor combination that is nothing short of heavenly. The subtle tang of cream cheese elevates the richness, ensuring each bite is perfectly balanced and deeply satisfying.
- Simply Sweet & Effortlessly Easy: One of the most remarkable aspects of these blossom cookies is their incredible simplicity. You only need five common ingredients to whip up these delectable, egg-free treats. This minimalist approach doesn’t compromise on flavor; instead, it highlights the quality of each component, resulting in a pure, sweet taste that everyone will adore. They’re perfect for beginner bakers or anyone looking for a foolproof dessert.
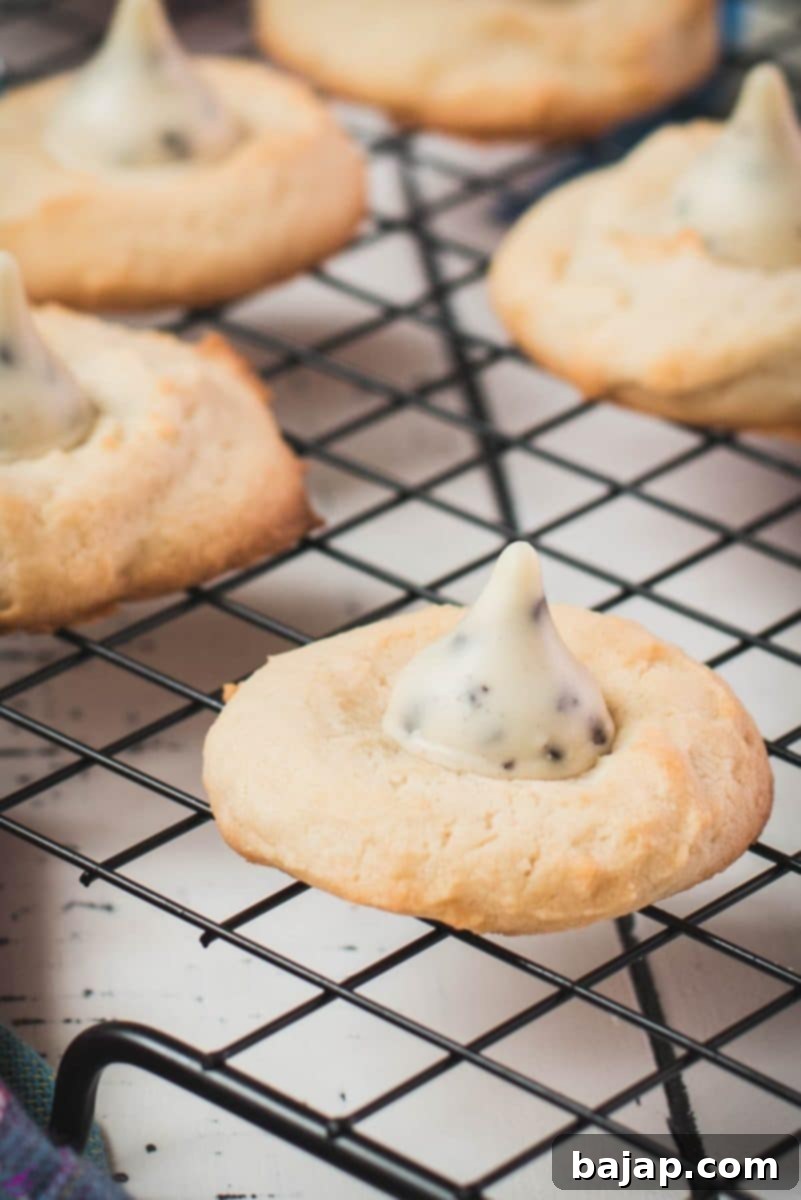
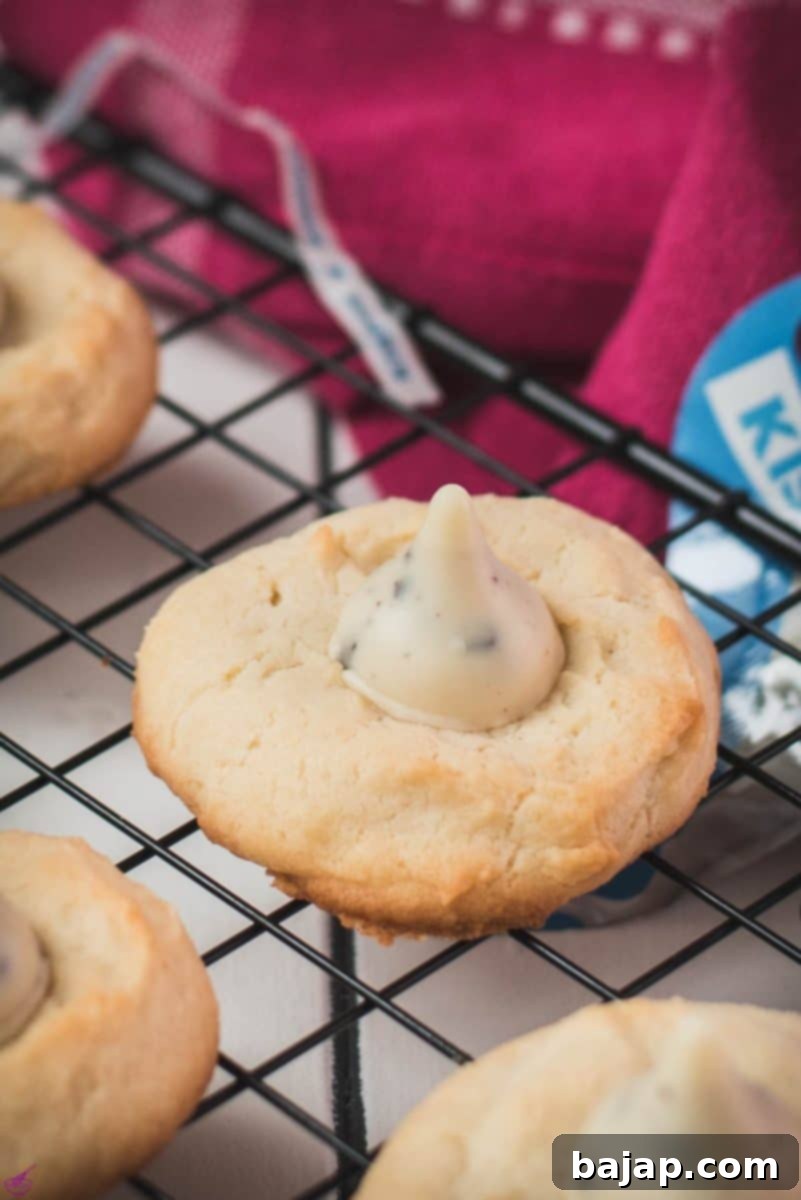
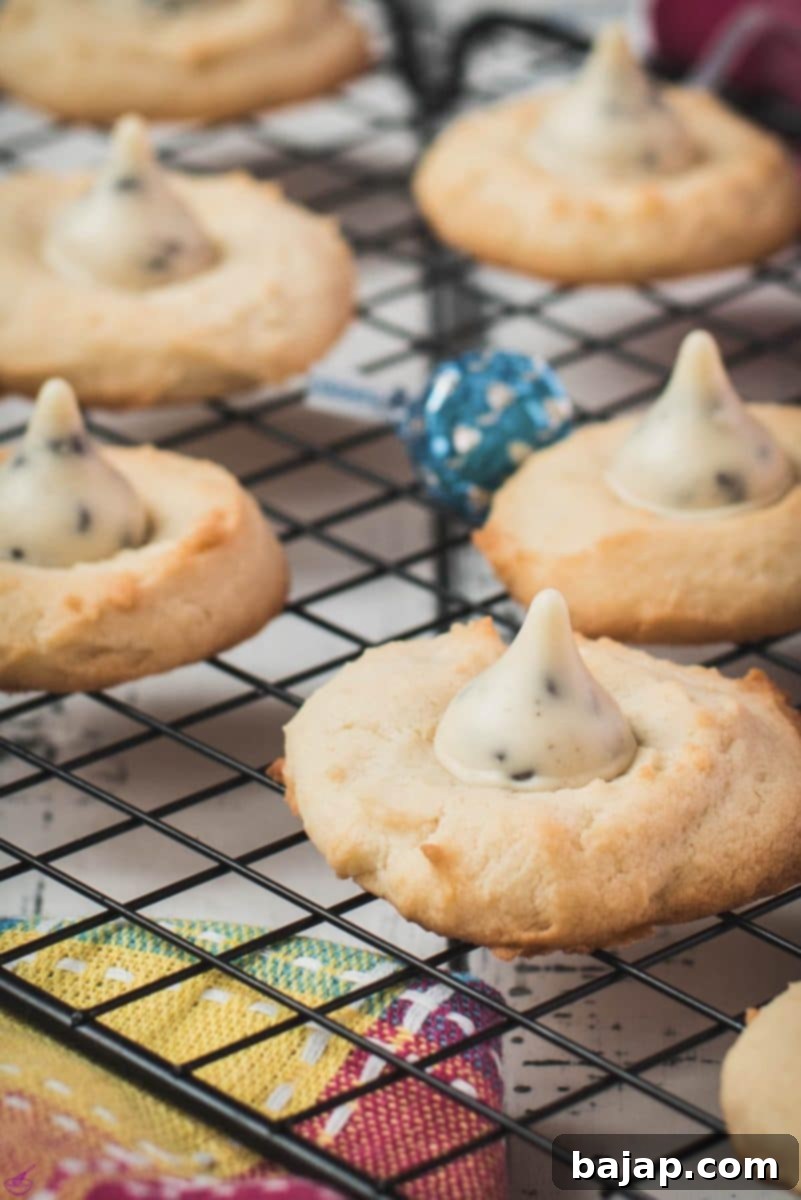
- Instant Cookie Crush (Visually Stunning): These treats are designed to make you fall in love at first sight! Their beautiful golden-brown hue, achieved through perfect baking, provides a stunning backdrop for the vibrant, speckled Hershey’s Kisses nestled on top. The contrast in colors and textures makes them incredibly appealing, guaranteeing admiring glances and eager anticipation before the first bite. They’re a true showstopper for any dessert table.
- A Fast Favorite for Any Occasion: If you find yourself in need of a quick dessert or a last-minute contribution to a potluck, these cookies are your ultimate solution. They demand minimal preparation time – typically just a half-hour from start to finish. But be warned: despite their quick creation, they tend to disappear from the plate in mere seconds, becoming an instant favorite among all who try them!
- Endless Options for Customization: The versatility of these cookies is truly boundless. They are a guaranteed hit for any event, from festive holiday gatherings and birthday parties to casual get-togethers or simply “just because.” Furthermore, this recipe serves as a fantastic blank canvas for your culinary creativity. You can easily customize the Kisses flavor, add sprinkles, or even batch them in different sizes to perfectly suit your specific needs or imaginative ideas.
- A Smart Way to Prevent Food Waste: Beyond their deliciousness, these cookies offer a practical benefit: they are absolutely perfect for utilizing leftover cream cheese! I often find myself with a small amount of cream cheese remaining after crafting a decadent cheesecake or other cream cheese-heavy recipes. This blossom cookie recipe provides an ideal and delicious solution, ensuring no valuable ingredient goes to waste.
[feast_advanced_jump_to]
🥘 Essential Ingredients for Your Blossom Cookies
Crafting these delectable Cookies ‘n Cream Blossom Cookies requires just a handful of simple, readily available ingredients. Each component plays a crucial role in achieving the perfect texture, flavor, and visual appeal:
- Unsalted Butter: Butter forms the rich, foundational base of these creamy cookies. Opting for unsalted butter gives you complete control over the cookie’s salinity, ensuring a clean, sweet flavor profile. It’s essential that your butter is cold but softened – this helps in creating a tender crumb and allows for proper creaming with the sugar and cream cheese, contributing to the buttery richness that makes these cookies so special.
- Granulated Sugar: Beyond simply adding sweetness, granulated sugar contributes significantly to the cookies’ structure and texture. It helps to tenderize the dough and creates that satisfying, slightly crisp edge and a delicate crunch that contrasts beautifully with the soft interior. It also assists in the creaming process, incorporating air into the dough for a lighter result.
- Cream Cheese: This is the secret ingredient that truly elevates these treats, making them extraordinarily decadent and delicious. Cream cheese introduces a subtle tang, a luscious creaminess, and an incredible tenderness to the cookie dough, differentiating them from traditional blossom cookies. Remember to take the cream cheese out of the fridge well in advance to allow it to soften to room temperature, which is crucial for achieving a smooth, well-combined dough. You can easily opt for a low-fat cream cheese if you prefer, without significantly compromising on taste or texture.
- Cake Flour: The choice of flour is key to the melt-in-your-mouth texture of these cookies. Cake flour has a significantly lower protein content compared to all-purpose flour. This lower protein means less gluten development during mixing, which in turn results in a wonderfully light, delicate, and tender texture in the final baked cookie. It’s what gives these blossom cookies their unique, soft crumb.
- Hershey’s Cookies ‘n’ Creme Kisses: The crowning glory of these blossom cookies! This delectable variety of Hershey’s Kisses offers a delightful blend of creamy white chocolate studded with crunchy bits of chocolate sandwich cookies. They not only provide a fun, contrasting texture but also infuse each cookie with their distinctively creamy and satisfying flavor, making every bite an indulgent experience.
For the precise quantities of each ingredient, please refer to the comprehensive recipe card provided below.
🔪 Step-by-Step Baking Instructions
Creating these delightful Cookies ‘n Cream Blossom Cookies is a straightforward process. Follow these easy steps to achieve perfect results every time:
Step One: Prepare Your Base Dough. In a large mixing bowl, combine your softened butter, cream cheese, and granulated sugar. Using your stand mixer (fitted with a paddle attachment) or a hand mixer, start beating at medium speed. Allow these ingredients to cream together for about 2-3 minutes until the mixture becomes light, fluffy, and visibly well combined.
Step Two: Gradually Increase Speed for Smoothness. After the initial creaming, gradually increase the mixer speed to medium-high. Continue mixing for another 1-2 minutes, ensuring all ingredients are fully incorporated and the mixture has a smooth, uniform consistency. Scrape down the sides of the bowl as needed to ensure everything is thoroughly mixed.
Step Three: Incorporate the Cake Flour Gently. With the mixer running on low speed, begin adding the cake flour, one spoon at a time. It’s crucial to add the flour gradually and to stop mixing as soon as all the flour is just incorporated into the dough. Overmixing the flour can lead to tough cookies, so mix only until no dry streaks remain.
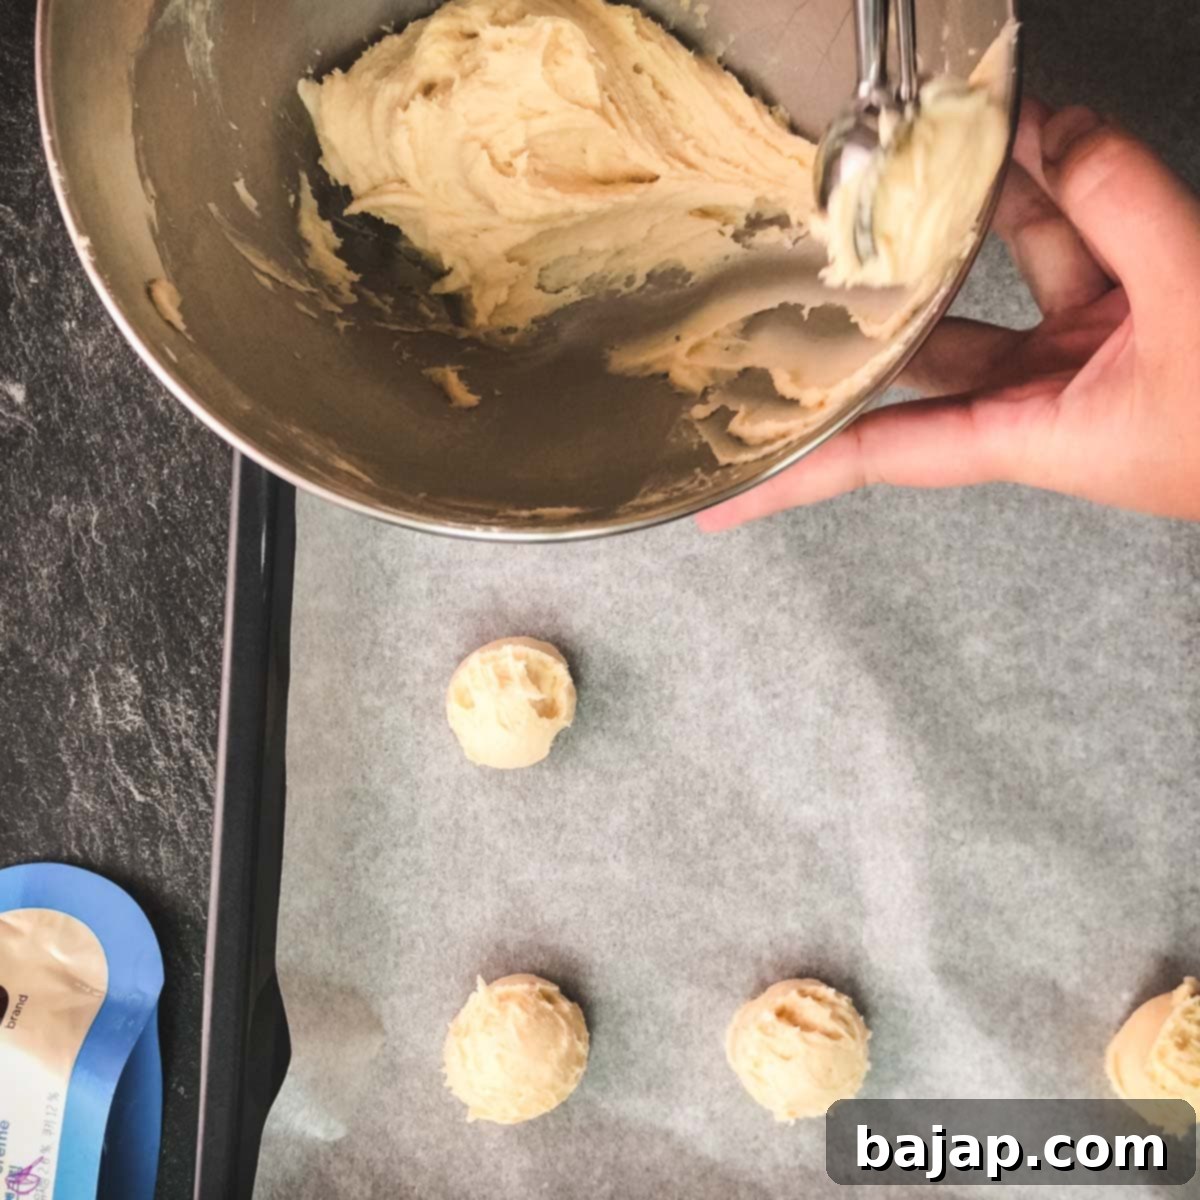
Step Four: Portion and Shape Your Cookies. Using a small ice cream scoop or a cookie disher (typically 1 to 1.5 tablespoons), portion out uniform balls of cookie dough. Place them onto a prepared baking sheet lined with parchment paper or a silicone mat, ensuring they are about 1-inch apart to allow for proper spreading. Gently press down on the center of each dough ball with your thumb or the back of a spoon. This creates a slight indent, perfect for nestling the Hershey’s Kiss after baking, and also helps the cookies bake more evenly.
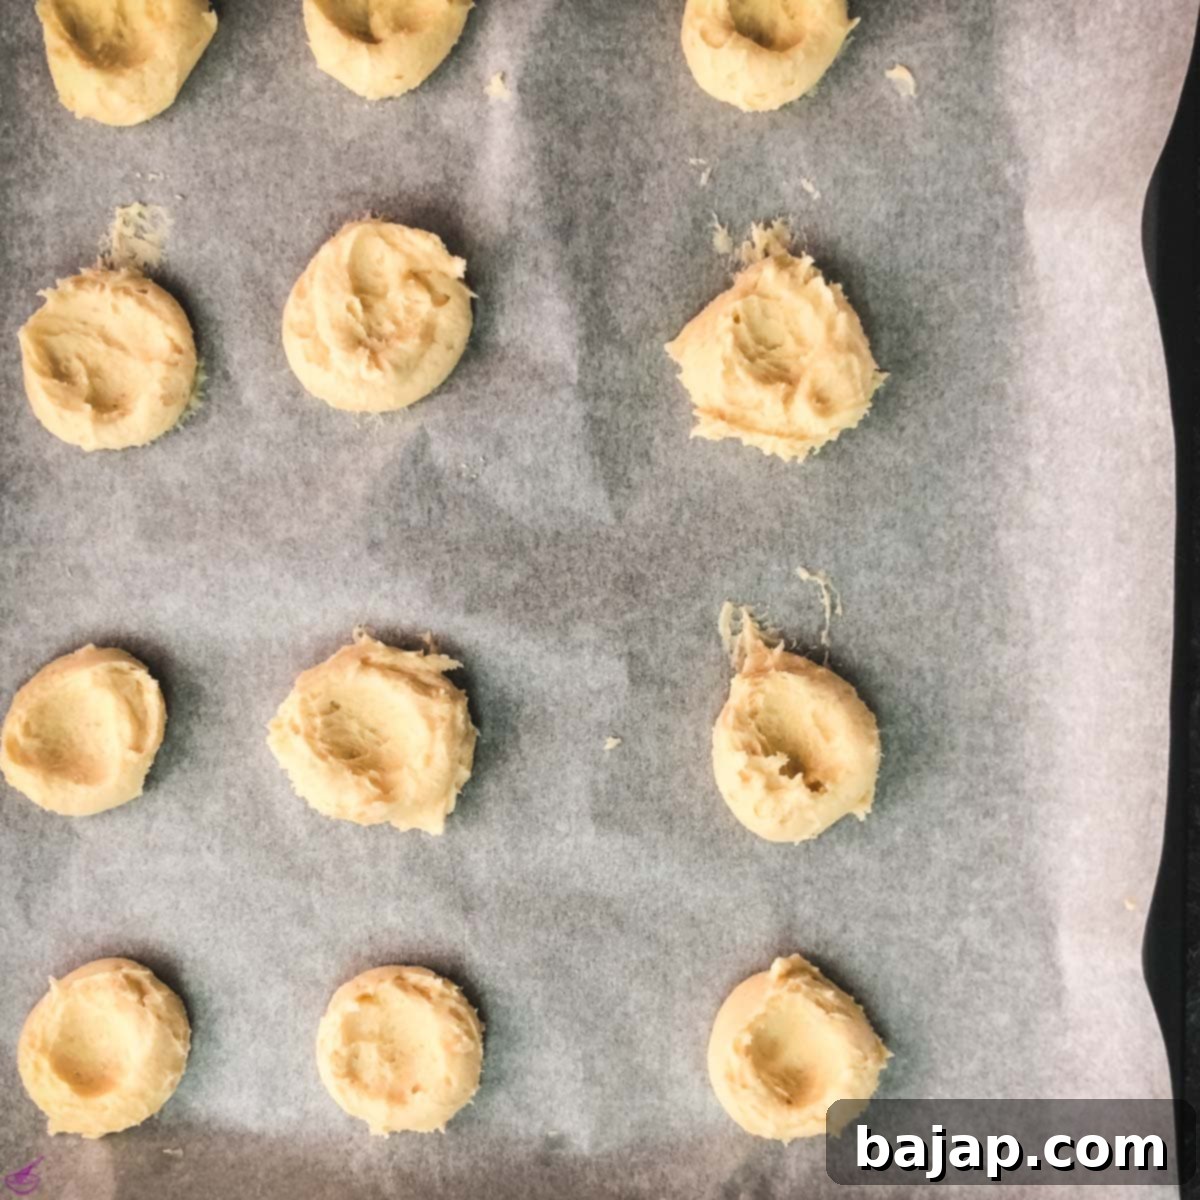
Step Five: Bake to Golden Perfection. Place your prepared baking sheet into a preheated oven (refer to the recipe card for specific temperature). Bake the cookies for approximately 15 minutes, or until their edges begin to turn a beautiful golden brown and the centers are just set. They should still be slightly soft in the middle. Once baked, remove them from the oven promptly.
Step Six: Add the Signature Kiss. Immediately after removing the hot cookies from the oven, gently press one Cookies ‘n Cream Hershey’s Kiss into the indent of each cookie. The residual heat from the cookie will slightly melt the base of the Kiss, allowing it to adhere perfectly and creating that iconic “blossom” effect. Ensure the Kisses are unwrapped beforehand for quick placement.
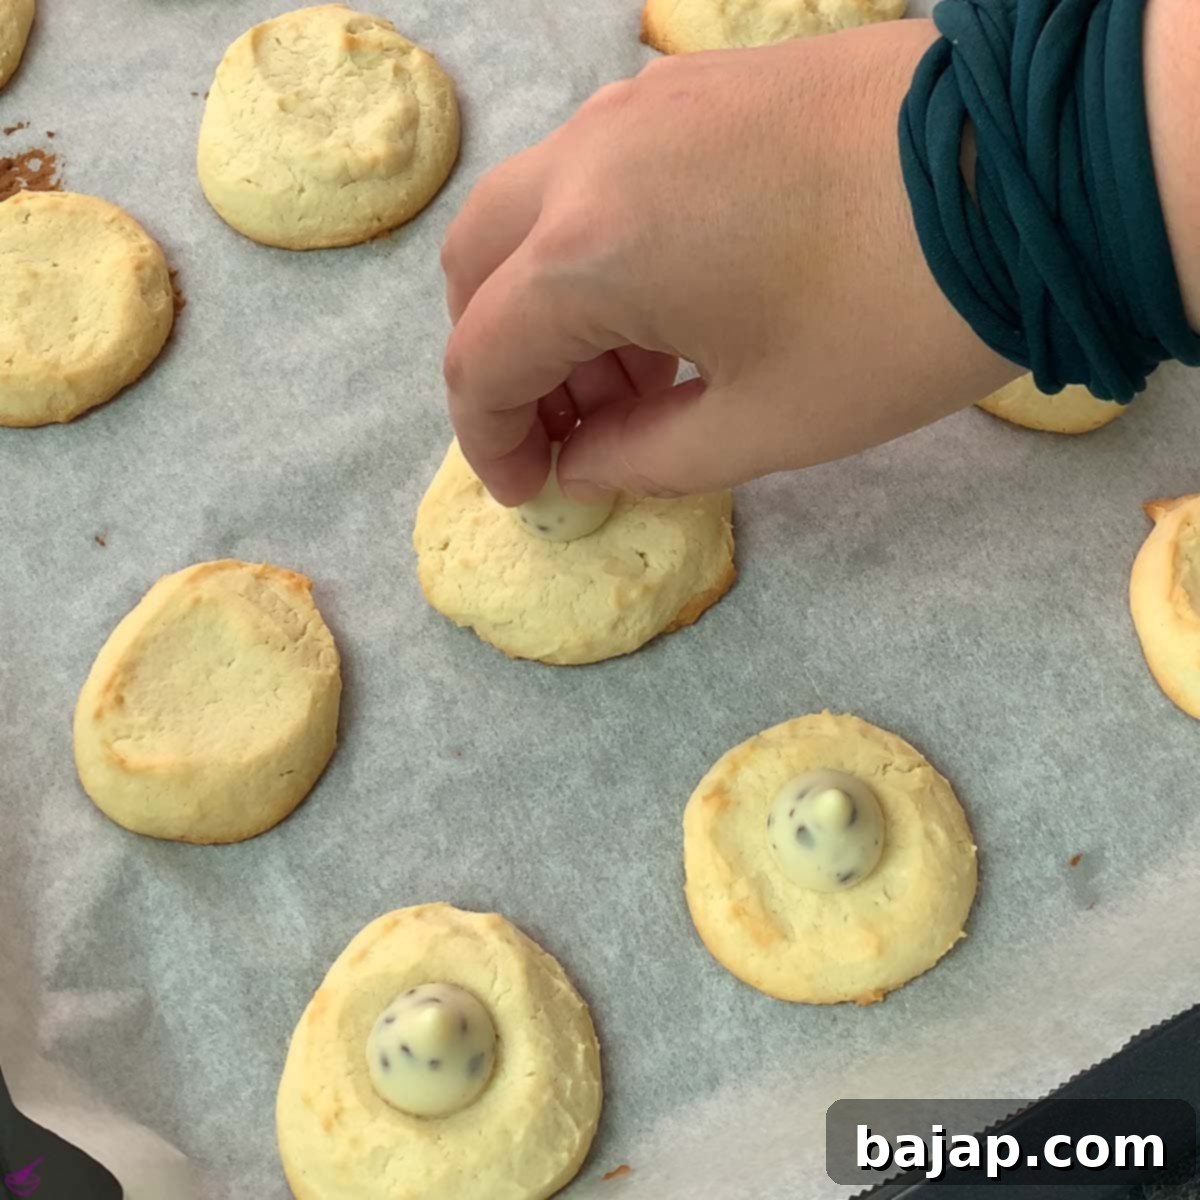
Step Seven: Cool and Savor. Once the Kisses are in place, carefully transfer the cookies to a wire cooling rack. Allow them to cool completely. This cooling period is vital, as it allows the cookies to set properly and the Kisses to firm up. Once cooled, they’re ready to be enjoyed! Prepare for a delightful symphony of textures and flavors.
🍪 Creative Variations to Explore
While the classic Cookies ‘n Cream Blossom is undeniably perfect, there’s always room to get creative and tailor these treats to your personal preferences or the theme of an occasion. Here are some exciting variations to try:
- Cheesecake Craze: If you’re a fan of the creamy, tangy goodness in these cookies, you absolutely must try my amazingly easy recipe for Cheesecake Thumbprint Cookies! They offer a similar delightful texture with a burst of fruity cheesecake flavor.
- Crazy Kisses (Flavor Swaps): The beauty of the blossom cookie lies in its crowning jewel. You can truly go wild with your choice of Hershey’s Kisses! Instead of the Cookies ‘n’ Creme variety, swap them out for traditional Milk Chocolate Kisses, festive Peppermint Kisses (during the holidays), rich Caramel Kisses, or even special edition Birthday Cake Kisses. The possibilities are endless, allowing you to create a unique flavor profile for every batch.
- Funky Fruit Infusion: For those who prefer a fruity twist, consider trading the chocolate Kisses for your favorite fruit jam or fruit curd. A dollop of vibrant raspberry, tangy lemon curd, or sweet apricot jam pressed into the warm cookies will add a bright, refreshing flavor dimension and a beautiful pop of color.
- Candied Cookie Delights: Transform these blossom cookies into a delicious chocolate or caramel version by topping them with a drizzle of chocolate sauce or a small spoonful of gooey caramel while they’re still warm. You could also press in mini peanut butter cups, a small piece of your favorite candy bar, or even a mini marshmallow for a s’mores-inspired treat.
- Nutty Nibblers: If you love a bit of crunch, consider mixing in finely chopped nuts like pecans or walnuts into the cookie dough. Alternatively, you could roll the dough balls in finely crushed nuts before baking for an added texture and a rich, nutty flavor.
🍽 Essential Equipment for Success
Having the right tools can make all the difference in your baking experience. For these Cookies ‘n Cream Blossom Cookies, you’ll need a few standard kitchen items:
- Lined Baking Sheet: A sturdy baking sheet is essential, and lining it with parchment paper or a silicone baking mat is a non-negotiable step. This ensures your cookies won’t stick, promotes even baking by preventing the bottoms from burning, and makes for incredibly easy cleanup.
- Mixer: For achieving that perfectly light and creamy dough, a mixer is highly recommended. A stand mixer (ideally equipped with a flat beater attachment) offers hands-free convenience, while a hand mixer provides excellent control. While you *could* mix the dough by hand for a good arm workout, a mixer will yield a smoother, more aerated dough.
- Ice Cream Scoop: To guarantee perfectly uniform cookies that bake evenly and look professional, an ice cream scoop or cookie disher is your best friend. Using a consistent measure for each dough ball ensures that every cookie is cooked to perfection at the same time.
- Wire Cooling Rack: After baking, transferring your cookies to a wire cooling rack is crucial. This allows air to circulate around the entire cookie, preventing the bottoms from becoming soggy and ensuring they cool evenly, leading to that ideal cookie texture.
💭 Expert Tips for Perfect Blossom Cookies
Achieving the best possible Cookies ‘n Cream Blossom Cookies is easy with a few insider tips:
- Gentle Flour Incorporation: As you add the flour to the butter, cream cheese, and sugar mixture, this deliciously rich dough can become a little tough if overmixed. To prevent your mixer from overworking and to ensure a tender cookie, stop mixing as soon as the flour is just combined. If the dough seems stiff, you can turn it out onto a lightly floured surface and gently knead it a few times by hand, just until all the flour streaks disappear. Remember, only knead to incorporate the flour and no further, to avoid developing too much gluten which can lead to a tough, less tender blossom cookie dough.
- Timing is Key for Kisses: Be absolutely sure to press the Hershey’s Kiss into the cookie while it is still nice and hot, immediately after removing it from the oven. The residual heat from the warm cookie will slightly soften the base of the chocolate, allowing it to meld seamlessly into the dough. As the cookie cools, the dough will set perfectly around the chocolate, securing the Kiss in place and creating that classic “blossom” shape.
- Don’t Overcrowd the Pan: Give your cookies enough space on the baking sheet. Overcrowding can lead to uneven baking and can prevent the cookies from spreading properly. Leave at least an inch between each dough ball.
- Measure Flour Accurately: For the most consistent results, weigh your cake flour with a kitchen scale. If you don’t have one, spoon the flour into your measuring cup and then level it off with a straight edge. Scooping flour directly from the bag can compact it, leading to too much flour and a dry, crumbly cookie.
- Room Temperature Ingredients: Ensure your butter and cream cheese are at proper room temperature (softened but not melted). This allows them to cream together effectively with the sugar, creating a smooth, aerated dough that bakes beautifully.
🙋🏻 Frequently Asked Questions (FAQ)
To ensure your delicious Cookies ‘n Cream Blossom Cookies stay fresh and retain their wonderful texture, proper storage is key. First, allow the cookies to cool completely on a wire rack after baking. Once fully cooled, place them in an airtight container. You can store them at room temperature on your counter for up to five days. For longer storage, these cookies freeze beautifully! Place cooled cookies in a single layer on a baking sheet to freeze solid, then transfer them to a freezer-safe bag or container for up to 2-3 months. Thaw at room temperature before serving.
Absolutely! The original recipe is designed to yield about twelve delicious cookies, which is perfect for a small gathering or a personal treat. However, if you’re planning to feed a larger crowd, hosting a party, or simply want to have more on hand, you can easily double (or even triple) all the ingredients. Just remember to prepare an extra baking sheet (or two!) for the larger batch to ensure proper spacing and even baking.
This tasty take on cookies ‘n cream blossoms is wonderfully nut-free and egg-free, making them a great option for those with nut or egg allergies. However, please be aware that the recipe does contain dairy (from butter, cream cheese, and Hershey’s Kisses) and wheat flour (cake flour). If you have other dietary restrictions, always check the labels of your specific ingredients, especially the Kisses, for any hidden allergens or cross-contamination warnings.
While cake flour is highly recommended for its low protein content, which contributes to the tender, delicate texture of these cookies, you can substitute it with all-purpose flour in a pinch. If using all-purpose flour, you might notice a slightly chewier cookie. To mimic cake flour’s effect, you can remove 2 tablespoons of all-purpose flour per cup and replace them with 2 tablespoons of cornstarch, then sift it together before using. This helps reduce the overall gluten content and will result in a more tender cookie.
Yes, absolutely! This is a fantastic make-ahead recipe, perfect for meal prepping your desserts. You can prepare the cookie dough up to 2-3 days in advance. Simply form the dough balls, press the thumbprint, and then arrange them on a parchment-lined baking sheet. Cover the baking sheet tightly with plastic wrap and refrigerate. When ready to bake, just pull them out of the fridge and bake as directed. You might need to add a minute or two to the baking time if baking directly from cold.
Other Delicious Cookie Recipes for You to Try
If you’ve fallen in love with these Cookies ‘n Cream Blossoms, you’ll surely enjoy exploring more delightful cookie creations from our kitchen:
- 5 Ingredients Raspberry Cheesecake Thumbprint Cookies
- Raspberry Almond Thumbprint Cookies
- Bright & Zesty Lemon Sugar Cookies
- Creative Leftover Egg Yolk Cookies
- Colorful M & M Cookies
- Rich Coffee Chocolate Chip Cookies
- Unique Matcha White Chocolate Chip Cookies
If you try this delightful recipe, please let me know how much you liked it by giving it a ★★★★★ star rating and leaving a comment below. Your feedback is incredibly valuable! You can also sign up for our Newsletter to receive weekly delicious homemade recipes directly to your inbox. Don’t forget to follow me on Pinterest or Instagram and share your creations with me. Just tag me @combinegoodflavors and use the hashtag #combinegoodflavors, so I don’t miss your fantastic bakes!
📖 Recipe

Delicious Cookies ‘n Cream Blossom Cookies
Nora
Save RecipeSaved!
Pin Recipe
Equipment
-
Baking pan
-
Hand mixer or stand mixer
-
Bowl
-
Parchment Paper or silicone mat
-
Ice cream scoop
Ingredients
- ¼ cup Butter unsalted, softened, at room temperature
- ½ cup Granulated sugar
- ½ cup Cream cheese
- 1 cup Cake Flour
- 12 Hershey Cookies and Cream Kisses
Instructions
-
Using a hand mixer or stand mixer, combine the ¼ cup Butter (softened), ½ cup Cream cheese (softened), and ½ cup Granulated sugar for 2-3 minutes, starting at medium speed and gradually increasing to high speed until light and fluffy.¼ cup Butter, ½ cup Granulated sugar, ½ cup Cream cheese
-
Continue mixing on low speed while adding the 1 cup Cake Flour spoon by spoon. Stop mixing as soon as the flour is just evenly incorporated into the dough, avoiding overmixing.1 cup Cake Flour
-
Using an ice cream scoop, portion the cookie dough into uniform balls onto a baking pan covered with parchment paper.
-
Gently press the center of each dough ball down lightly with your thumb. This makes the cookie a little flatter and creates an indent, which helps to perfectly place the Hershey’s Kisses after baking.
-
Bake for about 15 minutes in a preheated oven at 180 C / 356 F, or until the edges begin to turn golden brown.
-
Immediately after removing the hot cookies from the oven, press one of the 12 Hershey’s Cookies ‘n’ Cream Kisses into the indent of each cookie while they are still warm.12 Hershey Cookies and Cream Kisses
Nutrition values are estimates only, using online calculators. Please verify using your own data.

🤎 You might also like
- Coconut Chocolate Chip Cookies
- Soft Oatmeal Chocolate Chip Cookies
- Easter Cookie Bars
- Hershey Kisses Chocolate Chip Cookies
⛑️ Important Food Safety Guidelines
Ensuring food safety is paramount when preparing any recipe. Please keep the following guidelines in mind for a safe and enjoyable baking experience:
- Proper Cooking Temperature: Always ensure your baked goods are cooked to a minimum internal temperature of 165 °F (74 °C) to eliminate any potential harmful bacteria, especially if eggs or raw milk products are involved in other recipes.
- Prevent Cross-Contamination: Never use the same utensils or cutting boards on cooked food that have previously touched raw meat or unbaked dough (if it contains raw eggs or flour, which can carry bacteria). Always wash thoroughly between uses.
- Hand Hygiene: Wash your hands thoroughly with soap and warm water for at least 20 seconds after handling raw ingredients, especially if you’re dealing with raw meat, and before touching cooked food or other kitchen surfaces.
- Temperature Danger Zone: Do not leave perishable foods, including dough with dairy or eggs, sitting out at room temperature for extended periods (generally no more than two hours). This can allow harmful bacteria to multiply rapidly.
- Never Leave Cooking Unattended: Always supervise food that is cooking on the stovetop or in the oven. Unattended cooking is a leading cause of kitchen fires.
- Choose Oils Wisely: If your recipe involves frying or high-heat cooking, use oils with a high smoke point to avoid the formation of harmful compounds and to prevent burning.
- Ensure Good Ventilation: Always ensure good ventilation in your kitchen when using a gas stove or oven to prevent the buildup of carbon monoxide and to dissipate cooking fumes.
For further comprehensive information on safe food handling practices, please refer to the official guidelines from the U.S. Food & Drug Administration (FDA).
