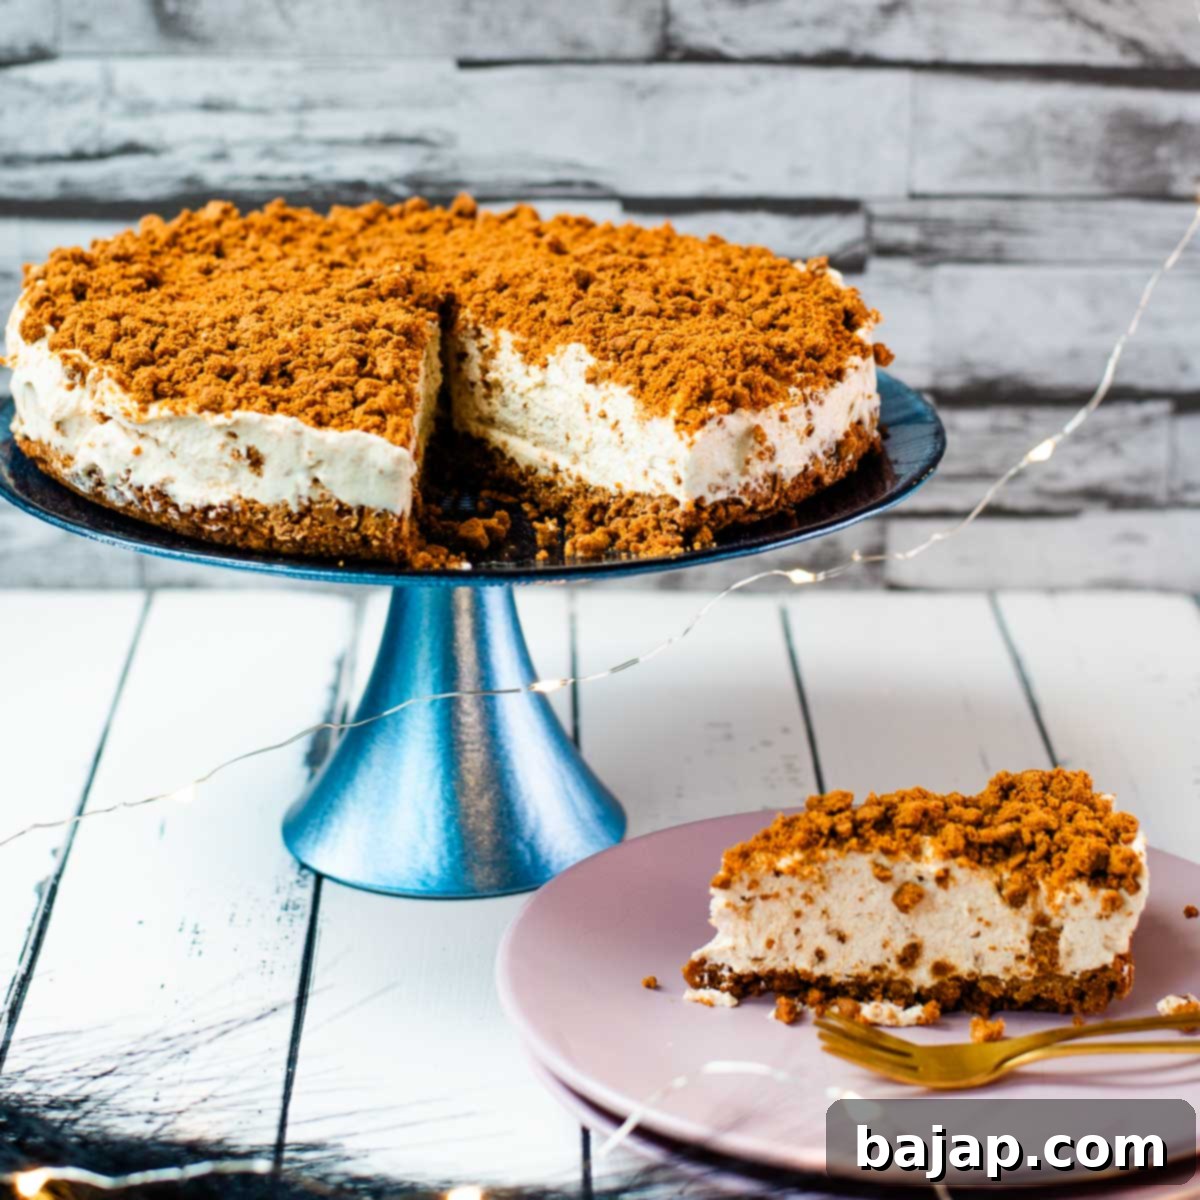
Decadent No-Bake Biscoff Cheesecake: Your Easy, Creamy, 5-Ingredient Dream Dessert
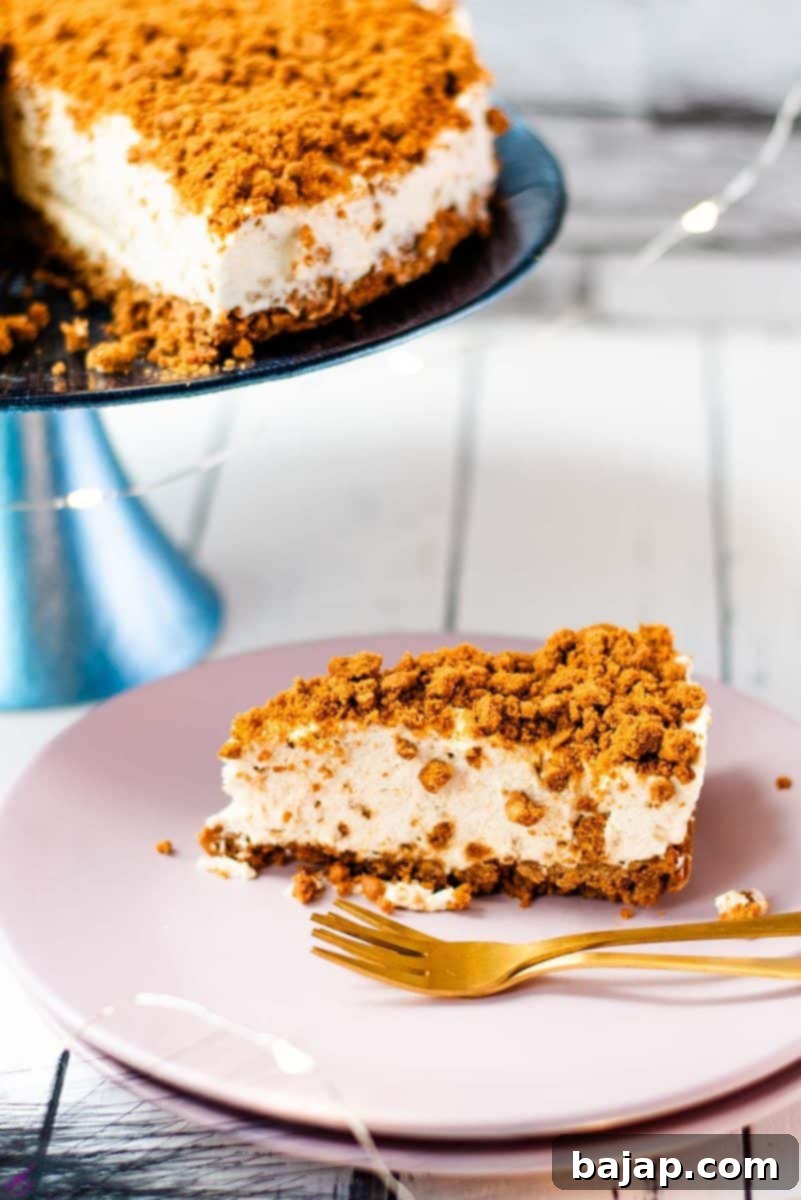
Prepare to bid farewell to all your stresses and worries as you indulge in this ultra-creamy, effortlessly decadent, and utterly delightful no-bake Biscoff cheesecake. The rich, spiced caramel flavors of Lotus Biscoff cookies are truly a taste of heaven, and when you crown this masterpiece with an extra sprinkle of crumbled cookies, it reaches a state of pure, unadulterated dessert perfection. This recipe isn’t just a treat for your taste buds; it’s a testament to how incredible a dessert can be without ever touching an oven!
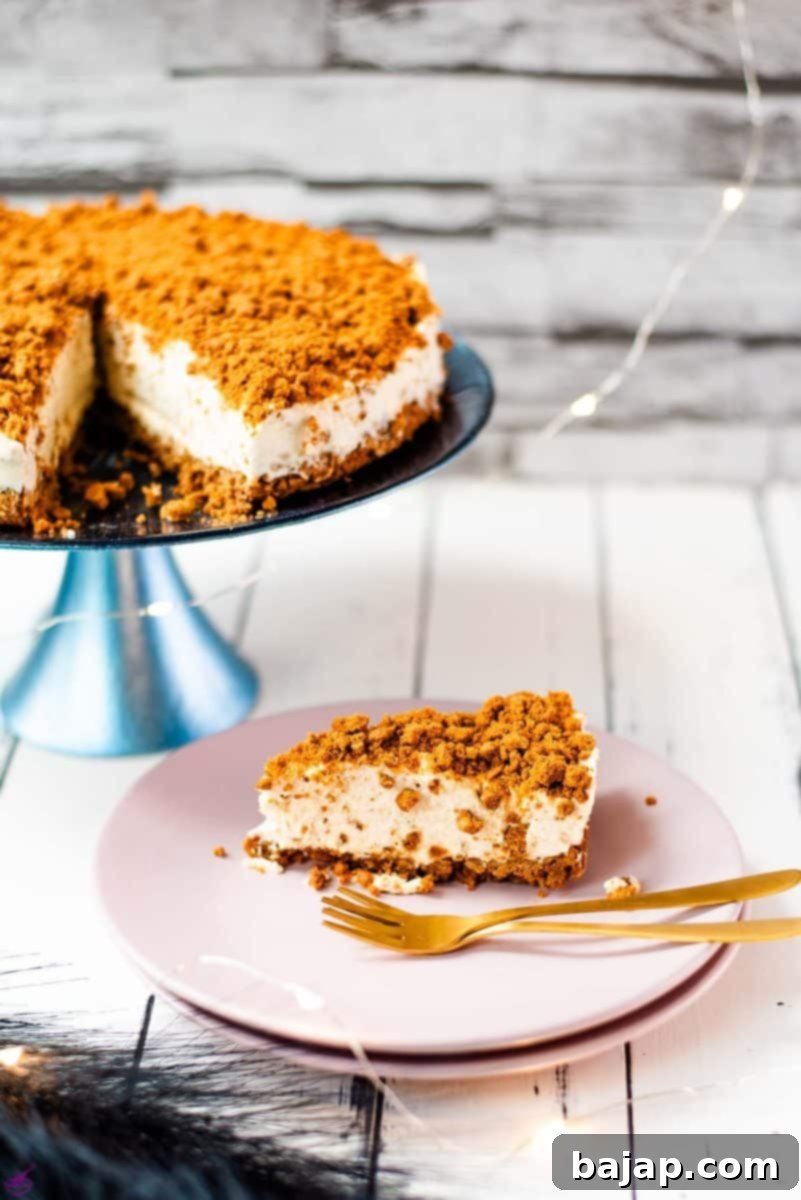
Despite its luxurious taste and impressive appearance, this recipe is remarkably quick and simple to assemble. You’ll impress everyone with a dessert that tastes like it required hours of elaborate kitchen work, when in reality, it comes together in mere minutes of active preparation. If you’re ready to be whisked away by these unbelievably comforting and unique flavors, this Biscoff cheesecake is guaranteed to exceed your expectations. It’s the ideal dessert for any occasion, from casual weeknight treats to special gatherings, offering a delightful twist on a classic favorite.
Why You’ll Love This No-Bake Biscoff Cheesecake
There are countless reasons to fall in love with this particular cheesecake, but here are just a few that make it an absolute must-try:
- Effortless Preparation: No baking required means no worrying about cracks, water baths, or oven temperatures. Simply assemble and chill!
- Irresistible Flavor: The unique, spiced caramel notes of Biscoff cookies infuse every layer, creating a deeply satisfying and nostalgic taste.
- Creamy, Dreamy Texture: The filling is unbelievably smooth and velvety, a perfect contrast to the crunchy Biscoff crust.
- Minimal Ingredients: With just 5 core ingredients, this recipe is straightforward and doesn’t require a trip to a specialty store.
- Perfect for Any Occasion: From casual family desserts to impressive party centerpieces, it’s always a crowd-pleaser.
- Make Ahead Friendly: It needs chilling time, making it an excellent option for preparing in advance for events.
Whether you’re a seasoned baker looking for a quick win or a novice eager to create something spectacular, this Biscoff cheesecake recipe is designed for success.
[feast_advanced_jump_to]
🥘 Simple Ingredients for Heavenly Flavor
One of the best aspects of this no-bake Biscoff cheesecake is its simplicity, requiring just a handful of readily available ingredients to create something truly extraordinary. Quality ingredients make a difference, so choose them wisely!
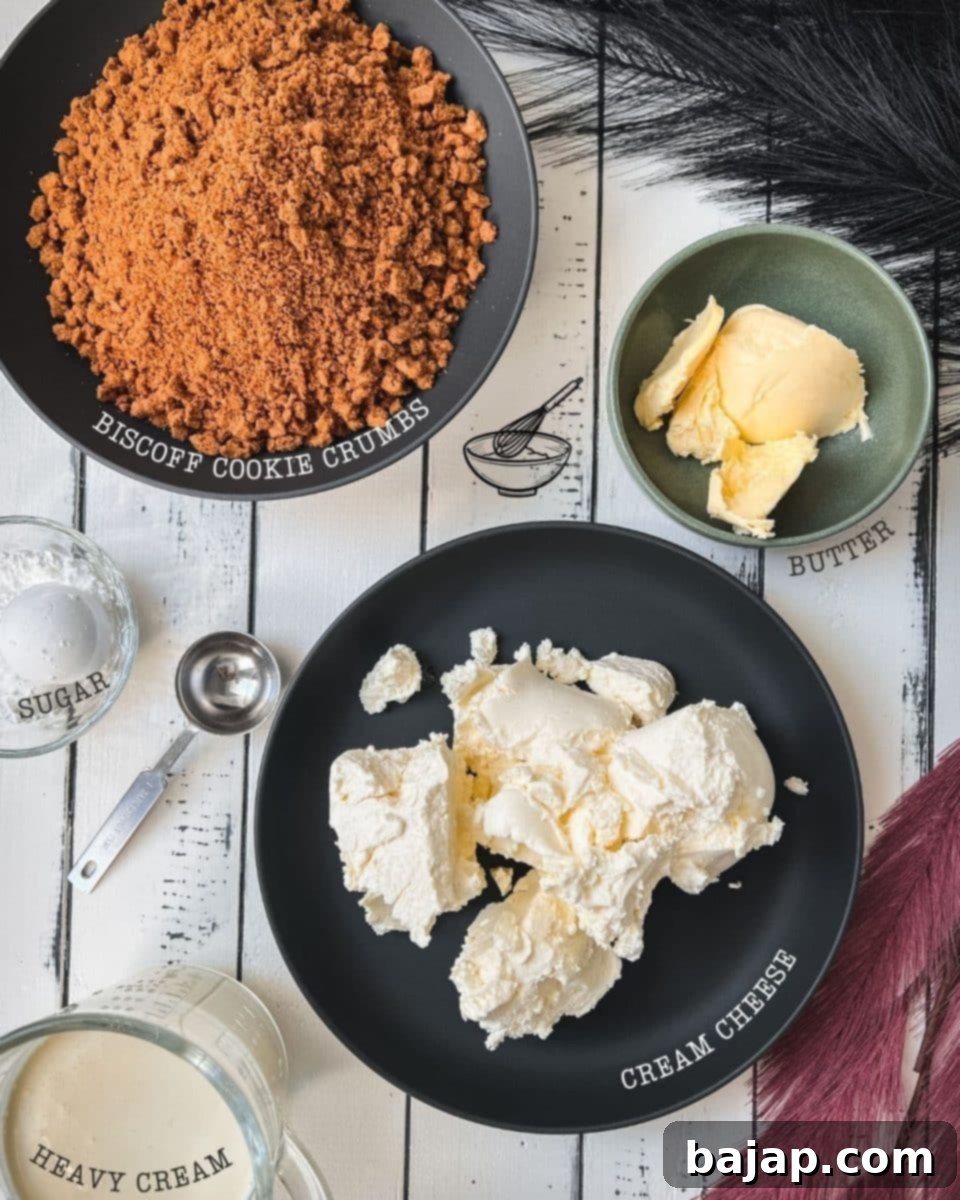
- Lotus Biscoff Cookies & Cookie Crumble: These iconic caramelized biscuits are the star of the show. You’ll need them for both the crunchy crust and to be folded into the creamy filling, plus extra for a beautiful garnish. Buying pre-crushed cookie crumbs can save you a step if you’re feeling extra lazy – no judgment here! 😉
- Unsalted Butter: Essential for binding the cookie crumbs together to form a firm, flavorful crust. Unsalted butter allows you to control the overall saltiness of the dessert.
- Full-Fat Cream Cheese: This is the backbone of any great cheesecake filling. Make sure it’s full-fat for the creamiest, richest texture, and softened to room temperature for smooth blending, preventing lumps.
- Powdered Sugar (Confectioners’ Sugar): Not only does it add sweetness, but its fine texture ensures a silky-smooth, lump-free cheesecake filling.
- Heavy Whipping Cream: When whipped to soft peaks, it provides the essential lightness and airy texture that distinguishes a no-bake cheesecake. Use cold cream for best whipping results.
For precise measurements and detailed quantities, please refer to the comprehensive recipe card located further down the page.
🔪 Step-by-Step Instructions: Crafting Your Biscoff Masterpiece
Creating this stunning no-bake Biscoff cheesecake is a straightforward process, even for beginner bakers. Follow these simple steps for a dessert that looks and tastes like it came from a professional patisserie.
Step 1: Prepare the Biscoff Cookie Crumbs
The foundation of our cheesecake starts with the glorious Biscoff cookies. You’ll need to crush them into fine crumbs. A food processor is your best friend here, turning a full pack of cookies into perfect crumbs in mere seconds. If you don’t have one, no worries! Place the cookies in a sturdy plastic bag, seal it, and use a rolling pin to crush them. Aim for a fine, sand-like consistency, with a few slightly larger pieces for added texture. Alternatively, many stores now sell pre-crushed Biscoff cookie crumbs, which can save you valuable time and effort.
Step 2: Create the Signature Biscoff Crust
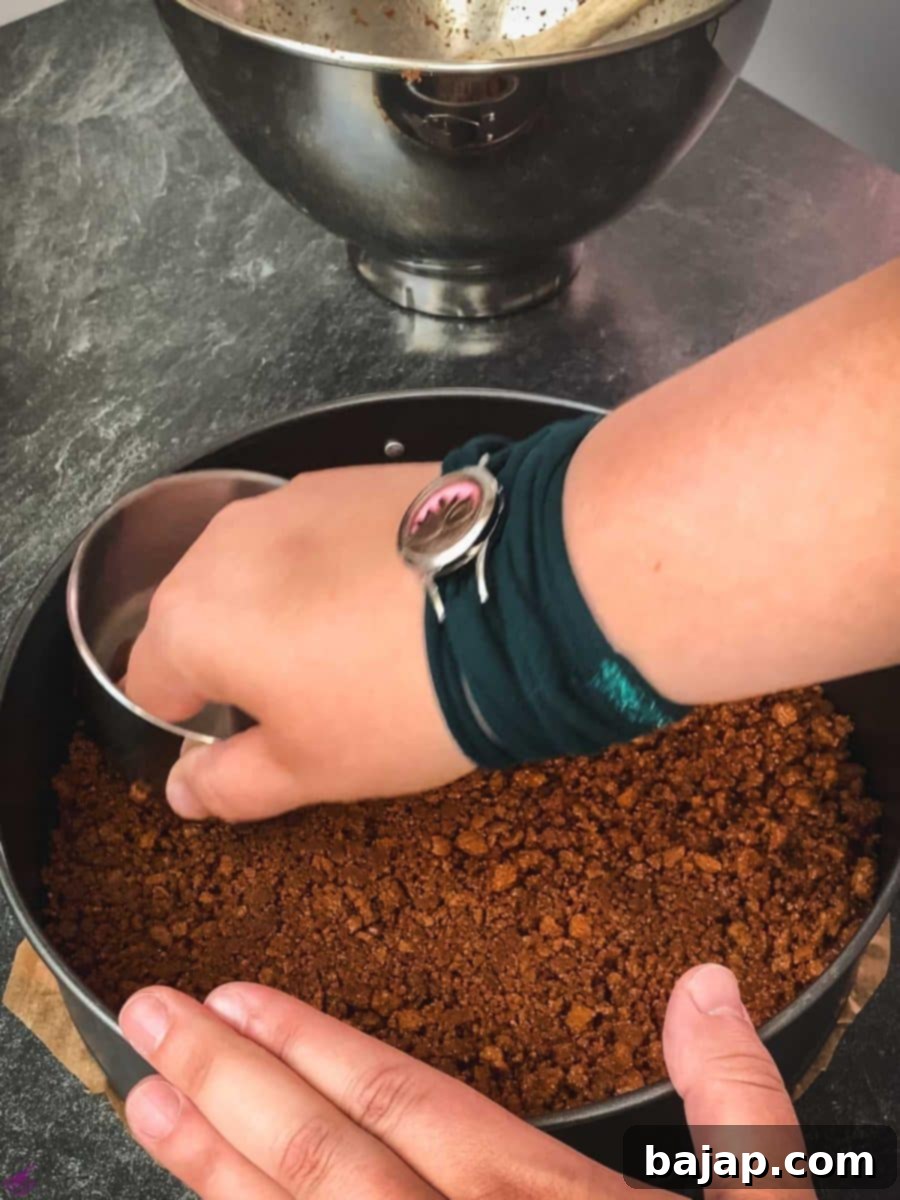
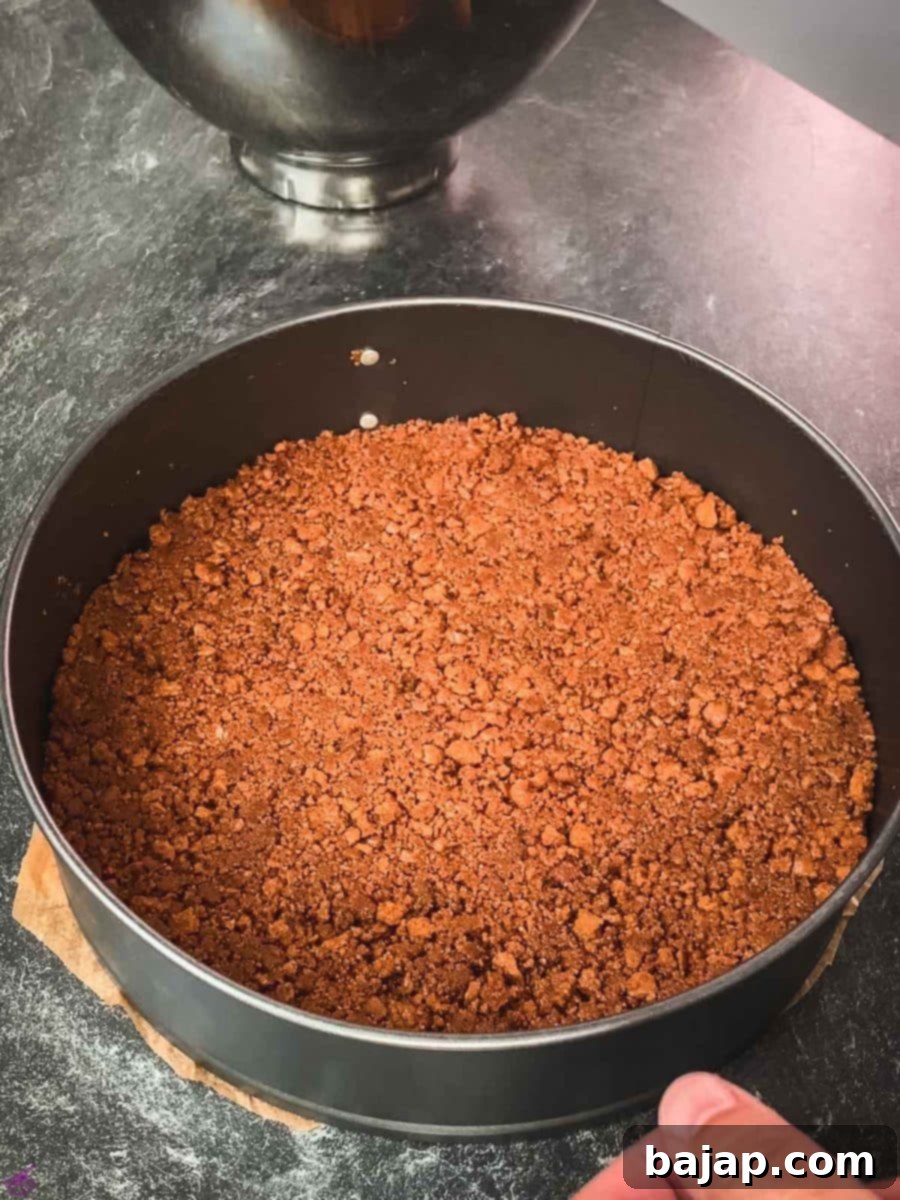
Take approximately two-thirds of your freshly crushed Biscoff cookie crumbs and transfer them to a mixing bowl. Pour in the molten (melted) unsalted butter and mix everything thoroughly until the crumbs are evenly coated and resemble wet sand. This butter acts as the binding agent, ensuring your crust holds together beautifully. To prepare your cheesecake pan, line the bottom of a springform cake pan (we recommend a 9-inch pan for this recipe) with parchment paper. This simple step makes for incredibly easy removal later on. Once your pan is ready, firmly and evenly press the Biscoff and butter mixture across the bottom of the pan. Use the back of a spoon or the bottom of a flat-bottomed glass to create a compact, uniform crust. Place this crust in the refrigerator to chill while you prepare the filling; this will help it set firmly.
Step 3: Prepare the Creamy Biscoff Filling
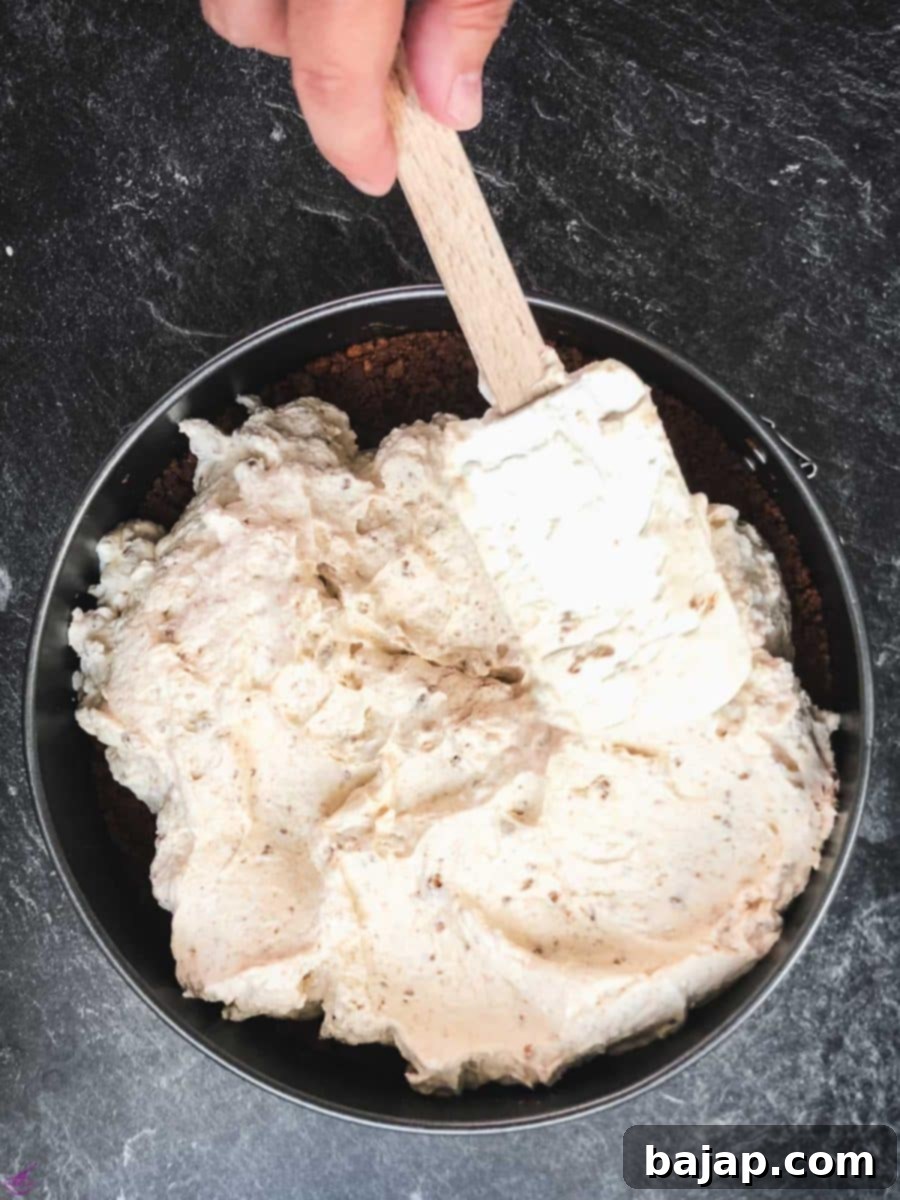
In a large, chilled mixing bowl (a cold bowl helps cream whip faster), whip your cold heavy cream at medium-high speed using an electric mixer or stand mixer with a whisk attachment. Continue until the cream forms soft, pillowy peaks. Be careful not to over-whip, or it will turn grainy. Set the whipped cream aside. In a separate, even larger bowl, add your softened full-fat cream cheese. Beat it thoroughly with your electric mixer (using the paddle attachment if you have a stand mixer) until it becomes wonderfully smooth and creamy, with no lumps visible. Next, gradually add the powdered sugar to the cream cheese, beating for another two minutes until the mixture is light, fluffy, and smooth. Now for the Biscoff magic! Gently fold in the remaining one-third of your Biscoff cookie crumbs into the cream cheese mixture using a rubber spatula. Finally, carefully fold the whipped cream into the Biscoff-cream cheese mixture. Use a gentle, sweeping motion to incorporate it fully without deflating the air, ensuring a light and airy filling.
Step 4: Assemble the Cheesecake Layers
Retrieve your chilled Biscoff crust from the refrigerator. Carefully spoon the prepared cream cheese and Biscoff cookie filling over the crust. Use a rubber spatula or an offset spatula to spread the filling evenly across the top, smoothing it out to create a neat and appealing surface.
Step 5: Chill to Perfection & Garnish
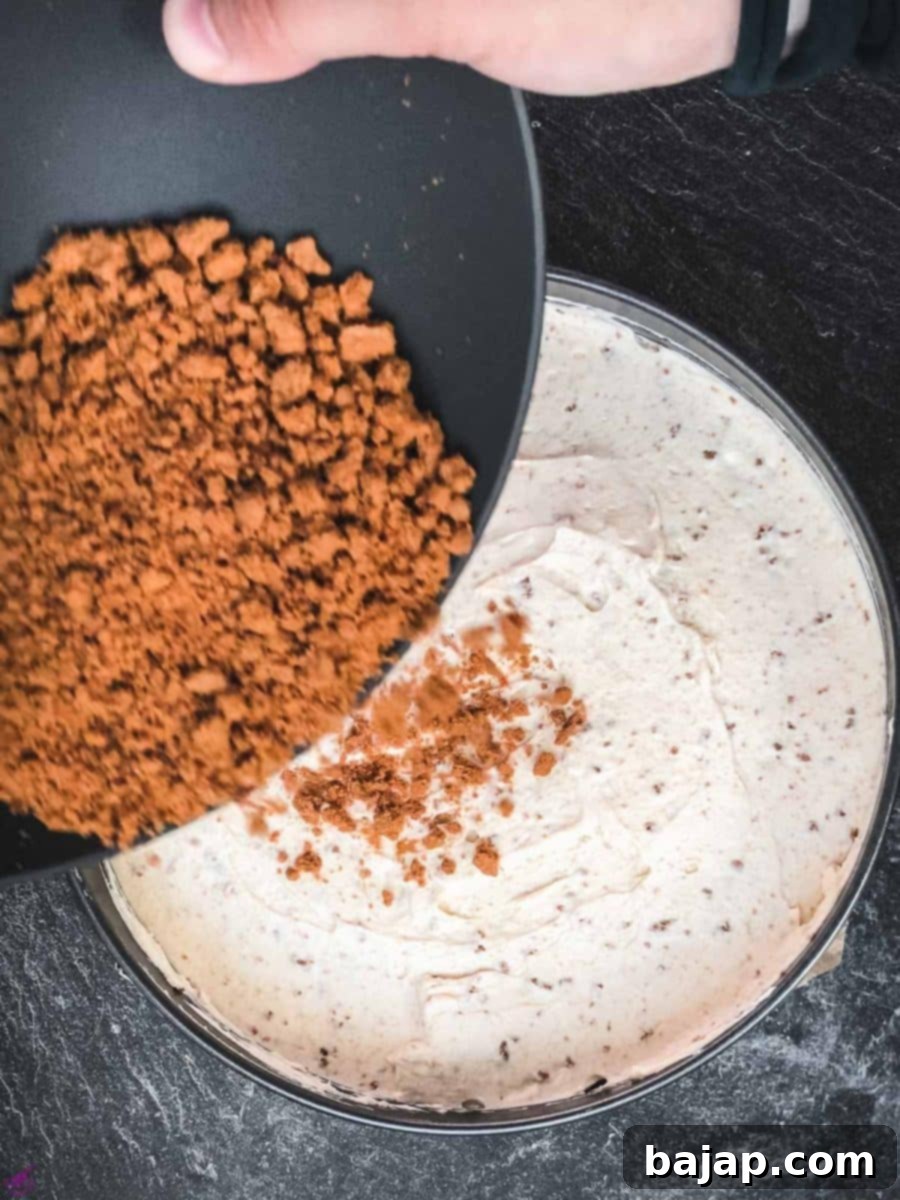
For that irresistible final touch, sprinkle a generous amount of additional Biscoff cookie crumbs over the entire surface of the cheesecake. This not only adds more Biscoff flavor and crunch but also makes for a beautiful presentation. Now comes the most challenging part: patience! Place your heavenly creation into the freezer for a minimum of 3 hours. This crucial chilling period ensures that the filling firms up perfectly, allowing for clean, beautiful slices. For an even firmer result, overnight freezing is recommended.
Step 6: Serve and Enjoy!
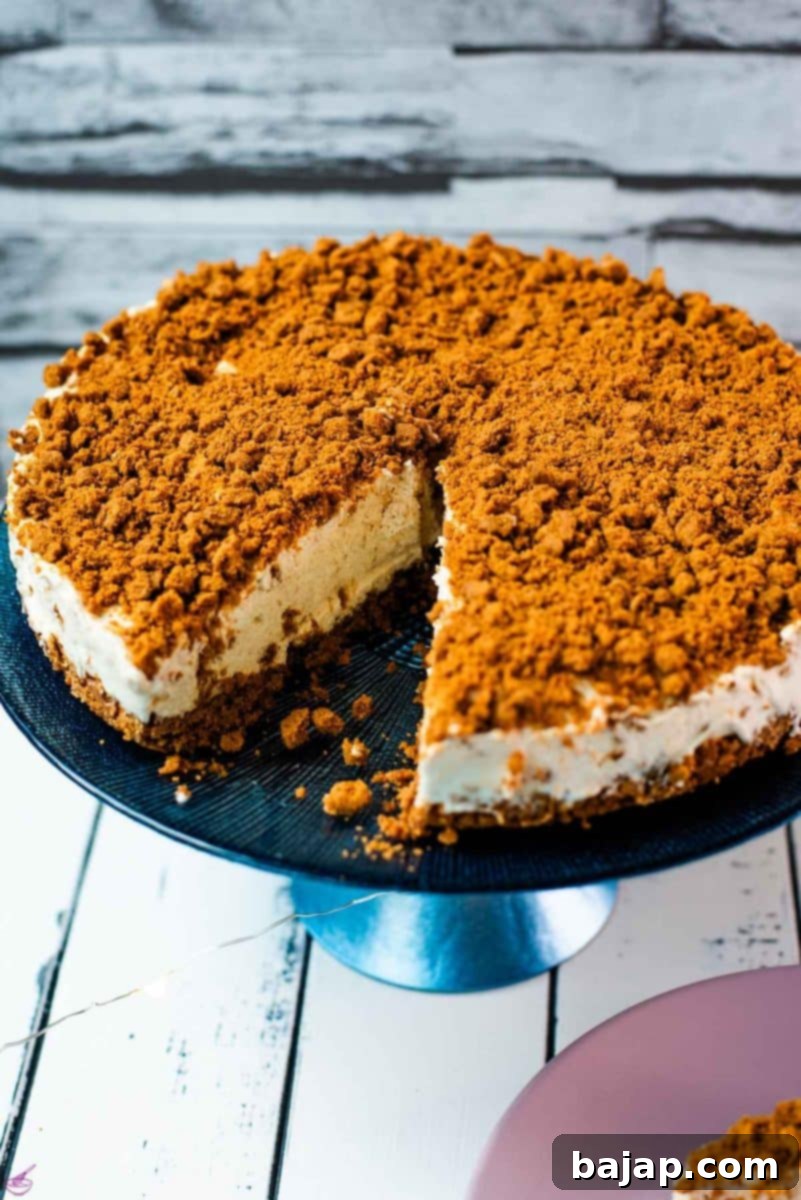
Once sufficiently chilled and firm, remove the cheesecake from the freezer. If frozen solid, allow it to thaw slightly in the refrigerator for about 20-30 minutes before serving. You want it cold and firm, but not rock-hard. Carefully unlatch the springform pan and gently lift the sides away. Slice with a hot knife (see our top tip below!) and serve immediately to delighted faces. Prepare for compliments!
🍦 Delightful Variations & Serving Suggestions
While this no-bake Biscoff cheesecake is absolutely divine on its own, there are many ways to customize it or serve it to make it even more special:
- Ice Cream Pairing: For an ultimate indulgence, pair a slice of your chilled Lotus Biscoff Cheesecake with a scoop of creamy vanilla ice cream. The contrast of cold, smooth ice cream with the spiced cheesecake is truly irresistible.
- Biscoff Drizzle: Melt some Biscoff cookie butter spread in the microwave for a few seconds until it’s pourable. Drizzle it generously over individual slices or the entire cake before serving for an extra layer of Biscoff goodness.
- Chocolate Chips: Fold white chocolate chips, milk chocolate chips, or even dark chocolate chips into the cream cheese filling for an added textural and flavor dimension.
- Fresh Berries: A vibrant counterpoint to the rich Biscoff flavor, fresh raspberries, blueberries, or sliced strawberries make a beautiful and delicious garnish.
- Caramel Sauce: A swirl of salted caramel sauce on top or alongside each slice would complement the caramelized notes of the Biscoff cookies wonderfully.
- Whipped Cream Dollops: For an extra touch of elegance, pipe small dollops of fresh whipped cream around the edge of the cheesecake before serving.
- Coffee Companion: This cheesecake pairs exceptionally well with a hot cup of coffee, espresso, or a spiced latte, creating a perfect afternoon treat or after-dinner dessert.
🍽 Essential Equipment for Your Biscoff Cheesecake
You don’t need a professional kitchen to make this cheesecake. Here’s a list of the basic equipment that will make your preparation smooth and enjoyable:
- 9-Inch Springform Pan: This is crucial for easy removal of the cheesecake without damaging its delicate structure. The removable sides make serving a breeze.
- Electric Hand Mixer or Kitchen Machine: With a whisk and paddle attachment, this will effortlessly cream your cheese and whip your cream to perfection, saving you time and arm strength.
- Parchment Paper: For lining the bottom of your springform pan, ensuring a non-stick surface and easy transfer.
- Two Mixing Bowls: Essential for separating ingredients and preparing the different components of your cheesecake (crust, whipped cream, cream cheese mixture).
- Rubber Spatula: Ideal for gently folding ingredients, scraping down bowls, and smoothly spreading the filling.
- Food Processor (Optional, but Recommended): For quickly crushing Biscoff cookies into fine crumbs. If you don’t have one, a sturdy plastic bag and a rolling pin work just as well!
🌡 Storage Tips to Keep Your Cheesecake Fresh
Proper storage is key to enjoying your delicious no-bake Biscoff cheesecake for days to come. Here’s how to keep it fresh:
- Refrigeration: Any leftover cheesecake should be stored in an airtight container or tightly wrapped with plastic wrap in the refrigerator. It will stay fresh and delicious for three to four days.
- Freezing for Longer Storage: This cheesecake freezes beautifully! After it has fully set, you can store it in the freezer for an extended period. For best results, wrap the entire cheesecake (or individual slices) tightly in several layers of plastic wrap, followed by a layer of aluminum foil. It can be stored in the freezer for three to six months.
- Thawing: When you’re ready to enjoy a frozen cheesecake, transfer it to the refrigerator and allow it to thaw slowly overnight, or for at least 4-6 hours, for the best texture. Avoid thawing at room temperature for food safety reasons.
💭 Top Tips for Cheesecake Perfection
Achieving the perfect no-bake Biscoff cheesecake is easy with these expert tips:
- Perfect Filling Texture: To achieve that ideal, melt-in-your-mouth filling texture, we highly recommend allowing your Biscoff cheesecake to defrost in the refrigerator for at least 20-30 minutes after its initial freezing time. This ensures it reaches the perfect temperature and creamy consistency for serving – simply divine!
- The Hot Knife Trick for Clean Slices: For presentation-worthy slices every single time, dip a sharp knife into hot water, wipe it dry, and then make your cut. Repeat this process for each slice. The hot blade glides through the cheesecake effortlessly, preventing sticking and creating beautifully clean edges.
- Room Temperature Cream Cheese: Always ensure your full-fat cream cheese is at room temperature before beating. This is vital for achieving a smooth, lump-free filling. Cold cream cheese will result in a lumpy texture that’s hard to rectify.
- Don’t Overmix: While you want the cream cheese smooth and the heavy cream whipped, be careful not to overmix the combined filling. Overmixing can lead to a dense or grainy texture. Gentle folding is key once the whipped cream is added.
- Chilled Bowl for Whipping Cream: For best results when whipping heavy cream, chill your mixing bowl and whisk attachment in the freezer for 10-15 minutes beforehand. Cold equipment helps the cream whip up faster and hold its peaks better.
- Patience with Chilling: The chilling time is not optional! It’s crucial for the cheesecake to firm up and for the flavors to meld. Resist the urge to cut into it too early.
🙋🏻 Frequently Asked Questions About No-Bake Cheesecakes
Here are answers to some common questions about no-bake cheesecakes, particularly this delightful Biscoff version:
That all comes down to personal preference! The main differences between a baked and a no-bake cheesecake—besides the obvious absence of an oven—lie in their ingredients and texture. No-bake cheesecakes typically do not use eggs and achieve their perfect, firm filling texture from sufficient chilling time in the refrigerator or freezer. Baked cheesecakes, on the other hand, rely on eggs for their structure and often boast a denser, richer, and sometimes slightly tangy texture. Some people argue that baked cheesecakes are superior due to their classic, fluffy, custard-like consistency, but I’d passionately make the case that each sweet dessert is uniquely delicious in its own right. I’m a particularly big fan of no-bake cheesecakes because they often require less hands-on time and don’t necessitate waiting for them to cool completely after cooking. While you still need to patiently wait for the cream cheese mixture to firm up in the freezer or fridge, the process can feel less intimidating and often quicker overall. Both offer a delightful dessert experience, just with different characteristics!
If your no-bake cheesecake isn’t setting up firmly, the most common culprit is insufficient chilling time. The filling needs ample time in the refrigerator or, for this recipe, the freezer, to properly solidify. You’ll need to keep it in the freezer for at least several hours (minimum 3 hours, but longer is better). Personally, I almost always prepare my cheesecakes the night before I plan to serve them, allowing them a full 8-12 hours in the freezer. This extended chilling period ensures they get wonderfully firm and easy to slice. Another factor could be the amount of heavy cream or cream cheese; ensure you’re using full-fat cream cheese and whipping your cream to at least soft peaks for optimal structure.
If you’ve never had the pleasure of enjoying a Lotus Biscoff cookie before, you are truly in for quite a treat! These delightful shortbread-style cookies pack a surprising amount of unique flavor into each bite. The dominant taste is a warm, caramelized sweetness, reminiscent of brown sugar or treacle. This is beautifully complemented by a distinctive blend of spices, primarily cinnamon, nutmeg, and ginger, which give it a cozy, slightly exotic aroma and taste. It’s a sophisticated and comforting flavor profile that’s utterly addictive, making it perfect for a decadent cheesecake like this one!
A Biscoff cheesecake, particularly a no-bake one, is fundamentally similar to other no-bake cheesecakes but with the delicious and distinct addition of Lotus Biscoff elements. It typically features a crunchy crust made from crushed Biscoff cookies mixed with melted butter. The creamy filling is usually a blend of full-fat cream cheese, powdered sugar, and whipped heavy cream, with additional Biscoff cookie crumbs or even Biscoff cookie butter folded in. Finally, it’s often garnished with more crushed Biscoff cookies or a drizzle of melted Biscoff spread, ensuring that unique, spiced caramel flavor shines through in every layer and bite.
Absolutely! While this recipe focuses on cookie crumbs, you can easily incorporate Biscoff cookie butter into the filling for an even more intense Biscoff flavor. You could replace some of the powdered sugar with a few tablespoons of softened Biscoff cookie butter, or simply swirl melted Biscoff spread into the finished cream cheese mixture before folding in the whipped cream. It also makes an excellent drizzle for the top!
Other Irresistible No-Bake Cheesecake Recipes for You to Try
If you’ve loved this Biscoff cheesecake, you’ll be thrilled to discover our other equally delicious and easy no-bake cheesecake creations. Perfect for any season or celebration!
- No Bake Pumpkin Cheesecake
- The Best No Bake Chocolate Ricotta Cheesecake
- No Bake Mint Chocolate Cheesecake
- Patriotic Fourth of July No Bake Cheesecake
- Eggnog Cheesecake with Ginger Spiced Crust
- No Bake Fig Cheesecake in a Jar
- No Bake Lemon Cheesecake with Blueberry Topping
- No Bake Halloween Cheesecake with Raspberry Filling
- No Bake Strawberry Cheesecake
- No Bake 5 Ingredient Mini Oreo Cheesecakes
If you try this delightful No-Bake Biscoff Cheesecake recipe, please let me know how you liked it by giving it a ★★★★★ star rating and leaving a comment below. Your feedback means the world and helps other dessert enthusiasts! It would be truly awesome! You can also sign up for our Newsletter to get more delicious recipes delivered straight to your inbox, or follow me on Pinterest or Instagram. Don’t forget to share your amazing creation with me! Just tag me @combinegoodflavors and use the hashtag #combinegoodflavors so I don’t miss seeing your culinary masterpiece!
📖 Recipe Card: No-Bake Biscoff Cheesecake
No Bake Biscoff Cheesecake {5 Ingredients}
Nora
Save RecipeSaved!
Pin Recipe
Equipment
-
Electric hand mixer or Stand mixer with a whisk attachment
-
Food processor Electric Chopper
-
Parchment Paper
-
Mixing bowls
-
Rubber spatula
-
Springform pan 9-inch
-
Plastic Wrap or aluminum foil
Ingredients
- 53 Biscoff Cookies or ½ Pack Biscoff cookie crumbs (approximately 1 cup / 120g for crust, ½ cup / 60g for filling, ¼ cup / 30g for topping)
- 3 oz Unsalted butter melted (approximately 6 tablespoons or 85g)
- 2 ½ cups Full-Fat Cream Cheese softened to room temperature (approximately 20 oz or 560g)
- 3 tablespoons Powdered Sugar sifted (approximately 30g, adjust to taste)
- 1 ¼ cup Heavy Whipping Cream cold (approximately 300ml)
Instructions
-
**Crush Biscoff Cookies:** Crush about 53 Biscoff Cookies into fine crumbs using a food processor or by placing them in a plastic bag and crushing with a rolling pin. Alternatively, use ½ pack of pre-made Biscoff cookie crumbs. Measure out roughly 1 cup (120g) for the crust, ½ cup (60g) for the filling, and ¼ cup (30g) for the topping.53 Biscoff Cookies
-
**Prepare the Crust:** In a mixing bowl, combine the 1 cup (120g) of Biscoff cookie crumbs with the melted 3 oz Unsalted butter. Mix thoroughly until the crumbs are evenly coated.3 oz Unsalted butter
-
**Form the Crust:** Line the bottom of a 9-inch springform cake pan with parchment paper. Tightly pack the Biscoff and butter mixture over the parchment paper to create an even crust. Place in the refrigerator to chill while you prepare the filling.
-
**Whip Heavy Cream:** In a chilled large bowl, whip 1 ¼ cup Heavy Whipping Cream with an electric mixer until it forms soft peaks. Be careful not to over-whip. Set aside.1 ¼ cup Heavy Whipping Cream
-
**Prepare Cream Cheese Mixture:** In another large bowl, beat the softened 2 ½ cups Full-Fat Cream Cheese until it’s smooth and creamy. Add 3 tablespoons Powdered Sugar and beat for another 2 minutes until light and fluffy.2 ½ cups Cream Cheese3 tablespoon Powdered Sugar
-
**Combine Filling:** Gently fold the ½ cup (60g) of reserved Biscoff cookie crumbs into the cream cheese mixture with a rubber spatula. Then, carefully fold in the whipped cream until just combined, being careful not to overmix.
-
**Assemble Cheesecake:** Pour the Biscoff cream cheese filling over the chilled crust in the springform pan. Use a spatula to smooth out the top evenly.
-
**Garnish & Chill:** Sprinkle the remaining ¼ cup (30g) of Biscoff cookie crumbs over the cake for a decorative and flavorful topping. Place the cheesecake in the freezer for at least 3 hours (preferably overnight) to allow it to firm up completely.
-
**Serve:** Once firm, remove the cheesecake from the freezer. If completely frozen, let it thaw in the refrigerator for 20-30 minutes before serving. Release the sides of the springform pan. Serve cold, but not frozen solid, using a hot knife for clean slices (see Top Tips). Enjoy!
Notes
Using cold heavy cream and a chilled bowl helps the cream whip faster and hold its peaks better.
Nutrition values are estimates only, using online calculators. Please verify using your own data.

🤎 You Might Also Enjoy These Biscoff & Dessert Delights
If you’re as enchanted by the spiced caramel magic of Biscoff as we are, or simply looking for more easy and delicious dessert recipes, explore these other fantastic creations:
- Simple Layered Eggnog Vanilla Pudding Dessert
- Easy Biscoff Granola Recipe
- Biscoff Truffles without Cream Cheese
- No-bake Lotus Biscoff Cake Pops
⛑️ Important Food Safety Reminders
While this is a no-bake recipe, maintaining good food safety practices is always important, especially when working with dairy products. Please keep these general guidelines in mind for a safe and enjoyable cooking and eating experience:
- Temperature Control: Do not leave ingredients like cream cheese or heavy cream sitting out at room temperature for extended periods during preparation. Chill perishable ingredients immediately after use.
- Cleanliness is Key: Always wash your hands thoroughly with soap and warm water before and after handling any food. Ensure all your equipment, including bowls, spatulas, and the springform pan, are clean and sanitized.
- Cross-Contamination: Though this recipe doesn’t involve raw meat, it’s a good habit to prevent cross-contamination by using separate utensils and cutting boards for different food types.
- Prompt Refrigeration: After assembly, refrigerate or freeze the cheesecake promptly to prevent bacterial growth. Do not leave the assembled cheesecake at room temperature for more than two hours.
- Proper Thawing: If you freeze your cheesecake, thaw it in the refrigerator. Do not thaw at room temperature.
For further comprehensive information and best practices on food safety, always refer to reputable sources such as the Safe Food Handling guidelines from the FDA.
