Irresistible No-Bake Candy Cane Oreo Cake Pops: The Ultimate Festive Treat!
Are you searching for a show-stopping, yet incredibly easy, no-bake dessert to delight your guests this holiday season? Look no further! These magnificent Candy Cane Oreo Cake Pops are the quintessential treat for spreading festive cheer and satisfying every sweet craving. Imagine a symphony of flavors and textures: the classic, beloved crunch of Oreo cookies, harmoniously blended with the refreshing, cool burst of peppermint candy cane bits, all encased in a rich, decadent chocolate shell. This isn’t just a dessert; it’s a bite-sized celebration of holiday magic that promises to captivate both young and old.
Picture the moment: a velvety smooth, melt-in-your-mouth interior, punctuated by tiny, glistening shards of peppermint that dance on your tongue like snow crystals. Yes, this is the essence of Christmas captured in a single, extraordinary confectionery creation! These no-bake Oreo candy cane cake pops embody the spirit of the season, offering a culinary composition that is both sophisticated and delightfully playful.

For a long time, I envisioned creating a cake pop that offered an enticing contrast: the yielding softness of a cake-like interior coupled with a delightful, unexpected crunch. Through countless experiments, the perfect alchemy was finally discovered by pairing the iconic crunch and creamy filling of Oreo cookies with the crisp, cooling texture of crushed candy canes. The result? A dessert so undeniably addictive, it vanished faster than I could blink! These cake pops were an instant sensation, disappearing from the platter at lightning speed. It’s safe to say I had to whip up a second batch immediately – and yes, I admit, my own enthusiasm for them might have contributed to their rapid disappearance! 😊
Why You’ll Love These Candy Cane Oreo Cake Pops
- Effortlessly Delicious: No baking required! This recipe simplifies dessert-making, making it accessible to even novice home bakers.
- Festive Flavor Profile: The classic combination of chocolate, vanilla, and peppermint is synonymous with the holiday season.
- Irresistible Texture: Enjoy the smooth, rich interior with delightful crunchy candy cane pieces.
- Perfect for Any Occasion: Ideal for holiday parties, festive gifting, or simply a sweet treat to enjoy with family.
- Customizable: Easily adapt the recipe with different Oreo flavors or chocolate coatings to suit your taste.
🥘 Essential Ingredients for Your No-Bake Masterpiece
Crafting these delectable candy cane Oreo cake pops requires just a handful of readily available ingredients. Each component plays a crucial role in building the layered flavors and textures that make this dessert so special.
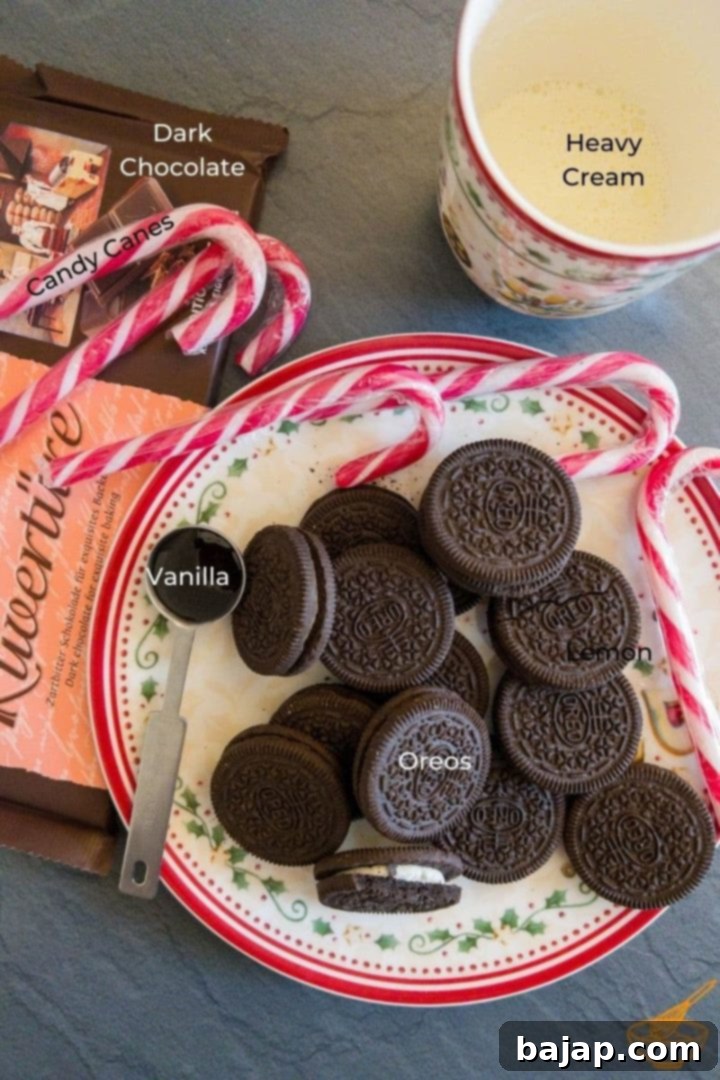
- Candy Canes: These festive treats are more than just a decoration; they’re the secret to the unique textural contrast and refreshing minty kick in our cake pops. Their inherent crunch provides a wonderful counterpoint to the smooth Oreo base. While peppermint is traditional for the holidays, feel free to experiment with other hard candies if you’re looking for a different flavor profile.
- Oreo Cookies: The star of the show! Oreos provide the rich chocolate base and creamy filling that are essential to the cake pop’s consistency and flavor. Any cream-filled chocolate sandwich cookie will work, but the classic Oreo offers that recognizable, comforting taste everyone loves. For a twist, consider using mint-flavored Oreos for an extra peppermint punch!
- Dark Chocolate Couverture: Using dark chocolate couverture is key for a smooth, shiny, and professional-looking coating. Its higher cocoa butter content makes it melt more evenly and set beautifully. Dark chocolate’s slight bitterness perfectly complements the sweetness of the Oreos and candy canes, creating a balanced flavor. If you choose a different cookie, select a chocolate that harmonizes with its flavor. For example, milk chocolate might be too sweet with certain cookies, while white chocolate offers a different canvas.
- Vanilla Extract: A staple in most desserts, vanilla extract enhances the overall flavor profile, adding warmth and depth to the chocolate and peppermint. For an extra festive touch or if using different cookies, consider substitutes like gingerbread spice, caramel extract, or a hint of rum essence to create unique flavor combinations. Ground vanilla beans can also be used for a more intense, pure vanilla flavor.
- Heavy Whipping Cream: This ingredient acts as a binder, bringing the crushed cookies and candy canes together into a pliable, truffle-like dough. It also adds richness and moisture, ensuring your cake pops are wonderfully soft and tender on the inside.
Elevate your chocolate experience! Get your premium chocolate couverture at Prime Chocolate and save 10% with the exclusive code ThankYouNora.
🍽 Essential Equipment for Cake Pop Success
Having the right tools makes the cake pop-making process smooth and enjoyable. Here’s what you’ll need to assemble these delightful treats:
- Cake Pop Equipment:
- Cake Pop Silicone Mold: This two-part mold is invaluable for creating perfectly spherical cake pops with minimal effort. It ensures uniform size and shape, which is great for presentation.
- Lollipop Sticks (Cake Pop Sticks): Essential for transforming your truffle balls into handheld treats. Choose sturdy sticks that won’t easily break.
- Food Processor: This is your best friend for quickly and efficiently crushing the candy canes and Oreos into fine crumbs. It saves time and ensures a consistent texture, which is crucial for the cake pop base.
- Water Bath (or Bain-Marie): The gentlest and most effective way to melt chocolate without scorching it. This method uses indirect heat, preventing the chocolate from seizing. If you don’t have a dedicated double boiler, two pots of different sizes work just as well.
- Medium-Size Bowl: For mixing your cookie and candy cane crumb mixture with the melted chocolate and cream.
- Electric Hand Mixer: While not strictly necessary, an electric hand mixer helps achieve a more homogeneous and smoothly combined cake pop dough, ensuring all ingredients are evenly distributed. A sturdy wooden spoon can also do the trick with a bit more elbow grease.
- Tablespoon or Cookie Scoop: These tools aid in portioning out the dough, making it easier to fill your cake pop molds evenly and consistently.
🔪 Step-by-Step Guide to Crafting Your Candy Cane Oreo Cake Pops
Follow these simple instructions to create your delightful no-bake cake pops. Precision and a little patience will ensure perfect results!
1. Prepare Your Chocolate: Before anything else, set up your water bath (bain-marie) and begin melting your dark chocolate couverture. This proactive step ensures that you’ll have beautifully liquid, tempered chocolate ready precisely when you need it. If you don’t own a fancy chocolate melter, simply use two pots of different sizes: fill the larger one with a few inches of water and bring it to a simmer on the stove, then place the smaller pot on top with your chocolate, ensuring the bottom of the smaller pot doesn’t touch the water. Stir occasionally until smooth.
2. Crush the Candy Canes: Now, for the most exciting (and admittedly, slightly noisy!) part. Carefully place your candy canes into the food processor. Brace yourself – this step can be quite loud, but it’s thankfully brief! I mention this as a friendly heads-up: if you have little ones napping, you might want to time this step accordingly to avoid any unexpected wake-ups. Once crushed into fine, sparkly crystals, set aside precisely one tablespoon of these crushed candy canes. This small portion will be used later as a final festive garnish for your finished cake pops.
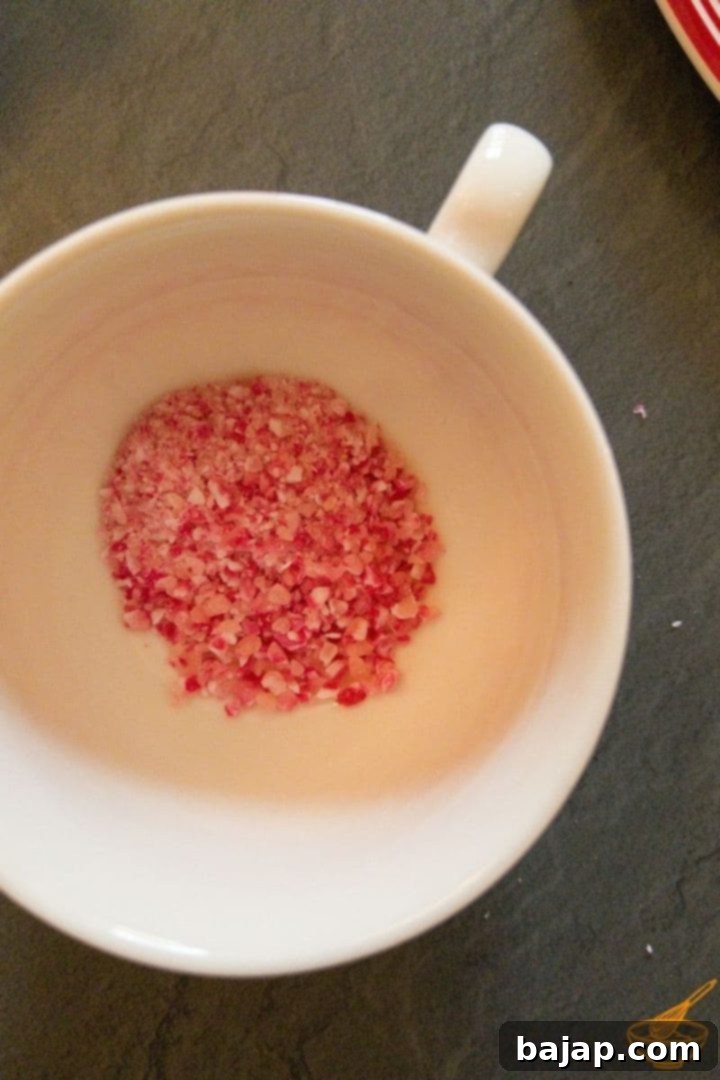
3. Combine Oreos and Candy Canes: While the food processor is still out, add your Oreo cookies to the remaining candy cane crystals. Process them together until you have a fine, uniform crumb mixture. Again, it’ll be a bit noisy, but soon tranquility will return – I promise!
4. Create the Cake Pop Base: Transfer your cookie and candy cane crumbs into a spacious mixing bowl. Now, add the vanilla extract and precisely half of your beautifully melted chocolate. It’s crucial to only add half at this stage, as the remaining melted chocolate will be used later for coating your perfectly formed cake pops. Adding it all now would be a delicious, but unfortunately, premature, mistake!
5. Mix and Bind the Dough: Using either a sturdy wooden spoon or, for a more consistent blend, an electric hand mixer, thoroughly combine the ingredients until a thick, cohesive dough forms. Once well combined, incorporate the heavy whipping cream and mix again until everything is evenly distributed and the mixture holds together well when pressed.
6. Chill the Dough: To make the dough easier to handle and transfer into the molds, cover the mixing bowl and chill it in the refrigerator for about 15 minutes. This brief chilling period firms up the mixture significantly, making the next step much simpler and less messy.
7. Fill the Molds: Lay out the base of your cake pop silicone mold (the half without the holes) on your countertop. Using a tablespoon or a cookie scoop, evenly distribute the chilled truffle mixture into each cavity of the mold. A cookie scoop is particularly helpful for achieving consistent portions, though a spoon works perfectly fine, as demonstrated in many videos. Once all cavities are filled, carefully place the top part of the silicone mold (the half with the holes) over the filled base.
8. Insert Sticks and Freeze: Now, gently insert the lollipop sticks into the tiny holes on the top mold, pushing them in far enough to securely embed them into the cake pop mixture. This ensures your cake balls remain firmly attached to their sticks once hardened. Transfer the entire filled silicone mold to the freezer for 30-60 minutes. This freezing step is vital for firming up the cake pops, making them stable enough for dipping.
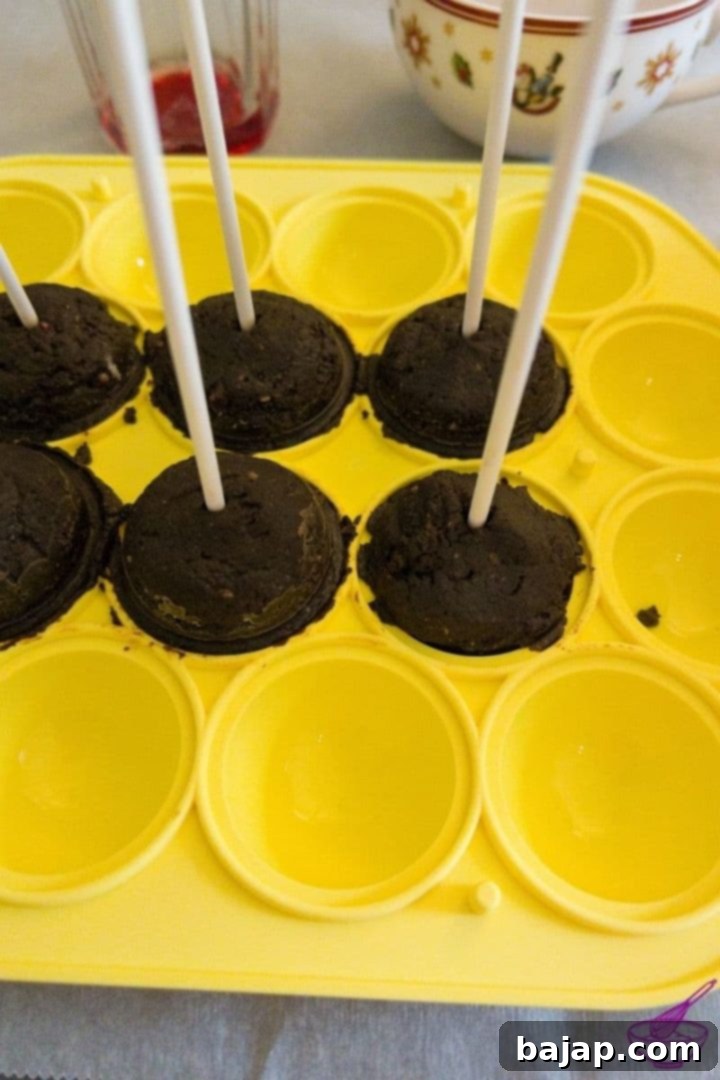
TIP for Freezing: You can quickly check if your cake pops are sufficiently firm. Carefully try to lift the silicone top from one of the sticks. If the stick feels fixed and the cake pop doesn’t wobble, they’re ready! If there’s still any give or wobbliness, pop them back into the freezer for a bit longer to prevent any unfortunate crumbling during the dipping process.
9. Coat and Decorate: Once hardened, gently remove the solid cake balls from the silicone mold. Dip each cake pop into the remaining melted chocolate, ensuring it’s completely coated. Allow any excess chocolate to drip off, then immediately press the top of the coated dough ball into the reserved candy cane crystals. The chocolate sets quickly, so work efficiently to get that festive sprinkle to adhere.
10. Set and Enjoy: Set your finished cake pops aside to fully solidify. A simple glass jar or a dedicated cake pop stand works perfectly to hold them upright as they set. For best results, allow them to set completely in the refrigerator before serving. And just like that, your beautiful, delicious, and incredibly festive Oreo candy cane cake pops are ready to be savored! Enjoy every minty, chocolatey bite!

🌡️ Storage Instructions to Keep Them Fresh
To maintain their optimal flavor and texture, store your delightful candy cane Oreo cake pops in an airtight container in the refrigerator. They will remain wonderfully fresh and delicious for several days. If you’re planning ahead for a future event or want to keep a stash for spontaneous cravings, these cake pops also freeze exceptionally well! Simply place them in a freezer-safe, airtight container or bag, and they can be stored for up to two months. When you’re ready to enjoy them, just transfer them to the refrigerator to thaw for a few hours. You’ll be rewarded with a scrumptious, ready-to-eat dessert that tastes as good as freshly made.
💭 Top Tip: No Mold? Make Decadent Truffles!
Don’t have a silicone cake pop mold? No problem! You can easily transform this recipe into equally delicious no-bake Oreo candy cane truffles. These make for elegant individual treats, perfect for platters or gifting.
After chilling the mixture in the refrigerator for 15 minutes as per the instructions, prepare a pre-cooled surface. A silicone mat or a baking sheet chilled in the refrigerator beforehand works perfectly. Scoop out teaspoon-sized portions of the firm truffle mixture and quickly roll them into neat balls between your palms. For a cleaner, less sticky process, I highly recommend wearing food-safe gloves for this step!
Next, dip one hand into your melted chocolate (or carefully drizzle the chocolate over the truffle balls). Roll each truffle ball in your “chocolate hands” to ensure it’s evenly coated. Immediately place the chocolate-covered Oreo truffle onto your cooled surface and generously sprinkle it with the reserved candy cane crystals. This quick application ensures the peppermint bits adhere beautifully before the chocolate sets.
Allow these gorgeous truffles to solidify in the refrigerator, just like the cake pops. Once firm, store them in an airtight container in the fridge. This variation offers all the incredible flavor and texture of the cake pops, presented in a slightly different, yet equally charming, form!
📖 Full Recipe: No-Bake Candy Cane Oreo Cake Pops

No-bake Candy Cane Oreo Cake Pops
Nora
Save RecipeSaved!
Pin Recipe
Equipment
-
Cake pop silicone mold
-
Cake pop sticks
-
Baine Marie for melting the couverture
-
medium sized bowls
-
Electric hand mixer
-
Cookie scoop or Tablespoon
-
Food processor
Equipment
-
Cake pop silicone mold
-
Cake pop sticks
-
Baine Marie for melting the couverture
-
medium sized bowls
-
Electric hand mixer
-
Food processor
Ingredients
- 5 pieces Candy canes or any hard candy of your choice
- 14 Oreo cookies or any cream-filled cookie
- 5.3 oz Dark chocolate couverture
- 1 teaspoon Vanilla extract
- 2 ¾ tablespoon Heavy whipping cream
Instructions
-
Prepare a water bath and start melting 5.3 oz Dark chocolate couverture.5.3 oz Dark chocolate couverture
-
Crush 5 pieces Candy canes in the food processor.5 pieces Candy canes
-
Take one tablespoon of the crushed candy and set them aside.
-
Add 14 Oreo cookies to the candy cane crystals and crush them together with your food processor.14 Oreo cookies
-
Empty the cookie candy cane crumbs into a mixing bowl.
-
Add 1 teaspoon Vanilla extract and half of the melted chocolate.1 teaspoon Vanilla extract
-
Mix the ingredients well together with the electric hand mixer.
-
Add the 2 ¾ tablespoon Heavy whipping cream and mix well again.2 ¾ tablespoon Heavy whipping cream
-
Chill the batter in the refrigerator for 15 minutes.
-
Fill the batter into the molds and place the top part of the silicone molds. Insert the cake pop sticks.
-
Freeze for 30-60 minutes.
-
Remove the solid balls from the mold, and dip them in the remaining melted chocolate.
-
Let the excess chocolate drip off and press the top of the balls into the candy cane crystals you set aside earlier.
-
Set the finished cake pops aside to set.
-
Let your cake pops set in the refrigerator before eating.
Nutrition values are estimates only, using online calculators. Please verify using your own data.

🤎 You Might Also Like These Festive Treats
If you loved these Candy Cane Oreo Cake Pops, you’re in for more delicious discoveries! Explore our other holiday favorites and find inspiration for your next sweet creation:
- Stracciatella Egg Liqueur Milkshake Recipe
- No-Bake Chocolate Ricotta Cheesecake
- 37 Fabulous Christmas Dinner Dessert Recipe Ideas
- Waffle Blossoms with Chestnut Purée
⛑️ Important Food Safety Reminders
While these cake pops are no-bake, good food safety practices are always important when preparing any culinary delight. Please keep the following guidelines in mind to ensure a safe and enjoyable experience for everyone:
- Cook to a minimum temperature of 165 °F (74 °C) – Note: This applies to recipes involving raw meat or eggs. For this no-bake recipe, the primary concern is proper handling and storage.
- Do not use the same utensils on cooked food that previously touched raw meat.
- Always wash hands thoroughly after touching raw meat or before handling food.
- Avoid leaving perishable food, especially those containing dairy or chocolate, sitting out at room temperature for extended periods. Prompt refrigeration is key to prevent bacterial growth.
- Never leave cooking food unattended (relevant for melting chocolate on the stove).
- Use oils with a high smoking point to avoid harmful compounds if any part of your preparation involves high-heat cooking.
- Always ensure good ventilation when using a gas stove.
For more comprehensive food safety information and best practices, please consult the Safe Food Handling – FDA guidelines.
