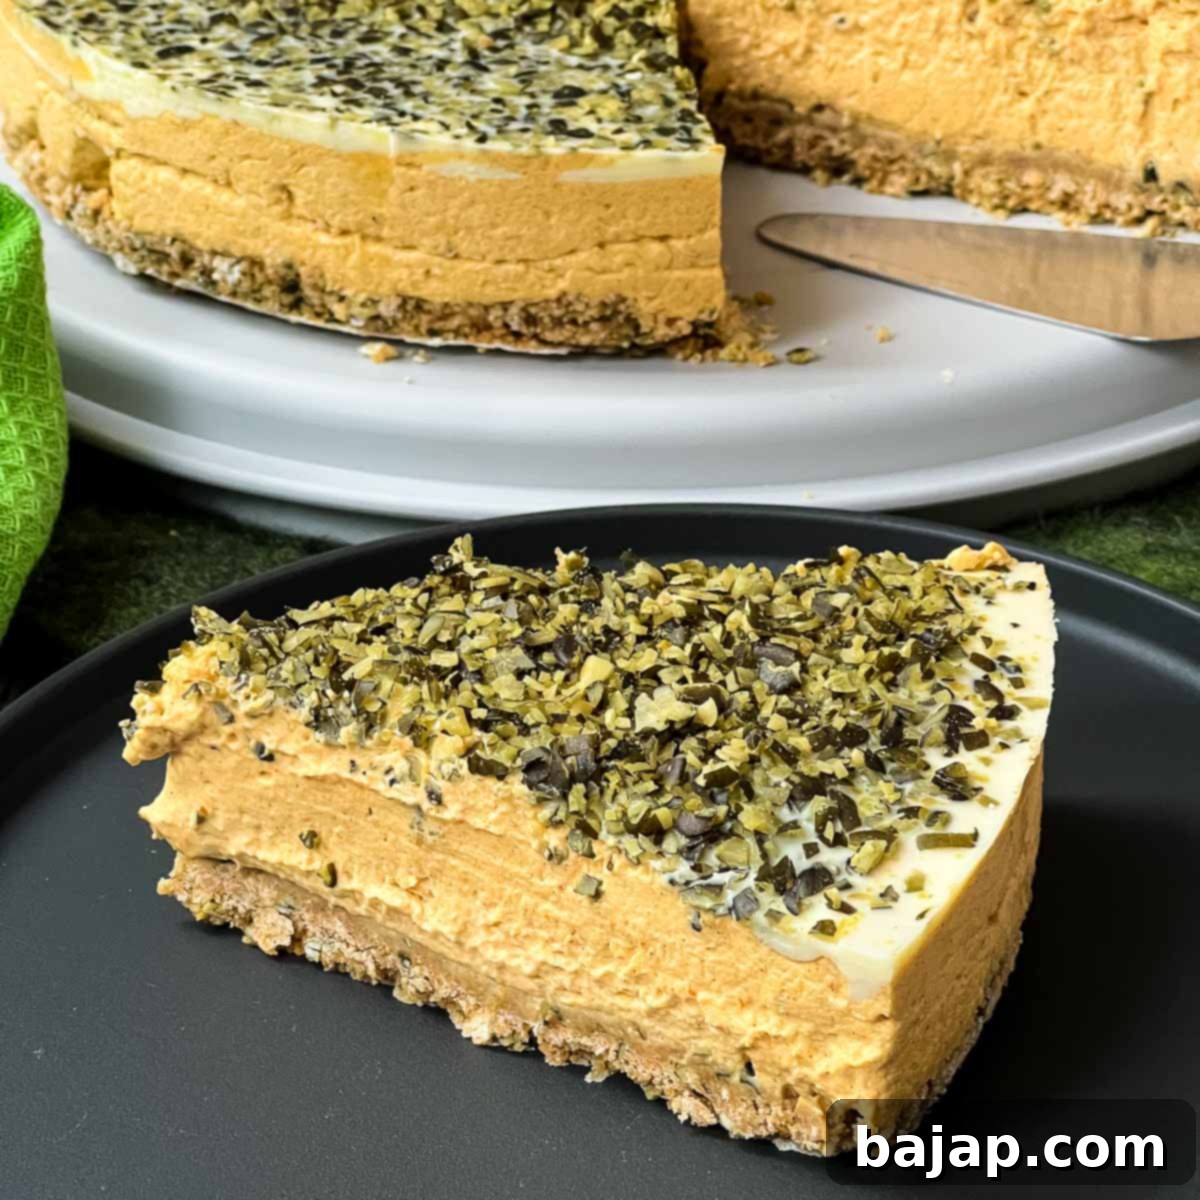
Easy No-Bake Pumpkin Cheesecake: The Ultimate Fall Dessert Recipe
As the leaves begin to turn and a crispness fills the air, autumn officially ushers in pumpkin season! And what better way to celebrate this beloved time of year than with a delectable No-Bake Pumpkin Cheesecake? This isn’t just any dessert; it’s a celebration of fall flavors, combining the rich warmth of pumpkin with a wonderfully light and creamy cheesecake texture.
This incredibly easy pumpkin cheesecake stands out because it requires absolutely no baking! Forget the stress of water baths or cracked tops. Instead, you’ll be treated to a delightful, fluffy texture and charming autumnal taste that can be prepared in a jiffy. It’s the perfect treat for a cozy evening, a festive gathering, or simply to satisfy your seasonal sweet cravings.
What truly sets this cheesecake apart is its unique crust, a harmonious blend of classic graham crackers and finely grated pumpkin seeds. This addition not only provides a lovely nutty flavor but also a satisfying crunch that perfectly complements the smooth, creamy filling. It’s a crust so yummy, you’ll want to make it again and again!
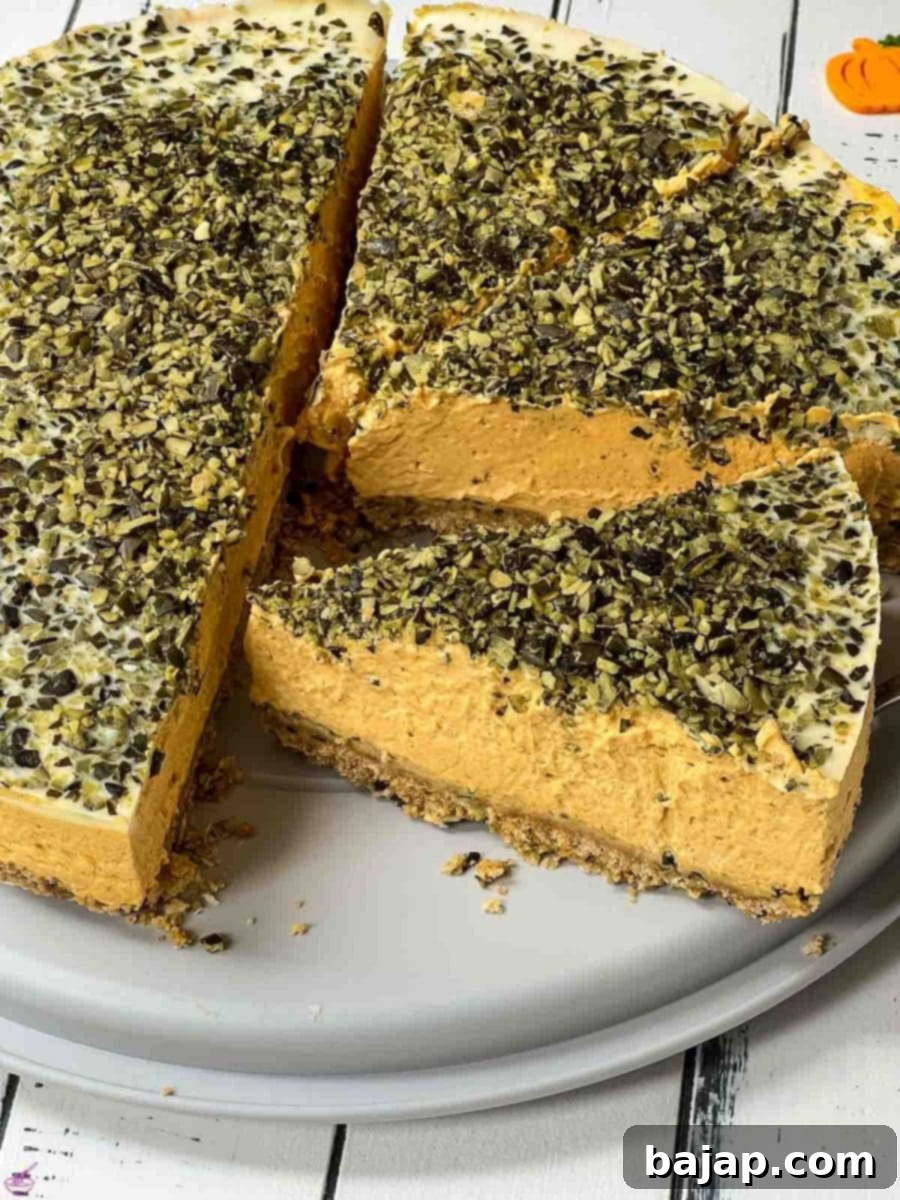
For convenience and to keep this recipe truly simple, I’ve used unsweetened canned pumpkin purée. This saves a significant amount of time without compromising on flavor, making it accessible for even the busiest home cooks. However, if you prefer the deep, earthy notes of fresh pumpkin, don’t worry! Detailed instructions for preparing your own pumpkin purée from scratch are included below in the post and also conveniently in the recipe card.
This versatile pumpkin cheesecake isn’t just for dessert. It’s also an ideal finish to a hearty autumn meal. Imagine serving it after a comforting chestnut and porcini mushroom soup, followed by grilled venison accompanied by delicious Brussels sprouts with chestnuts and bacon! The rich flavors of the main course would be beautifully balanced by the sweet, spiced pumpkin. This cheesecake truly embodies the spirit of fall dining.
Whether you’re new to making cheesecakes or a seasoned pro looking for a hassle-free option, this no-bake recipe is a winner. Its straightforward steps and delightful outcome make it a perfect choice for anyone wanting to enjoy the flavors of pumpkin without the fuss of oven baking.
[feast_advanced_jump_to]
🥘 Gather Your Ingredients for the Perfect Pumpkin Cheesecake
Crafting this irresistible no-bake pumpkin cheesecake starts with a selection of high-quality ingredients, divided into three main components: the crispy, nutty crust, the luscious pumpkin cream cheese filling, and the elegant white chocolate pumpkin seed glaze. Each element plays a crucial role in creating a harmonious and utterly delicious dessert.
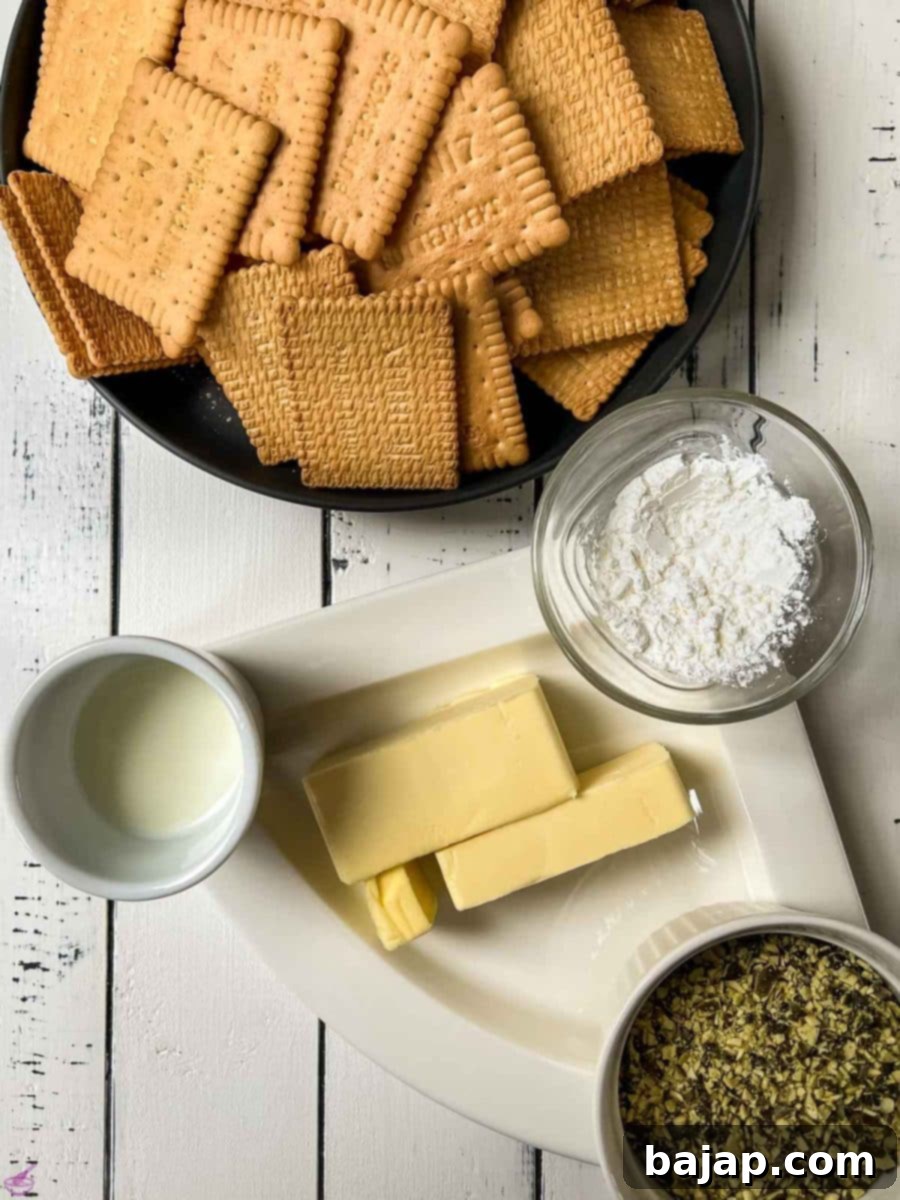
For the Crunchy Cracker Crust
- Graham crackers – These classic biscuits provide a sweet, buttery base. In Europe, Petit beurre biscuits are a common and excellent substitute. For extra convenience, pre-made graham cracker crumbs work perfectly.
- Unsalted butter – The binder for our crust, ensuring it holds together beautifully.
- Milk – Adds a touch of moisture and helps achieve the right crust consistency.
- Grated pumpkin seeds – This is our secret ingredient for an added layer of nutty flavor and texture.
- Cornstarch – A small amount helps prevent sticking and makes for easier slicing.
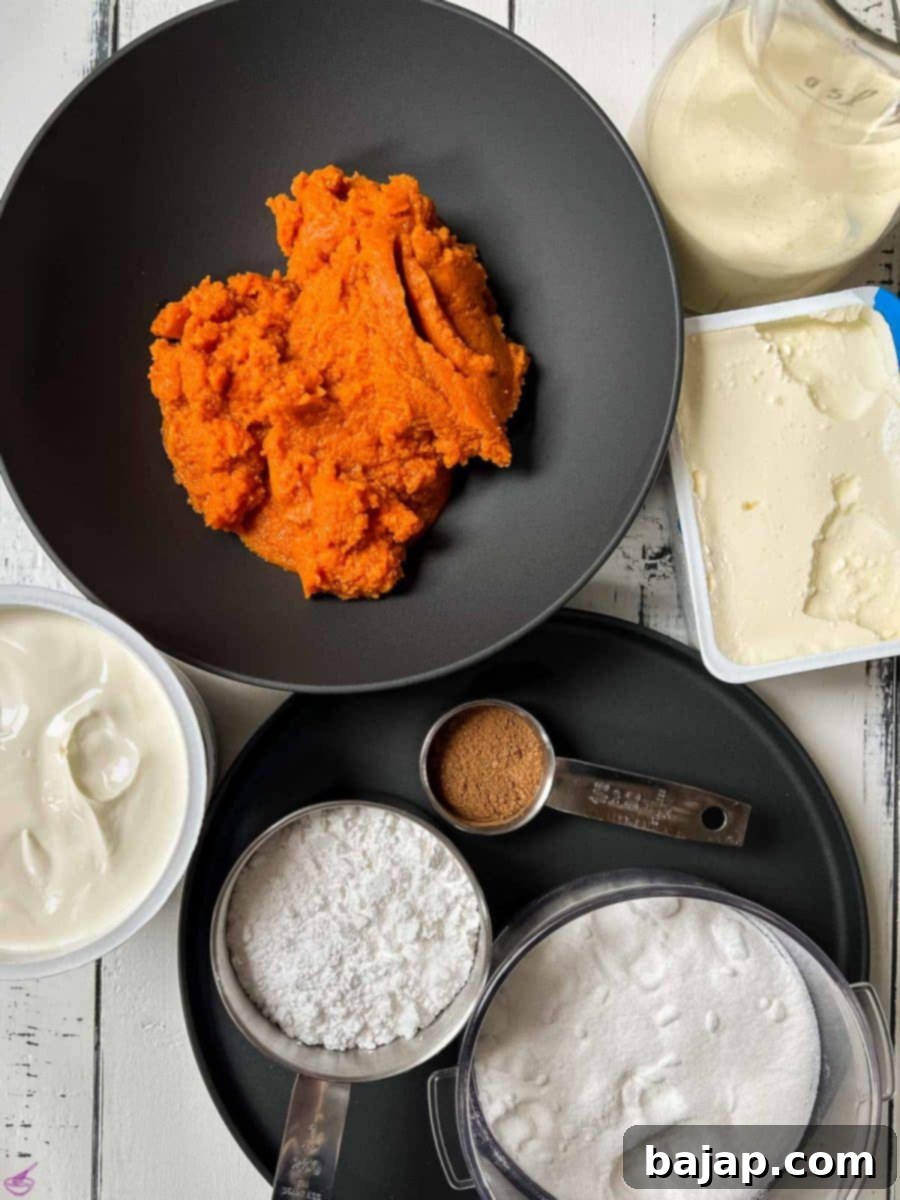
For the Creamy Pumpkin Cheesecake Filling
- Mascarpone – For an incredibly rich and luxurious creaminess.
- Cream cheese – The classic cheesecake base, providing that signature tangy flavor. Ensure both mascarpone and cream cheese are at room temperature for smooth blending.
- Heavy whipping cream – Whipped to stiff peaks, it provides the light and airy texture characteristic of a no-bake cheesecake.
- Icing sugar (powdered sugar) – Sweetens the filling without adding a grainy texture.
- Pumpkin – Use fresh, homemade purée for a more intense flavor, or convenient canned pumpkin purée (unsweetened).
- Granulated Sugar – Balances the sweetness of the pumpkin filling.
- Ground cinnamon – The quintessential spice that brings out the best in pumpkin flavor.
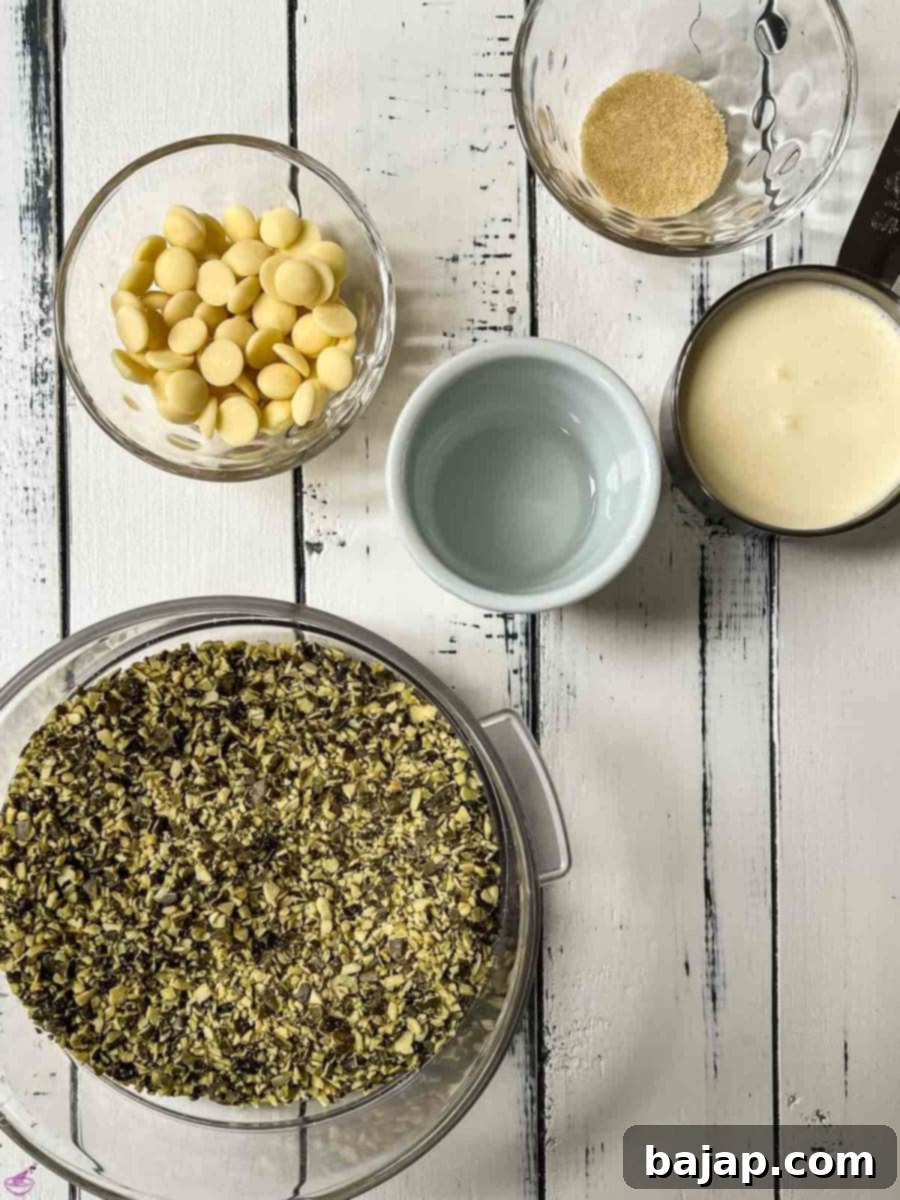
For the Decadent White Chocolate Pumpkin Seed Glaze
- Gelatin granules – Essential for setting the glaze and giving it a beautiful sheen.
- Water – To hydrate the gelatin.
- Heavy whipping cream – Provides richness and helps create a smooth, pourable glaze.
- White chocolate – Adds a sweet, creamy counterpoint to the pumpkin, melting into a luxurious topping.
- Grated pumpkin seeds – A final sprinkle for visual appeal and an extra textural element.
- Optional: Pumpkin pie spice – For an aromatic dusting before serving, enhancing the autumnal flavors.
Refer to the comprehensive recipe card below for precise quantities and measurements to ensure a perfect dessert every time.
🔪 Step-by-Step Guide: Crafting Your No-Bake Pumpkin Cheesecake
Creating this stunning no-bake pumpkin cheesecake is a straightforward process, broken down into manageable steps. Follow these instructions carefully, and you’ll soon be enjoying a dessert that’s both impressive and incredibly delicious.
Step 1: The Flavorful Cookie Crust Foundation
The base of your cheesecake is crucial for both flavor and stability. This unique crust combines the classic crunch of graham crackers with the nutty notes of pumpkin seeds.
- To begin, take your graham crackers (or Petit beurre biscuits if you’re in Europe) and place them in a sturdy ziplock bag. Using a rolling pin, crush them until they form fine crumbs. Alternatively, if you have a universal chopper or food processor, this task becomes even quicker and easier, ensuring an even consistency. The goal is fine crumbs, not a powder, so you still get some texture.
- Once crushed, transfer the cracker crumbs to a spacious mixing bowl. Add the grated pumpkin seeds, which will infuse the crust with an earthy, nutty aroma. Mix these dry ingredients thoroughly with a wooden spoon, ensuring the pumpkin seeds are evenly distributed throughout the crumbs.
- Next, in a microwave-safe dish, combine the unsalted butter and milk. Heat this mixture on medium power until the butter is completely melted. In most microwaves, this takes about 3 x 30-second intervals at 540 watts, but adjust as needed until the butter is fully liquid and well combined with the milk.
- Crucially, set aside two tablespoons of this melted butter-milk mixture. You’ll use this later for preparing your springform pan, which helps prevent sticking. Mix the remaining butter-milk mixture with your crushed cookies and pumpkin seeds.
- For the best results, use a food processor with a paddle attachment (like a flat beater) to mix the crumbs and butter. This ensures everything is perfectly combined and forms a uniform, slightly sticky mixture. If you don’t have a food processor, mixing by hand with a sturdy spoon or even your clean hands will also work, just ensure thorough mixing.
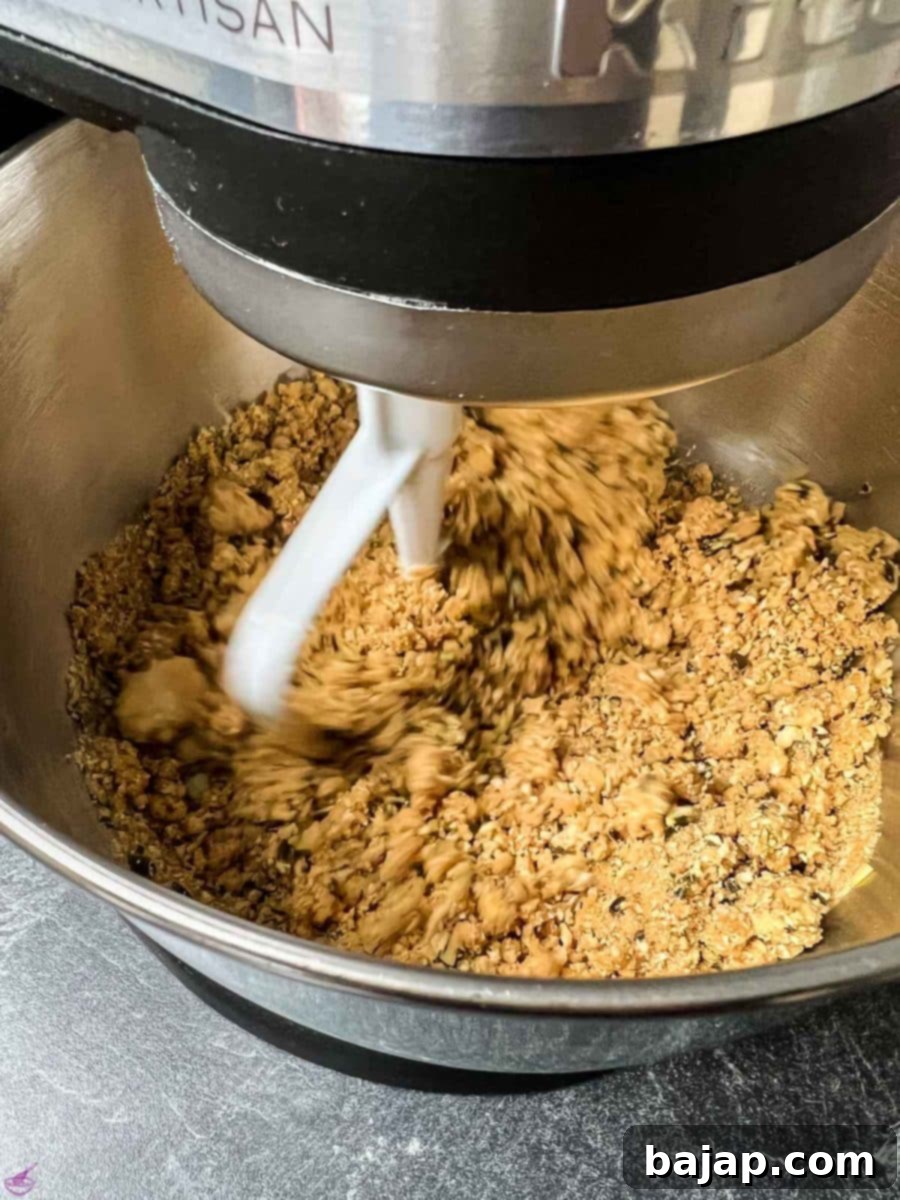
Continue mixing until all the cookie crumbs are thoroughly saturated with the butter. The final crumb mixture should have a somewhat sticky consistency when pressed between your fingers, indicating it will hold together well to form a firm crust.
- Now, prepare your springform pan. Line the bottom of a 30 cm (12 inch) springform pan with parchment paper. This will greatly assist in removing the cheesecake later. Brush the parchment paper and the bottom edges of the pan with the two tablespoons of reserved melted butter-milk mixture.
- Sprinkle the cornstarch evenly over the brushed parchment paper. Shake the cake pan gently, tilting it from side to side, until the entire bottom surface is coated with a thin layer of cornstarch.
- Invert the pan and tap out any excess cornstarch. Place the prepared pan in the refrigerator for 2-3 minutes. This critical step prevents the cheesecake from sticking and makes it significantly easier to remove and slice the finished cake.
- Once the springform pan is ready, pour the biscuit-butter mixture into the pan. Use the bottom of a measuring cup or a sturdy tablespoon to firmly and evenly press the crumbs down, spreading them all the way to the edge of the pan. A well-compacted crust is essential for a stable and delicious base.
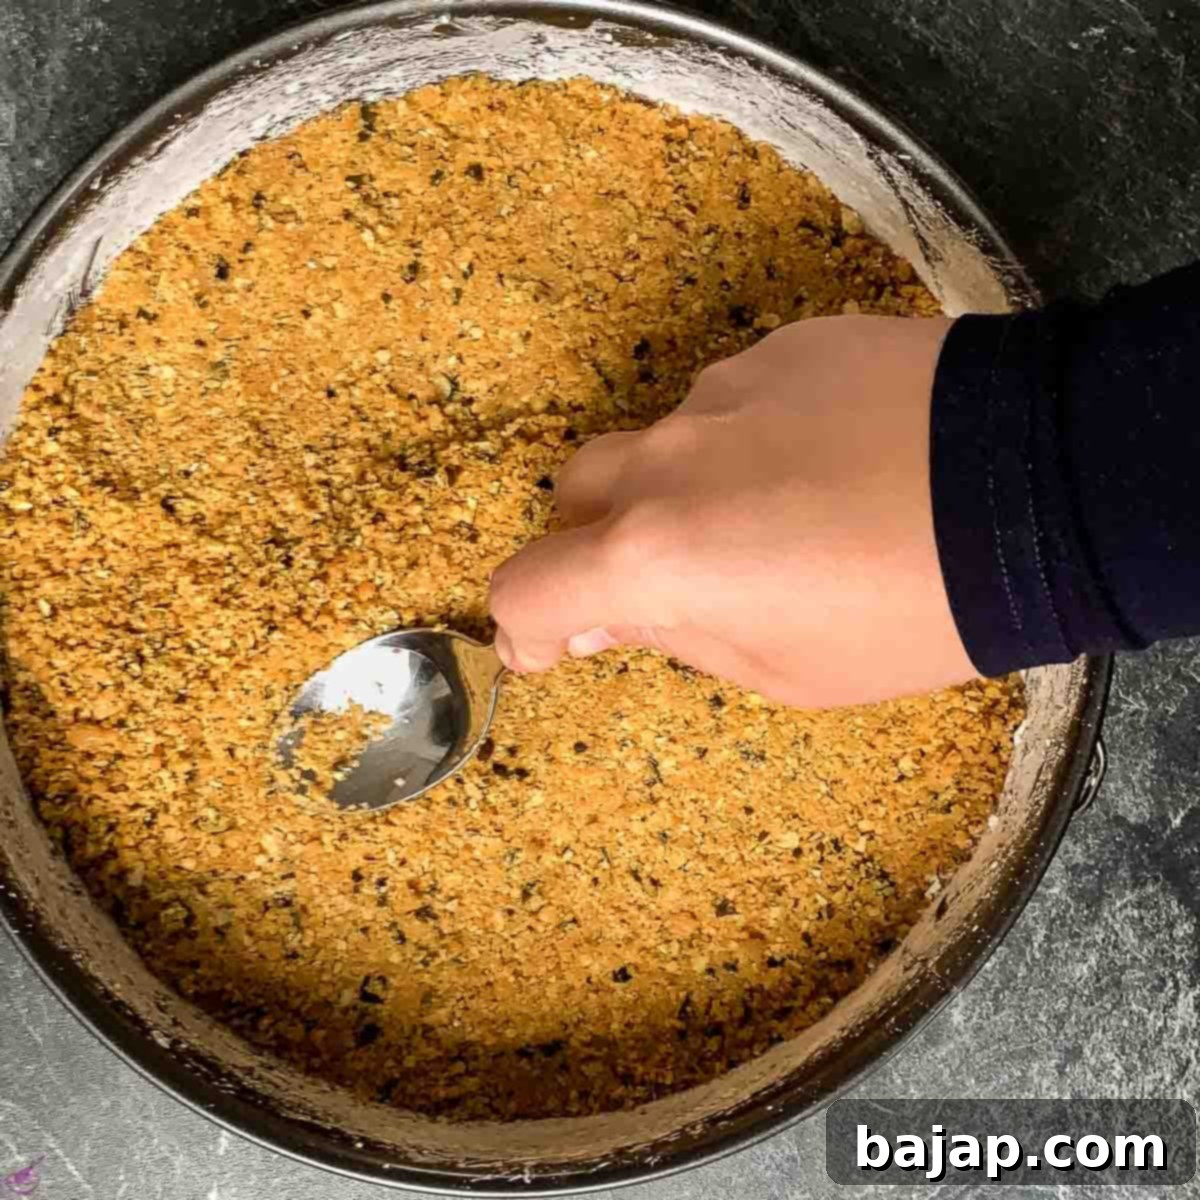
Tightly press the cookie crumbs into the pan to create a firm, even base.
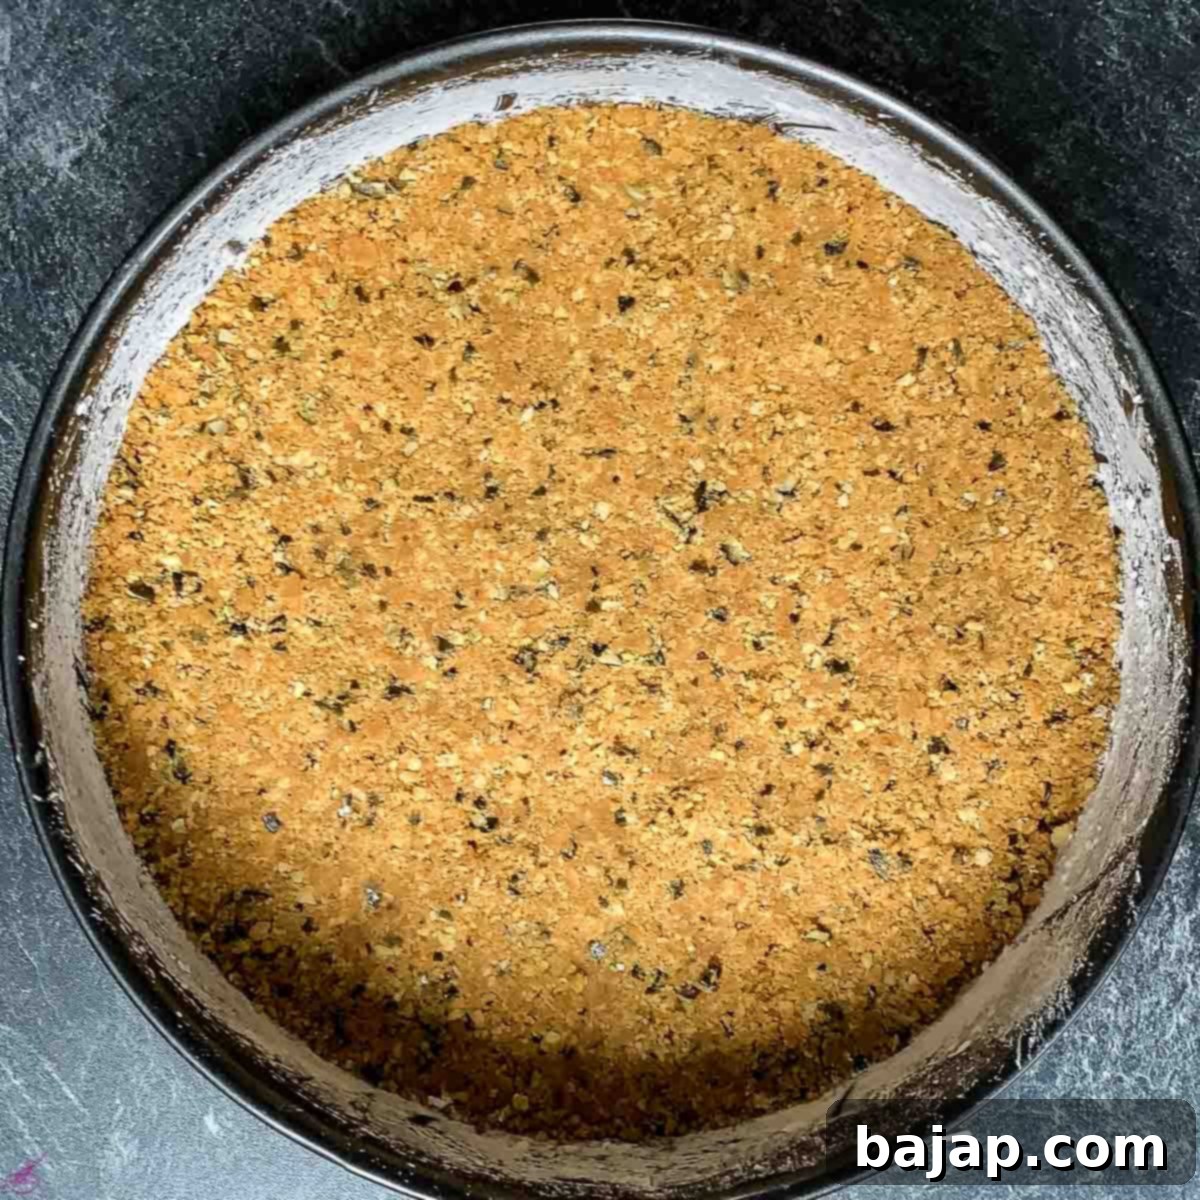
Place the crust in the freezer to set.
- Finally, place the finished crust in the freezer for at least 15 minutes. This chilling time is vital for the butter to firm up, creating a solid and cohesive base that won’t crumble when you add the filling. Leave it there until you’ve prepared the cream cheese filling.
Step 2 OPTIONAL: Preparing Fresh Pumpkin Purée
While canned pumpkin purée offers unparalleled convenience, preparing your own fresh pumpkin adds a layer of rich, authentic flavor that can truly elevate your cheesecake. If you choose this path, here’s how to do it:
- Select a sweet, dense pumpkin variety, like a sugar pumpkin or pie pumpkin. First, carefully scoop out the fibrous strings and all the pumpkin seeds. You can reserve the seeds for roasting later if desired!
- Cut the pumpkin into manageable 2.5 cm (approximately 1 inch) cubes. Place these cubes in a pot with about an inch of water. Bring the water to a boil, then reduce heat, cover, and steam the pumpkin until it is fork-tender. This usually takes at least 20 minutes, depending on the pumpkin’s density.
- Once cooked, strain the pumpkin through a fine-mesh sieve to remove any excess moisture. This step is crucial, as too much water can make your cheesecake filling runny. Allow the purée to cool completely for 20-30 minutes before proceeding. A cooled purée prevents the cream cheese and mascarpone from softening too much when combined.
Step 3: Crafting the Velvety Pumpkin Cream Cheese Filling
This is where the magic happens, transforming simple ingredients into a rich, airy pumpkin cheesecake filling.
- If using fresh, cooled pumpkin purée, transfer it to a tall mixing bowl. Using a hand blender, blend the pumpkin until it’s completely smooth and free of lumps. While blending, gradually add the granulated sugar, ensuring it’s fully incorporated. Set this vibrant pumpkin mixture aside.
- If you opted for canned pumpkin purée, simply add it to a mixing bowl. No hand blender is needed here, but it’s still a good idea to mix the granulated sugar into the pumpkin purée with a hand mixer to ensure it’s well combined.
- In the clean mixing bowl of your stand mixer, add the mascarpone and cream cheese. Ensure both are at room temperature; this is vital for achieving a smooth, lump-free filling. Blend on medium-high speed with a whisk attachment until the mascarpone and cream cheese are softened and creamy. Gradually add the powdered sugar as you continue to blend.
- Once all the powdered sugar is incorporated and the cream cheese mixture is smooth, gently fold in the pumpkin purée and ground cinnamon. Mix until just combined, being careful not to overmix.
- In a separate, chilled bowl, whip the heavy cream until stiff peaks form. The cream should be thick enough to hold its shape when you lift the whisk. Be careful not to over-whip, or it might become grainy.
- With a spatula, gently fold the whipped cream into the mascarpone-pumpkin mixture. Use a circular motion, lifting from the bottom of the bowl, until the whipped cream is fully incorporated and the filling is light, airy, and uniform in color. This gentle folding preserves the airiness of the whipped cream, contributing to the cheesecake’s fluffy texture.
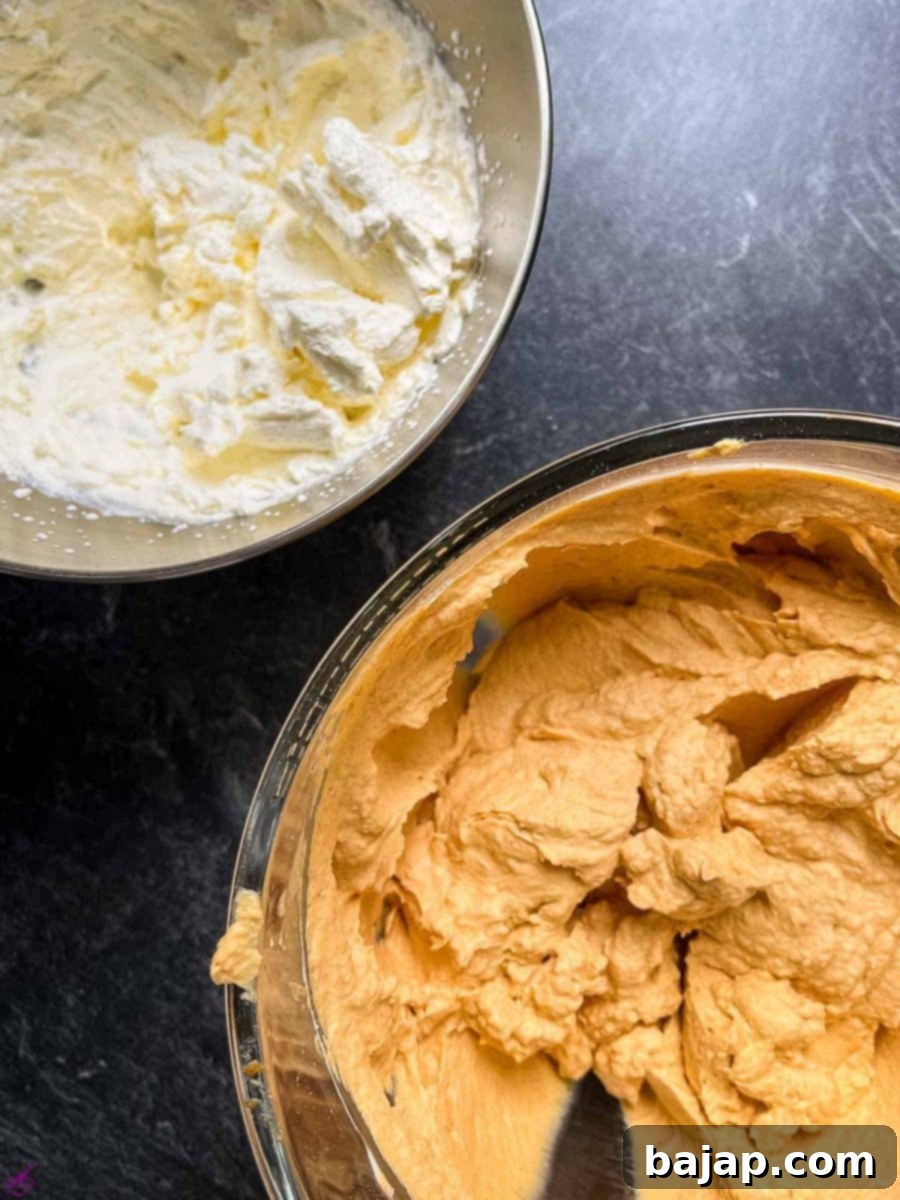
Whipped cream and pumpkin cream prior combining. These two components will soon create a light and fluffy filling.
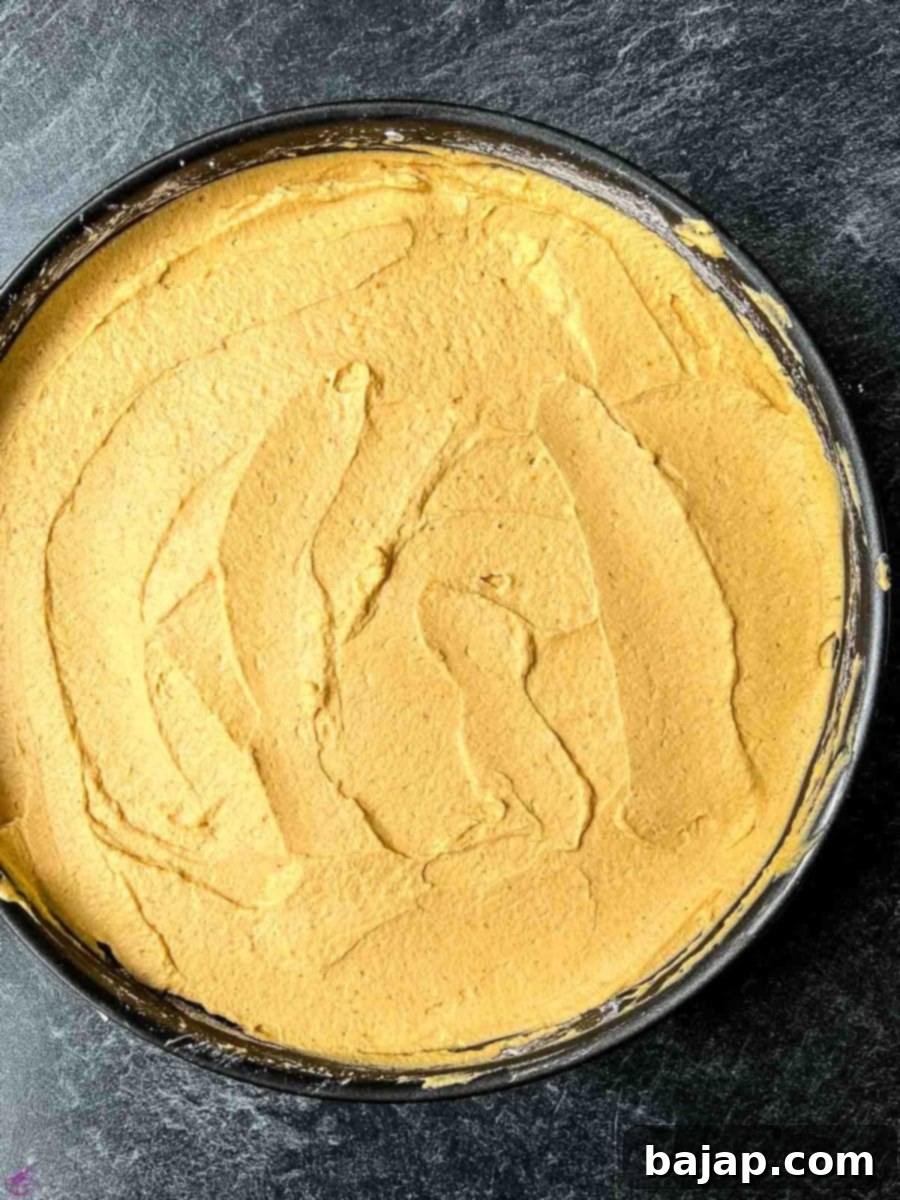
Spread the finished cream onto the cookie crust, creating a smooth layer.
- Retrieve your cookie crust from the freezer. Carefully spread the finished pumpkin cream cheese filling evenly over the chilled crust using a spatula, creating a smooth and flat surface.
- Return the filled springform pan to the freezer. This allows the cheesecake to firm up slightly while you prepare the beautiful white chocolate pumpkin seed glaze.
Step 4: The Dazzling White Chocolate Pumpkin Seed Glaze
The final touch is a glossy, irresistible white chocolate glaze, adding another layer of flavor and visual appeal to your pumpkin cheesecake.
- For the glaze, sprinkle the gelatin granules over the specified amount of cold water in a small bowl. Allow it to sit and hydrate for about 5 minutes. The gelatin will bloom and absorb the water.
- Meanwhile, heat the heavy whipping cream in the microwave until it reaches over 60 degrees Celsius (approximately 140 degrees Fahrenheit). This typically takes about 2 minutes on maximum power in most microwaves. If you have a kitchen thermometer, it’s ideal for precise temperature control, but hot (not boiling) cream is sufficient.
- Once the gelatin is hydrated and the cream is hot, combine the white chocolate pieces, the heated whipping cream, and the bloomed gelatin in a small mixing bowl.
- Using a fork, mix these three ingredients together thoroughly. Continue stirring until the white chocolate is completely melted and the mixture forms a smooth, liquid cream with no lumps of chocolate remaining. The heat from the cream will melt the chocolate, and the gelatin will dissolve smoothly.
- Retrieve the cheesecake from the freezer. Carefully pour the warm white chocolate glaze evenly over the firm cheesecake filling, gently tilting the pan if necessary to ensure full coverage.
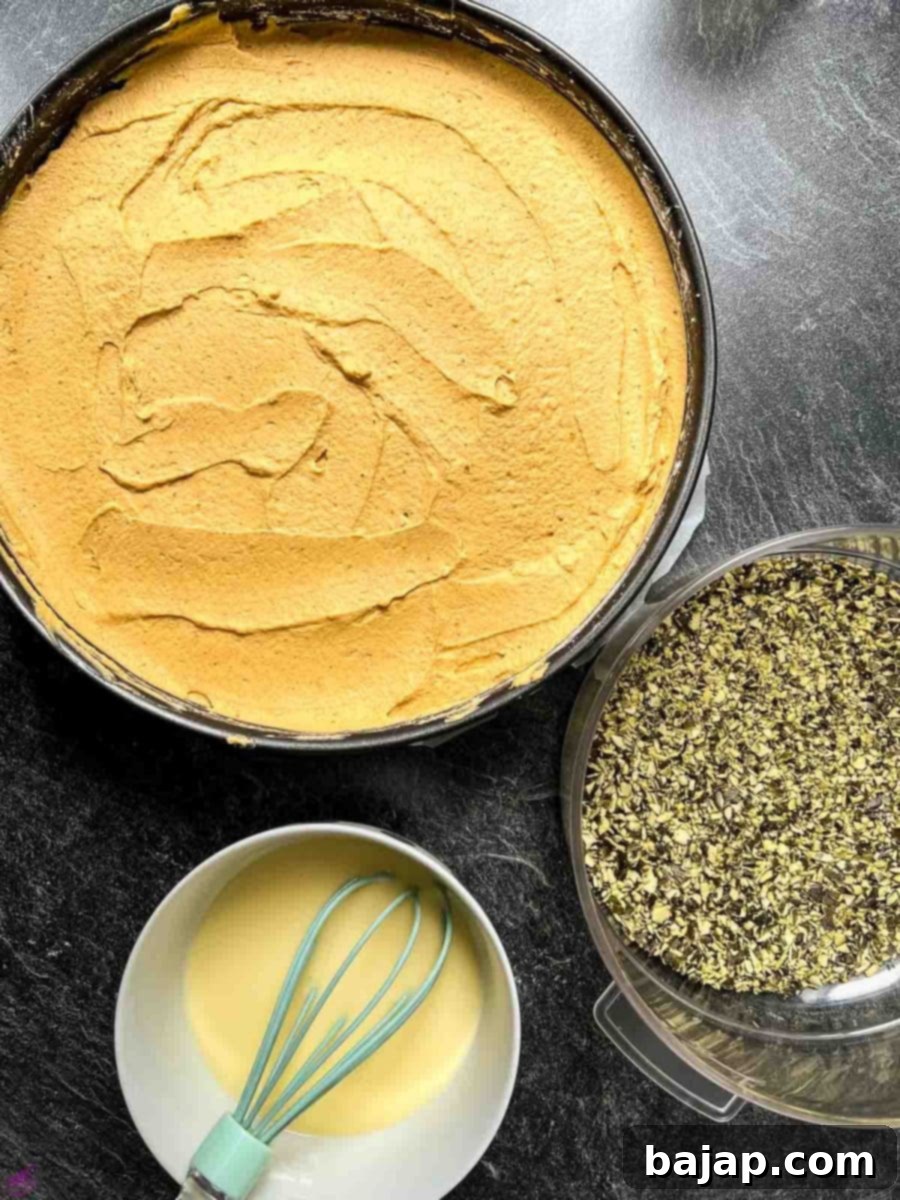
The cheesecake is firm and ready for the glaze layer.
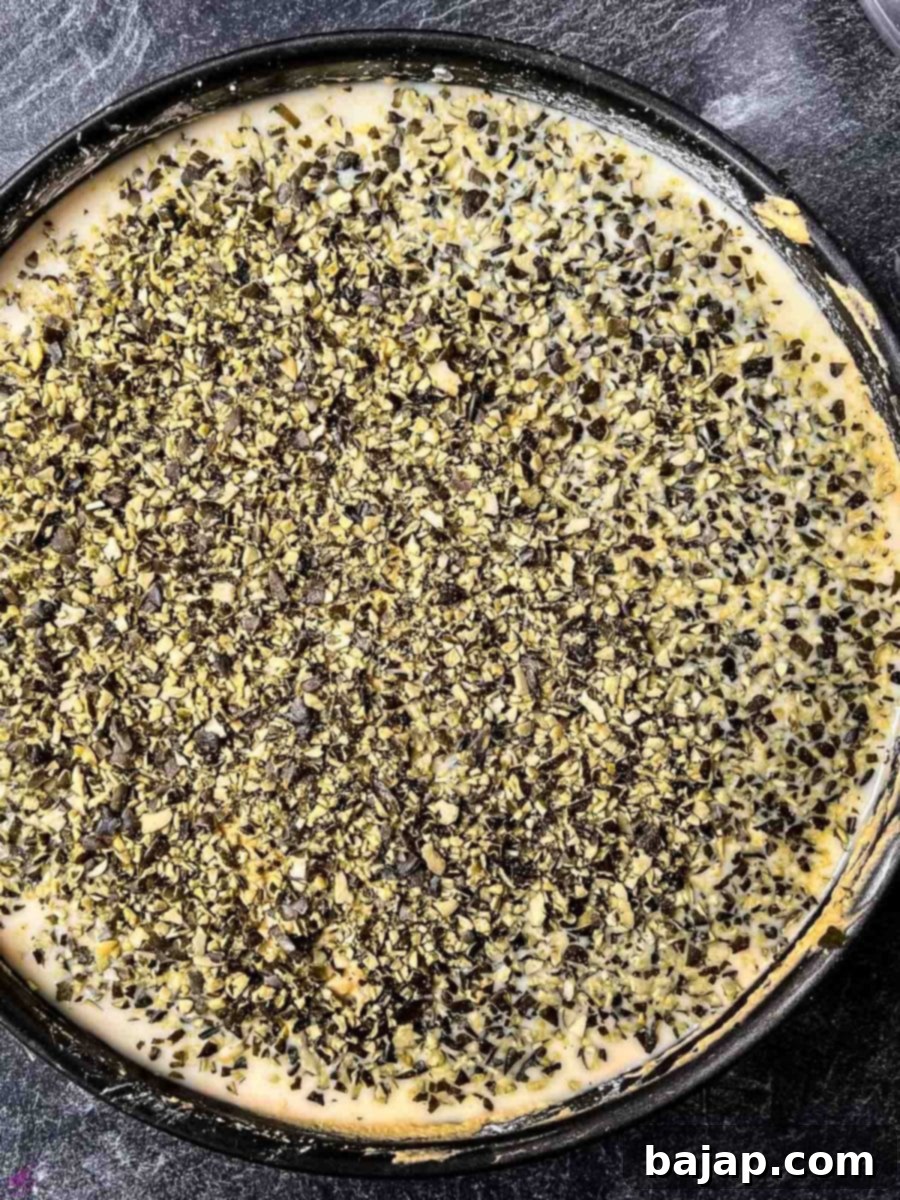
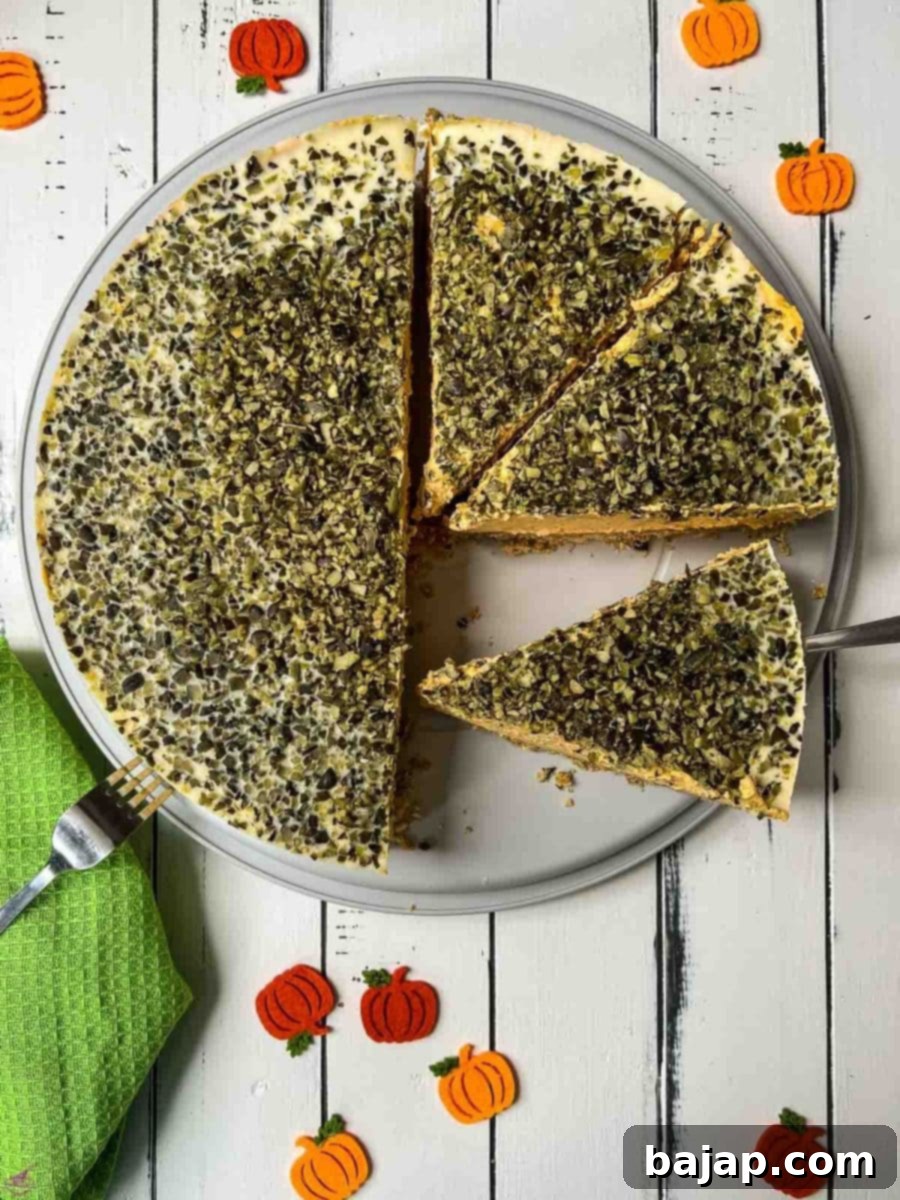
The cheesecake, beautifully topped with grated pumpkin seeds, is ready to chill.
- Immediately sprinkle the grated pumpkin seeds evenly over the still-liquid glaze. This ensures they adhere beautifully to the surface. For an extra touch of autumnal spice, lightly dust the top with pumpkin pie spice.
- Place the cheesecake back into the freezer for at least 3 hours. For the best results and a perfectly set, easy-to-slice cheesecake, chilling it overnight is highly recommended.
- Once the cheesecake is thoroughly hardened, you can carefully remove it from the springform pan. If the seal of the springform pan freezes solid and is difficult to open, you can gently heat the outside edge with a blowtorch, a gas flame, or even a lighter. Briefly directing the flame to the metal edge will help loosen the seal.
- Allow the cake to thaw slightly in the refrigerator for about 15-30 minutes before serving, as it will be very firm directly from the freezer.
Congratulations! Your beautiful and delicious no-bake pumpkin cheesecake is ready to be enjoyed. Each slice offers a perfect balance of creamy pumpkin, crunchy crust, and sweet white chocolate. Enjoy this delightful autumn treat!
Fall in Love with More Autumn Recipes
If you’re embracing the flavors of fall, don’t stop at this pumpkin cheesecake! Here are some other seasonal delights to keep your kitchen warm and your taste buds happy:
- Bourbon Highball
- Beetroot Sour Cocktail
- Rum Muffins
- Negroni Cocktail Recipe
🥜 Smart Substitutions for Your No-Bake Pumpkin Cheesecake
One of the beauties of home cooking is the flexibility to adapt recipes to suit dietary needs or ingredient availability. This no-bake pumpkin cheesecake is no exception!
If you need to make this delightful pumpkin dessert gluten-free, the substitution is incredibly simple: just replace the traditional graham crackers with your favorite brand of gluten-free cookies or biscuits. Ensure they are a sturdy, crunchy variety that can be crushed into a firm crust. For a deeper dive into gluten-free pumpkin cheesecake recipes, you might also like this gluten-free pumpkin cheesecake recipe!
Dairy-Free Option: For those with dairy sensitivities, you can try substituting dairy cream cheese with a plant-based cream cheese alternative, and heavy whipping cream with full-fat coconut cream (chilled, scoop out the thick cream only). For mascarpone, there are also some plant-based versions available, or you can use extra dairy-free cream cheese. Be mindful that the texture and flavor might vary slightly, but it can still be a delicious alternative.
Spice Variations: While cinnamon is classic, feel free to experiment with other pumpkin pie spices. A pinch of nutmeg, ginger, or cloves can add a different dimension to the pumpkin filling. You can also mix in a teaspoon of pumpkin pie spice blend directly into the filling for an all-in-one flavor boost.
Crust Flavor Boosts: Instead of or in addition to pumpkin seeds, consider adding finely chopped pecans, walnuts, or even a tablespoon of cocoa powder to the graham cracker crust for a different twist. A pinch of ginger or pumpkin pie spice in the crust can also enhance the overall flavor profile.
🍽 Essential Equipment for Your No-Bake Cheesecake
Having the right tools can make the process of creating this no-bake pumpkin cheesecake even more enjoyable and efficient. Here’s a list of the equipment you’ll need, from crushing the crust to perfecting the glaze:
- Electric mixer (stand mixer or hand mixer) – Indispensable for whipping cream and blending the filling to a smooth consistency.
- Kitchen machine – Especially useful with a whisk attachment for cream cheese and mascarpone.
- Universal Chopper – A food processor makes quick work of crushing crackers and blending pumpkin. If unavailable, a ziplock bag and rolling pin are excellent alternatives.
- Dough scraper – Helpful for folding in whipped cream and smoothing the cheesecake filling.
- Whisk – For manual mixing and ensuring ingredients are well combined.
- Hand mixer – A versatile tool if you don’t have a stand mixer.
- Hand blender (optional) – Great for blending fresh pumpkin purée until silky smooth.
- Microwave (optional) – For melting butter and heating cream for the glaze. A saucepan on the stove can be used instead.
- Parchment paper – For lining the springform pan, making removal a breeze.
- Mixing bowls – Several are needed for different components.
- Wooden spoon – For initial mixing and combining ingredients.
- Brush – To evenly coat the springform pan with butter.
- Springform pan – A 30 cm (12 inch) pan is ideal for this recipe, allowing for generous slices.
- Saucepan – If preparing fresh pumpkin or heating cream without a microwave.
- Close-meshed sieve – Crucial for straining fresh pumpkin purée to remove excess moisture.
- Thermometer (optional) – Useful for precise temperature control when heating cream for the glaze.
🌡 Storing Your Delicious Pumpkin Cheesecake
Proper storage is key to enjoying your no-bake pumpkin cheesecake for as long as possible while maintaining its freshness and delightful texture.
The finished pumpkin cheesecake will last beautifully for three to five days when stored in an airtight container in the refrigerator. Make sure it’s well-covered to prevent it from absorbing any odors from other foods in your fridge.
This cheesecake is also an excellent candidate for freezing. Since it becomes solid after assembly and chilling in the freezer, it’s perfect for longer-term storage. You can store the entire cake or individual slices (wrapped tightly in plastic wrap and then foil) in the freezer for three to six months. When you’re ready to enjoy it, transfer the frozen cheesecake to the refrigerator to thaw slowly overnight, or let individual slices thaw at room temperature for about 30-60 minutes before serving for the best texture.
💭 Top Tip: Elevate Your Pumpkin Seed Game!
For an unparalleled depth of flavor in your crust and as a garnish, I highly recommend seeking out pumpkin seeds from the Styrian company Steirerkraft. These Austrian pumpkin seeds are renowned for their exceptional quality, intense nutty flavor, and beautiful dark green hue. If you have the opportunity to get your hands on them, I can only highly recommend them – they truly make a difference!
If you’re a true pumpkin enthusiast, expanding your repertoire beyond this cheesecake is a must! You’ll fall in love with our incredibly soft pumpkin cookies, which are wonderfully chewy and packed with spice. Or, for a breakfast or brunch treat, try these delicious pumpkin cream cheese swirl muffins – they’re a delightful combination of savory and sweet. And for a truly impressive yet manageable dessert, a gorgeous pumpkin cake roll is always a crowd-pleaser; it’s both cute and super delicious!
🙋🏻 Frequently Asked Questions About No-Bake Pumpkin Cheesecake
Here are some common questions about making and enjoying your no-bake pumpkin cheesecake:
When stored properly in an airtight container in the refrigerator, your finished pumpkin cheesecake will last for three to five days. Its fresh, creamy texture and vibrant flavors will hold up well within this timeframe.
Absolutely! This no-bake pumpkin cheesecake freezes beautifully. Since it already sets solid during its chilling process in the freezer, you can comfortably store it there for an extended period. It maintains its quality in the frozen state for three to six months, making it a perfect make-ahead dessert.
Yes, it can! Making this pumpkin cheesecake gluten-free is very simple. Just swap out the regular graham crackers for a gluten-free cookie alternative. Ensure the gluten-free cookies are a firm, crunchy variety that can be easily crushed to form a stable crust, and you’re good to go!
Definitely! While this recipe calls for ground cinnamon, you can certainly substitute or add pumpkin pie spice to the filling for a more complex and traditional pumpkin pie flavor. Start with ½ to 1 teaspoon and adjust to your taste preferences.
There could be a few reasons. Ensure your cream cheese and mascarpone were at room temperature before blending for a smooth mixture. Most importantly, make sure you whipped the heavy cream to stiff peaks – this is what provides the primary setting power for a no-bake cheesecake. Also, ensure you allowed adequate chilling time in the freezer, preferably overnight.
Looking for more delicious no-bake cheesecakes? If you loved the ease and flavor of this pumpkin version, you’ll definitely want to check out these other fantastic recipes:
- The Best No-Bake Chocolate Ricotta Cheesecake
- Decadent No-Bake Eggnog Cheesecake
- Spooktacular No-Bake White Chocolate Raspberry Cheesecake {Halloween Edition}
- Charming No-Bake Fig Cheesecake in a Jar
- Refreshing No-Bake Mint Chocolate Cheesecake
- Patriotic No-Bake 4th of July Cheesecake
- Quick 5-Ingredient Mini Oreo Cheesecakes
- Classic No-Bake Strawberry Cheesecake
We hope you enjoy creating and savoring this delightful No-Bake Pumpkin Cheesecake. It’s truly a labor of love that pays off with every creamy, spiced bite. If you make this recipe, please let me know how you liked it by giving it a ★★★★★ star rating and leaving a comment below. Your feedback is incredibly valuable and would be awesome! You can also sign up for our Newsletter to receive delicious recipes directly in your inbox, or follow me on Pinterest or Instagram and share your creation with me. Just tag me @combinegoodflavors and use the hashtag #combinegoodflavors, so I don’t miss it!
📖 Recipe Card: No-Bake Pumpkin Cheesecake
Pumpkin Cheesecake (no bake)
By Nora
Save RecipeSaved!
Pin Recipe
Equipment
-
Electric Mixer
-
Kitchen machine
-
Universal Chopper or ziplock bag and rolling pin
-
Dough scraper
-
Whisk
-
Hand mixer
-
Hand blender (optional)
-
Microwave (optional)
-
Parchment Paper
-
Mixing bowls
-
Cooking spoon
-
Brush
-
Springform pan 30 cm // 12 inch
-
Saucepan
-
Close meshed sieve
-
Thermometer (optional)
Ingredients
For the cracker crust
- 10 oz Graham cracker or Petit beurre biscuits
- 5 oz Unsalted butter
- ¼ cup Milk
- 8 tablespoon Grated pumpkin seeds
- 1 tablespoon Cornstarch
For the cheesecake filling
- 17.5 oz Mascarpone
- 10.5 oz Cream cheese
- 1 cup Heavy whipping cream
- ¾ cup Icing sugar
- 12.5 oz Pumpkin fresh or canned
- ½ cup Sugar
- ½ tablespoon Ground cinnamon
For the glaze
- ⅓ tablespoon Gelatin granules
- ⅛ cup Water
- 7 tablespoon Whipped cream
- ¼ cup White chocolate
- ¾ cup Grated pumpkin seeds
Optional
- Pumpkin pie spices for the final dusting
Instructions
Cookie base
-
Place the crackers in a ziplock bag and crush them with a rolling pin or let a universal chopper do the task.10 oz Graham cracker
-
Add the cracker crumbs and the grated pumpkin seeds to a mixing bowl and mix well with a wooden spoon.
-
Place the butter together with the milk in a microwave-safe dish and heat on medium until the butter is completely melted.5 oz Unsalted butter, ¼ cup Milk
-
Set aside two tablespoons of the melted butter-milk mixture and mix the rest with the crushed cookies and pumpkin seeds.8 tablespoon Grated pumpkin seeds
-
Mix until all the cookie crumbs are well combined with the butter.
-
Line the bottom of the springform pan with parchment paper and brush with the melted butter.
-
Then sprinkle the cornstarch on the parchment paper and shake the cake pan until it is evenly coated with cornstarch.1 tablespoon Cornstarch
-
Remove the excess by turning the mold and place the pan in the refrigerator for 2-3 minutes.
-
Once the springform pan is ready, pour the biscuit-butter mixture on top and press it down evenly to the edge of the cake pan.
-
Place the finished base in the freezer for at least 15 minutes or until the cream cheese filling is prepared.
OPTIONAL: Prepare the fresh pumpkin
-
First, scoop out the fresh pumpkin and remove the pumpkin seeds. Cut the pumpkin into 2.5 cm cubes and cook in a pot until soft (at least 20 minutes).12.5 oz Pumpkin
-
After cooking, strain through a fine sieve and leave to cool for 20-30 minutes.
Pumpkin cream cheese filling
-
Place the cooled pumpkin in a tall mixing bowl and blend with a hand blender. While blending, gradually add the icing sugar and set it aside.¾ cup Icing sugar, 12.5 oz Pumpkin
-
If you opted for the canned puree, add it to a mixing bowl. You don’t need a hand blender here, but it’s a good idea to mix the sugar with the pumpkin puree using a hand mixer.
-
In the meantime, take the mixing bowl of your kitchen machine and add the mascarpone and cream cheese.17.5 oz Mascarpone, 10.5 oz Cream cheese
-
Blend on medium-high speed with a whisk attachment until the mascarpone softens, gradually adding the powdered sugar as you go.½ cup Sugar
-
Once all the powdered sugar is added, you can mix in the pumpkin purée and ground cinnamon.½ tablespoon Ground cinnamon, 12.5 oz Pumpkin
-
Whip the heavy cream in a separate bowl until stiff peaks form.1 cup Heavy whipping cream
-
Add the whipped cream to the mascarpone with a spatula and mix in a circular motion until well combined.
-
Now get the cookie base out of the freezer. The finished pumpkin cream can now be spread with a spatula into the springform pan onto the previously prepared cookie base, creating a flat surface.
-
Return the filled springform pan to the freezer while you make the glaze.
White Chocolate Pumpkin Seed Glaze
-
Add the gelatin granules to the water and hydrate for 5 minutes.⅓ tablespoon Gelatin granules, ⅛ cup Water
-
Meanwhile, heat the whipping cream in the microwave to over 60 degrees (or 2 minutes on maximum).7 tablespoon Whipped cream
-
Once the gelatin is ready, place the white chocolate, heated whipped cream, and gelatin in a small mixing bowl. Mix the three ingredients together well by using a fork.7 tablespoon Whipped cream, ¼ cup White chocolate, ⅓ tablespoon Gelatin granules
-
Once forming a liquid cream and there are no white chocolate pieces left, pour the cream over the cheesecake.
-
Finally, sprinkle the grated pumpkin seeds on top and place the cheesecake in the freezer for at least 3 hours. (Overnight is best).¾ cup Grated pumpkin seeds
-
Additionally, sprinkle pumpkin pie spice on top.Pumpkin pie spices
-
You can remove the cake from the springform pan when it has hardened.
-
Now the cake can be released from the mold and served after thawing.
Nutrition values are estimates only, using online calculators. Please verify using your own data.

🤎 More Delicious No-Bake Desserts & Fall Favorites
If this no-bake pumpkin cheesecake has sparked your love for easy, delightful desserts, you’re in luck! Here are some other fantastic recipes, including more no-bake cheesecakes and other autumnal treats, that you might also enjoy:
- Spooktacular Cheesecake with “Bloody” Raspberry Filling
- Fall in Love with these Soft Pumpkin Cookies
- How to make an Apple Compote
- Fall in Love with this Cranberry Bundt Cake
⛑️ Food Safety First
Ensuring food safety is paramount when preparing any meal, especially desserts that may involve dairy and other perishable ingredients. Please keep these important guidelines in mind:
- Always cook pumpkin, if using fresh, to a minimum internal temperature of 165 °F (74 °C) to eliminate any potential bacteria.
- Avoid cross-contamination: do not use the same utensils or cutting boards on cooked food that previously touched raw meat or unwashed vegetables.
- Thoroughly wash your hands with soap and warm water before and after handling any food, especially raw ingredients.
- Never leave perishable foods, like cream cheese or whipped cream, sitting out at room temperature for extended periods. Promptly refrigerate or freeze your cheesecake to prevent bacterial growth.
- While this is a no-bake recipe, if you are incorporating any cooked elements (like preparing fresh pumpkin), never leave cooking food unattended.
- Although not directly applicable to this recipe’s “no-bake” nature, for general cooking, use oils with high smoking points to avoid producing harmful compounds when frying or sautéing.
- Always ensure good ventilation when using a gas stove, both for safety and to dissipate cooking odors.
For more detailed and comprehensive information on safe food handling practices, please refer to authoritative sources such as the Safe Food Handling guide from the FDA. Your health and safety in the kitchen are always the top priority!
