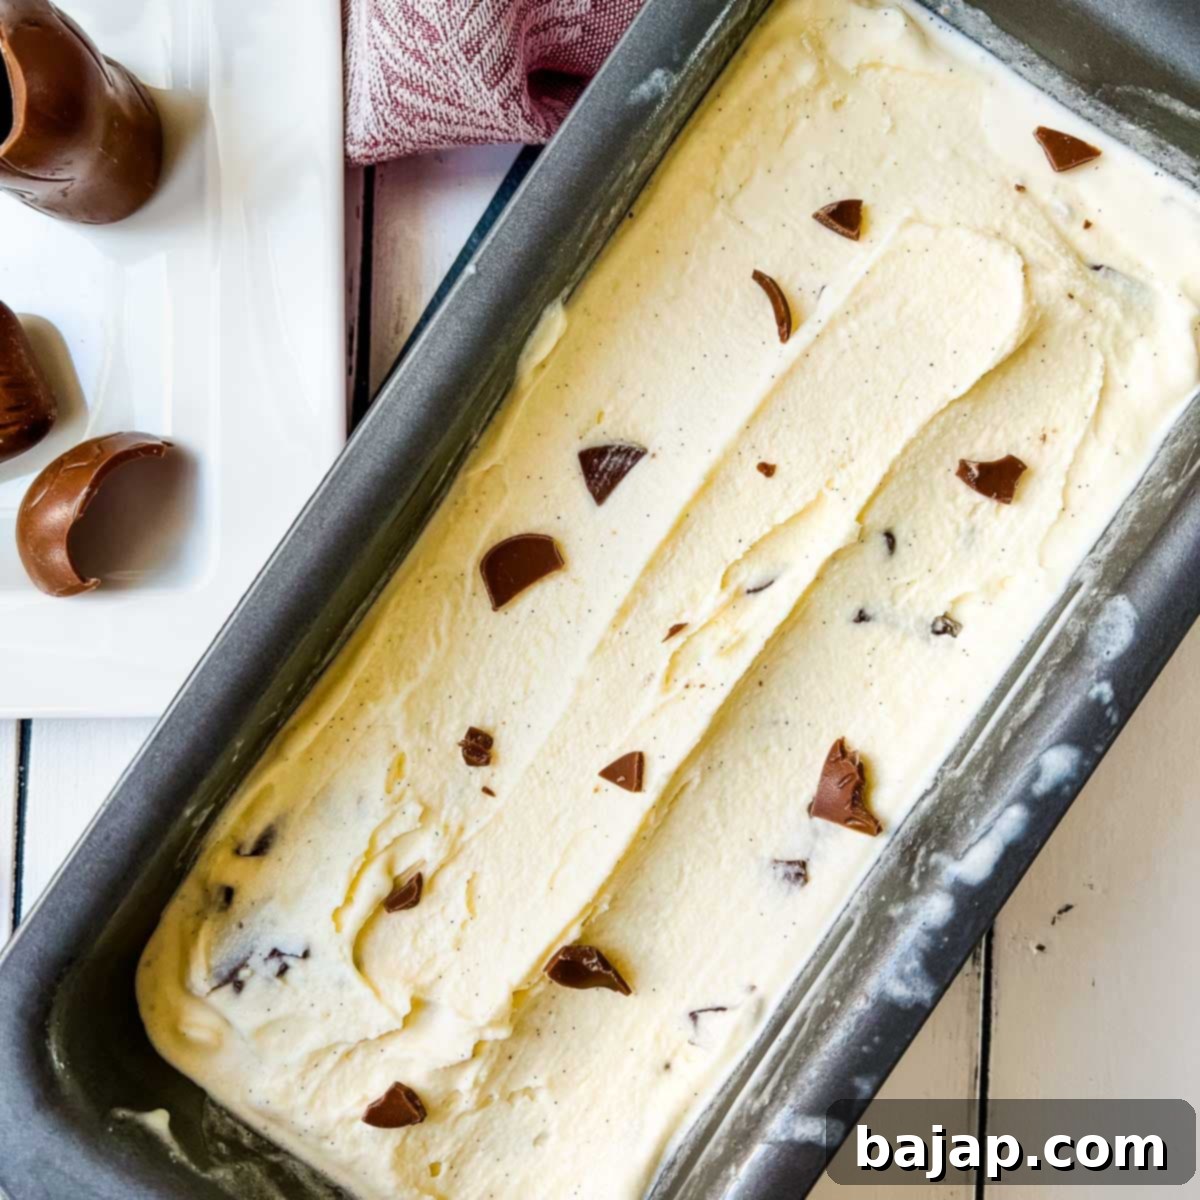
Homemade Chocolate Chip Vanilla Ice Cream: The Easiest Recipe for Creamy Perfection
There’s an unparalleled joy that comes with making your own ice cream right in your kitchen. While the convenience of store-bought tubs and the excitement of a family outing to the ice cream parlor are wonderful, there’s something truly magical about scooping out a batch of homemade goodness. The flavor, the texture, and the pride in knowing you created it yourself are simply unbeatable.
This delightful chocolate chip vanilla ice cream recipe is incredibly versatile, serving as the perfect complement to a wide array of desserts or shining brightly as the main event itself. Imagine a scoop nestled alongside your favorite baked treats, elevating every bite. It pairs beautifully with rich, decadent desserts like our Ultimate Double Chocolate Bundt Cake, or the smooth, creamy indulgence of our No-Bake Chocolate Ricotta Cheesecake. This isn’t just a sidekick; it’s a star in its own right!
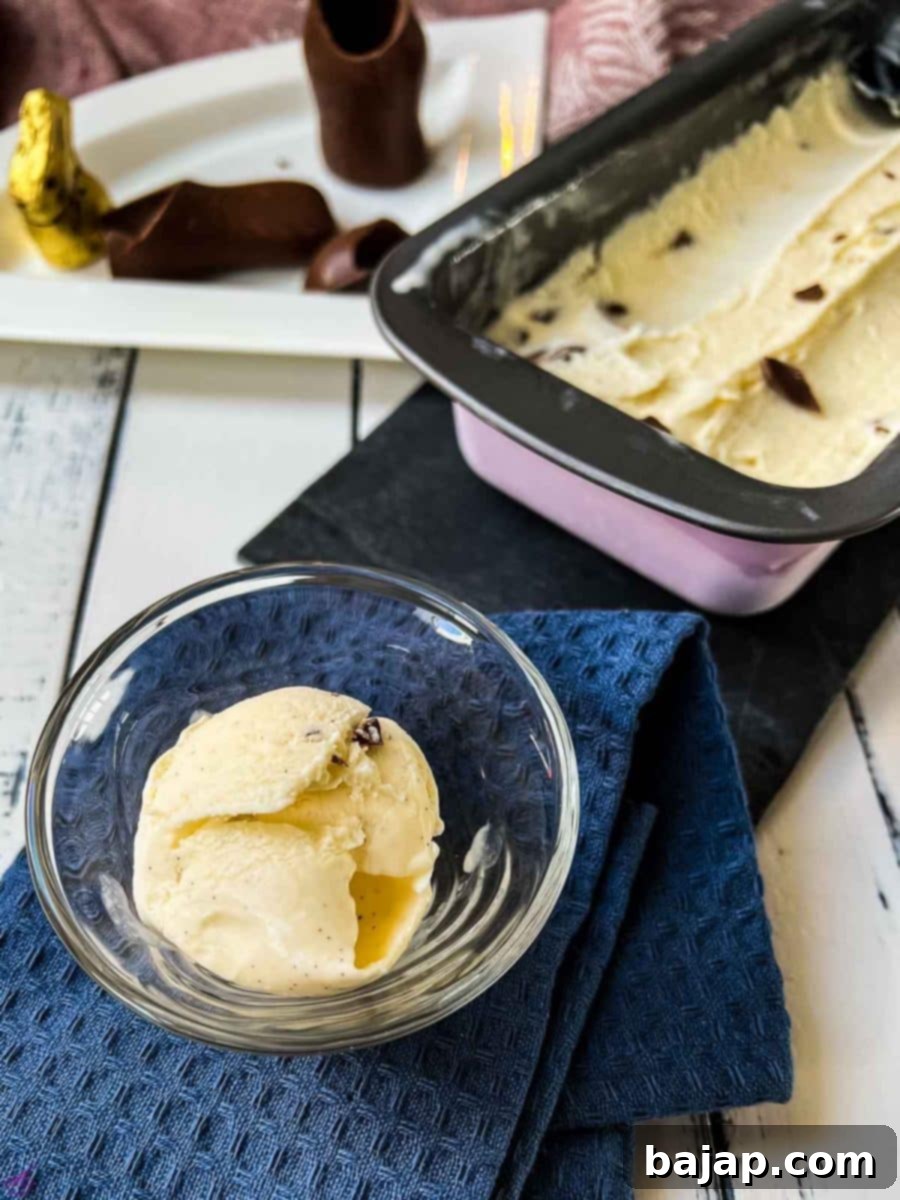
While often associated with scorching summer days, this homemade chocolate chip vanilla ice cream transcends seasonal boundaries. Its rich, comforting flavor profile makes it a fantastic treat even during the colder months, especially when paired with holiday sweets. Think about how delightful it would be with leftover Christmas chocolates or those charming chocolate Easter Bunnies you have tucked away. It’s a wonderful way to give new life to holiday treats and extend the festive spirit!
What truly sets this recipe apart is its incredible, intense vanilla flavor and surprisingly quick and easy preparation. You’ll be amazed at how simple it is to achieve such a luxurious result. In fact, the most challenging part of this entire process will undoubtedly be the waiting – waiting for your homemade chocolate chip vanilla ice cream to properly chill and freeze to that perfect, scoopable consistency. But trust us, the wait is absolutely worth it for the creamy, flavorful reward!
Are you a fan of chocolate chips? We certainly are! If you’re looking for more ways to enjoy this beloved ingredient, be sure to try our scrumptious Chocolate Chip Ricotta Loaf Cake for a moist, tender treat, or our unique Chocolate Chip Cookies with Chestnut Flour for a delightful twist on a classic. Each recipe offers a different way to experience the joy of chocolate chips!
[feast_advanced_jump_to]
🥘 Essential Ingredients for Your Creamy Creation
Crafting the perfect homemade chocolate chip vanilla ice cream starts with a selection of quality ingredients. Each component plays a crucial role in achieving that rich, creamy texture and intense vanilla flavor we’re aiming for. Here’s a detailed look at what you’ll need:
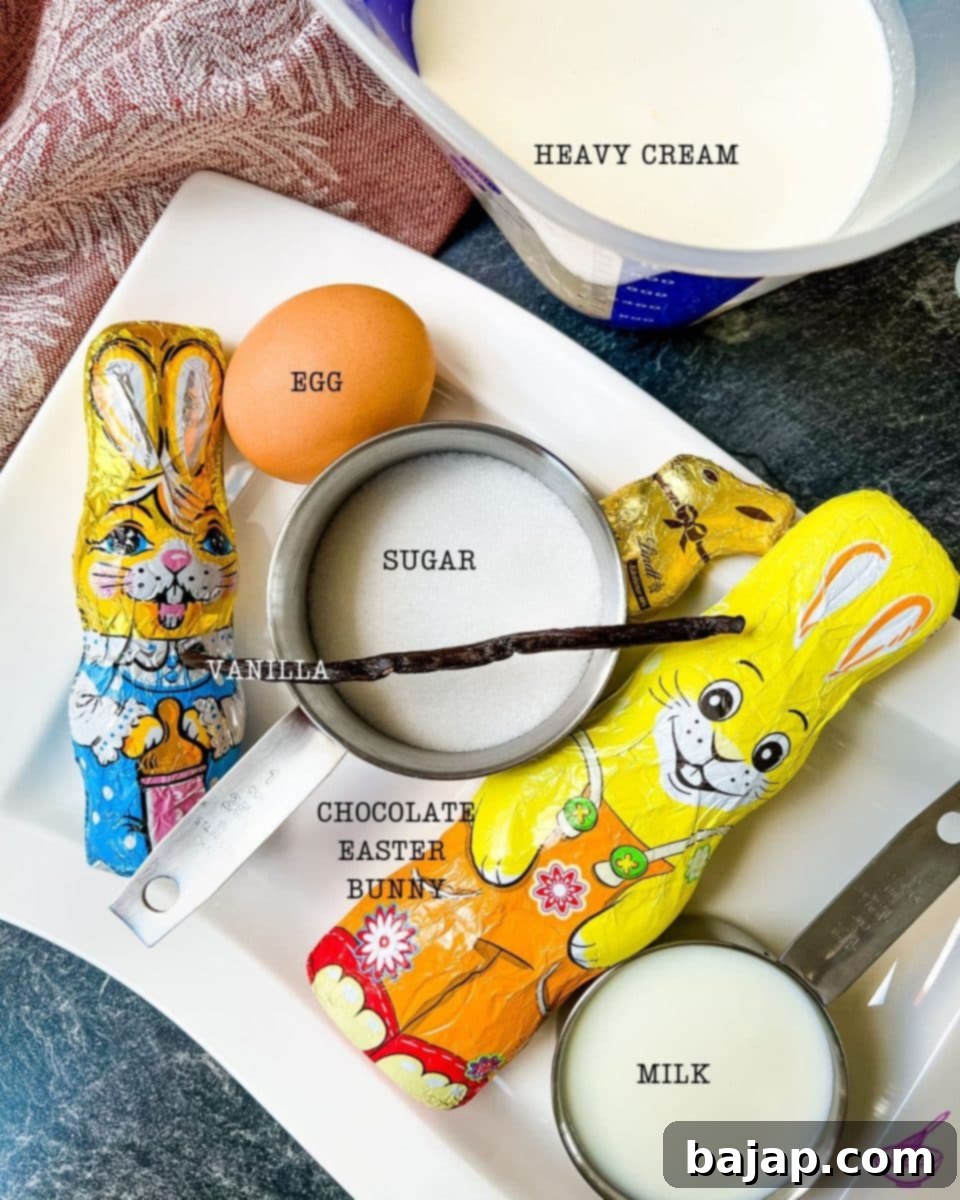
- Whole Milk: This is non-negotiable for achieving the rich, creamy consistency synonymous with high-quality ice cream. Steer clear of 2% milk, skim milk, or any dairy alternatives, as they contain less fat and will result in a more icy, less satisfying texture. The fat content in whole milk is key to that luxurious mouthfeel.
- Heavy Whipping Cream (Full-Fat): Just like with the milk, full-fat heavy whipping cream is essential. Reduced-fat creams simply won’t deliver the same decadent richness. The high fat content contributes significantly to the creaminess and prevents the formation of large ice crystals, ensuring a smooth, delightful scoop every time.
- Vanilla Bean: This is where the magic happens for an intense vanilla flavor. While vanilla extract can work in a pinch, a fresh vanilla bean provides a depth of flavor that is truly unparalleled. The tiny seeds and the scraped-out pod infuse the base with a wonderfully aromatic and complex vanilla essence.
- Salt: Just a pinch of salt might seem counter-intuitive in a sweet dessert, but it’s a flavor enhancer! It balances the sweetness, brings out the nuanced vanilla, and makes the chocolate chips taste even more vibrant.
- Egg: A single egg yolk (or sometimes a whole egg, depending on the recipe type) adds richness and helps to create a smoother, more custard-like texture, preventing iciness and contributing to the overall creamy body of the ice cream.
- Granulated Sugar: The primary sweetener, sugar, not only provides taste but also plays a role in the ice cream’s texture, helping to keep it soft and scoopable by lowering the freezing point.
- Chocolate Chips (or Leftover Chocolate): This is where you can get creative! Dark chocolate and milk chocolate chips both work wonderfully, offering different levels of sweetness and intensity. For a truly unique touch, consider using up any leftover chocolate Easter Bunnies or other holiday chocolates you might have. Break them into small, irregular pieces for varied bites of chocolatey goodness.
For exact quantities and detailed measurements, please refer to the comprehensive recipe card located at the bottom of this post.
🔪 Step-by-Step Instructions for Homemade Chocolate Chip Vanilla Ice Cream
Making your own ice cream is a rewarding process, and while it requires a bit of chilling time, the active prep is surprisingly quick and straightforward. Follow these steps for a truly incredible result:
- Prepare the Vanilla Bean: Begin by carefully slicing your vanilla bean lengthwise down the middle. Using the back of a small knife or a spoon, scrape out the fragrant, black pulp (the tiny seeds) from both halves. This pulp is packed with intense vanilla flavor, which is key to our ice cream.
- Infuse the Dairy: In a medium saucepan, combine your heavy whipping cream and whole milk. Add both the scraped vanilla pulp and the emptied vanilla bean pod to the mixture. Gently heat the mixture over medium-low heat, stirring occasionally. It is absolutely crucial that you do not bring the mixture to a boil. You want it to be warm enough to infuse the vanilla flavor, but boiling can alter the dairy’s texture.
- Cool the Base: Once the mixture is heated and aromatic, remove the saucepan from the heat. Allow it to cool down to room temperature. This step is important for both safety and flavor.
- Chill Thoroughly: After the mixture has cooled, cover the saucepan tightly with a lid or plastic wrap. Place it in the refrigerator for at least three hours. This extended chilling time is vital; it allows the vanilla flavor to deepen and ensures the base is thoroughly cold before it goes into the ice cream maker, which is essential for proper churning and a smooth texture.
- Remove Vanilla and Add Remaining Ingredients: Once the three hours have passed and the mixture is well-chilled, remove the vanilla bean pod from the saucepan. Discard the pod. To the cold vanilla-infused dairy mixture, add your egg, granulated sugar, and salt. Whisk everything together thoroughly until the sugar is completely dissolved and the mixture is well combined. You can achieve this by hand with a sturdy whisk or by using a food processor fitted with a whisk attachment for extra ease.
- Prepare Your Chocolate: If you’re using leftover chocolate Easter bunnies or chocolate bars, now is the time to break them into small, bite-sized pieces. Don’t worry about perfect uniformity; varying sizes will add character to your ice cream. Place these chocolate pieces in a bowl and set them aside. If you’re using store-bought chocolate chips, simply measure them out and have them ready.
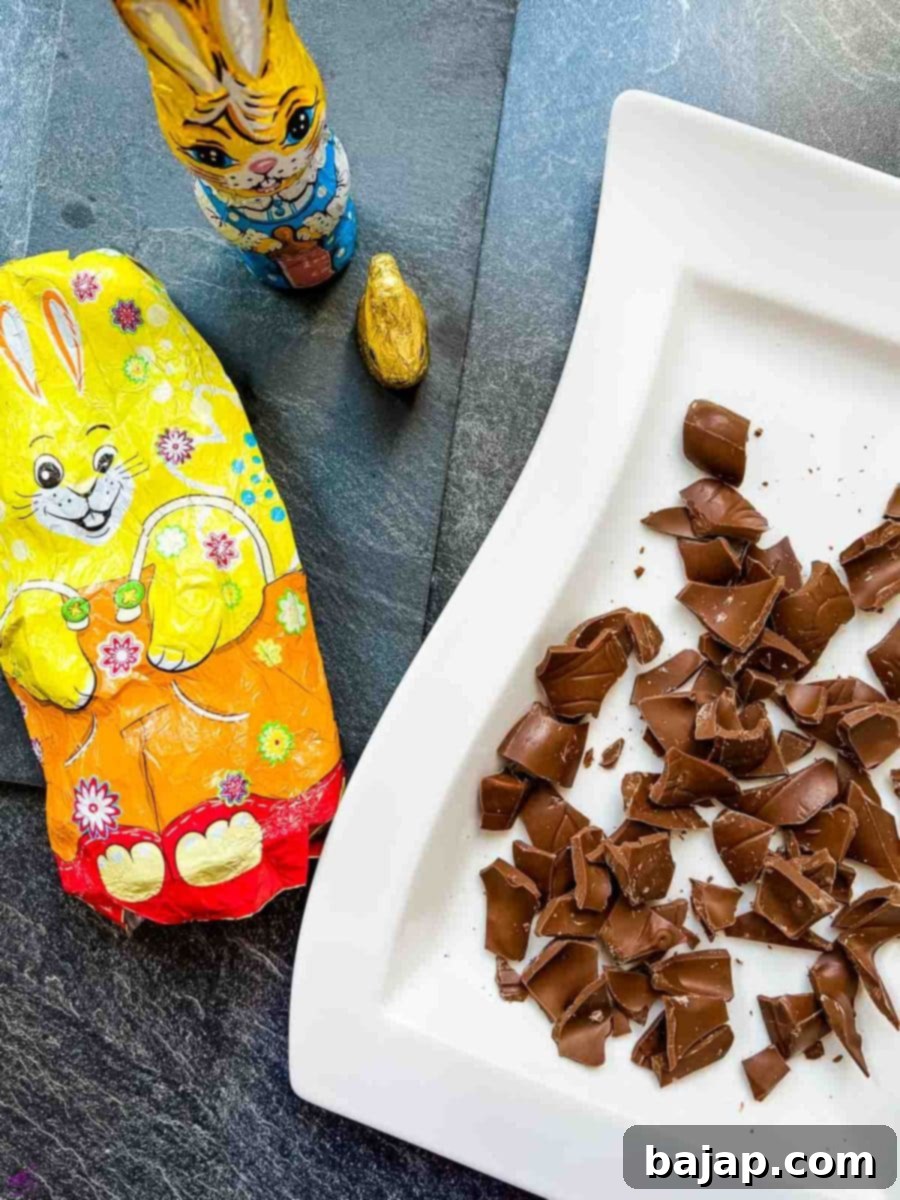
If you don’t have any holiday chocolate leftovers, any good quality store-bought chocolate chips will be fantastic. Just make sure to have them ready to go when it’s time to add them to your churning ice cream.
- Prepare Your Ice Cream Maker: Ensure your ice cream maker bowl has been frozen for at least 12-24 hours prior to use, as recommended by your machine’s manufacturer. Attach the frozen bowl to your ice cream maker base. Pour the chilled vanilla milk mixture into the prepared bowl.
- Churn the Ice Cream: Insert the dasher (the paddle attachment) and turn your ice cream maker on to its designated churning setting (often referred to as ‘level two’ or a specific ice cream setting). Allow the mixture to churn for 15-20 minutes, or until it reaches a soft-serve consistency. The exact time may vary based on your machine and the initial temperature of your mixture.
- Add Chocolate Chips: Approximately 2-3 minutes before the churning process is complete, add your broken chocolate Easter bunny pieces or chocolate chips into the churning ice cream. This allows them to be evenly distributed throughout the mixture without breaking down too much.
- Final Freeze and Serve: Once the ice cream reaches your desired soft-serve consistency, turn off the machine. You can either scoop it directly into dessert bowls for immediate enjoyment (it will be soft and creamy!), or for a firmer, more scoopable ice cream, transfer it to a suitable airtight storage container (like a loaf pan or specialized ice cream container) and freeze for an additional 2-4 hours.
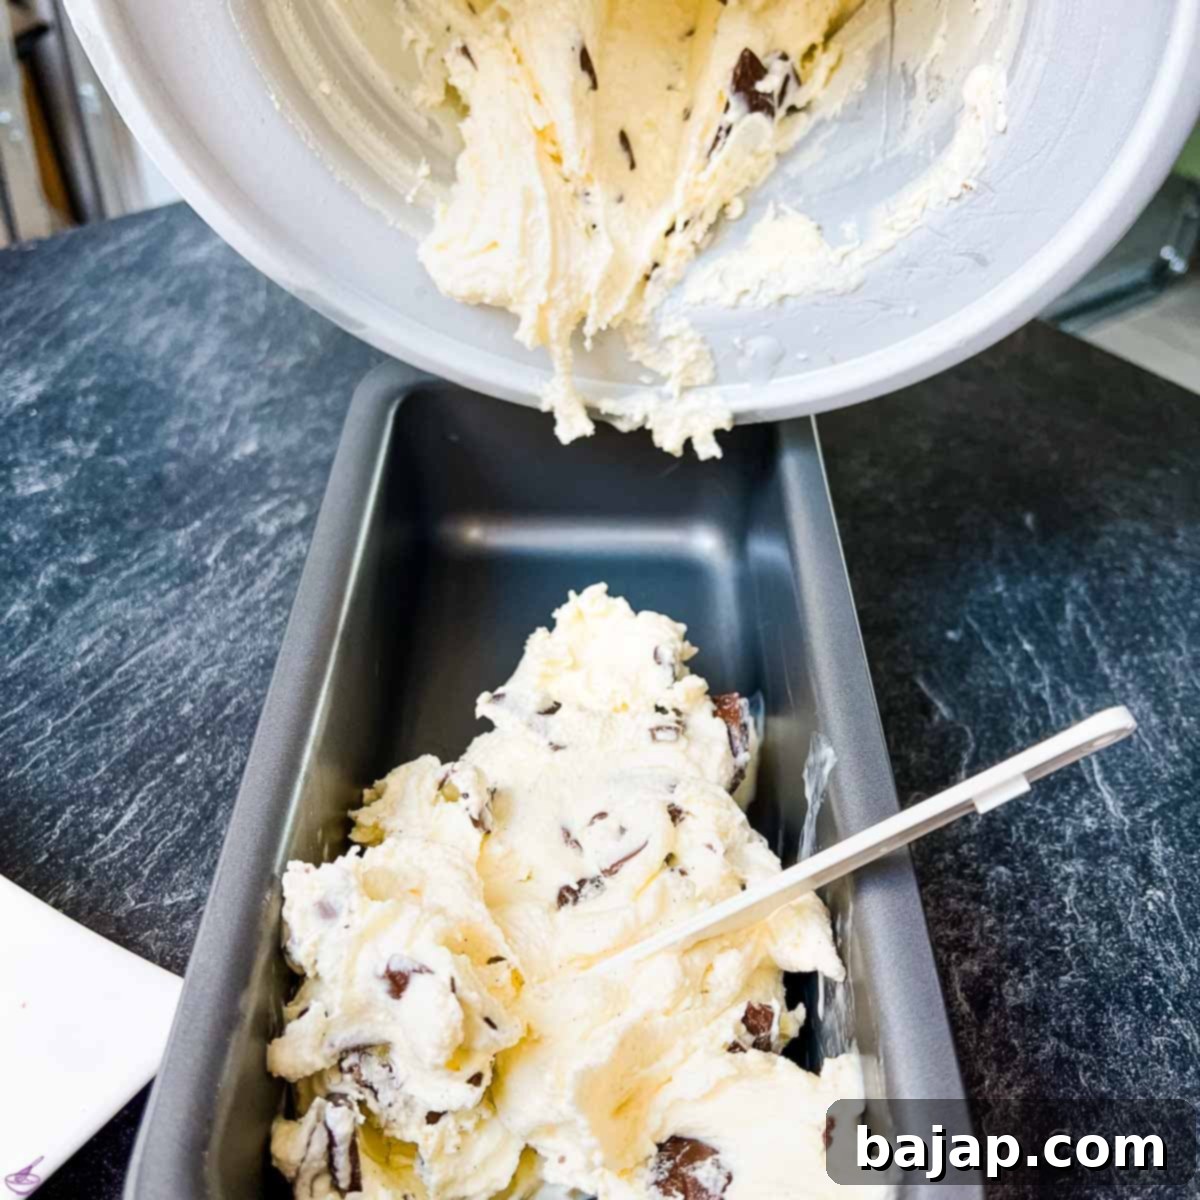
And there you have it! Grab a spoon, take a moment to appreciate your culinary creation, and say “Bon Appetit!” This homemade chocolate chip vanilla ice cream is truly a treat for the senses.
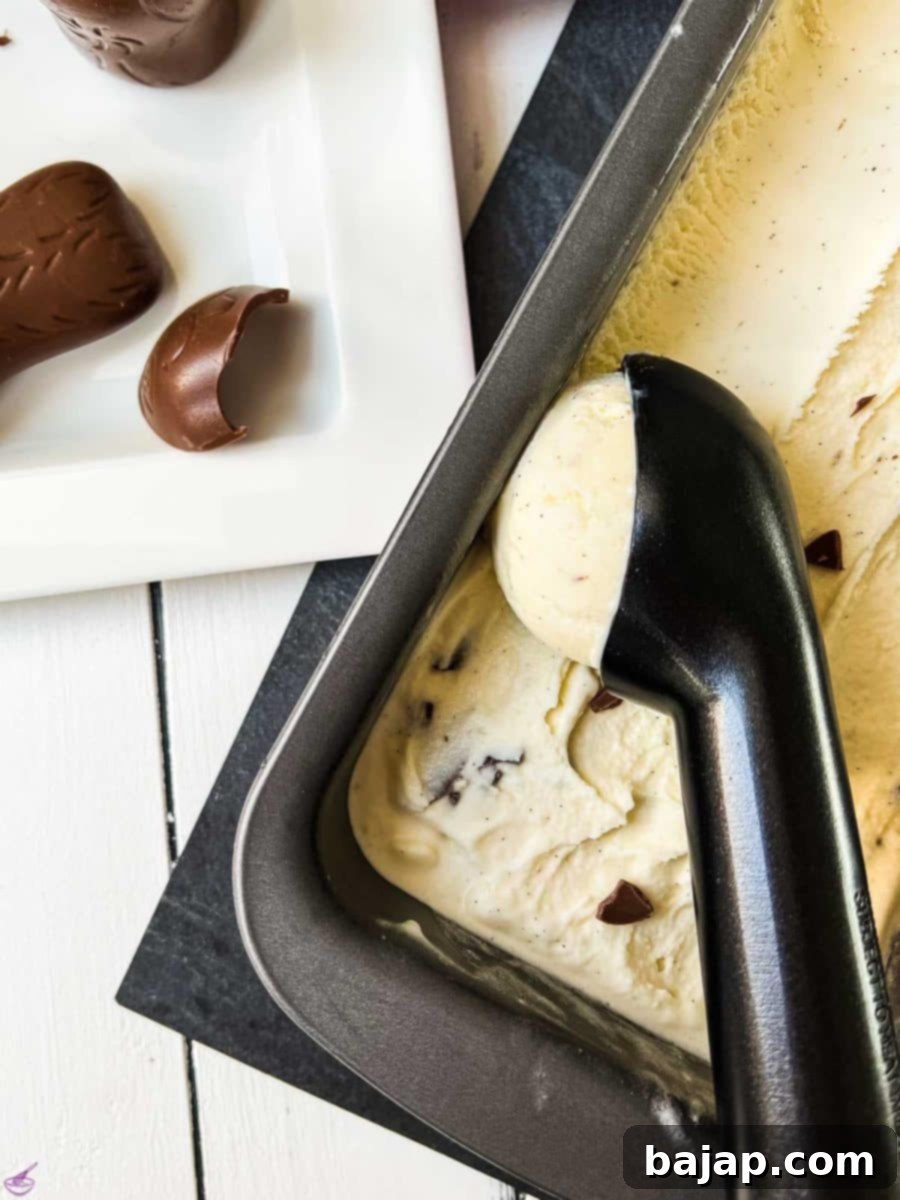
🍑 Delicious Variations to Experiment With
One of the best things about making ice cream at home is the freedom to customize it to your heart’s desire! While our classic chocolate chip vanilla is fantastic, this recipe offers a wonderful canvas for culinary experimentation. Don’t be afraid to get creative with your mix-ins, especially when it comes to chocolate!
When selecting your chocolates, the possibilities are vast. Do you prefer the rich intensity of dark chocolate, the classic sweetness of milk chocolate, or the creamy indulgence of white chocolate? Or why not go for a delightful combination of all three? You can use standard chocolate chips, finely chopped chocolate bars, or even break up various chocolate candies. Personally, I love adding ROLO pieces into mine for an extra gooey caramel-chocolate surprise!
Beyond chocolate, consider these other exciting mix-in ideas:
- Nuts: Toasted pecans, walnuts, almonds, or even pistachios add a delightful crunch and nutty flavor.
- Caramel or Fudge Swirls: Drizzle in warm caramel sauce or chocolate fudge sauce during the last few minutes of churning, or swirl it in when transferring to the freezer container.
- Cookie & Candy Bits: Crushed Oreos, graham cracker pieces, crumbled brownies, or chopped candy bars (like Snickers or Butterfinger) can transform your ice cream into a whole new experience.
- Fruit: For a touch of freshness, consider adding finely diced fresh berries (strawberries, raspberries) or a swirl of fruit compote. Just make sure the fruit is well-drained to avoid making the ice cream too icy.
The key is to add mix-ins towards the end of the churning process to ensure they are evenly distributed and maintain their texture.
🍽 Essential Equipment for Homemade Ice Cream
To make this creamy homemade chocolate chip vanilla ice cream, you’ll need a few key pieces of equipment. While some items are flexible, an ice cream maker is central to achieving that perfect texture.
- Ice Cream Maker: This is the star of the show! We highly recommend a stand mixer attachment, specifically the KitchenAid ice cream attachment, which we use and love for its consistent results and ease of use. If you don’t have a stand mixer, a standalone freezer bowl ice cream maker will also work beautifully. Just ensure the bowl is thoroughly pre-frozen according to its instructions.
- Medium Saucepan: Essential for gently heating and infusing your milk and cream with that wonderful vanilla flavor.
- Spatula or Whisk: A good spatula is handy for scraping out vanilla bean pulp and for stirring. A whisk is perfect for ensuring the egg, sugar, and salt are fully incorporated into the chilled mixture, preventing lumps.
- Airtight Container for Storage: Once churned, you’ll need a suitable container to store your homemade ice cream in the freezer. A loaf pan covered tightly with plastic wrap and foil works, but dedicated reusable ice cream tubs are excellent for maintaining freshness and preventing freezer burn.
🌡 Storing Your Homemade Ice Cream for Optimal Freshness
Unlike commercial ice creams that often contain stabilizers and preservatives to extend their shelf life for months, your homemade chocolate chip vanilla ice cream is made with fresh, natural ingredients. This means it has a shorter, but equally delicious, freezer life. If you happen to have any leftovers – which is a rare occurrence with this recipe! – proper storage is key to maintaining its quality.
To store your homemade ice cream, transfer it to a suitable airtight storage container immediately after churning. A sturdy plastic container with a tight-fitting lid, or a loaf pan covered first with plastic wrap pressed directly onto the surface of the ice cream (to prevent ice crystals), and then with aluminum foil, works best. This double layer of protection helps minimize exposure to air, which is the primary cause of freezer burn and ice crystal formation.
You’ll want to enjoy your homemade chocolate chip vanilla ice cream within approximately two weeks for the best flavor and texture. Beyond that, it might start to develop ice crystals or lose some of its creamy consistency. Remember, the fresher, the better!
💭 Top Tips for Perfect Homemade Ice Cream
Achieving truly perfect homemade ice cream is simple when you know a few tricks. These pieces of advice will help ensure your chocolate chip vanilla ice cream comes out wonderfully creamy and bursting with flavor every single time:
- Don’t Skimp on Vanilla: The number one tip is to use REAL, fresh vanilla bean. While vanilla extract is good for baking, a fresh vanilla bean provides an unparalleled depth of flavor and aromatic richness that truly elevates your ice cream. If you try to cut corners on this step, your ice cream won’t have the same delicious, intense vanilla profile. The tiny specks of vanilla bean are also a beautiful visual indicator of quality!
- Embrace Full-Fat Dairy: This is arguably the most important piece of advice for a creamy texture. Always use whole milk and full-fat heavy whipping cream. Low-fat dairy products contain more water and less fat, which will inevitably lead to an icy, watery ice cream. The fat content in whole milk and heavy cream is what gives homemade ice cream its luxurious, smooth, and utterly scoopable consistency. It prevents large ice crystals from forming, ensuring a velvety mouthfeel.
- Chill, Chill, Chill: Don’t rush the chilling process for your ice cream base. The longer and colder your base mixture is before it goes into the ice cream maker, the better. This helps the ice cream churn faster and more efficiently, leading to a smoother texture. Aim for at least 3 hours, but overnight is even better!
- Pre-Freeze Your Bowl Properly: If using a freezer-bowl ice cream maker, ensure the bowl is completely frozen solid for a minimum of 12-24 hours. A partially frozen bowl won’t churn the ice cream effectively.
- Add Mix-ins at the Right Time: Always add your chocolate chips (or any other mix-ins) during the last few minutes of churning, when the ice cream has already started to thicken. Adding them too early can result in them sinking to the bottom or becoming too broken down.
- Don’t Overfill: Your ice cream maker bowl should not be filled more than two-thirds full, as the mixture will expand as it churns and freezes.
Looking for more frozen dessert inspiration? Check out these fantastic Ninja Creami Recipes for even more delicious ice cream, sorbet, and frozen yogurt ideas, all made with the popular NINJA Creami Ice Cream Maker!
🙋🏻 Frequently Asked Questions About Homemade Ice Cream
Because you’re using whole, unprocessed ingredients (for the most part) in this recipe, your homemade ice cream won’t have the same extended shelf life as the cartons you buy at the supermarket. To store it effectively, transfer any leftovers into a suitable airtight container, such as a Pyrex dish with a tight lid or a specialized ice cream tub. For an extra layer of protection against ice crystals, press a piece of plastic wrap directly onto the surface of the ice cream before sealing the container. Store it in the coldest part of your freezer. For the best flavor and texture, aim to finish off those delicious leftovers within two weeks!
The best way to chop chocolate for ice cream depends on your desired texture. Personally, I love to take leftover chocolates (like those Easter bunnies!) or chocolate bars and simply chop them into irregular chunks. Don’t stress about making them uniform in shape or size – the varied pieces add a rustic charm and interesting bites. If you prefer a softer chocolate texture in your frozen treat, you can melt your chocolate, add a tiny bit of water (this helps prevent it from getting too hard when refrozen), let it cool slightly until it thickens, and then chop it up. This method can result in thinner, slightly softer chocolate shards once frozen.
There’s a fantastic variety of ice cream makers on the market today, each with its own advantages. For this recipe, I personally rely on my KitchenAid stand mixer with its dedicated ice cream maker attachment. It consistently delivers excellent results and is incredibly convenient if you already own a KitchenAid mixer. Its efficiency and ease of use make it a top recommendation. However, if a KitchenAid isn’t in your kitchen, many other great options exist, including standalone freezer bowl machines (like Cuisinart or Breville) or even compressor-style machines that don’t require pre-freezing. Feel free to research online reviews to find the best model that fits your needs and budget.
Other Delicious Recipes You’ll Love
Vanilla Bean Ice Cream Pancakes
Eggnog Cheesecake with Gingerbread Spiced Crust
Dark Chocolate Mousse with Heavy Cream
Best Homemade Vanilla Ice Cream Recipe
Easy Vanilla Sauce
If you make this irresistible homemade chocolate chip vanilla ice cream recipe, please let me know how much you loved it by leaving a ★★★★★ star rating and a comment below. Your feedback is truly awesome! You can also sign up for our Newsletter to get weekly delicious recipes directly to your inbox, or follow me on Pinterest or Instagram and share your creation with me. Just tag me @combinegoodflavors and use the hashtag #combinegoodflavors, so I don’t miss your fantastic work!
📖 Recipe Card: Homemade Chocolate Chip Ice Cream
Chocolate Chip Ice Cream
Nora
Save RecipeSaved!
Pin Recipe
Equipment
-
Ice Cream Maker
-
Saucepan
-
Spatula
-
Container for homemade ice cream
Ingredients
- ½ cup Whole milk
- 1 ½ cup Heavy Whipping Cream (full-fat)
- 1 Vanilla bean
- 1 Pinch Salt
- 1 Large Egg
- 6 ¼ tablespoon Granulated Sugar
- ¾ cup Chocolate Chips or Chopped Easter bunnies
Instructions
-
Carefully cut the vanilla bean lengthwise down the middle and scrape out all of the flavorful pulp using a small spoon or knife.1 Vanilla bean
-
In a medium saucepan, gently heat the heavy whipping cream and whole milk. Add the scraped vanilla pulp, along with the empty vanilla bean pod, to the saucepan. Ensure the mixture heats slowly and do not allow it to boil.1 ½ cup Heavy Whipping Cream, ½ cup Whole milk
-
Remove the saucepan from the heat and allow the cream mixture to cool down completely to room temperature.
-
Once cool, cover the saucepan tightly and transfer it to the refrigerator to chill for a minimum of three hours. This chilling process is essential for optimal flavor infusion and texture.
-
After the three-hour chilling period, remove the vanilla bean pod from the mixture and discard it.
-
To the cold vanilla mixture, add the large egg, granulated sugar, and salt. Whisk vigorously by hand or use a food processor with a whisk attachment to ensure all ingredients are well combined and the sugar is fully dissolved.1 Large Egg, 6 ¼ tablespoon Granulated Sugar, 1 Pinch Salt
-
If using leftover chocolate Easter bunnies or chocolate bars, break them into small, irregular pieces. Place the chopped chocolate in a bowl and set aside until ready to use. If using chocolate chips, simply measure them out.¾ cup Chocolate Chips or Chopped Easter bunnies
-
Prepare your ice cream maker according to the manufacturer’s instructions. If using a KitchenAid attachment, ensure the freezer bowl is frozen solid (at least 12-24 hours in advance) and securely attach it to your stand mixer. Pour the prepared vanilla milk mixture into the frozen ice cream maker bowl.
-
Insert the dasher (paddle attachment) and turn the ice cream maker on to its churning setting (e.g., level two). Churn for 15-20 minutes, or until the ice cream reaches a soft-serve consistency.
-
About 2-3 minutes before the end of the churning time, add the chopped chocolate pieces or chocolate chips through the opening of the ice cream maker. This ensures they are evenly distributed.
-
Once the ice cream is ready and has a soft-serve consistency, you can serve it immediately in dessert bowls. For a firmer ice cream, transfer it to a suitable airtight storage container and freeze for an additional 2-4 hours until firm.
Nutrition values are estimates only, using online calculators. Please verify using your own data.

🤎 You Might Also Like These Sweet Treats
If you enjoyed making this homemade chocolate chip vanilla ice cream, you’re sure to find more delicious inspiration among these other delightful recipes:
- Homemade Vanilla Ice Cream Recipe
- Vanilla Bean Ice Cream Pancakes {Palatschinken}
- Stracciatella Egg Liqueur Milkshake Recipe
- Boozy Eggnog Milkshake
⛑️ Important Food Safety Guidelines
When preparing any food, especially those involving raw eggs and dairy, it’s crucial to adhere to proper food safety practices to ensure a delicious and safe eating experience. Please keep the following guidelines in mind:
- Minimum Cooking Temperatures: If your recipe involves any cooking step for the egg base, ensure it reaches a minimum internal temperature of 165 °F (74 °C) to eliminate harmful bacteria. Although this specific recipe doesn’t involve cooking the egg, always be mindful when using raw eggs, ensuring they are fresh and from a trusted source.
- Prevent Cross-Contamination: Always use separate utensils, cutting boards, and bowls for raw ingredients (like eggs) and cooked or ready-to-eat foods to prevent cross-contamination.
- Thorough Handwashing: Wash your hands thoroughly with soap and warm water before and after handling any food, especially raw ingredients.
- Avoid Extended Room Temperature Exposure: Do not leave food, particularly dairy-based mixtures, sitting out at room temperature for extended periods. Bacteria can multiply rapidly between 40°F (4°C) and 140°F (60°C). Our recipe emphasizes prompt cooling and chilling for this reason.
- Never Leave Cooking Unattended: If you are heating any part of your ice cream base, never leave it unattended on the stove. This prevents scorching, boiling, and potential hazards.
- Good Ventilation: Always ensure you have good ventilation when using a gas stove or any cooking appliances to prevent the buildup of fumes.
For comprehensive and up-to-date food safety information, always refer to reputable sources such as the Safe Food Handling guidelines from the FDA.
