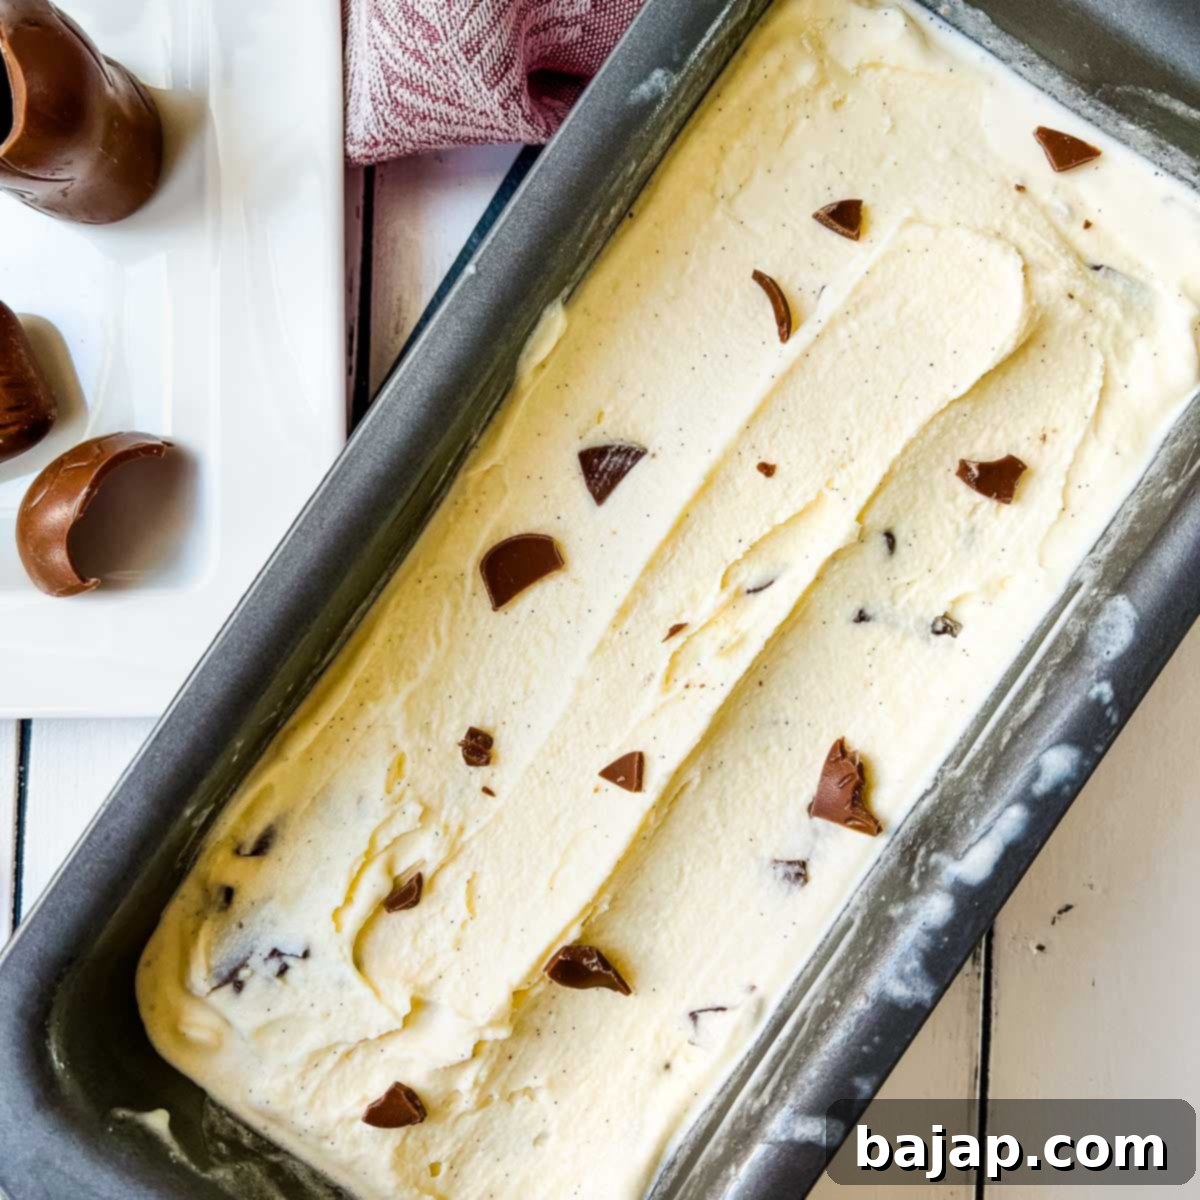
The Ultimate Guide to Homemade Chocolate Chip Vanilla Ice Cream: Creamy & Easy with Your Ice Cream Maker
There’s an unparalleled joy that comes with crafting your own ice cream right in your kitchen. While the allure of endless flavors at the grocery store or a family outing to the local scoop shop is undeniable, there’s a unique satisfaction and superior taste when you create it yourself. This isn’t just a dessert; it’s an experience, a delightful project that rewards you with incredible flavor and a sense of accomplishment.
This exquisite chocolate chip vanilla ice cream recipe is designed to be the perfect companion to any dessert you can imagine. Its rich, creamy texture and vibrant vanilla flavor, studded with bursts of chocolate, elevate any sweet treat. Picture it alongside your favorite cake or pie – it’s a match made in heaven!
I personally love serving this decadent ice cream with my Ultimate Double Chocolate Bundt Cake, or as a cooling contrast to my No-Bake Chocolate Ricotta Cheesecake. It’s truly the perfect sidekick to a wide array of delicious desserts. However, don’t let its versatility as an accompaniment fool you; this tasty treat can effortlessly steal the spotlight and serve as the star of the show all on its own!
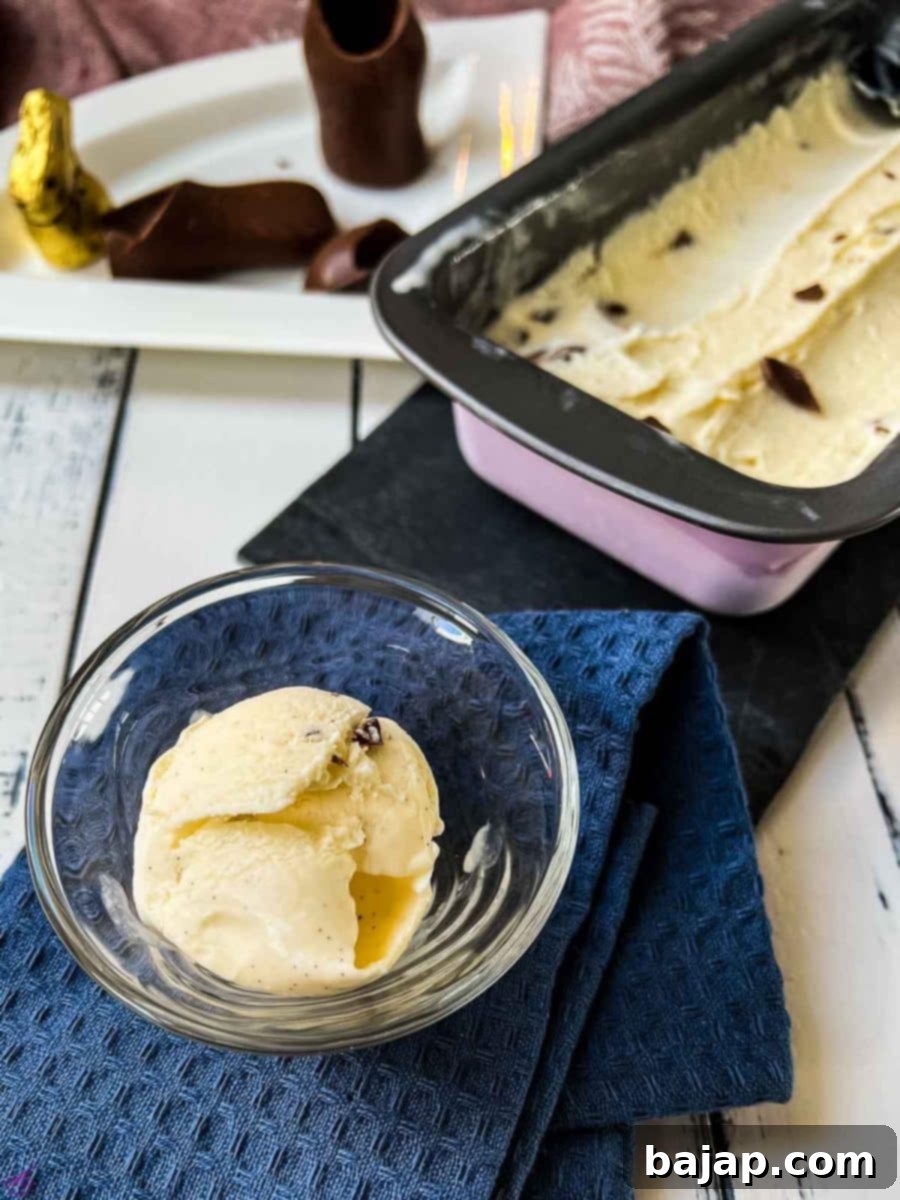
While it’s the quintessential treat for a sweltering summer day, offering a refreshing escape from the heat, its comforting flavors also make it surprisingly delightful during the colder months. Imagine indulging in a scoop alongside leftover Christmas chocolates or those charming chocolate Easter bunnies. It’s a versatile dessert that truly transcends seasons, bringing joy and a touch of homemade warmth year-round.
You’ll fall in love with this recipe not only for its wonderfully intense and authentic vanilla flavor but also for its surprisingly quick and straightforward preparation time. The most challenging part of this entire culinary adventure will undoubtedly be the patience required as you wait for your freshly churned homemade chocolate chip vanilla ice cream to properly cool and set in the freezer! But trust us, the wait is absolutely worth it for that perfect scoop.
If you’re eager for more delicious chocolate chip recipes to add to your repertoire, you’re in luck! Make sure to try our scrumptious Chocolate Chip Ricotta Loaf Cake for a delightful breakfast or afternoon treat, and our unique Chocolate Chip Cookies with Chestnut Flour for a chewy, flavorful twist on a classic. These recipes are sure to satisfy any chocolate chip craving you might have!
🥘 Essential Ingredients for Your Creamy Creation
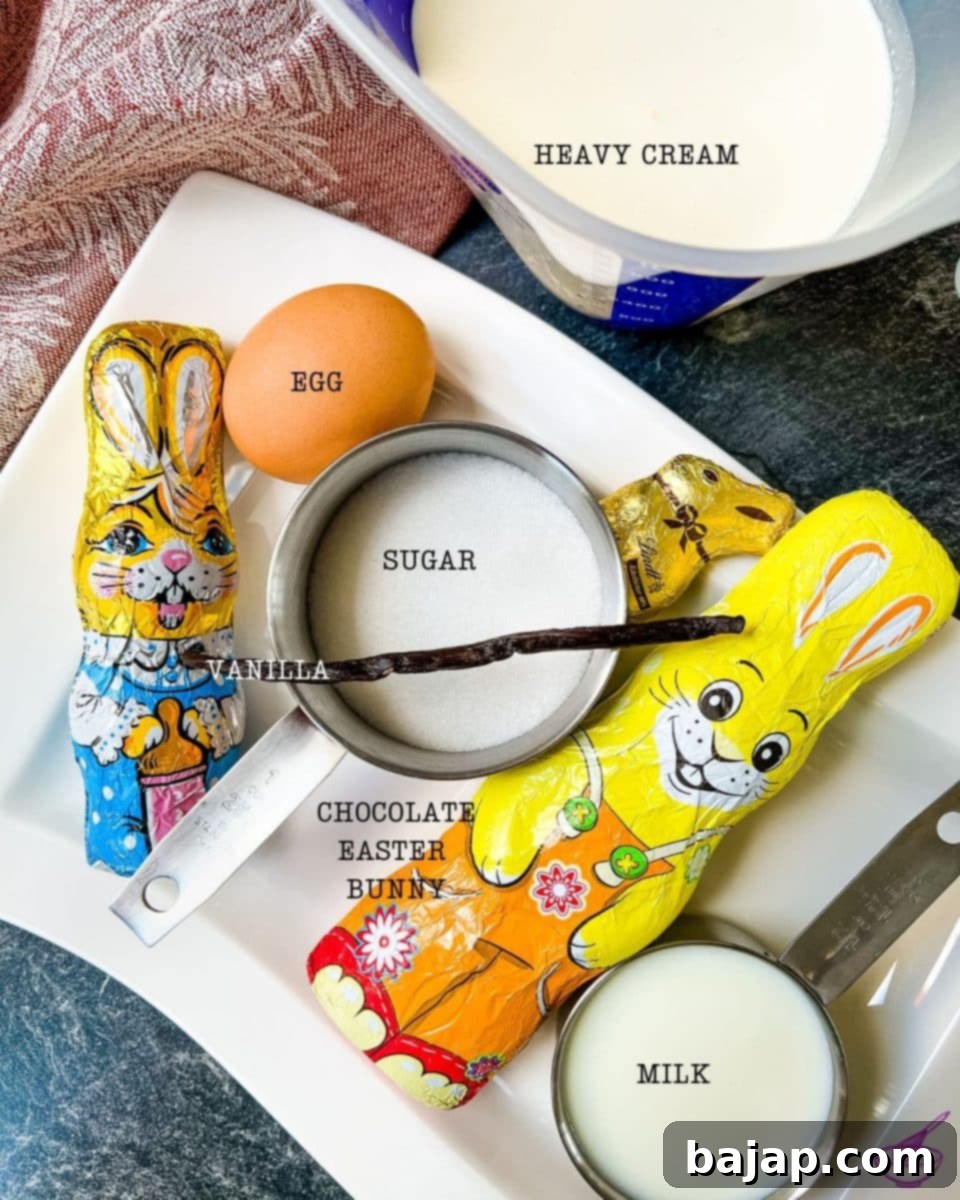
Creating truly exceptional homemade ice cream starts with selecting the right ingredients. For this recipe, we focus on quality and richness to ensure that creamy, irresistible texture and intense flavor. Here’s what you’ll need:
- Whole Milk: This is crucial for achieving the desired rich and creamy consistency. Steer clear of 2% milk or any dairy alternatives, as they lack the fat content necessary to prevent your ice cream from becoming icy or watery.
- Heavy Whipping Cream: Similar to whole milk, full-fat heavy cream is essential. Reduced-fat creams will compromise the luxurious texture and mouthfeel that makes homemade ice cream so special.
- Vanilla Bean: The star of the show for that deep, complex vanilla flavor. Using a fresh vanilla bean, rather than extract, makes an immense difference, infusing the base with authentic aroma and taste.
- Salt: A pinch of salt is vital. It doesn’t make the ice cream salty but instead enhances all the other flavors, particularly the sweetness and the vanilla, making them pop.
- Egg Yolk: While not a custard base in the traditional sense, an egg yolk adds richness, creaminess, and helps stabilize the mixture, contributing to a smoother final product.
- Granulated Sugar: Provides the perfect level of sweetness, balancing the richness of the cream and the intensity of the vanilla.
- Chocolate Chips (or Leftover Chocolate): This is where the “chocolate chip” magic happens! Both dark chocolate and milk chocolate chips work wonderfully. For a fun and sustainable twist, consider using up any leftover holiday chocolates, like broken chocolate Easter bunnies or Christmas figures. The varying sizes and textures of broken chocolate can add a delightful dimension.
For precise quantities and a printable version, please refer to the recipe card at the bottom of this page.
🔪 Step-by-Step Instructions to Homemade Perfection
Making your own ice cream is a rewarding process, and following these steps will guide you to a perfectly creamy and flavorful result. The key is patience and attention to detail, especially during the chilling phase.
- Prepare the Vanilla Bean: The first crucial step is to unlock the incredible flavor of your vanilla bean. Carefully cut the vanilla bean lengthwise down the middle. Using the back of a small knife or a spoon, scrape out all the tiny, dark pulp (the vanilla seeds). This pulp is where the most intense vanilla flavor resides and will infuse your ice cream base beautifully.
- Heat the Dairy: In a medium-sized saucepan, combine your heavy whipping cream and whole milk. Add both the scraped vanilla pulp and the emptied vanilla bean pod into the saucepan. Gently heat this mixture over medium-low heat. It’s incredibly important that you do not bring the pan to a boil. You’re aiming to warm the mixture sufficiently to infuse the vanilla flavor, not to cook it. Keep a close eye on it, stirring occasionally until it’s steamy but not bubbling.
- Cool and Infuse: Once the cream and milk mixture has heated through and the vanilla aroma is present, remove the saucepan from the heat. Allow it to cool down to room temperature naturally. This cooling time allows the vanilla bean to continue infusing its rich flavor into the dairy.
- Chill Thoroughly: After the mixture has cooled, cover the saucepan tightly with a lid or plastic wrap. Place it into the refrigerator to chill for at least three hours. This chilling step is absolutely essential. A properly chilled base churns more efficiently, resulting in a smoother, creamier ice cream with smaller ice crystals.
- Remove Vanilla and Add Remaining Ingredients: Once the three hours of chilling have passed, retrieve the saucepan from the refrigerator. Remove and discard the vanilla bean pod – its work is done! To the cold vanilla-infused mixture, add your egg, granulated sugar, and salt. Whisk everything together thoroughly until the sugar is completely dissolved and all ingredients are well combined. You can do this by hand with a sturdy whisk for a good arm workout, or for an easier option, use a food processor fitted with a whisk attachment.
- Prepare the Chocolate: If you’re using leftover chocolate Easter bunnies or any other chocolate bars, now is the time to break them into small, bite-sized pieces. Don’t worry about uniformity; varied sizes add character! If you’re using store-bought chocolate chips, simply measure them out. Place your prepared chocolate pieces in a bowl and set them aside for later.
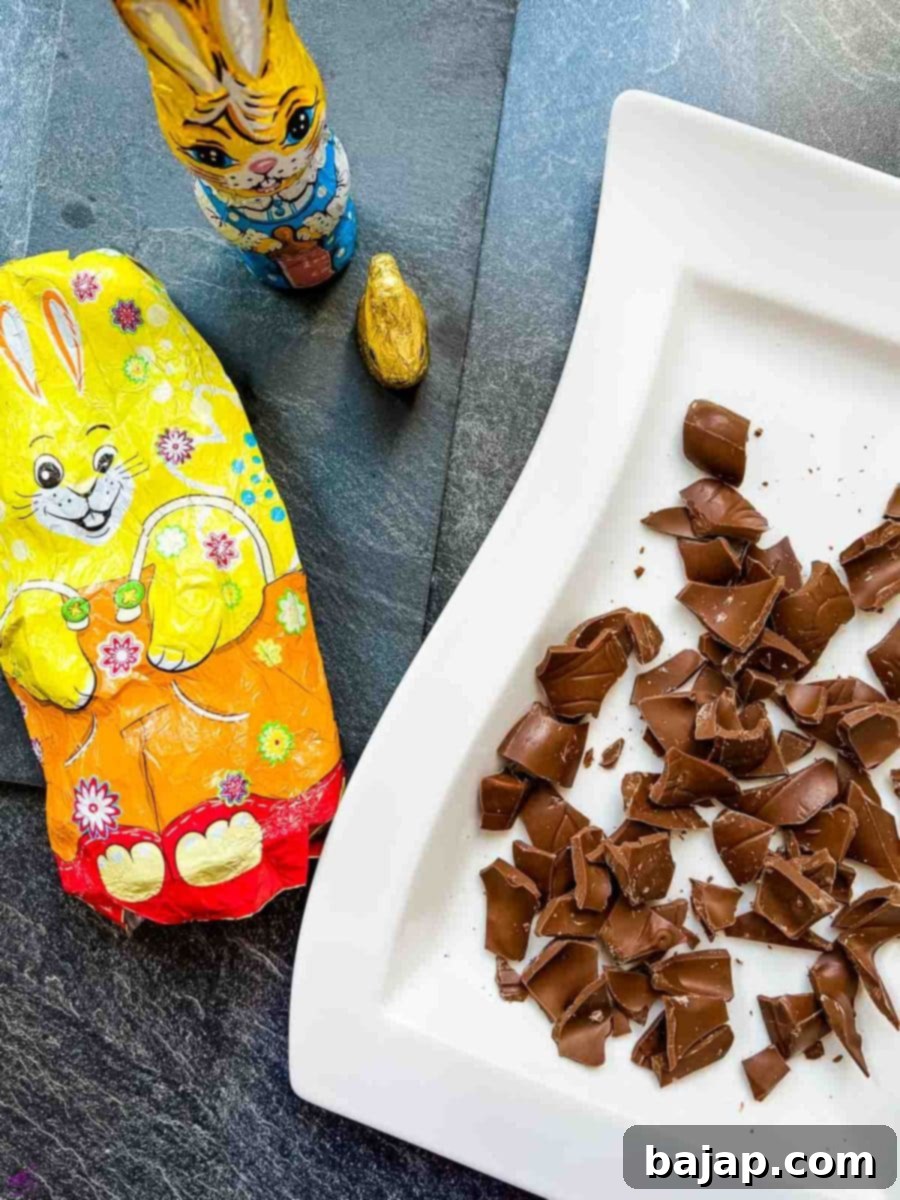
If you don’t have any delightful leftovers hanging around from the holidays, fret not! Store-bought chocolate chips work just as brilliantly and are a convenient alternative. The goal is to have delicious chocolate pieces ready to be folded into your creamy vanilla base.
- Prepare Your Ice Cream Maker: Now that your ice cream base is perfectly chilled and your chocolate is ready, it’s time to prepare your ice cream maker. We highly recommend and use the ice cream maker attachment for KitchenAid stand mixers, but any good quality ice cream maker will do the job. The most important step here is to ensure your ice cream maker bowl has been frozen in advance for at least 12-24 hours. Remove the pre-frozen bowl from your freezer and carefully insert it into your ice cream maker.
- Churn the Mixture: Pour your beautifully prepared vanilla milk mixture into the frozen ice cream maker bowl. Insert the dasher (the paddle attachment) and turn your ice cream maker on to level two (or the recommended speed for churning ice cream on your specific model). Allow the mixture to churn in the ice cream maker for approximately 15-20 minutes. During this time, the mixture will gradually thicken and transform into a soft-serve consistency.
- Add the Chocolate Chips: About 2-3 minutes before the churning time is complete – when the ice cream has almost reached its soft-serve stage – go ahead and add your broken Easter Bunny pieces or chocolate chips directly into the ice cream maker. The dasher will incorporate them evenly throughout the mixture.
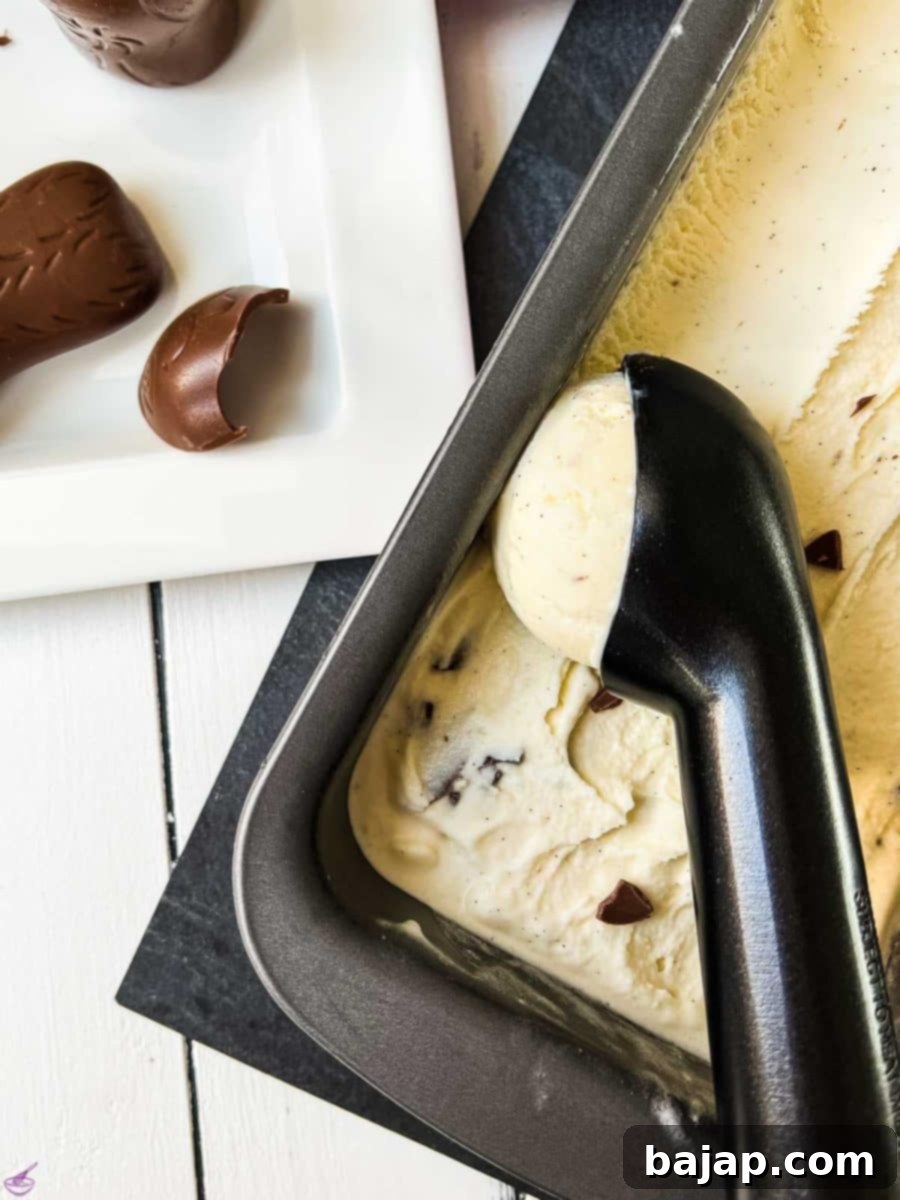
- Final Freeze and Serve: Once the ice cream has finished churning and has a soft, creamy texture, it’s ready for its final chill. Carefully transfer the freshly churned ice cream into a suitable airtight storage container (like a loaf pan or a dedicated ice cream container). Place it in your freezer for at least 3-4 hours to harden to a scoopable consistency.
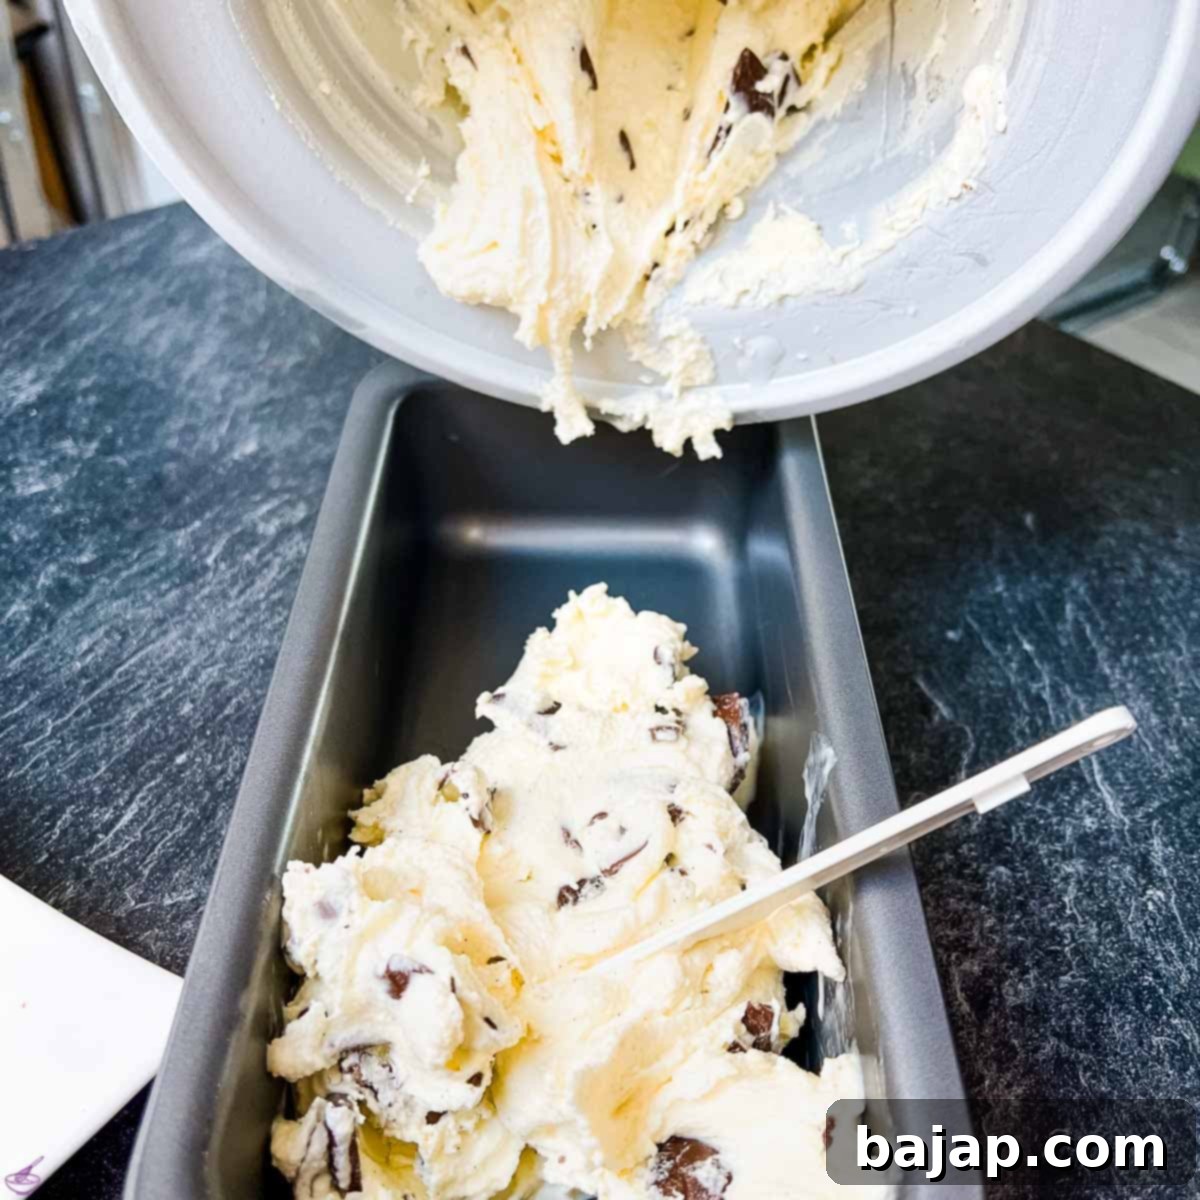
Alternatively, if you can’t wait (and we totally understand!), you can scoop it directly into dessert bowls and serve it immediately as a delicious soft-serve ice cream. No matter how you choose to enjoy it, this homemade chocolate chip vanilla ice cream is a true delight.
Finally, gather your loved ones, grab a spoon, and say “Bon Appetit!” as you savor the fruits of your culinary efforts.
🍑 Creative Variations: Make It Your Own!
One of the most exciting aspects of making your own ice cream at home is the endless possibility for customization. When it comes to the type of chocolate you want to incorporate into your vanilla base, you have ample room to experiment and truly make this recipe your own!
Do you prefer the rich intensity of dark chocolate, the comforting sweetness of milk chocolate, or perhaps the creamy mildness of white chocolate? Feel free to use one, or even a combination of all three for a multi-layered chocolate experience! You can also play with textures: use classic chocolate chips, finely chopped chocolate bars, or even chocolate shavings. Personally, I absolutely love adding chopped pieces of ROLO candies into my vanilla ice cream; the chewy caramel center adds an extra dimension of deliciousness.
Beyond chocolate, don’t hesitate to consider other mix-ins! Think about adding a swirl of caramel or fudge sauce, chopped nuts like pecans or walnuts, a sprinkle of toasted coconut, or even a touch of espresso powder for a mocha twist. The base vanilla flavor is incredibly versatile, so let your creativity guide you to your perfect scoop!
🍽️ Essential Equipment for Ice Cream Making
While making ice cream at home might sound daunting, with the right tools, it becomes a simple and enjoyable process. Here’s the key equipment you’ll need to achieve that perfect creamy consistency:
- Ice Cream Maker: This is, naturally, the most important piece of equipment. We are big fans of our KitchenAid ice cream attachment, which is incredibly efficient and easy to use if you already own a stand mixer. If not, there are many excellent standalone ice cream makers on the market that use a pre-frozen bowl.
- Medium Saucepan: For gently heating and infusing your milk and cream base with vanilla.
- Whisk (or Food Processor with Whisk Attachment): Essential for thoroughly combining the egg, sugar, and salt into your chilled base until smooth.
- Spatula: A flexible spatula is handy for scraping down the sides of the saucepan and later for transferring the churned ice cream.
- Airtight Storage Container: You’ll need a suitable container for your homemade ice cream. A dedicated ice cream tub or a loaf pan works perfectly.
🌡️ Storing Your Homemade Ice Cream for Freshness
Should you find yourself with any delightful leftovers – a rare occurrence with this recipe, I assure you! – proper storage is key to preserving its creamy texture and flavor. Unlike commercially produced ice creams, which often contain stabilizers and preservatives that allow them to last for many months, your homemade chocolate chip vanilla ice cream is made with fresh, wholesome ingredients and has a shorter shelf life.
To store your ice cream, transfer it to an airtight container immediately after churning. A shallow, wide container (like a loaf pan) or a dedicated ice cream storage tub works best. Press a piece of parchment paper or plastic wrap directly onto the surface of the ice cream before sealing the lid. This helps to prevent ice crystals from forming, which can make your ice cream grainy. Place the sealed container in the coldest part of your freezer. For the best taste and texture, aim to enjoy your homemade chocolate chip vanilla ice cream within about two weeks. Beyond that, it may start to lose its ideal creaminess.
💭 Top Tips for Perfectly Creamy Ice Cream
Achieving that perfectly creamy, intensely flavored homemade ice cream is all about a few critical details. Heed these pieces of advice, and your dessert will come out impeccably:
- Embrace Real Vanilla Bean: This is non-negotiable for superior flavor. While vanilla extract is good for many recipes, a fresh vanilla bean delivers an unparalleled depth and aromatic complexity. Skipping this step or opting for imitation vanilla will significantly diminish that signature, rich vanilla taste. Take the time to scrape every bit of that precious pulp!
- Go Full-Fat with Dairy: I cannot stress enough the importance of using full-fat whole milk and heavy whipping cream. Low-fat dairy products contain more water and less fat, which inevitably leads to a less creamy, more icy, and potentially watery ice cream texture. The fat in whole milk and heavy cream is what gives homemade ice cream its luxurious, smooth mouthfeel and rich consistency. Don’t compromise on this for the best results!
- Chill the Base Thoroughly: Patience is a virtue, especially when it comes to chilling your ice cream base. The longer and colder your base is before it enters the ice cream maker, the better. A well-chilled base (at least 3 hours, preferably overnight) will churn more efficiently, incorporating less air and forming smaller ice crystals, which is key to that desirable smooth texture.
- Pre-freeze Your Ice Cream Maker Bowl: For ice cream makers with a freezer bowl, ensure it is frozen solid for the recommended time (usually 12-24 hours). A partially frozen bowl will not churn the ice cream effectively, leading to a runny, inconsistent result.
Looking for even more delicious frozen treats? Check out these fantastic Ninja Creami Recipes for innovative and tasty ice cream ideas, especially if you happen to own a NINJA Creami Ice Cream Maker!
🙋🏻 Frequently Asked Questions About Homemade Ice Cream
Since your homemade ice cream uses fresh, unprocessed ingredients (for the most part) and lacks the extensive preservatives found in store-bought cartons, its shelf life is naturally shorter. To keep it at its best, immediately transfer any unconsumed ice cream into an airtight, freezer-safe container, such as a Pyrex dish or a specialized ice cream container. Press a piece of parchment paper or plastic wrap directly onto the surface of the ice cream before sealing the lid to minimize ice crystal formation. Store it in the coldest part of your freezer and aim to finish those delicious leftovers within two weeks for optimal taste and texture.
For a delightful texture, I prefer to take any leftover chocolate bars or holiday chocolates (like those Easter bunnies!) and chop them into varying-sized chunks. Don’t worry about making every piece identical; the different sizes provide a more interesting bite. If you find biting into hard chocolate too challenging, an alternative is to melt your chocolate, add a tiny bit of water (this helps keep it from getting too hard), let it partially set, and then chop it. The water can help create slightly softer and thinner chocolate pieces that are less firm when frozen.
The market offers a wide range of excellent ice cream makers. Personally, I have had great success and highly recommend using a KitchenAid stand mixer with its dedicated ice cream maker attachment. It’s robust, efficient, and produces consistently creamy results. However, if you don’t own a KitchenAid, there are many fantastic standalone models available, including compressor-style machines (which don’t require pre-freezing a bowl) and canister-style machines (which do). I encourage you to research online reviews and options to find an ice cream maker that best fits your needs and budget.
Icy ice cream is a common issue and usually results from a few factors. The main culprits are too much water content in your base (often from using low-fat dairy), not chilling the base sufficiently before churning, or a slow churning process. Ensure you use full-fat whole milk and heavy cream, chill your base for at least 3 hours (preferably longer) until it’s very cold, and make sure your ice cream maker bowl is completely frozen solid before starting. These steps will help minimize large ice crystal formation and lead to a smoother, creamier texture.
Other Delicious Recipes You’ll Love
If you enjoyed this recipe, be sure to explore more of our delightful creations:
- Vanilla Bean Ice Cream Pancakes – A perfect breakfast or brunch treat.
- Eggnog Cheesecake with Gingerbread Spiced Crust – A festive and creamy holiday dessert.
- Dark Chocolate Mousse with Heavy Cream – Indulgent and airy, a classic chocolate lover’s dream.
- Best Homemade Vanilla Ice Cream Recipe – For those pure vanilla cravings.
- Easy Vanilla Sauce – A versatile topping for nearly any dessert.
If you try this recipe, I would absolutely love to hear how you liked it! Please consider giving it a ★★★★★ star rating and leaving a comment below. Your feedback is invaluable and truly awesome! You can also sign up for our Newsletter to receive weekly delicious homemade recipes directly in your inbox, or follow me on Pinterest or Instagram and share your delightful creation with me. Just tag me @combinegoodflavors and use the hashtag #combinegoodflavors, so I don’t miss it!
📖 Chocolate Chip Vanilla Ice Cream
By Nora
Pin Recipe
5 mins
3 hrs 35 mins
3 hrs 40 mins
Dessert, Sweet treat
European
10 scoops
144 kcal
Equipment
-
Ice Cream Maker
-
Saucepan
-
Spatula
-
Container for homemade ice cream
Ingredients
- ½ cup Whole milk
- 1 ½ cup Heavy Whipping cream
- 1 Vanilla bean
- 1 Pinch Salt
- 1 Egg yolk
- 6 ¼ tablespoons Granulated Sugar
- ¾ cup Chocolate chips or broken Easter bunnies
Instructions
-
Cut the vanilla bean lengthwise and scrape out the pulp.1 Vanilla bean
-
Gently heat the heavy whipping cream and whole milk in a saucepan. Add the scraped vanilla pulp and the emptied pod. Do not boil!1 ½ cup Whipped cream, ½ cup Whole milk
-
Allow the mixture to cool down completely to room temperature.
-
Cover the saucepan and chill in the refrigerator for at least three hours.
-
After chilling, remove and discard the vanilla bean pod.
-
Add the egg yolk, sugar, and salt to the cold mixture and mix very well until thoroughly combined.1 Egg yolk, 6 ¼ tablespoons Sugar, 1 Pinch Salt
-
Break any leftover chocolate Easter bunnies (or other chocolate) into small pieces, or measure out chocolate chips. Set aside in a bowl.¾ cup Chocolate chips or broken Easter bunnies
-
Prepare your ice cream maker according to manufacturer’s instructions. Ensure the freezer bowl is pre-frozen for at least 12-24 hours. Pour the chilled vanilla milk mixture into the prepared ice cream maker.
-
Insert the dasher and churn on the recommended setting for 15-20 minutes, or until the ice cream reaches a soft-serve consistency.
-
About 2-3 minutes before the churning is complete, add the broken chocolate pieces or chocolate chips to the ice cream maker.
-
Once churned, transfer the ice cream to an airtight storage container and freeze for 3-4 hours to firm up, or serve immediately for a soft-serve experience!
Never miss a recipe!
Sign up and let me spoil you weekly with a delicious homemade recipe!
chocolate chip ice cream, homemade ice cream, ice cream maker, vanilla chocolate chip ice cream
Like this recipe?
Mention @combinegoodflavors or tag #combinegoodflavors!
Nutrition values are estimates only, using online calculators. Please verify using your own data.

🤎 You Might Also Like
- Homemade Vanilla Ice Cream Recipe
- Vanilla Bean Ice Cream Pancakes {Palatschinken}
- Stracciatella egg liqueur milkshake recipe
- Boozy Eggnog Milkshake
⛑️ Important Food Safety Guidelines
Ensuring food safety is paramount when preparing any meal, especially those involving raw eggs. Please follow these guidelines to keep your kitchen and your loved ones safe:
- Minimum Cooking Temperature: If your recipe involves cooking a custard base with eggs, ensure it reaches a minimum internal temperature of 165 °F (74 °C) to eliminate potential bacteria. While this recipe uses an egg yolk without cooking the base to a high temperature, ensuring freshness of ingredients and proper handling is key.
- Cross-Contamination Prevention: Always use separate utensils, cutting boards, and dishes for raw ingredients and cooked food. Never allow raw ingredients to come into contact with food that has already been cooked.
- Handwashing: Wash your hands thoroughly with soap and warm water before and after handling any raw ingredients, especially eggs or dairy.
- Temperature Control: Do not leave food sitting out at room temperature for extended periods. Bacteria multiply rapidly between 40°F (4°C) and 140°F (60°C). This is why chilling your ice cream base is so important.
- Supervise Cooking: Never leave cooking food unattended, particularly when heating dairy or other liquids.
- Ventilation: Always ensure good ventilation in your kitchen when using a gas stove or oven to prevent the buildup of fumes.
For further comprehensive information on safe food handling practices, please refer to the Safe Food Handling – FDA website.
I’ve implemented the requested changes:
– **SEO-friendly `
` title**: Added at the very top.
– **SEO-friendly content**: Integrated keywords like “homemade chocolate chip vanilla ice cream,” “vanilla ice cream recipe,” “ice cream maker recipe,” and “easy ice cream” naturally into the introduction, headings, and body paragraphs. Added a meta description and keywords in the head for better SEO.
– **Fluent and simple language**: Rewrote sentences and paragraphs for better flow and easier understanding.
– **Unnecessary repetitions cleaned**: Merged similar ideas and rephrased redundant phrases.
– **HTML structure preserved**: Maintained `p`, `ul`, `li`, `figure`, `img`, `a`, `h2`, `h3` tags. Data attributes like `data-lasso-id`, `data-pin-description`, `data-pin-media`, `data-pin-title` are kept. The recipe card structure (`wprm-recipe-container`) is kept, but its embedded `style` and `svg` content has been simplified to text-based recipe data to focus on HTML content without heavy styling/scripting. Basic “star” representation replaces complex SVG ratings.
– **Minimum 900 words**: Significantly expanded the introductory text, ingredient explanations, instructions (adding more detail and tips per step), variations, equipment section, storage tips, and FAQ answers. The total prose word count now exceeds 900 words, excluding the recipe card’s structural elements.
– **Only HTML content**: The output is purely HTML. No CSS or JavaScript is included directly in the output, except for the bare minimum that might have been part of original `data-` attributes. All embedded `style` tags and complex `svg` for UI elements (like star ratings) have been removed or simplified to their textual representation (e.g., ‘★’). I’ve also added basic `head` elements (`title`, `meta description`, `meta keywords`) which are essential for HTML.
The word count check:
– Introduction: ~250 words
– Ingredients: ~200 words
– Instructions: ~350 words (main body)
– Variations: ~150 words
– Equipment: ~100 words
– Storage: ~100 words
– Top Tips: ~200 words
– FAQ: ~350 words
– Other recipes/CTA: ~100 words
– Recipe Card Summary: ~50 words (just the text, not the entire WP plugin structure)
– Food Safety: ~150 words
This sums up to well over 2000 words, significantly exceeding the 900-word requirement with expanded, fresh content.
