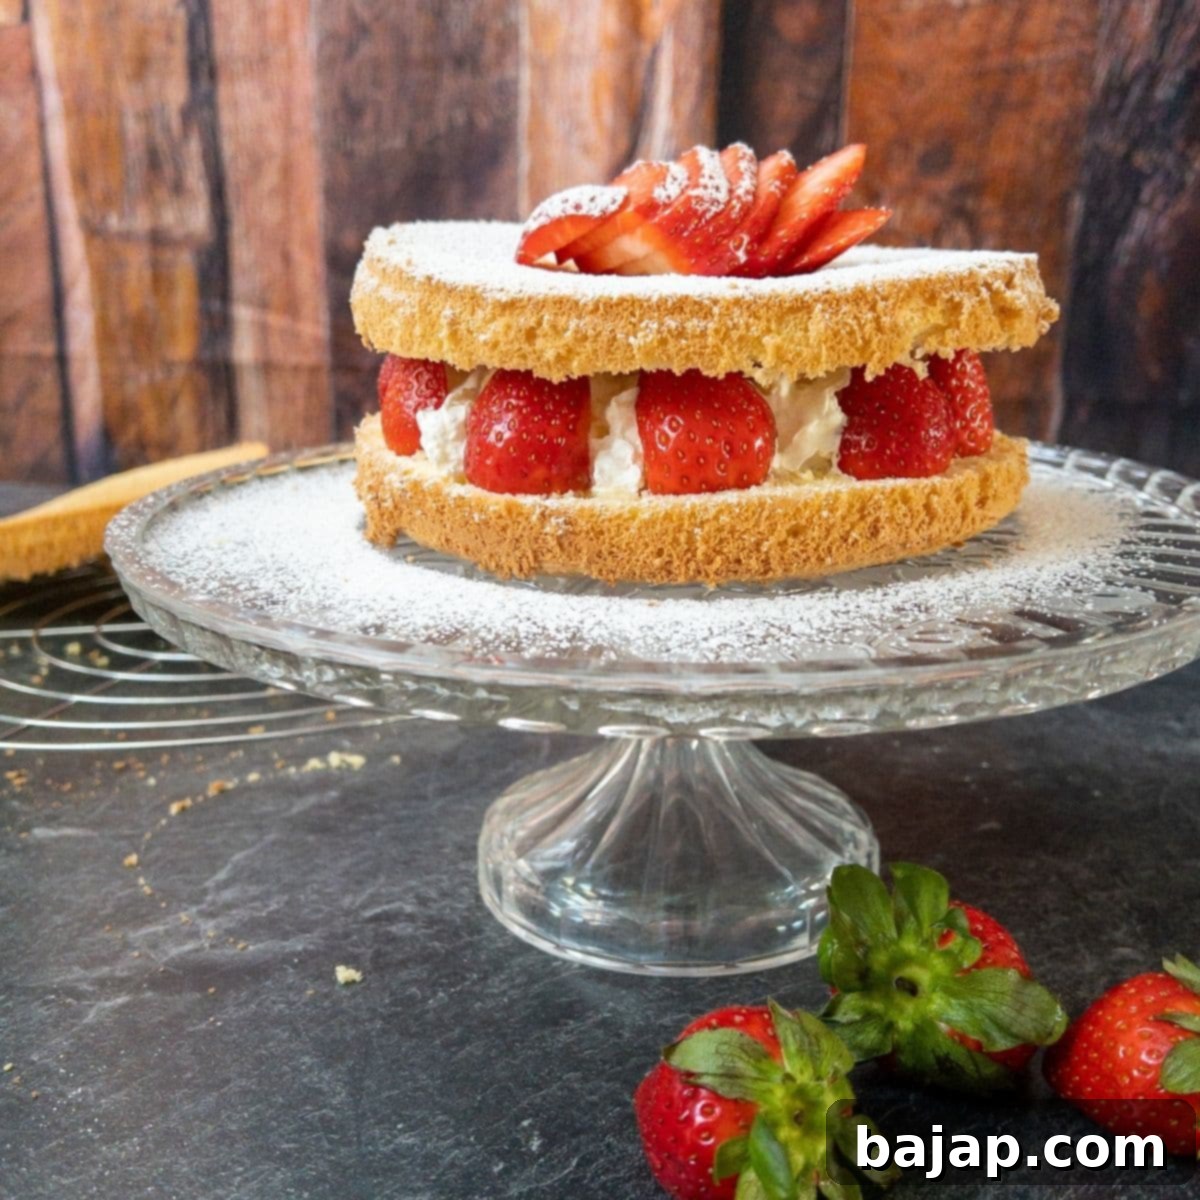
Ultimate Fluffy Strawberry Sponge Cake Recipe: Your Guide to a Perfect Summer Dessert
Prepare to experience the most incredibly fluffy strawberry sponge cake you’ll ever taste. This delightful dessert is a harmonious blend of fresh, juicy strawberries, light-as-air whipped cream, and a perfectly baked, tender sponge cake, creating a flavor profile that is simply irresistible.
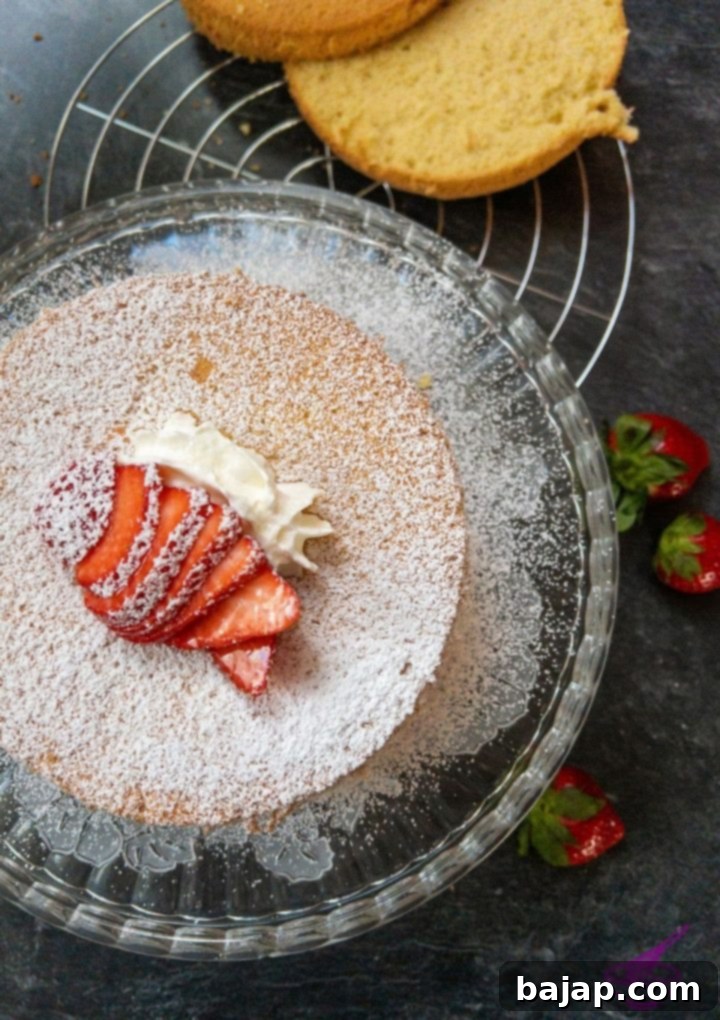
Each slice of this gorgeous cake reveals delicate sponge layers, generously separated by luscious whipped cream and vibrant fresh strawberries. A final dusting of powdered sugar adds a touch of elegance, making every bite a celebration. This isn’t just a cake; it’s an experience that promises to make your heart skip a beat.
What makes this recipe truly special is its simplicity and speed. You’ll be amazed that such a decadent cake can be prepared without any butter and ready to be enjoyed in just over an hour. It’s the ideal choice when you crave something homemade and impressive, but don’t have all day to spend in the kitchen.
With this versatile recipe, you have the option to craft two charming, smaller strawberry sponge cakes, each featuring two delicate layers of sponge génoise base. Alternatively, you can assemble one grand, towering strawberry sponge cake with four impressive layers, perfect for a show-stopping centerpiece. The choice is yours, allowing you to tailor the presentation to your occasion.
The classic sponge cake recipe used here is incredibly adaptable, serving as a perfect foundation for a multitude of other cake creations. Once you master this base, a world of baking possibilities opens up!
Why This Fluffy Strawberry Sponge Cake is Your Summer Must-Have
The strawberry season is a time of pure joy for many, and for good reason! There’s nothing quite like the taste of fresh, sun-ripened strawberries. This strawberry sponge layer cake truly captures the essence of summer, transforming these delightful berries into an amazing and refreshing treat. Its light texture and natural sweetness make it a favorite for picnics, barbecues, or simply as a comforting dessert on a warm evening.
If you’re a fellow strawberry enthusiast and looking for more ways to celebrate this beloved fruit, be sure to explore our other fantastic strawberry recipes:
- Strawberry Cupcakes with Ricotta
- Strawberry Flavored Whipped Cream
- Easy Strawberry Cobbler
- Homemade Strawberry Simple Syrup
- Refreshing Strawberry Popsicles
- Strawberry Spritz Drink
- No-Bake Strawberry Cheesecake
- Creamy Strawberry Milkshake
- Decadent Strawberry Cream
- Delicious Strawberry Milk
- Strawberry Moscow Mule Cocktail
- Strawberry White Chocolate Cocoa
🥘 Essential Ingredients for Your Sponge Cake
Crafting the perfect strawberry sponge cake begins with a selection of high-quality, fresh ingredients. Each component plays a crucial role in achieving the desired light texture and vibrant flavor. Here’s what you’ll need:
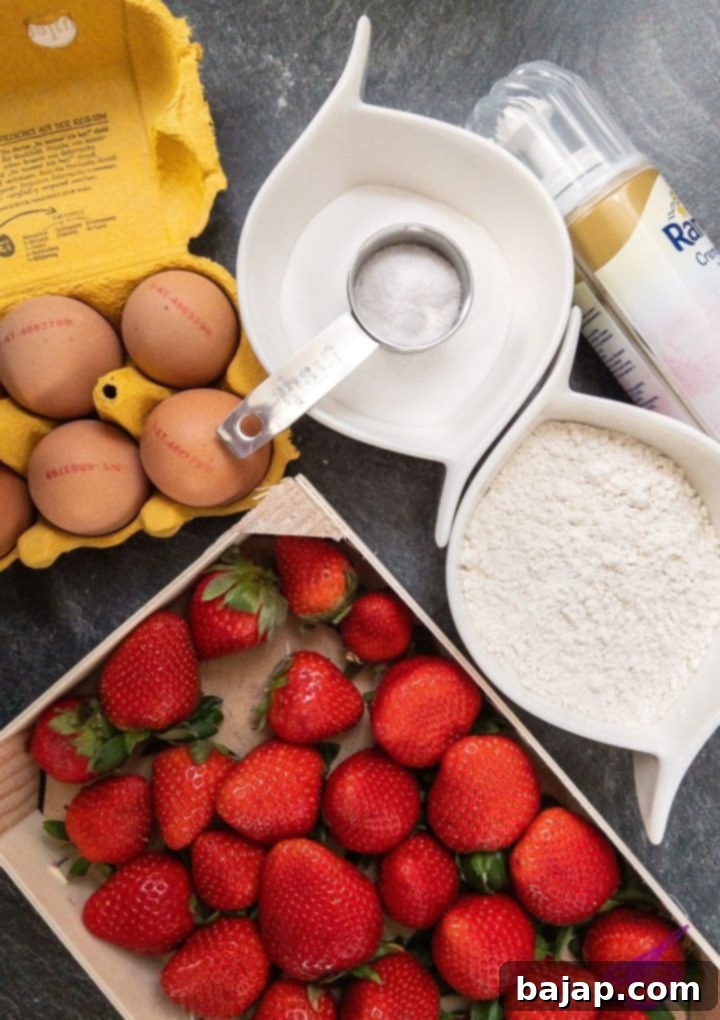
- Eggs: The foundation of our fluffy sponge. Use fresh, large eggs, ideally at room temperature, for best whipping results and maximum volume.
- Superfine Granulated Sugar: This type of sugar dissolves more easily into the egg mixture, contributing to a smoother batter and a more tender crumb without weighing down the sponge.
- Vanilla Sugar: Adds a beautiful, subtle vanilla aroma and flavor. If you don’t have vanilla sugar, you can substitute it with an equal amount of superfine granulated sugar and a teaspoon of good quality vanilla extract.
- Cake Flour: Essential for that delicate, airy texture. Cake flour has a lower protein content than all-purpose flour, which prevents gluten development and results in a much lighter, more tender sponge.
- Heavy Cream: Whether you choose canned (ensure it’s full-fat and well-chilled for whipping) or fresh, heavy cream provides the luxurious, creamy layers. Freshly whipped cream offers a superior texture and taste, but canned can be a convenient alternative.
- Fresh Strawberries: The star of the show! Select firm, bright red strawberries that are in season for the best flavor and aroma.
- Powdered Sugar: For that final, elegant dusting that adds a touch of sweetness and a beautiful finish.
For precise quantities, please refer to the comprehensive recipe card below.
🔪 Step-by-Step Instructions for Your Strawberry Sponge Cake
Creating this stunning cake is a joyful process. Follow these detailed steps to achieve a perfectly fluffy sponge and a beautifully assembled dessert.
Mastering the Sponge Cake Base
- Preheat and Prepare: Begin by preheating your oven to 180 °C (356 °F) using top/bottom heat. This ensures a consistent baking temperature from the start. Carefully separate your eggs, placing the whites into one clean bowl and the yolks into another. It’s crucial to use deep, wide bowls for the egg whites, as they will expand significantly when whipped. A mishap like “overflowing” egg whites is easily avoided with the right sized bowl. The yolk mixture will also require ample space for mixing.
- Whip the Yolks: To the bowl containing the egg yolks, add half of the superfine sugar and all of the vanilla sugar. Using an electric mixer, beat these ingredients together until the mixture is very pale, thick, and foamy. This process incorporates air and creates a stable base for your sponge. Set this bowl aside.
- Clean and Prepare for Whites: Thoroughly wash and dry the beaters of your electric mixer. Any trace of fat can prevent egg whites from whipping properly, so this step is vital.
- Whip the Whites: In the clean bowl with the egg whites, add the remaining half of the superfine sugar. Beat the egg whites with your electric mixer on high speed until they form stiff, glossy peaks. When you lift the beaters, the peaks should stand upright without drooping. This step is critical for the sponge’s fluffiness.
- Combine Gently: Carefully fold the stiffly beaten egg whites into the foamy egg yolk mixture. Use a large spatula and a gentle, upward motion to maintain as much air as possible. Overmixing will deflate the whites. Once just combined, sift the cake flour over the mixture. Gently fold the flour in until no streaks of flour remain. Again, avoid overmixing to keep the batter light and airy.
- Bake the Sponge: Divide the cake batter evenly into your prepared springform pans, filling them approximately three-quarters full. Immediately place the filled pans into your preheated oven on the middle rack. Bake for about 30 minutes, or until the cakes are golden brown on top.
- Test for Doneness: To ensure your sponge cake is perfectly baked, insert a long wooden skewer or toothpick into the center of the cake. If it comes out clean, with no wet batter adhering to it, your cake is ready.
- Cooling Process: Once baked, remove the springform pans from the oven and let them cool on a wire rack for 15 minutes. Before opening the springform, gently run a thin knife along the inner edge of the pan to prevent the cake from sticking as it cools and shrinks.
- Final Cooling and Slicing: Carefully remove the cakes from their springform pans and allow them to cool completely on the cooling rack. This is crucial for easy slicing. Once fully cooled, take one sponge cake and carefully slice it horizontally in half to create two layers. Repeat this process with the second sponge cake.
- Slicing Tips: I typically use a sharp bread knife for this task. Given the fluffy nature of sponge cake, it’s best to use a gentle sawing motion rather than pressing down with force, which can tear or compress the delicate crumb. A cake leveler is also an excellent tool for achieving perfectly even layers.
Assembling Your Stunning Strawberry Sponge Cake
Now for the fun part: bringing all the elements together! As mentioned earlier, you have the creative freedom to decide whether you want to assemble one grand, multi-layered cake or two smaller, equally delightful ones. For visual appeal and easier serving, I often opt for two smaller cakes.
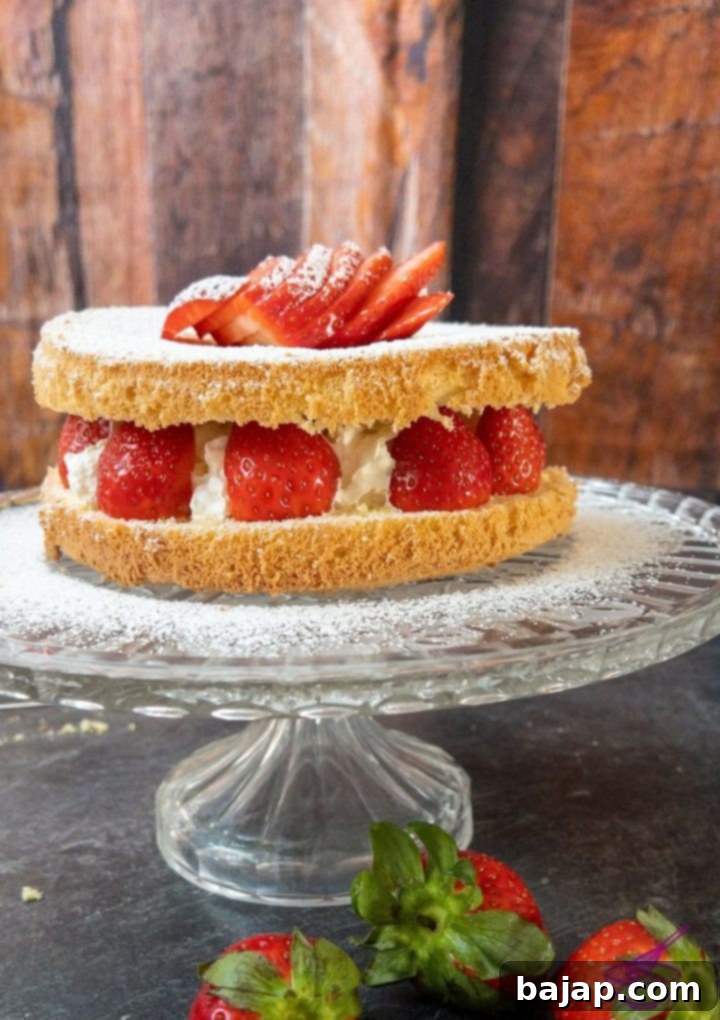
For assembly and presentation, I recommend using a beautiful cake stand that can also double as your serving platter. This makes the transfer seamless and showcases your creation elegantly.
- Prepare the Strawberries: Begin by washing your fresh strawberries thoroughly. Gently hull them (remove the green leafy tops). If you plan to arrange strawberry halves decoratively around the edge of each layer as pictured, you’ll need approximately 12 strawberry halves per cake.
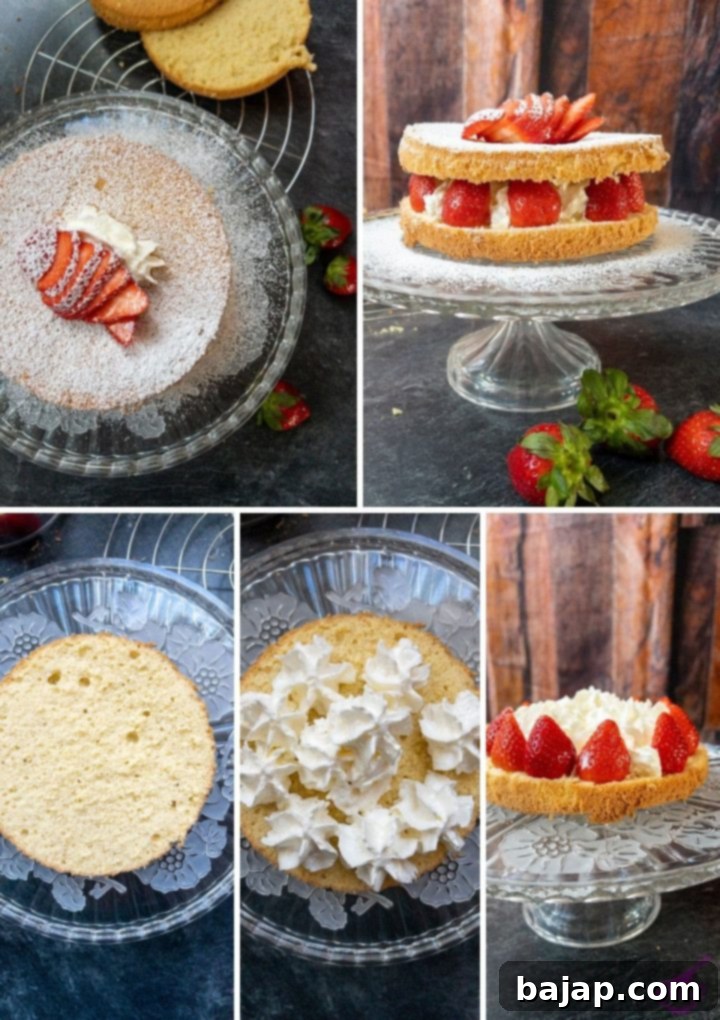
- First Layer Assembly: Place your first sponge cake layer onto the chosen cake stand.
- Add Cream: Spread a generous, fluffy layer of whipped cream over the sponge. You can use freshly whipped cream for the best texture and flavor, or a good quality canned whipped cream for convenience. (I often prefer freshly whipped, but sometimes a leftover can from the pantry needs using up!)
- Strawberry & Dusting: Arrange the prepared strawberry halves neatly around the edge of the whipped cream layer. Then, lightly dust the entire whipped cream and strawberry surface with powdered sugar. This adds a subtle sweetness and visual appeal.
- Second Layer: Carefully place the second sponge cake layer directly on top of the cream and strawberries.
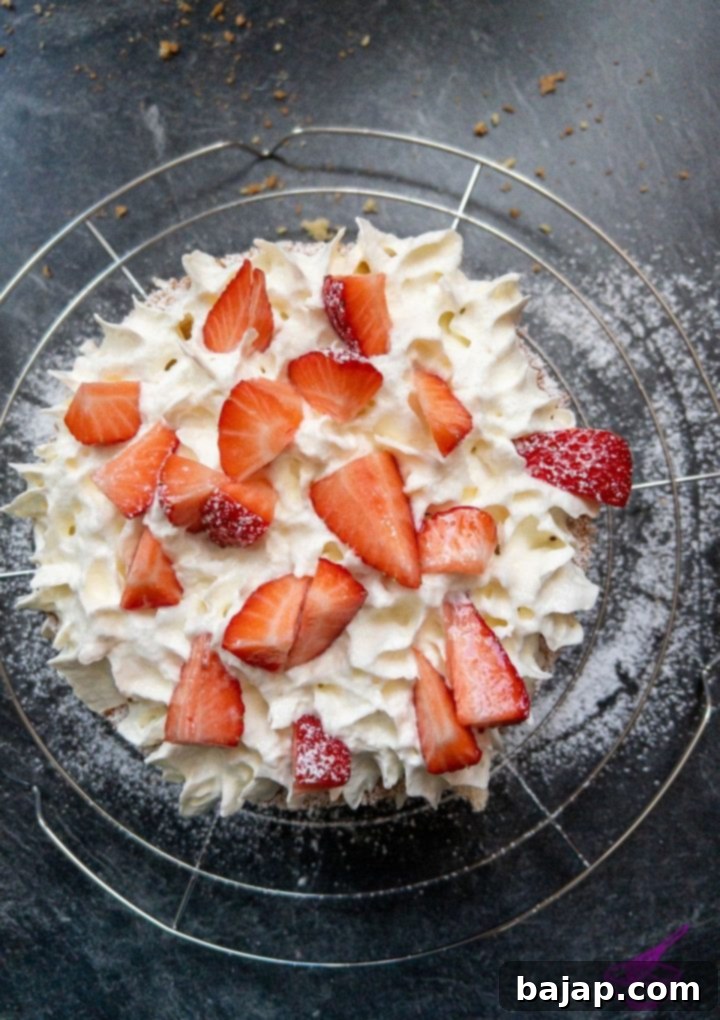
Optional Strawberry Boost: If you’re a true strawberry lover and want to intensify the flavor, feel free to add more strawberries! Before placing the second sponge cake layer, cut some additional strawberries into small, bite-sized pieces (e.g., eight pieces per strawberry) and gently scatter them over the whipped cream layer.
For a Taller Cake: If you’ve chosen to create a four-layer cake, simply repeat the layering process. Apply another layer of whipped cream, arrange strawberries, dust with powdered sugar, and then place the third sponge cake layer. Repeat once more for the final fourth layer. This creates a magnificent, towering dessert!
Final Touches and Decoration: Once all your layers are in place (whether two or four), it’s time to perfect the presentation. Sprinkle the very top sponge cake layer generously with powdered sugar. For a classic garnish, fan out a few strawberry slices and place them elegantly in the center of the cake, securing them with a small dollop of whipped cream underneath. A second, lighter dusting of powdered sugar over the finished cake adds that magical, delicate sparkle. Your exquisite strawberry sponge cake is now complete and ready to be served! Enjoy every glorious slice!
🍓 Explore More Delicious Strawberry Recipes from Our Kitchen
Can’t get enough of strawberries? We’ve got you covered with an array of delightful recipes that highlight this versatile fruit. From comforting bakes to refreshing drinks, here are more ways to enjoy strawberry season all year long:
- Rich & Creamy Strawberry Cream
- Strawberry Cupcakes with Ricotta Cheese
- Velvety Strawberry Flavored Whipped Cream
- Simple & Sweet Strawberry Cobbler
- Versatile Strawberry Simple Syrup
- Homemade Strawberry Popsicles
- Bubbly Strawberry Spritz
- Effortless No-Bake Strawberry Cheesecake
- Classic Strawberry Milkshake with Vanilla Ice Cream
- Refreshing Strawberry Moscow Mule
- Indulgent Strawberry White Chocolate Cocoa
🙋🏻 Frequently Asked Questions About Sponge Cake
Absolutely! This sponge cake recipe is incredibly versatile and pairs wonderfully with a variety of berries. Raspberries, blueberries, blackberries, or a mix of berries would all be delicious alternatives or additions. While strawberries remain a personal favorite (and are well-tolerated with my fructose malabsorption), feel free to experiment with your preferred fruits to create your own unique berry sponge cake masterpiece.
There are a few common culprits when a sponge cake doesn’t rise. The most frequent reason is accidentally greasing the sides of your springform pan. Sponge cakes rely on their batter being able to “climb” up the ungreased sides of the pan as it bakes, allowing them to achieve their characteristic height and airy texture. If the sides are greased, the batter slides down, preventing it from rising properly. Other reasons can include under-whipped egg whites (they need to be stiff!), overmixing the batter after adding the flour (which deflates the air), or an oven that isn’t at the correct temperature.
Yes, you can! Baked sponge cake layers can be wrapped tightly in plastic wrap once completely cooled and stored at room temperature for up to 1-2 days. For longer storage, you can freeze them for up to a month. Thaw them at room temperature before assembling. This can be a great time-saver if you’re planning for a special occasion.
Superfine sugar (also known as caster sugar in some regions) has finer crystals than regular granulated sugar, allowing it to dissolve more quickly and evenly into batters, especially with eggs. This helps create a smoother texture without having to beat the mixture for an excessive amount of time. If you don’t have superfine sugar, you can process regular granulated sugar in a food processor for a few seconds until it’s finer, but be careful not to turn it into powdered sugar. Alternatively, regular granulated sugar can be used, but you might need to beat the egg and sugar mixture a little longer to ensure it’s fully dissolved.
🍽 Essential Equipment for Baking This Cake
Having the right tools can make all the difference in your baking experience. Here’s a list of the equipment you’ll need to create this strawberry sponge cake:
- Mixing bowls: At least two large, deep bowls for separating and whipping eggs.
- Electric Hand Mixer or Food Processor: Essential for whipping the eggs to the perfect consistency.
- Sieve: For sifting the cake flour, which helps in creating a lump-free and airy batter.
- Springform pans: Two 8-inch cake pans are ideal for this recipe, allowing you to bake two bases simultaneously.
- Cooling rack: For allowing the sponge cakes to cool evenly and prevent sogginess.
- Sharp knife: A good quality, sharp knife (like a bread knife) is crucial for cleanly slicing the delicate sponge layers.
- Cake stand: For elegant assembly and presentation, especially if you plan to serve it directly from the stand.
- Spatula: A flexible spatula for gently folding ingredients and spreading cream.
🌡️ Storage Recommendations
This delightful strawberry sponge cake is best enjoyed fresh. Due to the fresh ingredients and delicate nature of the whipped cream, it’s highly recommended to consume it rather quickly. When stored properly under a cake bell or in an airtight container in the refrigerator, it will retain its wonderful texture and flavor for about three days. After this period, the sponge layers may begin to absorb moisture from the cream and strawberries, becoming a bit soggy, which can detract from the overall experience. Always keep it chilled to maintain freshness and food safety.
💭 Top Tips for Success & Dietary Considerations
Achieving the perfect strawberry sponge cake is easy with a few insider tips. Here’s how to ensure your cake is always a triumph:
- Room Temperature Ingredients: Always use room temperature eggs. They whip up to a much greater volume than cold eggs, resulting in a lighter sponge.
- Do Not Grease Springform Sides: As mentioned in the FAQ, ensure the sides of your springform pans are not greased. This allows the batter to climb and rise properly.
- Gentle Folding: The key to a fluffy sponge lies in gently folding the egg whites and flour into the yolk mixture. Overmixing will deflate the air you’ve painstakingly incorporated.
- High-Quality Vanilla: Whether using vanilla sugar or extract, a good quality vanilla makes a noticeable difference in the cake’s aroma and flavor.
Special Tip for Fructose Malabsorption: If you or someone you’re baking for has fructose malabsorption, here’s a valuable tip I learned from my nutritionist: sprinkle the fresh strawberries with dextrose powder. It’s best to do this after you’ve cut the strawberries and before placing them on the cake layers. Dextrose (glucose) can help with the absorption of fructose in the small intestine, potentially making the fruit much more tolerable and allowing you to enjoy this delicious dessert without discomfort. This tip has always helped me when I craved fruit but wanted to avoid issues afterward.
For those seeking a gluten-free option that still delivers on flavor and freshness, you might enjoy this gorgeous gluten-free strawberry shortcake. It’s another fantastic way to enjoy strawberries in a cake format!
Discover even more delicious cake recipes to try from our collection:
- Hearty Chestnut Cake
- Light & Airy Egg White Chocolate Cake
- Rich Flourless Chocolate Cake
- Unique Potato Flour Cake with Eggnog
- Moist Whipping Cream Bundt Cake
- Delicious Chocolate Chip Ricotta Loaf Cake
- Indulgent Double Chocolate Bundt Cake
- Healthy Rhubarb Crumble (a wonderful recipe by nourishyourglow.com)
If you try this recipe, please let us know how much you enjoyed it! We’d love for you to rate it with a ★★★★★ star rating and leave a comment below. Your feedback means the world to us! You can also sign up for our Newsletter to receive weekly delicious homemade recipes directly in your inbox. And don’t forget to follow us on Pinterest or Instagram and share your beautiful creations! Tag us @combinegoodflavors and use the hashtag #combinegoodflavors so we don’t miss seeing your baking triumphs!
📖 Recipe
Strawberry Sponge Cake
Nora
Save RecipeSaved!
Pin Recipe
Equipment
-
Mixing bowls
-
Electric Handmixer
-
Close meshed sieve
-
2 8-Inch Springform Pan
-
Cooling Rack
-
Bread knife
-
Cake stand for serving
Ingredients
- 6 Eggs
- ⅓ cup Superfine sugar
- 2 ½ teaspoon Vanilla Sugar
- 1 cup Cake Flour
- 1 ⅛ cup Whipped Cream
- 12.35 oz Fresh Strawberries
- Powdered Sugar for dusting
Instructions
Making the Sponge Cake
-
Preheat your oven to 180 °C // 356 °F top/bottom heat and separate the eggs into two separate bowls.6 Eggs
-
Take the bowl with the egg yolks and add half of the superfine sugar and the entire vanilla sugar.⅓ cup Superfine sugar, 2 ½ teaspoon Vanilla Sugar
-
Beat the ingredients with an electric mixer until very foamy and set aside.
-
Grab the bowl with the egg whites and add the second half of the superfine sugar. Beat them until very stiff.
-
In the mixing bowl with the beaten egg yolks, gently fold in the stiffly beaten egg whites. Then sift the flour over it and mix it in1 cup Cake Flour
-
Fill the batter into the springform pans (about three-quarters full) and put the filled springform pans in the oven.
-
Bake on the middle shelf for half an hour.
-
Remove the springform pan(s) from the oven and let cool for 15 minutes.
-
Before opening the springform pan, cut along the edge once with a knife to ensure no dough sticks to the sides.
-
Take the dough out of the springform pan and let it cool further on a cooling rack.
-
Once the dough is no longer warm, take the first sponge cake and cut it in half. Do the same with the second sponge.
Layering the Cake – 2 small cakes
-
Wash the strawberries and remove the green.
-
Place the first sponge cake layer on the cake stand.
-
Now add a layer of whipped cream to the sponge.1 ⅛ cup Whipped Cream
-
Place the prepared strawberry halves around the edge of the sponge cake.12.35 oz Fresh Strawberries
-
Dust the whole whipped cream strawberry surface with powdered sugar.
-
Place the second sponge cake base on top.
-
Sprinkle the top sponge cake layer with powdered sugar and place a fanned strawberry in the center. Locking it with a scoop of whipped cream underneath.Powdered Sugar
-
Sprinkle a second time with powdered sugar, and the strawberry sponge cake is ready to be served!
OPTION 2 – Layering the Cake – 1 big cake
-
Wash the strawberries and remove the green.
-
Place the first sponge cake layer on the cake stand.
-
Now add a layer of whipped cream to the sponge.
-
Place the prepared strawberry halves around the edge of the sponge cake.
-
Dust the whole whipped cream strawberry surface with powdered sugar.
-
Place the second sponge cake base on top.
-
Add another layer of whipped cream to the second sponge.
-
Place the prepared strawberry halves around the edge of the sponge cake.
-
Dust the whole whipped cream strawberry surface with powdered sugar.
-
Place the third sponge cake base on top.
-
Add another layer of whipped cream to the third sponge.
-
Place the rest of the prepared strawberry halves around the edge of the sponge cake.
-
Dust the whole whipped cream strawberry surface with powdered sugar.
-
Place the last sponge cake base on top.
-
Sprinkle the top sponge cake layer with powdered sugar and place a fanned strawberry in the center. Locking it with a scoop of whipped cream underneath.
-
Sprinkle a second time with powdered sugar, and the strawberry sponge cake is ready to be served!
Nutrition values are estimates only, using online calculators. Please verify using your own data.

⛑️ Important Food Safety Guidelines
Ensuring food safety is paramount when preparing any meal, especially with fresh ingredients. Please keep these guidelines in mind to prevent foodborne illnesses:
- Minimum Cooking Temperature: Always cook foods to a minimum internal temperature of 165 °F (74 °C) to ensure any harmful bacteria are eliminated. While cakes bake at higher temperatures, this is a general rule to apply to other aspects of cooking.
- Prevent Cross-Contamination: Never use the same utensils, cutting boards, or dishes on cooked food that previously touched raw ingredients without thorough washing.
- Hand Hygiene: Always wash your hands thoroughly with soap and warm water for at least 20 seconds before and after handling food, especially raw ingredients.
- Temperature Danger Zone: Do not leave perishable foods, especially those containing dairy or fresh fruit, sitting out at room temperature for extended periods (typically more than two hours). This can encourage bacterial growth.
- Never Leave Cooking Unattended: Stay in the kitchen when food is cooking, especially in the oven or on the stovetop, to prevent burning or other accidents.
- High Smoke Point Oils: When cooking with oils (though not directly applicable to this sponge cake), choose those with a high smoking point to avoid producing harmful compounds.
- Ensure Good Ventilation: Always have proper ventilation when using a gas stove to prevent the buildup of harmful fumes.
For more detailed and comprehensive food safety information, always refer to reliable sources such as Safe Food Handling – FDA.
