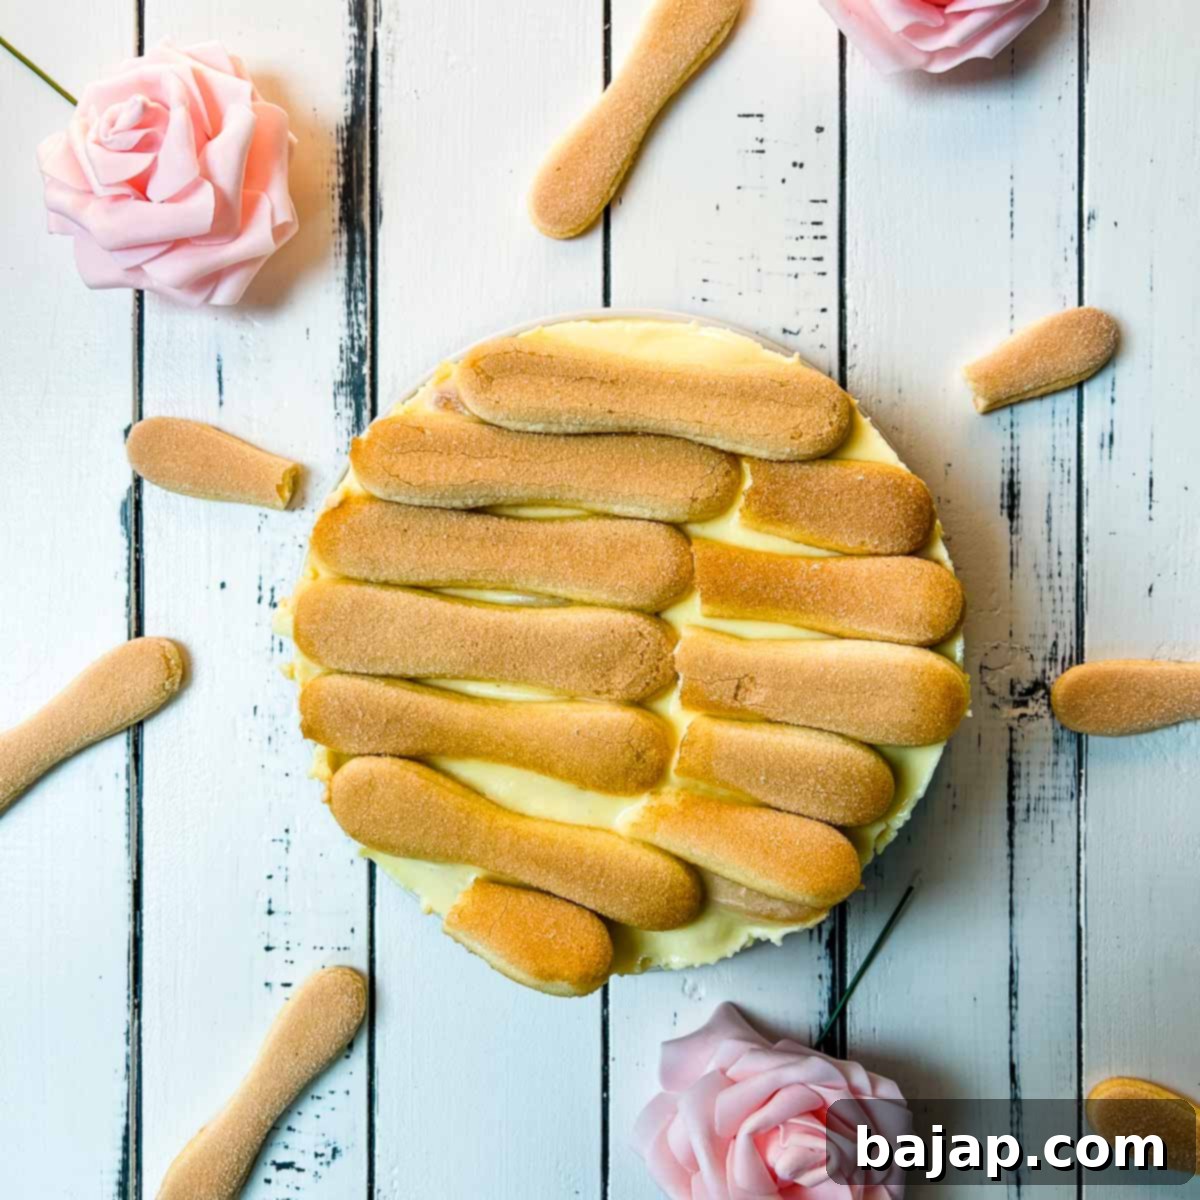
Easy No-Bake Eggnog Ladyfinger Pudding Dessert: A Layered Masterpiece
Prepare to delight your taste buds with an extraordinary dessert that combines elegance, ease, and irresistible flavor: a luscious layered pudding dessert featuring espresso-dipped ladyfingers, a rich vanilla pudding, and the unmistakable festive kick of eggnog. This no-bake wonder is not only incredibly simple to prepare, but it also shines as a perfect make-ahead option, allowing you to focus on your guests while a show-stopping delicacy chills to perfection in your refrigerator. Forget the oven – this dessert proves that some of the most impressive treats require no baking at all!
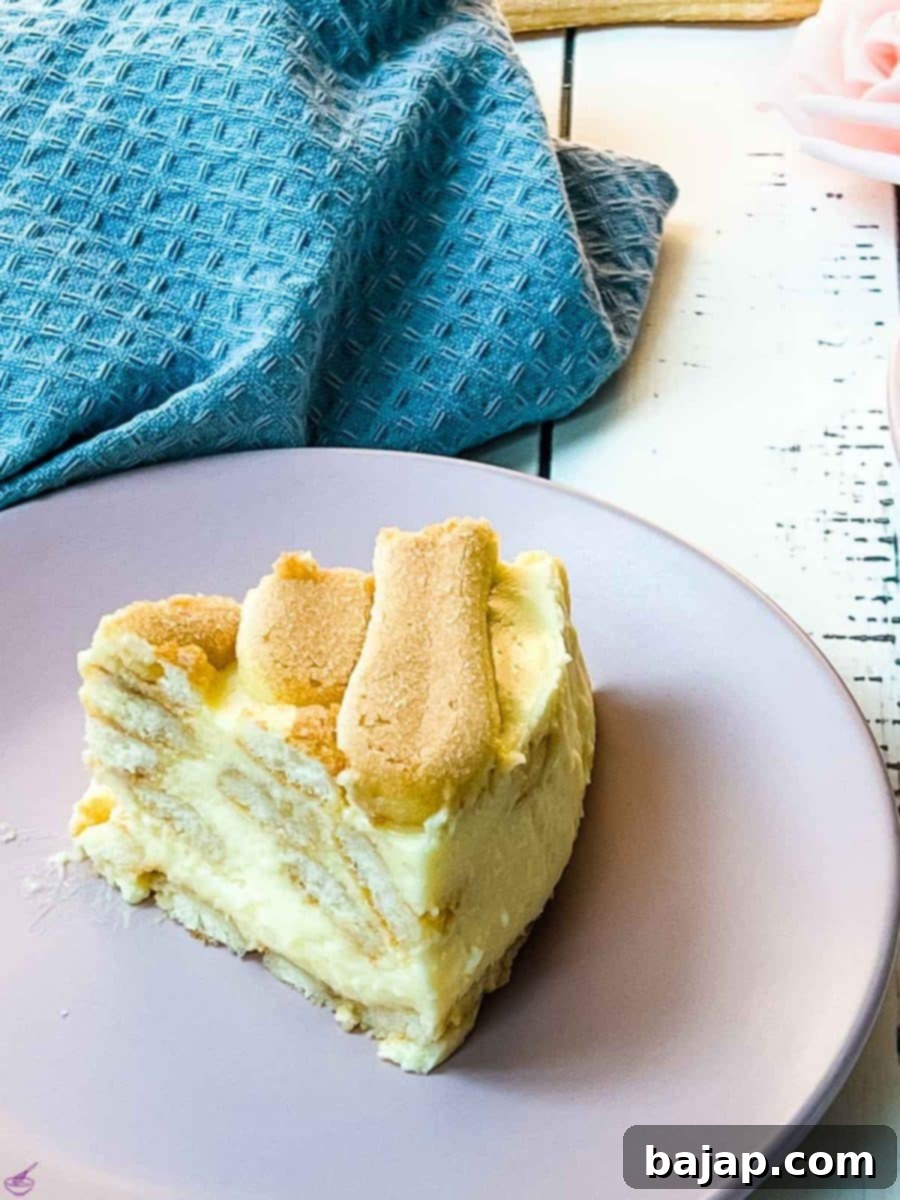
The heart of this dessert lies in its divine eggnog vanilla pudding cream. It’s a velvety, smooth concoction that boasts an intense eggnog flavor, perfectly balanced by the classic comfort of vanilla. Each layer of delicate ladyfingers, generously drizzled or dipped in strong espresso, adds a wonderful contrast of texture and a sophisticated coffee aroma that complements the rich cream beautifully. The result is a dessert with an amazing creamy, soft, and slightly wobbly consistency, showcasing lovely yellow-colored layers that are as appealing to the eye as they are to the palate. This recipe offers a delightful nod to traditional European desserts like the classic Malakoff cake or Italy’s beloved Tiramisu, bringing their sophisticated charm to your table with minimal effort.
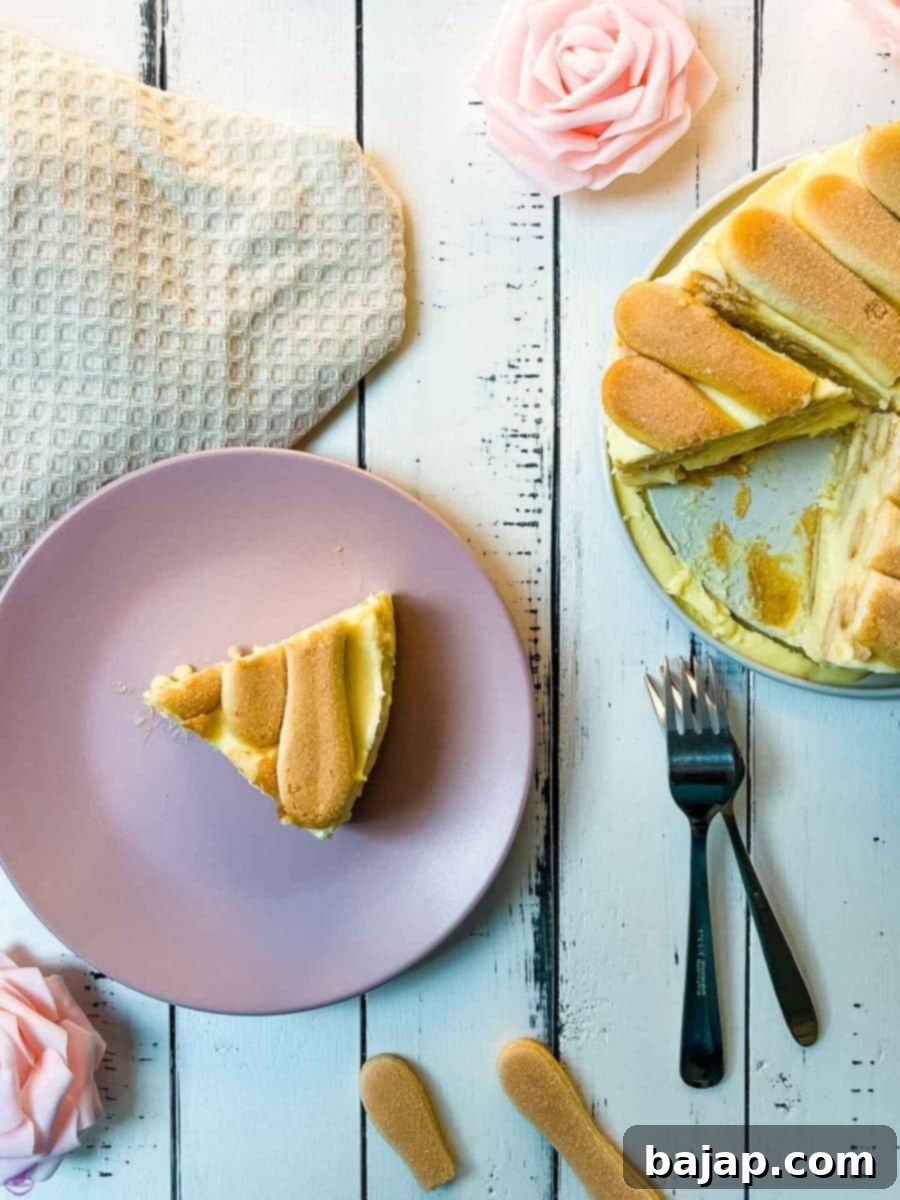
Whether you’re hosting a holiday gathering, a special dinner, or simply craving a luxurious treat, this easy ladyfinger dessert will impress. Its striking appearance with distinct layers and its rich, comforting flavors make it an unforgettable experience. The ease of preparation, combined with the convenience of making it ahead, positions it as a go-to recipe for both novice and experienced dessert makers.
[feast_advanced_jump_to]
🎥 Watch the Magic Unfold: No-Bake Layered Pudding Dessert
Curious to see how quickly this magnificent dessert comes together? Watch our step-by-step video tutorial to guide you through each part of the process, from whipping the creamy eggnog pudding to perfectly layering your ladyfingers. You’ll be amazed at how simple it is to create such an elegant and delicious no-bake pudding dessert.
🥘 Key Ingredients for Your Layered Ladyfinger Dessert
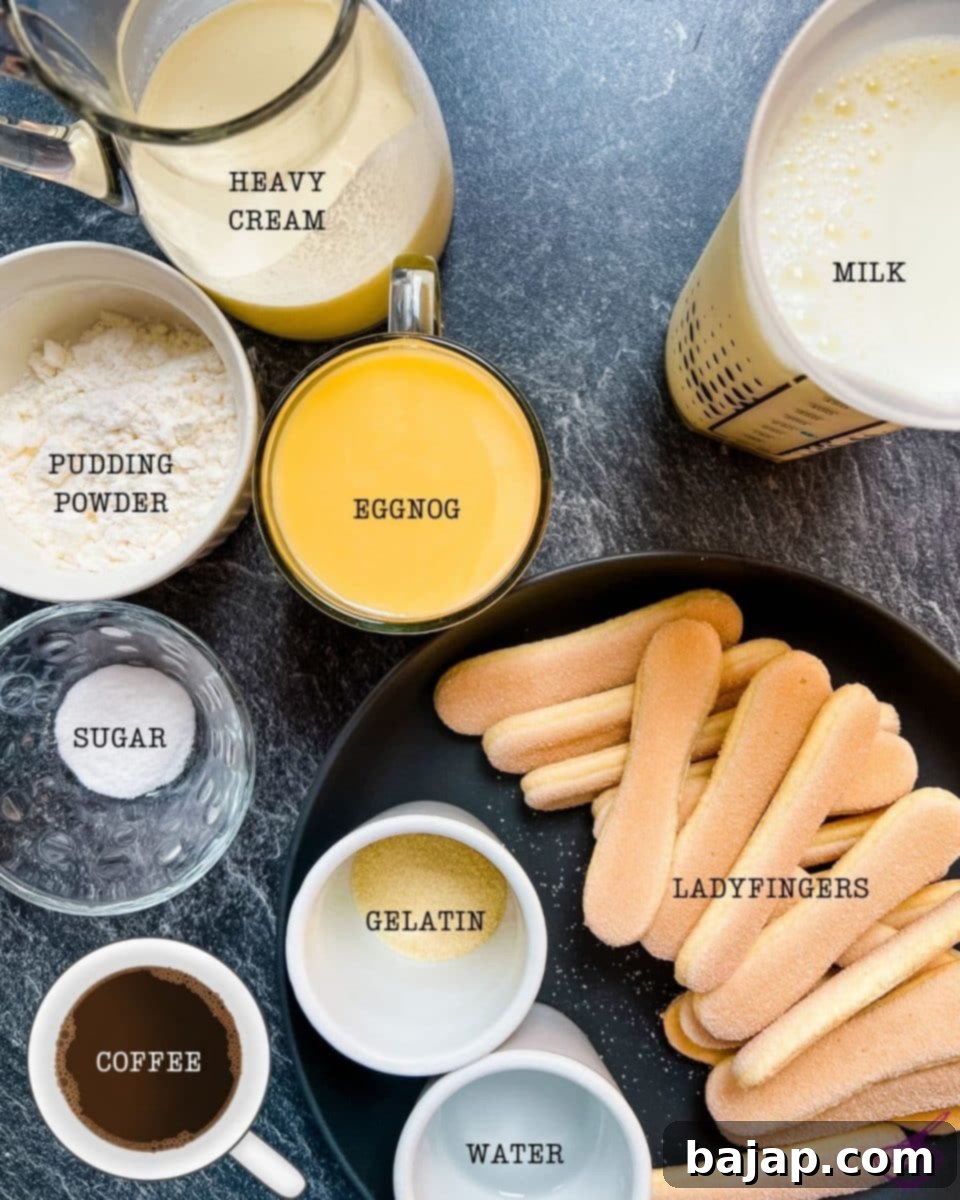
Crafting this delightful layered pudding dessert requires a few essential ingredients, each playing a crucial role in building its incredible flavor and texture profile. Here’s what you’ll need to create this amazing treat:
- Ladyfingers: These light, airy, and slightly sweet sponge cake biscuits are fundamental. They form the foundational layers, providing a soft yet structured base and delightful intermediate textures throughout the dessert.
- Espresso: Strongly brewed espresso is key for infusing the ladyfingers with a rich, aromatic coffee flavor, reminiscent of a classic Tiramisu. Dipping or basting the ladyfingers ensures they are moist and flavorful without becoming soggy.
- Gelatin: This ingredient is vital for achieving the perfect consistency. It helps the pudding set beautifully, giving the dessert its desired creamy, soft, and wobbly structure while ensuring it holds its shape when sliced.
- Cold water: Used to hydrate the gelatin, allowing it to bloom properly before being incorporated into the pudding mixture.
- Whole milk: The creamy base for our rich vanilla pudding, contributing to its luxurious texture.
- Granulated sugar: Provides the perfect level of sweetness to the pudding, enhancing the vanilla and eggnog flavors without overpowering them.
- Vanilla pudding powder: The primary component for the pudding, creating a smooth and classic vanilla base that pairs wonderfully with the other ingredients.
- Eggnog (Egg Liqueur): This is the star of the show, imparting its distinctive rich, creamy, and subtly boozy flavor to the pudding. For the best and most authentic taste, we highly recommend using homemade eggnog. However, for convenience, a high-quality store-bought eggnog will also yield fantastic results.
- Whipped cream: Gently folded into the pudding, the whipped cream adds airiness and a silky-smooth texture, making the eggnog pudding even more irresistible and decadent.
For precise measurements and detailed instructions, please refer to the comprehensive recipe card below.
🔪 Step-by-Step Guide to Crafting Your Perfect Eggnog Ladyfinger Dessert
Creating this stunning no-bake layered dessert is an enjoyable and straightforward process. Follow these detailed steps to achieve a flawless and delicious treat:
Step 1: Prepare the Espresso, Gelatin, and Pudding Base
Begin by brewing two double espressos. Pour them into a metal pitcher or a suitable bowl and set them aside to cool. This cooling time is crucial as you’ll be preparing the creamy eggnog custard next.
Next, prepare your gelatin. It’s essential to follow the specific instructions on your gelatin package, as brands can vary. Typically, our recipes call for mixing gelatin with three times its volume in cold water and allowing it to swell for about 10 minutes. This process, known as “blooming,” ensures the gelatin dissolves smoothly and effectively thickens your pudding.
While the gelatin blooms, turn your attention to the vanilla pudding. In a small mixing bowl, combine eight tablespoons of cold milk with the vanilla pudding powder. Whisk vigorously until the mixture is completely smooth and free of lumps. This creates a slurry that will prevent lumps when added to the hot milk.
Concurrently, in a small saucepan, bring the remaining whole milk to a gentle boil over medium heat. Stir in the granulated sugar until it fully dissolves. Meanwhile, using a kitchen machine or hand mixer, whip the cold heavy cream until it forms very stiff peaks. This stiff whipped cream is essential for the airy, luxurious texture of your final eggnog pudding.
Once the milk and sugar mixture in the saucepan reaches a boil, remove it immediately from the heat. Gradually whisk in the vanilla pudding mixture you prepared earlier. Return the saucepan to the heat for a brief moment, bringing it to a boil again while stirring constantly. This brief second boil ensures the pudding thickens correctly. Remove from heat once more. Now, carefully stir in the eggnog (egg liqueur) and the bloomed gelatin until both are thoroughly incorporated. The residual heat will help dissolve the gelatin completely.
Finally, gently fold the very stiffly whipped cream into the warm eggnog pudding mix. Be careful not to deflate the whipped cream; this step is key to achieving that wonderfully light and airy texture. Set this creamy concoction aside.
Step 2: Layering Your Elegant No-Bake Dessert
Now comes the exciting part: assembling your beautiful ladyfinger dessert! Take an 8-inch (approximately 20 cm) springform pan. This type of pan is ideal for easily releasing the delicate layers once chilled.
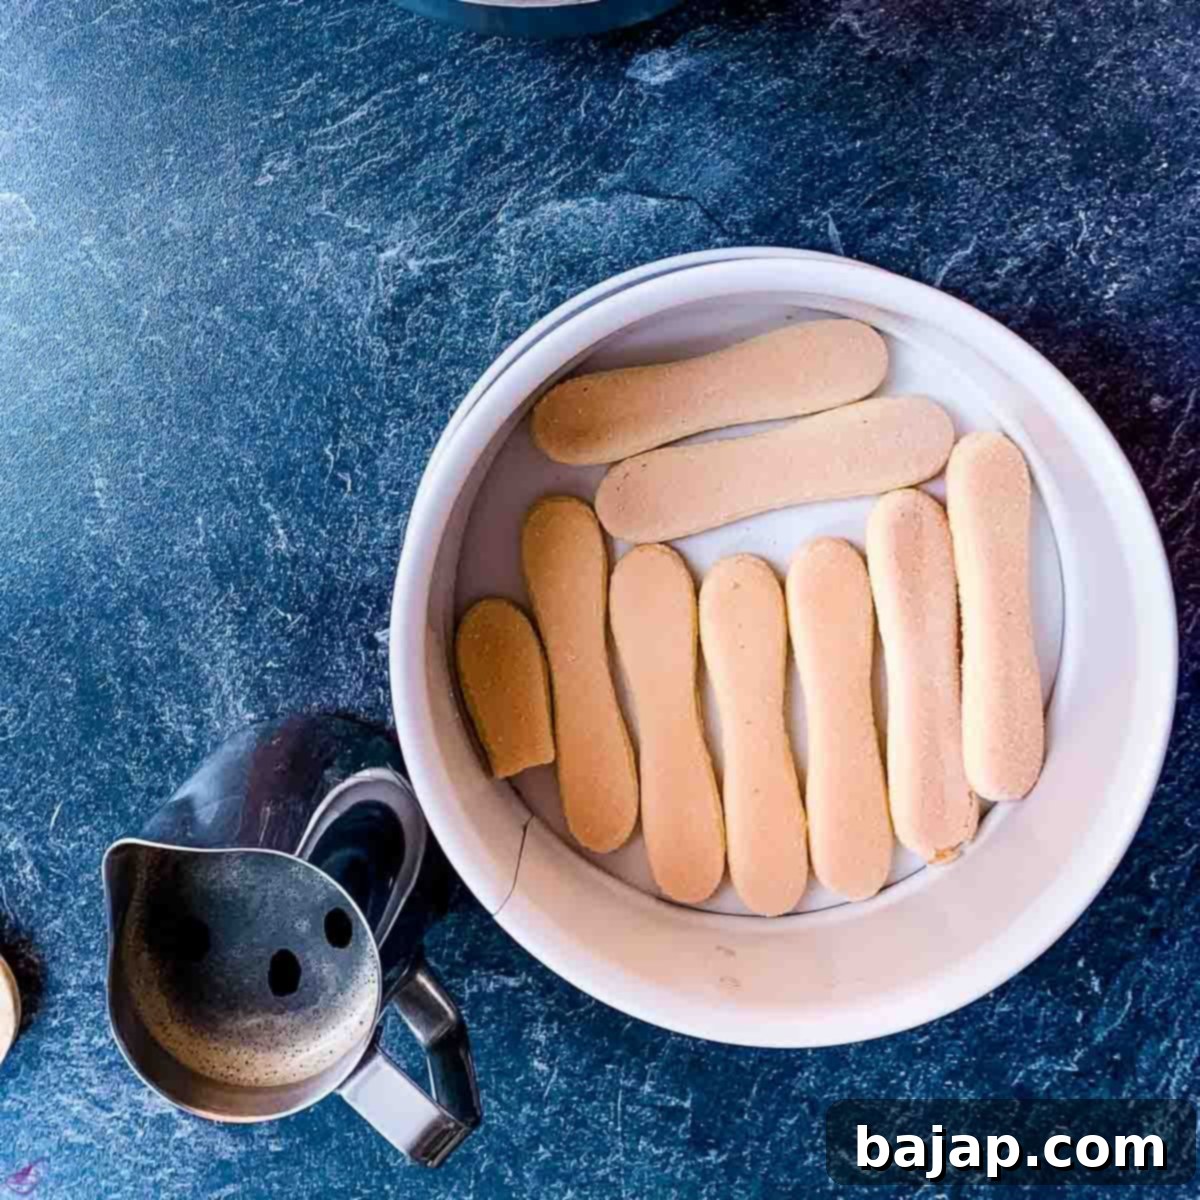
Arrange the ladyfingers neatly to form the sturdy bottom layer.
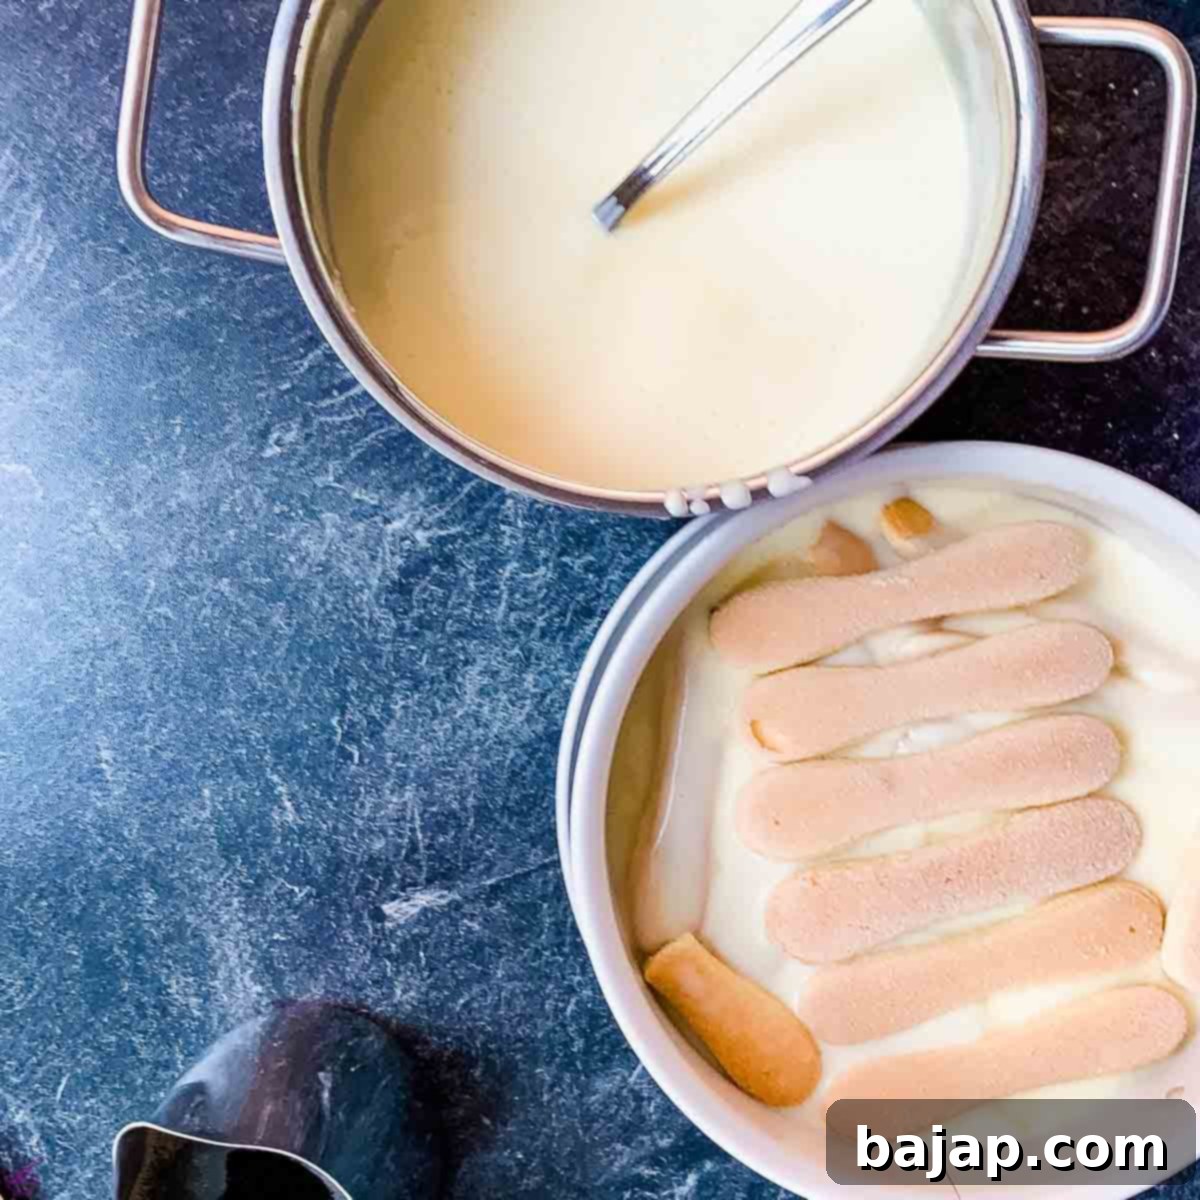
Carefully place the second layer of ladyfingers over the rich pudding cream.
Arrange the ladyfingers closely together at the bottom of the springform pan to create your dessert’s sturdy and flavorful base. You can either quickly dip each ladyfinger into the cooled espresso before placing it or, once all are arranged, drizzle them evenly with the espresso. The goal is to moisten them without saturating them too much.
Follow this with a generous layer of approximately five ladles of the prepared eggnog pudding cream. Use a spatula to gently spread the cream, ensuring it completely covers the espresso-soaked biscuits right to the edges. This creates a smooth and even surface for the next layer.
Next, carefully place another layer of ladyfingers on top of the pudding cream. As before, you have the option to dip these in coffee beforehand or drizzle them after layering. Consistency in your method will contribute to a more uniform final texture. Add another five ladles of pudding mix, carefully spreading it out.
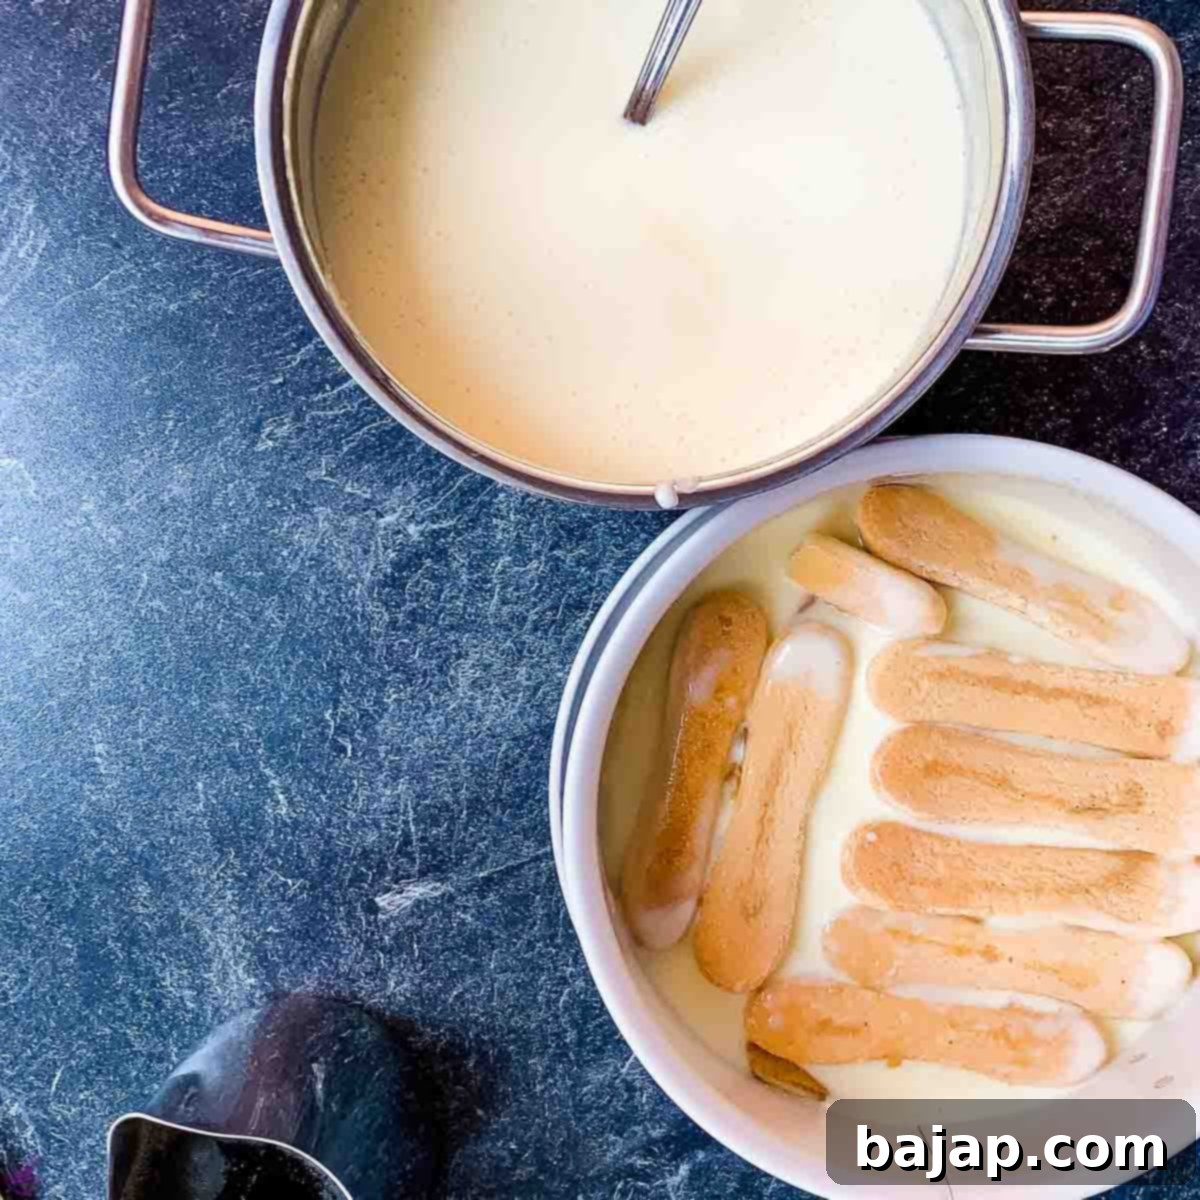
Ensure the second layer of ladyfingers is also moistened with espresso.
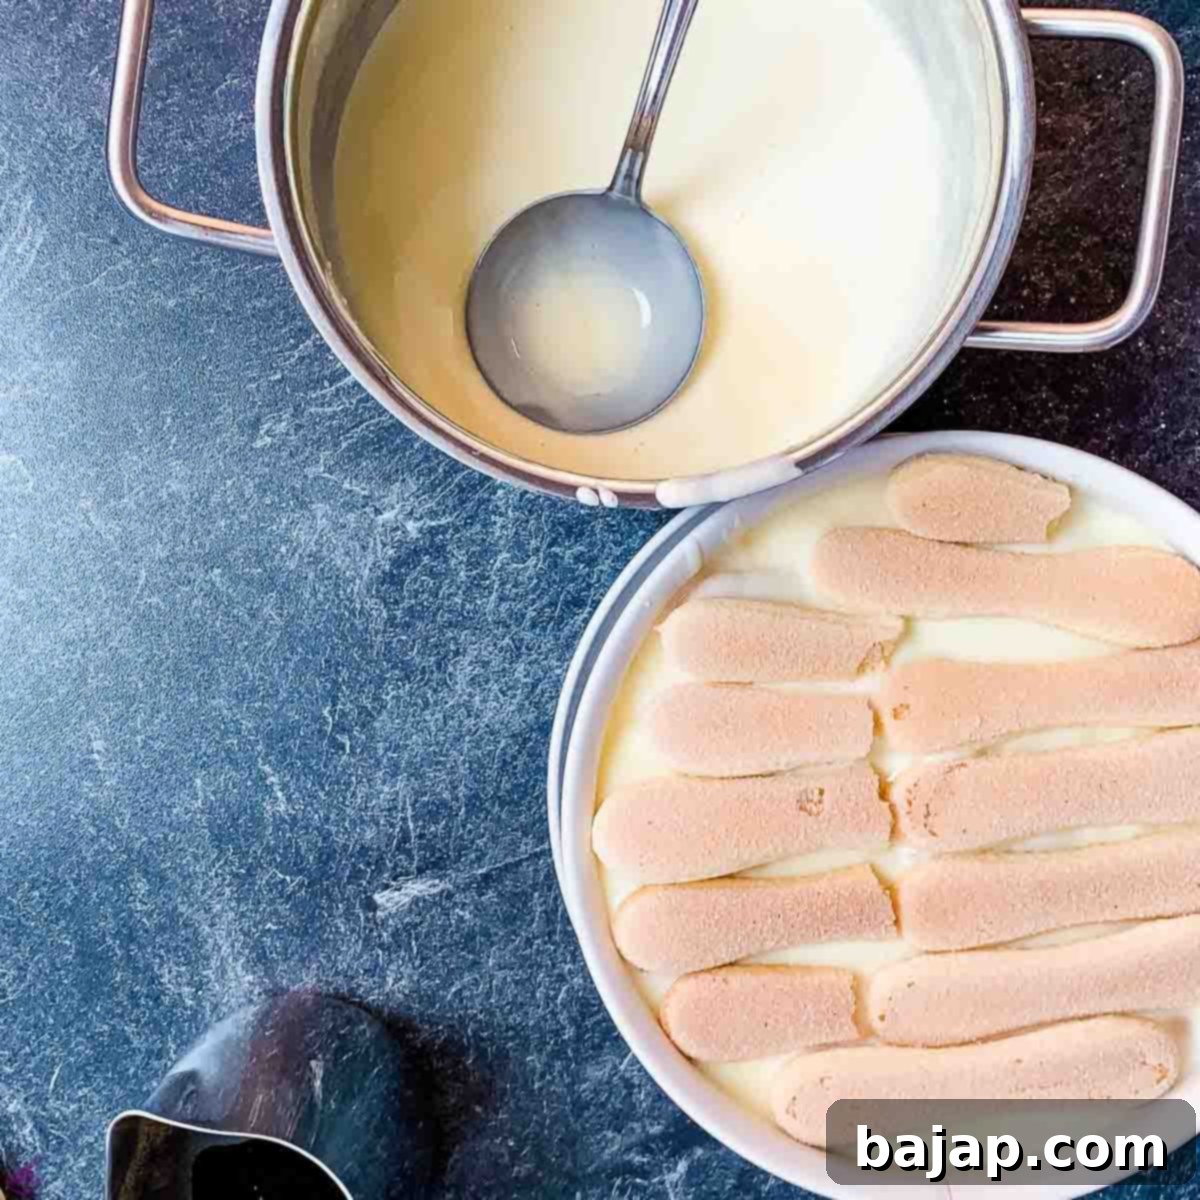
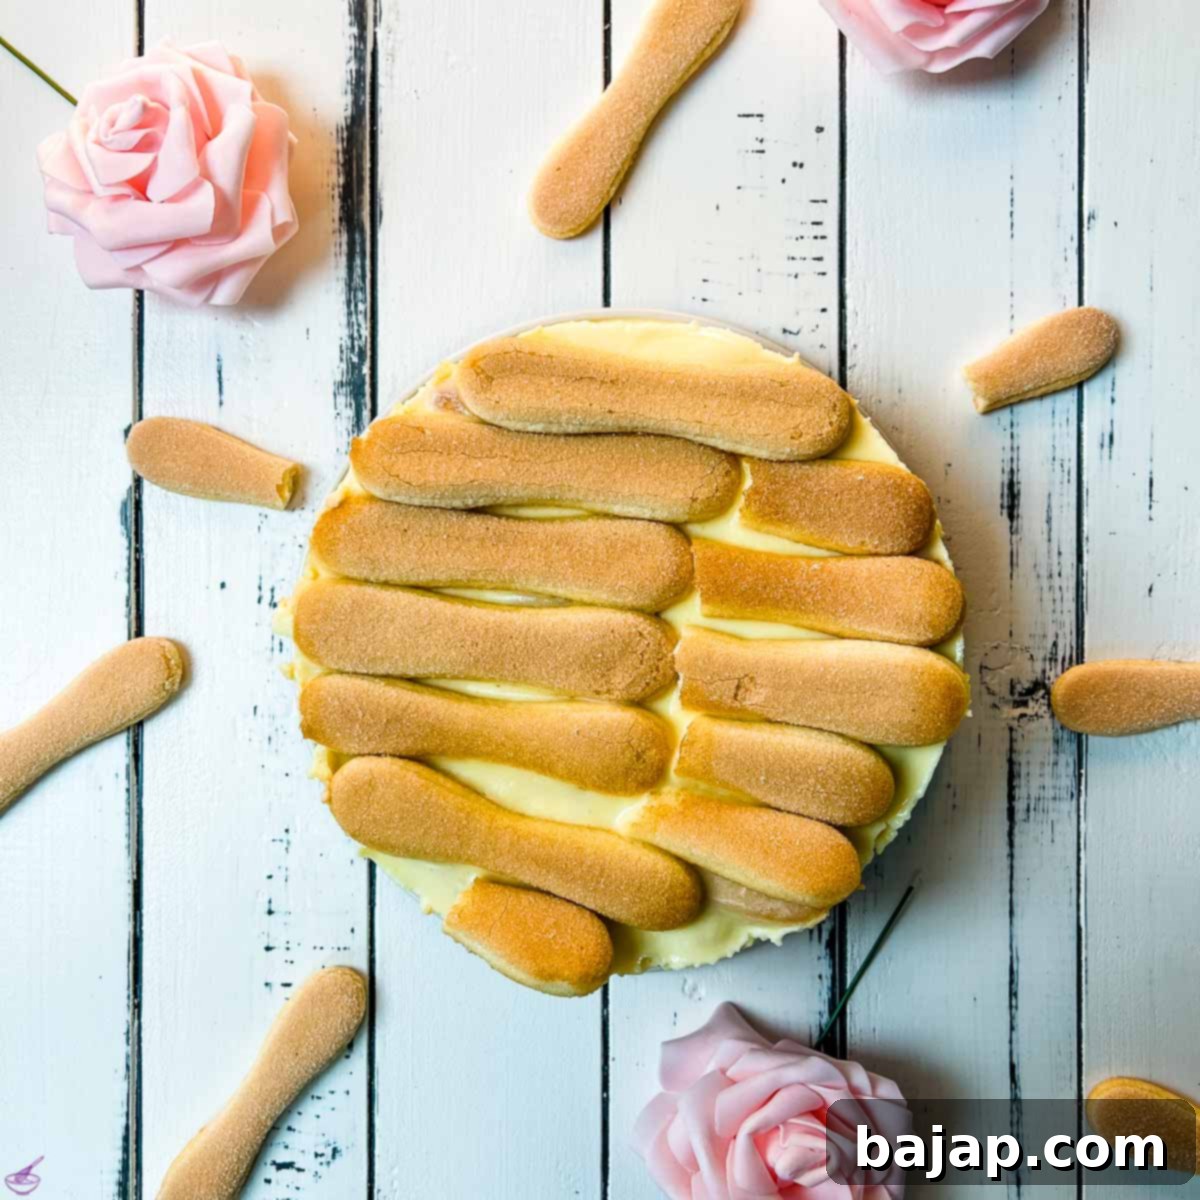
A final layer of ladyfingers creates a visually stunning top.
Continue this alternating pattern of espresso-soaked ladyfingers and creamy eggnog pudding until your springform pan is filled to the top. To achieve the most appealing presentation, always finish with a final layer of ladyfingers. This provides a neat and elegant top surface that can be garnished beautifully.
Once all layers are perfectly assembled, cover the springform pan securely with either a plate or plastic wrap. This prevents any odors from the refrigerator from affecting your dessert and helps maintain moisture. Transfer the covered dessert to the refrigerator and allow it to chill completely for at least eight hours. For the absolute best results, letting it chill overnight is highly recommended. This extended chilling time is crucial for the gelatin to fully set, allowing the flavors to meld, and ensuring the dessert is firm enough to slice cleanly.
Step 3: Serve and Enjoy Your Chilled Masterpiece
After the recommended chilling time, carefully remove the springform pan from the refrigerator. Before attempting to open the pan, run a thin, sharp knife gently along the inner edge of the pan. This simple step prevents the creamy dessert from sticking to the sides and ensures a clean release.
Once the sides are loosened, unclip and remove the springform pan. Your stunning layered pudding dessert is now ready to be served. Using your sharp knife, cut neat slices and transfer them to individual plates. Garnish as desired (a dusting of cocoa powder or a sprinkle of chocolate shavings would be lovely!) and serve immediately.
Enjoy every delightful spoonful of this rich, creamy, and flavorful no-bake eggnog ladyfinger dessert!
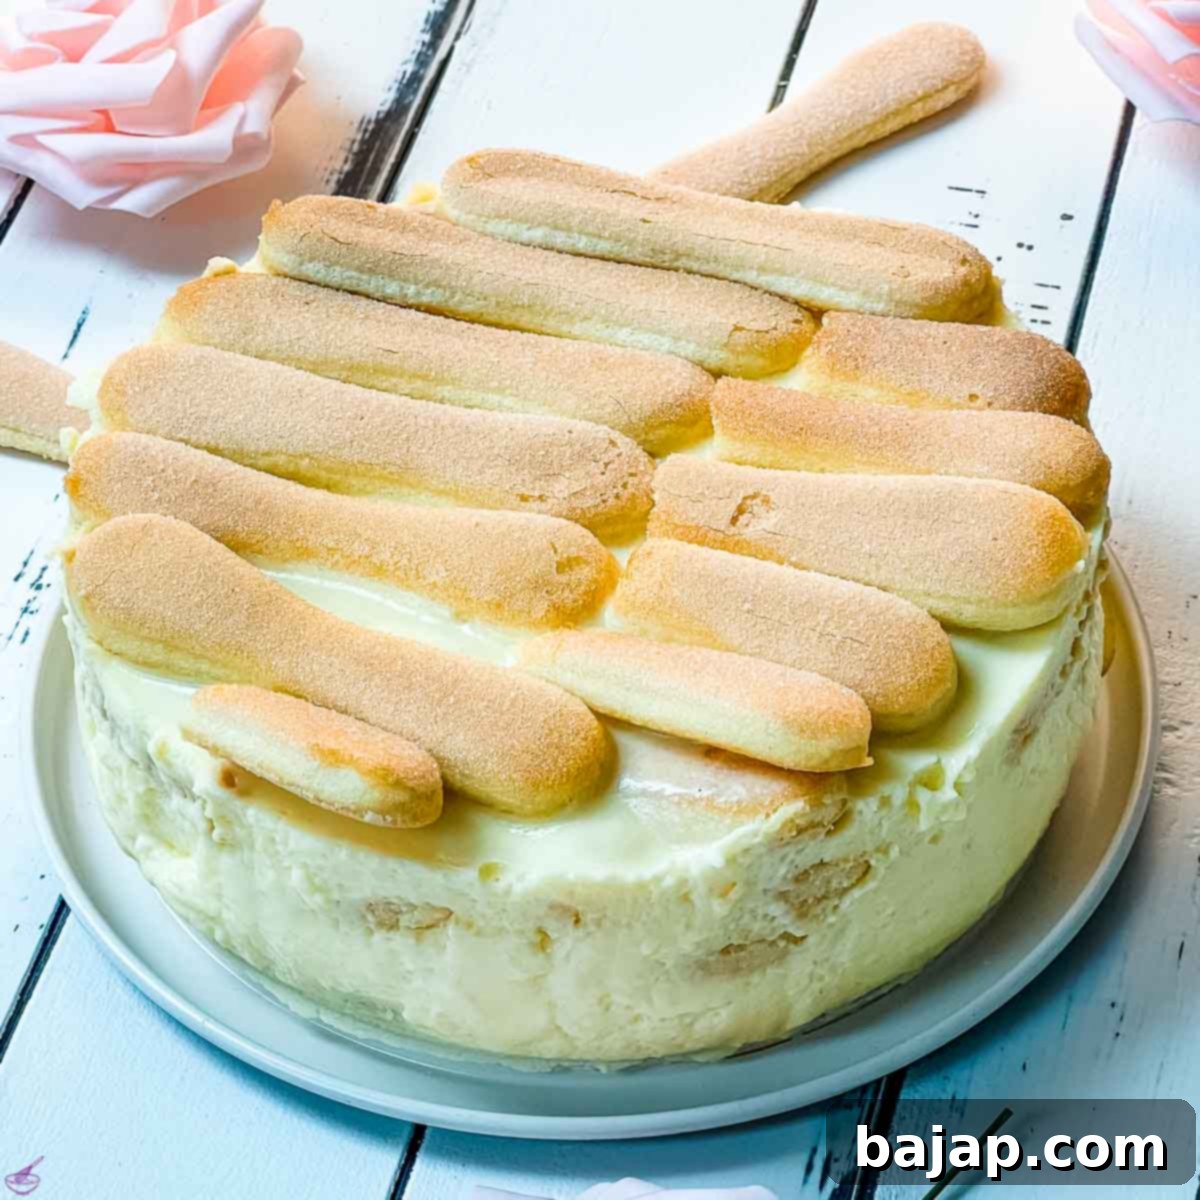
Enjoy!
More Delicious Recipes to Explore
If you loved this easy ladyfinger dessert, you might want to try these other delightful recipes:
- Eggnog Cheesecake with Ginger Spiced Crust: A festive and creamy twist on a classic cheesecake.
- Linzer Cookies with Egg Liqueur: Elegant cookies with a hint of boozy goodness.
- Snowball Cocktail: The perfect complementary drink for an eggnog-themed evening.
- Eggnog Truffles: Bite-sized delights bursting with eggnog flavor.
- The Best No-Bake Chocolate Ricotta Cheesecake: Another fantastic no-bake option for chocolate lovers.
- No-bake Candy Cane Oreo Cake Pops: Fun and festive no-bake treats.
- Fig Cheesecake in a Jar: Individual cheesecakes perfect for portion control and picnics.
For a completely different, tropical flavor profile, you might enjoy this delicious Pina Colada Layer Cake!
🥜 Creative Substitutions for Your Layered Dessert
While this layered pudding dessert is perfectly delicious as written, feel free to experiment with substitutions to tailor it to your taste or what you have on hand. For a delightful change, you can easily replace the vanilla pudding powder with chocolate pudding powder to create a rich chocolate version. If you opt for chocolate pudding, we highly recommend complementing it with a different liqueur instead of eggnog. Excellent choices include Baileys Irish Cream, Kahlua coffee liqueur, or a rich chocolate cordial for a non-alcoholic option. These alternatives will enhance the chocolate notes beautifully and offer a unique flavor experience.
🍽 Essential Equipment for Your No-Bake Dessert
You won’t need any specialized baking equipment for this no-bake pudding dessert, but having these standard kitchen tools will make the process smooth and enjoyable:
- Springform pan: A round, 8-inch (20 cm) pan is ideal for easily unmolding your layered dessert.
- Small saucepan: For boiling the milk and sugar, and preparing the pudding.
- Whisk: Essential for combining ingredients smoothly and preventing lumps in your pudding.
- Wooden spoon: Useful for stirring and folding.
- Mixing bowls: You’ll need a few for preparing the pudding mixture, bloomed gelatin, and whipping cream.
- Hand mixer or food processor with a whisk attachment: Crucial for whipping the cream to stiff peaks.
- Metal pitcher: Or a heat-proof container for brewing and cooling the espresso.
- Ladle: For evenly distributing the pudding cream into layers.
🌡 Storage Guidelines for Freshness
This no-bake layered pudding dessert is fantastic as a make-ahead option. Once fully chilled, it can be stored in an airtight container or kept covered in the springform pan in the refrigerator for up to three to four days. This makes it perfect for preparing in advance for parties or enjoying over several days.
💭 Top Tip for a Stunning Presentation
For an absolutely show-stopping layered pudding dessert, the final layer is incredibly important. Finishing your dessert with a neat layer of ladyfingers is far more visually appealing than a simple eggnog vanilla cream topping. The crisp lines of the ladyfingers create a beautiful contrast, providing a professional and elegant finish. For an extra touch of flair, consider dusting the top ladyfinger layer with cocoa powder, fine chocolate shavings, or a light sprinkle of ground cinnamon just before serving. This not only enhances the visual appeal but also adds another layer of subtle flavor.
🙋🏻 Frequently Asked Questions About Ladyfinger Desserts
Ladyfingers are delightful, crisp, and subtly sweet treats that possess a lovely vanilla flavor. Their unique coarse, sugary surface provides an interesting texture that makes them enjoyable to nibble on, even plain. When soaked in espresso, they absorb the rich coffee notes beautifully, softening to a tender, cake-like consistency perfect for layered desserts.
When purchased, high-quality ladyfingers should always be crunchy and firm. This crispness is crucial because it allows them to properly absorb the liquid (like espresso in this recipe) without immediately turning mushy. If you find ladyfingers that are already soft or pliable in the package, it typically indicates they have been stored incorrectly or have absorbed too much moisture. We recommend returning them for a refund to ensure the best results for your dessert.
Absolutely! Ladyfingers are wonderfully delicious on their own and are often enjoyed as a simple biscuit with coffee or tea. In Austria, where this recipe has its roots, they have a charming tradition on New Year’s Eve: ladyfingers are baked in the shape of fish and called “lucky fish.” These are shared among friends and family at midnight as a symbol of good fortune for the coming year. An important part of this tradition is to eat the tail of the fish first, believed to make your luck “swim upwards” throughout the year.
Yes, absolutely! This is one of the greatest advantages of a no-bake layered pudding dessert. In fact, making it ahead is highly recommended. The extended chilling time (preferably overnight) allows the gelatin to set firmly and gives all the wonderful flavors a chance to meld and deepen, resulting in a more harmonious and delicious final product. Simply prepare it the day before your event, keep it covered in the refrigerator, and then unmold and serve when ready!
For the richest and most authentic flavor, we highly recommend using a homemade eggnog (egg liqueur) if you have the time and inclination. Homemade versions often have a superior depth of flavor and creaminess. However, if you’re short on time or prefer convenience, a good quality store-bought eggnog will work perfectly well. Look for brands that are known for their rich flavor and smooth texture. Ensure it’s a liqueur type if you want the “boozy” element; otherwise, you can use non-alcoholic eggnog for a family-friendly version, adjusting sweetness as needed.
If you embark on this culinary adventure and make this exquisite easy ladyfinger dessert, we would absolutely love to hear from you! Please let us know how you enjoyed it by leaving a ★★★★★ star rating and a comment below. Your feedback means the world to us! You can also sign up for our Newsletter to receive weekly delicious homemade recipes, or follow us on Pinterest or Instagram and share your creation with us. Just tag us @combinegoodflavors and use the hashtag #combinegoodflavors, so we don’t miss your culinary masterpiece!
📖 Recipe: Layered Vanilla Pudding Dessert with Ladyfingers and Eggnog
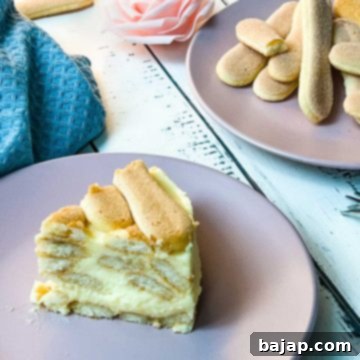
Layered Vanilla Pudding Dessert with Ladyfingers and Eggnog
Nora
Save RecipeSaved!
Pin Recipe
Equipment
-
Springform pan 8 inch
-
Small Saucepan
-
Whisk
-
Wooden spoon
-
Mixing bowls
-
Hand mixer or food processor with a whisk attachment
-
Metal pitcher
-
Ladle
Ingredients
- 40 Ladyfingers
- 2 shots Espresso
- 3 teaspoon Gelatin
- 9 teaspoon Cold water
- 4 cups Whole milk
- ¼ cup Granulated sugar
- 1.5 oz Vanilla pudding powder
- 1 cup Egg liqueur
- 1 cup Whipped cream
Instructions
-
Brew two double espressos in a metal pitcher and set aside to cool.2 shots Espresso
-
Prepare the gelatin according to package instructions. For our recipes, mix 3 teaspoons of gelatin with 9 teaspoons of cold water and let it swell for 10 minutes.3 teaspoon Gelatin, 9 teaspoon Cold water
-
In a small mixing bowl, combine eight tablespoons of cold milk (from the 4 cups total) with the vanilla pudding powder. Whisk until completely smooth.4 cups Whole milk
-
In a small saucepan, bring the remaining milk to a boil with the granulated sugar, stirring until dissolved.4 cups Whole milk, ¼ cup Granulated sugar
-
Simultaneously, using a kitchen machine or hand mixer, whip the 1 cup of heavy cream until very stiff peaks form.1 cup Whipped cream
-
Once the milk is boiling, remove it from the heat and add the vanilla pudding mixture, whisking continuously.1.5 oz Vanilla pudding powder
-
Bring the pudding to a brief boil again, then remove from heat. Stir in the egg liqueur and the bloomed gelatin until fully dissolved and combined.1 cup Egg liqueur
-
Finally, gently fold the very stiffly whipped cream into the eggnog pudding mix. Set aside.
-
Take an 8-inch springform pan and arrange 40 ladyfingers closely together as the bottom layer.40 Ladyfingers
-
Drizzle the ladyfingers with some of the cooled espresso, ensuring they are evenly moistened.2 shots Espresso
-
Follow with about five ladles of the eggnog pudding cream, spreading it evenly to fully cover the ladyfingers.
-
Place another layer of ladyfingers on top of the pudding cream. Drizzle or dip them in espresso as you prefer.
-
Add five more ladles of pudding mix, spreading it for the next pudding layer.
-
Repeat the layering process until the springform pan is filled to the top.
-
Ensure the final layer is ladyfingers for an appealing visual finish.
-
Cover the springform pan tightly with a plate or plastic wrap and refrigerate for at least eight hours, or preferably overnight, to chill and set completely.
-
After chilling, remove the pan from the refrigerator. Run a thin knife along the inner edge of the pan to loosen the dessert before opening the springform.
-
Remove the springform ring and serve the dessert immediately in neat slices. Enjoy!
Nutrition values are estimates only, using online calculators. Please verify using your own data.

🤎 Explore More Delicious Recipes You’ll Love
If this easy ladyfinger dessert sparked joy in your kitchen, you’re in for a treat! Discover more delightful recipes that are perfect for any occasion, from festive celebrations to everyday indulgences:
- Firecracker Bundt Cake for the 4th of July
- Limoncello Ricotta Cake
- Limoncello Cheesecake No Bake
- Easter Cookie Bars
⛑️ Important Food Safety Reminders
Ensuring food safety is paramount when preparing any recipe. Please keep the following guidelines in mind:
- Minimum Temperature: Always cook foods to their recommended minimum internal temperature, which is generally 165 °F (74 °C) for poultry and certain other ingredients, to eliminate harmful bacteria. While this is a no-bake dessert, apply this rule to any components that might be cooked.
- Cross-Contamination: Avoid using the same utensils, cutting boards, or dishes on cooked food that previously touched raw meat, poultry, or eggs, without thorough washing in between.
- Hand Washing: Wash your hands thoroughly with soap and warm water for at least 20 seconds after handling raw meat or eggs, and before starting any food preparation.
- Temperature Control: Do not leave perishable foods, especially those containing dairy or egg products, sitting out at room temperature for extended periods (typically no more than two hours). This includes chilling the dessert promptly and adequately.
- Unattended Cooking: Never leave cooking food unattended on the stovetop or in the oven.
- Safe Oils: Use cooking oils with a high smoke point when high-heat cooking to prevent the formation of harmful compounds.
- Ventilation: Always ensure good ventilation in your kitchen when using a gas stove to prevent the buildup of carbon monoxide.
For further comprehensive information on safe food handling practices, please refer to the official guidelines provided by the FDA (Food and Drug Administration).
