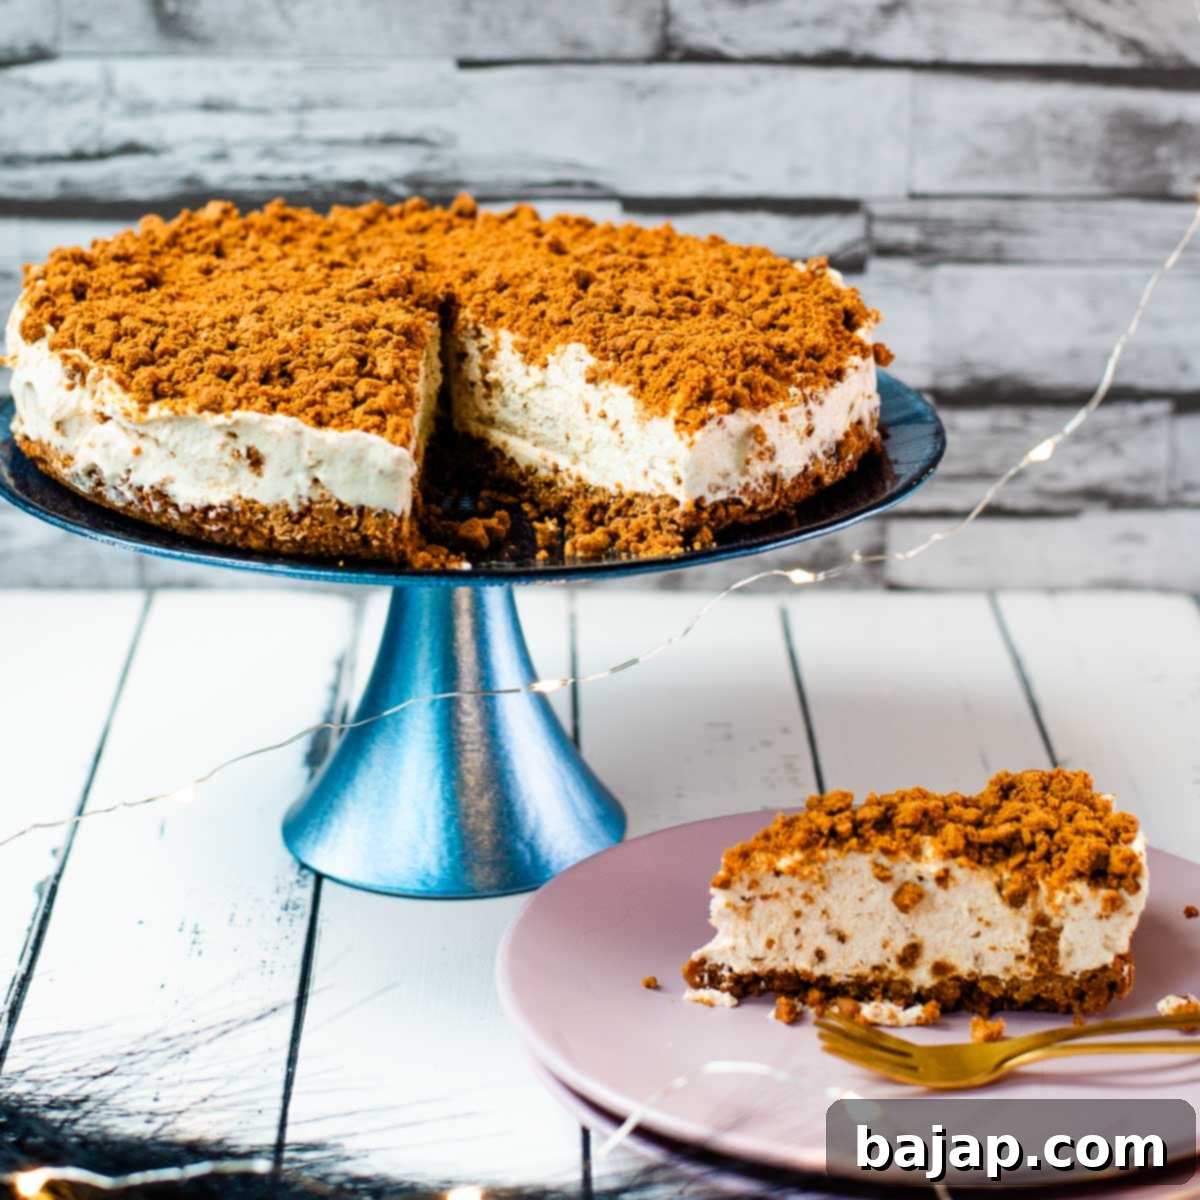
Decadent No-Bake Biscoff Cheesecake Recipe: Easy, Creamy & Irresistible
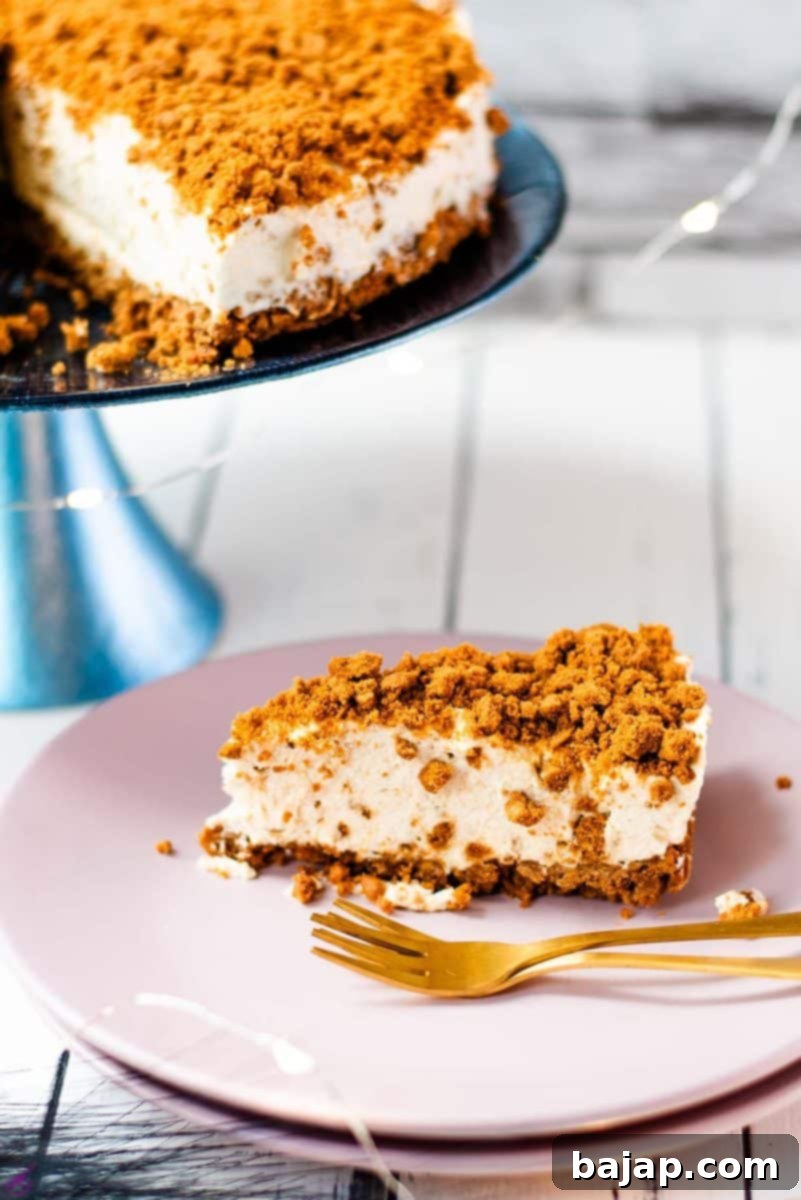
Prepare to have your taste buds transported to dessert heaven with this unbelievably easy and ultra-creamy No-Bake Biscoff Cheesecake. Forget your troubles and worries as you bite into the rich, spiced caramel flavors of Lotus Biscoff cookies, perfectly blended into a velvety smooth filling and crowned with a generous sprinkle of crumbled biscuits. This isn’t just a dessert; it’s a sublime experience that promises pure indulgence with minimal effort.
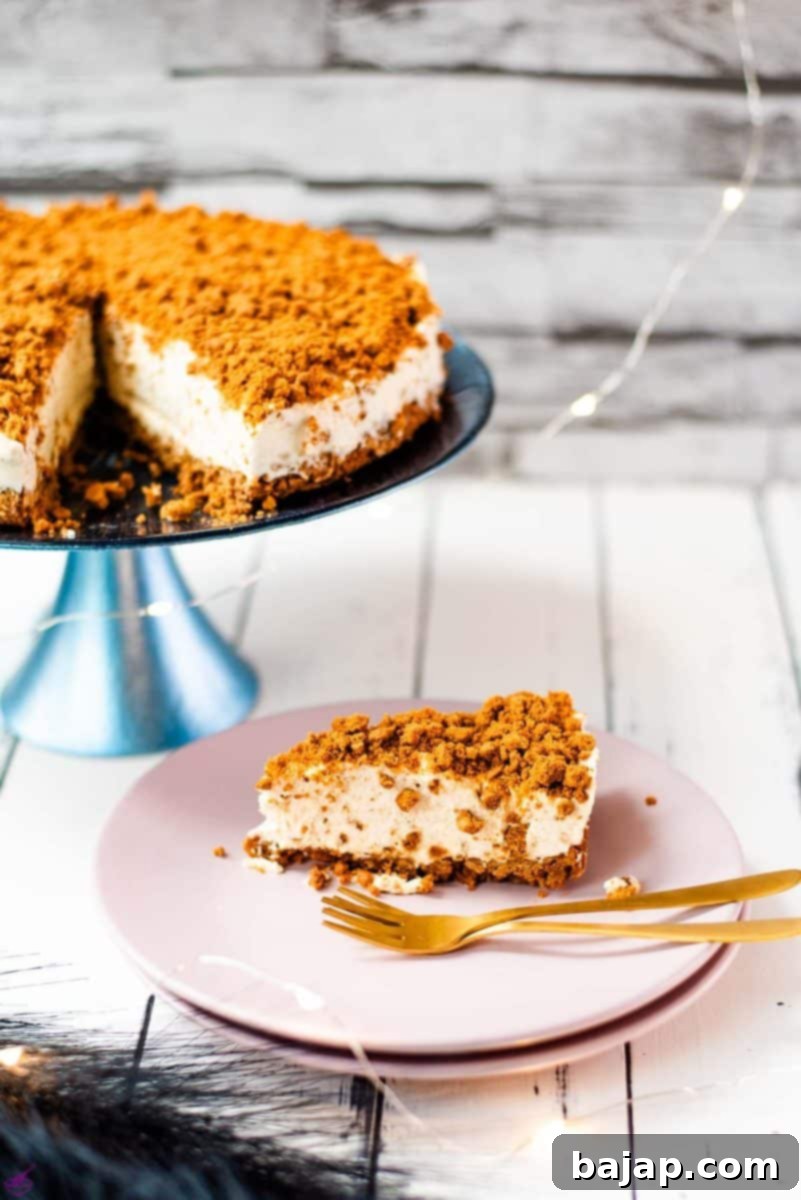
Whether you’re a seasoned baker looking for a simple showstopper or a beginner eager to impress, this no-bake Biscoff cheesecake recipe is your secret weapon. It comes together quickly, requiring no oven time, yet delivers a taste and texture that suggests hours of intricate preparation. The unique, deeply caramelized notes of Biscoff cookies truly shine, making every forkful a moment to savor. If you’re ready to create a dessert that will be the talk of the town, this Biscoff delight is guaranteed to exceed all expectations!
Why You Will Love This Easy Biscoff Cheesecake
Beyond its irresistible flavor, there are so many reasons to fall in love with this No-Bake Biscoff Cheesecake. First and foremost, it’s incredibly easy to make. No complicated water baths, no cracked tops, and no need to heat up your kitchen. Just a few simple ingredients and minimal prep time stand between you and a truly spectacular dessert.
- Effortless Preparation: Skip the oven! This recipe is perfect for hot days or when you just don’t feel like baking.
- Decadent Flavor: The unique, spiced caramel flavor of Biscoff cookies is deeply satisfying and truly shines in this cheesecake.
- Creamy Texture: The filling is unbelievably smooth and rich, melting in your mouth with every bite.
- Crowd-Pleaser: It’s a universally loved flavor profile that appeals to both kids and adults, making it ideal for parties, holidays, or a special treat at home.
- Make-Ahead Friendly: This cheesecake needs time to chill, making it a fantastic dessert to prepare a day or two in advance.
- Customizable: Easily adapt with additional toppings or variations to suit your taste.
🥘 Essential Ingredients for Your No-Bake Biscoff Cheesecake
Creating this dreamy Biscoff cheesecake requires just five key ingredients, each playing a crucial role in achieving that perfect texture and flavor. Quality ingredients make all the difference, so opt for the best you can find.
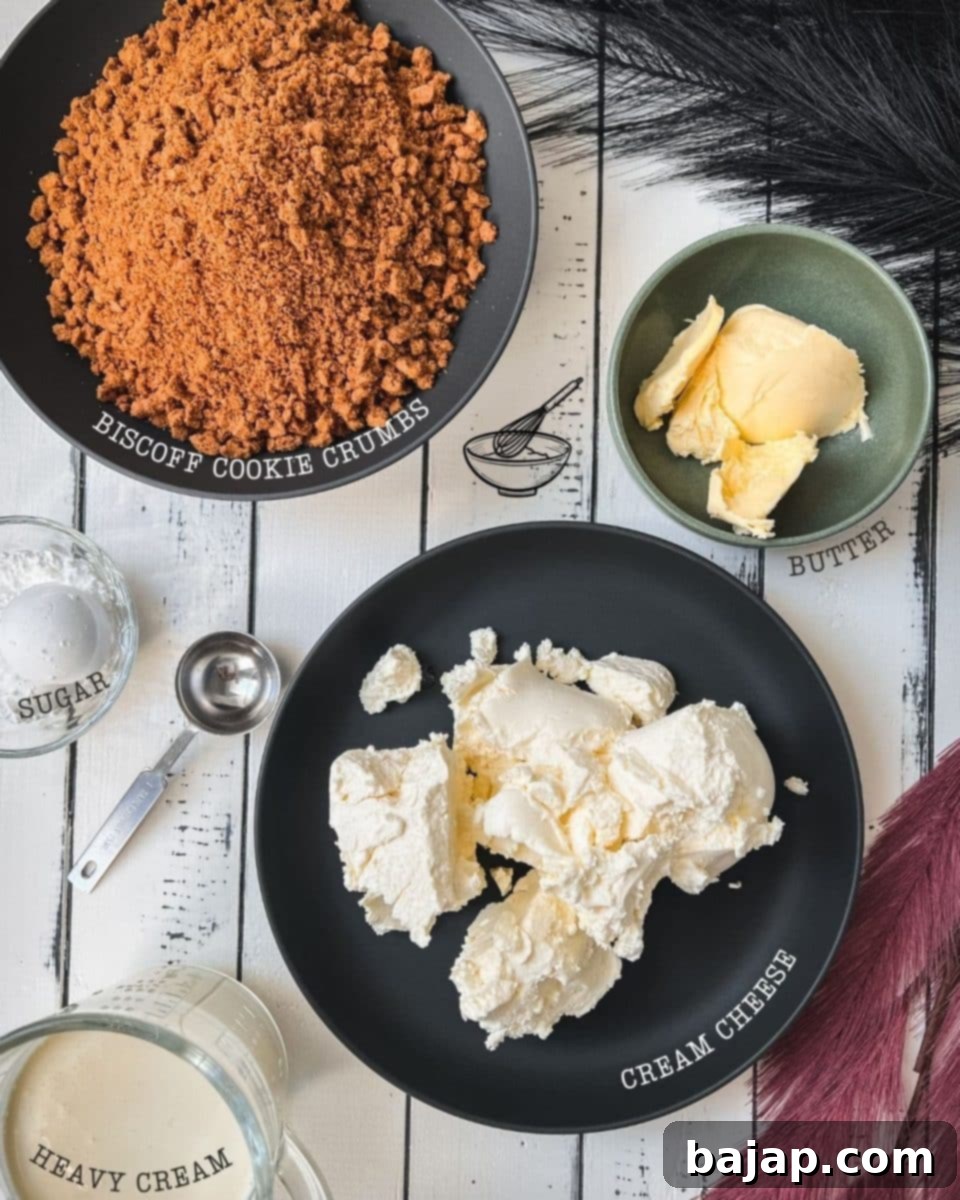
- Lotus Biscoff Cookies & Cookie Crumble: The star of our show! These distinctive caramelised biscuits provide both the crunchy base and the iconic flavor infused throughout the filling. While crushing whole cookies is easy, store-bought Biscoff cookie crumbs are a fantastic time-saver, perfect for the lazy baker! Ensuring you have extra for topping is key for that perfect finish.
- Unsalted Butter: Essential for binding the cookie crumbs into a firm, delicious crust. Using unsalted butter allows you to control the overall saltiness of the dessert. Make sure it’s fully melted and combined evenly for a sturdy base.
- Full-Fat Cream Cheese: This is critical for the cheesecake’s creamy texture and rich flavor. Always opt for full-fat cream cheese, and ensure it’s softened to room temperature before mixing. This prevents lumps and ensures a smooth, airy filling.
- Powdered Sugar (Confectioners’ Sugar): Unlike granulated sugar, powdered sugar dissolves instantly, guaranteeing a silky-smooth cheesecake filling without any grainy texture. It also adds the perfect touch of sweetness to balance the cream cheese and Biscoff flavors.
- Heavy Whipping Cream: Whipped until light and fluffy, heavy cream (or double cream) is what gives this no-bake cheesecake its incredible airy and luxurious texture. It lightens the cream cheese base, making the filling wonderfully decadent yet not too dense. Ensure it’s very cold before whipping for best results.
See the recipe card below for precise quantities and detailed instructions.
🔪 Step-by-Step Instructions for Your Dreamy Biscoff Cheesecake
Making this No-Bake Biscoff Cheesecake is straightforward and fun! Follow these steps carefully to ensure a perfect, show-stopping dessert every time.
Step 1: Prepare the Biscoff Cookie Crumbs
First, get your Lotus Biscoff cookies ready. You’ll need to crush them into fine crumbs. A food processor makes this task incredibly quick, taking mere seconds to achieve the perfect consistency. If you don’t have one, simply place the cookies in a sturdy plastic bag and use a rolling pin to crush them evenly. Alternatively, you can purchase pre-crushed Biscoff cookie crumbs, making this step even easier!
Step 2: Create the Biscoff Crust
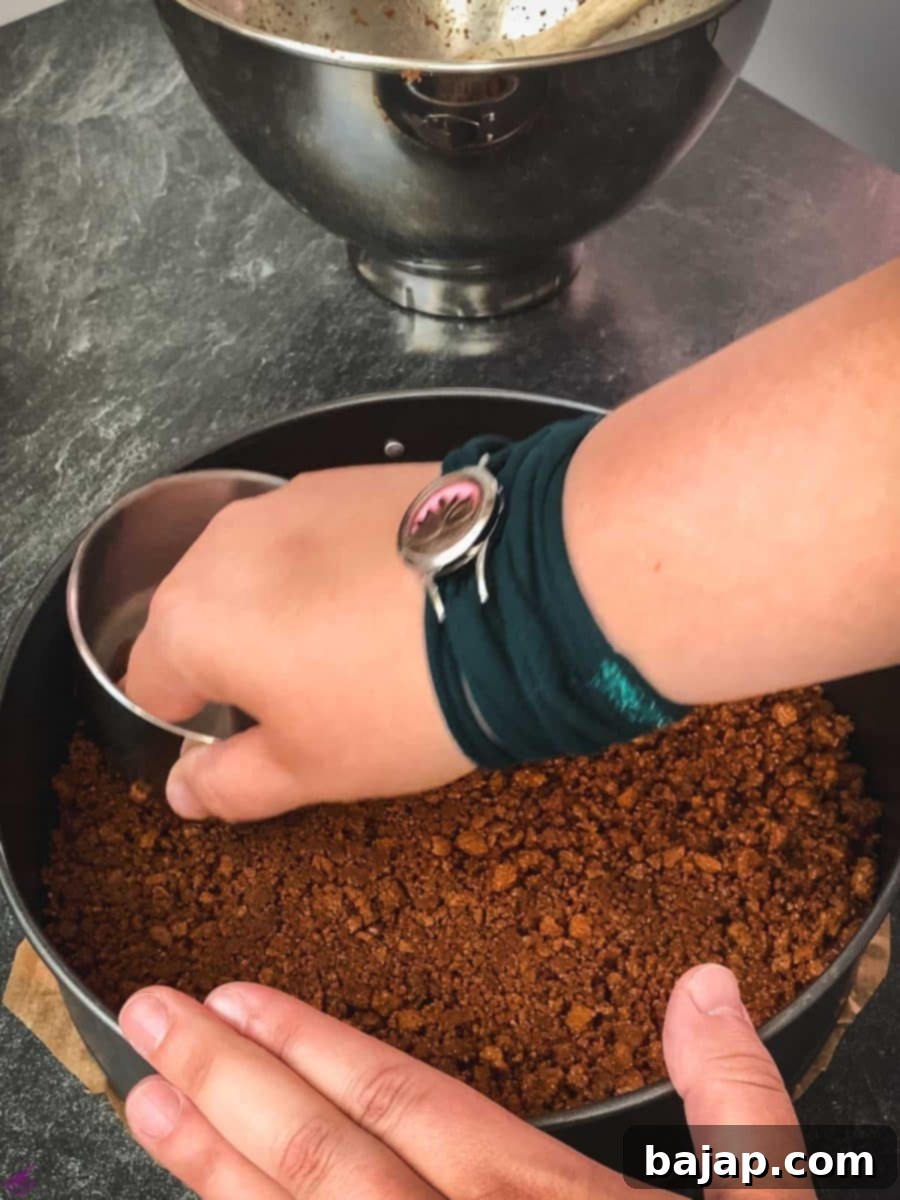
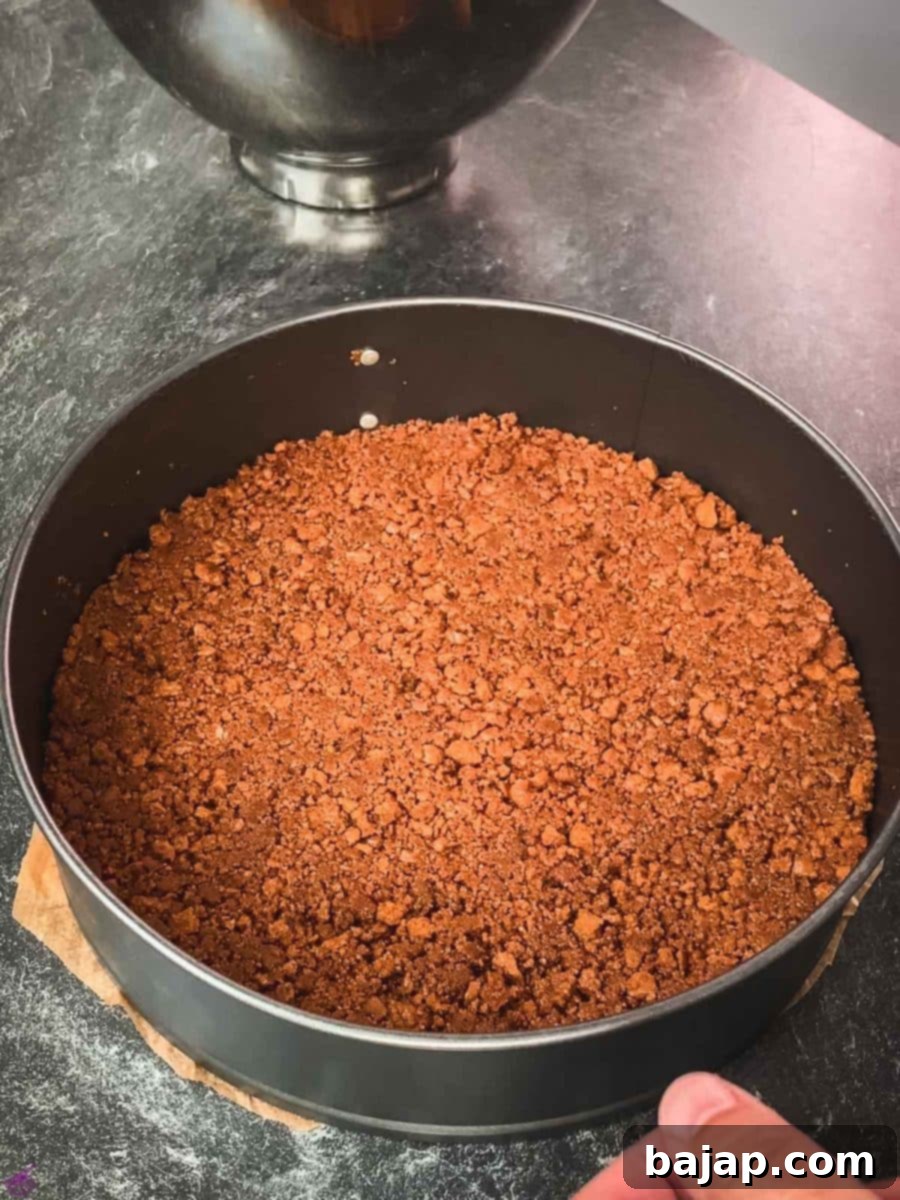
Measure out two-thirds of your Biscoff cookie crumbs and place them in a mixing bowl. Gently melt your unsalted butter, then add it to the crumbs. Mix thoroughly until the butter is fully incorporated and the crumbs are moistened and resemble wet sand. This mixture will form the sturdy, flavorful base of your cheesecake. Prepare your 9-inch springform cake pan by lining the bottom with parchment paper. This will make it much easier to remove the cheesecake later. Tightly pack the Biscoff and butter mixture over the parchment paper, ensuring an even layer across the entire bottom of the pan. Press firmly to create a compact crust. Place this crust in the refrigerator to chill while you prepare the filling, allowing it to firm up.
Step 3: Prepare the Creamy Biscoff Filling
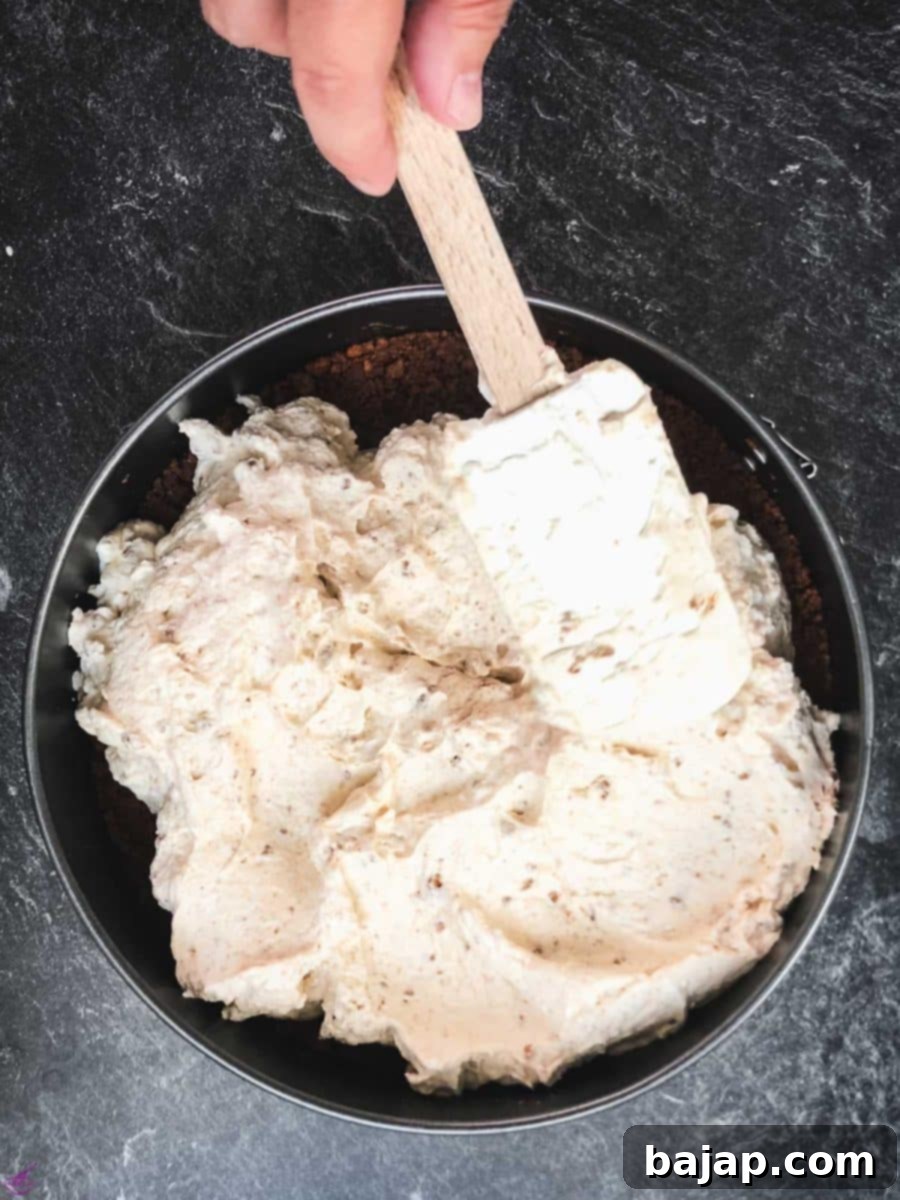
In a large mixing bowl, using an electric hand mixer or a stand mixer with a whisk attachment, whip your cold heavy cream at medium-high speed until it forms soft peaks. Be careful not to over-whip it into butter. Set the whipped cream aside. In a separate, even larger bowl, beat the softened full-fat cream cheese until it is smooth and creamy. This should take a couple of minutes. Next, gradually add the powdered sugar to the cream cheese, beating for another two minutes until the mixture is light, fluffy, and completely smooth, with no lumps. Now, gently fold in the remaining one-third of your Biscoff cookie crumbs into the cream cheese mixture. Finally, carefully fold in the whipped heavy cream until just combined. Overmixing at this stage can deflate the cream, so be gentle to maintain that airy texture.
Step 4: Assemble the Cheesecake
Retrieve your chilled Biscoff cookie crust from the refrigerator. Carefully spoon the creamy Biscoff cream cheese mixture over the crust, spreading it evenly to cover the entire surface. Use a rubber spatula to smooth out the top, creating a beautiful, professional-looking finish.
Step 5: Chill to Perfection
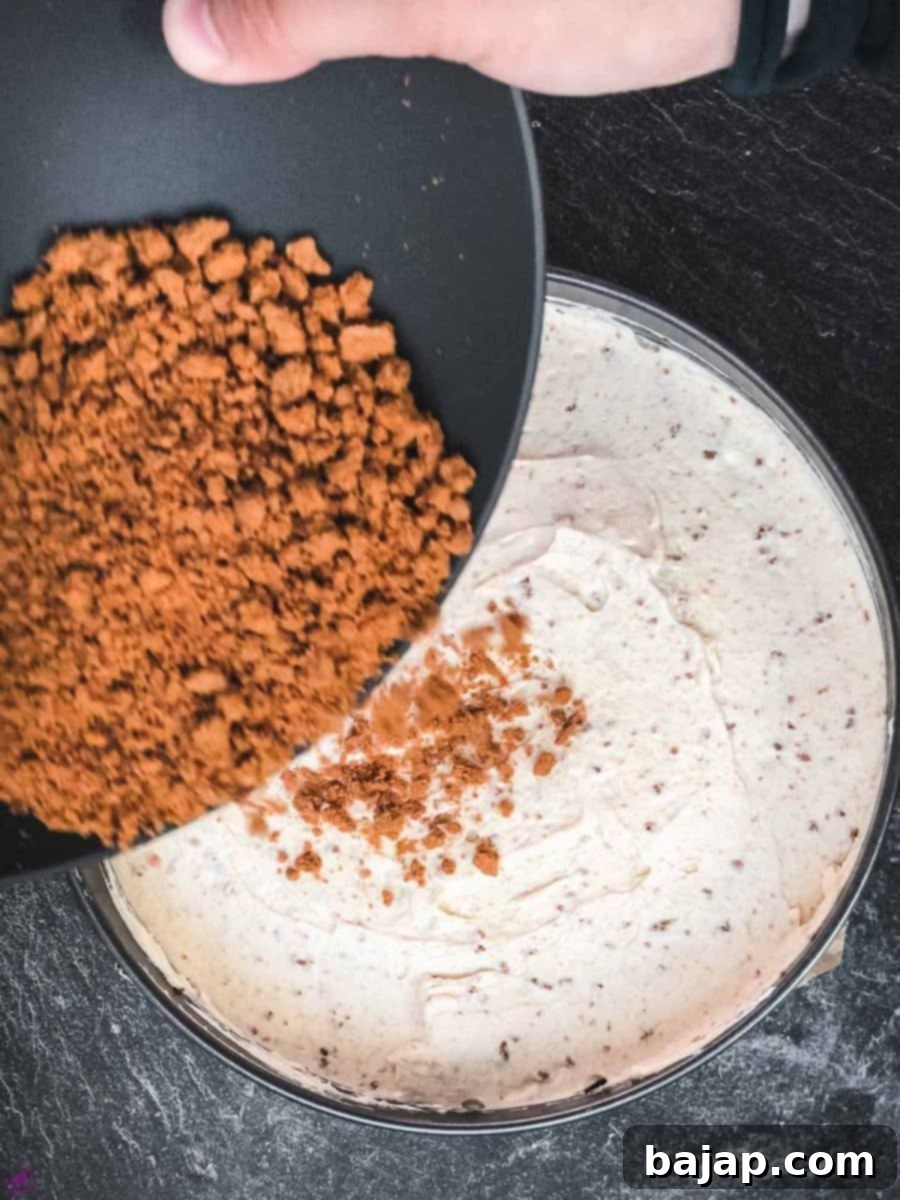
For that extra special touch, sprinkle some additional Biscoff cookie crumbs over the top of the cheesecake. This not only adds visual appeal but also another layer of Biscoff flavor and texture. Now, the most important step: place your heavenly creation in the freezer for a minimum of 3 hours. This crucial chilling time allows the filling to firm up properly, ensuring a perfect slice every time. For an even firmer cheesecake, you can chill it overnight in the refrigerator.
Step 6: Serve and Enjoy
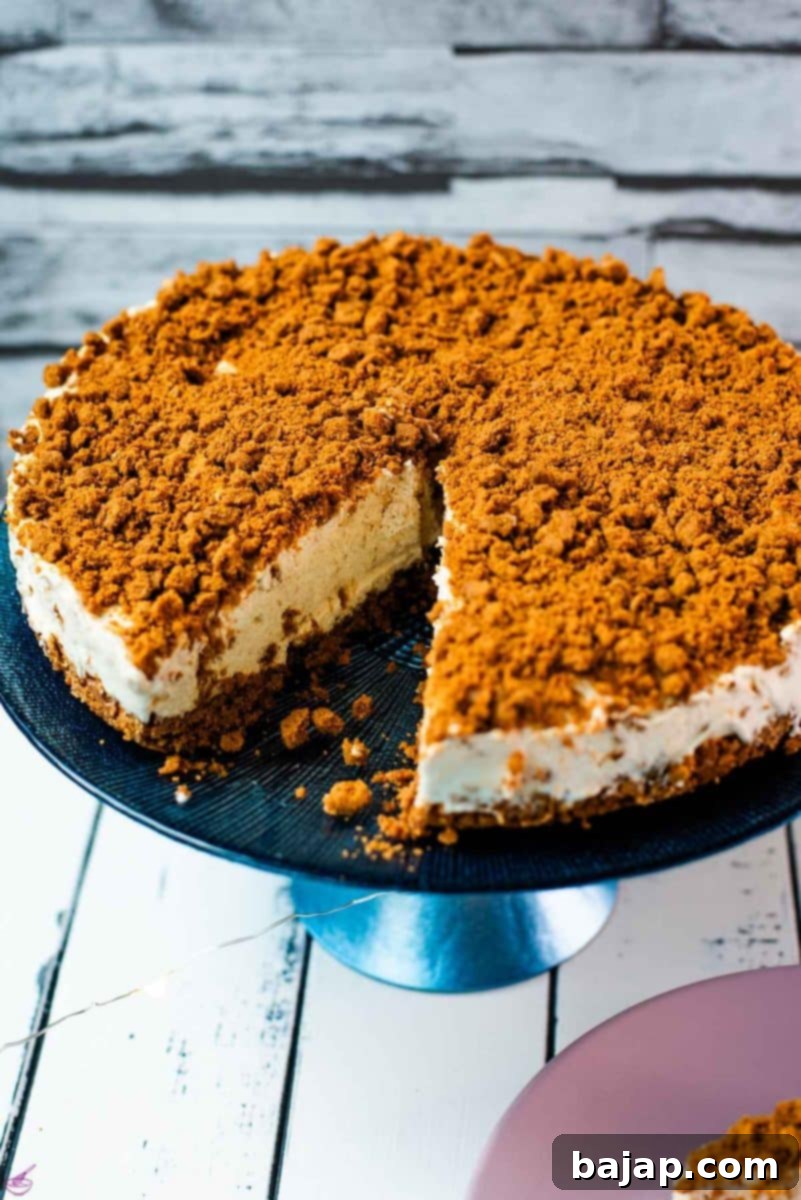
Once thoroughly chilled and firm, remove your no-bake Biscoff cheesecake from the springform pan. We recommend serving it cold but not completely frozen. If it’s been in the freezer for an extended period, allow it to defrost slightly in the refrigerator for about 30-60 minutes to achieve the perfect creamy, melt-in-your-mouth texture. Slice, serve, and watch it disappear!
🍦 Delicious Variations and Serving Suggestions
This No-Bake Biscoff Cheesecake is fantastic on its own, but it also serves as a wonderful canvas for creative additions! Here are a few ideas to elevate your dessert:
- Biscoff Drizzle: Melt some Biscoff cookie butter (also known as Biscoff spread) and drizzle it generously over the top of the chilled cheesecake just before serving. This adds an extra layer of intense Biscoff flavor and a beautiful glaze.
- Vanilla Ice Cream: For an ultimate treat, pair a slice of your Biscoff cheesecake with a scoop of creamy homemade vanilla ice cream. The cool, refreshing ice cream perfectly complements the rich cheesecake.
- Chocolate Swirl: Melt some milk or dark chocolate and swirl it into the cream cheese filling before chilling, or drizzle it artfully over the top.
- Fresh Berries: A scattering of fresh raspberries or sliced strawberries can add a pop of color and a touch of tartness, cutting through the richness of the cheesecake.
- Individual Servings: Instead of a large cheesecake, press the Biscoff crust into individual ramekins or small dessert glasses. Layer with the filling and chill for cute, portion-controlled desserts.
- Coffee Pairing: Serve with a warm cup of coffee or a latte to highlight the caramel notes of the Biscoff.
🍽 Recommended Equipment
Having the right tools makes the process of creating this no-bake cheesecake even smoother and more enjoyable. Here’s what you’ll need:
- 9-Inch Springform Pan: Essential for easily releasing your cheesecake once it’s set.
- Electric Hand Mixer or Stand Mixer: With both whisk and paddle attachments, these are invaluable for whipping the cream and beating the cream cheese to perfection, ensuring a light and airy filling.
- Food Processor: While not strictly necessary (a plastic bag and rolling pin work), a food processor makes crushing Biscoff cookies into fine crumbs incredibly quick and efficient.
- Parchment Paper: Lining the bottom of your springform pan with parchment paper prevents the crust from sticking and ensures a clean release.
- Two Large Mixing Bowls: You’ll need one for whipping the cream and another for the cream cheese mixture, making the assembly process organized.
- Rubber Spatula: Ideal for gently folding ingredients and smoothing the top of the cheesecake filling.
🌡 Storage Tips for Your Biscoff Cheesecake
Proper storage is key to enjoying your delicious No-Bake Biscoff Cheesecake for as long as possible. Here’s how to keep it fresh:
- Refrigeration: Any leftover cheesecake should be stored in an airtight container in the refrigerator. It will maintain its delicious taste and creamy texture for three to four days. Ensure it’s well-covered to prevent it from absorbing other odors from the fridge.
- Freezing for Longer Storage: This cheesecake freezes beautifully! After it’s fully assembled and firm, you can wrap it tightly in plastic wrap, then an additional layer of aluminum foil. You can store the entire cheesecake or individual slices in the freezer for three to six months.
- Thawing: When you’re ready to enjoy a frozen slice, transfer it to the refrigerator and allow it to thaw for several hours, or overnight, until it reaches your desired consistency. Avoid thawing at room temperature for food safety and best texture.
💭 Pro Tips for the Perfect No-Bake Biscoff Cheesecake
Achieving a picture-perfect and incredibly delicious no-bake Biscoff cheesecake is easy with these expert tips:
- Chill Time is Crucial: The most important step for a successful no-bake cheesecake is adequate chilling. Do not rush this process! At least 3 hours in the freezer or overnight in the refrigerator is essential for the filling to firm up properly. This ensures your cheesecake holds its shape beautifully when sliced.
- Perfect Texture After Freezing: If you freeze the cheesecake for longer than 3 hours, we recommend defrosting it in the refrigerator for about 30-60 minutes before serving. This brings it to the ideal creamy texture and temperature – simply divine!
- Room Temperature Cream Cheese: Always ensure your full-fat cream cheese is at proper room temperature. This makes it easier to beat until smooth and prevents lumps in your filling, resulting in a much creamier final product.
- Don’t Overmix the Cream Cheese: While you want smooth cream cheese, avoid overmixing it after adding the sugar and especially after folding in the whipped cream. Overmixing can incorporate too much air, which can lead to a less stable filling.
- For Clean Slices Every Time: To get perfectly clean slices, dip a sharp knife into hot water, wipe it clean, and then make your cut. Repeat this process for each slice. This technique ensures a smooth, non-stick cut, preventing the cheesecake from tearing or sticking to the knife.
- Lining the Pan: Using parchment paper on the bottom of your springform pan is highly recommended. It makes transferring the cheesecake to a serving plate incredibly easy and clean.
🙋🏻 Frequently Asked Questions (FAQ)
This truly comes down to personal preference! Baked cheesecakes often have a denser, more custard-like texture due to the eggs and baking process. No-bake cheesecakes, on the other hand, achieve their perfect creamy texture through chilling, relying on the fat content of the cream cheese and heavy cream to set. They are typically lighter and airier. While some might argue for the superiority of baked cheesecakes, many adore the smooth, melt-in-your-mouth quality of a no-bake version, especially for its refreshing chill and ease of preparation. Each offers a unique and delicious experience, but for convenience and pure decadence without the oven, no-bake is a fantastic choice.
The most common reason for a no-bake cheesecake not firming up sufficiently is insufficient chilling time. The filling needs ample time in the refrigerator or freezer for the cream cheese and heavy cream to set properly. Ensure you’ve chilled it for at least 3 hours in the freezer, or preferably 6-8 hours (or overnight) in the refrigerator. Additionally, using full-fat cream cheese and ensuring your heavy cream is properly whipped to soft peaks before folding it in are crucial steps. If ingredients are too warm or overmixed, the structure might be compromised. Patience is a virtue when it comes to no-bake cheesecakes!
If you’ve never had the pleasure of enjoying a Biscoff cookie before, you are in for a delightful treat! Lotus Biscoff cookies are distinctively spiced caramel biscuits. They offer a unique flavor profile that is sweet, deeply caramelized, with hints of cinnamon, ginger, and other warm spices. It’s often described as a comforting and sophisticated flavor, making it incredibly versatile in desserts and beloved by many. The “speculoos” flavor is truly one-of-a-kind and instantly recognizable.
At its core, a Biscoff cheesecake is a variation of a classic cheesecake that heavily features Lotus Biscoff cookies and/or Biscoff cookie butter (spread). This particular no-bake Biscoff cheesecake is made with a crust crafted from crushed Biscoff cookies and melted butter. The creamy filling consists of softened full-fat cream cheese, powdered sugar, and whipped heavy cream, all infused with additional Biscoff cookie crumbs. The final touch is often a sprinkle of more Biscoff crumbs or a drizzle of Biscoff spread, ensuring that iconic caramelized spice flavor is present in every layer.
While this specific recipe focuses on Biscoff cookies for the crust and filling, Biscoff cookie butter (spread) is an excellent addition! You can melt about 1/4 to 1/2 cup of Biscoff spread and fold it into the cream cheese mixture for an even more intense Biscoff flavor. Alternatively, a melted Biscoff spread drizzle makes for a beautiful and delicious topping, adding a smooth, gooey texture that complements the creamy cheesecake perfectly. Just ensure it’s not too hot when adding to the cream cheese mixture to avoid melting the other ingredients.
Other Cheesecake Recipes for You to Try
If you’ve loved this Biscoff cheesecake, you’re in for a treat! Explore more delightful no-bake (and some baked) cheesecake recipes from our collection:
- No Bake Pumpkin Cheesecake
- No Bake Chocolate Ricotta Cheesecake
- No Bake Mint Chocolate Cheesecake
- Patriotic Fourth of July No Bake Cheesecake
- Eggnog Cheesecake with Ginger Spiced Crust
- No Bake Fig Cheesecake in a Jar
- No Bake Lemon Cheesecake with Blueberry Topping
- No Bake Halloween Cheesecake with Raspberry Filling
- No Bake Strawberry Cheesecake
- No Bake 5 Ingredient Mini Oreo Cheesecakes
If you make this irresistible No-Bake Biscoff Cheesecake recipe, we would absolutely love to hear from you! Let us know how you liked it by giving it a ★★★★★ star rating and leaving a comment below. Your feedback helps us and other home cooks. This would be awesome! You can also sign up for our Newsletter to receive delicious recipes weekly, or follow me on Pinterest or Instagram and share your creation with me. Just tag me @combinegoodflavors and hashtag #combinegoodflavors, so I don’t miss your beautiful work!
📖 Recipe Card
No-Bake Biscoff Cheesecake {5 Ingredients}
Nora
Save RecipeSaved!
Pin Recipe
Equipment
-
Electric hand mixer or Stand mixer with a whisk attachment
-
Food processor Electric Chopper (for crushing cookies quickly)
-
Parchment Paper
-
Mixing bowls (at least 2 large ones)
-
Rubber spatula
-
Springform pan (9-inch recommended)
-
Plastic Wrap or aluminum foil (for chilling and storage)
Ingredients
- 53 Lotus Biscoff Cookies (approximately 1 ½ packs, or use ½ pack Biscoff cookie crumbs)
- 3 oz Unsalted butter (melted)
- 2 ½ cups Full-Fat Cream Cheese (softened to room temperature)
- 3 tablespoons Powdered Sugar (confectioners’ sugar)
- 1 ¼ cup Cold Heavy Whipping Cream (or double cream)
Instructions
-
Prepare Biscoff Crumbs: Crush 53 Lotus Biscoff Cookies into fine crumbs using a food processor or a plastic bag and rolling pin. Alternatively, use pre-made Biscoff cookie crumbs. Set aside 4 oz of these crumbs for the cream cheese filling later.53 Biscoff Cookies
-
Make the Crust: In a mixing bowl, combine the remaining Biscoff cookie crumbs (approx. 7.9 oz) with the melted 3 oz Unsalted butter. Mix thoroughly until the crumbs are fully moistened.3 oz Unsalted butter
-
Form the Crust: Line the bottom of a 9-inch springform pan with parchment paper. Tightly pack the Biscoff and butter mixture evenly over the parchment paper to form the crust. Place the crust in the refrigerator to chill while you prepare the filling.
-
Whip the Cream: In a separate bowl, using an electric mixer with a whisk attachment, whip the 1 ¼ cup Cold Heavy Whipping Cream at medium-high speed until soft peaks form. Do not over-whip. Set aside.1 ¼ cup Heavy Whipping Cream
-
Prepare Cream Cheese Base: In a large mixing bowl, beat the softened 2 ½ cups Full-Fat Cream Cheese until smooth and creamy.2 ½ cups Cream Cheese
-
Add Sugar: Gradually add 3 tablespoons Powdered Sugar to the cream cheese, beating for another 2 minutes until light and fluffy.3 tablespoon Powdered Sugar
-
Fold in Biscoff Crumbs: Gently fold the reserved 4 oz Biscoff cookie crumbs into the cream cheese mixture until just combined.
-
Combine Filling: Carefully fold the whipped heavy cream into the Biscoff cream cheese mixture until no streaks remain, being careful not to deflate the cream.
-
Assemble: Pour the Biscoff cream cheese filling over the chilled crust in the springform pan. Use a rubber spatula to gently spread and even out the top surface.
-
Garnish and Chill: Sprinkle approximately 2.5 oz of additional Biscoff cookie crumbs evenly over the top of the cake. Place the cheesecake in the freezer for at least 3 hours (or in the refrigerator for 6-8 hours or overnight) to allow it to firm up completely.
-
Serve: Once firm, carefully release the sides of the springform pan. If frozen solid, allow it to thaw slightly in the refrigerator for 30-60 minutes before serving for the best creamy texture. Slice with a hot, clean knife and enjoy cold!
Notes
To get perfectly clean slices, dip your knife in hot water and wipe it clean before each cut.
Nutrition values are estimates only, using online calculators. Please verify using your own data.

🤎 You might also like
- Simple Layered Eggnog Vanilla Pudding Dessert
- Easy Biscoff Granola Recipe
- Biscoff Truffles without Cream Cheese
- No-bake Lotus Biscoff Cake Pops
⛑️ Food Safety Guidelines
While this is a no-bake recipe, maintaining good food safety practices is always important to ensure your delicious dessert is safe to enjoy.
- Temperature Control: Ensure cream cheese and heavy whipping cream are not left at room temperature for extended periods before use. Work quickly to assemble the cheesecake and get it into the refrigerator or freezer.
- Cleanliness: Always wash hands thoroughly before and after handling food, especially when transitioning between different ingredients. Use clean utensils and mixing bowls.
- Storage: Store the cheesecake in an airtight container to prevent contamination and absorption of odors from other foods in the refrigerator.
- Refrigeration Time: Do not consume the cheesecake if it has been left out at room temperature for more than 2 hours. Prompt chilling is essential for food safety and optimal texture.
- Ingredient Freshness: Always use fresh, in-date dairy products (cream cheese, heavy cream) for the best taste and safety.
For further information on general food safety, always refer to reputable sources like Safe Food Handling – FDA.
