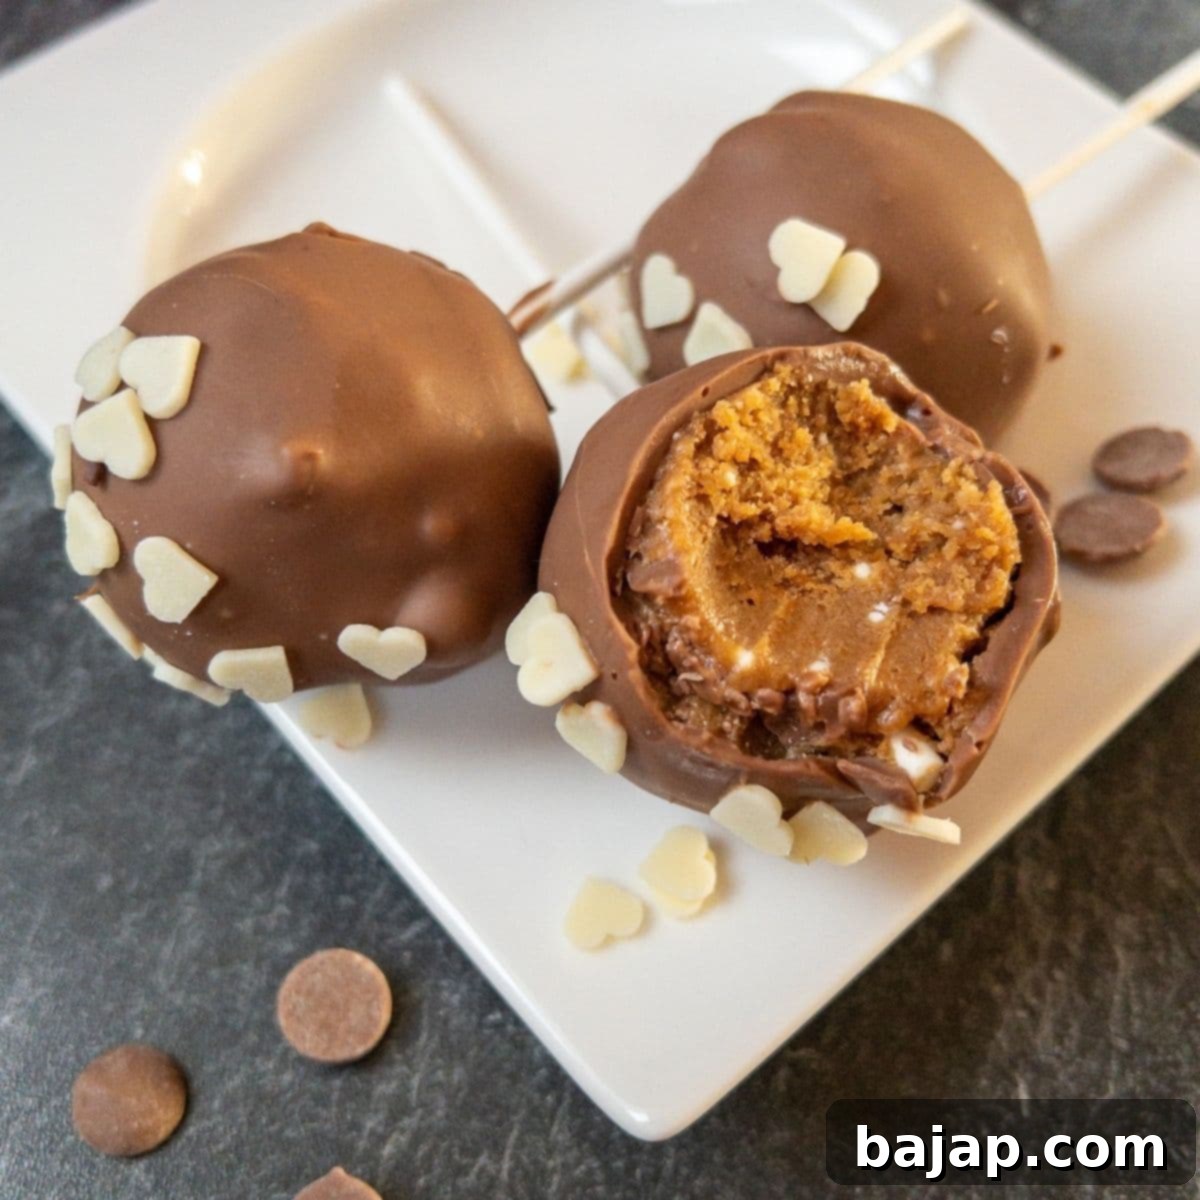
Indulge in Irresistible No-Bake Lotus Biscoff Cake Pops: Easy Recipe & Creative Decorating Ideas
Prepare your taste buds for an exquisite treat! The very mention of Lotus Biscoff Cake Pops is enough to make any dessert lover’s heart sing. These delightful bite-sized wonders combine the unique, caramelized flavor of Biscoff cookies with a rich, smooth milk chocolate coating, creating a symphony of textures and tastes that are simply irresistible. If you’re searching for an easy-to-make dessert that promises to impress with minimal effort, you’ve found your new favorite recipe!
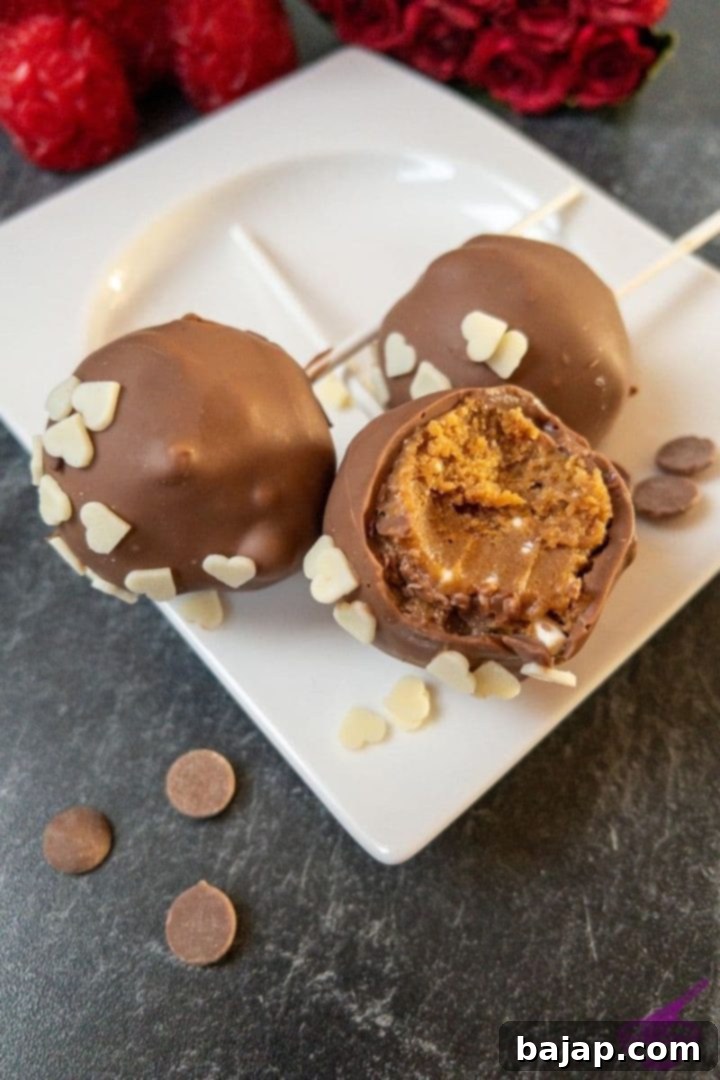
What makes these Biscoff Cake Pops truly stand out is their incredible simplicity. Requiring only four core ingredients, this no-bake recipe is a dream come true for busy bakers or anyone new to dessert making. Just like our popular candy cane Oreo Cake Pops, these treats eliminate the need for an oven, making the process quick, easy, and virtually foolproof. As an added bonus, they are naturally fructose-free, catering to those with specific dietary considerations without compromising on flavor.
The real magic happens during the final stages: coating these delectable spheres in a generous layer of chocolate and, of course, the decorating! This is where your creativity truly shines. With no limits to your imagination, you can customize these cake pops to perfectly match any taste or occasion. Think beyond simple sprinkles – how about elegant chocolate drizzles, festive sugar hearts, or even miniature sugar Christmas fir trees for a holiday twist? The possibilities are endless, ensuring you always have a uniquely decorated cake pop ready to delight.
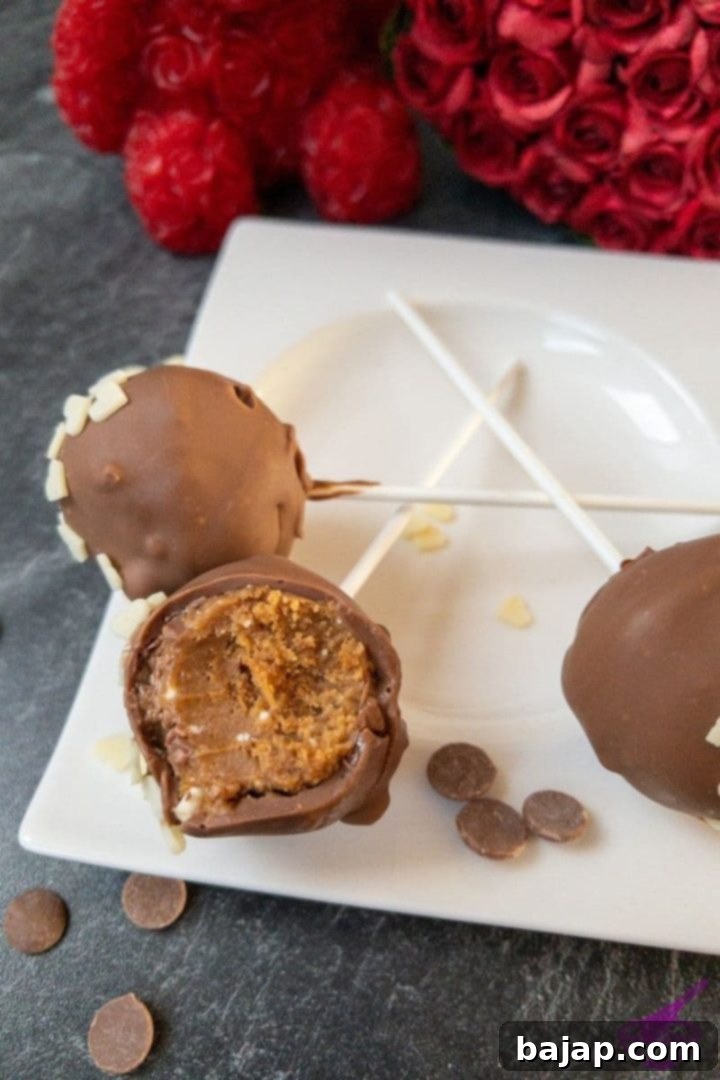
These charming little cakes on a stick are a guaranteed hit, no matter the event. They’re perfect for a quick pick-me-up between meals, a thoughtful homemade gift for Mother’s Day or Father’s Day, or a sweet indulgence to share with loved ones on Valentine’s Day. Simply put, a Biscoff Cake Pop is always a delicious choice and an excellent item to keep chilled in your fridge for whenever a craving strikes. As Valentine’s Day approaches, we’ve chosen beautiful white chocolate heart sprinkles for today’s recipe, adding a touch of romantic charm.
So, let’s gather our simple ingredients and embark on this fun and rewarding journey to create these delightful delicacies together! If you’re looking for more delicious recipes that fit specific dietary needs, be sure to explore our extensive allergy-friendly recipes section.
Why You’ll Adore This No-Bake Biscoff Cake Pop Recipe
There are countless reasons why these no-bake Lotus Biscoff Cake Pops will become a staple in your dessert repertoire. First and foremost, the **effortless preparation** makes them accessible to everyone, from novice bakers to seasoned pros. The “no-bake” aspect means you won’t be tethered to the oven, allowing for a quicker turnaround from prep to plate. The minimal ingredient list simplifies grocery shopping and keeps costs down.
Beyond the ease, it’s the **flavor profile** that truly captivates. The distinct caramel-spice notes of Biscoff cookies blend harmoniously with creamy mascarpone, creating a rich and indulgent core that is perfectly complemented by the sweetness of milk chocolate. This combination offers a sophisticated taste that belies its simple origins.
Furthermore, their **versatility** is unmatched. Whether you need a quick dessert for an impromptu gathering, a charming party favor, or a special treat for holidays like Christmas or Easter, these cake pops adapt beautifully. And for those mindful of sugar intake, the option to adjust powdered sugar or enjoy them as a fructose-free treat (when using specific Biscoff varieties) is a huge plus. They’re small, satisfying, and utterly delicious – everything you could want in a sweet bite!
🥘 Ingredients for Biscoff Cake Pops
Gathering your ingredients for these Lotus Biscoff Cake Pops is delightfully simple, as you’ll only need a handful of items to create these sensational treats. Each component plays a vital role in achieving that perfect balance of flavor and texture. Ensure your ingredients are at room temperature for optimal mixing, especially the mascarpone.
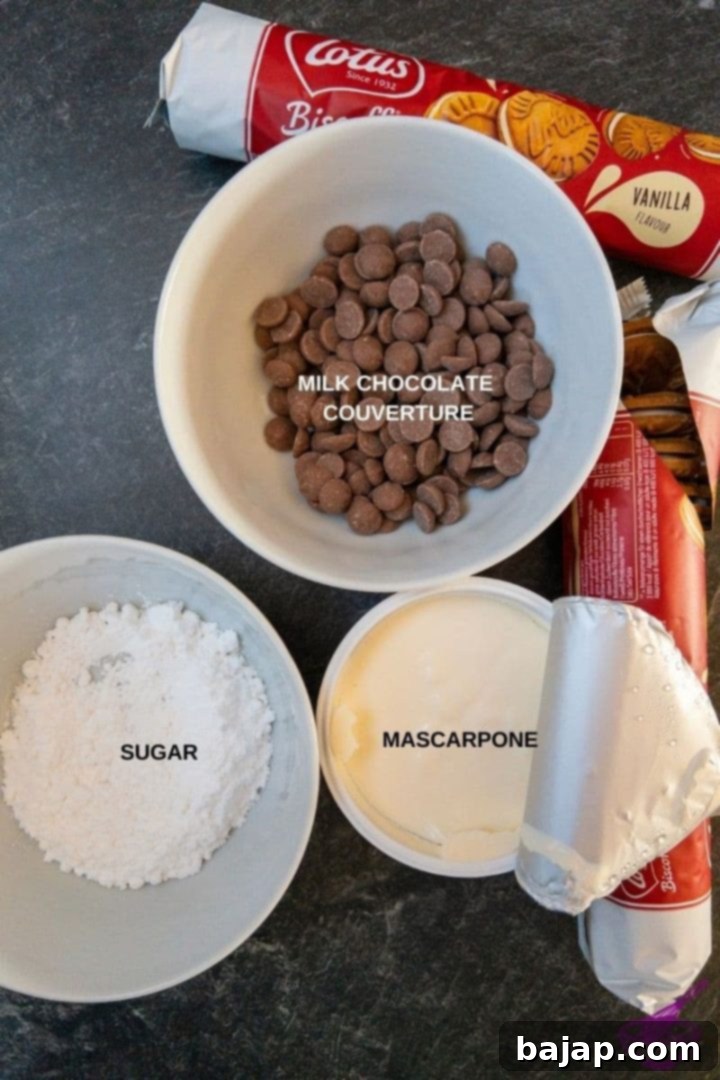
- Powdered Sugar: Also known as confectioners’ sugar, this fine sugar blends smoothly into the mascarpone, providing sweetness and helping bind the cake pop mixture. Sifting it is key to avoiding lumps.
- Mascarpone: This Italian cream cheese is crucial for a rich, creamy, and wonderfully moist cake pop interior. Its high-fat content contributes significantly to the indulgent texture.
- Lotus Biscoff sandwich cookie vanilla cream: These iconic caramel-flavored cookies are the star of the show, providing the signature taste and crumbly base. The vanilla cream filling adds an extra layer of flavor and moisture.
- Milk chocolate couverture for coating: Couverture chocolate is preferred due to its higher cocoa butter content, which ensures a smooth, shiny, and snap-worthy coating that’s easy to temper and work with.
- White chocolate heart sprinkles: For decoration! These add a festive and charming touch, especially for occasions like Valentine’s Day. Feel free to choose sprinkles that suit your event or personal preference.
For high-quality chocolate couverture, consider visiting Prime Chocolate and save 10 % with the code ThankYouNora.
Refer to the recipe card below for precise quantities and detailed nutritional information.
🍽 Equipment for Biscoff Cake Pops
Having the right tools can make your cake pop creation process even smoother and more enjoyable. While some items are essential, others offer convenience or help achieve professional-looking results. Here’s a list of what you’ll need:
- Close mesh sieve: Essential for sifting powdered sugar to ensure a lump-free, smooth mixture.
- Mixing Bowls: You’ll need at least one medium-sized bowl for mixing the cake pop base and another (or a double boiler setup) for melting chocolate.
- Cake Popsicle Sticks: The classic way to serve cake pops, these sticks make them easy to hold and display.
- Cake Pops silicone mold: While not strictly necessary (you can hand-roll), these molds help create perfectly uniform, spherical cake pops effortlessly.
- Food processor or universal chopper: The easiest and most efficient tool for grinding Biscoff cookies into fine crumbs. A powerful blender can also work.
- Water bath or tempering device for melting the chocolate: A double boiler (water bath) is a simple method, but a dedicated tempering device offers more precise temperature control for perfectly coated cake pops.
- Cake pop stand: (or a drinking glass, egg carton, or styrofoam plate) Crucial for holding the cake pops upright while their chocolate coating sets, preventing any flat sides.
🔪 Instructions: Crafting Your No-Bake Biscoff Cake Pops
Follow these step-by-step instructions to create perfect, deliciously coated Lotus Biscoff Cake Pops that are sure to be a crowd-pleaser. Precision in each step will ensure the best texture and appearance.
Step 1: Crush the Biscoff Cookies.
First, you want to transform your Lotus Biscoff cookies into very fine crumbs. This step is crucial for the texture of your cake pops. A food processor or universal chopper makes this incredibly easy; simply pulse until the cookies resemble fine sand with no large chunks remaining. If you don’t have these appliances, place the cookies in a sturdy Ziploc bag, remove the air, and crush them thoroughly with a rolling pin. The more finely ground they are, the better the final mixture will hold together and the smoother your cake pops will be. This fine texture is key to preventing a crumbly end product.
Step 2: Prepare the Mascarpone Mixture.
Next, take your powdered sugar and sift it through a close-meshed sieve into a medium-sized mixing bowl. Sifting prevents lumps, ensuring a silky-smooth base. Add the mascarpone to the sifted powdered sugar. Using an electric mixer or a whisk, whip the mascarpone and powdered sugar together until the mixture is light, fluffy, and well combined. This creamy base is what will give your cake pops their delightful moisture.
Step 3: Combine and Mix.
Now it’s time for some manual labor: add the finely crumbled Biscoff cookies to the sugar-mascarpone mixture. The best way to thoroughly combine these ingredients is with your hands. You might find it helpful to wear food-safe gloves to prevent the mixture from sticking excessively to your hands. Knead and mix until all the cookie crumbs are fully incorporated into the mascarpone. At first glance, the mixture might appear quite moist – this is perfectly intended, as it results in a wonderfully juicy cake pop. If you prefer a firmer batter, you can gradually add a little more powdered sugar until you reach your desired consistency.
Step 4: Shape the Cake Pops.
In the next step, you will need your cake pop silicone mold (or a cookie scoop/your hands if shaping manually). Take small portions of the cookie mixture and shape them into uniform balls. Place each ball into the bottom half of the silicone mold. Repeat this process until all the dough is used up. Carefully close the silicone mold, ensuring the top half fits snugly over the bottom. Then, insert your cake pop sticks into the designated holes, pushing them about halfway into each ball. This helps secure the cake pops to their sticks.
Step 5: Freeze for Firmness.
Place the filled cake pop mold into the freezer for at least one hour. This chilling time is essential, as it allows the dough balls to become nice and firm, which is crucial for a smooth and even chocolate coating. A well-chilled cake pop will hold its shape better and absorb less heat from the melted chocolate, preventing it from crumbling or softening too quickly during dipping.
Step 6: Melt the Chocolate.
While your cake pops are firming up in the freezer, you can prepare your chocolate coating. Melting chocolate requires care to prevent burning or seizing.
Water bath (Bain-marie): If you opt for a water bath, you’ll need two pots of different sizes. Fill the larger pot with 3-4 finger-widths of water and bring it to a gentle simmer. Place the second, smaller pot (which should not touch the water in the larger pot) on top. Add your chocolate couverture to the upper, smaller pot and let it melt slowly over the rising steam, stirring frequently until smooth. Avoid getting any water into the chocolate.
Tempering unit: For more precise control, use a tempering unit. Add the chocolate to be melted and set the device to the appropriate melting temperature. For white and milk chocolate, this is typically around 40 °C (104 °F). For dark chocolate, it’s closer to 50 °C (122 °F). Follow your tempering unit’s specific instructions for the best results.
You can begin coating when the cooling time for the cake pops is over, and your chocolate has reached the correct working temperature (ideally around 30-32 °C / 86-90 °F for milk chocolate after tempering).
Step 7: Coat and Decorate.
Carefully remove one cake pop at a time from the silicone mold. Hold it by the stick and gently dipitintothemelted chocolate, swirling gently to ensure it’s fully coated. Lift the cake pop, allowing any excess chocolate to drip off. While the chocolate is still wet, immediately apply your desired decorations – sugar sprinkles, chocolate hearts, or edible glitter. Work quickly as the cold cake pop will cause the chocolate to set rapidly. Then, place the decorated cake pop upright in a cake pop stand, a drinking glass, a styrofoam plate, or an empty egg carton to dry and solidify.
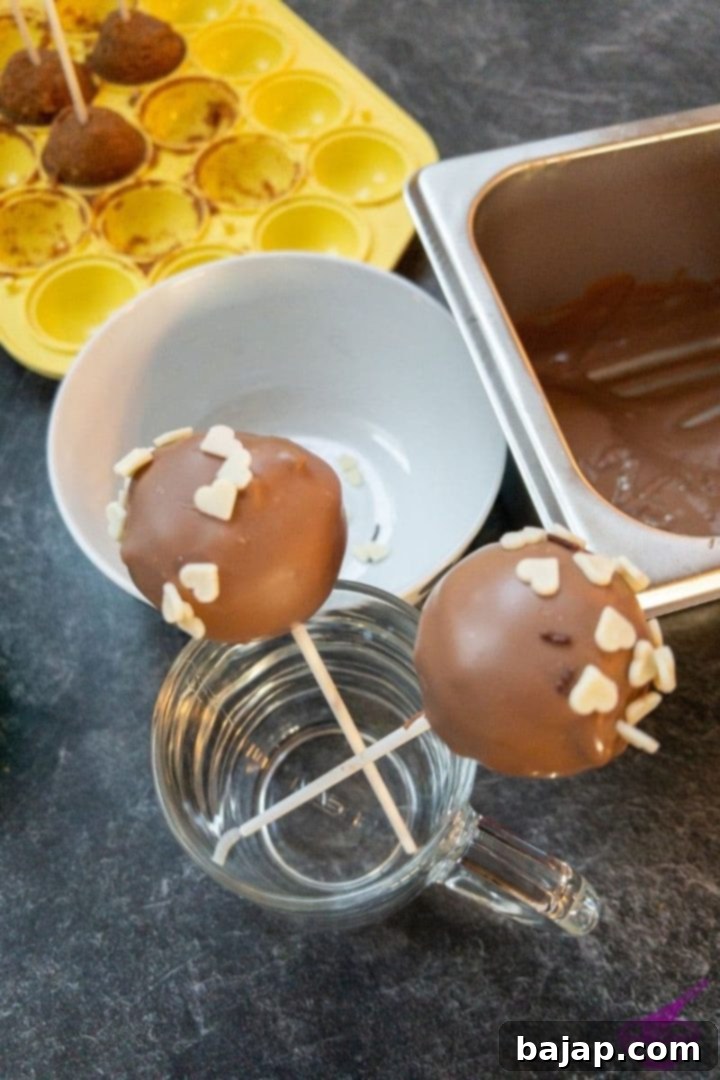
And just like that, you’ve created gorgeous Lotus Biscoff Cake Pops! No baking required, just pure indulgence and fun. Now, you can enjoy this little delicacy alone or share it with friends and family. Have fun and savor every bite!
✨ Tips for Perfect Biscoff Cake Pops
To ensure your no-bake Lotus Biscoff Cake Pops turn out perfectly every time, keep these helpful tips in mind:
- Consistency is Key: When mixing the cookie and mascarpone, aim for a dough-like consistency that is firm enough to roll but still moist. If it’s too dry, add a tiny bit more mascarpone. If too wet, a touch more finely ground Biscoff crumbs or powdered sugar can help.
- Chill Thoroughly: Don’t rush the freezing step. A minimum of one hour ensures the cake pops are firm enough to withstand the warm chocolate coating without falling apart or creating a messy dip.
- Work Quickly with Chocolate: Melted chocolate sets fast on cold cake pops. Have your sprinkles and decorations ready and work swiftly after dipping each pop.
- Tap Off Excess Chocolate: After dipping, gently tap the stick against the edge of your bowl to remove any excess chocolate. This prevents pooling at the base and ensures a smooth, even coating.
- Storing Melted Chocolate: If your chocolate starts to thicken during coating, gently re-warm it over the water bath or in the tempering unit until it reaches the ideal dipping consistency again.
🎨 Creative Decoration Ideas
While white chocolate heart sprinkles are charming, the fun of cake pops truly lies in their endless decoration possibilities! Here are a few ideas to spark your creativity:
- Sprinkle Extravaganza: Use colorful sprinkles for birthdays, festive nonpareils for holidays, or even edible glitter for a touch of elegance.
- Chocolate Drizzle: After the main coating sets, drizzle contrasting melted chocolate (e.g., dark chocolate over milk chocolate, or white chocolate over milk chocolate) in a zig-zag pattern for an artistic flair.
- Crushed Cookie Topping: Before the chocolate sets, sprinkle some extra finely crushed Biscoff cookies on top for an extra boost of flavor and texture.
- Nutty Toppings: If not fructose-free or for those without nut allergies, finely chopped pistachios or walnuts can add a delightful crunch and color.
- Themed Decorations: Use colored candy melts to match party themes, or create small edible shapes (like stars or flowers) from fondant to adorn your cake pops.
- Edible Markers: For more intricate designs, edible food markers can be used on a fully set white chocolate coating to draw faces, patterns, or messages.
🥜 Substitutions
While this recipe is fantastic as is, here are some thoughtful substitutions if you need to adapt it to your preferences or what you have on hand:
- Mascarpone: This can be replaced with a full-fat cream cheese (like Philadelphia, softened) or ricotta cheese. Keep in mind that cream cheese will result in a slightly less moist cake pop with a tangier flavor. Ricotta, on the other hand, makes the cake pop very moist; if you opt for ricotta, be sure to add an extra tablespoon or two of confectioner’s sugar during the final mixing to help firm up the batter and balance the moisture.
- Lotus Biscoff Vanilla Cream Sandwich Cookies: The beauty of this recipe is its adaptability! You can easily substitute the vanilla cream variety with other Lotus Biscoff Cream Sandwich Cookies or even Lotus Biscoff Chocolate Cream Sandwich Cookies for a different flavor profile. And yes, for a classic twist, you absolutely can use Oreo cookies (or any other cream-filled sandwich cookie) as the base, following the same instructions. The key is to use cookies with a cream filling in between, as this contributes to the moisture and binding of the cake pop mixture.
- Milk Chocolate Couverture: While couverture is recommended for its smooth finish, you can use regular milk chocolate chips or bars, just ensure you melt them slowly and carefully. For a different flavor, dark chocolate or white chocolate can also be used for coating.
- Decorations: As mentioned above, the sky’s the limit! Any sprinkles, chopped nuts (if no allergy), or even a drizzle of caramel sauce can replace the white chocolate heart sprinkles.
💕 More Valentine’s Day Recipes
Looking for more sweet ways to celebrate love? Here are some other delightful recipes perfect for Valentine’s Day or any romantic occasion:
- Puffed spelt hearts with chocolate
- No-bake Biscoff cake pops
- Marzipan potatoes
- Sacher cake
- Red velvet cupcakes
- 30 Sweet Valentine’s day recipes
🌡️ Storage
Proper storage is essential to keep your delicious Biscoff Cake Pops fresh and delightful. You can store these no-bake treats in an airtight container in the fridge for at least a week. The cold helps maintain their firm texture and prevents the chocolate coating from melting.
For longer storage, these cake pops are also freezer-friendly and can be kept in the freezer for up to three months. To freeze, place them on a baking sheet lined with parchment paper, ensuring they don’t touch, and freeze until solid. Once frozen, transfer them to an airtight freezer-safe container or a resealable bag. When you’re ready to enjoy them, simply thaw them in the fridge for a few hours or at room temperature for about 30 minutes.
A note on decoration: While most decorations hold up well in the freezer, some delicate sugar sprinkles might lose their shape or color slightly after thawing. Keep this in mind if you plan to freeze decorated cake pops and opt for more robust toppings like chocolate drizzles or crushed cookies for freezer storage.
🍫 Download Your Free Chocolate Workbook
If you make this recipe, let me know how you liked it by ★★★★★ star rating it and leaving a comment below. This would be awesome! You can also sign up for our Newsletter or follow me on Pinterest or Instagram and share your creation with me. Just tag me @combinegoodflavors and hashtag #combinegoodflavors, so I don’t miss it.
📖 Recipe

Lotus Biscoff Cake Pops
Nora
Save RecipeSaved!
Pin Recipe
Equipment
-
Close meshed sieve
-
Mixing bowls
-
Cake pop silicone mold
-
Cake pop sticks
-
Kitchen machine
-
Water bath or tempering device
-
Cake pop stand
Ingredients
- 7 oz Mascarpone
- ¼ cup Powdered sugar
- 30 Lotus Biscoff sandwich cookie vanilla cream
Coating
- 1 ½ cups Milk chocolate couverture
- White chocolate heart sprinkles
Instructions
-
Crush your Biscoff cookies into fine crumbs using a food processor or a rolling pin. The finer the crumbs, the smoother your cake pops will be.30 Lotus Biscoff sandwich cookie vanilla cream
-
Sift the powdered sugar into a mixing bowl and then whip it with the mascarpone until the mixture is fluffy and smooth.¼ cup Powdered sugar, 7 oz Mascarpone
-
Add the Biscoff cookie crumbles to the mascarpone mixture and mix well with your hands until a cohesive dough forms. Wearing gloves can prevent sticking.
-
Shape the cookie mixture into small, uniform balls (using a cookie scoop or by hand) and place them into the bottom half of your cake pop silicone molds.
-
Close the silicone mold, ensuring the balls are enclosed. Then, insert the cake pop sticks into each ball through the mold’s openings.
-
Place the filled cake pop mold in the freezer for at least one hour. This firming step is crucial for successful coating.
-
While the cake pops are chilling, melt your milk chocolate couverture using a water bath or tempering device (aim for 30-32°C / 86-90°F).1 ½ cups Milk chocolate couverture
-
Once the cake pops are firm, carefully remove them from the mold. Dip each frozen cake pop into the melted chocolate, allowing excess to drip off. Immediately decorate with sprinkles or other toppings while the chocolate is still wet.White chocolate heart sprinkles
-
Place the coated and decorated cake pops in a stand (or glass/egg carton) to solidify completely. Once set, store them in the fridge until ready to serve.
Nutrition values are estimates only, using online calculators. Please verify using your own data.

🤎 More Recipes with Biscoff Cookies
Can’t get enough of that delightful Biscoff flavor? Here are some other fantastic recipes that celebrate the unique taste of Biscoff cookies:
- No-bake Biscoff cheesecake
- Biscoff granola
- No-bake chocolate ricotta cheesecake with Biscoff base
- Biscoff truffles without cream cheese
⛑️ Food Safety
Ensuring food safety is paramount when preparing any recipe, even no-bake ones. Here are some essential guidelines to keep in mind:
- Maintain Cleanliness: Always start with clean hands, utensils, and work surfaces. Wash hands thoroughly before and after handling food.
- Temperature Control: Since these are no-bake, ingredients like mascarpone should not be left out at room temperature for extended periods. Chill ingredients as necessary and store finished cake pops in the refrigerator promptly.
- Cross-Contamination: While this recipe doesn’t involve raw meat, it’s a good habit to prevent cross-contamination by using separate cutting boards and utensils for different food types.
- Ingredient Freshness: Always use fresh, high-quality ingredients, especially dairy products like mascarpone. Check expiry dates before use.
- Chocolate Handling: When melting chocolate, avoid overheating, which can cause it to seize or burn. If using a water bath, ensure no water gets into the chocolate.
- Storage: Follow the storage guidelines provided to ensure the cake pops remain safe to eat. Rapid cooling and proper sealing are key.
For more detailed information on safe food handling practices, refer to resources like the Safe Food Handling – FDA website.
