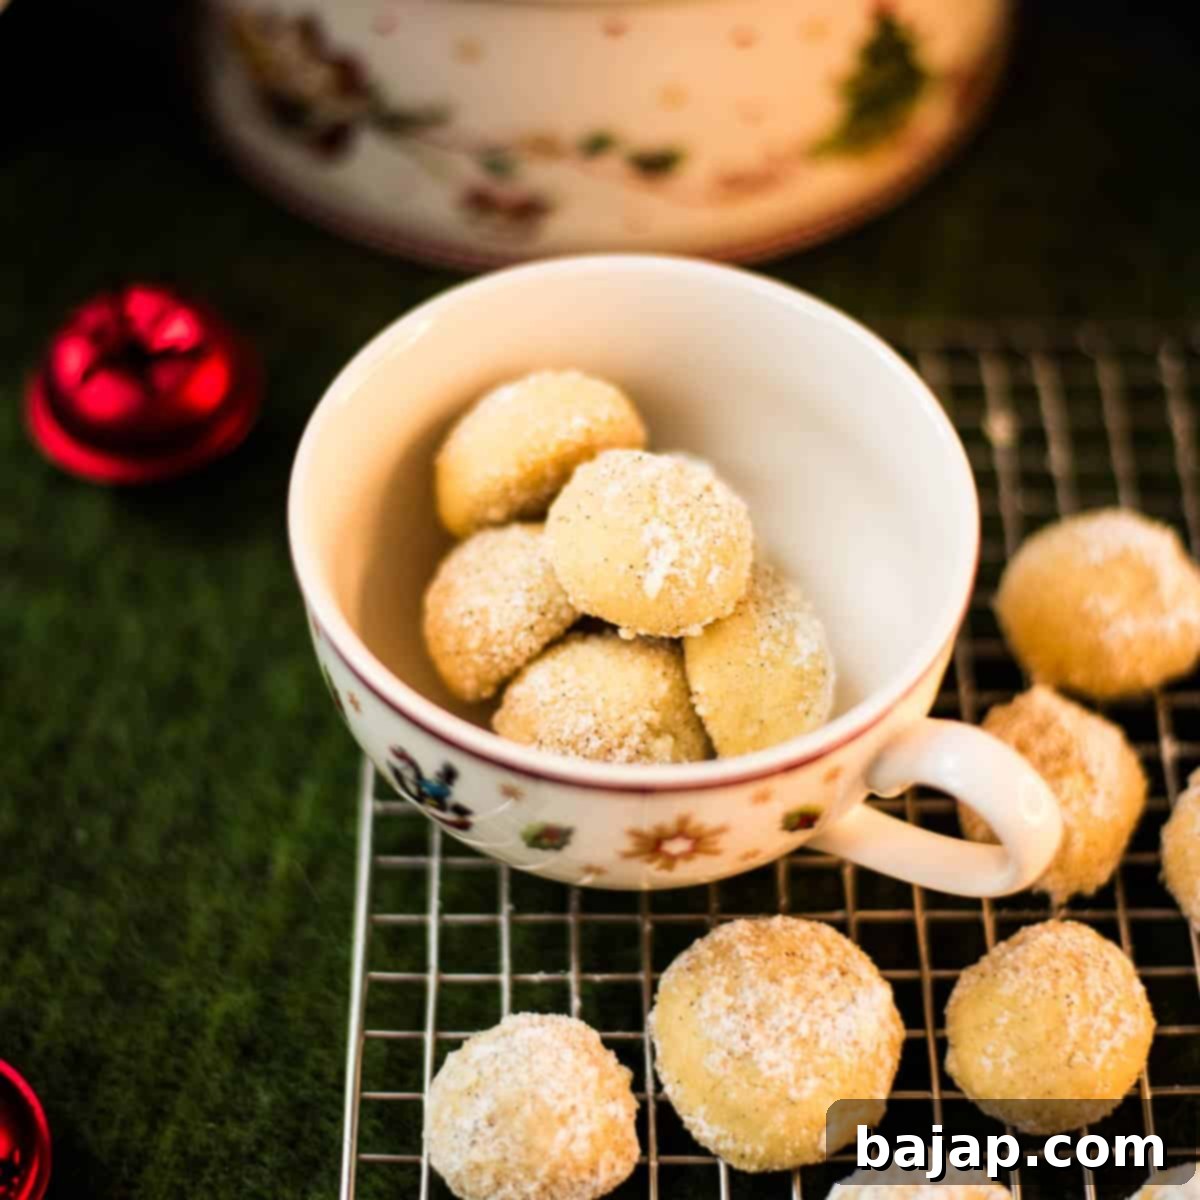
Melt-in-Your-Mouth Butterball Cookies: The Easiest Nut-Free Holiday Recipe
Prepare to fall in love with these melt-in-your-mouth butterball cookies! They are an absolute showstopper, looking incredibly festive alongside all your other holiday delights, and tasting even better. These delicate, tender cookies effortlessly earn a spot on my list of all-time favorite Christmas cookies. Once you experience how wonderfully simple they are to create, you’ll undoubtedly add them to your cherished collection too!
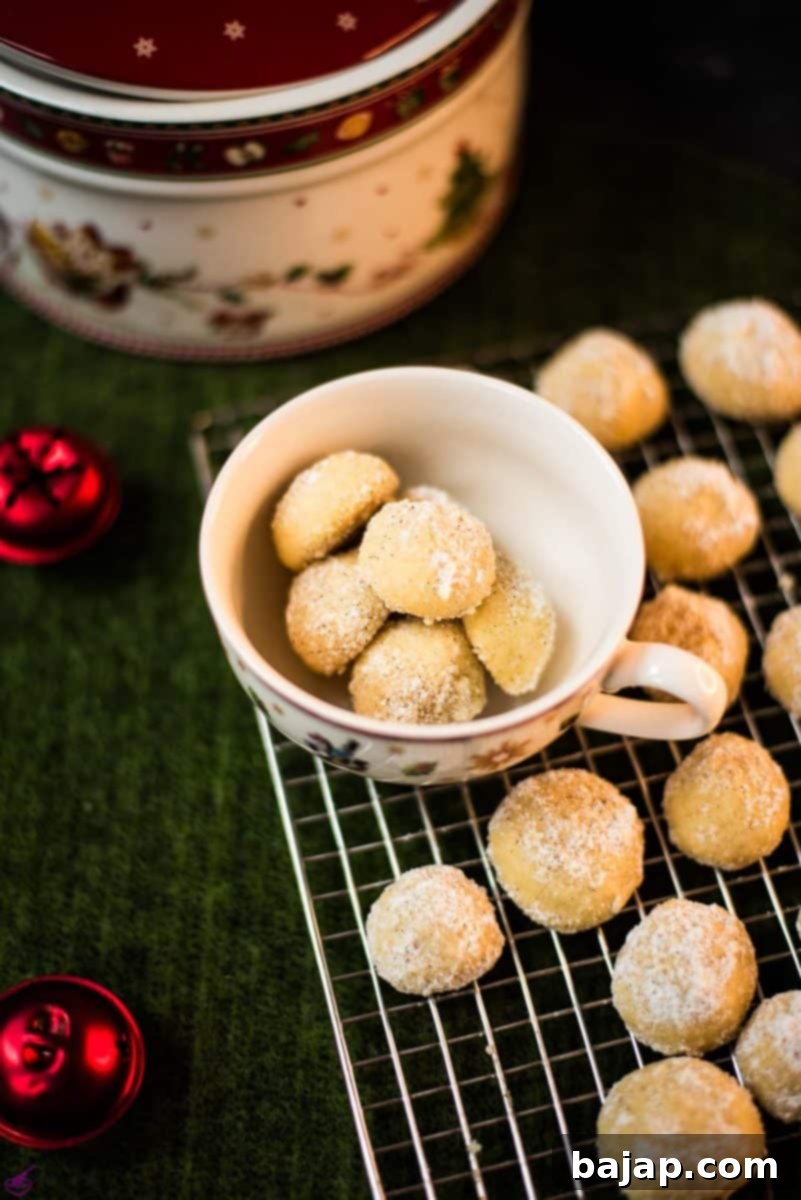
These butterball cookies share a striking resemblance to classic Russian Tea Cakes or Mexican Wedding Cookies, both known for their tender, crumbly texture. However, this particular recipe offers a delightful twist: it calls for absolutely no nuts. This makes them a fantastic and worry-free option if you’re baking for guests or family members with nut allergies. But don’t let the absence of nuts fool you – they are incredibly delicious on their own, boasting a pure, rich buttery flavor and a delicate, almost ethereal texture that truly lives up to their “melt-in-your-mouth” reputation.
Beyond their inclusive nature, these cookies are remarkably simple to prepare, making them an ideal project for even the youngest bakers in your household. Little hands can easily assist with mixing, rolling, and dusting, transforming baking into a fun and memorable family activity. Their straightforward process ensures a stress-free experience, allowing you to focus on the joy of creating these delightful treats.
Why You’ll Love This Butterball Cookie Recipe
There are countless reasons why these butterball cookies deserve a permanent spot in your recipe collection, especially during the holiday season. Their unparalleled charm lies in their simplicity, delightful texture, and versatile nature. Here’s why they’re destined to become a household favorite:
- Effortlessly Delicious: Despite their elegant appearance, these cookies require minimal effort and simple ingredients, yielding a truly gourmet taste.
- Nut-Free & Allergy-Friendly: A huge bonus for many! Enjoy the classic butterball experience without worrying about nut allergies, making them perfect for sharing with everyone.
- Melt-in-Your-Mouth Texture: The combination of softened butter, fine flour, and cornstarch creates an incredibly tender, crumbly cookie that dissolves deliciously on your tongue.
- Holiday Perfect: Their snowy white coating and dainty size make them a beautiful addition to any holiday cookie platter, gift basket, or festive gathering.
- Kid-Friendly Baking: The process involves fun steps like rolling dough into balls and dusting with powdered sugar, perfect for engaging children in the kitchen.
- Make-Ahead Marvel: The dough can be chilled or even frozen, and the baked cookies store wonderfully, allowing for flexible holiday prep.
- Pure Vanilla Flavor: Using vanilla pod pulp elevates the taste, providing a deep, aromatic vanilla essence that shines through.
[feast_advanced_jump_to]
🥘 Ingredients for Your Perfect Butterball Cookies
Crafting these exquisite butterball cookies requires a few basic yet essential ingredients. Each component plays a vital role in achieving their signature delicate texture and rich flavor. Here’s what you’ll need:
For the Cookie Dough:
- Butter (softened): Unsalted butter is preferred to control the salt content. Ensuring it’s perfectly softened (at room temperature) is crucial for a smooth, creamy dough and the ultimate melt-in-your-mouth texture. If your butter is too cold, it won’t cream properly, and if it’s melted, your cookies may spread excessively.
- Powdered Sugar: Also known as confectioners’ sugar. Its fine texture blends seamlessly into the dough, contributing to a wonderfully tender crumb. Granulated sugar can make cookies crunchier, which is not what we’re aiming for here.
- Pulp from one Vanilla Pod: This is where the magic happens for flavor! Using the pulp from a fresh vanilla pod offers an unparalleled depth of aromatic vanilla that far surpasses extract. If a vanilla pod isn’t available, a good quality vanilla extract (about 1-2 teaspoons) can be substituted.
- All-Purpose Flour: The primary dry ingredient, providing structure. While the initial prompt mentioned “Cake Flour,” using all-purpose flour combined with cornstarch (as detailed in the instructions) is a fantastic way to achieve a tender crumb.
- Cornstarch: A secret weapon for incredibly tender cookies! Adding cornstarch to all-purpose flour mimics the low-protein content of cake flour, resulting in a wonderfully soft and delicate texture that truly melts in your mouth.
For Rolling the Cookies:
- Powdered Sugar: This creates the iconic snowy white coating that is synonymous with butterball cookies. It provides an immediate sweetness and a beautiful presentation.
- Vanilla Sugar (homemade or store-bought): Infusing the rolling sugar with vanilla adds an extra layer of aromatic sweetness. Homemade vanilla sugar (made by storing vanilla beans with granulated sugar) is always a fantastic choice, but store-bought versions work wonderfully too.
See the recipe card below for precise quantities and detailed nutritional information.
🔪 Step-by-Step Instructions: Baking Your Perfect Butterball Cookies
Follow these simple steps to create a batch of irresistible butterball cookies that will impress everyone:
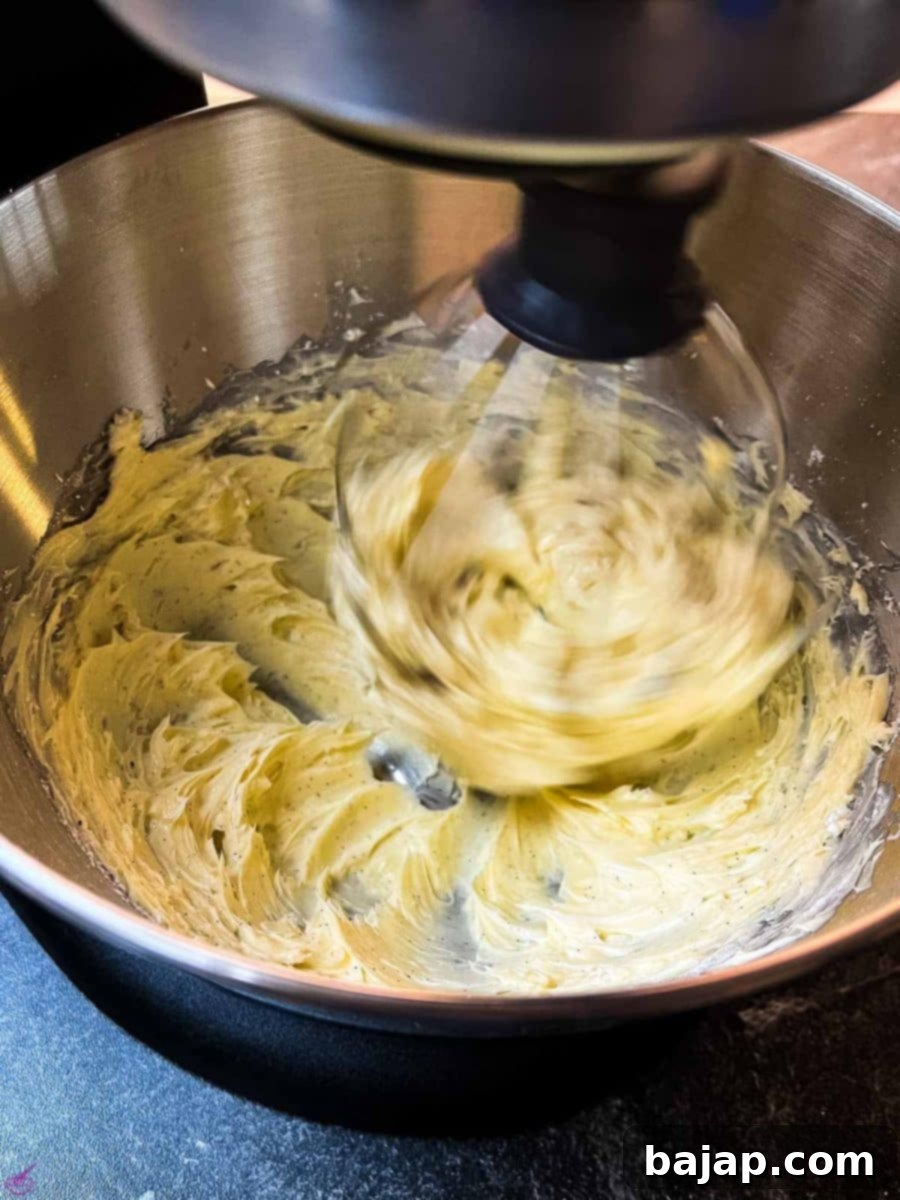
- Cream the Wet Ingredients: In a large mixing bowl, combine your softened unsalted butter, powdered sugar, and the fragrant pulp from one vanilla pod. Using an electric mixer with a whisk attachment, beat these ingredients together for about 5 minutes. This creaming process is vital as it incorporates air, making the mixture light, fluffy, and incredibly creamy. This aeration contributes significantly to the final cookie’s tender texture. If you’re doing this by hand, prepare for a good arm workout, but the results will be worth it!
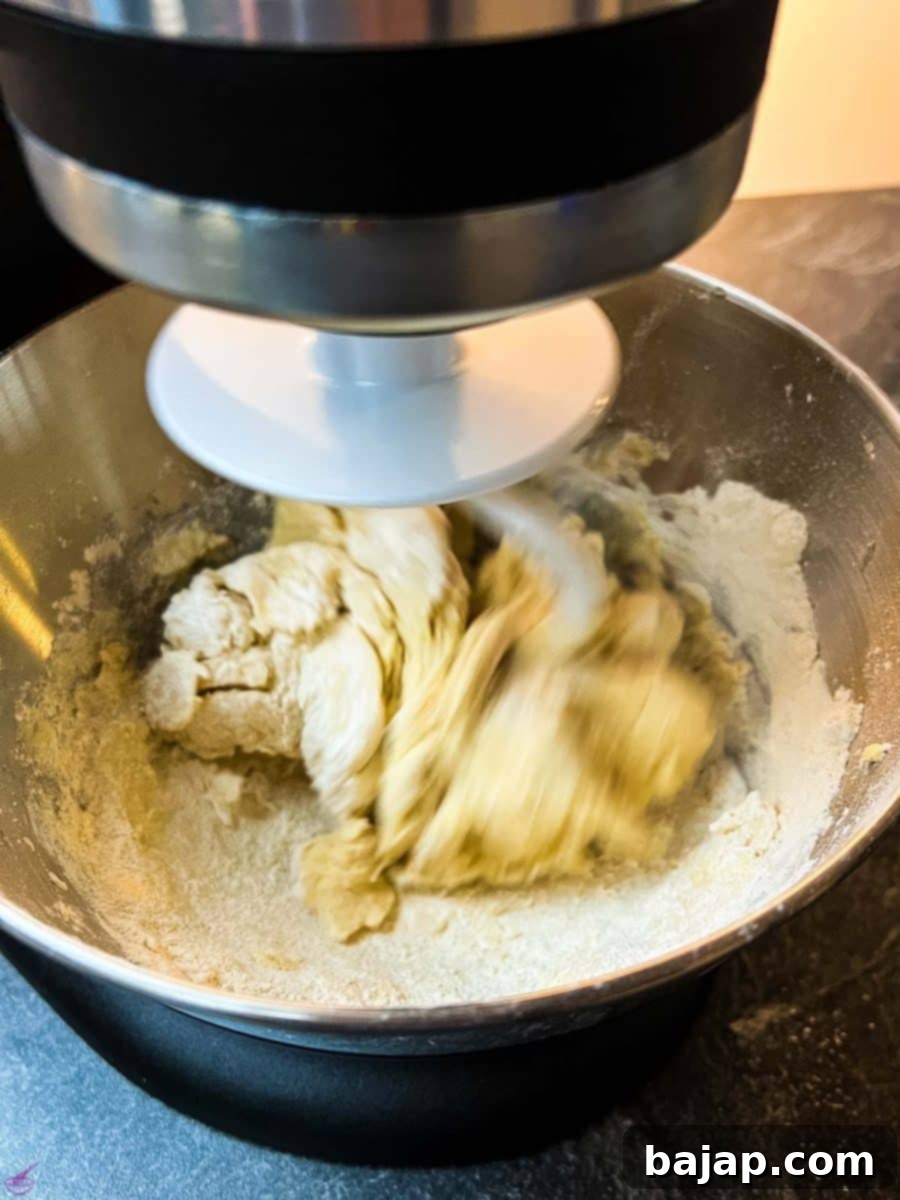
- Form the Dough: Next, switch to a dough hook attachment (or continue with strong mixing by hand if no dough hook is available). Add in your all-purpose flour and cornstarch. Knead the ingredients gently until they come together to form a soft, cohesive dough. Be careful not to overmix, as this can develop too much gluten and result in tougher cookies. The dough should be smooth and easy to handle, not sticky.
- Chill the Dough: Once your cookie dough has reached the perfect consistency, gently form it into a disc, wrap it tightly in plastic wrap (cling film), and place it in the refrigerator to chill for at least 2 hours. This chilling step is non-negotiable! It solidifies the butter, preventing the cookies from spreading too much in the oven, and allows the flavors to meld beautifully, resulting in a more flavorful and perfectly textured cookie.
- Prepare for Baking: After the dough has sufficiently chilled, preheat your oven to 355 °F (180 °C). Line your baking sheets with parchment paper. This prevents sticking and ensures even baking, making cleanup a breeze.
- Shape the Cookies: Using a teaspoon, scoop out small portions of the chilled cookie dough. Gently roll each portion between your palms to form small, uniform 1-inch balls. Consistency in size is key for even baking. Arrange the balls on your prepared baking sheets, leaving a little space between each to allow for slight expansion.
- Bake to Perfection: Place the baking sheets on the middle shelf of your preheated oven and bake for approximately 10-12 minutes. The cookies are ready when they are just set and very lightly golden brown on the bottom, but still pale on top. Avoid overbaking, as they will lose their signature melt-in-your-mouth tenderness.
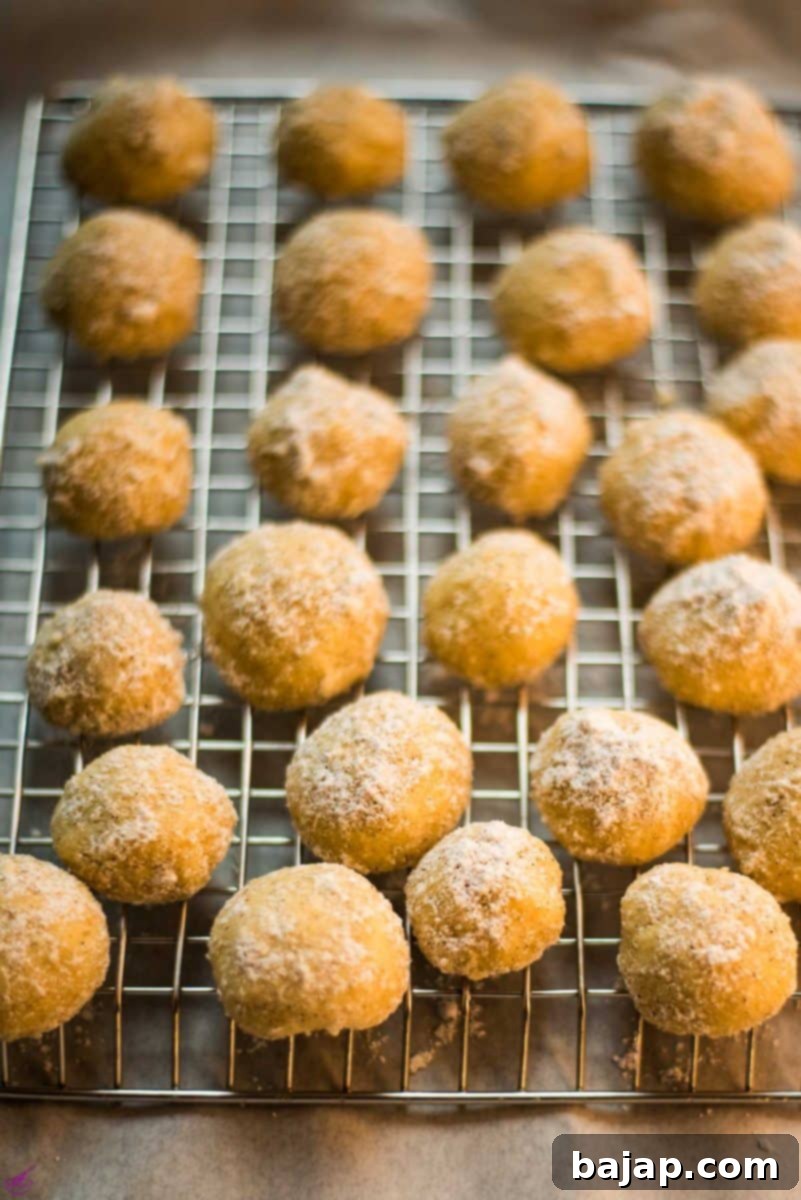
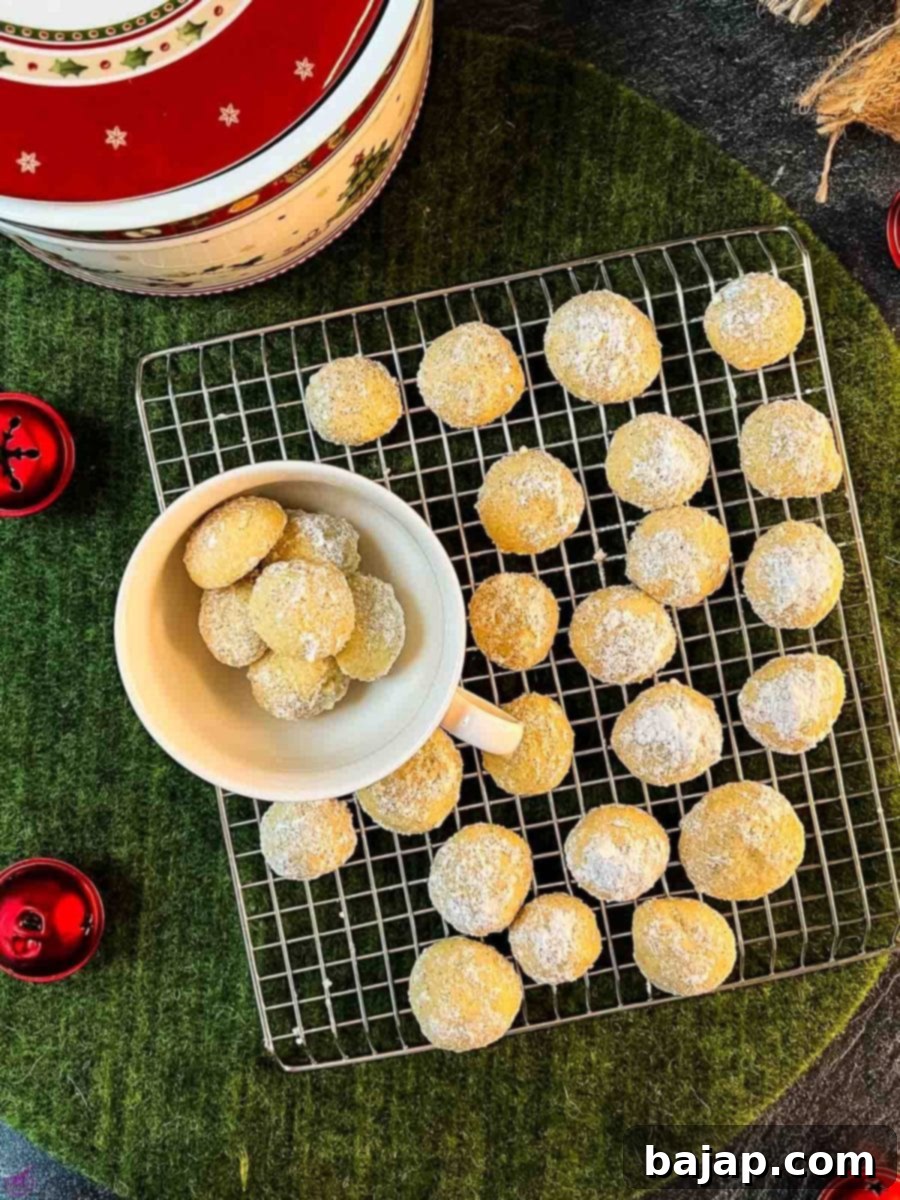
- Roll While Warm: While the cookies are still warm from the oven, mix the powdered sugar and vanilla sugar together in a shallow bowl. Gently roll each hot cookie in this sugar mixture until it’s thoroughly coated. The warmth of the cookies helps the sugar adhere and creates that beautiful, snowy finish. For an extra thick and luscious coating, you can roll them again once they’ve cooled slightly.
- Cool and Store: Carefully transfer the sugar-coated butterball cookies to a wire rack to cool completely. Once fully cooled, store them in an airtight cookie tin or container to maintain their freshness and delicate texture.
🥜 Delicious Variations for Your Butterball Cookies
While this nut-free butterball cookie recipe is a classic delight on its own, it also serves as a fantastic base for creative variations. Feel free to experiment and customize them to your taste or for different occasions:
- Nutty Twist: If nut allergies aren’t a concern for you or your guests, incorporating finely ground nuts into the dough adds a wonderful depth of flavor and a slightly more complex texture. Almonds, pecans, or walnuts are traditional choices. Toasting the nuts lightly before grinding can enhance their flavor significantly, making the cookies even more irresistible and adding a delightful crunch.
- Citrus Zest: Add 1-2 teaspoons of finely grated lemon, orange, or lime zest to the dough for a bright, refreshing flavor profile. The citrus pairs beautifully with the sweet butter base.
- Spiced Delight: For a warmer, more aromatic cookie, mix in a pinch of ground cinnamon, cardamom, or nutmeg with the flour. These spices are especially lovely for autumn and winter holidays.
- Chocolatey Indulgence: Fold in mini chocolate chips or finely chopped dark chocolate into the dough for a decadent surprise.
- Extract Exchange: While vanilla bean pulp offers superior flavor, you can swap it for other extracts. Almond extract (if nuts are okay), lemon extract, or even a touch of rum extract can transform the cookies.
- Colorful Coatings: Instead of just powdered sugar, consider mixing a small amount of cocoa powder into the rolling sugar for a chocolate butterball. For festive occasions, you can even tint a portion of the powdered sugar with food coloring (e.g., green for St. Patrick’s Day or red for Valentine’s Day).
- Gluten-Free Option: For those with gluten sensitivities, you can experiment with a high-quality gluten-free all-purpose flour blend (ensure it contains xanthan gum or add a small amount, about ½ teaspoon, per cup of flour). Results may vary slightly in texture.
- Vegan Version: Substitute the butter with a high-quality plant-based butter alternative (ensure it’s solid and at room temperature) for a vegan-friendly option.
🎄 Get in the Christmas Mood with More Holiday Treats
If these butterball cookies have sparked your holiday spirit, you’re in for a treat! Explore more delightful recipes and festive inspiration to make your celebrations extra special:
- How to Decorate a real Christmas Tree in 11 Steps
- Baking basics for Christmas Cookies
- Delicious No Churn Egg Liqueur Parfait
- Cranberry Aperol Spritz
🍽 Essential Equipment for Baking Butterball Cookies
Having the right tools can make your baking experience smoother and more enjoyable. Here’s the equipment you’ll need for these butterball cookies:
- Hand or Stand Mixer with Whisk Attachment and Dough Hook: An absolute game-changer for creaming butter and mixing dough efficiently. The whisk attachment ensures a fluffy butter-sugar mixture, while the dough hook makes kneading quick and easy.
- Mixing Bowl: A sturdy bowl large enough to comfortably mix your dough ingredients.
- Cling Film / Plastic Wrap: Essential for wrapping and chilling the cookie dough to prevent it from drying out and to help it firm up.
- Teaspoon: Ideal for portioning out uniform cookie dough balls, ensuring even baking. A small cookie scoop also works wonderfully.
- Baking Tray: Sturdy baking sheets are necessary to hold your cookies in the oven.
- Parchment Paper: Lines your baking sheets, preventing cookies from sticking and making cleanup much easier.
🌡 Storage Tips for Butterball Cookies
This recipe yields a generous batch of about 40-60 cookies, which is perfect for holiday entertaining or sharing with loved ones. If you’re not hosting a grand affair, you’ll likely have some delicious leftovers, and thankfully, these cookies store beautifully!
- Airtight Container: Once completely cooled, butterball cookies will keep for about two weeks when stored in an airtight container, such as a traditional cookie tin, at room temperature. The powdered sugar coating acts as a natural preservative, helping to maintain their freshness and delicate texture.
- Freezing Baked Cookies: For longer storage, baked and cooled butterball cookies can be frozen. Place them in a single layer on a baking sheet to freeze solid, then transfer them to an airtight freezer-safe container or bag. They will keep for up to 3 months. Thaw at room temperature before serving. You can re-roll them in fresh powdered sugar if desired after thawing.
- Freezing Dough: You can also prepare the dough balls ahead of time and freeze them unbaked. After rolling the dough into individual balls, arrange them on a parchment-lined baking sheet and freeze until solid. Transfer the frozen dough balls to a freezer-safe bag or container. They can be stored for up to 3 months. When ready to bake, you can bake them directly from frozen, adding a few extra minutes to the baking time, or let them thaw slightly in the refrigerator first.
🙋🏻 Frequently Asked Questions About Butterball Cookies
Here are some common questions and helpful answers to ensure your butterball cookies turn out perfectly every time:
If your cookie dough balls are spreading too much and flattening in the oven, there are a few likely culprits. The most common reasons include using butter that is too soft or melted (it should be room temperature but still firm), not chilling the dough sufficiently, over-creaming the butter and sugar (which incorporates too much air), or an incorrect ratio of flour to fat and sugar. Ensure your butter is softened but not greasy, chill the dough for the full recommended time, and avoid over-mixing once the flour is added.
In baking, the state of your butter significantly impacts the final texture of your cookies. Using melted butter adds more moisture to your dough and results in a chewier, denser cookie. This is because melted butter incorporates less air when mixed and allows the flour to absorb more liquid, leading to a different crumb structure. While delicious for some cookie types, it’s not ideal for the delicate, airy texture we want in butterball cookies.
The choice between melted and softened butter entirely depends on the desired cookie texture. For butterball cookies, softened butter is paramount. Softened (room temperature) butter, when creamed with sugar, creates tiny air pockets that expand during baking, resulting in a lighter, more airy, and cake-like or crumbly consistency that simply melts in your mouth. Melted butter, as mentioned, leads to a chewier, denser cookie. Always follow the recipe’s specific instructions for butter temperature to achieve the intended result.
These three cookies are often used interchangeably because they share a similar appearance and delicate, powdered-sugar-coated, melt-in-your-mouth texture. The main distinction traditionally lies in their ingredients. Russian Tea Cakes and Mexican Wedding Cookies almost always include finely ground nuts (pecans, walnuts, or almonds) in their dough. Our Butterball Cookie recipe, however, is specifically designed to be nut-free, making it a safe and delicious option for those with allergies while retaining all the charm and flavor of its nutty counterparts.
While the recipe explicitly uses all-purpose flour complemented by cornstarch to achieve a tender texture, if your previous recipe called for cake flour alone, know that cake flour is lower in protein than all-purpose flour, which contributes to a softer, more delicate crumb. However, by adding cornstarch to regular all-purpose flour, you effectively reduce the protein content and create a texture very similar to cake flour. So, yes, the combination of all-purpose flour and cornstarch in this recipe is specifically designed to give you that desired tenderness!
For perfectly uniform, round cookies, use a small cookie scoop or a measuring teaspoon to portion out the dough. Then, gently roll each portion between your palms until smooth. Avoid pressing too hard, which can warm the dough excessively. If the dough becomes too soft during handling, pop it back into the refrigerator for 10-15 minutes to firm up.
Absolutely! While vanilla pod pulp offers a richer, more authentic vanilla flavor, high-quality vanilla extract is a perfectly acceptable substitute. Use about 1 to 2 teaspoons of vanilla extract in place of the pulp from one vanilla pod. Adjust to your taste preference.
Yes, these cookies are excellent for make-ahead preparation! You can prepare the dough, roll it into balls, and chill them for up to 2-3 days in the refrigerator before baking. Alternatively, you can freeze the unbaked dough balls for up to 3 months, baking them directly from frozen (adding a few extra minutes to the bake time) whenever you need a fresh batch. The baked cookies also store well in an airtight container for up to two weeks, making them ideal for holiday gifting or last-minute entertaining.
More Delicious Cookie Recipes for You to Try
If you enjoyed these butterball cookies, be sure to explore more delightful cookie creations from our collection. There’s always something new and delicious to bake!
- Baking Basics for Christmas Cookies
- Walnut Meringue Cookies
- Divine Leftover Egg Yolk Cookies
- How to make delicious Linzer Cookies with Egg Liqueur
- Austrian Coconut “Busserl” Cookies – Like Granny’s
If you make this recipe, I’d absolutely love to hear from you! Please let me know how you liked it by giving it a ★★★★★ star rating and leaving a comment below. Your feedback is truly awesome and helps others discover these wonderful treats! You can also sign up for our Newsletter to get weekly delicious homemade recipes directly to your inbox. Don’t forget to follow me on Pinterest or Instagram and share your delightful creations with me. Just tag me @combinegoodflavors and use the hashtag #combinegoodflavors, so I don’t miss your beautiful bakes!
📖 Recipe: Yummy Melt-in-Your-Mouth Butterball Cookies
Yummy Butterball Cookies
Nora
Save RecipeSaved!
Pin Recipe
Equipment
-
Hand or stand mixer with whisk attachment and dough hook
-
Mixing bowl
-
Cling film
-
Teaspoon for cutting out little cookie dough balls
-
Baking tray
-
Baking Paper
Ingredients
- 1 cup Butter softened
- ¼ cup Powdered sugar
- 1 Pulp from one Vanilla pod
- 1 ½ cups All-purpose flour
- ½ cup Cornstarch
For rolling
- 1 cup Powdered sugar
- 1 ¼ tablespoon Vanilla sugar homemade or store-bought
Instructions
-
Mix 1 cup softened Butter, ¼ cup Powdered sugar, and 1 Pulp from one Vanilla pod for about 5 minutes until creamy (use whisk attachment).1 cup Butter, ¼ cup Powdered sugar, 1 Pulp from one Vanilla pod
-
Mix in 1 ½ cups All-purpose flour and ½ cup Cornstarch and then knead into a dough using the dough hook until just combined.1 ½ cups All-purpose flour, ½ cup Cornstarch
-
Wrap the dough in plastic wrap and chill in the refrigerator for at least 2 hours to prevent spreading and enhance flavor.
-
Preheat oven to 355 °F (180 °C) and line baking sheets with parchment paper.
-
With the help of a teaspoon (or small cookie scoop), cut out the dough, shape it into small 1-inch balls, and place them evenly spaced on the prepared baking sheet.
-
Bake on the middle shelf for about 10-12 minutes until light brown on the bottom, but still pale on top. Do not overbake.
-
Mix 1 cup Powdered sugar and 1 ¼ tablespoon Vanilla sugar in a shallow bowl. Immediately roll the hot cookies in this mixture until fully coated.1 cup Powdered sugar, 1 ¼ tablespoon Vanilla sugar
-
Transfer the sugar-coated cookies to a wire rack to cool completely. After cooling, store in an airtight cookie tin to maintain freshness.
Nutrition values are estimates only, using online calculators. Please verify using your own data.

🤎 You might also like these delightful recipes
- Eggnog Mascarpone Cookies That Taste Like Christmas
- 5 Ingredients Raspberry Cheesecake Thumbprint Cookies
- Sour Cream Cookies with Pearl Sugar
- Cinnamon Cookies {Zimtsterne}
⛑️ Food Safety and Handling Tips
Ensuring food safety is paramount when baking. Please keep these general guidelines in mind:
- Cook all foods to a minimum internal temperature of 165 °F (74 °C) to eliminate harmful bacteria. While cookies aren’t typically checked with a thermometer, ensure they are fully baked and firm.
- Avoid cross-contamination by not using the same utensils or cutting boards on cooked food that previously touched raw ingredients like meat or unbaked dough.
- Always wash your hands thoroughly with soap and water before handling food, and especially after touching raw meat or eggs.
- Do not leave perishable foods sitting out at room temperature for extended periods (typically no more than 2 hours) to prevent bacterial growth. While cookie dough is less risky than raw meat, it’s still best to follow chilling instructions.
- Never leave cooking food unattended, particularly when using high heat or an oven.
- When cooking with oils, choose those with a high smoking point to avoid the formation of harmful compounds.
- Always ensure good ventilation when using a gas stove to prevent the buildup of fumes.
For further comprehensive information and guidelines on safe food handling, please refer to the FDA’s Safe Food Handling resources.
