Indulge in Homemade Dark Chocolate Truffles with a Hint of Cinnamon and Velvety White Chocolate Coating
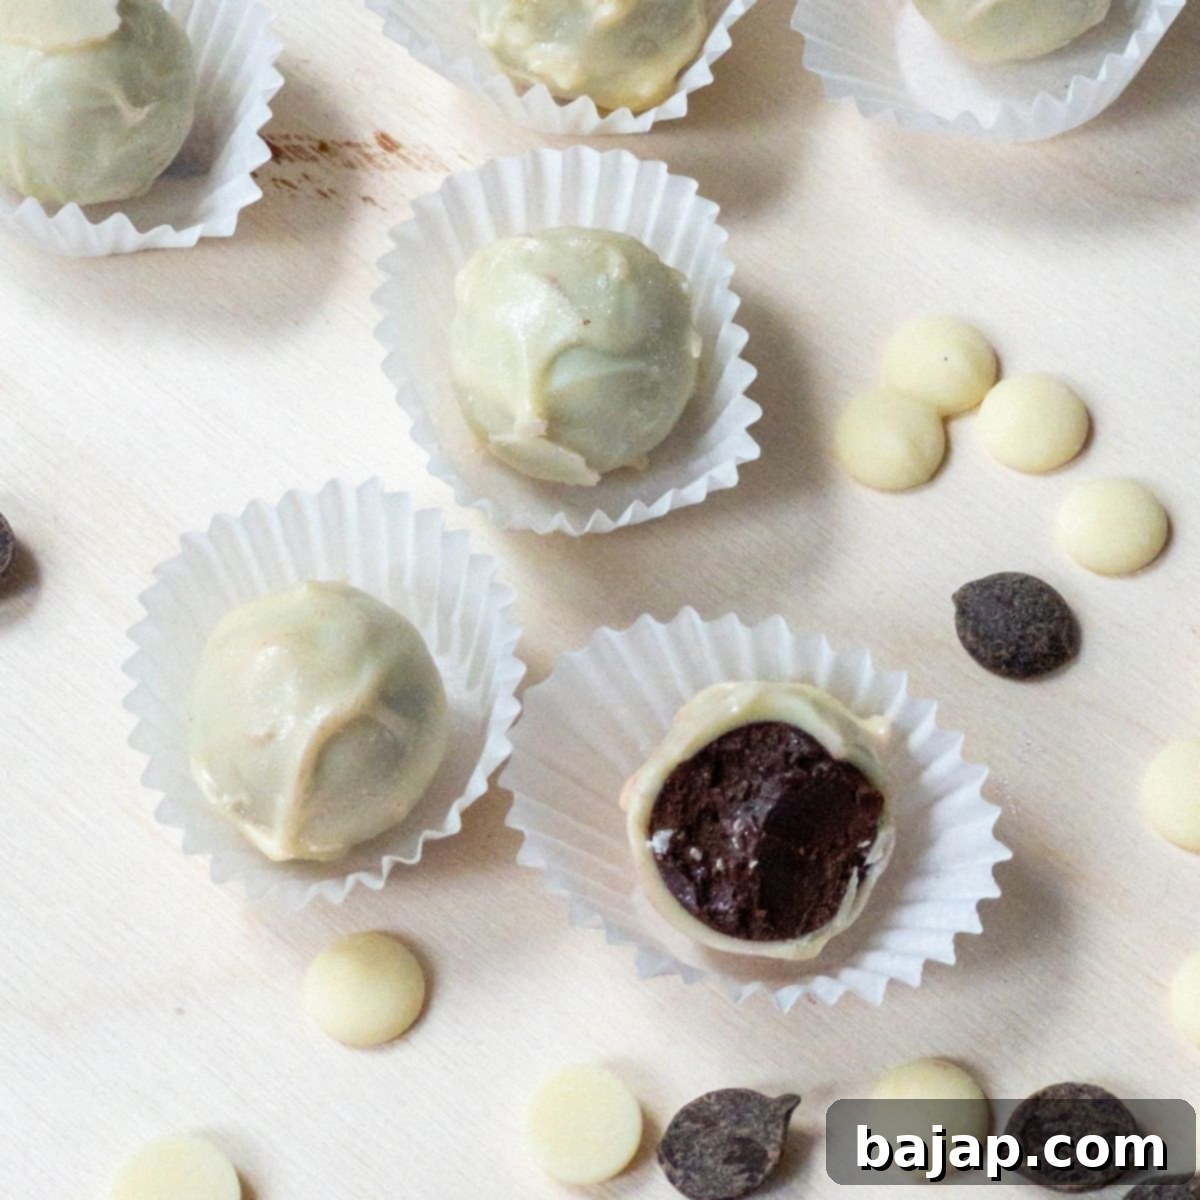
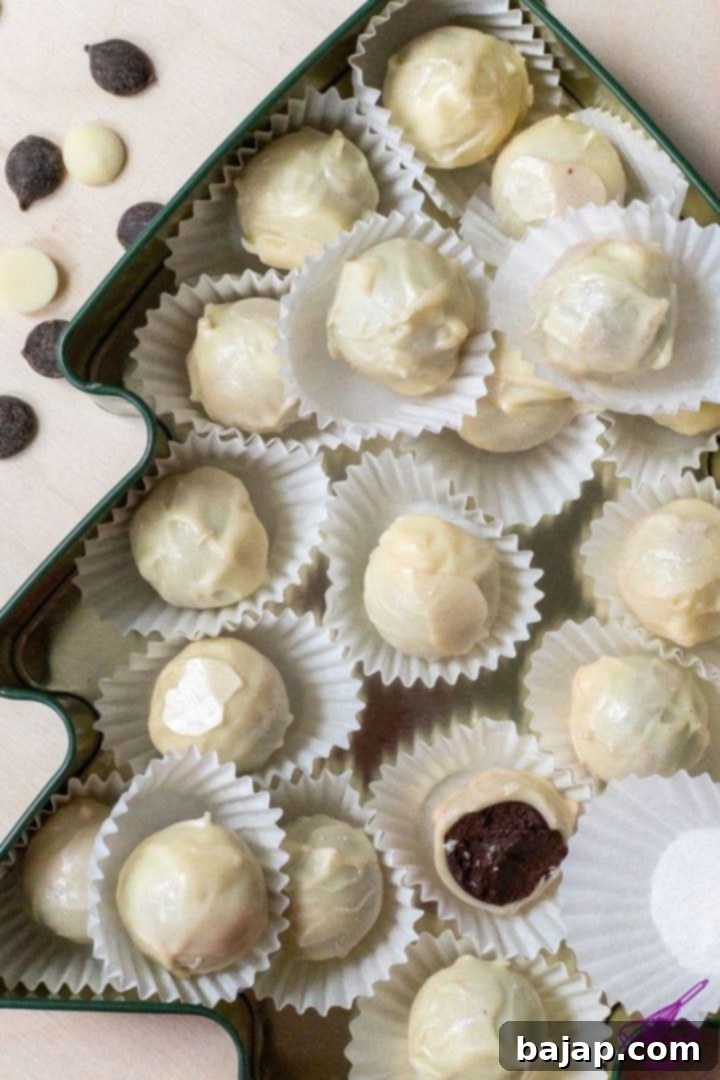
Prepare to be enchanted by these exquisite homemade dark chocolate truffles! Each bite offers a delightful surprise: a rich, dark chocolate ganache, subtly infused with aromatic cinnamon, encased within a smooth, creamy white chocolate shell. They are an absolute dream for any chocolate lover!
From the outside, these elegant confections appear to be simple white chocolate truffles. But that first decadent bite reveals a symphony of flavors and textures, proving that appearances can indeed be deceiving in the most delicious way. The warmth of cinnamon perfectly complements the deep cocoa notes of the dark chocolate, creating an unforgettable taste experience that will leave you craving more.
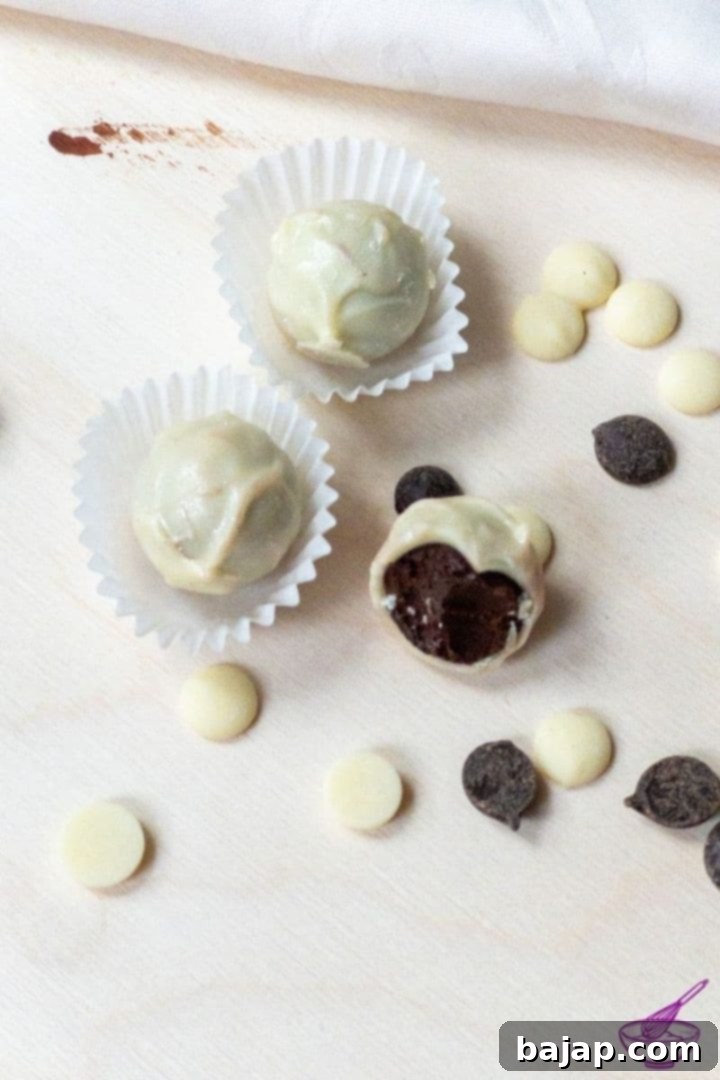
These homemade dark chocolate truffles are incredibly versatile and make for a perfect treat. Whether you’re looking for a thoughtful edible gift, a delightful souvenir, or simply a luxurious chocolate treat to savor yourself, these truffles fit the bill. They are also ideal for celebrating special occasions like birthdays, name days, Mother’s Day, Father’s Day, or just because you want to spread a little sweetness.
One of the best aspects of this recipe is its straightforward preparation, making it accessible even for those new to chocolate making. What I particularly cherish about these truffles is that they are thoughtfully crafted to be fructose-free, offering a wonderful indulgence for those with fructose sensitivities! So, if you’re looking for a sweet treat that everyone can enjoy, this recipe is for you. Let’s dive right in and create these irresistibly delicious sweet bites!
If your love for chocolate candies knows no bounds, be sure to explore more chocolate candy recipes on my blog. You might particularly enjoy my eggnog truffles or the rich milk chocolate salted caramel truffles. For a truly elevated experience, pair these exquisite chocolate treats with a vibrant Snowball cocktail or a comforting classic homemade Lumumba – the perfect accompaniments for a moment of pure bliss.
🥘 Essential Ingredients for Your Cinnamon Dark Chocolate Truffles
Crafting perfect truffles begins with selecting high-quality ingredients. Here’s what you’ll need for these delightful treats:
- White Chocolate Hollow Spheres: Using pre-made hollow spheres (a small foil of white hollow spheres) simplifies the process, making these truffles much quicker to prepare. They provide a perfect, consistent shell for your ganache.
- Heavy Whipping Cream: This is the base for our rich ganache, providing creaminess and a luxurious texture that emulsifies beautifully with chocolate.
- High-Quality Dark Chocolate Couverture: The star of our ganache. Opt for a couverture with a high cocoa percentage (around 60-70%) for a deep, intense chocolate flavor. For an exceptional experience, I highly recommend Felchlin chocolate for its superior quality and taste.
- Glucose: A small amount of glucose is crucial for achieving a smooth, stable ganache. It helps prevent crystallization, adds a lovely sheen, and contributes to the truffles’ melt-in-your-mouth texture.
- Cinnamon: Just a pinch of ground cinnamon adds a warm, spicy note that perfectly complements the dark chocolate without overpowering it. Feel free to adjust to your personal preference.
- White Chocolate Couverture (for coating): Choose a good quality white chocolate couverture for a smooth, even, and beautiful outer layer. Proper tempering of this chocolate is key for a professional finish.
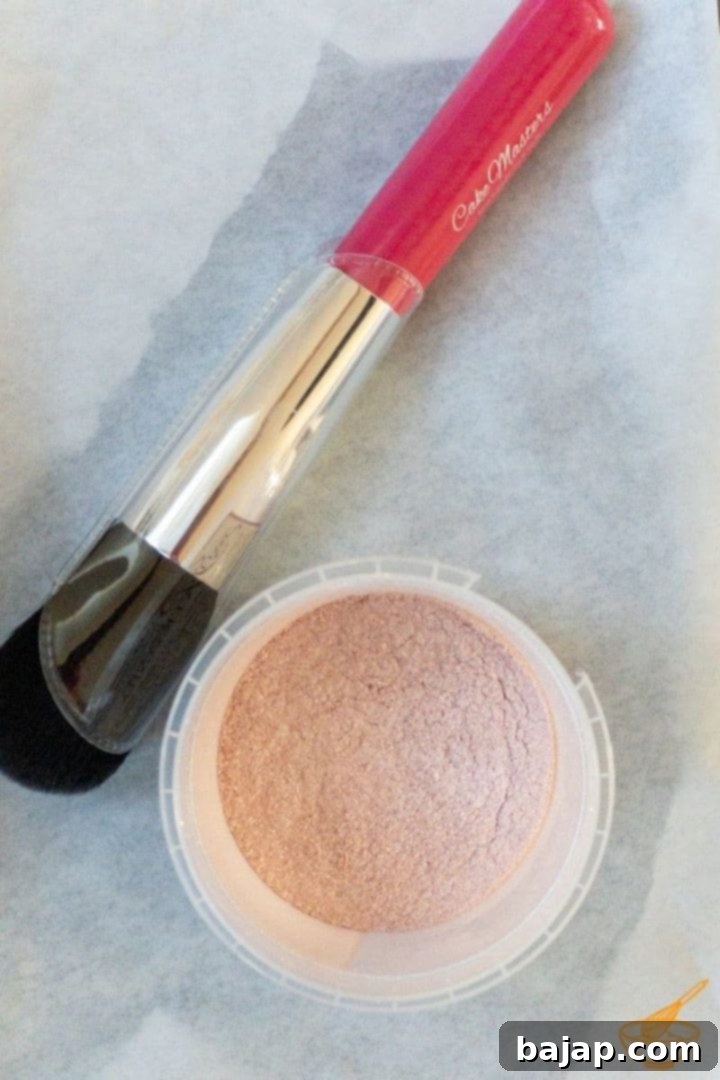
- Pink Glitter Powder: For decorating your chocolate-covered truffles, a touch of edible pink glitter powder adds a whimsical and elegant sparkle.
For exact quantities and detailed measurements, please refer to the comprehensive recipe card below.
🍽 Essential Equipment for Truffle Making
Having the right tools can make all the difference in ensuring a smooth and enjoyable truffle-making experience. Here’s the equipment you’ll need:
- Water Bath (Bain-Marie) or Tempering Device: Essential for melting chocolate gently and achieving the perfect temper, which is crucial for a smooth, shiny, and stable coating.
- Piping (Pastry) Bag: Used for neatly filling the hollow chocolate spheres with ganache.
- Small Saucepan: For gently heating the cream and glucose for the ganache.
- Squeeze Bottle: Invaluable for sealing the hollow spheres with tempered chocolate, ensuring a clean and precise application.
- Wooden Spoon: For stirring and combining ingredients, especially important when making ganache.
- Shallow Bowl: To hold the melted chocolate for coating and to allow excess to drip off.
- Parchment Paper: To line your workspace and a shallow bowl, preventing the truffles from sticking as they dry and making cleanup easier.
- Chocolate Paper Molds: For presenting your finished truffles beautifully and preventing them from touching each other, especially if gifting.
- Dusting Brush: Perfect for delicately applying the edible glitter powder, ensuring an even and subtle shimmer.
🔪 Step-by-Step Instructions to Craft Your Luxurious Truffles
For the ultimate convenience and a streamlined process, this recipe utilizes pre-made white chocolate hollow spheres. This allows us to focus on perfecting the delicious fillings and coatings.
Crafting the Rich Dark Chocolate Cinnamon Ganache
- Prepare the Cream Base: Begin by combining the glucose and heavy whipping cream in a small saucepan. Gently bring this mixture to a simmering point over moderate heat. You’ll want it to be hot, but not at a rolling boil. Glucose helps create a smoother, more stable ganache with a beautiful sheen, preventing it from becoming grainy.
- Melt the Dark Chocolate: Once the cream mixture is hot, remove it from the heat and immediately add your high-quality dark chocolate couverture. Let the chocolate sit for about a minute to begin melting, then stir gently with a wooden spoon until the chocolate is completely melted and smoothly incorporated with the cream. This creates a luscious, homogenous ganache.
- Infuse with Cinnamon: Now for the magical touch – cinnamon! Add a pinch of cinnamon to the ganache. I personally prefer a subtle hint of cinnamon to allow the rich dark chocolate flavor to shine through, so a single pinch is usually sufficient for my taste. However, feel free to be bold and add a bit more if you adore a stronger cinnamon presence! Stir well to distribute the spice evenly.
- Cool and Fill: Allow the finished ganache to cool down. It’s crucial for the ganache to reach a temperature of approximately 31 °C (87.8 °F). This temperature ensures the ganache is still fluid enough to pipe but cool enough to set properly without melting the hollow spheres. Transfer the cooled ganache into a piping bag.
- Fill the Hollow Spheres: Carefully fill each white chocolate hollow sphere with the ganache, stopping just below the rim. Overfilling can make sealing difficult. The goal is to create a perfectly rounded truffle.
- Chill for Setting: Place the filled chocolate spheres in the refrigerator for at least 8 hours, though 24 hours is ideal. This extended chilling time is vital for the ganache to firm up completely and achieve its exquisite texture. This firm setting will prevent any ganache from leaking during the sealing and coating process.
Sealing Your Truffles for a Perfect Finish
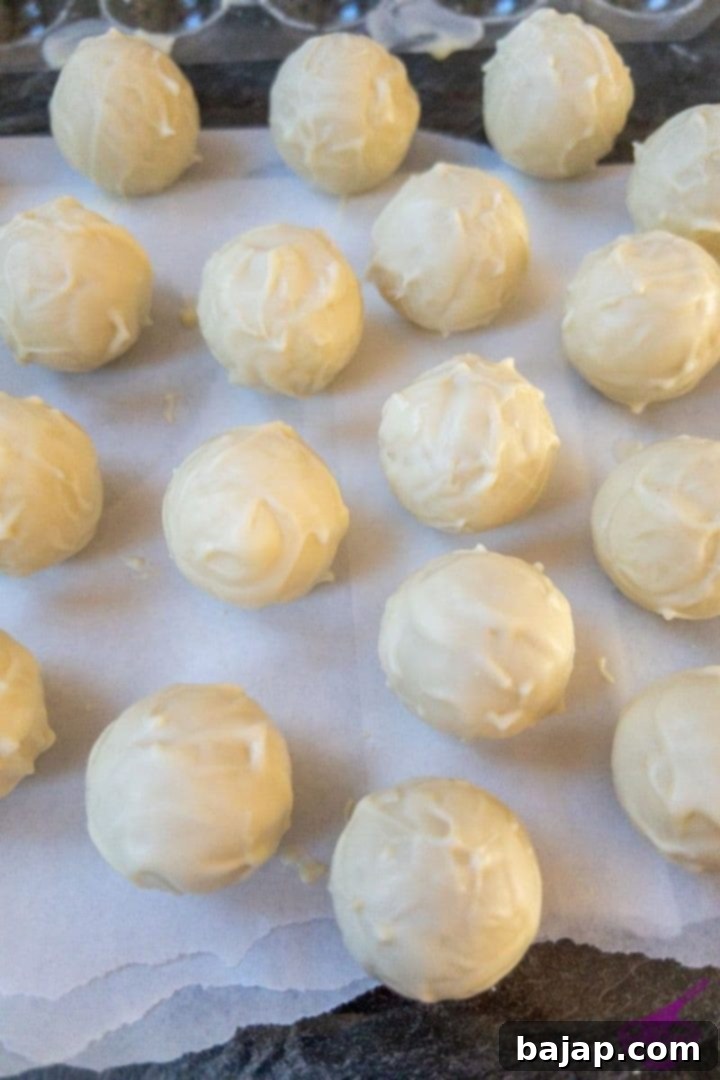
After the essential chilling time, it’s time to prepare your truffles for their beautiful white chocolate coating! Before you can fully coat your chocolate candies, you need to seal the open ends of the hollow spheres. This critical step prevents the ganache from oozing out and creates a smooth, continuous surface for the final coating.
You’ll need a liquid chocolate coating for this, which in our case is more white chocolate. The key here is proper tempering, which gives the chocolate its snap, shine, and resistance to melting at room temperature. You can melt and temper the chocolate using a water bath (bain-marie) or a specialized tempering device.
Water Bath (Bain-Marie) Method: If using a water bath, choose two pots of different sizes. Fill the larger pot with about 3-4 finger-widths of water and place the smaller pot inside, ensuring the bottom of the smaller pot does not touch the water. Add your white chocolate to the upper, smaller pot and melt it over moderate heat, stirring frequently. The steam from the lower pot will gently melt the chocolate, preventing it from burning or seizing.
Tempering Device Method: If you have a tempering unit, simply add your white chocolate to the device and set it to the appropriate melting temperature. For white and milk chocolate, this is typically around 40 °C (104 °F). For dark chocolate, a higher temperature of 50 °C (122 °F) is usually recommended. Follow your device’s instructions for cooling and re-heating cycles to achieve a perfect temper.
The simplest and most efficient way to seal the hollow spheres is by using a squeeze bottle. Fill the bottle with your freshly tempered white chocolate. Carefully apply the tempered chocolate to the open rim of each truffle. Gently shake or tap the truffle to ensure the chocolate spreads evenly and seals the opening completely. This creates a neat, flat base for the final coating.
Any leftover tempered chocolate from this sealing process can be poured back into your main batch of white chocolate couverture to be used for the final coating. Don’t let any go to waste!
Once all the truffles are sealed, return them to the refrigerator to allow the chocolate seal to firm up. This “hardening” step is quite quick, usually taking less than 10 minutes. The chocolate will be solid, indicating they are perfectly ready for their glorious final coating of white chocolate.
Mastering the White Chocolate Coating for a Dazzling Finish
Coating truffles can be a bit messy and requires quick work, so it’s always best to prepare your workspace thoroughly beforehand. Lay out a shallow bowl lined with parchment paper or greaseproof paper. This bowl will serve as the landing spot for your freshly coated truffles, allowing them to set without sticking and preventing any damage to their pristine white exterior.
Take your sealed and chilled truffles out of the refrigerator. Grab 1-4 truffles in one hand, depending on how comfortable you are handling multiple at once. Dip the fingers of your other hand into the melted and tempered white chocolate coating. Now, gently roll the 1-4 truffles between your chocolate-dipped fingers. This hand-coating method allows for excellent control and ensures an even, thin layer of chocolate around each truffle. Once they are beautifully coated, carefully transfer them to your prepared bowl lined with parchment paper.
As soon as the white chocolate coating begins to solidify but is still slightly tacky, it’s time for the final decorative touch. Dust them with the edible pink glitter powder. Inspired by my daughter’s current “pink is the best” phase, I decided to try this, and it was a complete success! The pink glitter powder on the white chocolate creates a very subtle, light pink shimmer that looks incredibly charming and adds a festive flair. You can also experiment with other colors or edible decorations to match different occasions.
Once you’ve finished coating all 21 truffles and applied their lovely glitter dusting, carefully place the finished chocolates into individual praline molds. Store them in an airtight container at a cool room temperature to maintain their quality and texture. High humidity can cause tempering issues, so a dry environment is best.
Congratulations! Your batch of delicious homemade dark chocolate truffles, with their secret cinnamon ganache and shimmering white chocolate coating, are now ready to be savored or shared as thoughtful gifts. Enjoy every exquisite moment!
If you have a profound appreciation for cinnamon, much like I do, you absolutely must try these delightful chocolate cinnamon cookies!
For those mindful of dietary needs, these treats are also gluten-free. Explore more delectable options by checking out Sharon’s Roundup post for additional gluten and dairy-free desserts!
🌡️ Storage Tips for Keeping Your Truffles Fresh
Proper storage is essential to maintain the quality and extend the shelf life of your beautiful homemade truffles:
- Room Temperature: Properly tempered truffles will maintain their best texture and flavor for about three days when stored at cool room temperature (ideally between 18-20°C or 64-68°F). Always store them in a cool, dry place with low humidity to prevent blooming or stickiness.
- Refrigerator: If you need to store them for a longer period, they can last for approximately one week in the refrigerator. Be aware that refrigeration can slightly alter the texture of the ganache, making it firmer. To minimize condensation, store them in an airtight container and allow them to come to room temperature for about 15-20 minutes before serving.
- Freezer: For extended storage, truffles can be frozen for up to a month. Again, store them in an airtight, freezer-safe container. Freezing will cause the ganache centers to firm up more significantly. Thaw them gradually in the refrigerator overnight before bringing them to room temperature for serving.
💭 Pro Tip: Reclaiming Chocolate from a Squeeze Bottle
After using your squeeze bottle for sealing the truffles, you’ll inevitably have some tempered chocolate stuck inside. You certainly don’t want to waste this precious chocolate, especially if you plan to use it for the main coating. Here’s a clever trick to easily retrieve it:
Instead of struggling to scrape it out, simply place the squeeze bottle, with the leftover chocolate inside, into the refrigerator. Allow the chocolate to fully solidify. Once hard, gently squeeze and flex the bottle. The solid chocolate inside will typically crack and crumble, making it much easier to empty the pieces out. This method ensures minimal waste and keeps your chocolate-making process efficient.
And if you find yourself with extra white chocolate chips or couverture after all your truffle endeavors, Isabelle’s delightful chocolate mermaid bark recipe is a fantastic way to use them up creatively!
🍫 Download Your Free Chocolate Workbook
Master the art of chocolate tempering and unlock the secrets to perfect chocolate creations every time! Our free workbook will guide you through the process, ensuring your truffles always have that professional, glossy finish without any undesirable grey streaks. It’s an invaluable resource for any home chocolatier!
If you try this delightful recipe, please let me know your thoughts by giving it a ★★★★★ star rating and leaving a comment below. Your feedback is truly appreciated! You can also sign up for our Newsletter to receive weekly delicious homemade recipes directly in your inbox. For more inspiration and to share your creations, follow me on Pinterest or Instagram. Don’t forget to tag me @combinegoodflavors and use the hashtag #combinegoodflavors so I don’t miss your beautiful work!
📖 Recipe
Homemade Dark Chocolate Truffles with White Chocolate Coating
Nora
Prevent your screen from going dark
Save Recipe
Saved!
Pin Recipe
2 hours
8 hours 30 minutes
10 hours 30 minutes
Dessert, Snack
European
21
Chocolates
83
kcal
Equipment
-
1 Water bath or tempering device
-
1 Pastry bag
-
1 Saucepan
-
1 Wooden spoon
-
1 shallow bowl
-
Parchment Paper
-
Chocolate paper molds
-
1 Squeeze Bottle
-
1 Dusting Brush
best dark chocolate truffles recipe, candies, chocolates, dark chocolate truffles, fructose-free, gluten-free, homemade dark chocolate truffles, pralines
Never miss a recipe!
Sign up and let me spoil you weekly with a delicious homemade recipe!
best dark chocolate truffles recipe, candies, chocolates, dark chocolate truffles, fructose-free, gluten-free, homemade dark chocolate truffles, pralines
Like this recipe?
Mention @combinegoodflavors or tag #combinegoodflavors!
Nutrition values are estimates only, using online calculators. Please verify using your own data.
Serving: 1Truffle
|
Calories: 83kcal
|
Carbohydrates: 7g
|
Protein: 1g
|
Fat: 7g
|
Saturated Fat: 4g
|
Polyunsaturated Fat: 1g
|
Monounsaturated Fat: 2g
|
Cholesterol: 5mg
|
Sodium: 3mg
|
Potassium: 3mg
|
Fiber: 1g
|
Sugar: 5g
|
Vitamin A: 58IU
|
Vitamin C: 1mg
|
Calcium: 3mg
|
Iron: 1mg
🤎 You might also like
- The Perfect Holiday Treat – Homemade Eggnog Truffles
- How to create Milk Chocolate Salted Caramel Truffles
- Matcha Truffles – a Delicious St. Patrick’s Day Treat
- Homemade Baileys Chocolates
⛑️ Food Safety Guidelines for Chocolate Making
Ensuring food safety is paramount, especially when working with ingredients like cream and chocolate. Please keep the following best practices in mind:
- Minimum Cooking Temperatures: When heating cream or other dairy products, ensure they reach a safe temperature to eliminate bacteria. While this recipe doesn’t involve cooking meat, general kitchen hygiene is vital.
- Prevent Cross-Contamination: Always use separate utensils, cutting boards, and containers for raw ingredients (if applicable) and cooked/ready-to-eat foods. Although this recipe doesn’t include raw meat, maintaining cleanliness is crucial.
- Hand Washing: Wash your hands thoroughly with soap and warm water before and after handling food, especially when switching between different ingredients.
- Temperature Control: Avoid leaving perishable ingredients or finished products sitting at room temperature for extended periods. This can promote bacterial growth. Ensure ganache is chilled promptly.
- Never Leave Cooking Food Unattended: If you’re melting chocolate or heating cream on the stovetop, stay present to prevent burning or overflowing.
- Choose High Smoke Point Oils: (Not directly applicable to this recipe, but a general food safety tip) When frying or sautéing, use oils with a high smoke point to avoid breaking down and forming harmful compounds.
- Ensure Good Ventilation: Always use adequate ventilation, especially when using a gas stove, to prevent the buildup of fumes.
For more detailed food safety information and best practices, please consult the Safe Food Handling – FDA guidelines.
