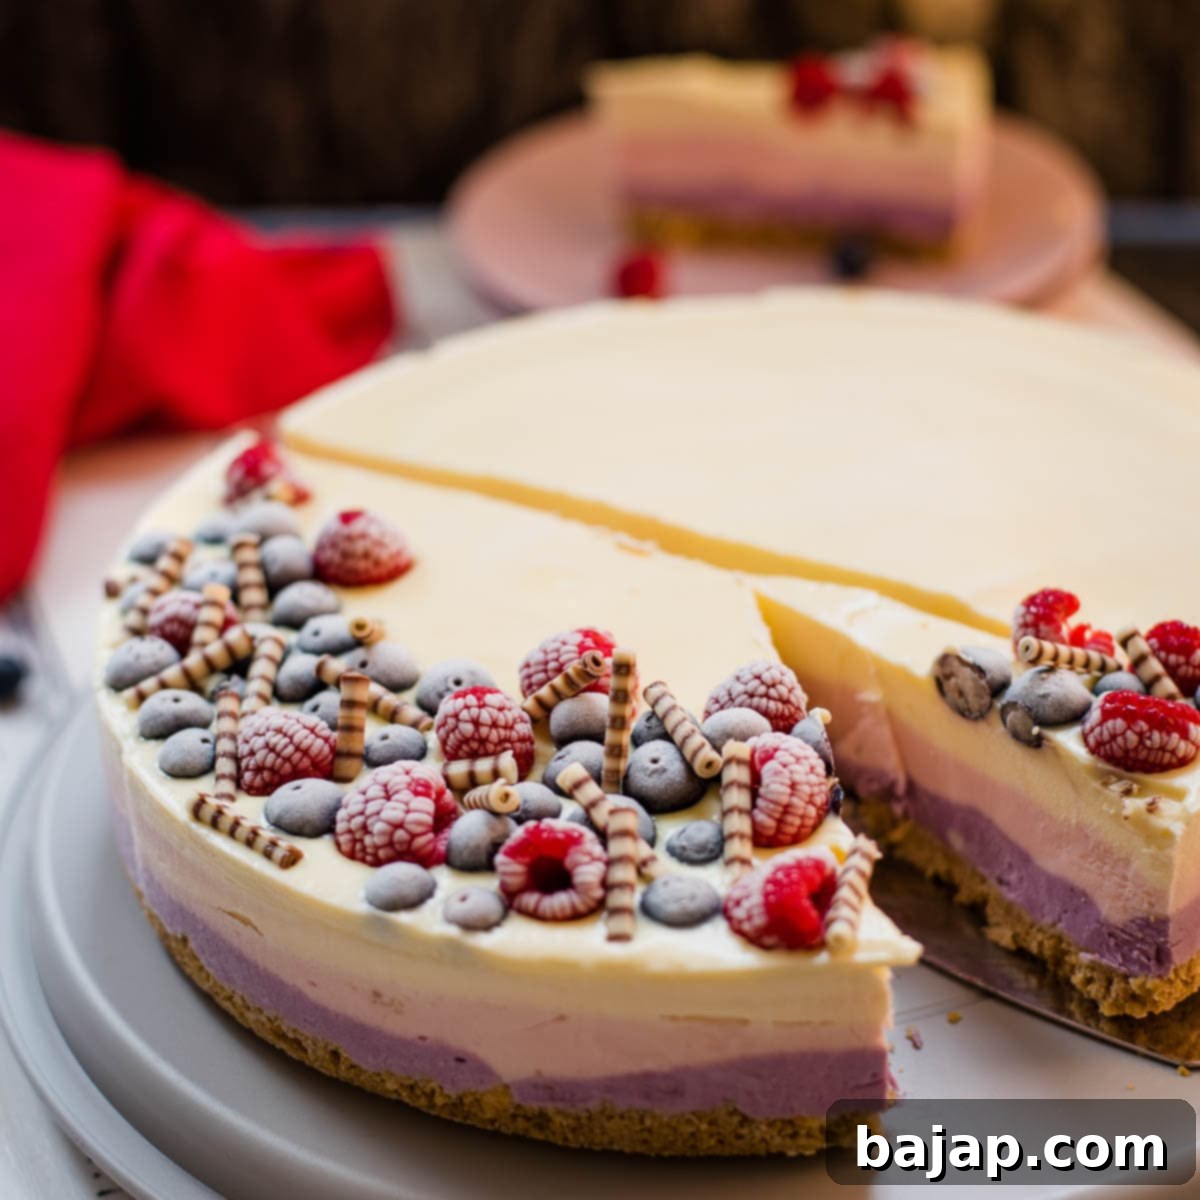
Ultimate No-Bake 4th of July Cheesecake: A Red, White & Blue Celebration
Prepare to wow your guests and ignite your taste buds with this sensational **No-Bake 4th of July Cheesecake**! This isn’t just any dessert; it’s a vibrant celebration of flavors and patriotism, perfectly embodying the spirit of a red, white, and blue holiday. Crafted with fresh raspberries and blueberries, this delectable cheesecake offers a naturally beautiful color palette, eliminating the need for artificial food dyes. The result is a lusciously creamy, velvety treat that will have everyone singing its praises!
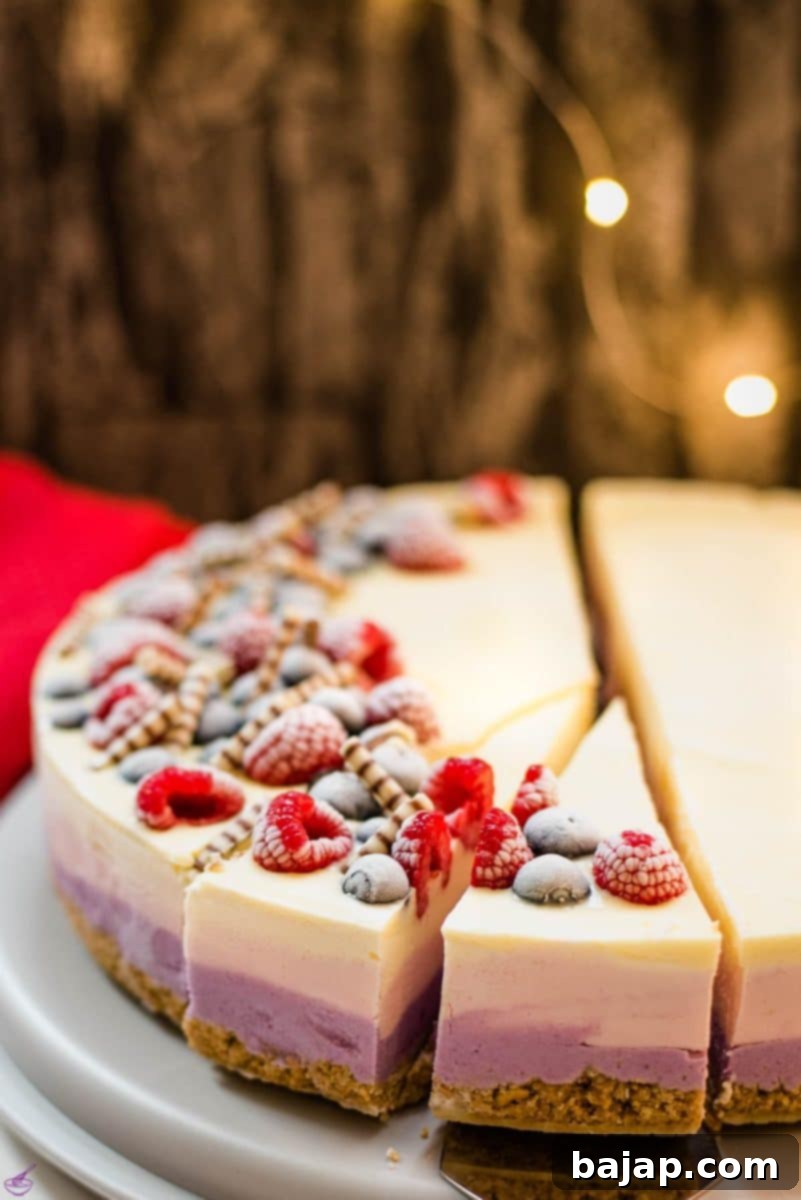
For those who have followed my culinary adventures, you know my profound love for cheesecake, like my no-bake chocolate ricotta cheesecake. While this particular recipe features the traditional richness of cream cheese, we elevate it further with the inclusion of mascarpone. This exquisite Italian cream cheese lends an unparalleled creamy, velvety texture and a subtle richness that makes this patriotic dessert truly unforgettable.
Cheesecakes, especially those adorned in red, white, and blue, have long been a beloved staple for Fourth of July celebrations. This easy no-bake version ensures you spend less time in the kitchen and more time enjoying the festivities. With every bite, you’ll experience a symphony of sweet, tangy, and creamy notes that are utterly irresistible. Get ready to collect compliments from family and friends, as they declare this the best Fourth of July cheesecake they’ve ever tasted!
While perfectly suited for Independence Day, there’s absolutely no need to reserve this incredible cheesecake for special occasions. It’s so effortlessly delicious, I wholeheartedly encourage you to enjoy this sweet masterpiece year-round. The secret to its vibrant and natural coloring lies in the fresh raspberries, blueberries, and freshly squeezed orange juice, offering a delightful and wholesome alternative to artificial food colorings. This ensures a stunning presentation without compromising on natural goodness.
Many recipes attempt to achieve that iconic red, white, and blue theme, but few can match the exquisite taste and natural beauty of this one. This **red, white and blue cheesecake** is not just an easy, no-bake recipe; it’s a showstopper that will look absolutely magnificent on your dessert table and leave all your guests thoroughly impressed. It’s the perfect combination of convenience, visual appeal, and outstanding flavor.
🥘 Ingredients You’ll Need
Crafting this delightful no-bake cheesecake requires a few simple, yet high-quality ingredients. Each component plays a crucial role in building the perfect texture and flavor profile for this festive dessert.
Crust
The foundation of any great cheesecake is its crust. For this **no-bake 4th of July cheesecake**, we’re creating a rich and flavorful base that perfectly complements the creamy filling. Here’s what you’ll need:
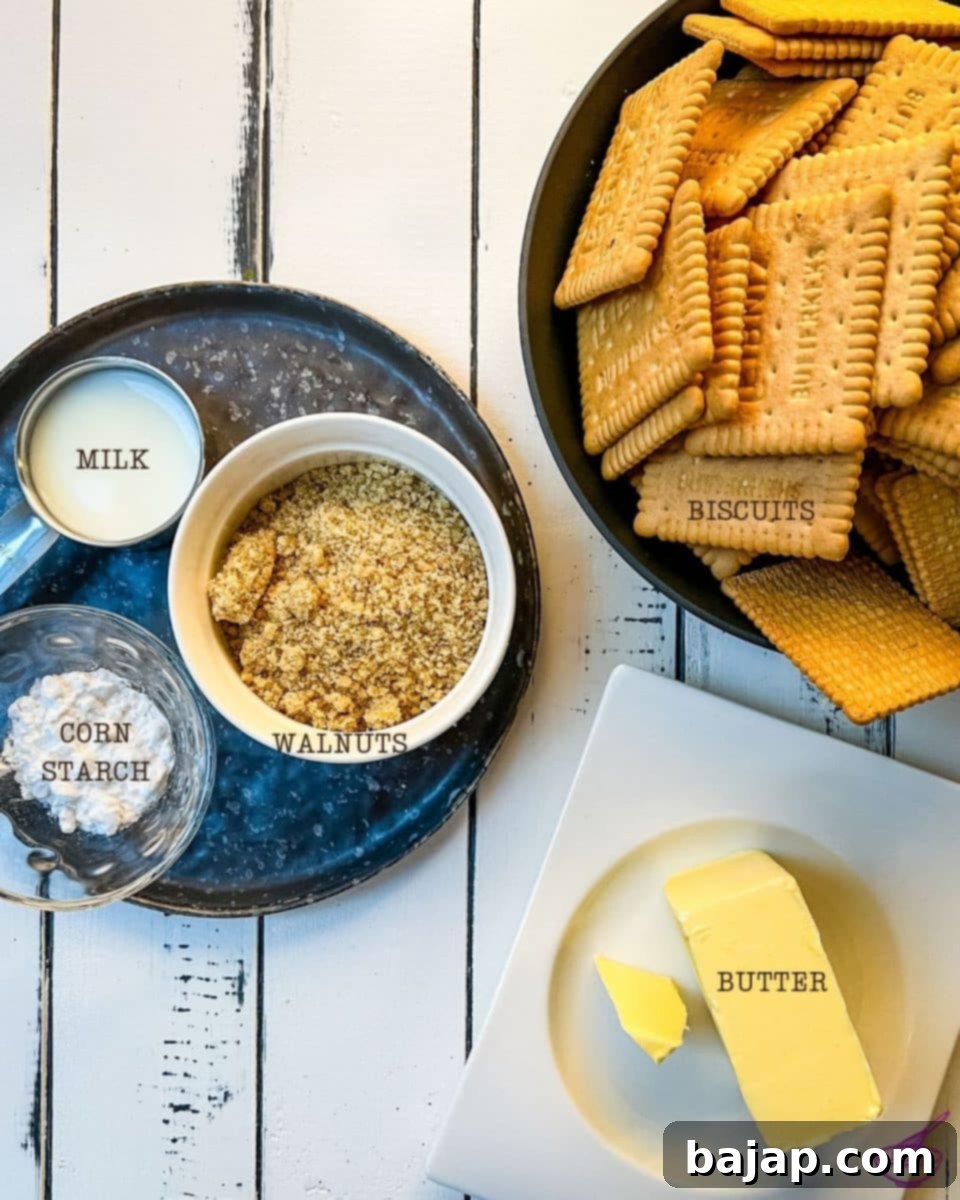
- Graham crackers – or Petit beurre biscuits (a common European alternative). You can save time by using ready-made graham cracker crumbs.
- Unsalted Butter
- Milk (full-fat for richness)
- Ground walnuts (adds a wonderful nutty depth)
- Corn starch (for easy release)
Cheesecake Filling
The heart of our **red, white, and blue cheesecake** is its incredibly creamy and flavorful filling. Combining traditional cream cheese with luxurious mascarpone creates a texture that’s both light and rich. The fresh fruits provide natural colors and bright flavors.
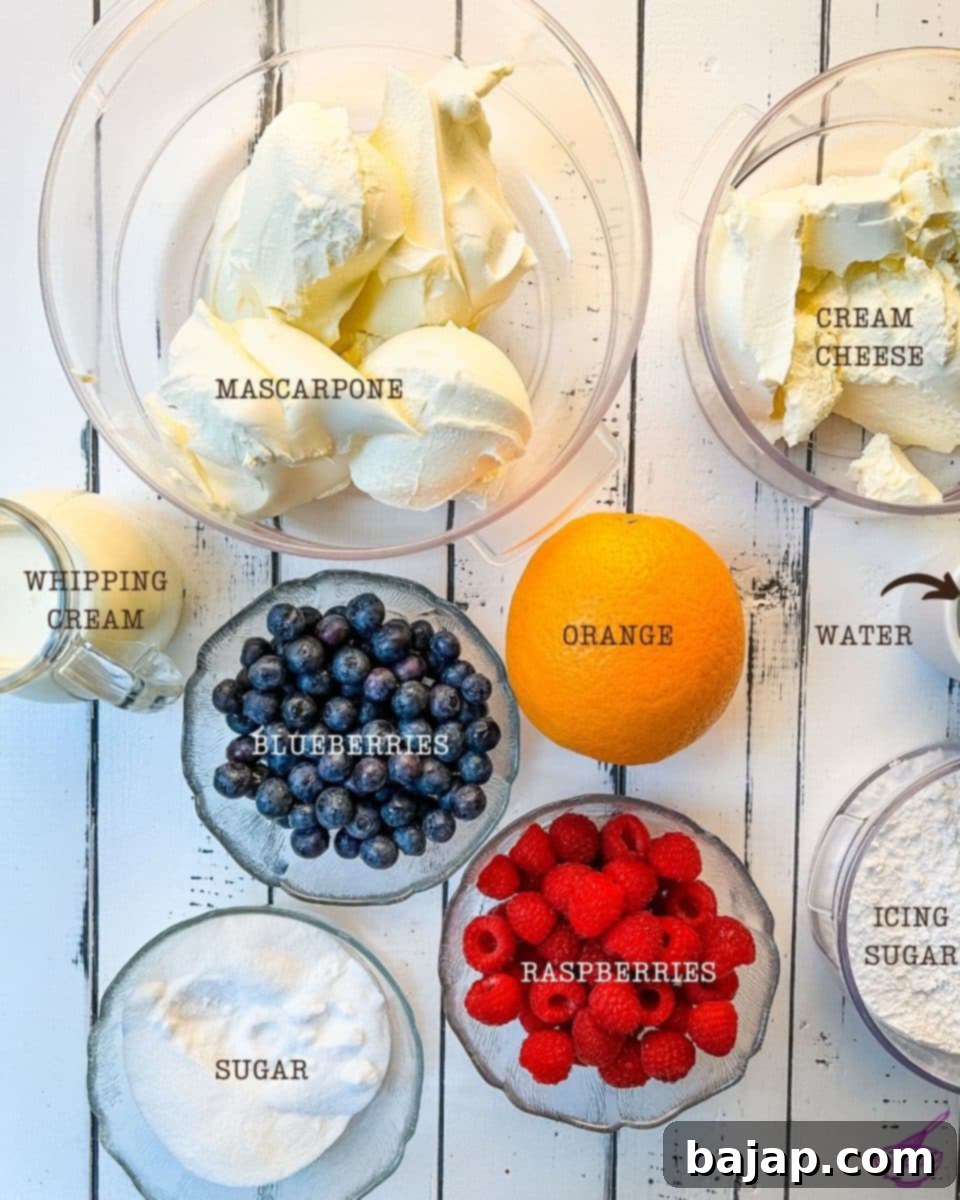
- Mascarpone cheese (for that extra velvety texture)
- Cream cheese (full-fat for the best consistency)
- Heavy whipping cream (to lighten and aerate the filling)
- Icing sugar (confectioners’ sugar)
- Fresh Blueberries (for the blue layer)
- Fresh Raspberries (for the red layer)
- Water
- Freshly squeezed Orange juice (for the white/orange layer)
- Granulated Sugar
Glaze & Decoration
A glossy glaze and thoughtful decorations are the finishing touches that make this **4th of July dessert** truly spectacular. The glaze adds a beautiful sheen and helps set the top layer, while fresh berries and chocolate rolls enhance its visual appeal.
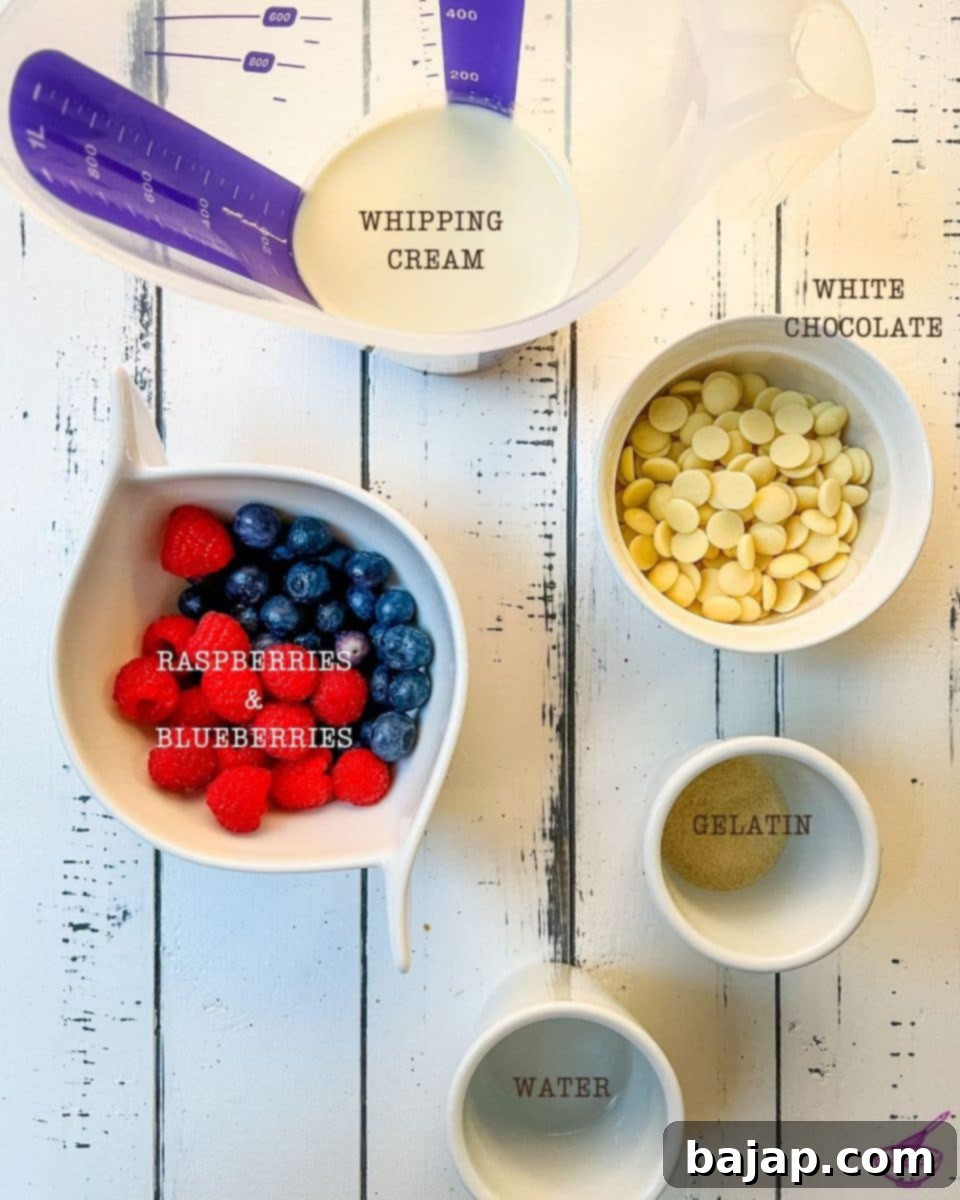
- Gelatin granules (for setting the glaze)
- Water
- Whipping cream
- White chocolate (finely chopped or chips)
- Extra Blueberries
- Extra Raspberries
- For a fun decorative touch, I suggest chocolate zebra rolls!
For precise quantities and a printable recipe card, please see the recipe card at the bottom of this post.
🔪 Instructions – How to Make the Best No-Bake 4th of July Cheesecake
Creating this stunning **no-bake cheesecake** is simpler than you might imagine. Follow these detailed steps to assemble your patriotic masterpiece, layer by delicious layer.
Crust Preparation
A perfect crust is the foundation of an excellent cheesecake. This recipe uses a flavorful graham cracker and walnut base that requires no baking.
- Crush the Biscuits and Walnuts: Begin by finely crushing your graham crackers (or Petit beurre biscuits) and ground walnuts. You can achieve this easily by placing them in a sturdy plastic bag and using a rolling pin, or for a quicker method, pulse them in a food processor until fine crumbs form. If you can find ready-made biscuit crumbs at the store, that’s a fantastic shortcut!
- Melt Butter and Milk: In a microwave-safe bowl, combine the butter and milk. Heat on a medium setting until the butter is completely melted. Alternatively, you can melt them gently in a saucepan over low heat on the stove. Important: Reserve 2 tablespoons of this molten butter mixture for later. Mix the remaining butter and milk with your crushed biscuit and walnut crumbs until everything is thoroughly combined and the mixture is slightly sticky when pressed.
- Prepare the Springform Pan: Line the bottom of your springform pan with parchment paper. Lightly brush this parchment paper with the 2 tablespoons of molten butter you set aside. Then, sprinkle the corn starch evenly over the buttered paper. Gently shake the pan to ensure an even coating, and then invert it to tap out any excess cornstarch.
- Chill the Pan: Place the prepared pan in the refrigerator for 2-3 minutes. This quick chill helps the crust set better and ensures the cheesecake pieces release cleanly once finished.
- Form the Crust: Once the pan is chilled, pour the biscuit and walnut mixture onto the prepared parchment paper. Using the back of a spoon or your hands, tightly and evenly press the mixture across the bottom of the pan, extending all the way to the edges. Ensure it’s compact and smooth.
- Freeze the Crust: Transfer the pan with the pressed crust to the freezer for at least 15 minutes, or until you’re ready to add the filling. This firm base is crucial for structural integrity.
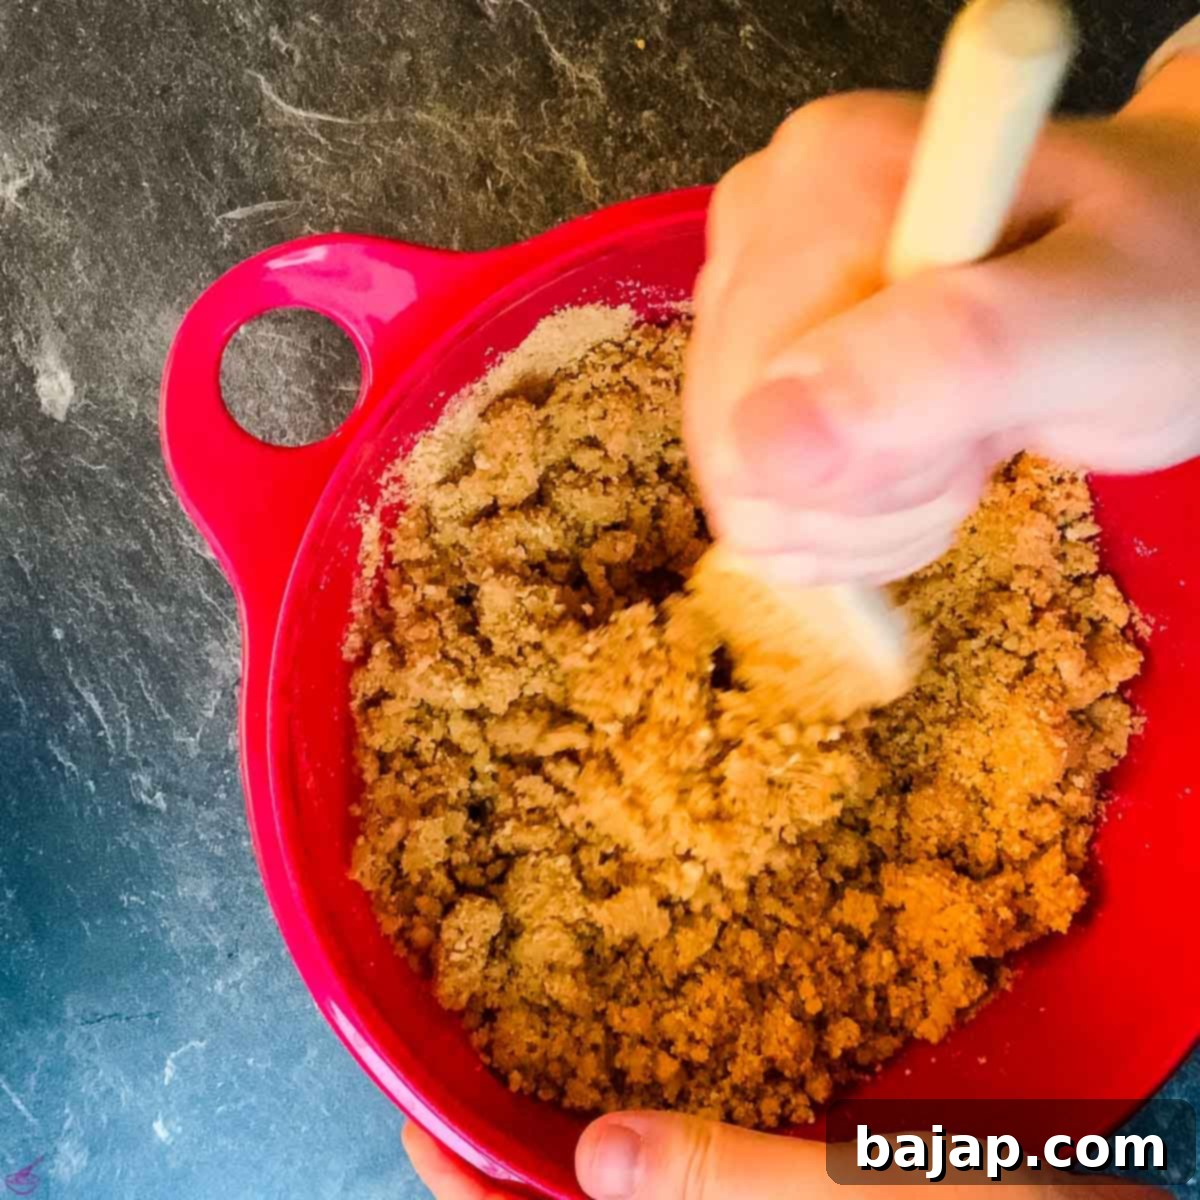
Combine the melted butter with the ground walnuts and crushed biscuits.
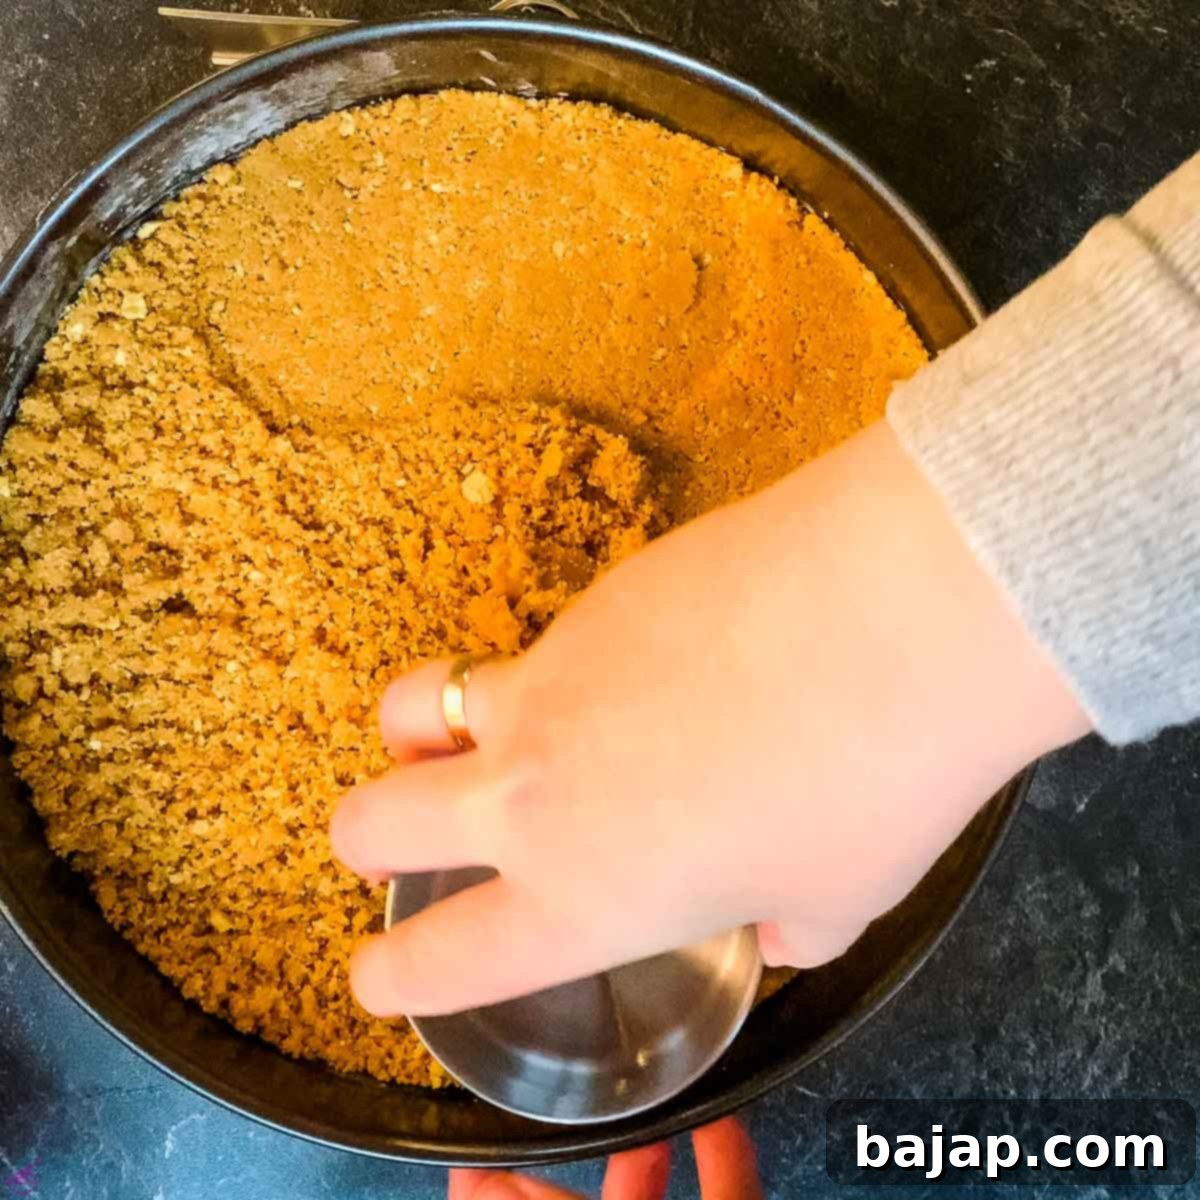
Press the walnut and biscuit crumbs firmly into the springform pan.
Cheesecake Filling Layers
Now comes the fun part: creating the creamy, colorful layers that define this **red, white, and blue dessert**. The key is to work in stages and allow for proper chilling.
Step 1 – Cheesecake Base Cream
First, we’ll prepare the foundational cream mixture that will form the body of all three layers.
- Whip Mascarpone: In a large mixing bowl, preferably with an electric mixer or stand mixer, beat the mascarpone cheese for 3-5 minutes until it becomes smooth and light. This aeration is key to a fluffy filling.
- Add Sugar and Cream Cheese: While continuously mixing, gradually incorporate the icing sugar into the mascarpone. Once combined, add the cream cheese and continue to mix until the mixture is uniform and creamy.
- Whip Whipping Cream: In a separate large bowl, using a clean whisk or mixer attachment, whip the heavy whipping cream until soft peaks form. Be careful not to over-whip.
- Gently Combine: Carefully fold the whipped cream into the mascarpone and cream cheese mixture, a little at a time, using circular motions. This manual step helps maintain the airiness of the whipped cream, resulting in a light, smooth texture.
- Divide the Base: Once all ingredients are well mixed and harmonious, divide the mixture evenly between three medium bowls. These three portions will become your blueberry, raspberry, and orange layers.
Step 2 – Blueberry Cream Layer (Blue)
The first vibrant layer for our patriotic cheesecake is the beautiful blueberry cream.
- Prepare Blueberry Sauce: In a medium-sized saucepan, combine ¼ cup (50 g) of sugar, ⅛ cup (30 ml) of water, and 1 cup (150 g) of fresh blueberries. Place the saucepan over medium heat, stirring continuously with a wooden spoon. As the mixture heats, gently crush the blueberries to release their juices and enhance their color. Continue to stir until the sugar has completely dissolved and you have a fragrant blueberry sauce.
- Strain and Mix: Pass the warm blueberry sauce through a fine-mesh sieve directly into one of the bowls of mascarpone base cream. This removes any skins or seeds, ensuring a perfectly smooth blueberry cream. Mix thoroughly until the cream is evenly colored and flavored.
- Spread and Freeze: Retrieve your springform pan with the chilled biscuit base from the freezer. Carefully and evenly spread the blueberry mascarpone cream over the crust. Once spread, return the pan to the freezer immediately. This allows the layer to firm up quickly, preparing it for the next layer.
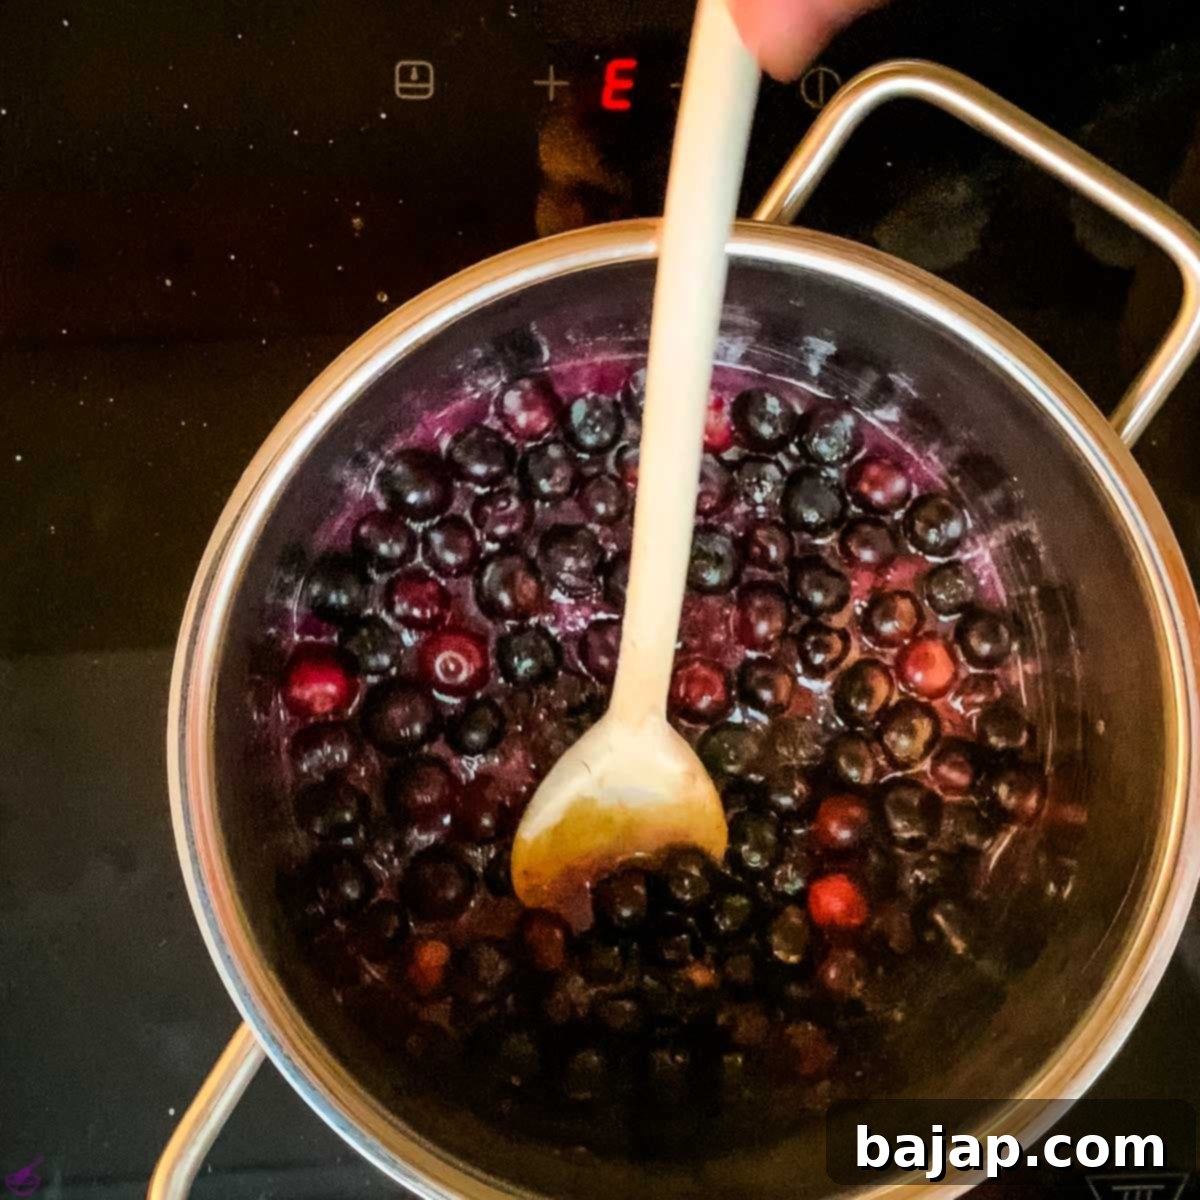
Make the blueberry flavoring.
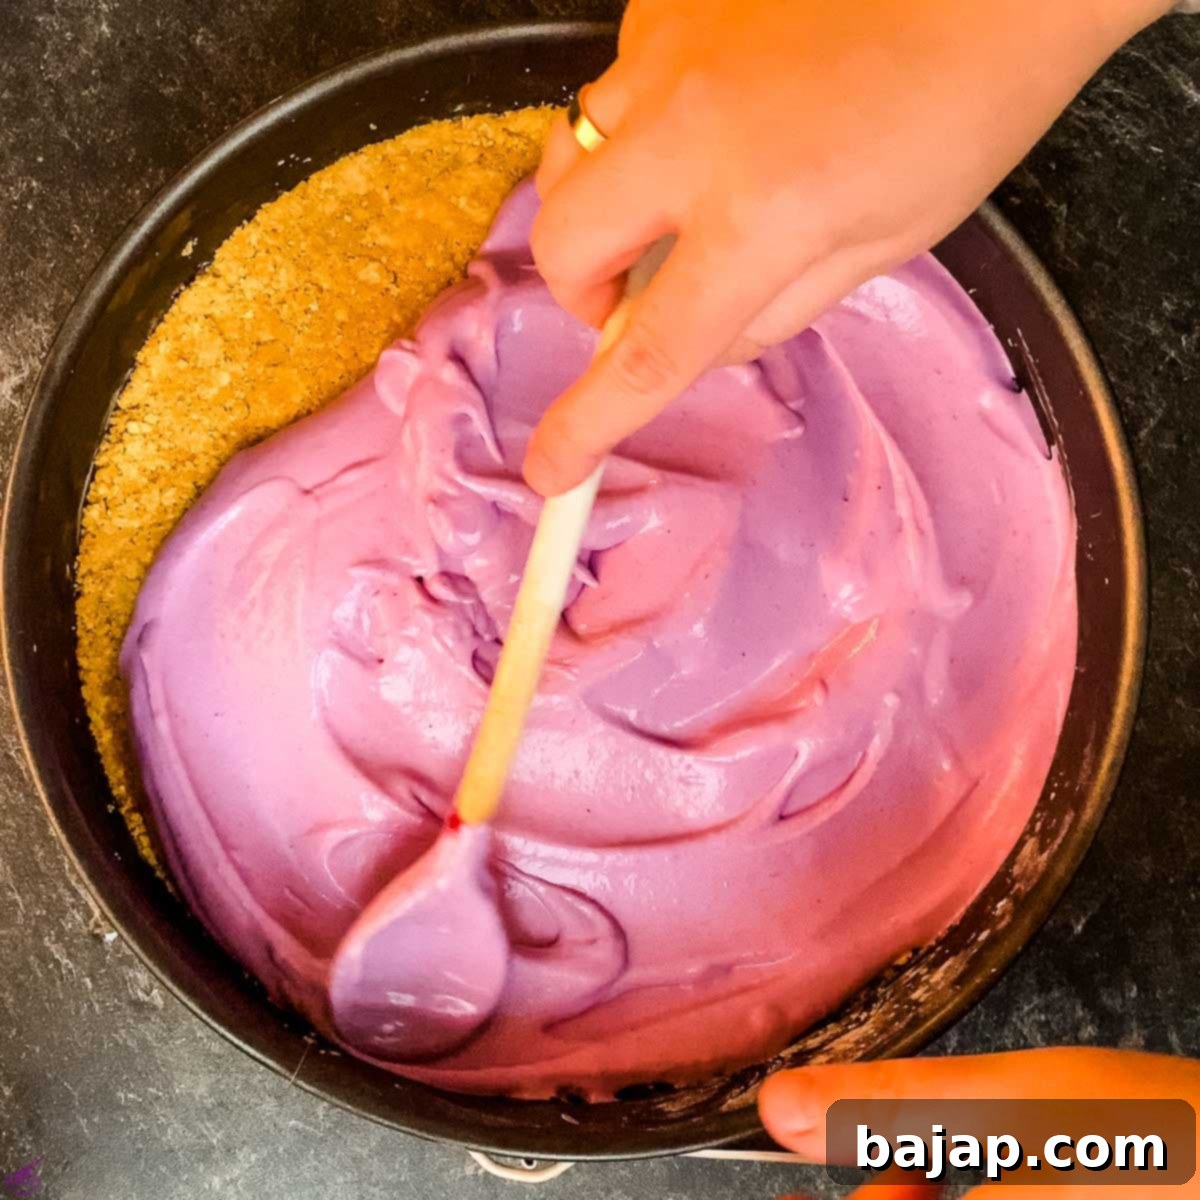
Spread the blueberry cream cheese on top of the crust.
Step 3 – Raspberry Cream Layer (Red)
Next, we add the bold red layer using fresh raspberries, creating another visually striking component.
- Prepare Raspberry Sauce: In a clean medium saucepan, repeat the exact same process as with the blueberries, using the same quantities of sugar, water, and 1 cup (150 g) of fresh raspberries. Stir and crush the raspberries over medium heat until a rich sauce forms and the sugar dissolves.
- Strain and Mix: Pass the raspberry sauce through a fine-mesh sieve into a second bowl of mascarpone base cream. Mix well to achieve a beautifully pinkish-red, smooth raspberry cream.
- Spread and Freeze: Retrieve the springform pan from the freezer. Thanks to the intermediate chilling, the blueberry layer should now be firm enough to easily spread the raspberry cream directly on top without mixing. Once the raspberry layer is smooth and even, place the pan back into the freezer.
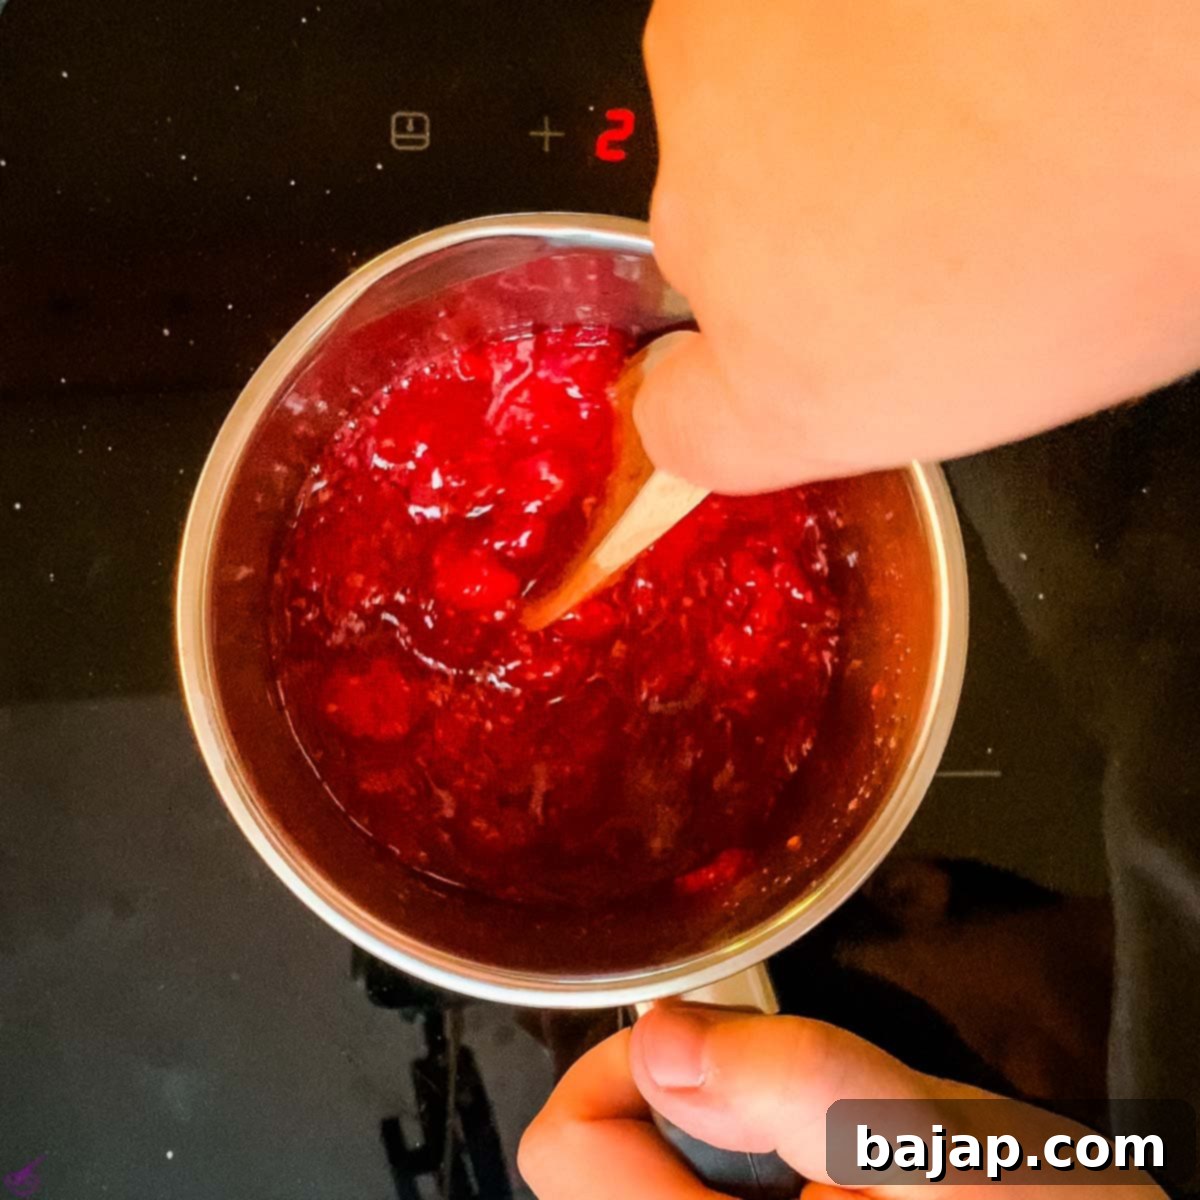
Make the raspberry flavoring.
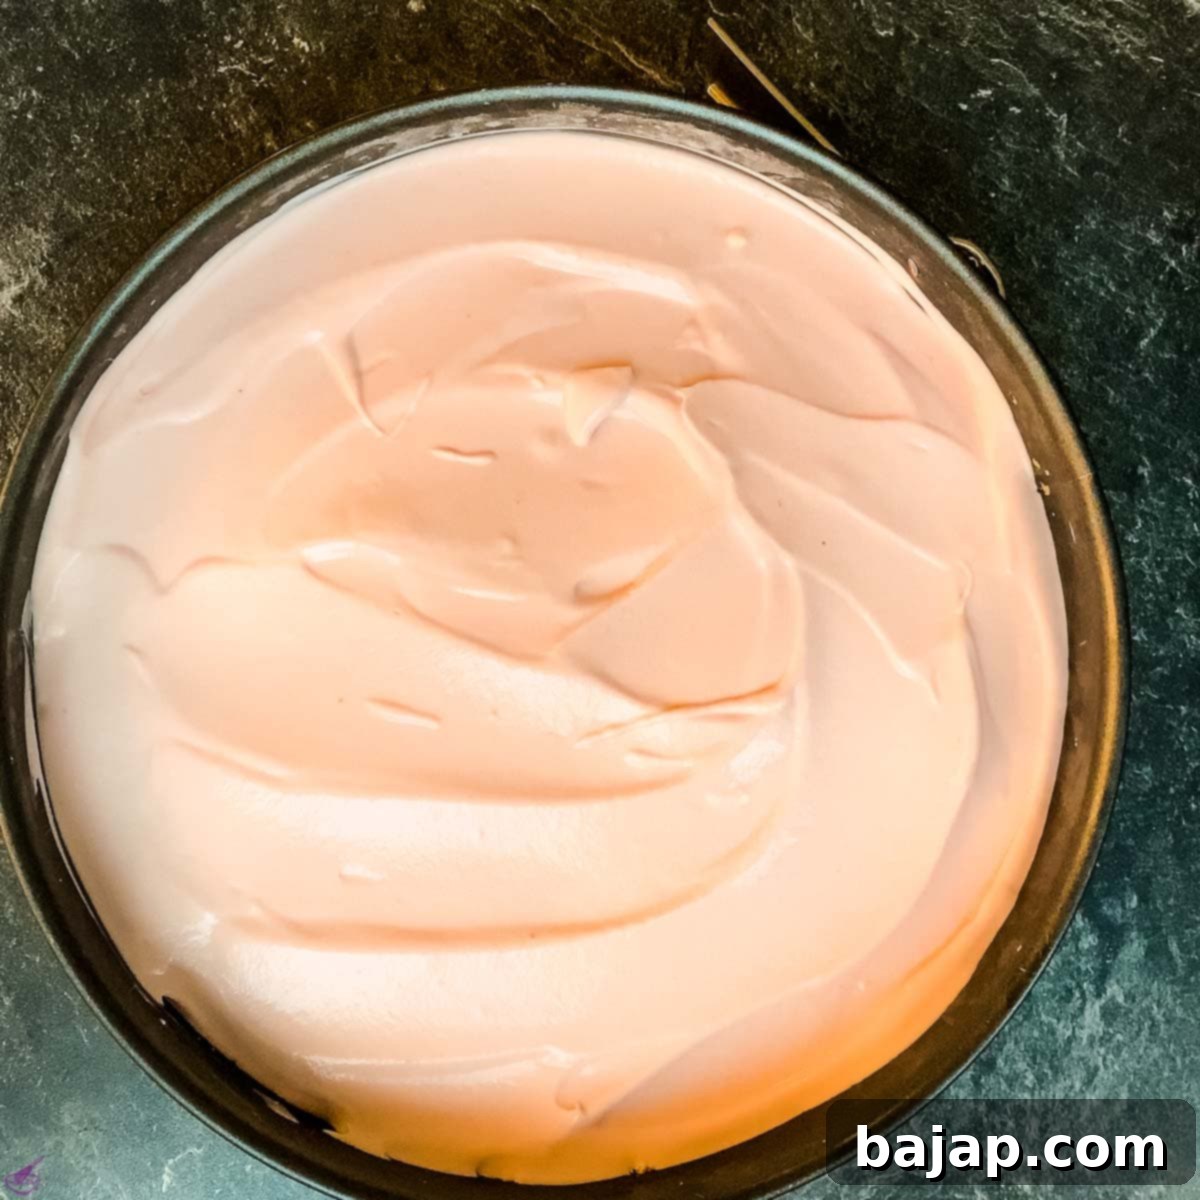
Spread the raspberry cream cheese on top of the blueberry layer.
Step 4 – Orange Cream Layer (White)
Finally, we complete the patriotic color scheme with a bright and zesty orange layer, representing the white in our red, white, and blue dessert.
- Prepare Orange Cream: Take the last bowl of mascarpone base cream. Squeeze one fresh orange and strain the juice directly into the cream to ensure no pulp or seeds.
- Mix and Spread: Mix the orange juice into the cream until it’s well combined and evenly flavored. This creates a natural pale yellow/orange hue, standing in for the “white” layer in our colorful design. Carefully spread this orange cream layer over the now-firm raspberry cream layer.
- Final Chill (Before Glaze): Place the cheesecake back in the freezer. Allow it to chill for at least half an hour before proceeding to make and apply the glaze. This extended chill is important for setting all the layers firmly.
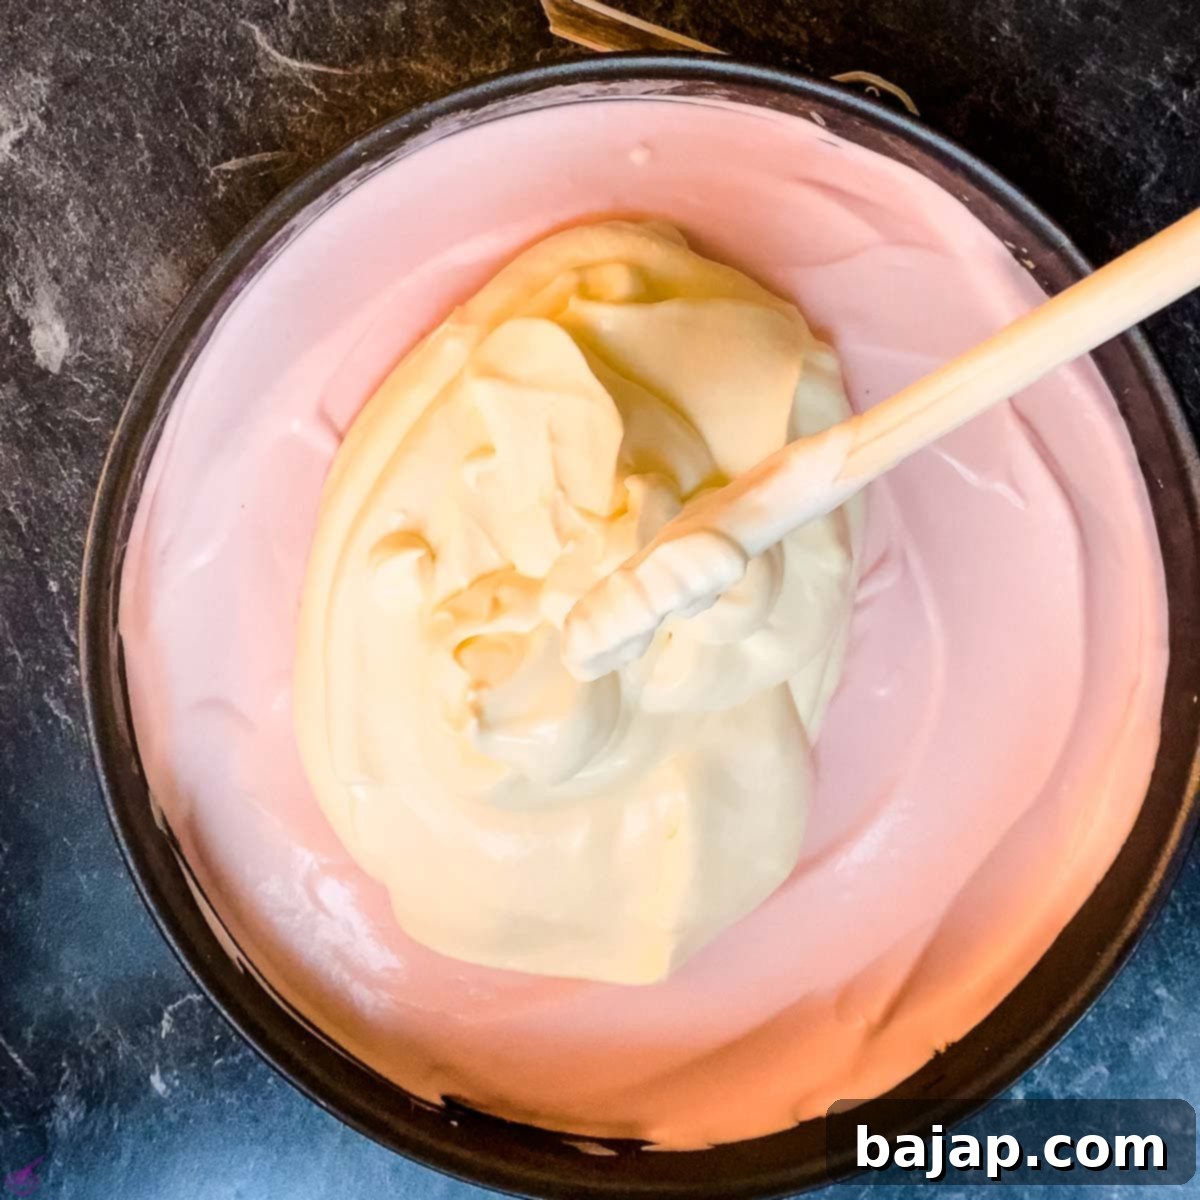
Add the orange cream cheese layer.
Glaze Application & Final Chill
The final step before the big chill is adding a beautiful, shiny glaze that not only looks professional but also locks in the flavors and layers.
- Hydrate Gelatin: In a small bowl, sprinkle the gelatin granules over the water and let them sit for 5 minutes to hydrate. This process is crucial for the gelatin to dissolve properly later.
- Heat Whipping Cream: While the gelatin is hydrating, heat the whipping cream in a microwave until it reaches over 60 °C (140 °F). This usually takes 2-3 minutes on a high setting, but watch it carefully to prevent boiling over.
- Combine Glaze Ingredients: Add the hydrated gelatin to the hot whipping cream, stirring until completely dissolved. Then, add the white chocolate (finely chopped) and mix continuously until the chocolate is fully melted and smoothly incorporated. You should have a uniform, glossy glaze.
- Pour the Glaze: Carefully retrieve the cheesecake from the freezer. Gently pour the prepared glaze evenly over the top orange layer of the cheesecake, ensuring it coats the entire surface.
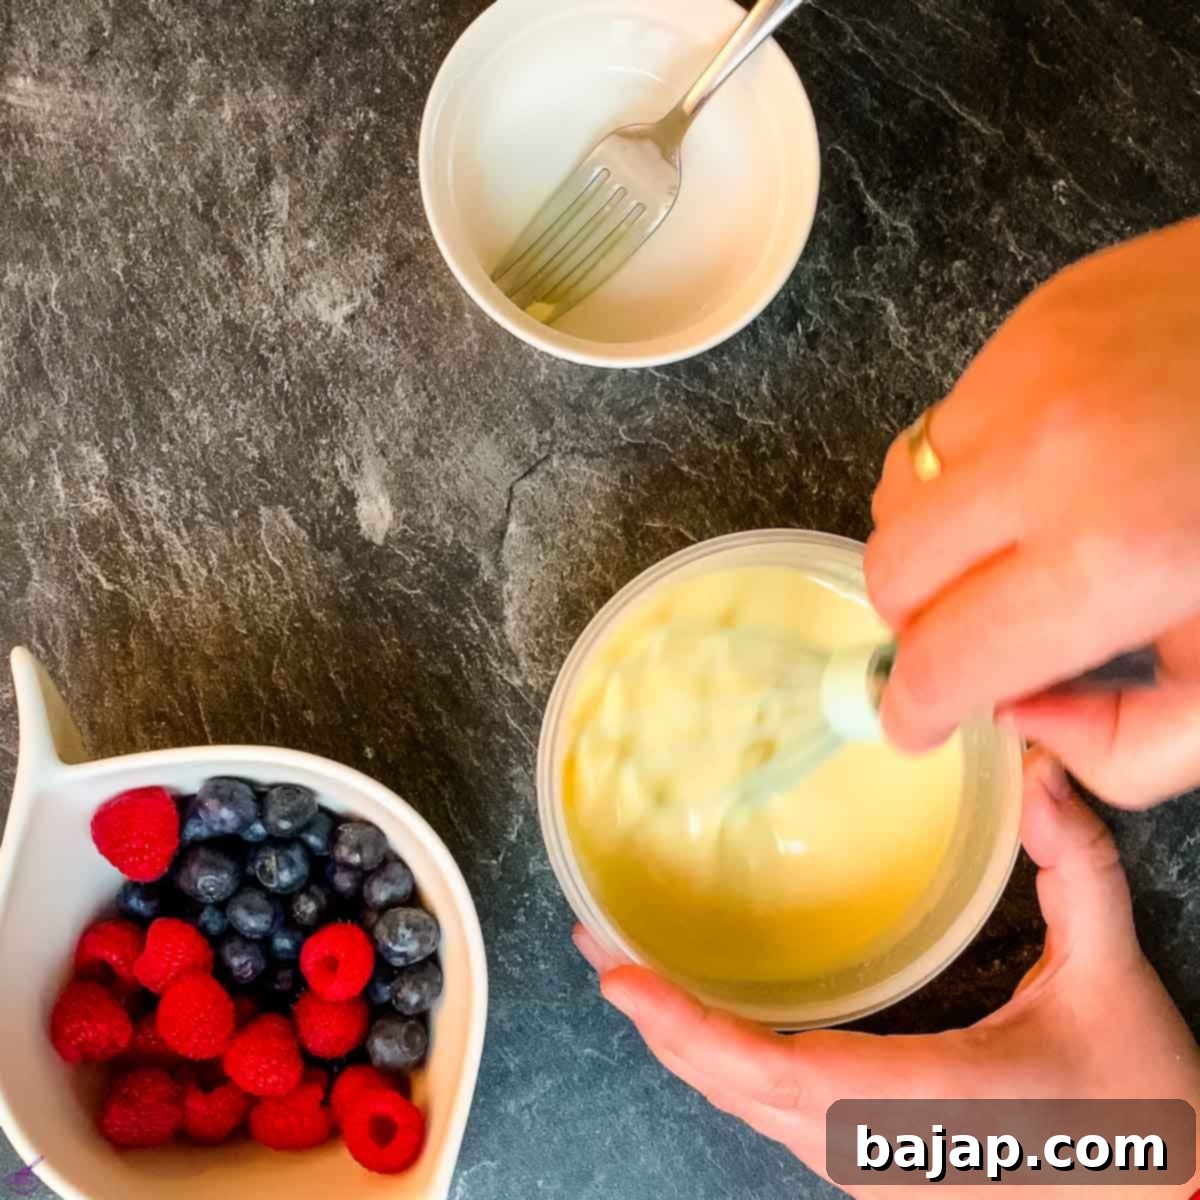
Combine the white chocolate, whipped cream, and gelatin.
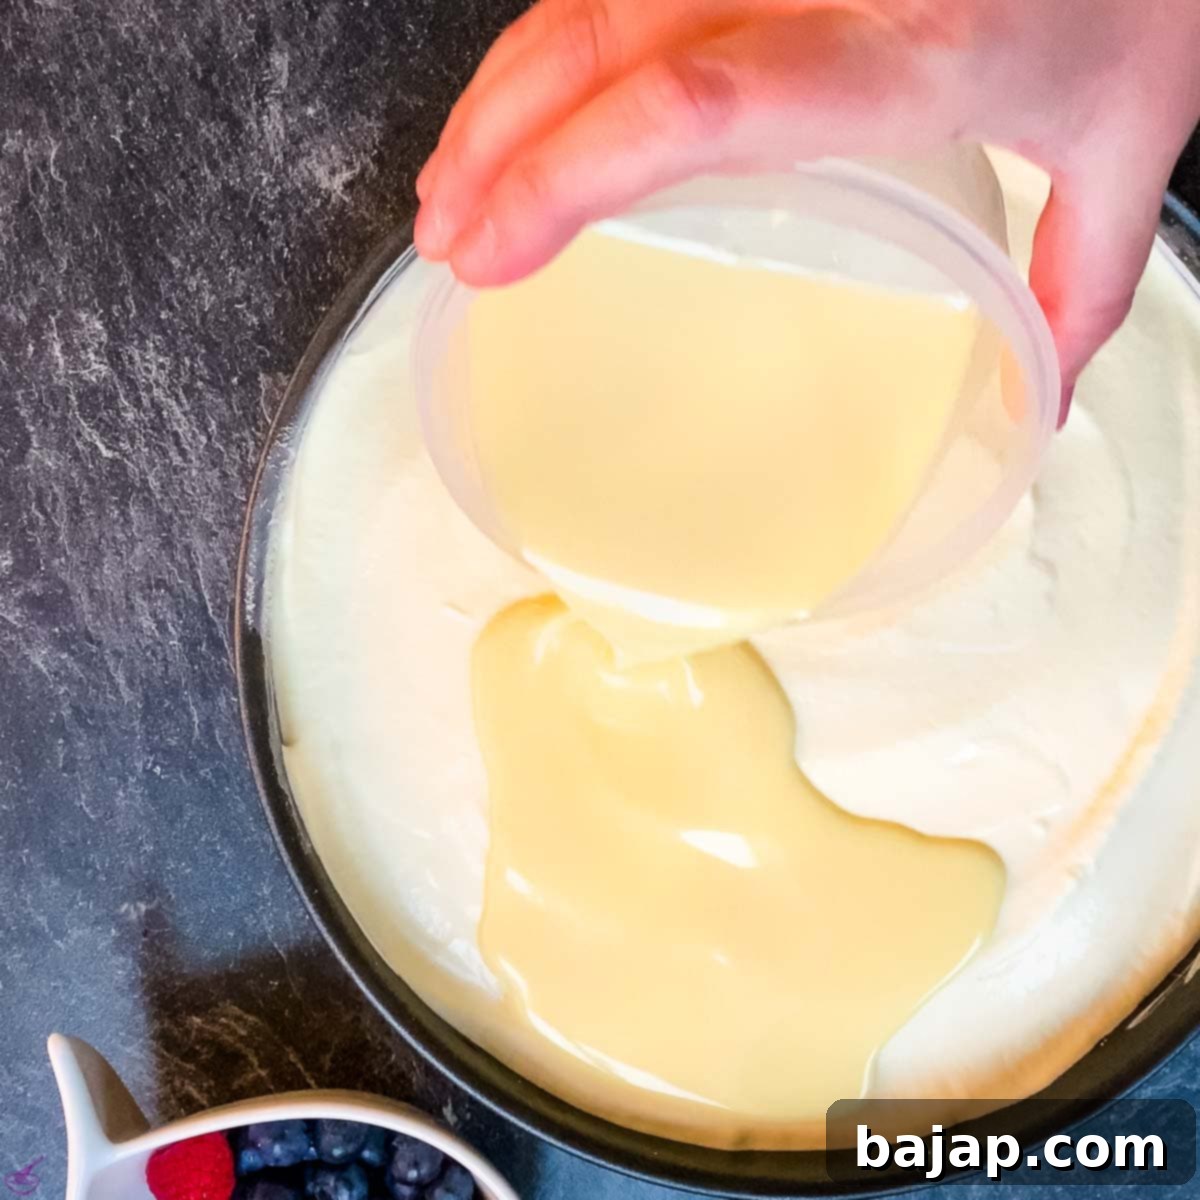
Pour the glaze over the orange cheesecake layer.
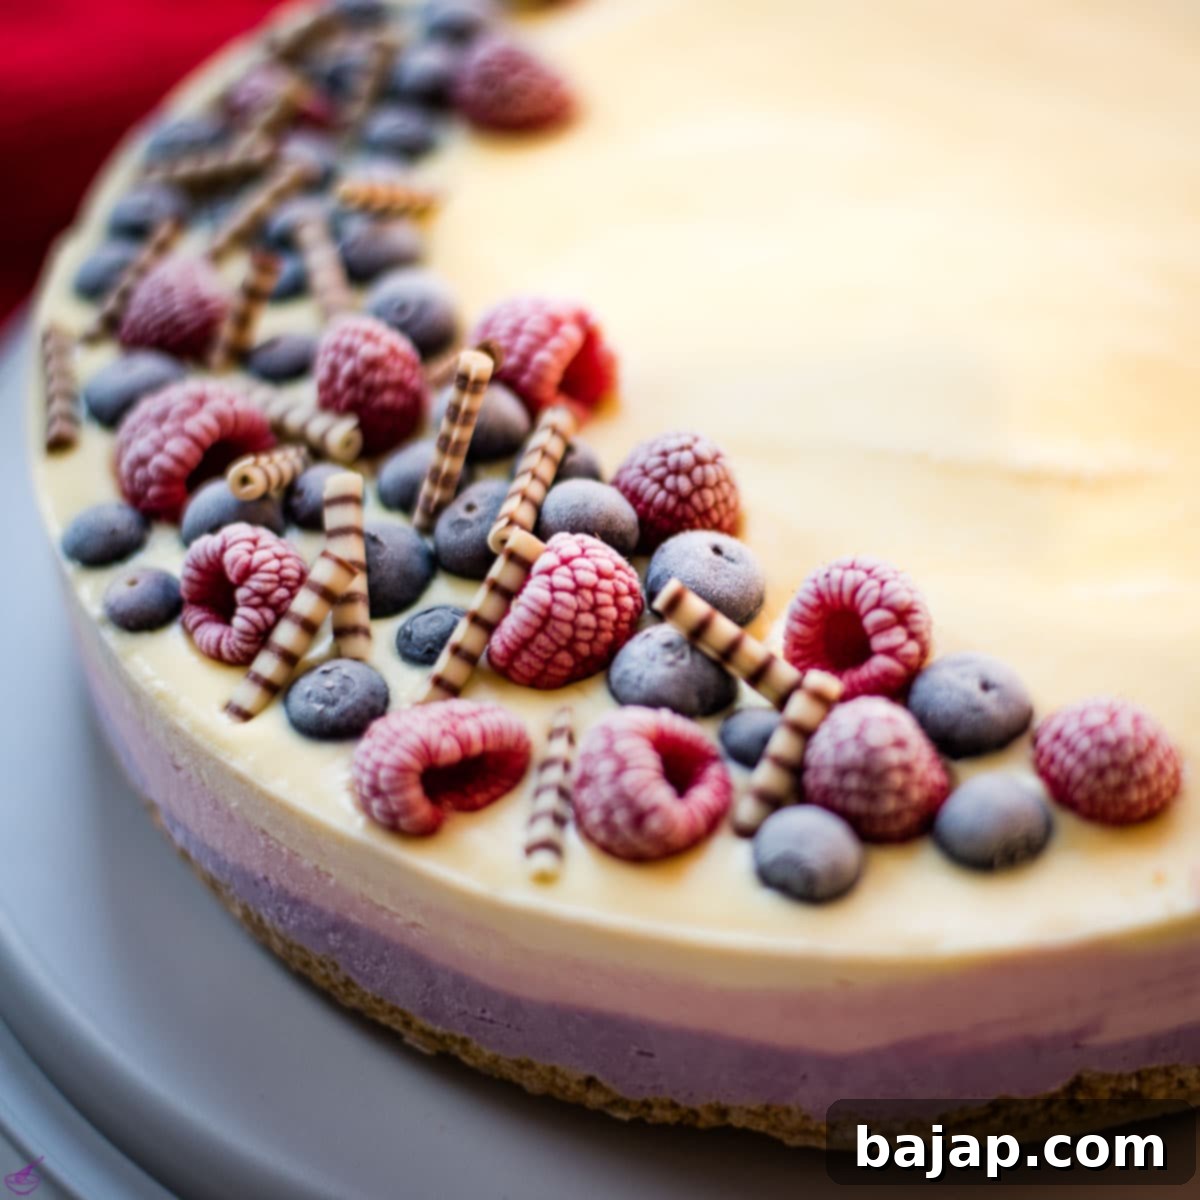
- Garnish and Final Freeze: Immediately after pouring the glaze, artfully arrange the remaining fresh blueberries and raspberries on top. If you’re using them, add a handful of elegant chocolate zebra rolls for extra flair.
- Long Chill: Place the entire cheesecake back into the freezer for at least 3 hours. For the absolute best results and a perfectly firm texture, I highly recommend freezing it overnight. This is the most crucial step for a successful no-bake cheesecake!
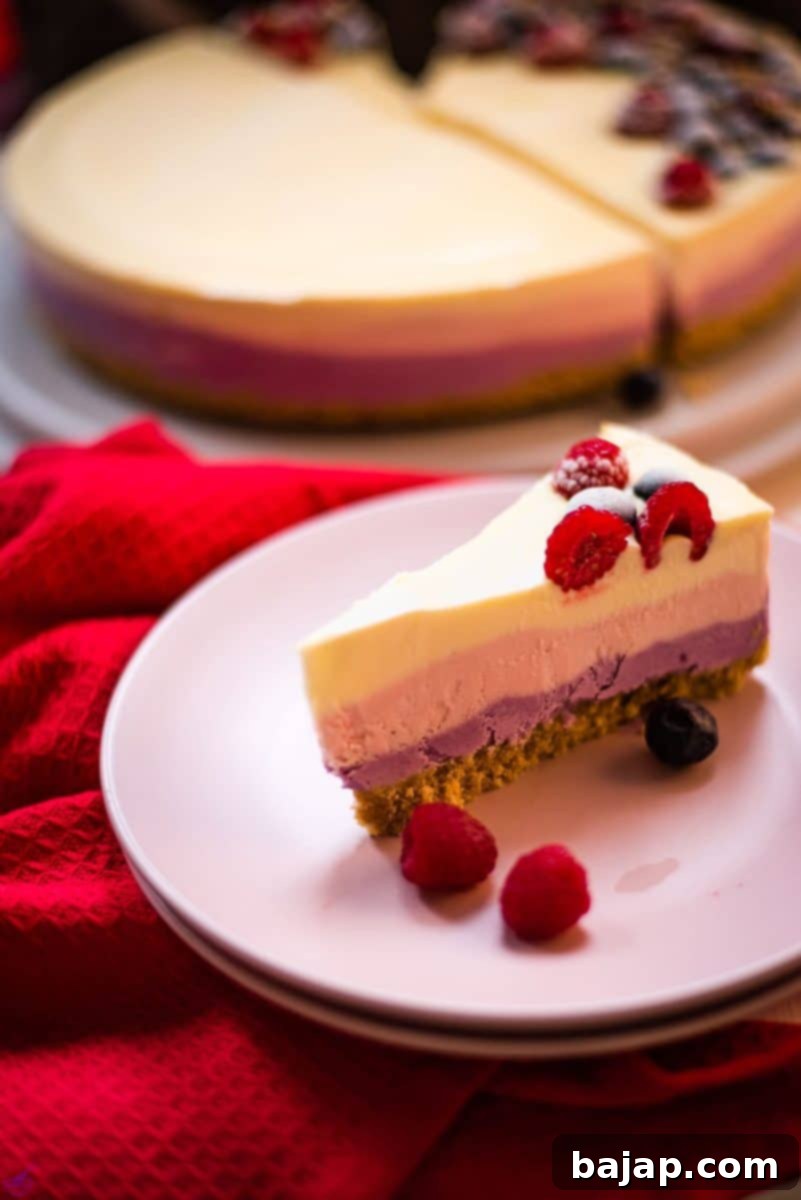
- Release and Serve: When the cheesecake is thoroughly hardened, gently release it from the springform pan. You can use a blow torch, a gas stove flame, or even a lighter to warm the outside of the pan briefly and carefully, which helps the edges detach cleanly. Once the cheesecake has thawed slightly to a desirable serving temperature (this can take about 30-60 minutes at room temperature, or longer in the fridge), it’s ready to slice and serve your guests!
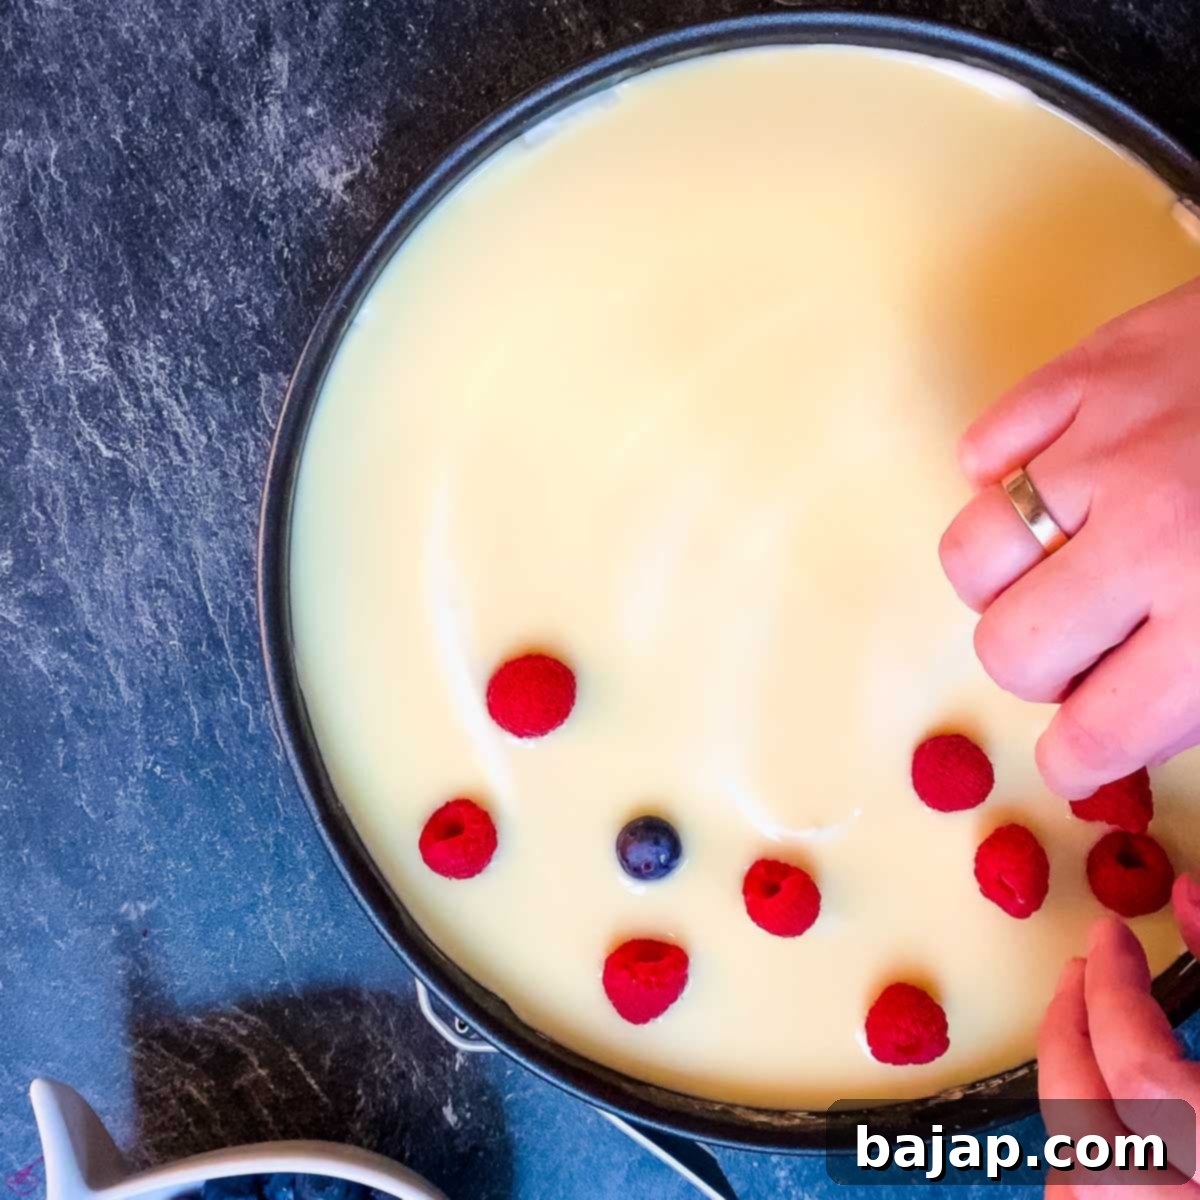
Decorate with fresh berries.
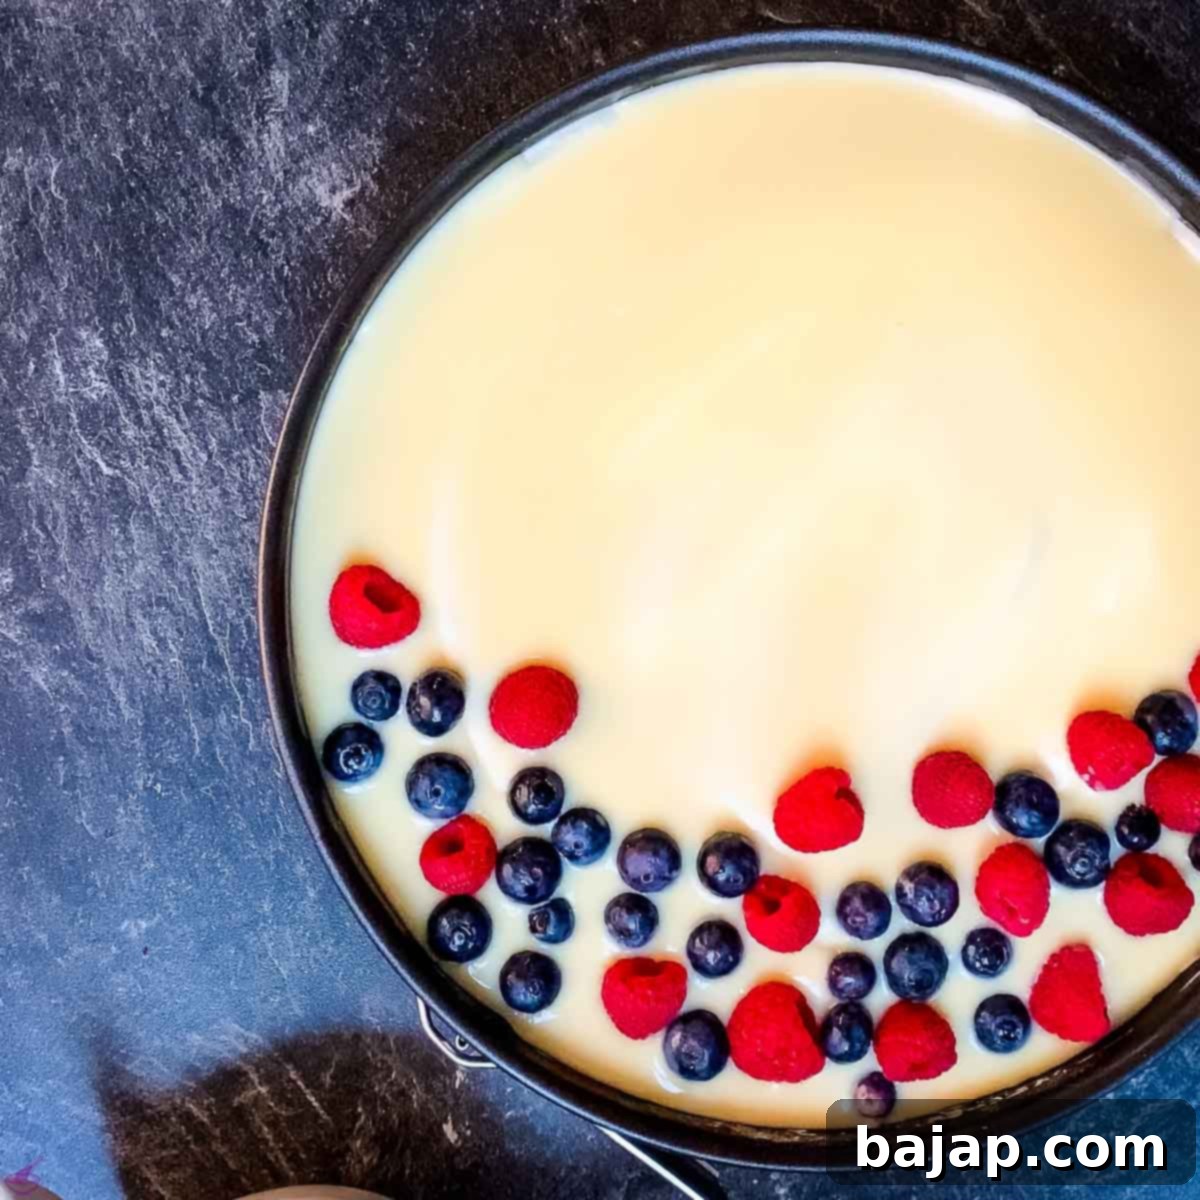
with raspberries and blueberries.
Remove the frozen cake from the pan.
🥜 Recipe Substitutions for Your No-Bake Cheesecake
While this recipe is perfect as written, here are some common substitutions you can make based on availability or dietary preferences:
- Mascarpone Alternatives: If mascarpone isn’t readily available, you can substitute it with a full-fat cream cheese for a denser texture, or ricotta cheese for a more moist result. If using ricotta, remember that it contains more moisture, so you might want to add an extra tablespoon or two of confectioners’ sugar during the final mixing to achieve the desired sweetness and consistency.
- Berry Swaps: Not a fan of raspberries? Strawberries make an excellent alternative and will still contribute to the festive red, white, and blue theme. Just like with raspberries, be sure to sieve the cooked strawberry sauce before incorporating it into the mascarpone mixture to ensure a silky-smooth layer. The vibrant red of strawberries will beautifully maintain your Fourth of July color scheme.
- Crust Variations: For the crust, if graham crackers or Petit beurre biscuits are hard to find, plain digestive biscuits or even vanilla wafers can work. You could also experiment with other nuts like pecans or almonds instead of walnuts for a different flavor profile.
🍽 Essential Equipment for Making this Cheesecake
Having the right tools makes the process of creating this no-bake masterpiece even smoother:
- Hand, Stand, or Electric Mixer (for whipping creams)
- Food processor (highly recommended for crushing biscuits and nuts quickly)
- Spatula (for mixing and spreading layers)
- Mixing bowls (several, for different layers)
- Whisk (if mixing by hand)
- Microwave (optional, for melting butter and heating cream)
- Springform Pan (essential for easy release)
- Parchment Paper (for lining the pan)
- Fine-mesh sieve (crucial for smooth fruit layers)
🌡 Storage & Top Tips for the Perfect Cheesecake
To ensure your **no-bake 4th of July cheesecake** is always at its best, here are some storage guidelines and expert tips:
- Storage: This cheesecake can be stored in an airtight container in the refrigerator for 3-5 days. However, given its fresh ingredients and deliciousness, it’s rare for it to last that long! You can also freeze individual slices for up to a month, wrapped tightly in plastic wrap and then foil.
- Servings: This generous recipe typically yields 16-20 servings, making it perfect for parties and gatherings.
- Achieving Smoothness: For the absolute best possible texture in your fruit layers, **always sieve** the cooked raspberry, blueberry, and freshly squeezed orange juice before folding them into their respective mascarpone mixtures. This step removes seeds and pulp, ensuring an incredibly smooth and luxurious cream.
- Layering Perfection: The intermittent freezing steps are not optional. They are key to creating distinct, clean layers. Do not rush this process!
- Thawing Before Serving: While the cheesecake is stored in the freezer, it needs time to thaw to a creamy consistency before serving. Remove it from the freezer and place it in the refrigerator for at least 2-3 hours, or at room temperature for about 30-60 minutes, depending on your desired firmness.
- Pairing Suggestions: To keep the patriotic theme going, consider serving your cheesecake alongside festive treats like red white and blue jello shots or a batch of blue muddy buddies!
🙋🏻 Frequently Asked Questions About No-Bake Cheesecakes
The secret to a perfectly firm no-bake cheesecake lies in adequate chilling time. While no baking is involved, it’s crucial to place your cheesecake in the freezer for at least three hours, but preferably overnight. This extended chilling allows the cream cheese and mascarpone mixture, along with the gelatin in the glaze, to set properly, transforming it from a pudding-like consistency into a sliceable, firm cheesecake. Skipping or shortening this step will result in a soft, unset dessert.
No, absolutely not! The beauty of a no-bake cheesecake is that literally nothing goes into the oven. This includes the crust. Our recipe uses a delicious mixture of crushed graham crackers and walnuts, bound with melted butter and milk. This mixture is simply pressed into the pan and then chilled or frozen, hardening to create a sturdy and flavorful base without any baking required. Forget pre-baking, cooling on wire racks, or even buying a pre-made crust – everything is prepared easily on your kitchen counter!
Generally, most no-bake cheesecakes will last 4-5 days when stored properly in an airtight container in the refrigerator. For this specific **no-bake 4th of July cheesecake**, which incorporates fresh berries that have a slightly shorter shelf life, I recommend enjoying it within 3-5 days for optimal freshness and taste. Beyond that, the quality and texture may start to diminish.
The primary difference, as the names suggest, is the cooking method: one is baked in an oven, while the other sets in the refrigerator or freezer. A key ingredient found in most baked cheesecakes but absent in no-bake versions is eggs. Baked cheesecakes rely on eggs as a binder and to achieve their signature dense, custard-like, yet fluffy texture when cooked. No-bake cheesecakes, on the other hand, achieve their firm, creamy consistency through chilling, often utilizing gelatin or extra whipping cream to help them set. While some argue for the superior texture of baked cheesecakes, I believe both types offer unique and equally delicious experiences. Plus, no-bake cheesecakes offer the significant advantage of no cooling time after cooking, meaning you can enjoy them sooner!
🍰 More Delicious Cheesecake Recipes to Try
If you’ve fallen in love with this **no-bake 4th of July cheesecake**, you’ll surely enjoy these other fantastic cheesecake creations:
- No-bake Chocolate Ricotta Cheesecake
- No-bake Pumpkin Cheesecake
- No-bake White Chocolate Raspberry Cheesecake {Halloween}
- Fig Cheesecake in a Jar
- No-bake Mint Chocolate Cheesecake
- Eggnog Cheesecake
- 5-Ingredient Mini Oreo Cheesecakes
If you give this recipe a try, I’d be absolutely thrilled to hear from you! Please consider rating it with ★★★★★ stars and leaving a comment below to share your experience. Your feedback is truly awesome! You can also sign up for our Newsletter or follow me on Pinterest or Instagram and share your delightful creation with me. Don’t forget to tag me @combinegoodflavors and use the hashtag #combinegoodflavors, so I don’t miss it!
📖 Recipe: No-Bake Fourth of July Cheesecake
Fourth of July Cake
By Nora
Save RecipeSaved!
Pin Recipe
Equipment
-
Hand or stand mixer
-
Springform pan 12 inch // 30 cm
-
Food processor
-
Mixing bowls
-
Spatula
-
Whisk
-
Microwave optional
-
Parchment Paper
-
Fine-mesh sieve
Ingredients
Crust
- 10 oz Biscuits Graham cracker or petit beurre biscuits
- 5 oz Butter
- ¼ cup Milk
- ½ cup Walnuts
- 1 tablespoon Cornstarch
Cheesecake Filling
- 25 oz Mascarpone
- 15 oz Cream cheese
- 1 cup Whipping cream
- ¾ cup Icing sugar
- 1 cup Blueberries
- ⅛ cup Water
- ¼ cup Sugar
- 1 cup Raspberries
- ⅛ cup Water
- ¼ cup Sugar
- 1 Orange freshly squeezed
Glaze
- ⅓ tablespoon Gelatin granules
- ⅛ cup Water
- 7 tablespoon Whipping cream
- ¼ cup White chocolate
- ¼ cup Blueberry/Raspberry
- Zebra rolls
Instructions
Crust
-
Crush 10 oz Biscuits and ½ cup Walnuts with a rolling pin once you put them in a plastic bag. If you can get biscuit crumbs in the market, go for them or use a food processor for crushing the biscuits.10 oz Biscuits, ½ cup Walnuts
-
Place 5 oz Butter and ¼ cup Milk in a microwave-safe bowl and melt it on a medium setting until the butter is completely molten.5 oz Butter, ¼ cup Milk
-
Save 2 tbsp. on the side and mix the rest of the butter and milk with the crushed biscuits and walnuts.
-
Mix until all the crumbs are mixed well with the butter.
-
Put parchment paper on the bottom of the cake pan and brush it with the molten butter that we kept on the side. Sprinkle 1 tablespoon Cornstarch on top of the paper and shake the cake pan until it’s evenly covered with cornstarch, and get rid of the excess by turning it over.1 tablespoon Cornstarch
-
Place in the refrigerator for 2-3 minutes.
-
Once the starch and butter dusting is cooled, pour the biscuit mix on top of it and tightly press it evenly till the edges of the cake pan.
-
Put it in the freezer for at least 15 minutes
Cheesecake filling
-
In a big mixing bowl (ideally the one of your kitchen machine) add 25 oz Mascarpone and mix it with a mixer for 3-5 minutes until it softens.25 oz Mascarpone
-
While mixing, gradually add ¾ cup Icing sugar to the mascarpone, and after that 15 oz Cream cheese.15 oz Cream cheese, ¾ cup Icing sugar
-
In a second bowl, mix 1 cup Whipping cream till it makes soft peaks on the mixers whisks.1 cup Whipping cream
-
Gradually combine the mascarpone mix and whipping cream by hand with circling movements.
-
After all the ingredients are well combined, separate them equally in 3 mixing bowls, so you can create the different flavors and colors.
-
With two different pans start making the flavoring.
-
In one pan, put ¼ cup Sugar (50 g), ⅛ cup Water (30 ml), and 1 cup Blueberries (150 g), and put on medium heat until the sugar is completely dissolved and mix with a spatula so you crush the blueberries.1 cup Blueberries, ⅛ cup Water, ¼ cup Sugar
-
Pass the blueberry sauce through a close-meshed sieve directly into the mascarpone cream and mix well to obtain an excellent cheesecake cream.
-
Take the springform pan with the biscuit base out of the freezer and evenly spread the blueberry mascarpone cream over it. Then put it back in the freezer.
-
Repeat the same process in a different pan with the raspberries.
-
Put ¼ cup Sugar (50 g), ⅛ cup Water (30 ml), and 1 cup Raspberries (150 g), and put on medium heat until the sugar is completely dissolved and mix with a spatula so you crush the raspberries.1 cup Raspberries, ⅛ cup Water, ¼ cup Sugar
-
Again, pass the raspberry sauce through a fine mesh sieve to mix with the cream. Then spread it as a second layer directly on top of the blueberry layer.
-
Then place it back in the freezer.
-
For the orange cream, squeeze 1 Orange and strain the freshly squeezed orange juice into the mascarpone cream.1 Orange
-
Mix the cream well with the orange juice and spread over the raspberry cream layer.
-
Place back in the freezer. Leave it there for about half an hour before frosting the cheesecake.
Glaze
-
Start making the glaze by putting ⅓ tablespoon Gelatin granules in ⅛ cup Water and leave them to hydrate for 5 minutes.⅓ tablespoon Gelatin granules, ⅛ cup Water
-
Meanwhile, put 7 tablespoon Whipping cream in a microwave till it goes over 60 °C // 140 °F (or 2-3 minutes on high setting).7 tablespoon Whipping cream
-
After that, add the gelatin to the cream, as well as ¼ cup White chocolate, and mix them till they combine well.¼ cup White chocolate
-
Once combined, pour the glaze on top of the cheesecake.
-
Garnish with ¼ cup Blueberry/Raspberry, and add some Zebra rolls if you fancy.¼ cup Blueberry/Raspberry, Zebra rolls
-
Put the cheesecake in the freezer for at least 3 hours (preferably overnight).
-
When the cake is hardened, remove it from the spring form.
-
Once thawed, serve.
Nutrition values are estimates only, using online calculators. Please verify using your own data.

🤎 You Might Also Like These Festive Desserts
If you’re looking for more delightful treats to complement your celebrations or simply enjoy year-round, here are some other recipes you might love:
- National Cheesecake Day {July 30th}
- Simple Layered Eggnog Vanilla Pudding Dessert
- Fig Cheesecake in a Jar {no-bake}
- No Bake Pumpkin Cheesecake
⛑️ Important Food Safety Guidelines
Ensuring food safety is paramount when preparing any meal, even a no-bake dessert. Please keep these guidelines in mind:
- Always cook ingredients (if applicable) to a minimum safe internal temperature of 165 °F (74 °C) to eliminate harmful bacteria. (Though largely no-bake, some initial steps involve heating).
- Avoid cross-contamination: Do not use the same utensils or cutting boards on cooked food that previously touched raw ingredients without thorough washing.
- Always wash your hands thoroughly with soap and water before and after handling food, especially if you’ve touched raw ingredients.
- Do not leave perishable foods, like this cheesecake, sitting out at room temperature for extended periods. Refrigerate promptly.
- Never leave cooking food unattended on the stove or in the microwave.
- If you are using oils for any purpose, choose those with a high smoking point to avoid the formation of harmful compounds.
- Always ensure good ventilation in your kitchen when using a gas stove or other cooking appliances.
For further comprehensive information and guidelines, always refer to reputable sources like Safe Food Handling – FDA.
