Delicious Marbled Heart Cookies with Fig Jam: An Easy & Elegant Sugar Cookie Recipe
Prepare to infuse your day with a touch of sweetness and beauty! Today, we’re unveiling a truly enchanting recipe: our exquisite **marbled heart cookies**, each one a delicate masterpiece filled with luscious fig jam. These aren’t just any cookies; they are an experience, offering a delightful treat for both the eyes and the palate.
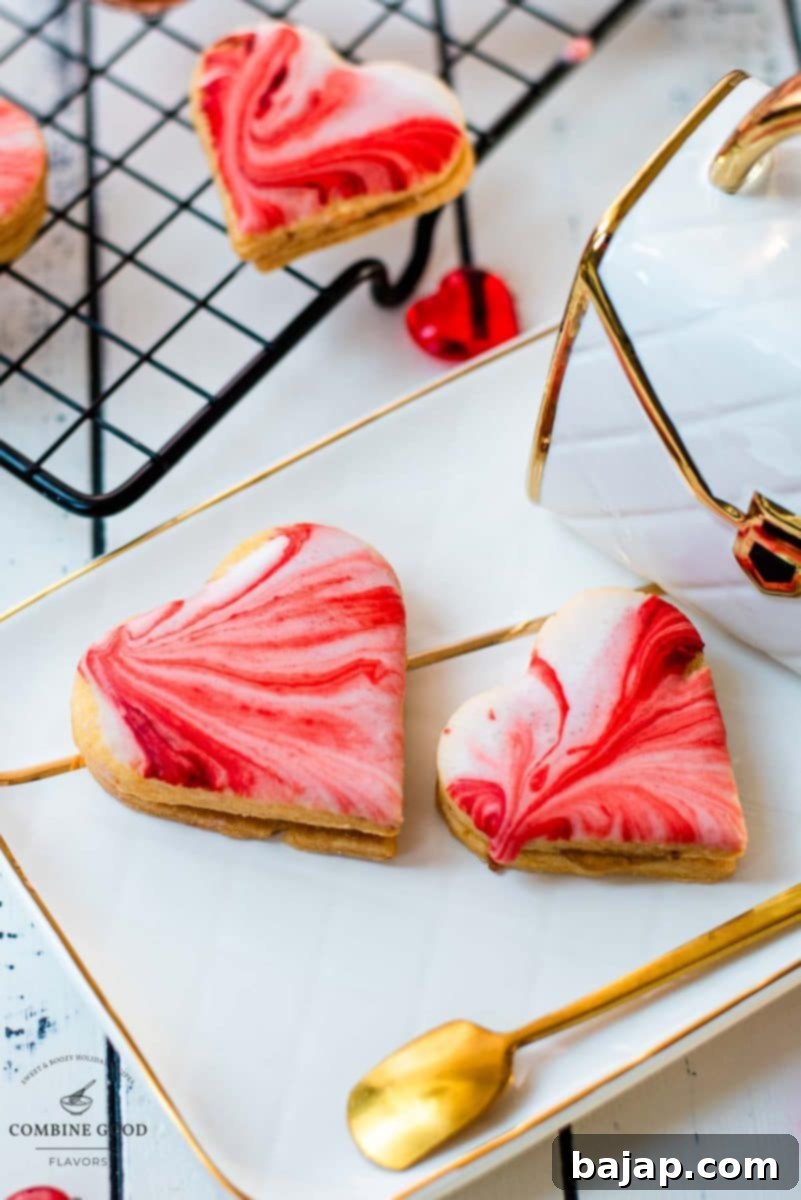
Picture this: perfectly formed, buttery cookies, adorned with a captivating red and white marbled icing that swirls together like a work of art. Tucked within each sweet embrace is a generous dollop of rich, flavorful fig jam, creating a harmonious blend of textures and tastes. These **fig jam-filled sugar cookies** are more than just a dessert; they are a celebration in edible form.
While their heart shape naturally makes them a popular choice for Valentine’s Day, their charm extends far beyond. These **marbled sugar cookies** are also an ideal, heartfelt gift for Mother’s Day, a thoughtful gesture for birthdays, anniversaries, or simply a delightful surprise for anyone you wish to make smile. They transform an ordinary day into something truly special, spreading joy with every bite.
The best part? Crafting these beautiful **homemade heart cookies** is surprisingly simple, making them accessible to bakers of all experience levels. Whether you’re a beginner looking for an impressive yet achievable project or a seasoned pro seeking a delightful recipe, these cookies are designed to please. Get ready to enchant your family and friends with cookies that are not only stunning to look at but also utterly irresistible in flavor. Let’s embark on this delightful baking journey and create something truly memorable!
🥘 Ingredients for Marbled Heart Cookies
Crafting these delightful marbled heart cookies requires a selection of quality ingredients that work in harmony to create a perfect balance of flavor and texture. Here’s a detailed look at what you’ll need and why each component is essential for achieving bakery-quality results.
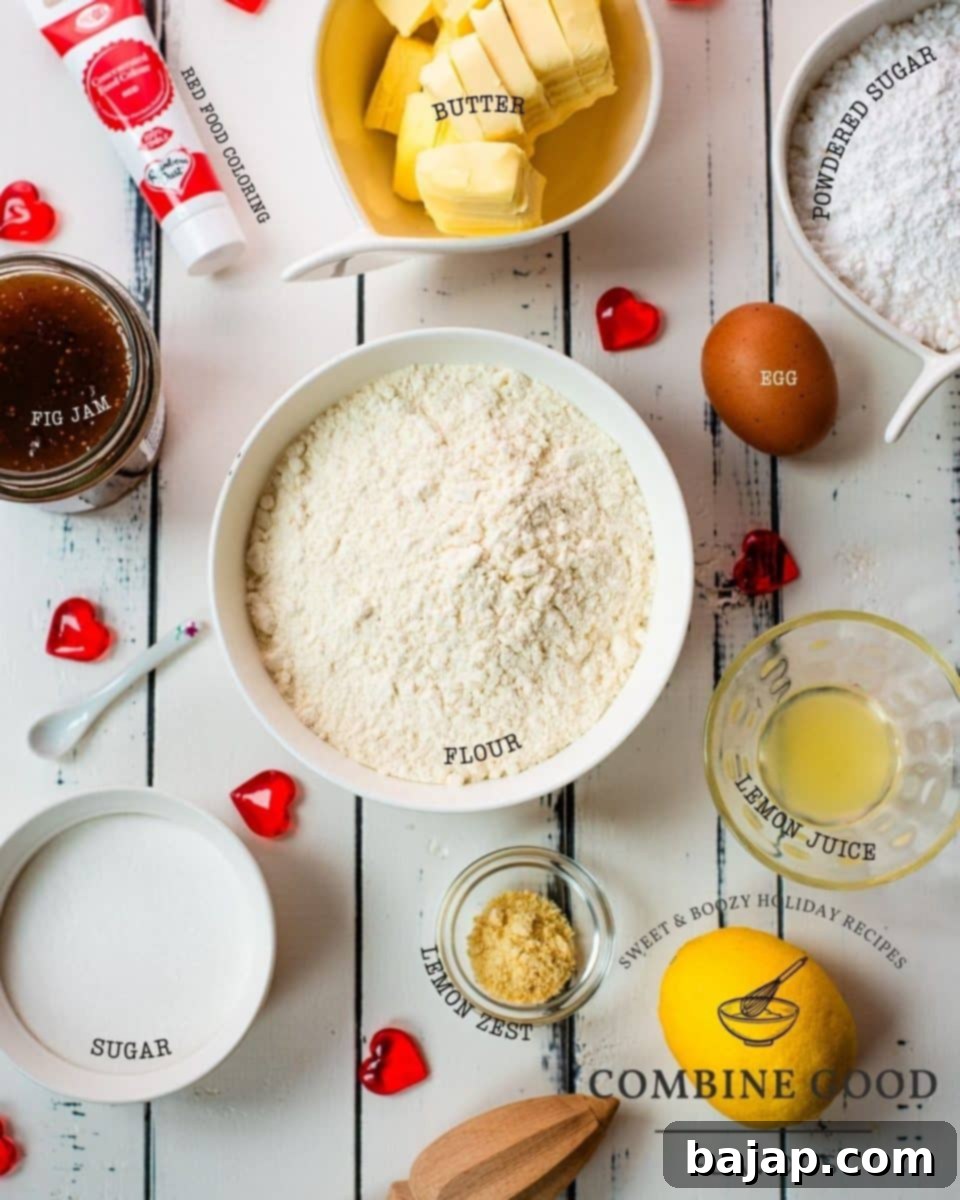
For the Delicate Cookie Dough
- Unsalted Butter (Cold & Diced): Using cold butter is crucial for creating that coveted flaky, tender cookie texture. When butter is cold, it melts slowly during baking, releasing steam that creates air pockets and prevents the dough from spreading too quickly. Unsalted butter allows you to control the exact salt content in your cookies.
- Medium-Sized Egg: A single medium egg provides essential moisture and acts as a binding agent, bringing the dough together and contributing to a rich, golden color and soft crumb. We’ll be using only the yolk for the dough, reserving the white for the icing.
- Cake Flour: This is a secret weapon for light, delicate cookies! Cake flour is distinguished by its fine milling and lower protein content compared to all-purpose flour. This results in less gluten development, leading to exceptionally tender and soft cookies that truly melt in your mouth.
- Fine Granulated Sugar: Opting for fine granulated sugar ensures that it dissolves evenly into the butter and flour, contributing to a consistently sweet flavor and a perfectly smooth dough texture without any grittiness.
- Fresh Lemon Zest: Don’t skip the lemon zest! It introduces a bright, fragrant, and slightly tangy citrus note that beautifully complements and balances the rich sweetness of the fig jam. It adds a layer of freshness that elevates the entire cookie experience.
- Fig Jam (High-Quality): The heart of these cookies! A delicious, high-quality fig jam provides a luxurious, fruity sweetness and a wonderfully soft, chewy contrast to the crisp cookie. Its distinct flavor pairs perfectly with the lemon zest and buttery dough. Choose a jam that you genuinely love, as its flavor will shine through.
For the Stunning Marbled Icing
- Powdered Sugar (Confectioners’ Sugar): This finely ground sugar is essential for creating an incredibly smooth, lump-free, and creamy glaze. It’s what gives the marbled icing its beautiful, professional finish.
- Fresh Lemon Juice: Beyond just adding a delightful, refreshing citrus tang to the glaze, fresh lemon juice plays a critical role in thinning out the powdered sugar to achieve the ideal drizzling consistency. This ensures your cookies will have a gorgeous, glossy, and evenly coated finish with vibrant marble patterns.
- Red Food Coloring (Gel or Liquid): To achieve that eye-catching, vibrant red swirl against the white glaze, red food coloring is key. We recommend using gel food coloring for its concentrated color and minimal impact on glaze consistency, allowing you to easily create beautiful, striking marble effects.
For precise measurements and detailed quantities, please refer to the comprehensive recipe card provided below.
🔪 Step-by-Step Instructions for Marbled Heart Cookies
Follow these detailed steps to create your own batch of stunning marbled heart cookies with fig jam. Precision and a little patience will ensure perfect results every time!
Making the Buttery Cookie Dough
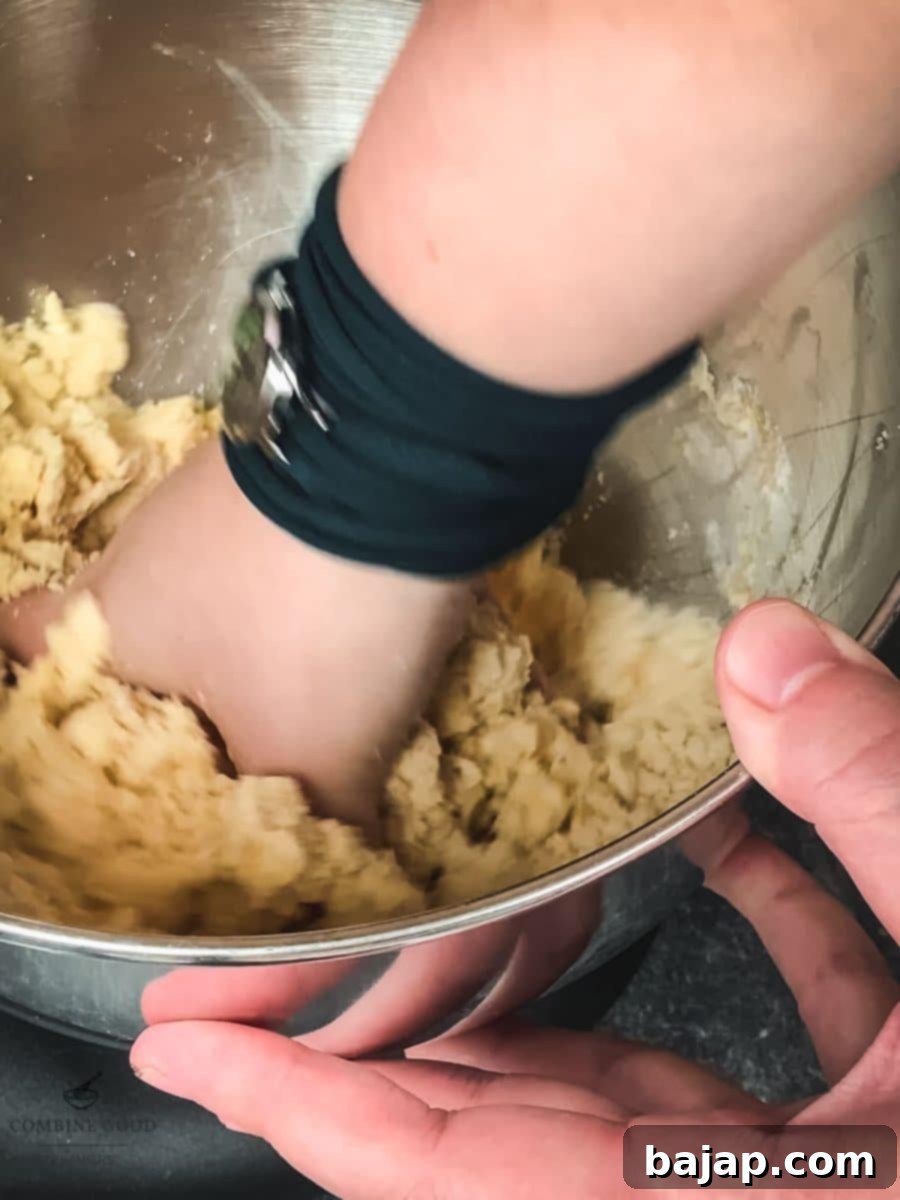
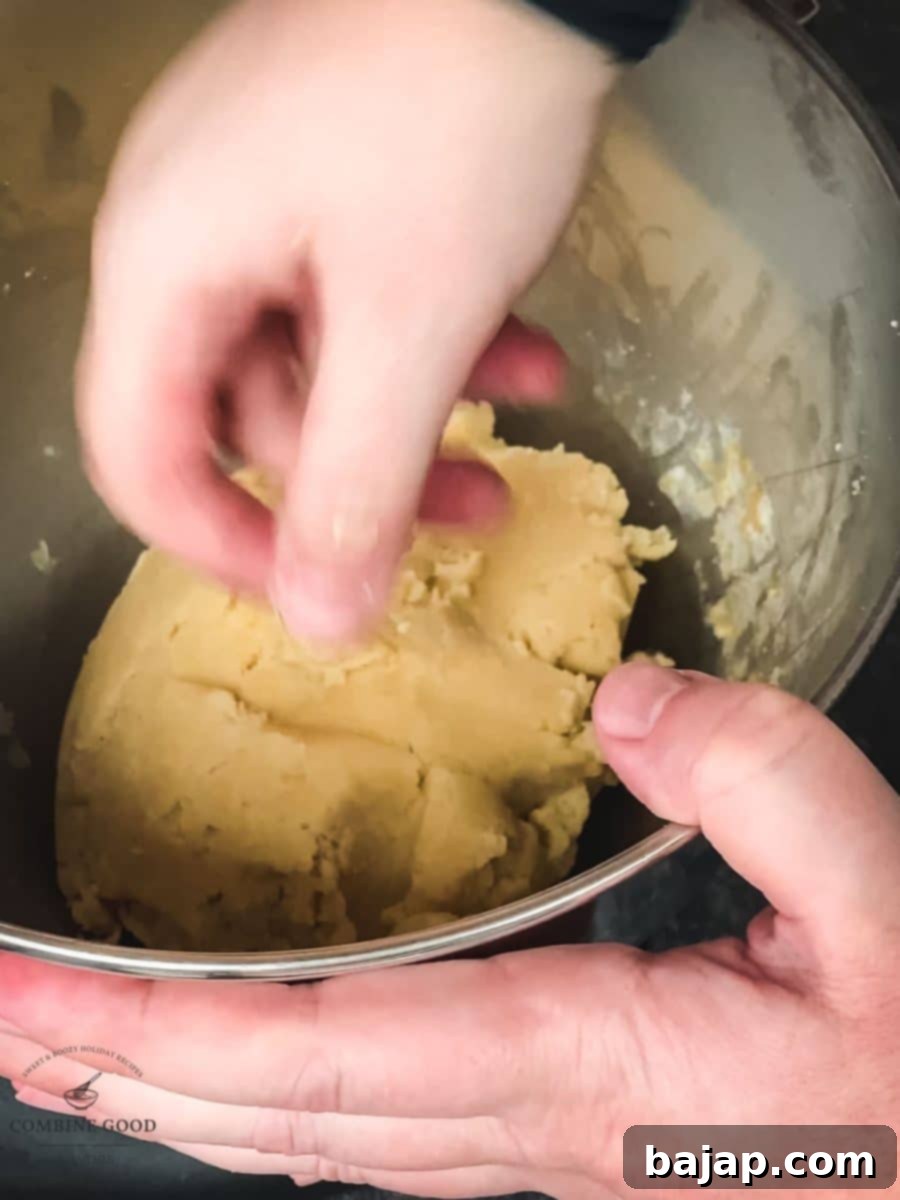
- Combine Dough Ingredients: Begin by dicing your cold, unsalted butter into small pieces. In a large mixing bowl, quickly knead together the cake flour, diced cold butter, fine granulated sugar, the separated egg yolk (save the egg white for the icing!), and fresh lemon zest. Use your hands to combine these ingredients until a smooth, cohesive dough forms. The key is to work quickly to prevent the butter from getting too warm.
- Chill the Dough: Form the dough into a flat disc, wrap it tightly in cling film, and refrigerate for at least 30 minutes. Chilling is a vital step as it allows the butter to firm up, making the dough easier to roll and preventing the cookies from spreading too much in the oven, ensuring they maintain their beautiful heart shape.
- Prepare for Baking: While the dough chills, preheat your oven to 320 °F (160°C) using the fan oven setting. Line a baking sheet with parchment paper to prevent sticking and ensure even baking.
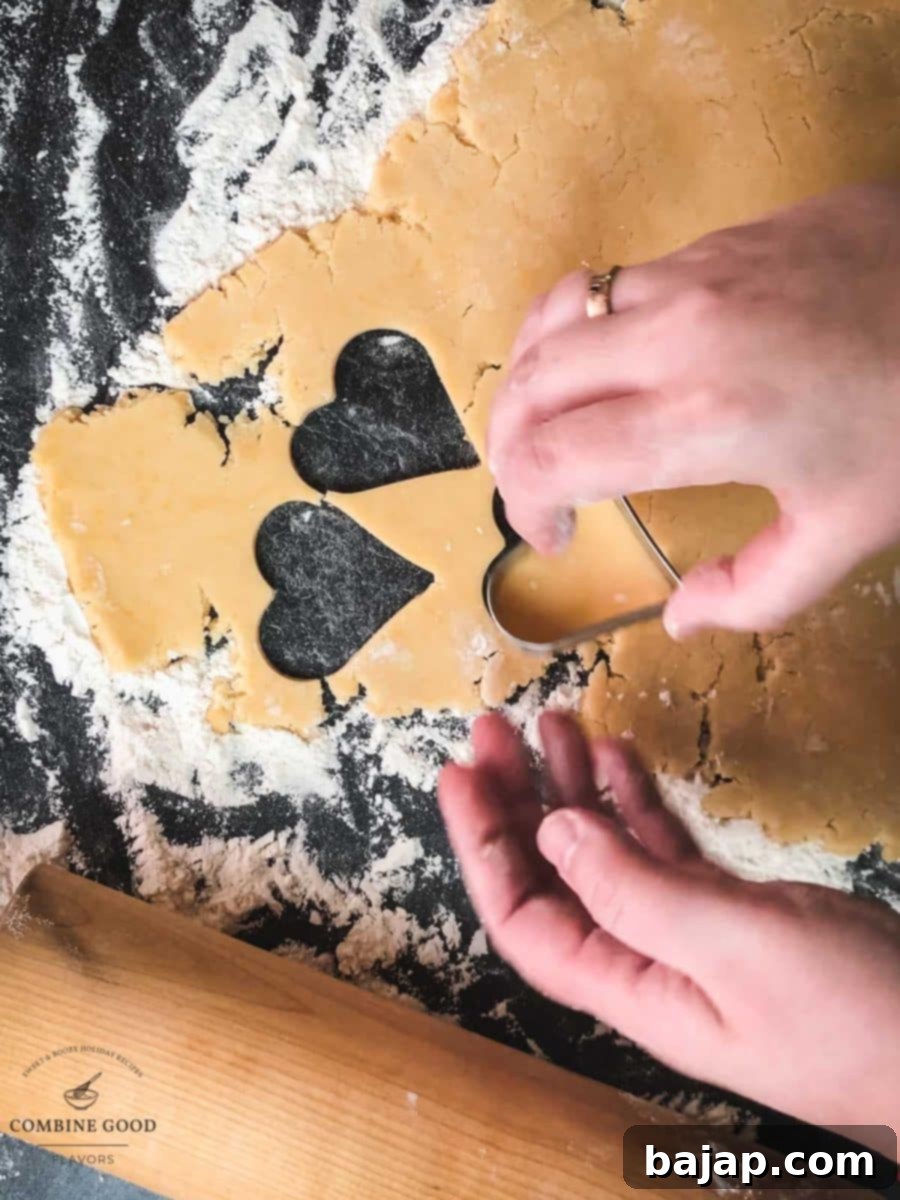
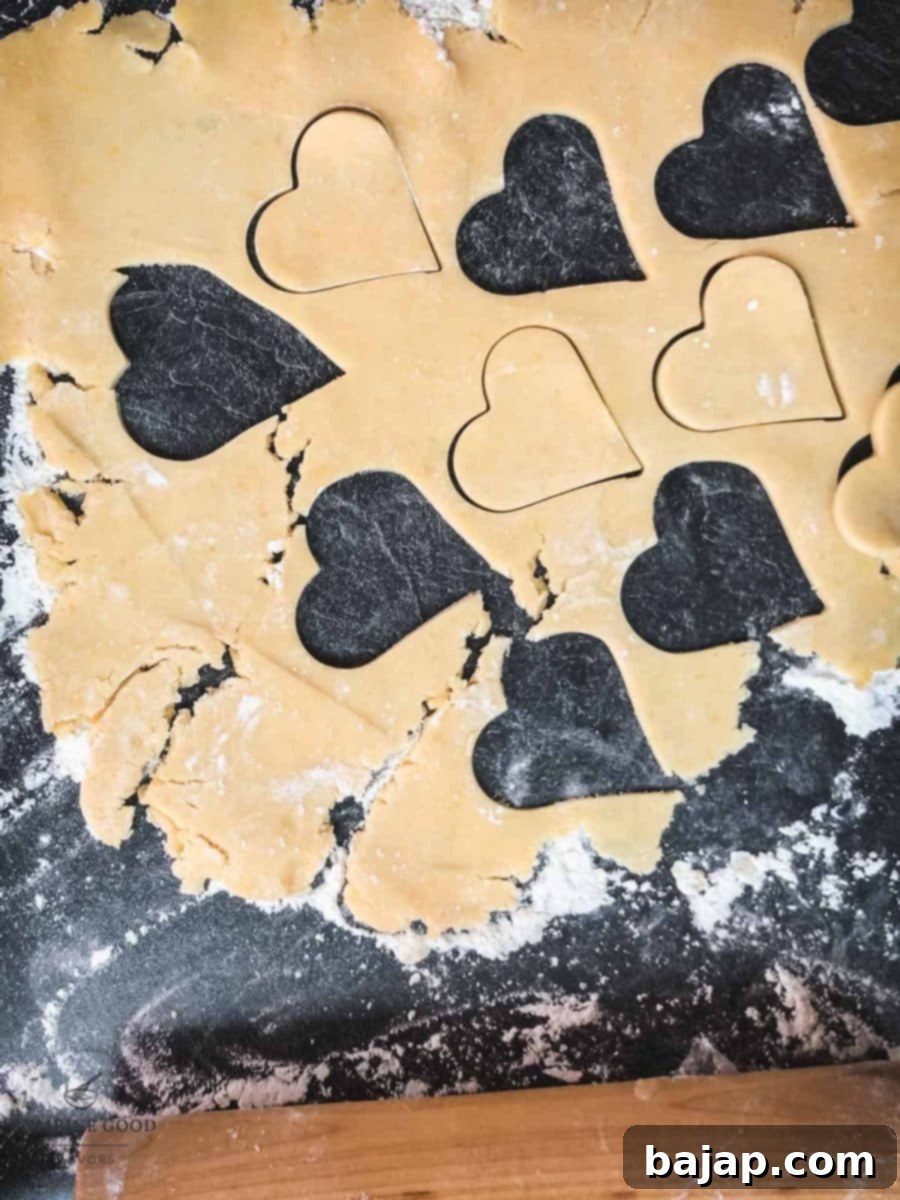
- Roll and Cut: On a lightly floured work surface, roll out the chilled dough thinly, aiming for a thickness of about ⅛ inch (3mm). Use your heart-shaped cookie cutters to cut out an even number of heart shapes. You’ll need two hearts for each sandwich cookie. Gently transfer the cutouts to your prepared baking sheet. Re-roll any leftover dough scraps and cut out more hearts until all the dough is used.
- Bake to Golden Perfection: Bake the heart cookies for approximately 12 minutes, or until the edges are lightly golden brown. Baking time may vary depending on your oven and cookie thickness. Once baked, remove them from the oven and let them cool on the baking sheet for a few minutes before carefully transferring them to a wire rack to cool completely. This prevents them from breaking and ensures a crisp texture.
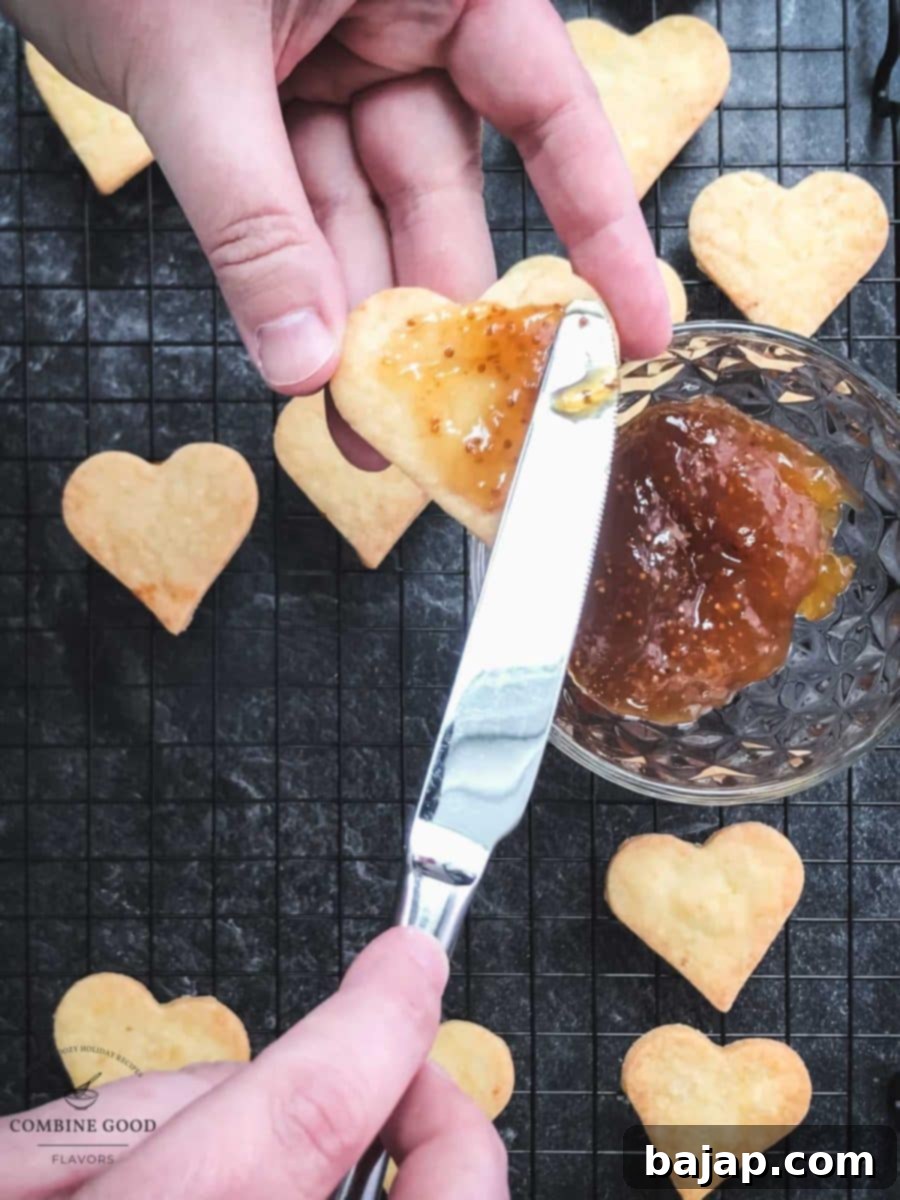
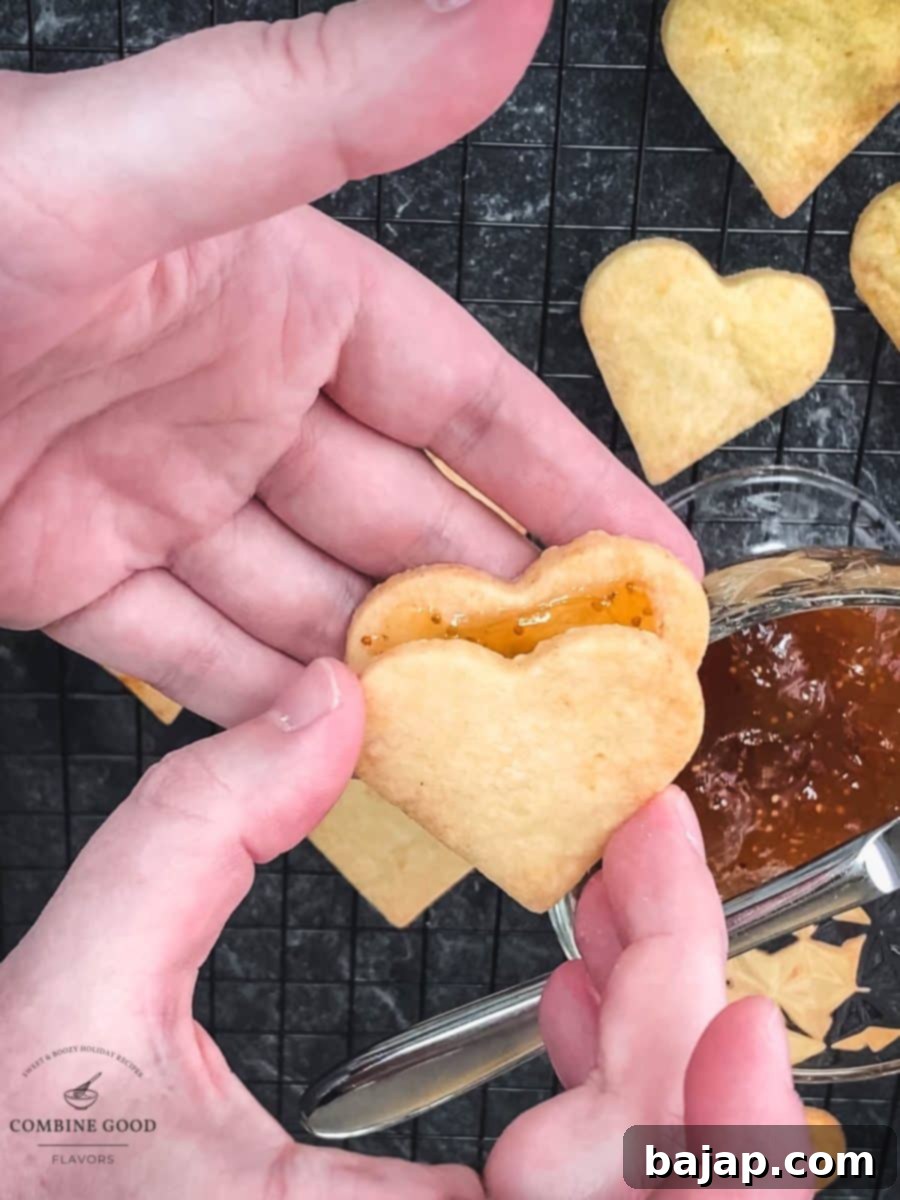
- Fill with Fig Jam: Once the cookies are completely cooled, take your luscious fig jam. Spread a generous amount on the flat side of one half of each cookie. Then, gently press a matching plain cookie half on top, creating a delightful sandwich. Ensure the jam is evenly distributed but doesn’t seep out the sides.
Creating the Mesmerizing Marbled Icing
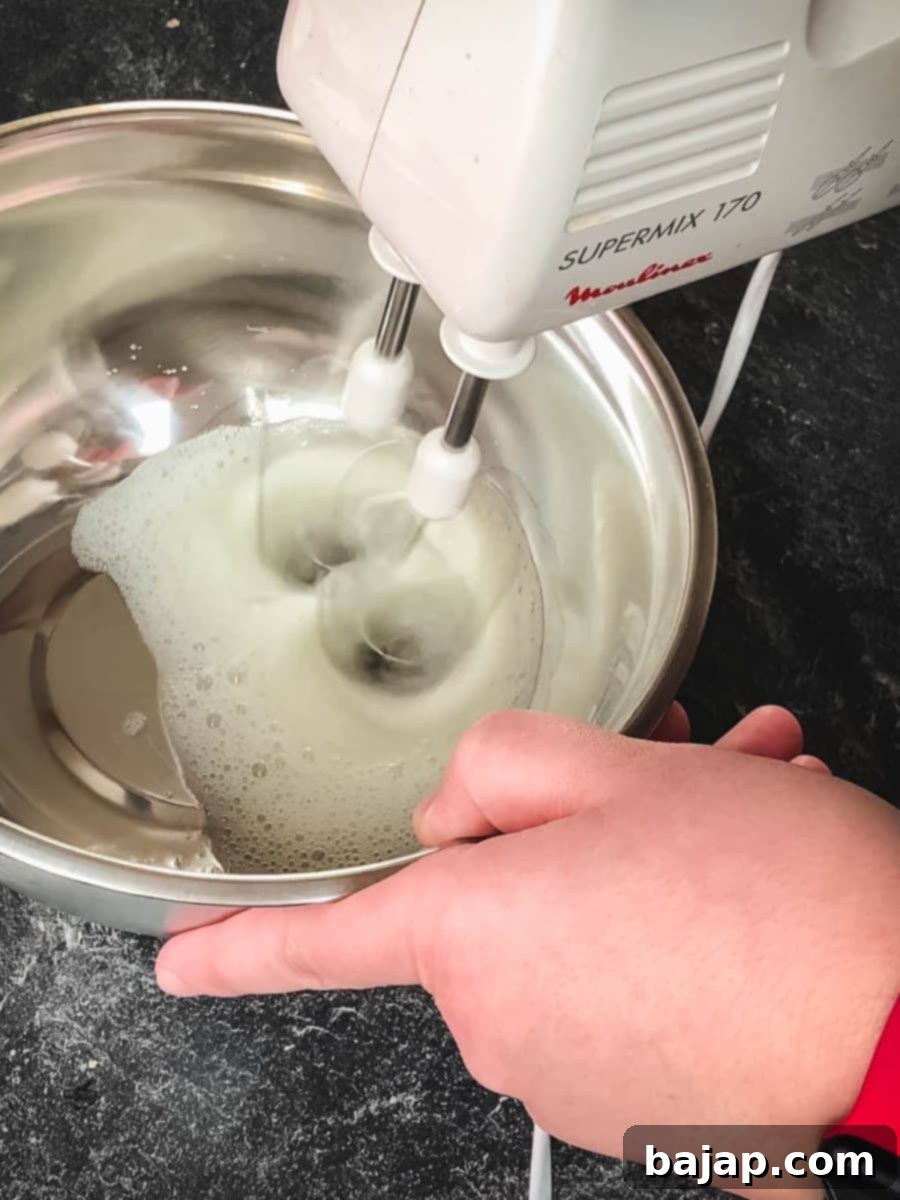
- Prepare the Glaze Base: In a clean bowl, whisk the reserved egg white until it’s slightly foamy. Gradually add the powdered sugar, stirring continuously until the mixture is smooth and lump-free. Then, stir in the fresh lemon juice, adjusting the amount slightly if needed to achieve a thick, yet pourable consistency – think slightly thicker than maple syrup.
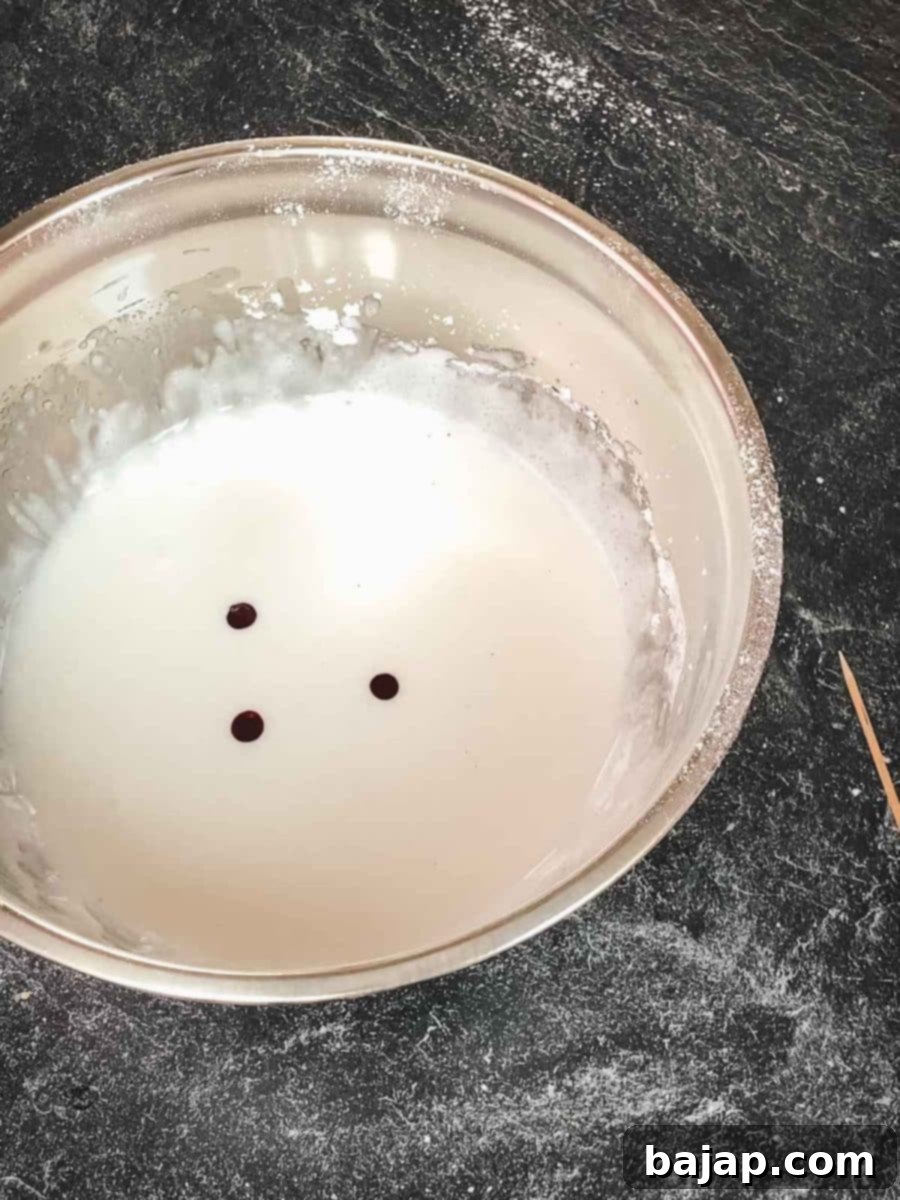
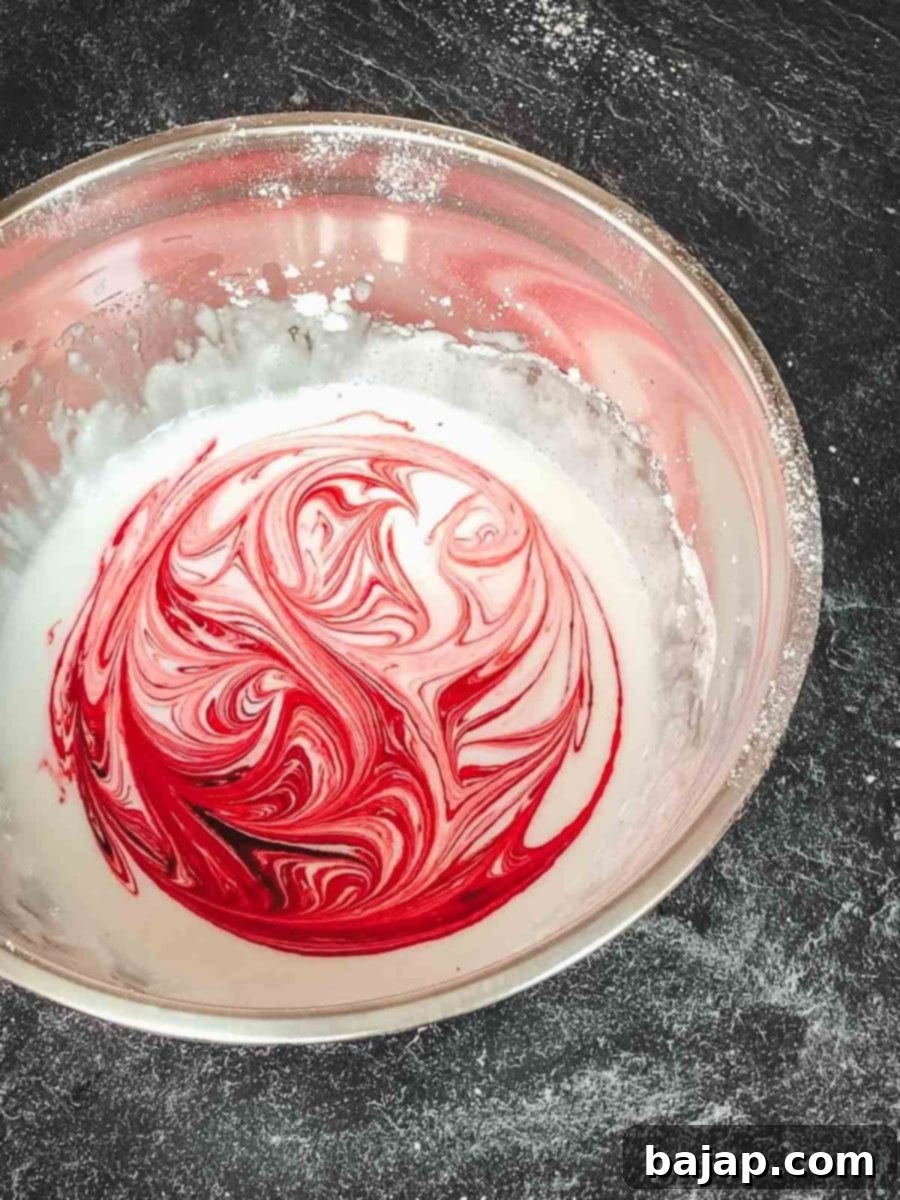
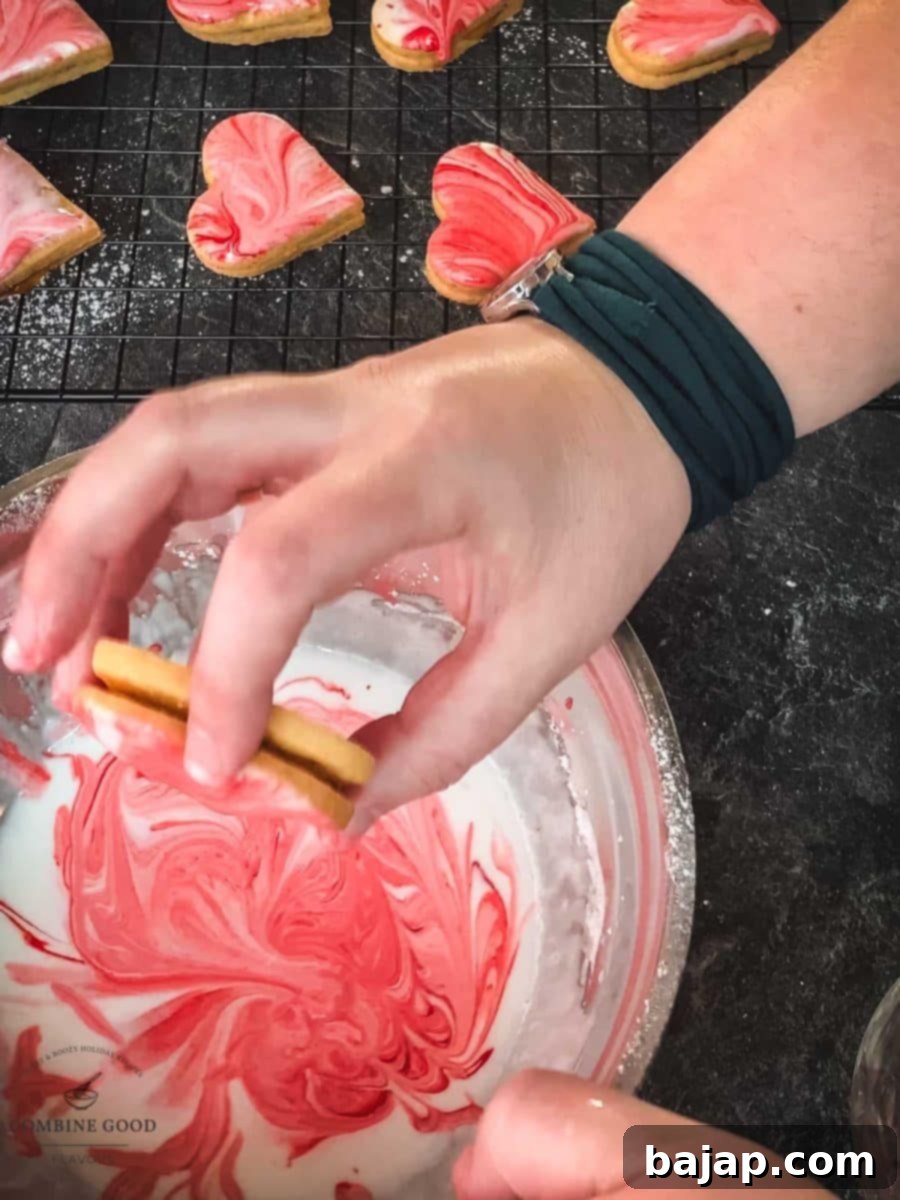
- Marble the Glaze: Add a few drops of red food coloring to the surface of your white glaze. Using a toothpick, gently swirl the red color into the white icing. Be careful not to overmix; you want distinct streaks and swirls, not a uniform pink color. Experiment with different swirling patterns for unique marbled effects.
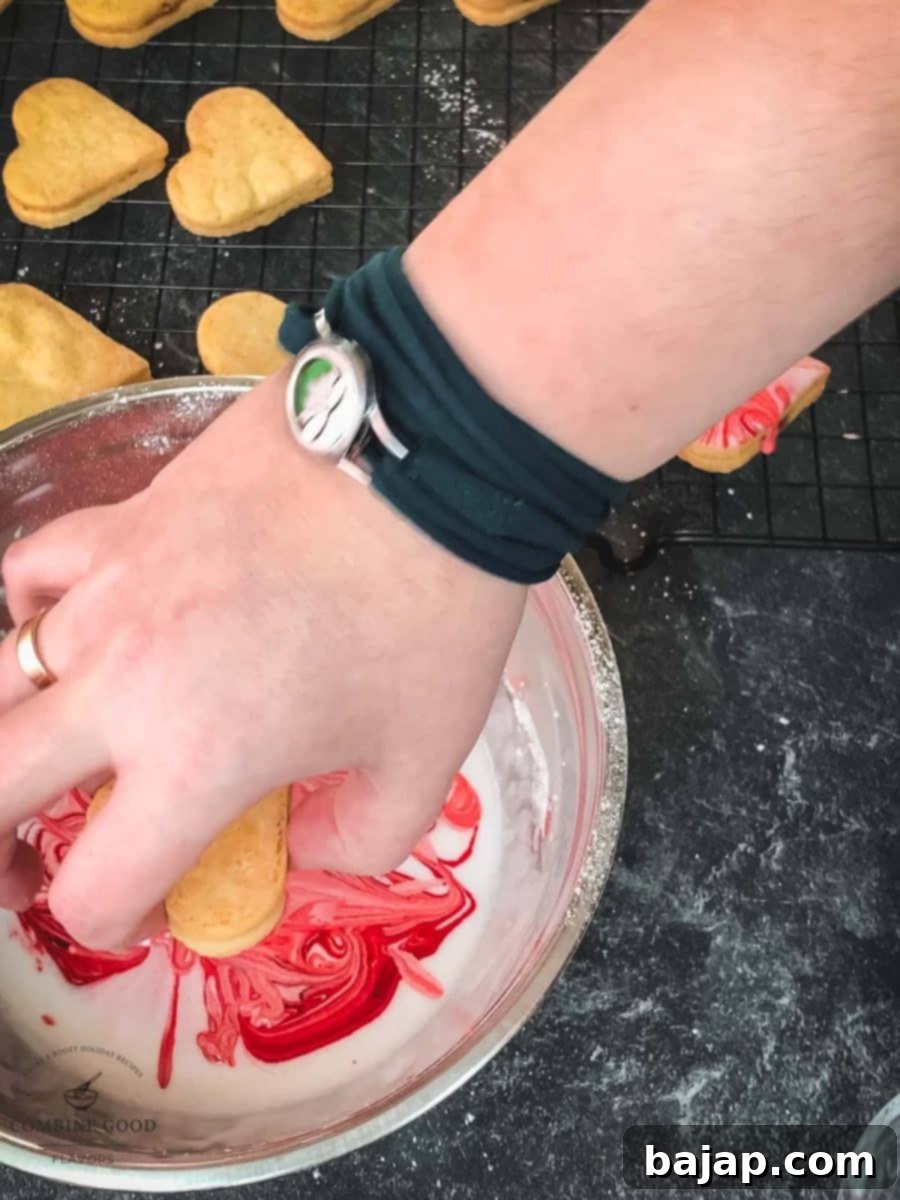
- Dip and Dry: Carefully dip one side of each fig jam-filled heart cookie flat into the marbled icing. Allow any excess glaze to drip off, then gently shake off any remaining drips. Place the dipped cookies onto a wire rack to allow the icing to set.
- Allow Icing to Set: Let the marbled icing set completely at room temperature for approximately 30 minutes. This will ensure a firm, non-sticky finish that protects the beautiful design. Once fully set, your stunning **marbled heart cookies** are ready to be admired and devoured!
- Storage: Once the icing is completely dry and firm, store the finished **jam-filled heart cookies** in an airtight tin at room temperature to maintain their freshness and delicate texture.

💖 Why You’ll Love This Marbled Heart Cookie Recipe
These Marbled Heart Cookies with Fig Jam are more than just a sweet treat; they’re a delightful baking project that yields impressive results with minimal fuss. Here’s why you’ll fall in love with them:
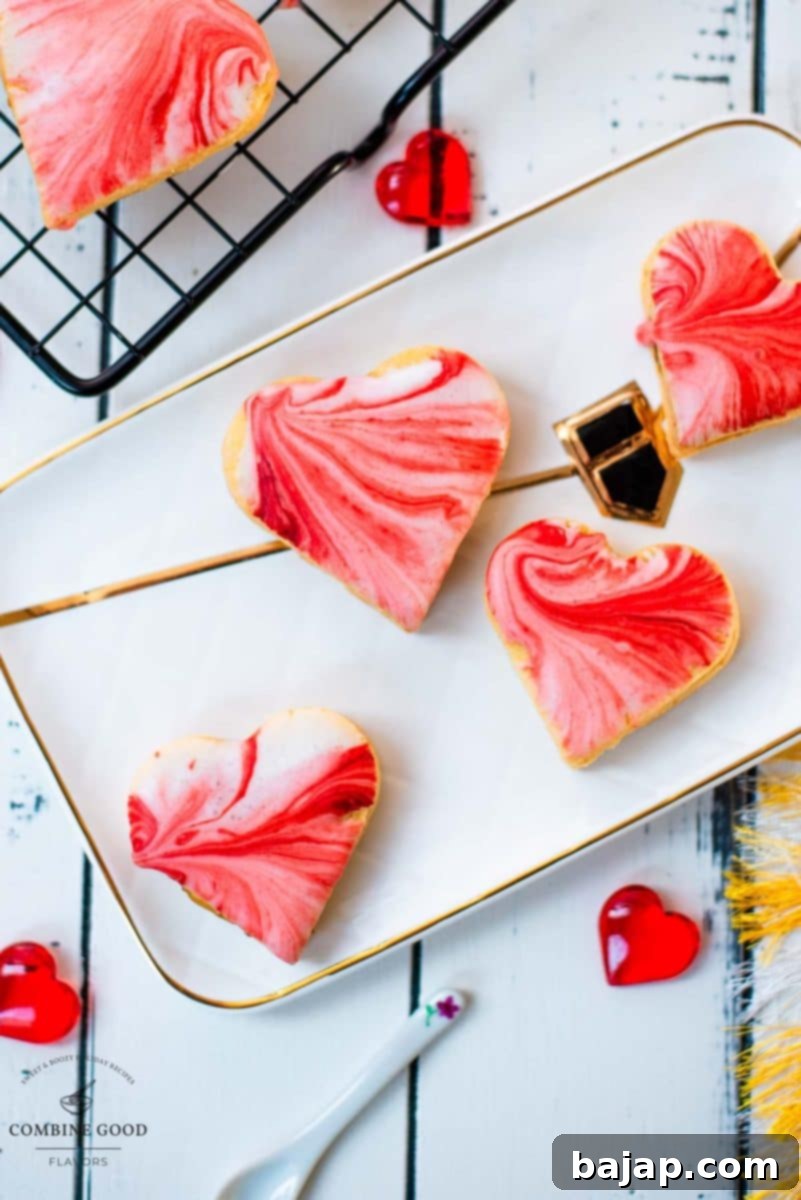
- Visually Stunning: The mesmerizing red and white marbled icing makes these cookies true showstoppers, perfect for any special occasion or as a beautiful edible gift.
- Irresistibly Delicious: A delicate, buttery sugar cookie base paired with the rich, sweet tang of fig jam creates a flavor combination that is simply divine. The fresh lemon zest in the dough and icing adds a bright counterpoint.
- Surprisingly Easy to Make: Despite their sophisticated appearance, this recipe is straightforward and accessible for bakers of all skill levels. The simple steps ensure a rewarding baking experience.
- Versatile for Any Occasion: While ideal for Valentine’s Day and Mother’s Day, their charm and deliciousness make them suitable for birthdays, tea parties, baby showers, or just a thoughtful treat for loved ones.
- Perfectly Portable: Once the icing sets, these sturdy cookies are easy to transport and make fantastic gifts, packed in a decorative tin or box.
- Customizable Flavors: While fig jam is exquisite, the recipe is flexible enough to allow for other jam fillings, letting you experiment with different fruity delights.
👩🍳 Expert Baking Tips for Perfect Cookies
Achieving bakery-quality marbled heart cookies is easier than you think with these expert tips:
- Cold Butter is Key: Always start with very cold butter for your dough. This prevents overworking the dough and helps create a tender, flaky cookie texture that holds its shape beautifully during baking. If your kitchen is warm, you can even pop your bowl of diced butter back in the fridge for a few minutes before mixing. For kneading by hand, placing your mixing bowl in a KitchenAid stand mixer (or similar heavy bowl) helps keep it stable and prevents sliding, making the process much more convenient.
- Don’t Overwork the Dough: Knead the dough just until it comes together and is smooth. Over-kneading can develop too much gluten, resulting in tough cookies.
- Proper Chilling Time: The 30-minute chilling period is non-negotiable. It allows the butter to firm up and the gluten to relax, which is essential for preventing the cookies from spreading and ensuring sharp, well-defined heart shapes.
- Even Thickness for Rolling: Roll your dough to a consistent thickness (about ⅛ inch or 3mm). This ensures all cookies bake evenly and have a uniform texture. Using a rolling pin with thickness guides can be very helpful.
- Flour Your Cutters: Lightly dust your cookie cutters with flour before each use to prevent the dough from sticking, especially with intricate shapes.
- Cool Completely: Ensure your cookies are entirely cool before adding the fig jam and applying the icing. Warm cookies will melt the jam and cause the icing to run, ruining the marble effect.
- Icing Consistency is Crucial: The perfect icing consistency is thick enough to hold its shape for marbling but thin enough to drip smoothly when dipped. If it’s too thick, add a tiny bit more lemon juice (or water). If it’s too thin, sift in a little more powdered sugar.
- Gentle Marbling: When marbling the food coloring, use a light hand with the toothpick. A few swirls are enough to create beautiful patterns; excessive swirling will blend the colors too much, resulting in a less distinct marble effect.
- Drying Environment: Place your iced cookies in a dry, room-temperature environment to set. High humidity can prolong drying time or even prevent the icing from setting properly. Avoid covering them until the icing is completely hard.
🎨 Variations & Substitutions
While the classic fig jam and red marble design are exquisite, don’t hesitate to get creative with these versatile heart cookies! Here are some ideas to inspire your baking:
- Different Jam Fillings: As mentioned, raspberry, strawberry, apricot, or even cherry jam would be fantastic alternatives to fig jam. Choose your favorite fruit preserve for a personalized touch. Make sure your jam isn’t too runny.
- Citrus Zest Variations: Instead of lemon zest, try orange or lime zest in the cookie dough for a different citrus aroma and flavor profile.
- Alternative Food Colors: While red is perfect for hearts, you could use blue, pink, green, or even multiple colors for different occasions (e.g., green for St. Patrick’s Day, pastels for Easter). For natural options, consider beetroot powder for red, turmeric for yellow, or spirulina for green.
- Flavor Extracts: Add a few drops of vanilla extract, almond extract, or even rosewater to the cookie dough or the icing for an extra layer of flavor complexity.
- Chocolate Drizzle: Instead of marbled icing, you could simply dip them in melted dark or white chocolate and drizzle with a contrasting chocolate.
- Sprinkles or Edible Glitter: Before the icing sets, sprinkle some festive edible glitter or colorful sprinkles over the top for an added touch of sparkle and fun.
- Nutty Dough: For an added depth of flavor, replace a small portion of the cake flour (e.g., ¼ cup) with finely ground almond flour or hazelnut flour. This will add a subtle nutty taste and a slightly different texture to your sugar cookies.
🌡️ Storage Instructions for Freshness
To keep your **fig jam heart cookies** tasting fresh and looking beautiful, proper storage is essential. Here’s how to best store them:
- Room Temperature: Once the marbled icing is completely set and dry to the touch (which typically takes about 30 minutes to an hour), store the cookies in an airtight container at room temperature. This will keep them fresh, tender, and delicious for about one week. Layer them between sheets of parchment paper to prevent sticking and preserve the icing design.
- Freezing Baked Cookies (Un-iced): If you wish to prepare ahead, you can bake the cookies, let them cool completely, and then freeze them *before* adding the jam and icing. Place them in a single layer on a baking sheet to freeze solid, then transfer to an airtight freezer-safe container or bag. They will keep for up to 2-3 months. Thaw at room temperature before filling and icing.
- Freezing Raw Dough: You can also freeze the unbaked cookie dough. Wrap the dough disc tightly in several layers of cling film, then place it in a freezer bag. It can be frozen for up to 3 months. When ready to bake, thaw the dough in the refrigerator overnight, then proceed with rolling and cutting as per the instructions.
- Avoid Refrigeration (for iced cookies): Refrigerating iced sugar cookies can sometimes cause the icing to become sticky or the colors to bleed due to condensation. Room temperature storage is generally best for decorated cookies.
🍽 Essential Equipment for Baking Success
Having the right tools on hand will make the baking process for these marbled heart cookies even more enjoyable and efficient. Here’s a list of the equipment you’ll need:
- Mixing Bowl: A sturdy mixing bowl is essential for combining your dough ingredients and preparing the icing. A large one will give you ample room to work.
- Close Meshed Sieve: Crucial for sifting powdered sugar to ensure a super smooth, lump-free icing.
- Cling Film (Plastic Wrap): For wrapping the dough during its chilling period.
- Rolling Pin: For rolling out the cookie dough to an even thickness. Consider one with adjustable guides for consistent results.
- Heart-Shaped Cookie Cutters: In various sizes, if you wish, to create an appealing assortment. Ensure you have at least two matching sizes for the sandwich cookies.
- Baking Sheets and Parchment Paper: For baking your cookies without sticking and for easy cleanup.
- Cooling Rack: Essential for cooling baked cookies completely and allowing the icing to set properly.
- Butter Knife or Small Offset Spatula: Useful for spreading the fig jam evenly onto the cookie halves.
- Electric Hand Mixer (Optional but Recommended): While you can whisk by hand, an electric mixer makes quick work of whisking egg whites and combining icing ingredients for a perfectly smooth glaze.
- Toothpick: The simple tool needed to create those beautiful marbled patterns in the icing.
🙋🏻 Frequently Asked Questions About Marbled Heart Cookies
Here are some common questions about making and enjoying these delightful marbled heart cookies:
Absolutely! While fig jam offers a unique and delicious flavor profile, these jam-filled cookies are incredibly versatile. Feel free to experiment with your favorite fruit preserves. Raspberry, strawberry, apricot, cherry, or even a citrus marmalade would make wonderful alternatives. Just ensure the jam isn’t too runny, as this can make the cookies soggy.
When stored properly in an airtight container at room temperature, your beautiful marbled heart cookies will stay fresh and delicious for approximately seven days. For optimal freshness, layer them with parchment paper to prevent the icing from sticking or smudging.
You can certainly freeze these cookies, but it’s best to do so *before* icing them. Bake the cookies, let them cool completely, and then freeze them in a single layer until solid. Once frozen, transfer them to a freezer-safe bag or container. They can be stored for up to 2-3 months. Thaw them at room temperature before filling with jam and applying the marbled icing. Freezing iced cookies can sometimes affect the icing’s texture and appearance due to condensation.
Yes, absolutely! If you prefer natural alternatives, you can definitely use natural food coloring for the glaze. Beetroot powder is an excellent natural option for achieving a beautiful pink or red hue. Just be aware that natural colorings might produce slightly different shades and may require a bit more to achieve the desired vibrancy compared to artificial gel colors.
While it might be tempting to skip, we strongly recommend against omitting the chilling step for the cookie dough. Chilling the dough for at least 30 minutes is crucial. It helps the butter firm up, prevents the cookies from spreading too much during baking, and ensures they maintain their crisp edges and delicate heart shapes. This step is essential for the best possible texture and appearance of your **homemade sugar cookies**.
More Sweet Treats & Delightful Recipes to Explore
If you loved baking these marbled heart cookies, you’ll surely enjoy exploring other delicious recipes from our collection. From more fig-inspired creations to other festive baked goods, there’s something for every sweet tooth:
- Sweet Recipes using Fig Jam (Roundup)
- Fig Cheesecake in a Jar
- Homemade Sacher Torte
- Fresh Strawberry Sponge Cake
- Easy Lavender Lemon Muffins
- Coffee Chocolate Chip Cookies
–> More Inspiring Mother’s Day Recipes
We absolutely adore these **Marbled Heart Cookies with Fig Jam**, and we’re confident you will too! If you decide to bring this delightful recipe to life in your kitchen, we would be thrilled to hear about your experience. Please take a moment to give it a ★★★★★ star rating and leave a comment below sharing your thoughts. Your feedback means the world to us!
Don’t miss out on more delicious recipes and baking inspiration! You can also sign up for our exclusive Newsletter to receive weekly homemade delights straight to your inbox. And if you’re on social media, be sure to follow us on Pinterest or Instagram. Share your beautiful **marbled sugar cookie** creations with us by tagging @combinegoodflavors and using the hashtag #combinegoodflavors. We can’t wait to see what you bake!
📖 Recipe

Marbled Icing Sugar Cookies with Fig Jam
Nora
Save RecipeSaved!
Pin Recipe
Equipment
-
Mixing bowl
-
Close meshed sieve
-
Cling film
-
Rolling Pin
-
Heart shaped cookie cutters in different sizes
-
Baking sheets and parchment paper
-
Cooling Rack
-
Butter knife
-
Electric hand mixer
-
Toothpick
Ingredients
- 7.05 oz Butter unsalted, cold
- 1 Egg medium
- 10.58 oz Cake flour
- ½ cup Granulated sugar fine
- 1 teaspoon Lemon zest
- ½ cup Fig jam
Marbled Icing
- 1 ½ cups Powdered sugar
- 2 teaspoon Lemon juice
- 3 drops Food color red
Instructions
-
Dice 7.05 oz Butter, and separate 1 Egg. Quickly knead 10.58 oz Cake flour, butter, ½ cup Granulated sugar, egg yolk, and 1 teaspoon Lemon zest into a smooth dough using your hands.7.05 oz Butter, 1 Egg, 10.58 oz Cake flour, ½ cup Granulated sugar, 1 teaspoon Lemon zest
-
Wrap in cling film and leave to rest in the fridge for 30 minutes.
-
Preheat the oven to 320 °F / 160°C fan oven.
-
Roll out the dough thinly on a floured work surface.
-
Cut out hearts of any size, making sure there is an even number for each size.
-
Place on a baking sheet lined with parchment paper.
-
Knead the leftover dough back together and roll it out.
-
Bake for 12 minutes until golden brown, and then leave to cool briefly on a cooling rack.
-
Take ½ cup Fig jam, spread the halves of the cookies with jam, and press the matching second half on top.½ cup Fig jam
Marbled Icing
-
Briefly whisk the egg whites and gradually add 1 ½ cups Powdered sugar while continuing to stir.1 ½ cups Powdered sugar
-
Stir in 2 teaspoon Lemon juice.2 teaspoon Lemon juice
-
Add 3 drops Food color to the surface and marble into the icing with a toothpick.3 drops Food color
-
Dip one side of the cookies flat into the icing, shake off gently and place back on the wire rack.
-
The icing needs about half an hour at room temperature to set.
-
Store the finished hearts in a cookie tin.
Nutrition values are estimates only, using online calculators. Please verify using your own data.

⛑️ Important Food Safety Reminders
Ensuring food safety is paramount when preparing any delicious treat. While baking cookies might seem straightforward, adhering to basic hygiene and cooking practices helps keep everyone safe and healthy. Please keep the following guidelines in mind:
- Proper Cooking Temperature: Although these cookies are baked until golden brown, if you ever incorporate ingredients like raw eggs or unpasteurized dairy into other recipes, ensure they reach a minimum internal temperature of 165 °F (74 °C) to eliminate harmful bacteria. For these cookies, baking until golden brown is sufficient.
- Prevent Cross-Contamination: Always use separate utensils and cutting boards for raw ingredients (if applicable to other dishes) and cooked food to avoid cross-contamination. For this recipe, ensure your workspace and tools are clean.
- Thorough Handwashing: Wash your hands thoroughly with soap and warm water before handling food, and especially after touching any raw ingredients or surfaces that might harbor bacteria.
- Mind the Temperature Danger Zone: Do not leave perishable food sitting out at room temperature for extended periods. While these cookies are fairly stable once baked and cooled, be mindful of ingredients like butter and eggs during preparation.
- Supervise Cooking: Never leave baking or cooking food unattended, especially when the oven is on. Keep an eye on your cookies to prevent burning and ensure they bake perfectly.
- Ventilation: Always ensure good ventilation in your kitchen, especially when using a gas stove or oven, to maintain air quality.
For comprehensive information and additional guidelines on safe food handling, we highly recommend checking the official resources from the FDA (U.S. Food and Drug Administration).
