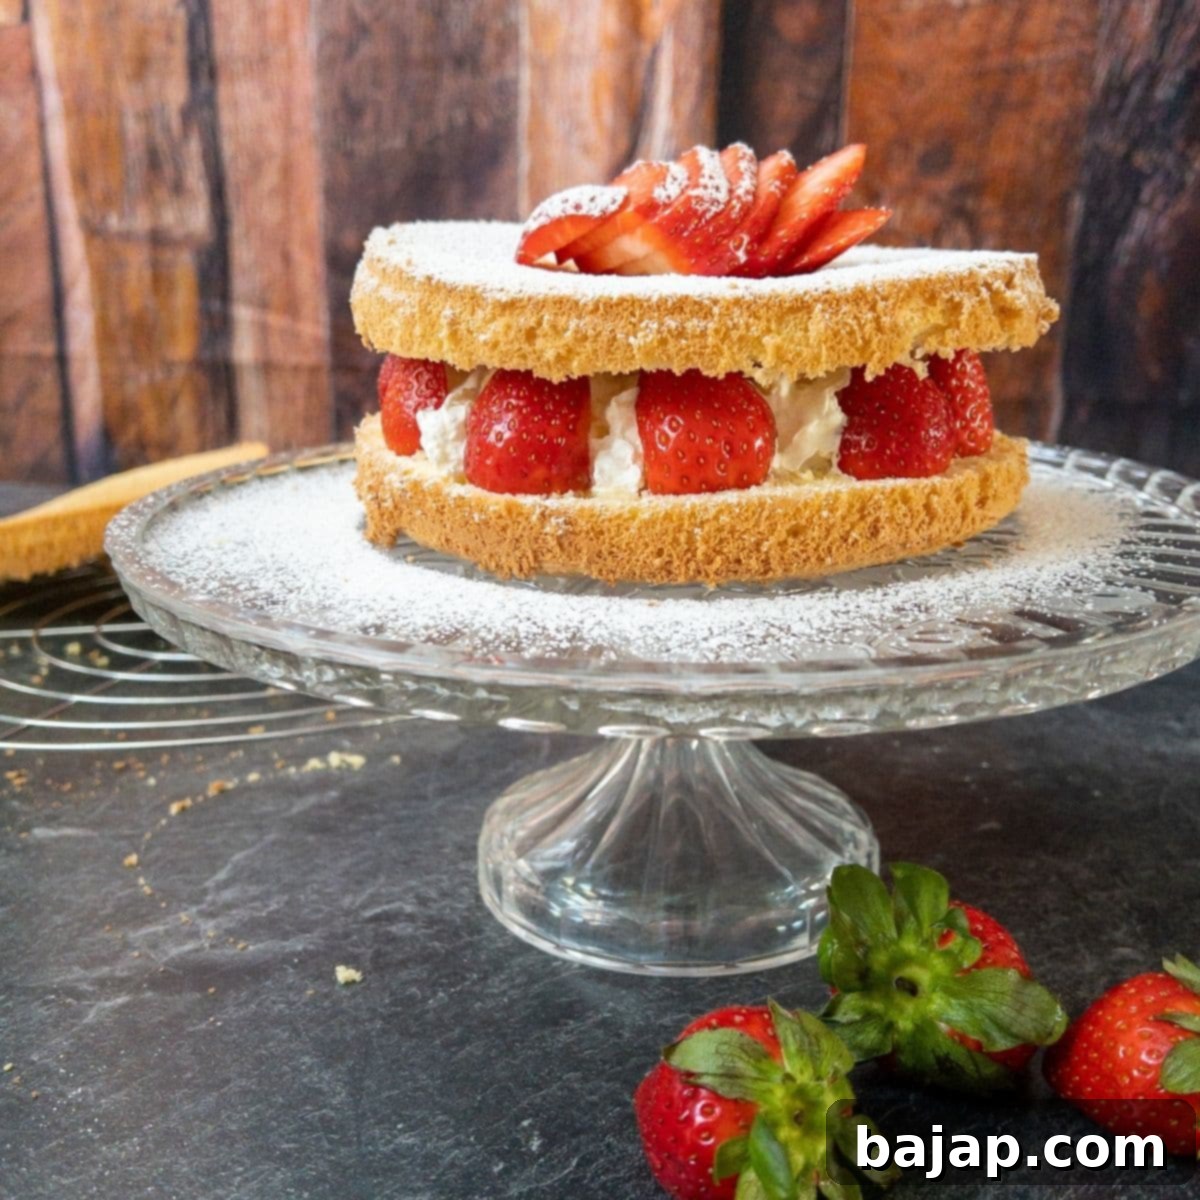
The Ultimate Fluffy Strawberry Sponge Cake Recipe: Your New Favorite Summer Dessert
Prepare to experience pure bliss with this exquisite strawberry sponge cake. It’s not just a cake; it’s an airy, delicate masterpiece that promises to be the fluffiest you’ll ever taste. The secret to its incredible flavor and feather-light texture lies in the harmonious combination of sweet, fresh strawberries, rich whipped cream, and a perfectly baked, tender sponge.
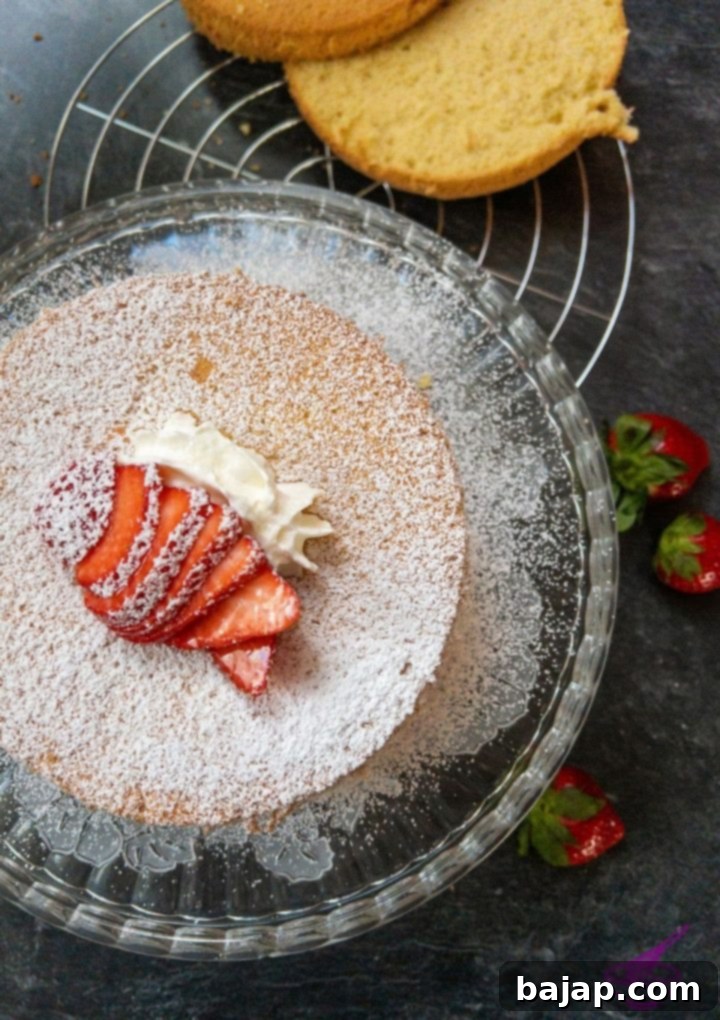
Each slice of this delightful cake reveals beautifully distinct layers of tender sponge, generously separated by luscious whipped cream and bursts of vibrant fresh strawberries. A final delicate dusting of powdered sugar on top creates a truly irresistible visual and taste experience that will surely make your heart skip a beat. This is more than just a dessert; it’s a celebration of fresh, seasonal flavors.
Why You’ll Love This Easy Strawberry Sponge Cake
This recipe stands out not only for its incredible taste but also for its simplicity and speed. You’ll be amazed that such an elegant and delicious cake can be prepared without any butter, making it lighter than traditional butter cakes. Plus, it’s ready to be savored in just over an hour, from mixing bowl to serving plate! It’s the perfect treat for last-minute gatherings or when you simply crave something sweet and refreshing.
With this versatile recipe, you have the option to craft two charming strawberry sponge cakes, each featuring two delightful sponge layers. Alternatively, you can combine all the layers to create one show-stopping, tall strawberry sponge cake with four impressive tiers. The choice is yours, allowing you to tailor the cake to your occasion and aesthetic preference. The core sponge cake recipe is incredibly adaptable, making it an excellent foundation for countless other cake creations.
This strawberry sponge layer cake is truly an amazing summer treat, capturing the essence of the season with every bite. The light sponge and fresh fruit offer a welcome respite from heavier desserts, making it ideal for picnics, barbecues, or simply enjoying on a warm afternoon.
Embrace Strawberry Season with More Delicious Recipes!
I absolutely adore strawberry season, and I bet you do too! If you’re looking for more ways to celebrate these juicy red berries, be sure to explore some of my other favorite strawberry recipes:
- Strawberry Cupcakes with Ricotta: Moist cupcakes with a creamy ricotta touch.
- Strawberry Flavored Whipped Cream: Elevate any dessert with this fruity, light topping.
- Easy Strawberry Cobbler: A comforting and simple dessert.
- Strawberry Simple Syrup: Perfect for drinks, pancakes, or drizzling over ice cream.
- Homemade Strawberry Popsicles: A refreshing and healthy summer snack.
- Strawberry Spritz: A bubbly, fruity drink for warm evenings.
- No-bake Strawberry Cheesecake: Creamy, dreamy, and no oven required!
- Strawberry Milkshake: A classic indulgent treat.
- Strawberry Cream: A simple, elegant dessert that highlights fresh berries.
- Strawberry Milk: A childhood favorite, reimagined.
- Strawberry Moscow Mule: A vibrant, spirited cocktail.
[feast_advanced_jump_to]
🥘 Key Ingredients for Your Fluffy Sponge Cake
Creating this magnificent strawberry sponge cake requires just a handful of fresh, high-quality ingredients. Each component plays a vital role in achieving that coveted light texture and vibrant flavor.
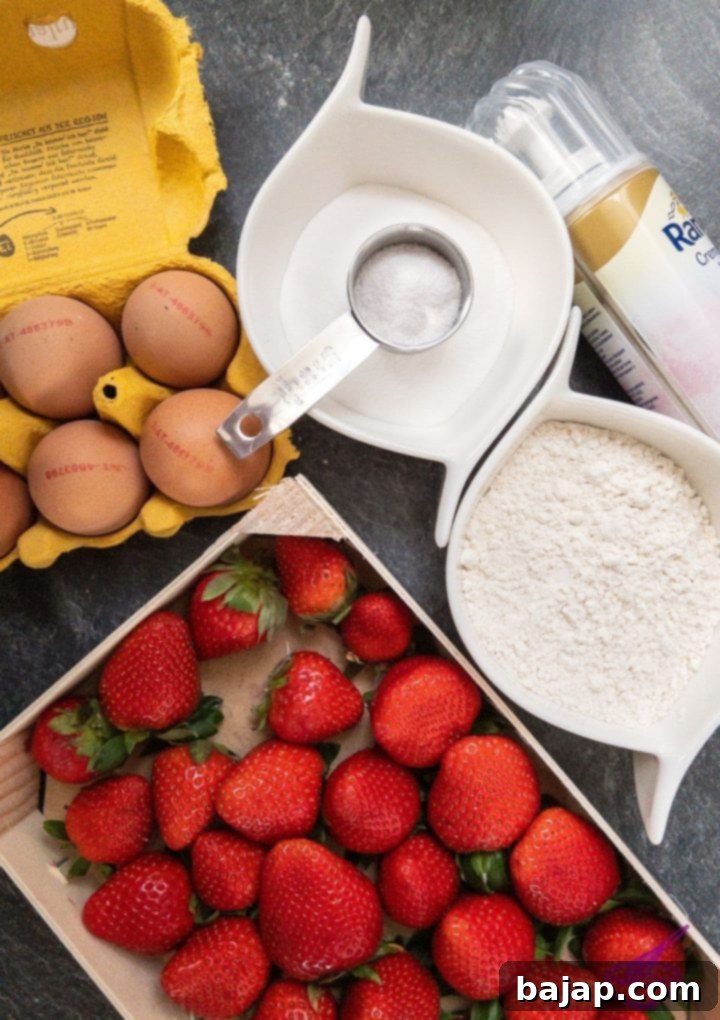
- Eggs: The foundation of our fluffy sponge! Using fresh, room-temperature eggs is crucial for achieving maximum volume when whipping.
- Superfine Granulated Sugar: This fine sugar dissolves more easily, contributing to a smooth batter and a tender crumb.
- Vanilla Sugar: Adds a beautiful aromatic depth that complements the strawberries perfectly. You can easily make your own or find it in specialty baking sections.
- Cake Flour: Essential for a truly light and airy sponge. Its lower protein content results in a more delicate texture compared to all-purpose flour.
- Heavy Cream: Whether you choose fresh heavy cream or a high-quality canned version, this forms the rich and creamy layer between your sponges. Freshly whipped cream offers the best texture and flavor.
- Fresh Strawberries: The star of the show! Select ripe, fragrant strawberries for the best taste and color.
- Powdered Sugar: For that elegant finishing touch and a hint of extra sweetness.
Refer to the detailed recipe card below for precise quantities and measurements.
🔪 Step-by-Step Instructions: Creating Your Masterpiece
Making the Perfectly Fluffy Sponge Cake
The key to a truly magnificent sponge cake lies in careful preparation. Follow these steps closely to ensure your cake layers are wonderfully light and airy:
- Preheat and Prepare: Begin by preheating your oven to 180 °C (356 °F) using top/bottom heat. Next, carefully separate your eggs into two impeccably clean, separate bowls. I strongly recommend using deep, large bowls for this step. As the egg whites whip, they will significantly increase in volume, and you wouldn’t want them overflowing! The bowl for the yolks will also eventually hold all the mixed ingredients, requiring ample space.
- Whip Egg Yolks: Take the bowl containing the egg yolks. Add half of the superfine sugar and all of the vanilla sugar. Beat these ingredients with an electric mixer until the mixture becomes very foamy and light yellow. Set this bowl aside.
- Clean Beaters: Thoroughly wash and dry the beaters of your mixer. Any trace of yolk or fat can prevent your egg whites from whipping properly.
- Whip Egg Whites: Now, take the bowl with the egg whites and add the remaining half of the superfine sugar. Beat the egg whites until they form stiff, glossy peaks. When you lift the beaters, the whites should hold their shape firmly.
- Combine Gently: In the mixing bowl with the beaten egg yolks, gently fold in the stiffly beaten egg whites using a spatula. Use a light, folding motion to retain as much air as possible. After that, sift the cake flour directly over the mixture and carefully fold it in until just combined. Overmixing at this stage will deflate the batter and result in a less fluffy cake.
- Bake the Layers: Pour the delicate cake batter into your prepared springform pans, filling them about three-quarters full. Crucially, **do not grease your springform pans**. This allows the sponge cake to “climb” the sides as it bakes, resulting in a taller, more evenly risen cake. Place the filled pans into the preheated oven on the middle shelf.
- Baking Time: Bake for approximately 30 minutes, or until the cakes are golden brown and a wooden skewer inserted into the center comes out clean. This clean test indicates your sponge is perfectly cooked through.
- Cooling Process: Once baked, remove the springform pans from the oven and let them cool on a wire rack for about 15 minutes. Before attempting to open the springform, run a thin knife carefully around the inner edge of the pan. This ensures the cake doesn’t stick and releases cleanly.
- Final Cooling & Slicing: Remove the cooled cake from the springform pan and let it cool completely on a cooling rack. Once the sponge cake is no longer warm to the touch, it’s time to slice! Carefully take your first sponge cake and slice it horizontally in half. Repeat with the second sponge.
- Slicing Tip: I recommend using a long, regular bread knife for this. Because sponge cake is incredibly fluffy and delicate, avoid pressing down with force. Instead, use a gentle “sawing” motion to cut through the layers. Applying too much force will cause the sponge to tear and fray, which we definitely want to avoid for a beautiful presentation!
Assembling Your Beautiful Strawberry Sponge Cake Layers
Now for the fun part – assembling your cake! As mentioned earlier, you have a delightful decision to make: will you create one grand, tall cake, or two charming smaller ones? For this demonstration, I opted for two smaller cakes, as I find they offer a lovely presentation.
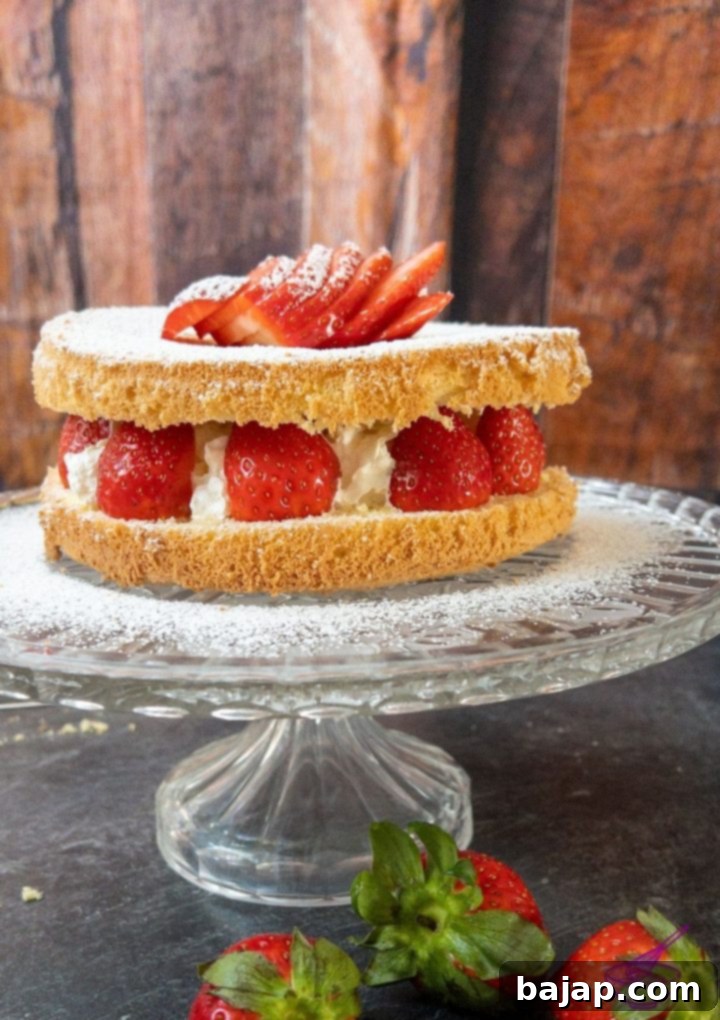
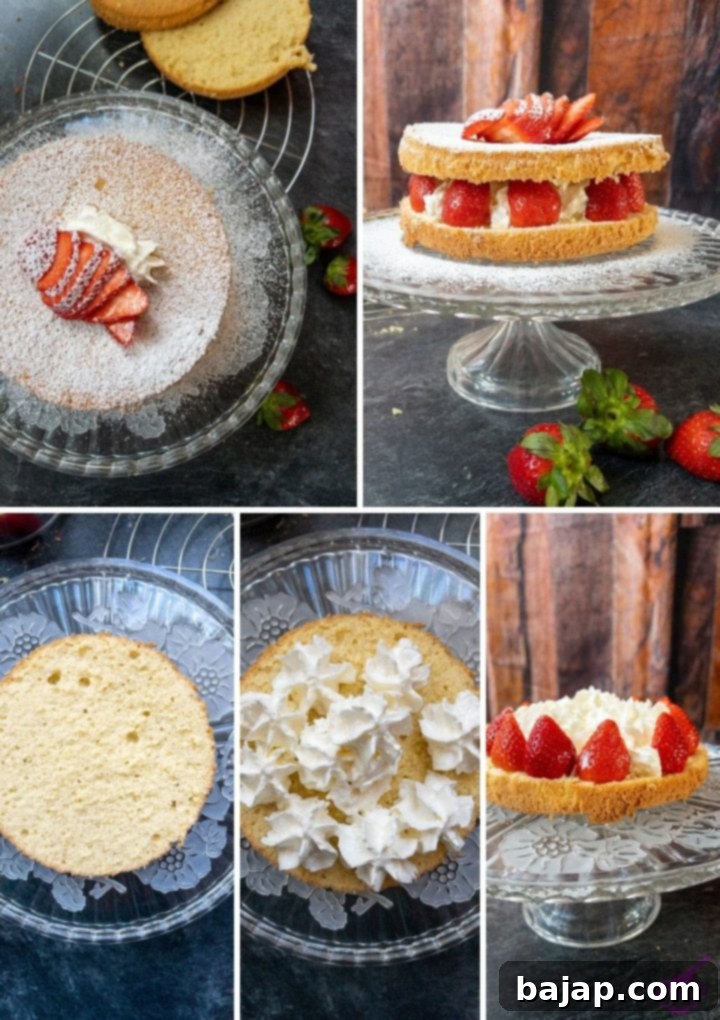
To begin the assembly, choose your serving vessel. I recommend a lovely cake stand that can double as your presentation piece. First, prepare your strawberries: wash them thoroughly and remove the green hulls. If you plan to arrange the strawberry halves around the edge as shown in the pictures, you’ll need at least 12 halves per cake. Feel free to slice some into smaller pieces if you wish to scatter them throughout the cream layers.
Now, let’s build those delicious layers:
- Place the first sponge cake layer onto your chosen cake stand.
- Generously spread a fluffy layer of whipped cream over the sponge. While I usually prefer freshly whipped cream for its superior texture and taste, if you have a can of high-quality whipped cream on hand and need to use it up, it will work in a pinch!
- Carefully arrange the prepared strawberry halves around the edge of the whipped cream, creating a beautiful border.
- Lightly dust the entire whipped cream and strawberry surface with powdered sugar.
- Gently place the second sponge cake layer directly on top.
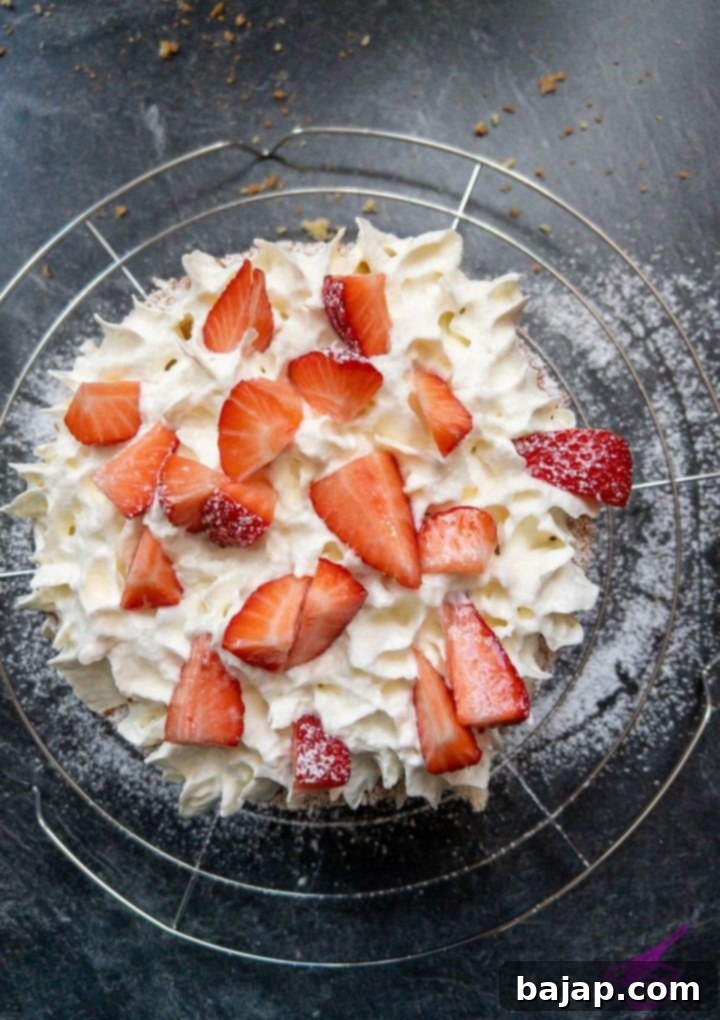
For those who desire even more strawberry goodness, here’s a fantastic idea: before adding the second sponge cake layer, cut some additional strawberries into smaller, eight-piece segments. Sprinkle as many as you like directly onto the whipped cream layer for an extra burst of fruit in every bite. This adds another dimension of flavor and texture to your cake.
If you’ve opted for a taller cake, continue building your layers in the same manner. Add another layer of whipped cream, arrange strawberries, dust with powdered sugar, and then place your remaining sponge cake layers until all four are stacked. Alternatively, if you’re content with a beautiful two-layer strawberry sponge cake, it’s time for the final decorations!
To finish, sprinkle the very top sponge cake layer generously with powdered sugar. For a stunning centerpiece, create a “fanned” strawberry by making several thin slices from the tip almost to the stem, then gently splaying it open. Place this fanned strawberry in the center of your cake, securing it with a small dollop of whipped cream underneath. Give it one last light dusting of powdered sugar, and your magnificent strawberry sponge cake is ready to be served! Enjoy every incredible, melt-in-your-mouth bite!
🍓 Can’t Get Enough Strawberries? Discover More Recipes!
If you’ve fallen in love with the fresh taste of strawberries through this cake, you’ll be thrilled to know there are many more ways to enjoy them. Here are additional delightful strawberry recipes to inspire your culinary adventures:
- Strawberry Cream
- Strawberry Cupcakes with Ricotta
- Strawberry Flavored Whipped Cream
- Strawberry Cobbler
- Strawberry Simple Syrup
- Strawberry Popsicles
- Strawberry Spritz
- No-bake Strawberry Cheesecake
- Strawberry Milkshake
- Strawberry Moscow Mule
- Strawberry White Chocolate Cocoa
🙋🏻 Frequently Asked Questions About Strawberry Sponge Cake
Absolutely, yes! This sponge cake recipe is wonderfully versatile and pairs beautifully with various types of berries. While strawberries are a personal favorite and well-tolerated with my fructose malabsorption, feel free to experiment with raspberries, blueberries, or a mixed berry combination. Each berry will lend its unique flavor profile, creating a new and exciting dessert every time. Just ensure they are fresh and ripe for the best results.
The most common culprit for a sponge cake that doesn’t rise is mistakenly greasing your springform pan. Unlike other cakes, sponge cake batter needs to “grip” the sides of the pan as it bakes to climb and achieve its characteristic height and airiness. If the sides are greased, the batter slides down, preventing it from rising. Other factors could include under-whipped egg whites (they need to be stiff!), overmixing the batter after adding the flour (which deflates the air), or incorrect oven temperature. Always ensure your oven is preheated to the correct temperature.
🍽️ Essential Equipment for a Perfect Bake
Having the right tools can make all the difference in your baking experience. Here’s what you’ll need to create this magnificent strawberry sponge cake:
- Mixing bowls: For separating and mixing your ingredients.
- Electric Hand Mixer or Food Processor: Essential for whipping those egg whites to stiff peaks.
- Sieve: For sifting the cake flour, ensuring a lump-free and airy batter.
- Springform pans: Two 8-inch cake pans are ideal for creating multiple layers.
- Cooling rack: Crucial for allowing your sponge cake layers to cool completely and prevent sogginess.
- Sharp knife: For carefully slicing your cooled cake layers. A bread knife works best.
- Cake stand: For elegant assembly and presentation.
🌡️ Storage Tips for Your Strawberry Sponge Cake
This fresh strawberry sponge cake is best enjoyed soon after assembly, which, let’s be honest, won’t be a problem given how delicious it is! To keep it at its best, store the cake under a cake dome in the refrigerator. It will maintain its optimal texture and flavor for about three days. After that, the sponge may start to absorb moisture from the cream and berries, becoming a bit soggy. For the freshest taste, plan to serve it within 1-2 days of baking.
💭 Pro Tip for Enhanced Enjoyment (Especially for Fructose Malabsorption)
Here’s a valuable tip, particularly if you’re managing fructose malabsorption: sprinkle your strawberries with dextrose powder. I received this excellent advice from my nutritionist, and it’s made a significant difference. It’s best to do this after you’ve sliced the strawberries open and before you place them onto the cake layers. The dextrose helps facilitate fructose absorption in the small intestine. This method has consistently allowed me to indulge in my fruit cravings without the discomfort that often follows. It’s a game-changer for enjoying fresh fruit!
If you’re looking for a delicious gluten-free cake and strawberry combination, I highly recommend trying this gorgeous gluten-free strawberry shortcake. It’s equally delightful and caters to different dietary needs!
Discover even more delicious recipes to try:
- Chestnut Cake
- Egg White Chocolate Cake
- Flourless Chocolate Cake
- Potato Flour Cake with Eggnog
- Whipping Cream Bundt Cake
- Chocolate Chip Ricotta Loaf Cake
- Double Chocolate Bundt Cake
- Healthy Rhubarb Crumble (created by nourishyourglow.com)
If you embark on this delightful recipe, please share your experience! Let me know how much you loved it by giving it a ★★★★★ star rating and leaving a comment below. Your feedback is truly invaluable! You can also subscribe to our Newsletter to receive weekly delicious homemade recipes, or follow me on Pinterest or Instagram and share your beautiful creation with me. Just tag me @combinegoodflavors and use the hashtag #combinegoodflavors, so I don’t miss it!
📖 Recipe
Strawberry Sponge Cake
Nora
Save RecipeSaved!
Pin Recipe
Equipment
-
Mixing bowls
-
Electric Handmixer
-
Close meshed sieve
-
2 8-Inch Springform Pan
-
Cooling Rack
-
Bread knife
-
Cake stand for serving
Ingredients
- 6 Eggs
- ⅓ cup Superfine sugar
- 2 ½ teaspoon Vanilla Sugar
- 1 cup Cake Flour
- 1 ⅛ cup Whipped Cream
- 12.35 oz Fresh Strawberries
- Powdered Sugar for dusting
Instructions
Making the Sponge Cake
-
Preheat your oven to 180 °C // 356 °F top/bottom heat and separate the eggs into two separate bowls.6 Eggs
-
Take the bowl with the egg yolks and add half of the superfine sugar and the entire vanilla sugar.⅓ cup Superfine sugar, 2 ½ teaspoon Vanilla Sugar
-
Beat the ingredients with an electric mixer until very foamy and set aside.
-
Grab the bowl with the egg whites and add the second half of the superfine sugar. Beat them until very stiff.
-
In the mixing bowl with the beaten egg yolks, gently fold in the stiffly beaten egg whites. Then sift the flour over it and mix it in1 cup Cake Flour
-
Fill the batter into the springform pans (about three-quarters full) and put the filled springform pans in the oven.
-
Bake on the middle shelf for half an hour.
-
Remove the springform pan(s) from the oven and let cool for 15 minutes.
-
Before opening the springform pan, cut along the edge once with a knife to ensure no dough sticks to the sides.
-
Take the dough out of the springform pan and let it cool further on a cooling rack.
-
Once the dough is no longer warm, take the first sponge cake and cut it in half. Do the same with the second sponge.
Layering the Cake – 2 small cakes
-
Wash the strawberries and remove the green.
-
Place the first sponge cake layer on the cake stand.
-
Now add a layer of whipped cream to the sponge.1 ⅛ cup Whipped Cream
-
Place the prepared strawberry halves around the edge of the sponge cake.12.35 oz Fresh Strawberries
-
Dust the whole whipped cream strawberry surface with powdered sugar.
-
Place the second sponge cake base on top.
-
Sprinkle the top sponge cake layer with powdered sugar and place a fanned strawberry in the center. Locking it with a scoop of whipped cream underneath.Powdered Sugar
-
Sprinkle a second time with powdered sugar, and the strawberry sponge cake is ready to be served!
OPTION 2 – Layering the Cake – 1 big cake
-
Wash the strawberries and remove the green.
-
Place the first sponge cake layer on the cake stand.
-
Now add a layer of whipped cream to the sponge.
-
Place the prepared strawberry halves around the edge of the sponge cake.
-
Dust the whole whipped cream strawberry surface with powdered sugar.
-
Place the second sponge cake base on top.
-
Add another layer of whipped cream to the second sponge.
-
Place the prepared strawberry halves around the edge of the sponge cake.
-
Dust the whole whipped cream strawberry surface with powdered sugar.
-
Place the third sponge cake base on top.
-
Add another layer of whipped cream to the third sponge.
-
Place the rest of the prepared strawberry halves around the edge of the sponge cake.
-
Dust the whole whipped cream strawberry surface with powdered sugar.
-
Place the last sponge cake base on top.
-
Sprinkle the top sponge cake layer with powdered sugar and place a fanned strawberry in the center. Locking it with a scoop of whipped cream underneath.
-
Sprinkle a second time with powdered sugar, and the strawberry sponge cake is ready to be served!
Never miss a recipe!Sign up and let me spoil you weekly with a delicious homemade recipe!
Like this recipe?Mention @combinegoodflavors or tag #combinegoodflavors!
Nutrition values are estimates only, using online calculators. Please verify using your own data.

⛑️ Food Safety Guidelines for Home Baking
Ensuring food safety is paramount when cooking at home. Following these guidelines will help keep your kitchen and your delicious creations safe:
- Cook to a minimum temperature of 165 °F (74 °C) to eliminate harmful bacteria, especially for dishes containing eggs.
- Do not use the same utensils on cooked food that previously touched raw ingredients to prevent cross-contamination.
- Always wash your hands thoroughly with soap and water after handling raw ingredients like eggs.
- Avoid leaving perishable food, such as this cake with whipped cream, sitting out at room temperature for extended periods. Refrigerate promptly.
- Never leave cooking food unattended, especially when using high heat.
- When baking or frying, use oils with a high smoking point to avoid the production of harmful compounds.
- Always ensure good ventilation when using a gas stove or oven to prevent the buildup of harmful fumes.
For more detailed information and comprehensive food safety tips, please refer to Safe Food Handling – FDA.
