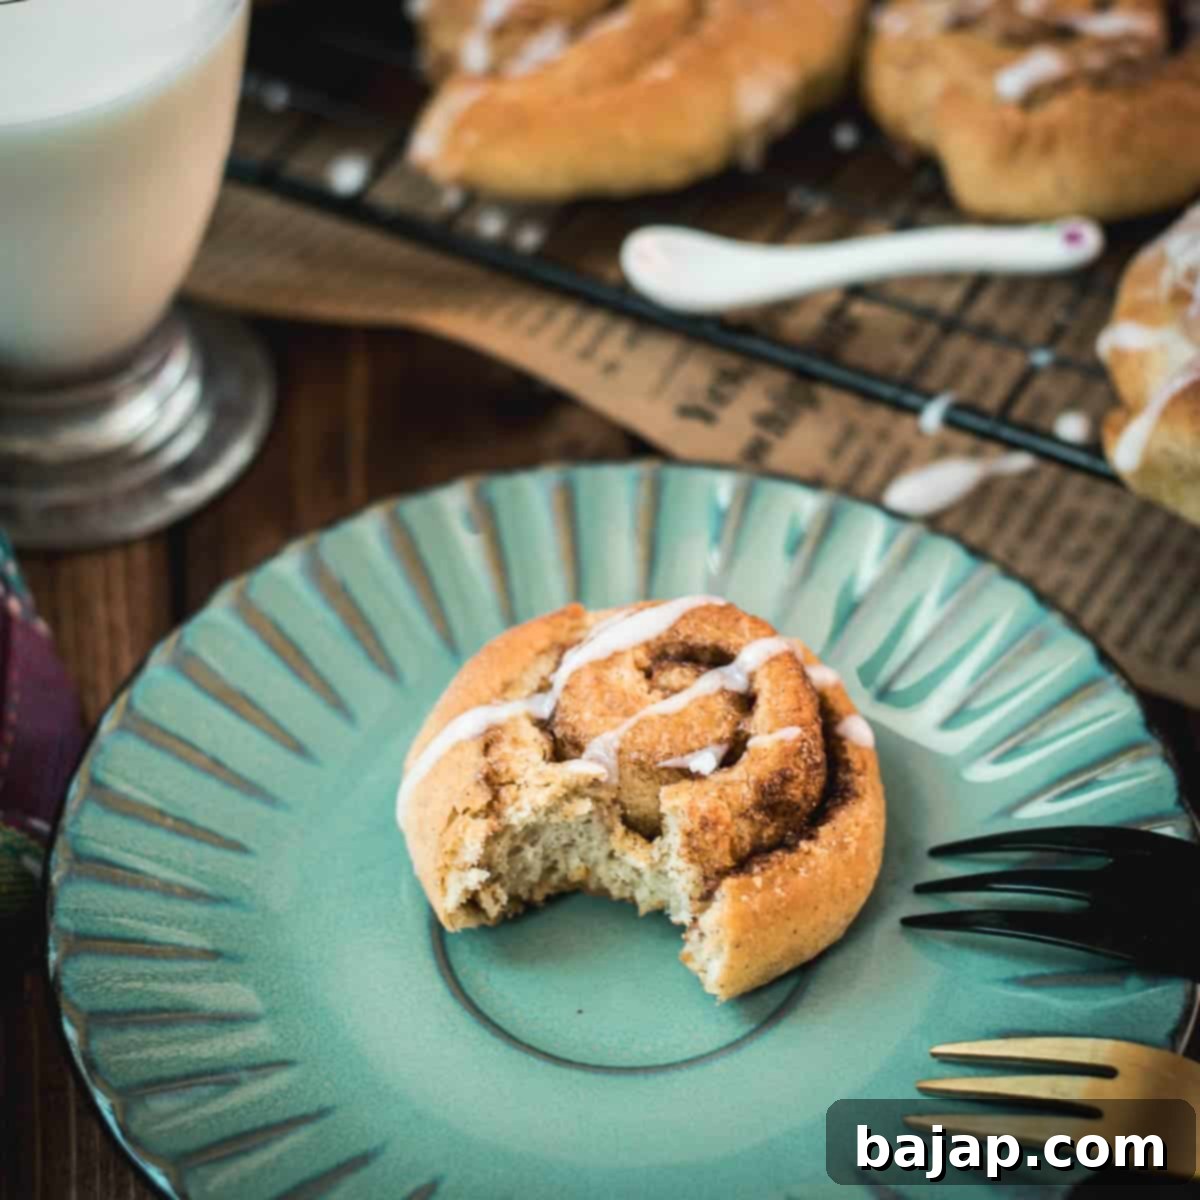
Deliciously Fluffy & Easy Mini Cinnamon Rolls: Your Perfect Sweet Treat Recipe
October 4th is annually celebrated as National Cinnamon Roll Day, a delightful occasion that truly calls for a special homemade treat. What better way to honor this sweet day, or simply brighten any morning, than by whipping up a batch of these incredibly quick and easy mini cinnamon rolls?
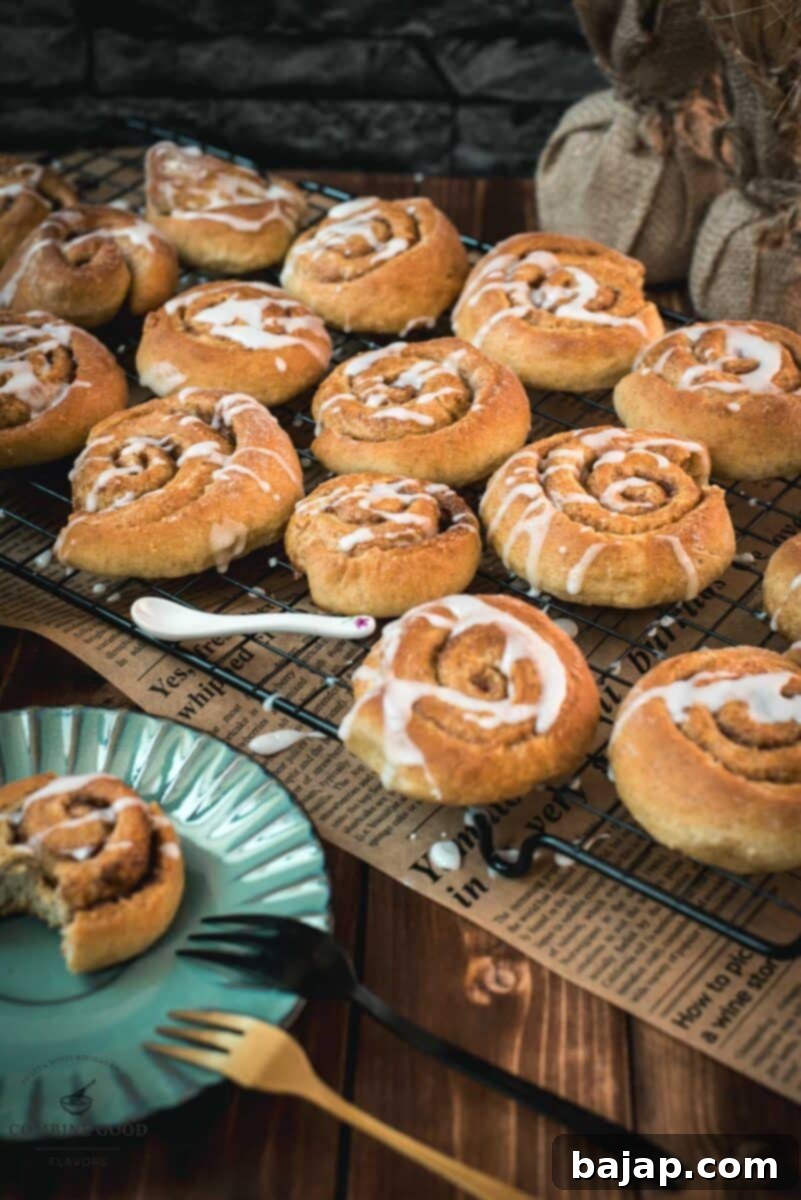
These petite pastries are a true revelation: unbelievably fluffy, wonderfully soft, and bursting with the classic, comforting flavors of cinnamon and vanilla. This recipe is designed to yield approximately 20 mini cinnamon rolls, making them perfect for sharing. But be warned – they are so utterly irresistible that they often vanish in record time! Our family and friends can attest to their fleeting presence on the cooling rack, devoured almost as soon as they were drizzled with our luscious homemade icing. Not only are these tiny delights exceptionally delicious, but their miniature size makes them absolutely adorable and perfect for any spread.
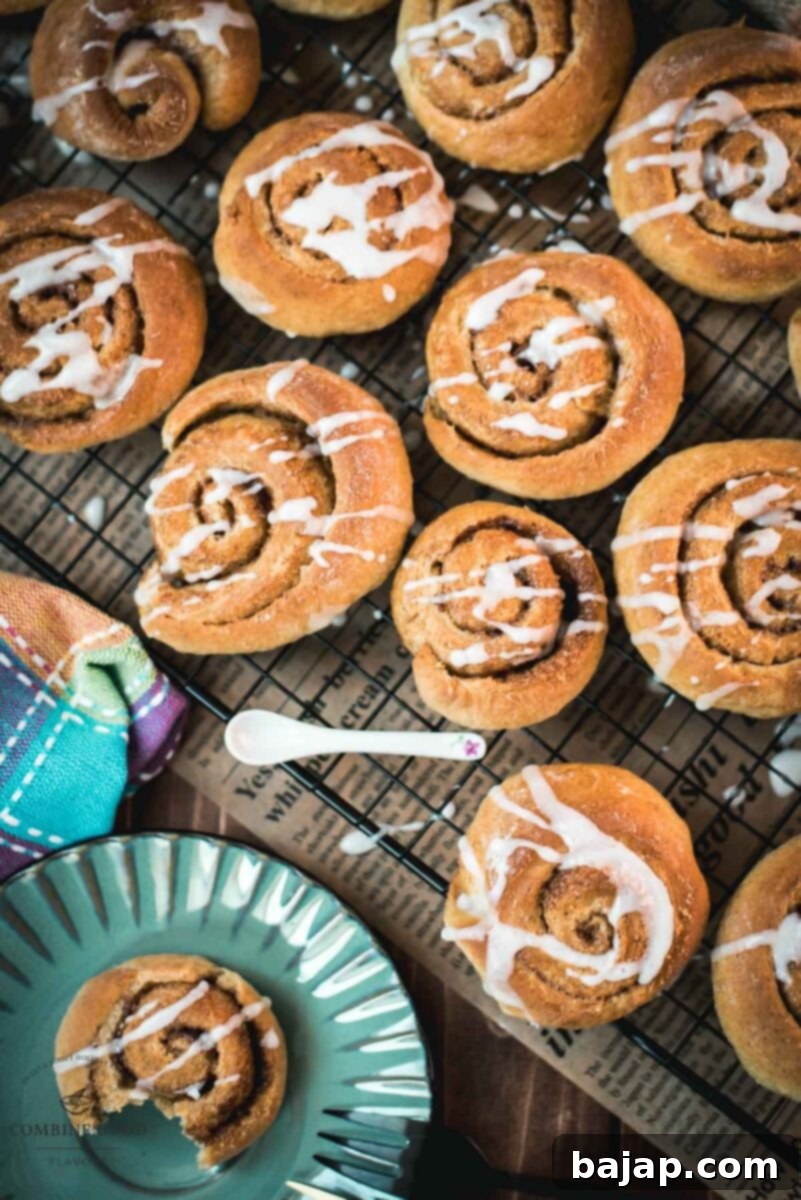
Forget the rush of the bakery; the warm, inviting aroma of freshly baked cinnamon rolls filling your home is an experience in itself. Baking these treats from scratch is surprisingly simple, and the results are far superior to any store-bought version. So, let’s not delay – grab your apron, gather your ingredients, and prepare to bake these fluffy mini cinnamon buns right in your own kitchen!
Happy National Cinnamon Roll Day!
Why Choose Mini Cinnamon Rolls?
While classic, full-sized cinnamon rolls are undeniably fantastic, their miniature counterparts offer several unique advantages that make them a standout choice for various occasions:
- Perfect Portion Control: Mini rolls are ideal for satisfying a sweet craving without overindulging. They’re just the right size for a breakfast treat, an afternoon snack, or a delightful dessert following a meal.
- Quicker Baking Time: Their smaller dimensions mean these delightful rolls bake significantly faster than standard-sized versions, getting you to that delicious first bite even sooner! This is perfect for when you need a quick dessert or a last-minute party contribution.
- Great for Sharing: Whether you’re hosting a brunch, a casual gathering, a children’s party, or simply want to share a homemade treat with friends and family, mini cinnamon rolls are incredibly easy to serve and enjoy. They fit perfectly on platters and in lunchboxes.
- Adorable Presentation: Let’s be honest, everything miniature is inherently cute! These small swirls of cinnamon goodness look fantastic on any platter, especially when generously drizzled with glistening homemade icing. They add a touch of charm to any table.
- Easier to Make: For bakers of all skill levels, working with smaller dough sections can be less intimidating. The dough is more manageable to roll out and cut into smaller pieces, simplifying the overall baking process and reducing potential stress.
- Freshness Factor: Since they bake quickly and are often eaten in one sitting, you’re more likely to enjoy them at their peak freshness and warmth.
🥘 Ingredients for the Fluffy Dough and Sweet Filling
Crafting the perfect mini cinnamon roll starts with selecting quality ingredients. Each component plays a crucial role in achieving that signature fluffy texture, rich, sweet flavor, and aromatic spice blend. Here’s a closer look at what you’ll need to create these irresistible treats:
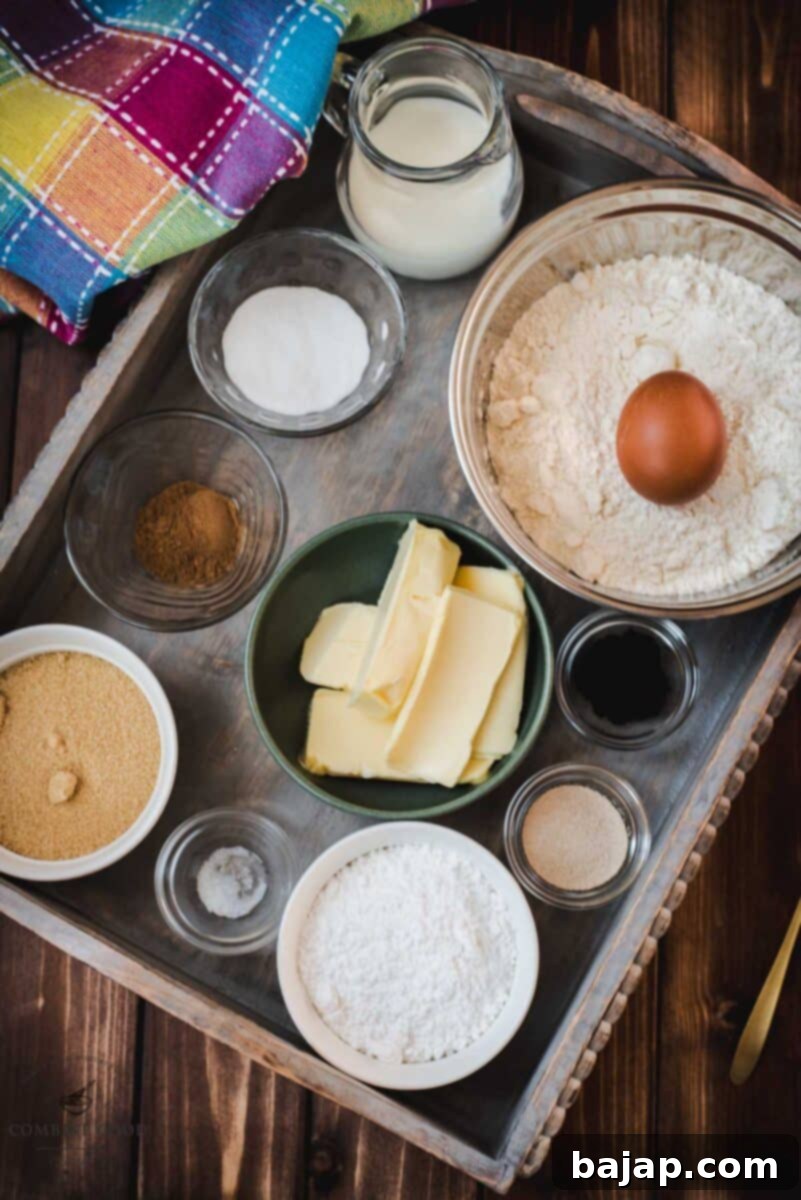
- Milk: This liquid ingredient is absolutely crucial for activating the dry yeast. Use lukewarm milk (not too hot, not too cold) to ensure the yeast thrives and helps the dough rise beautifully, resulting in a soft and tender crumb.
- Butter, soft: Butter is a key player, adding incredible richness, moisture, and a tender texture to the dough. It also forms the luscious base for the irresistible cinnamon sugar filling, making each bite melt in your mouth.
- Cake Flour: We recommend cake flour because its lower protein content compared to all-purpose flour results in a lighter, more tender, and ultimately fluffier cinnamon roll. It creates that delicate texture you crave. Make sure to have a little extra on hand for dusting your work surface.
- Granulated Sugar: This provides essential sweetness to the dough itself. More importantly, it acts as a food source for the yeast, accelerating fermentation and ensuring a vigorous rise.
- Yeast, dry: The magical leavening agent that transforms simple ingredients into incredibly fluffy rolls. Always check the expiration date on your yeast packet to guarantee it’s active and your dough rises properly.
- Vanilla Sugar: Elevates the overall flavor profile with a subtle, yet aromatic, vanilla note that perfectly complements the cinnamon. For a truly exceptional taste, consider making your own homemade vanilla sugar (here’s how to make it), or simply use good quality store-bought vanilla sugar.
- Salt: A small but mighty ingredient, a pinch of salt balances the sweetness and significantly enhances all the other flavors present in the dough, preventing it from tasting flat.
- Brown Sugar: This is the undeniable star of the cinnamon filling! Brown sugar provides a deeper, caramel-like sweetness and a moist texture that beautifully melts into the dough during baking, creating gooey pockets of flavor.
- Cinnamon: The essential spice that gives cinnamon rolls their iconic taste and aroma! We highly recommend using Ceylon cinnamon, often considered superior in flavor with a milder, more complex profile, and containing very little coumarin, making it a healthier choice.
- Egg: Incorporating one egg into the dough adds richness, vital moisture, and helps to bind the dough together. This contributes to its tender structure and a lovely golden-brown crust during baking.
- Powdered Sugar & Milk (for Icing): These two simple ingredients are all you need to create a perfect, smooth, and sweet icing drizzle. This glaze beautifully finishes your warm, freshly baked mini rolls, adding an extra layer of sweetness and shine.
For precise measurements and detailed nutritional information, please refer to the complete recipe card located further down this page.
🔪 Step-by-Step Instructions to Bake Your Mini Cinnamon Rolls
Follow these detailed steps to create a batch of the most delightful mini cinnamon rolls. Each stage is crucial for achieving that perfect fluffy texture and rich, sweet flavor. Precision and a little patience will ensure a fantastic result that will impress everyone!
Step 1: Prepare the Wet Ingredients. Begin by gently heating ½ cup of milk until it is lukewarm. The ideal temperature is between 105-115°F (40-46°C); it should feel warm to the touch but not hot, so as not to harm the yeast. Add 2 ¾ tablespoons of softened butter to the warm milk and stir until the butter has completely melted and is well combined. Set this mixture aside to cool slightly if it’s too warm.
Step 2: Combine Dry Ingredients. In a large mixing bowl (or the bowl of your kitchen machine), thoroughly combine the cake flour, granulated sugar, dry yeast, vanilla sugar, and salt. Whisking these dry ingredients together ensures that the yeast and flavorings are evenly distributed throughout the flour, which is important for a consistent rise.
Step 3: Form the Dough. Now, add one egg to the dry ingredient mixture. Pour in the lukewarm milk and butter mixture you prepared in Step 1. If using a kitchen machine, attach a dough hook and knead on low speed. Continue kneading for about 5-7 minutes, or until the dough comes together, becomes smooth, elastic, and pulls away cleanly from the sides of the bowl. If kneading by hand, work the dough on a lightly floured surface with steady movements until it’s pliable and smooth.
Step 4: First Rise. Lightly grease the mixing bowl with a little oil or butter, then place the dough back in and turn it once to coat the entire surface. This prevents it from sticking. Cover the bowl tightly with plastic wrap or a clean kitchen towel. Let the dough rise in a warm, draft-free place for about 40 minutes, or until it has noticeably doubled in size. A warm spot near a sunny window or in a slightly warmed (then turned off) oven works perfectly.
Step 5: Preheat Oven. While the dough is on its second rise, take a moment to preheat your oven. Set it to 190°C (374°F). This ensures the oven is at the correct, consistent temperature when your rolls are ready to go in, which is crucial for even baking.
Step 6: Roll Out the Dough. Once the dough has completed its first rise and doubled in size, gently punch it down to release the trapped air. Transfer the dough to a lightly floured work surface. Using a rolling pin, carefully roll the dough out into a large rectangle, aiming for a uniform thickness of about ¼ inch (approximately 0.6 cm). Try to keep the edges as straight as possible.
Step 7: Spread the Butter. Evenly spread the remaining soft butter over the entire surface of the rolled-out dough rectangle. Make sure to go right to the edges so every part of the roll gets that rich, buttery flavor.
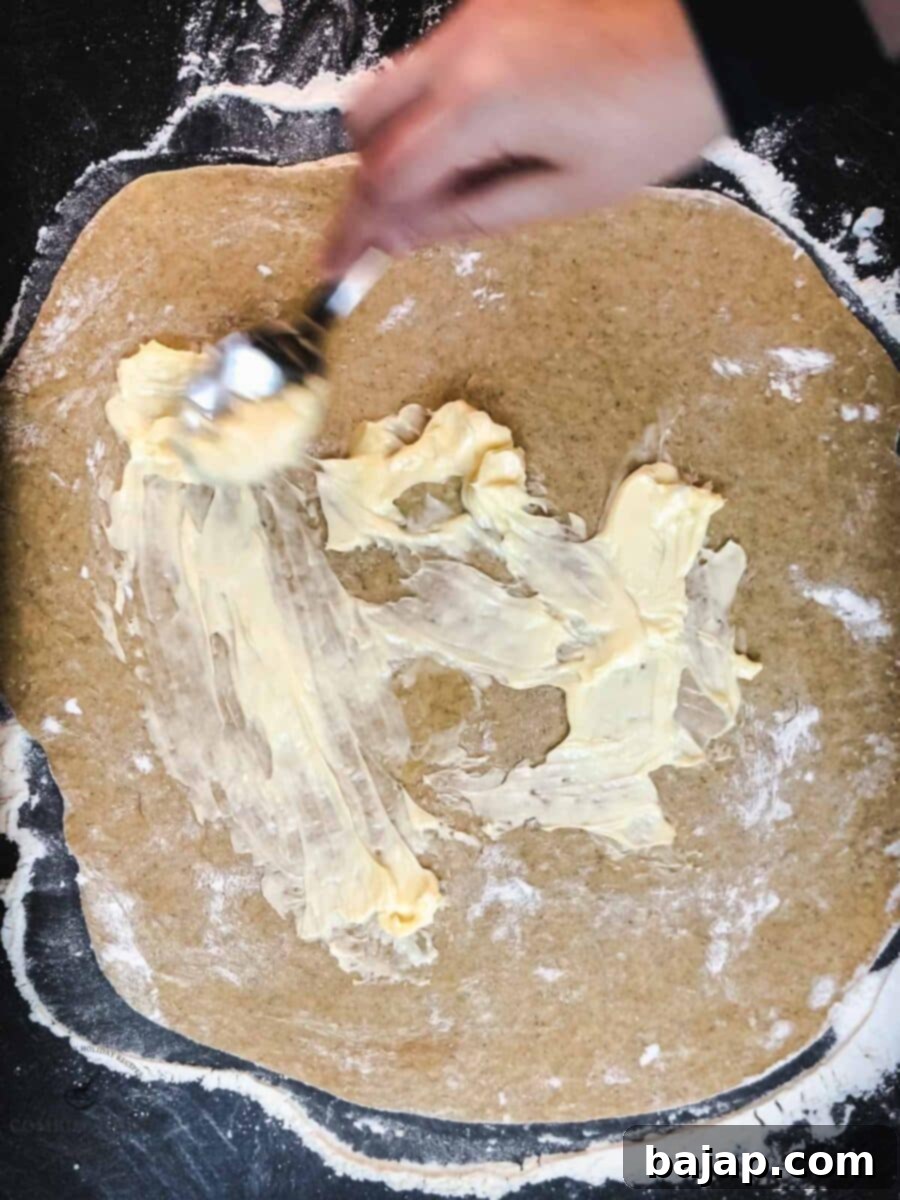
Step 8: Apply the Cinnamon-Sugar Filling. In a small, separate bowl, mix together the brown sugar and cinnamon until they are thoroughly combined. Generously sprinkle this fragrant mixture evenly over the buttered dough, covering it completely. Ensure the filling is spread right to the edges for maximum flavor in every bite.
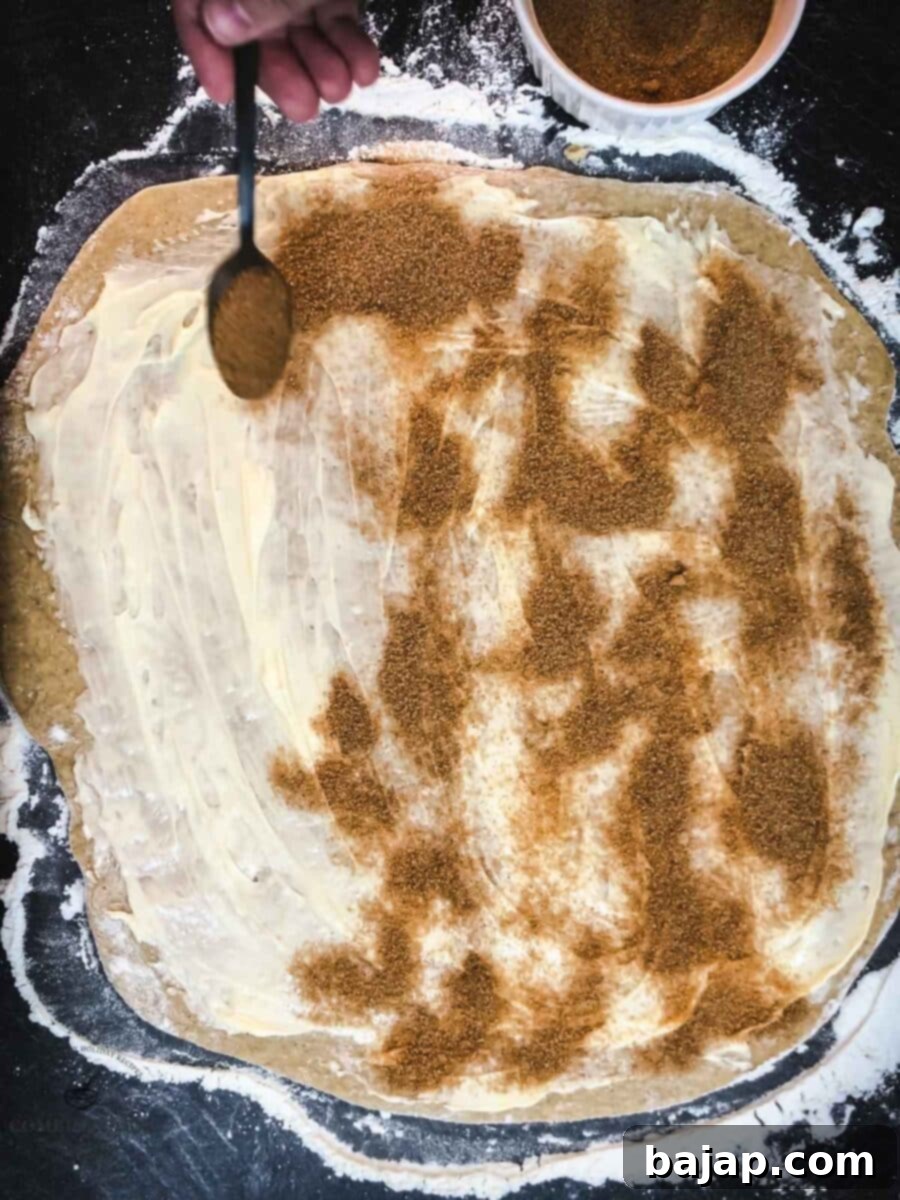
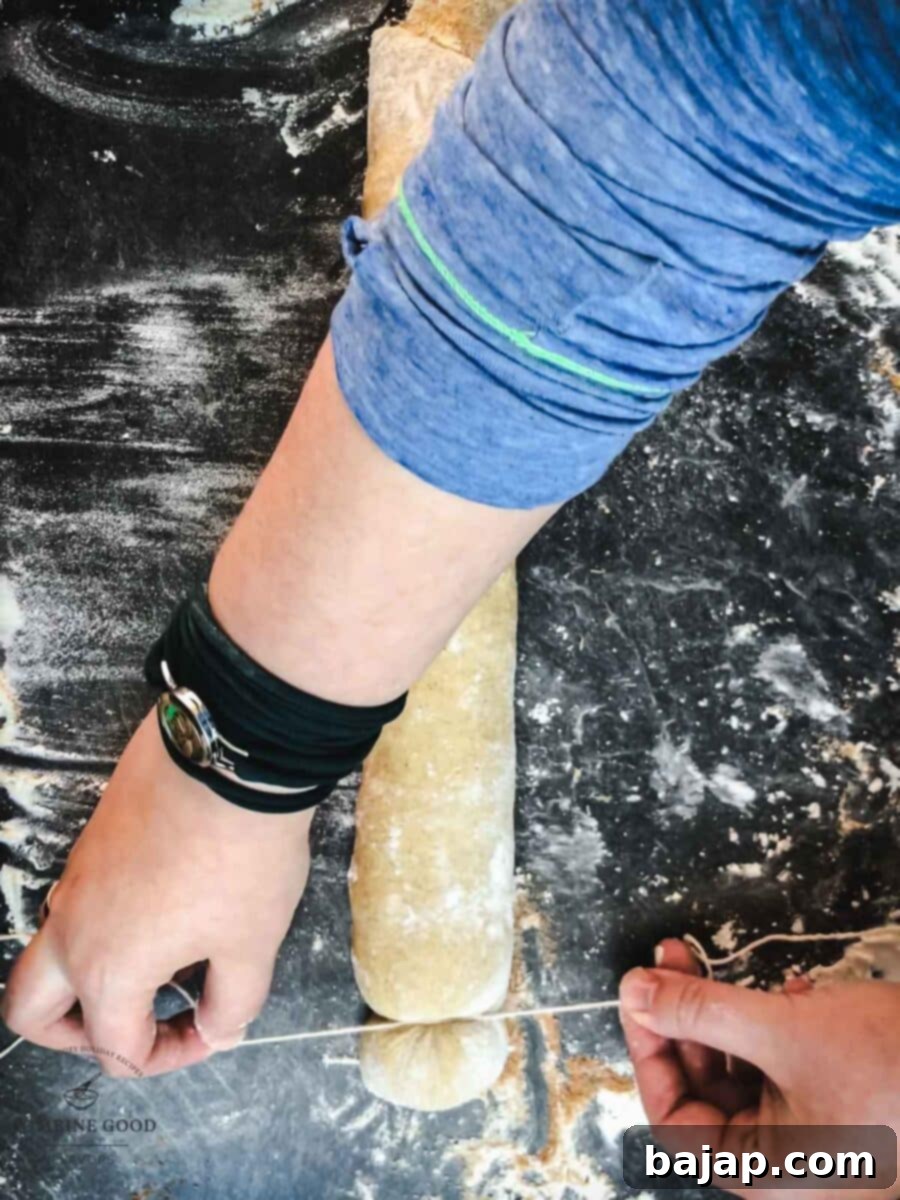
Step 9: Roll and Cut the Dough. Carefully and tightly roll the dough from one of the wide sides into a snug log. Once rolled, use a piece of kitchen twine (or a very sharp, un-serrated knife) to cut the log into finger-thick slices. Using twine helps keep the shape of the rolls intact and prevents squishing, resulting in beautifully round mini rolls.
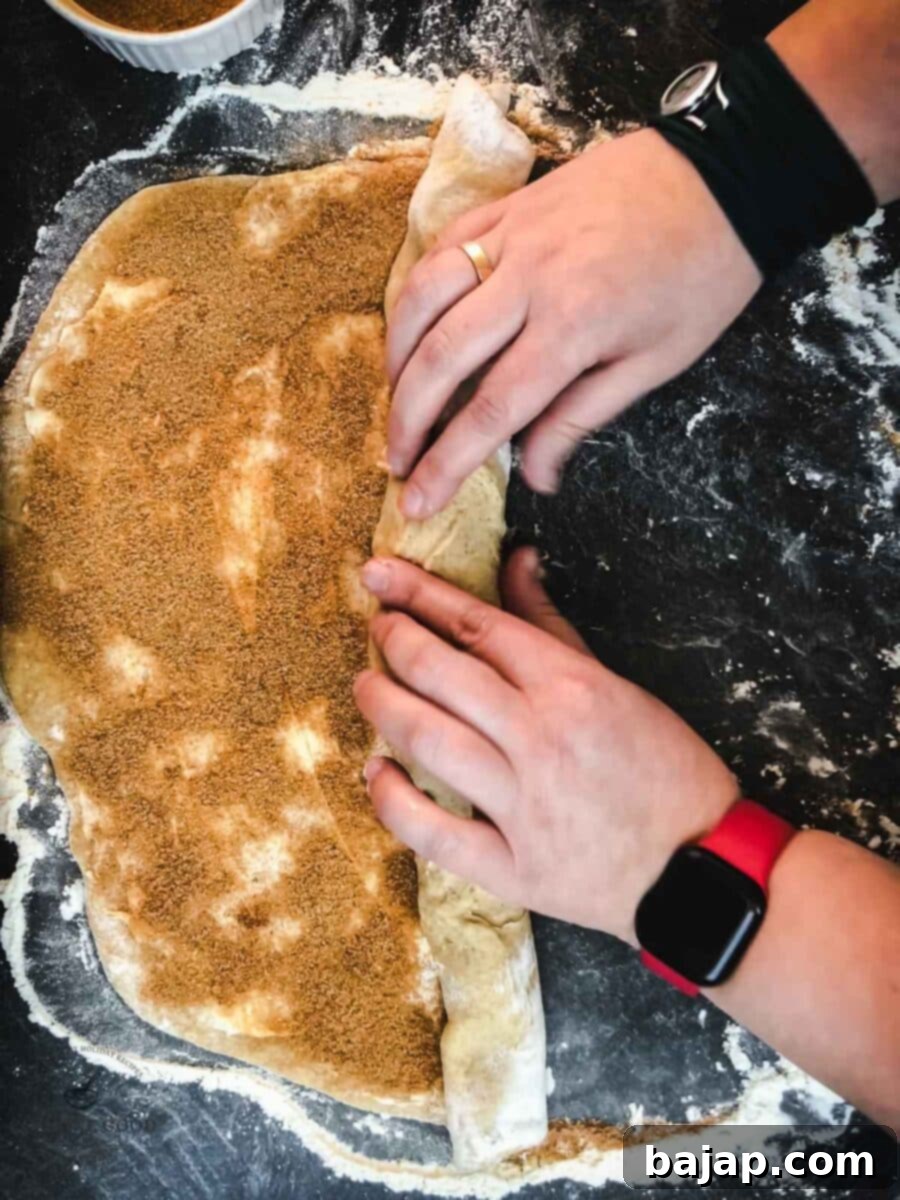
Step 10: Second Rise. Arrange the cut slices on a baking tray that has been lined with parchment paper, ensuring there is enough space between each roll to allow for further expansion during baking. Cover them loosely with plastic wrap or a kitchen towel and let them rise in a warm place for another 15 minutes. This second, shorter rise makes the rolls extra light and fluffy.
Step 11: Bake to Golden Perfection. Place the baking tray in the middle rack of your preheated oven. Bake for approximately 20 minutes, or until the tops are beautifully golden brown and the rolls appear cooked through and feel soft to the touch. Keep a close eye on them to prevent over-browning. Once baked, carefully transfer the rolls to a wire rack to cool slightly.
Step 12: Prepare the Icing. While the rolls are cooling, prepare the simple yet utterly delicious icing. Sieve the powdered sugar into a small bowl to remove any lumps and ensure a smooth glaze. Gradually add two tablespoons of milk, stirring continuously until you achieve a smooth, pourable consistency. If the icing is too thick, add a tiny bit more milk; if it’s too thin, add a little more powdered sugar.
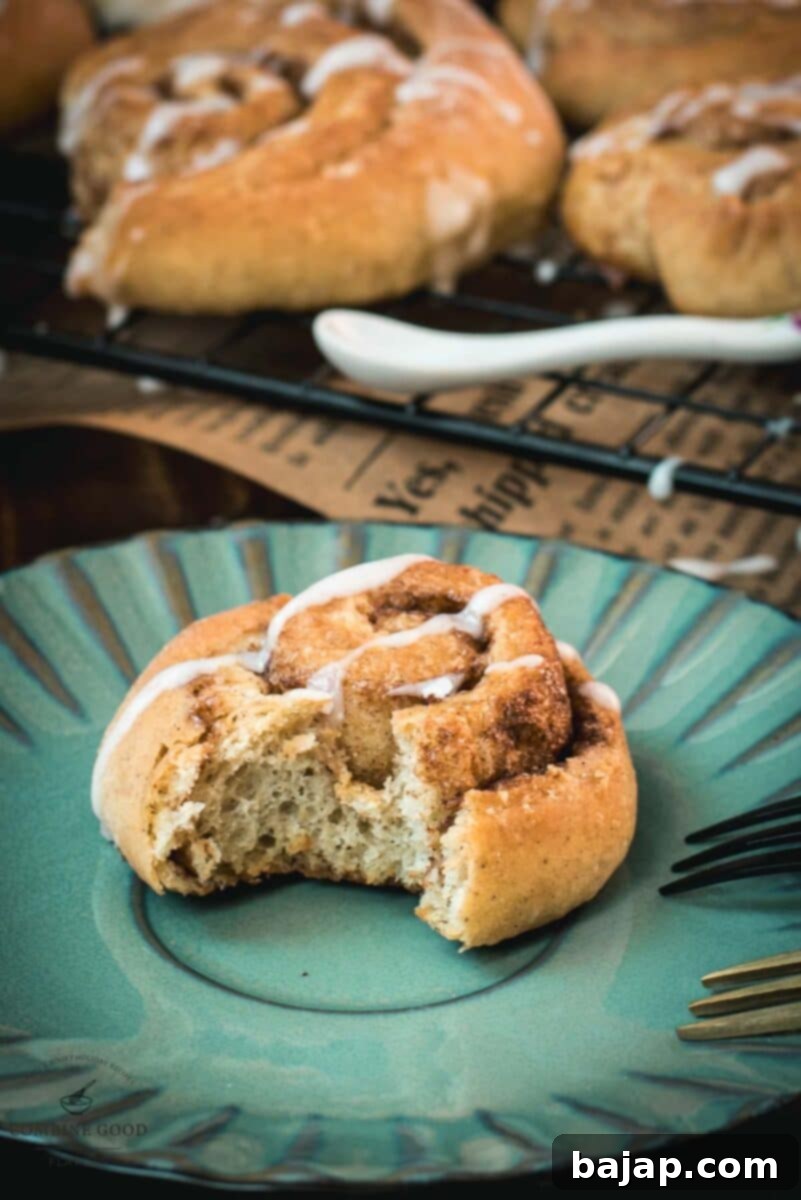
Step 13: Drizzle and Serve. Using a fork, generously drizzle the homemade icing over the warm (but not hot) mini cinnamon rolls. The warmth of the rolls will help the icing set beautifully. Allow the glaze to set for a few minutes before serving. These are best enjoyed fresh, but can be stored for later enjoyment in an airtight container.
Tips for Perfectly Fluffy Mini Cinnamon Rolls
Achieving bakery-quality cinnamon rolls at home is easier than you think with these expert tips. Follow these guidelines to ensure your mini cinnamon rolls are always soft, tender, and irresistibly fluffy:
- Don’t Over-Knead: While kneading is essential for developing the gluten that gives the rolls their structure, over-kneading can lead to a tough, chewy texture. Knead just until the dough is smooth, elastic, and pulls away from the bowl – typically 5-7 minutes with a machine, slightly longer by hand.
- Warm Environment for Rising: Yeast thrives in warmth. Ensure your dough rises in a warm, draft-free place. Ideal conditions help the yeast activate quickly and efficiently, leading to a robust rise. A slightly warmed (then turned off) oven, or a sunny spot, can make a significant difference.
- Use Lukewarm Milk: The temperature of your milk is critical. Milk that is too hot will kill the yeast, preventing any rise, while milk that is too cold won’t activate it properly, resulting in a slow or non-existent rise. Aim for 105-115°F (40-46°C).
- Softened Butter is Key: For both the dough and the filling, ensure your butter is genuinely soft, but not melted. Softened butter incorporates smoothly into the dough and spreads easily for the filling, ensuring even distribution and rich flavor.
- Even Rolling and Filling Distribution: Roll your dough into an even rectangle to ensure uniform thickness across all your rolls. Spread the butter and cinnamon-sugar mixture right to the edges of the dough. This guarantees that every single bite of your mini cinnamon roll is packed with flavor.
- Sharp Cutting Technique: Using kitchen twine for cutting is the secret to perfectly shaped, non-squished rolls. It slices cleanly through the layers without compressing them, preserving the beautiful swirl. If using a knife, make sure it’s very sharp and use a swift, clean motion.
- Don’t Overbake: Mini cinnamon rolls bake quickly due to their small size. Keep a close eye on them during the last few minutes of baking to prevent them from drying out. They should be beautifully golden brown and feel soft to the touch, not hard.
Delicious Variations to Try
While these classic mini cinnamon rolls are absolutely perfect on their own, you can easily customize them to your taste with these delightful variations:
- Cream Cheese Icing: For a richer, tangier topping that many people adore, substitute the simple milk icing with a classic cream cheese frosting. Simply combine softened cream cheese, butter, powdered sugar, and a splash of vanilla extract until smooth and creamy.
- Nutty Crunch: Add an extra layer of texture and flavor by sprinkling finely chopped pecans or walnuts over the cinnamon-sugar filling before rolling up the dough. The nuts toast slightly in the oven, adding a wonderful aroma and crunch.
- Orange Zest Infusion: For a bright, citrusy note that beautifully complements the warmth of cinnamon, add a teaspoon of fresh orange zest to either the dough itself or mix it directly into the cinnamon-sugar filling.
- Spiced Up Delight: Enhance the overall spice profile by adding a small pinch of ground nutmeg, allspice, or cardamom to the brown sugar and cinnamon mixture. These spices add depth and a unique aroma.
- Chocolate Swirl: If you’re a chocolate lover, consider adding a chocolatey twist. After spreading the butter, sprinkle a thin layer of mini chocolate chips or a mixture of cocoa powder and a little extra sugar before applying the cinnamon sugar.
- Maple Glaze: Instead of the traditional milk icing, create a delicious maple glaze by whisking powdered sugar with pure maple syrup and a tiny bit of milk until smooth.
Storing and Reheating Your Mini Delights
These mini cinnamon rolls are undeniably at their best when enjoyed fresh and warm from the oven. However, if you happen to have any delicious leftovers, here’s how to properly store and reheat them to maintain their deliciousness and fluffy texture:
- At Room Temperature: Once your mini cinnamon rolls have completely cooled down, store them in an airtight container. They will remain wonderfully fresh and tasty for up to 2-3 days on your countertop. The icing may soften slightly over time, which is completely normal.
- Refrigeration: For longer storage, you can extend their freshness by refrigerating the cooled rolls in an airtight container for up to a week. This is particularly useful if you live in a warm climate or if your rolls contain a cream cheese frosting, which requires refrigeration.
- Freezing for Future Enjoyment: If you want to prepare a larger batch ahead of time or simply save some for a rainy day, mini cinnamon rolls freeze beautifully. Once completely cooled, place un-iced rolls in a single layer on a baking sheet and freeze until solid. Then, transfer them to a freezer-safe bag or container, separating layers with parchment paper. They can be stored for up to 1-2 months. Thaw at room temperature before adding the fresh icing.
- Reheating for Freshness: To bring back that freshly baked warmth and softness, you have a couple of options. For individual rolls, a quick zap in the microwave for 10-20 seconds usually does the trick. For multiple rolls, warm them in a preheated oven at 175°C (350°F) for about 5-10 minutes. If they were previously iced, the icing might melt a bit, which is perfectly fine.
🍽 Essential Equipment for Baking These Mini Cinnamon Rolls
Having the right tools can make the baking process significantly smoother and more enjoyable. Here’s a list of equipment that will come in handy for preparing this delightful mini cinnamon roll recipe:
- Kitchen machine with a dough hook: Highly recommended for effortless and consistent kneading, which is key for a fluffy dough. However, you can certainly knead the dough by hand if you prefer.
- Kitchen twine: This is a fantastic secret weapon for cutting the dough log into perfectly shaped, non-squished rolls, preserving their beautiful swirl.
- Cooling rack: Essential for allowing your freshly baked rolls to cool evenly and preventing the bottoms from becoming soggy due to trapped steam.
- Mixing bowls: You’ll need various sizes for combining dry ingredients, mixing wet ingredients, and allowing the dough to rise comfortably.
- Rolling pin: A fundamental tool for shaping the dough into a uniform rectangle, ensuring all your rolls are of consistent size and thickness.
- Baking tray with parchment paper: A sturdy baking tray provides the surface for baking, while parchment paper ensures a non-stick surface for easy removal and significantly simplifies cleanup.
- Measuring cups and spoons: Accurate measurements are crucial in baking, so make sure you have a reliable set.
- Small saucepan or microwave-safe bowl: For heating the milk and melting butter in Step 1.
Other Sweet Recipes for You to Try
If you’ve enjoyed the process of making and the pleasure of devouring these mini cinnamon rolls, we encourage you to explore more delicious treats from our collection. Here are a few other sweet recipes that might capture your baking fancy:
- Apple Crisp without Oatmeal: A comforting, fruity dessert that boasts a wonderfully crunchy topping, perfect for any season.
- Semolina Cheesecake: A unique and surprisingly creamy cheesecake experience, offering a delightful twist on a classic dessert.
- Reese’s Pieces Peanutbutter Cookies: A soft, chewy, and intensely peanut buttery delight, loaded with everyone’s favorite candy pieces.
- Buchteln – Austrian Filled Sweet Rolls: Dive into traditional Austrian baking with these incredibly soft, yeast-risen buns, typically filled with jam or poppy seeds.
- Easy Vanilla Sauce: A versatile and rich homemade sauce that serves as the perfect accompaniment to a wide array of desserts, including cakes, strudels, and puddings.
And if you fancy a bigger, more traditional version of these cute little suckers, don’t miss out on Heidi’s classic cinnamon roll recipe!
Frequently Asked Questions (FAQ)
Here are some common questions about making mini cinnamon rolls that might help you perfect your baking skills:
- Can I prepare the dough ahead of time?
- Yes, absolutely! After the first rise (Step 4), simply cover the bowl containing the dough tightly with plastic wrap and refrigerate it overnight (for up to 24 hours). The next day, remove the dough from the fridge and let it come to room temperature for about 30-60 minutes before proceeding with Step 6 (rolling out the dough).
- Can I use all-purpose flour instead of cake flour?
- While cake flour is recommended for its lower protein content, which results in a lighter and fluffier texture, you can certainly substitute it with all-purpose flour. Your rolls might be slightly denser, but they will still be incredibly delicious. For a texture closer to cake flour, you can remove 2 tablespoons of all-purpose flour per cup and replace it with 2 tablespoons of cornstarch.
- What if my yeast doesn’t activate and the dough doesn’t rise?
- If your dough doesn’t show any signs of rising after the initial 40 minutes in a warm place, it usually indicates that your milk was either too hot (which kills the yeast) or too cold (which prevents it from activating properly). Additionally, always double-check the expiration date of your yeast. If the yeast is old, it may not be active. In such cases, it’s best to start over with fresh yeast and properly tempered milk.
- How do I get my icing to be the perfect consistency?
- Achieving the perfect icing consistency is all about gradual addition. First, sieve your powdered sugar to remove any lumps. Then, gradually add the milk one teaspoon at a time, stirring thoroughly after each addition, until you reach your desired drizzly or thick consistency. It should be thick enough to cling to the rolls beautifully but still pourable for an easy drizzle.
- Can I add nuts or other ingredients to the filling?
- Absolutely! Finely chopped pecans or walnuts are wonderful additions to the cinnamon-sugar filling, adding a delightful crunch and nutty flavor. You can also experiment with other ingredients like a pinch of nutmeg, orange zest, or even mini chocolate chips for a personalized twist.
- Can I make these larger, like traditional cinnamon rolls?
- Yes, you can! To make larger rolls, simply cut the dough log into thicker slices (e.g., 1.5-2 inches thick) instead of finger-thick. Adjust the baking time as needed; larger rolls will require a few more minutes in the oven. Keep an eye on them until they are golden brown and cooked through.
We truly hope you enjoy baking and devouring these mini cinnamon rolls as much as we do! They are a comforting treat that consistently brings smiles to every face. Don’t hesitate to make them for a special occasion, or simply to brighten an ordinary day with homemade goodness.
If you make this recipe, please let me know how you liked it by giving it a ★★★★★ star rating and leaving a comment below. Your feedback and reviews are greatly appreciated and help other bakers! You can also sign up for our Newsletter to receive delicious recipes weekly, or follow me on Pinterest or Instagram and share your creation with me. Just tag me @combinegoodflavors and use the hashtag #combinegoodflavors, so I don’t miss it!
📖 Recipe Card: Easy Mini Cinnamon Rolls

Easy Mini Cinnamon Rolls Recipe
Nora
Save RecipeSaved!
Pin Recipe
Equipment
-
Kitchen machine with a dough hook
-
Kitchen twine
-
Cooling Rack
-
Mixing bowls
-
Rolling Pin
-
Baking tray with parchment paper
