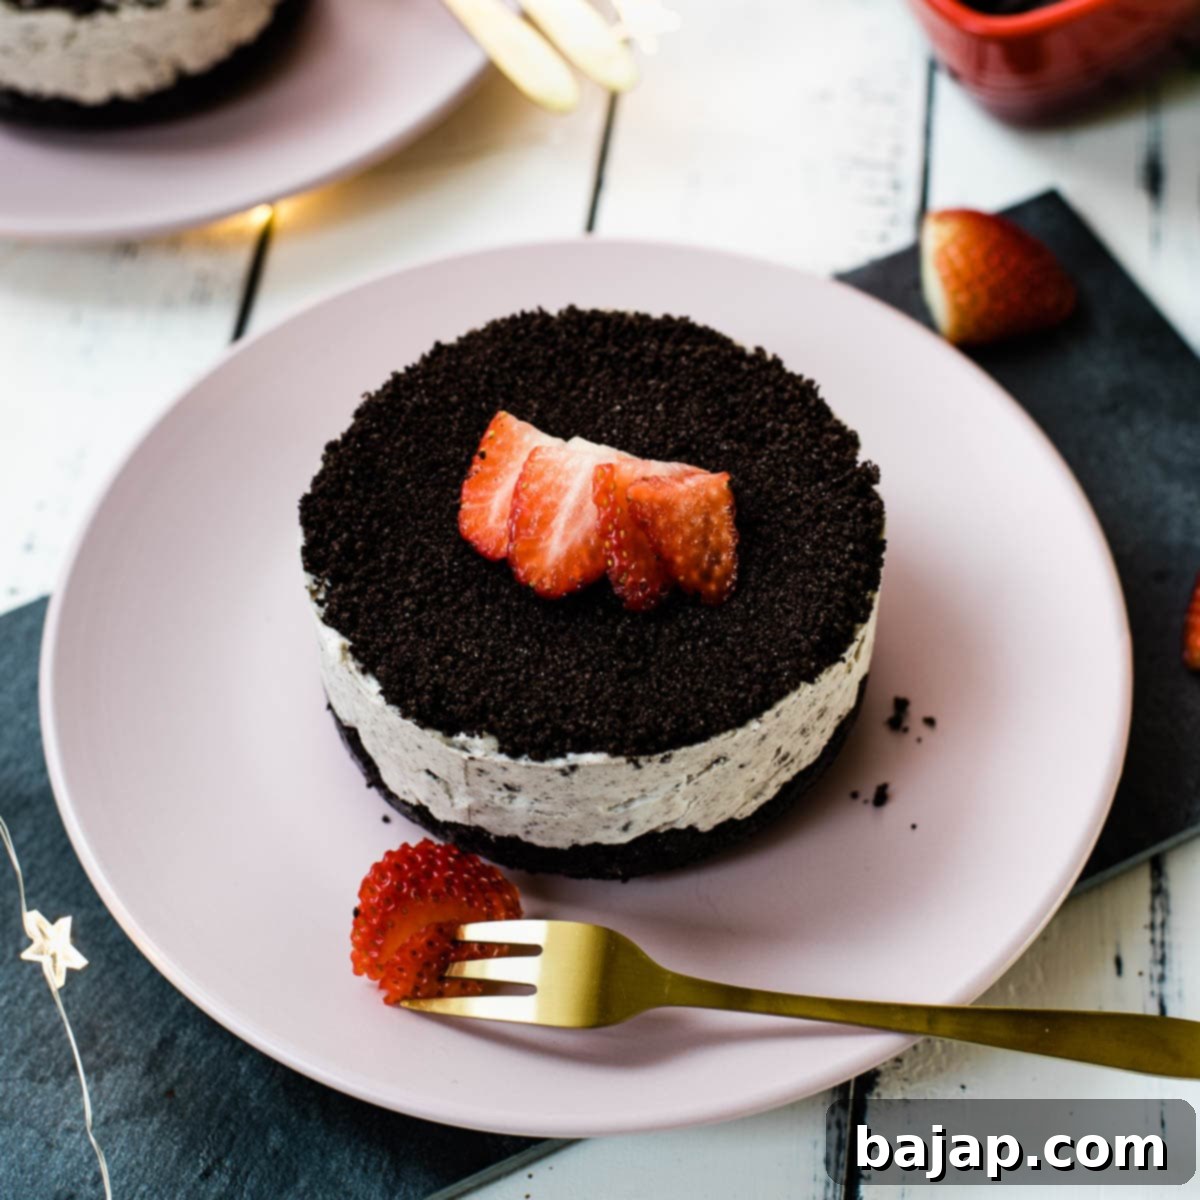
Easy 5-Ingredient No-Bake Mini Oreo Cheesecakes: Your Quick & Delicious Dessert!
Prepare to fall in love with these incredibly easy, intensely flavored, and absolutely adorable mini no-bake Oreo cheesecakes! They are the perfect solution for anyone craving a decadent dessert without the fuss of baking. With just five simple ingredients and a quick prep time, you’ll be whipping up these delightful treats in no time. Each bite delivers a rich blend of creamy goodness and classic Oreo flavor, beautifully complemented by a fresh strawberry topping.
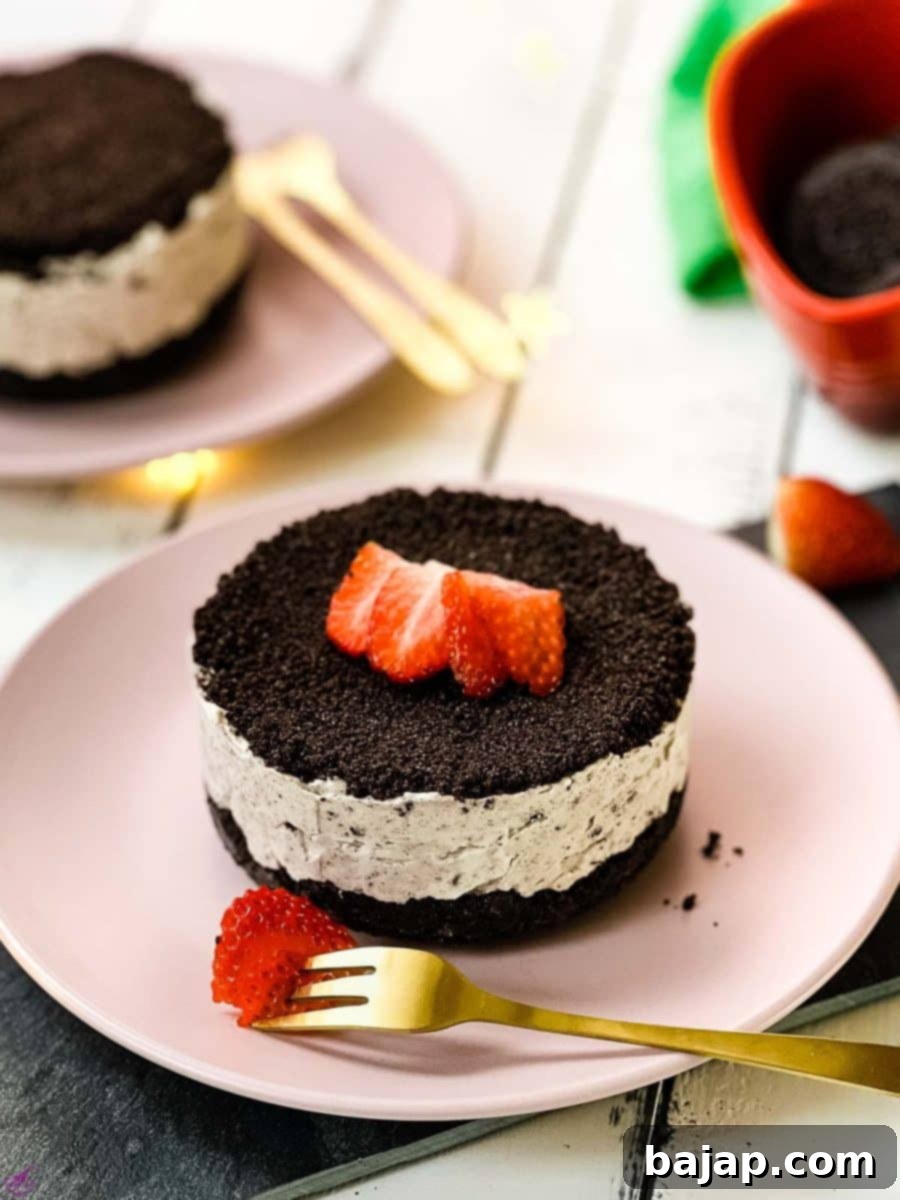
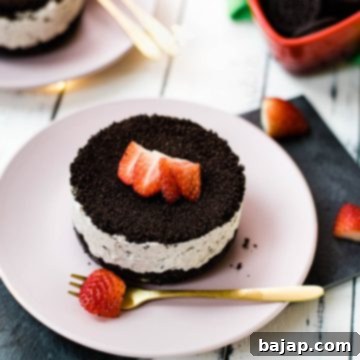
The magic of these cheesecakes lies in the harmonious blend of rich cream cheese and the iconic chocolatey crunch of Oreo cookies. The creamy filling is infused with crushed Oreos, while a sturdy Oreo crust provides the perfect foundation. To finish, a sprinkle of extra cookie crumbs and fresh, juicy sliced strawberries add a pop of color and a burst of natural sweetness, creating a truly irresistible dessert.
If you’re a cheesecake enthusiast, you know the joy a perfectly crafted cheesecake can bring. While I adore all kinds of cheesecakes—like this no-bake chocolate ricotta cheesecake—this particular recipe stands out for its simplicity and the convenience of individual portion sizes. No more messy slicing or uneven servings; each guest gets their own mini masterpiece!
These mini cheesecakes are not only a breeze to prepare but also incredibly versatile. They are an absolute showstopper for parties, potlucks, and any gathering where you want to impress without spending hours in the kitchen. Your guests will rave about them, and if by some miracle there are any leftovers, they are perfectly freezer-friendly, allowing you to enjoy a delightful treat whenever the craving strikes. Just pop them into the freezer and save them for another day!
Why You’ll Love This No-Bake Mini Oreo Cheesecake Recipe
There are countless reasons why these 5-ingredient no-bake mini Oreo cheesecakes will quickly become your go-to dessert:
- Incredibly Easy & Quick: Say goodbye to oven time! With no baking required and minimal prep, these cheesecakes are perfect for busy schedules or impromptu dessert cravings.
- Decadent Oreo Flavor: The combination of crushed Oreos in both the crust and the creamy filling delivers an intense, satisfying chocolate and cream taste that Oreo lovers will adore.
- Perfect Individual Portions: Each mini cheesecake is perfectly sized, making them ideal for portion control, elegant serving, and easy sharing at any event.
- Party-Perfect Dessert: These charming little treats are guaranteed to be a hit with guests of all ages. They’re easy to serve and even easier to enjoy!
- Freezer-Friendly Convenience: Prepare them ahead of time for future events or simply store leftovers in the freezer for a quick, delicious treat anytime.
- Only 5 Simple Ingredients: You won’t believe how much flavor comes from such a short ingredient list, making grocery shopping and preparation a breeze.
[feast_advanced_jump_to]
🥘 Ingredients
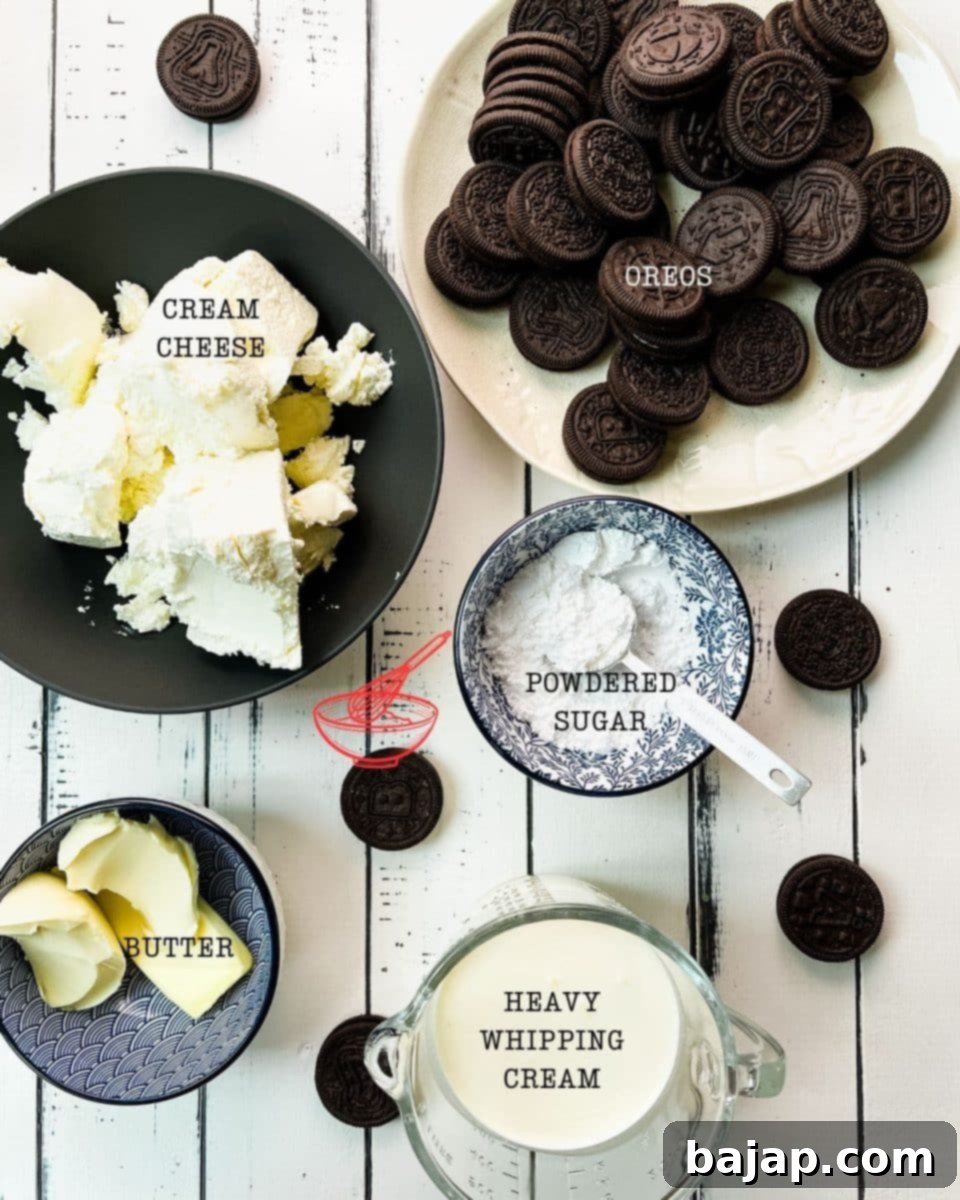
- Oreo Cookies – The star of our crust and filling, providing that classic chocolate sandwich cookie flavor.
- Unsalted butter – Melted, to bind our cookie crust perfectly.
- Cream Cheese – Crucially, use room temperature cream cheese for a smooth, lump-free filling.
- Powdered Sugar – Sweetens the cream cheese mixture and helps achieve that silky texture.
- Heavy Whipping Cream – Whipped to soft peaks, it adds lightness and airiness to our cheesecake filling.
Optional – Decoration
- Fresh berries – In our recipe, we used fresh strawberries for a beautiful presentation and a touch of tartness.
See the recipe card for exact quantities.
🔪 Instructions
Making these mini cheesecakes is a straightforward and enjoyable process. Follow these simple steps for a truly delightful dessert:
1. Prepare the Oreo Cookie Crust
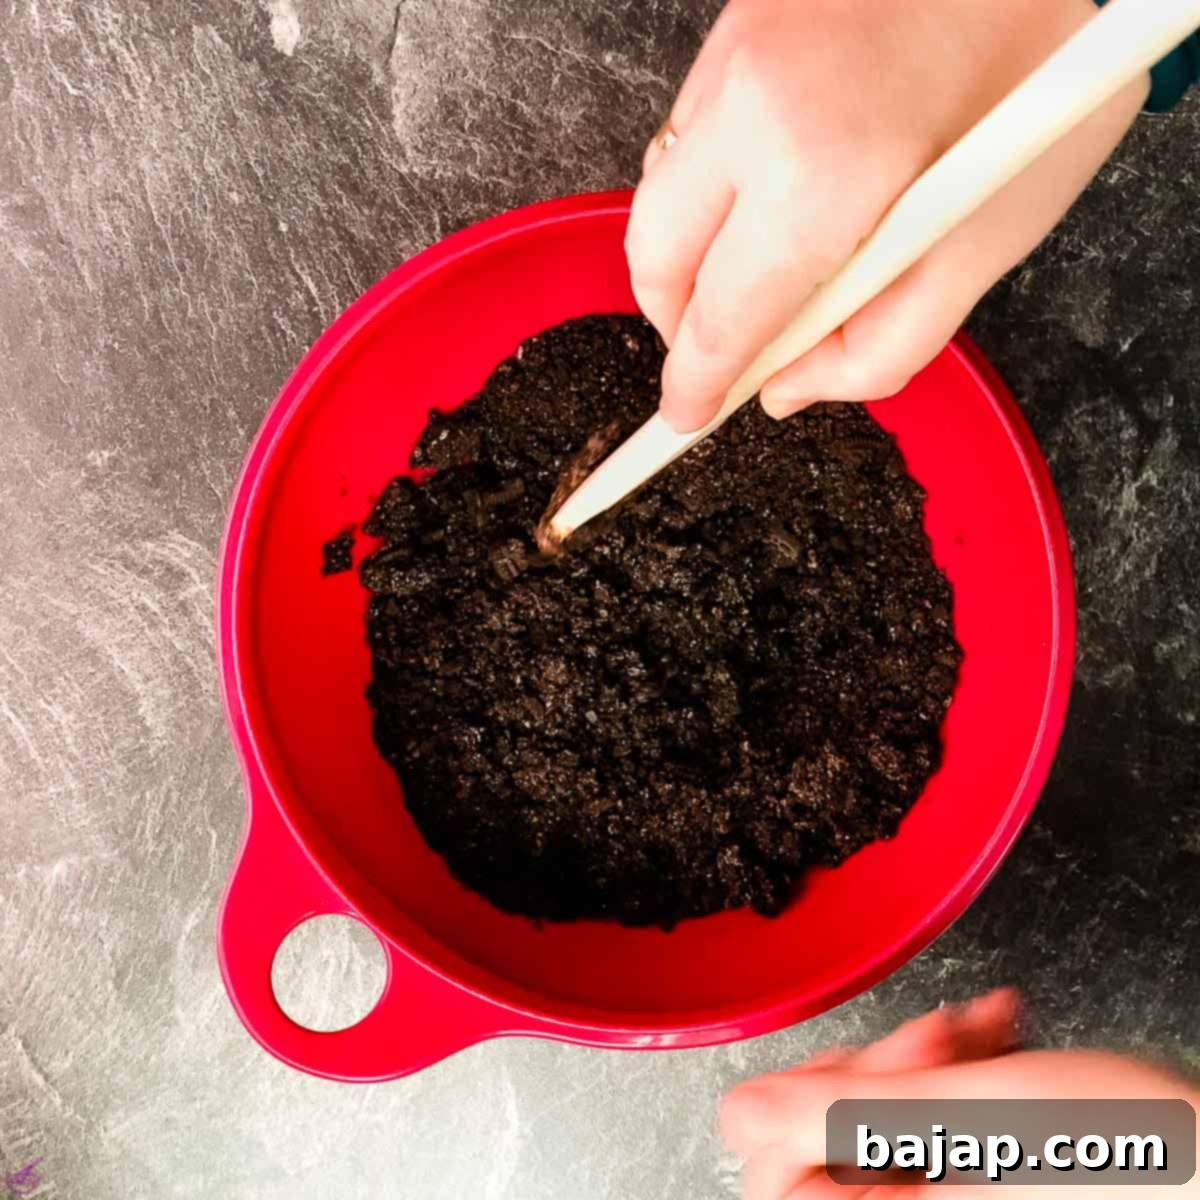
We start by creating a flavorful homemade crust. Take 30 Oreo cookies and crush them into fine crumbs. You can achieve this easily using a food processor, or by placing them in a plastic bag and using a rolling pin to pulverize them. Once you have a fine crumb consistency, set aside approximately one-third of the Oreo crumbs for the cream cheese filling. To the remaining two-thirds of the cookie crumbs, add your melted unsalted butter in a mixing bowl and mix thoroughly until well combined. The mixture should resemble wet sand.
2. Form the Crusts
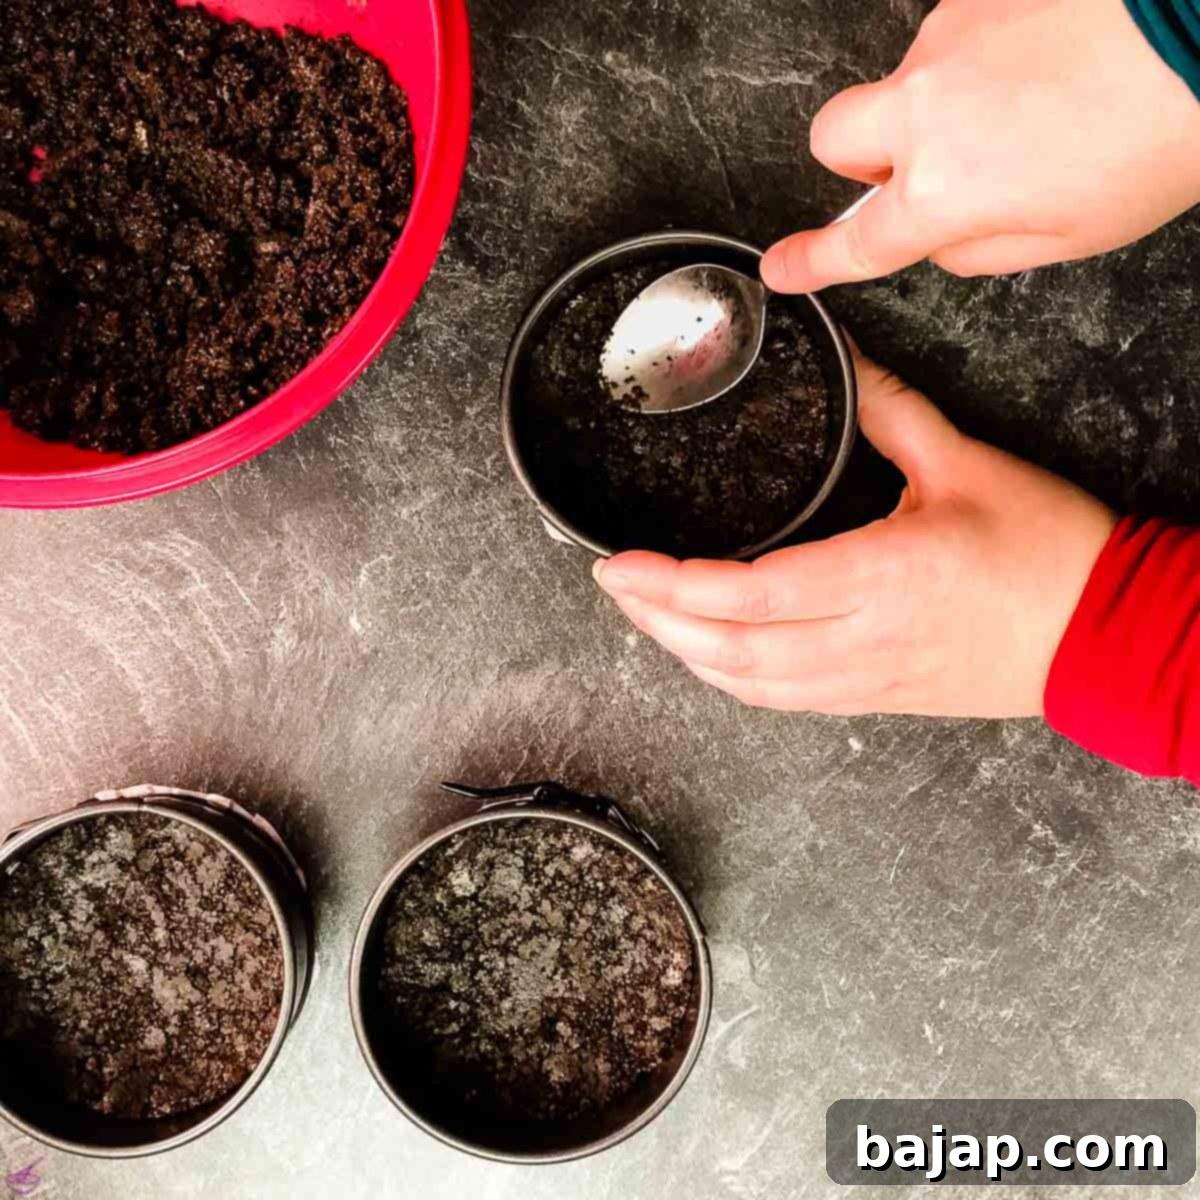
Next, line the bottom of each of your springform pans with a circle of parchment paper. This will make it much easier to remove the cheesecakes later. Tightly pack the crushed Oreo and butter mixture over the parchment paper, pressing it down firmly to create an even and compact crust in each cake pan. The firmer the crust, the better it will hold together. Once the crusts are formed, place the pans in the refrigerator to chill while you prepare the filling. This helps the butter solidify and the crust to set, creating a stable base.
3. Prepare the Creamy Cheesecake Filling
Now for the star of the show: the creamy cheesecake filling. Using your Kitchen Aid stand mixer fitted with a whisk attachment, or a hand-held electric mixer, whip your heavy cream until it forms soft peaks. Be careful not to over-whip it into butter. Set the whipped cream aside. In a separate large bowl, beat the softened cream cheese until it becomes wonderfully smooth and creamy. This is a crucial step to avoid any unwanted lumps in your cheesecake filling. Once smooth, add the powdered sugar to the cream cheese mixture and continue beating for another 2 minutes until fully incorporated and light. Gently fold in the reserved one-third of Oreo cookie crumbs, followed by the whipped cream. Use a rubber spatula and fold carefully to maintain the airiness of the whipped cream, ensuring everything is just combined.
4. Assemble the Cheesecakes
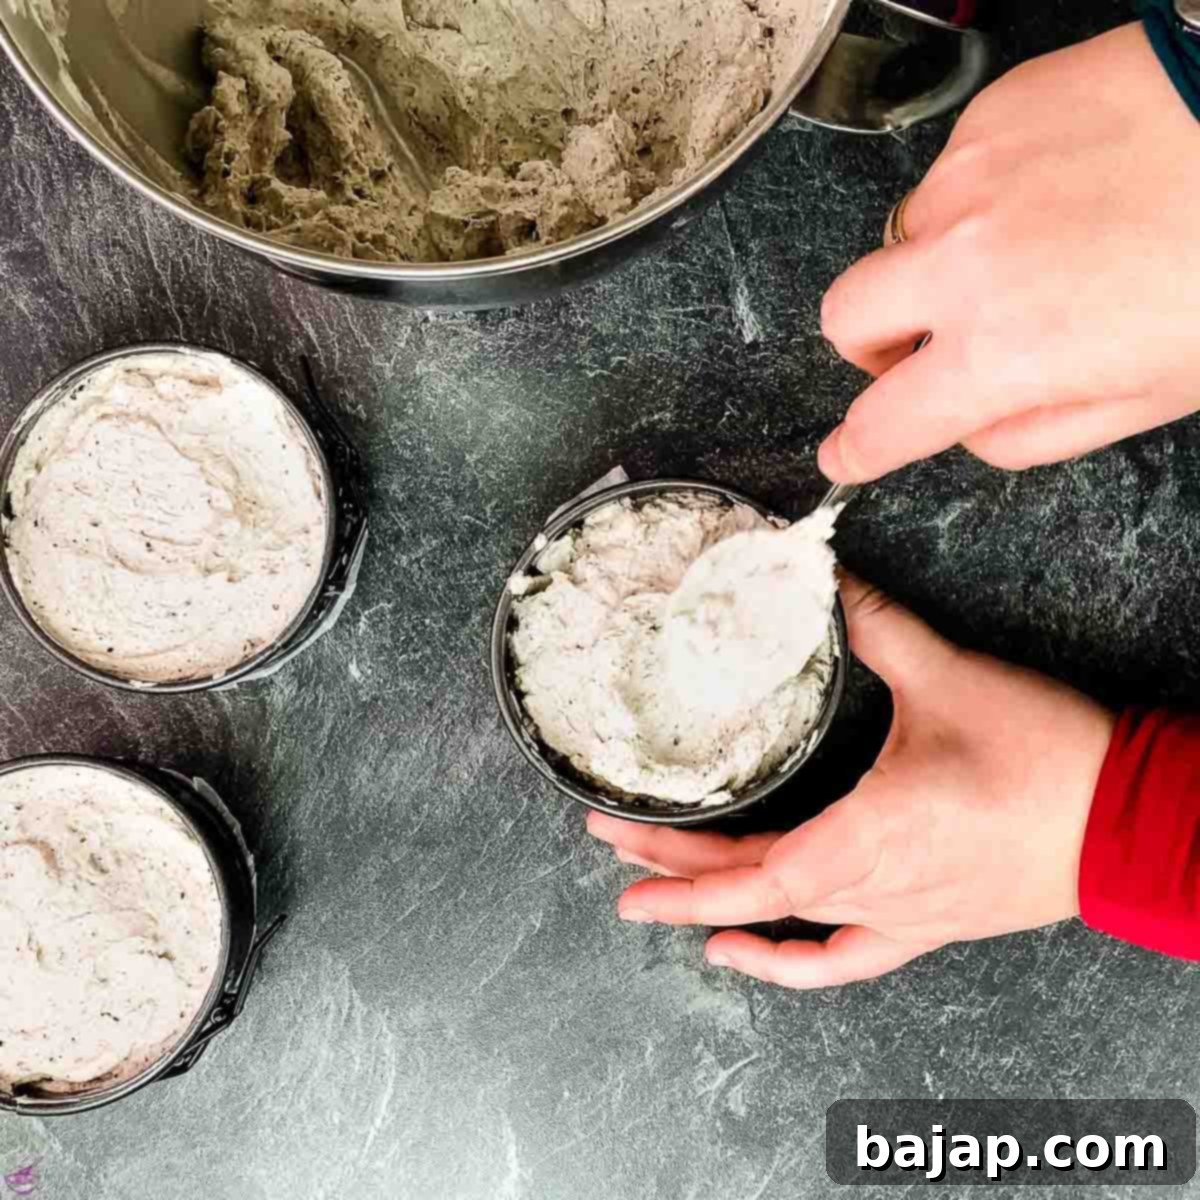
Retrieve your chilled Oreo crusts from the refrigerator. Evenly distribute the luscious Oreo and cream cheese mixture over each crust. Use a rubber spatula to gently spread the filling and smooth out the tops of each mini cheesecake for a professional finish. For an extra touch of Oreo goodness and visual appeal, sprinkle some additional crushed Oreo crumbs (about 6 Oreos should be sufficient for topping all the mini cakes) over the top of each individual cheesecake. These crumbs not only look adorable but also provide the perfect dark canvas to highlight the vibrant red of your strawberry decoration later.
5. Chill and Serve
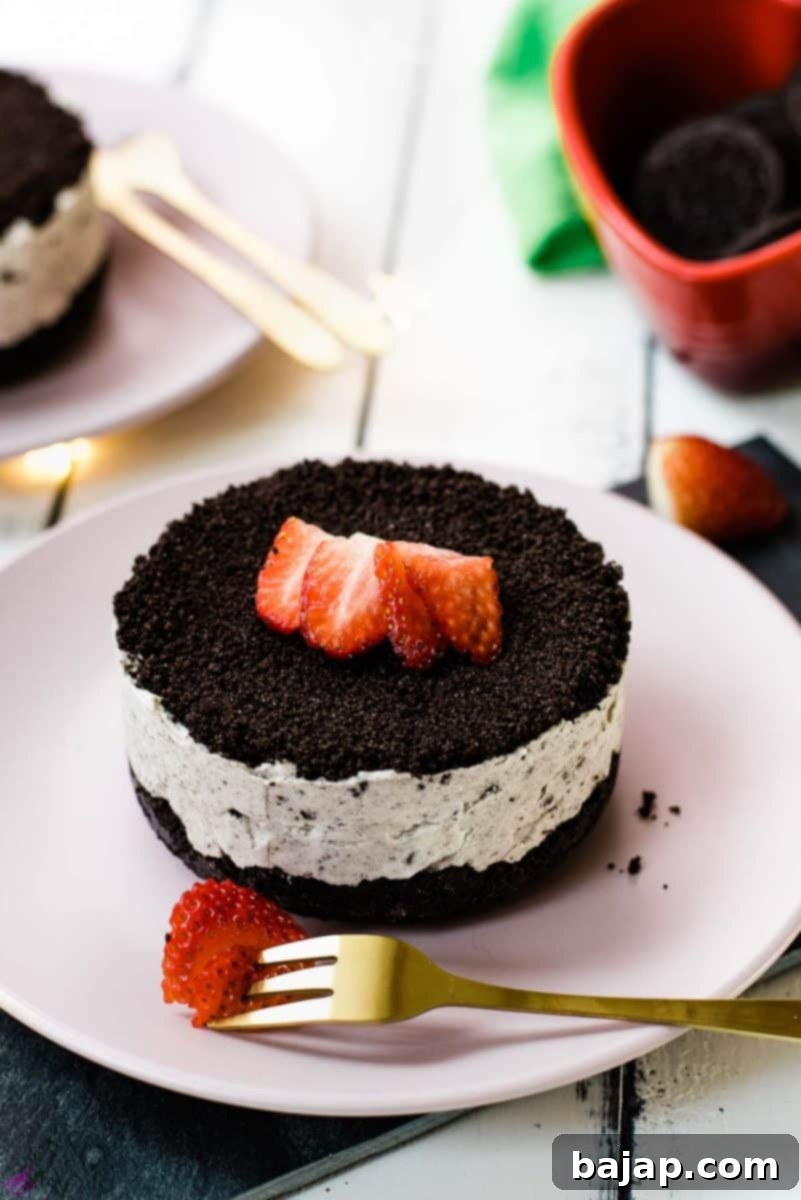
Before placing your mini cheesecakes in the freezer, we highly recommend covering them tightly with plastic wrap to prevent freezer burn and absorb any unwanted odors. Keep your mini cheesecakes in the freezer for at least 3 hours. This crucial chilling time allows the cheesecake to firm up perfectly, giving it that classic smooth, dense texture. After they are thoroughly chilled, carefully release the sides of your springform pans. Once you’re ready to serve, allow them to thaw slightly in the refrigerator for about 15-20 minutes, then decorate with fresh fruit – in our case, beautifully sliced strawberries – and serve ice-cold but not frozen for the ultimate taste and texture experience.
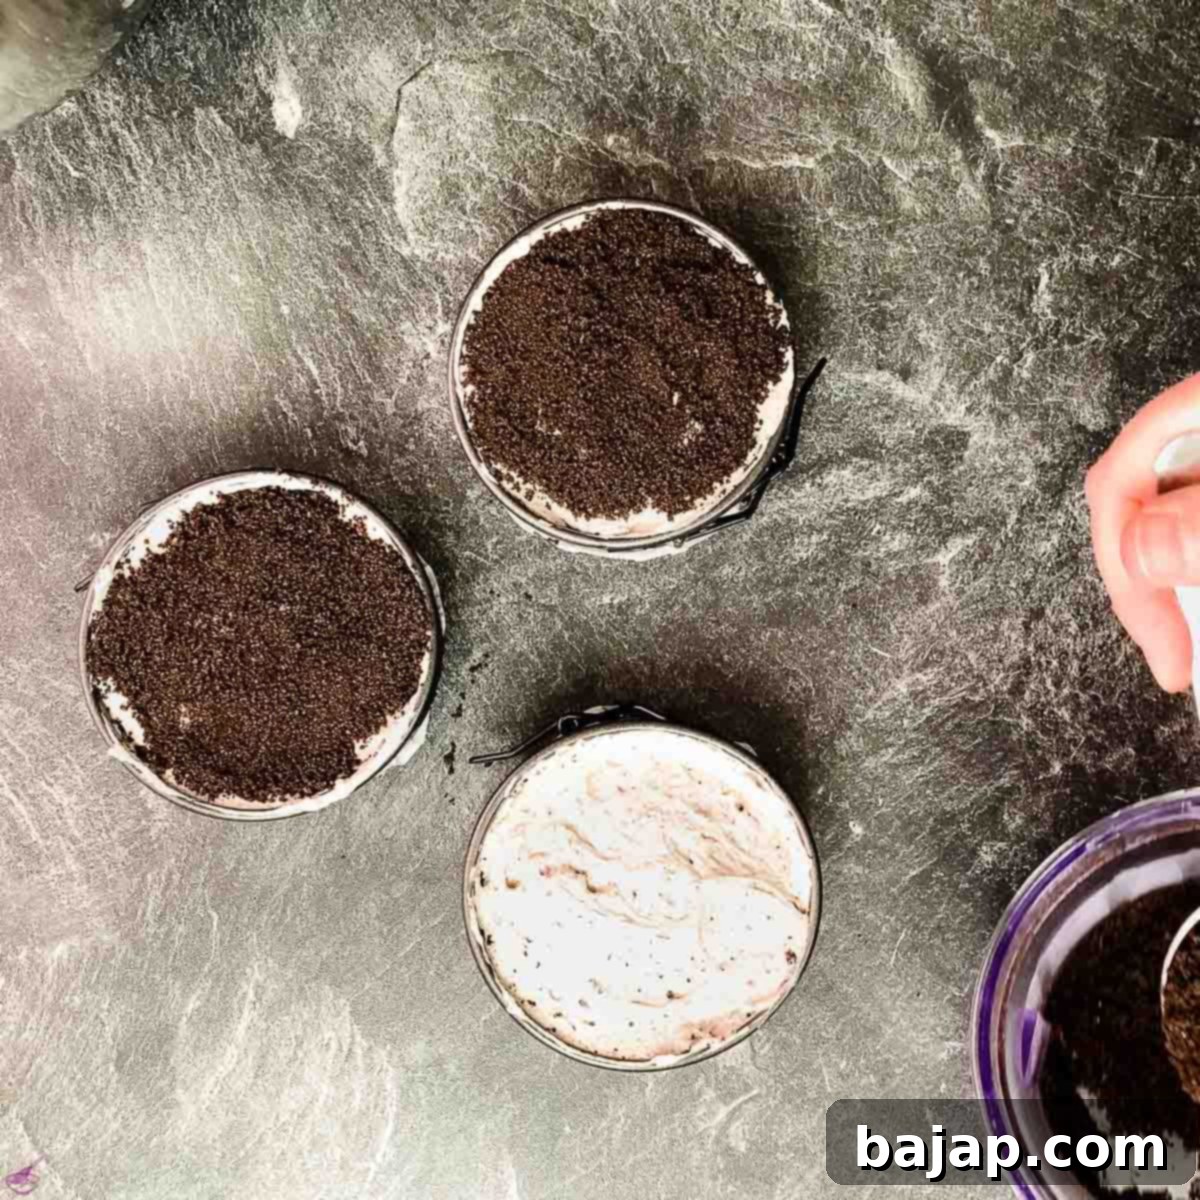
The final touch of sprinkled Oreo crumbs not only enhances the flavor but also creates a beautiful visual contrast, serving as a perfect base to truly highlight the intense red of your strawberry decoration.
Before freezing, always ensure your mini cheesecakes are covered with plastic wrap to protect their freshness and texture.
Allowing your mini cheesecakes to chill in the freezer for at least 3 hours is key to achieving that perfect firm, yet creamy, no-bake cheesecake consistency. Once set, they will easily release from the springform pans.
After a quick thaw, decorate these delightful 5-ingredient desserts with your chosen fresh fruit – we highly recommend vibrant strawberries – and serve them chilled but not completely frozen for the ideal texture and taste.
✨ Expert Tips for Perfect No-Bake Mini Oreo Cheesecakes
Achieving a perfect no-bake cheesecake is simple with a few key tips:
- Room Temperature Cream Cheese is Key: Ensure your cream cheese is completely softened to room temperature. This is crucial for achieving a smooth, lump-free filling that blends beautifully with other ingredients. Cold cream cheese will result in a clumpy mixture.
- Don’t Overmix the Filling: Once you’ve folded in the whipped cream, mix just until combined. Overmixing can deflate the whipped cream, leading to a less airy and firm cheesecake.
- Adequate Chilling Time is Essential: The freezer is your best friend here! A minimum of 3 hours, or preferably overnight, is necessary for the cheesecake to fully set and achieve its firm, sliceable texture. Impatience will result in a softer, pudding-like consistency.
- Use Quality Ingredients: Since there are only a few ingredients, the quality of each really shines through. Use good quality cream cheese and fresh heavy whipping cream for the best results.
- Evenly Packed Crust: Take your time to press the Oreo crust mixture firmly and evenly into the pans. A well-packed crust ensures a stable base that won’t crumble when serving.
- Decorate Just Before Serving: While the cheesecakes can be made ahead, it’s best to add fresh fruit or other delicate toppings right before serving to ensure they look their best and maintain their freshness.
🥜 Variations & Substitutions
While these no-bake Oreo cheesecakes are delicious as is, feel free to get creative with these variations and substitutions:
- Cookie Crust Alternatives:
- Biscoff Cookies: For a completely different, caramel-laden taste experience, replace the Oreo cookies with Biscoff cookies. Try the ones filled with chocolate cream, Biscoff cream, or vanilla cream for unique flavors.
- Graham Cracker Crust: If you prefer a more traditional cheesecake crust, use finely crushed graham crackers mixed with melted butter and a touch of sugar.
- Other Cookies: Experiment with Nilla Wafers, chocolate chip cookies, or even peanut butter cookies for different flavor profiles.
- Fruit Topping Options: While strawberries are fantastic, feel free to use raspberries, blueberries, cherries, or a mixed berry compote.
- Flavor Boosters:
- Mint Extract: Add a few drops of mint extract to the cream cheese filling for a refreshing mint-Oreo cheesecake.
- Coffee or Espresso Powder: A teaspoon of instant espresso powder can deepen the chocolate flavor and add a subtle coffee note.
- Cocoa Powder: For an extra chocolatey kick, mix a tablespoon of unsweetened cocoa powder into the cream cheese filling.
- Alternative Toppings: Drizzle with chocolate sauce, caramel, or add a dollop of whipped cream and sprinkles just before serving.
🍽 Equipment
You’ll need a few basic kitchen tools to make these mini no-bake cheesecakes:
- Electric Hand mixer or Stand mixer with a whisk attachment – For whipping cream and beating cream cheese to a silky-smooth consistency.
- Food Processor/Electric Chopper – Essential for crushing the Oreo cookies into fine crumbs quickly and efficiently.
- Parchment Paper – To line the bottom of your springform pans, ensuring easy release of the cheesecakes.
- Mixing Bowls – Several sizes for preparing the crust and filling separately.
- Rubber spatula – For folding ingredients gently and smoothing the tops of your cheesecakes.
- 4×10 cm // 4x 4-inch springform Pan or one 9-inch springform pan – For shaping your mini cheesecakes.
- Plastic wrap or aluminum foil – For covering the cheesecakes during chilling and storage.
🌡 Storage & Tips
One of the best features of these mini Oreo cheesecakes is their excellent storage potential, making them perfect for meal prep or enjoying later:
- Refrigerator Storage: These mini no-bake Oreo Cheesecakes will maintain their freshness and delicious texture for 3-4 days when stored in an airtight container in the refrigerator.
- Freezer Storage (Long Term): For extended enjoyment, these little darlings can be stored in the freezer for an impressive 3-6 months! Ensure they are individually wrapped in plastic wrap and then placed in an airtight freezer-safe container to prevent freezer burn and keep them tasting fresh. This makes them an ideal make-ahead dessert for holidays or unexpected guests.
- Defrosting for Perfect Texture: To achieve the best possible creamy texture after freezing, I highly recommend transferring them from the freezer to the refrigerator to defrost slowly. Allow them to thaw for at least 3-4 hours, or even better, overnight. This gradual defrosting process helps maintain their smooth consistency and ensures they are perfectly chilled and ready to eat.
- Serving Temperature: Serve these cheesecakes ice-cold but not frozen. The brief time thawing in the fridge brings them to the ideal temperature for enjoying their rich, creamy filling and crisp crust.
If you are looking for another great Oreo recipe, try these Oreo Chocolate Chip Cookies! They are simply divine!
🙋🏻 FAQ (Frequently Asked Questions)
The most common reason a no-bake cheesecake doesn’t firm up is insufficient chilling time. Unlike baked cheesecakes that rely on eggs and heat to set, no-bake versions depend entirely on cold temperatures to solidify their creamy structure. You need to put your no-bake cheesecake in the freezer for at least three hours – but preferably overnight – to achieve that perfect, firm texture. If you skip this crucial step or cut short on the time needed, your cheesecake will unfortunately remain more like a cheesecake pudding mix rather than a sliceable dessert. Always plan for adequate chilling time!
No, absolutely not! The beauty of a “no-bake cheesecake” recipe is that it truly means no baking whatsoever. You won’t need to pop anything in the oven, nor will you need to let things cool on a wire rack. You also don’t need to buy a pre-baked crust. This delightful Oreo Cookie Crust can be entirely assembled right on your kitchen counter. The only thing you’ll need to do to get the perfect texture and ensure the crust is firm is to chill it in the refrigerator while preparing the filling, and then chill the assembled cheesecakes in the freezer for the recommended amount of time. If you can, try to refrigerate the crust overnight before adding the filling for an even firmer base.
No-bake cheesecakes generally have a slightly shorter shelf life in the refrigerator compared to their baked counterparts. These particular no-bake Oreo mini cheesecakes should only be kept in the fridge for 3-4 days after assembly. For longer storage, you can significantly extend the shelf life of this tasty dessert by storing it in the freezer! In the freezer, when properly wrapped and stored in an airtight container, it can last wonderfully for up to 3 to 6 months. Just remember to thaw it in the refrigerator before serving for the best texture.
The primary difference between a baked cheesecake and a no-bake cheesecake—besides the obvious fact that one requires an oven and the other doesn’t—lies in their ingredients and setting methods. Baked cheesecakes typically contain eggs, which act as a binder and help the cheesecake set through coagulation during baking, resulting in a dense, rich, and often slightly fluffy texture. No-bake cheesecakes, on the other hand, do not use any eggs and depend on ingredients like whipped cream, cream cheese, and sometimes gelatin or other stabilizers, along with significant chilling time in the refrigerator or freezer, to firm up. Some people argue that baked cheesecakes are superior due to their traditional dense, custard-like texture, but I’d make the case that each sweet dessert is delicious in its own right, offering distinct experiences. No-bake cheesecakes also offer the advantage of not having to wait for them to cool completely after cooking, allowing for quicker enjoyment!
The question of which is better – a classic baked cheesecake or a no-bake cheesecake – truly comes down to personal preference. Both types offer a delightful dessert experience, but their textures are slightly different. A baked cheesecake often takes on a more dense, custard-like, and sometimes fluffy texture, while a no-bake cheesecake tends to be lighter, airier, and creamier, almost mousse-like if not chilled enough, but firm and smooth when properly set. They also don’t use the exact same ingredients (no eggs in no-bake). So, while they offer different sensations, many find no-bake cheesecakes just as satisfying, especially for their ease of preparation and refreshing cold serving temperature. Feel free to put them up to a blind taste test and decide for yourself!
MORE DECADENT CHEESECAKE RECIPES
If you’ve enjoyed this no-bake treat, explore more delicious cheesecake recipes:
- No-bake Ricotta Cheesecake
- No-bake Pumpkin Cheesecake
- No-bake White Chocolate Raspberry Cheesecake {Halloween}
- Fig Cheesecake in a Jar
- No-bake Mint Chocolate Cheesecake
- Eggnog Cheesecake
If you make this recipe, let me know how you liked it by ★★★★★ star rating it and leaving a comment below. This would be awesome! You can also sign up for our Newsletter or follow me on Pinterest or Instagram and share your creation with me. Just tag me @combinegoodflavors and hashtag #combinegoodflavors, so I don’t miss it.
📖 Recipe
5 Ingredients No Bake Oreo Cheesecake
By Nora
This 5 ingredient no bake cheesecake, with a prep time of 15 minutes and an amazing creamy texture, will make a perfect dessert that’s sure to impress.
15 mins
3 hrs
3 hrs 15 mins
Cake, Dessert
American
8 Servings
715 kcal
Equipment
- Electric hand mixer or Stand mixer with a whisk attachment
- Food processor Electric Chopper
- Parchment Paper
- Mixing bowls
- Rubber spatula
- Mini Springform Pan 4×10 cm // 4x 4-inch
- Plastic Wrap or aluminum foil
Ingredients
- 36 Oreo Cookies
- 3 oz Unsalted butter, melted
- 2 ½ cups Softened Cream Cheese
- 3 tablespoon Powdered Sugar
- 1 ¼ cup Heavy Whipping Cream
Optional – Decoration
- 4 Strawberries
Instructions
- Crush 36 Oreo Cookies (with a food processor or using a plastic bag and rolling pin).
- Add ⅔ of the Oreo cookie crumbs to a mixing bowl and add the melted 3 oz Unsalted butter. Mix well.
- Keep ⅓ Oreo crumbs for the cream cheese filling.
- Cover the spring form cake pans with parchment paper, then tightly pack the crushed Oreo and butter mixture over it, taking care to cover everything evenly.
- Leave the Oreo cookie crust in the refrigerator until the cream cheese filling is ready.
- With the kitchen machine, whip 1 ¼ cup Heavy Whipping Cream, till soft peaks form.
- Take another (large) bowl and beat 2 ½ cups Softened Cream Cheese well till it softens.
- Add 3 tablespoon Powdered Sugar, and beat it for another 2 minutes.
- Add the rest of the 30 crushed Oreos and fold them into the Oreo cream cheese mixture.
- Then fold in the whipped cream.
- Cover the Oreo crusts with the Oreo and cream cheese filling, and even out the top using a spatula.
- Sprinkle the 6 crushed Oreos over each individual cake to cover them.
- Keep them in a freezer for at least 3 hours so the cheesecake can firm up well, then release the sides of the pans.
- After thawing, decorate every piece using fresh fruits (in our case, 4 Strawberries) and serve ice cold but not frozen.
Notes
Each individual Oreo Cheesecake is perfect for two people to share. Even better, to divide each mini cake into thirds!
5 ingredients, mini oreo cheesecake, no bake cheesecake, no bake mini oreo cheesecakes, Oreo cheesecake

Nutrition values are estimates only, using online calculators. Please verify using your own data.
Calories: 715kcal |
Carbohydrates: 47g |
Protein: 8g |
Fat: 57g |
Saturated Fat: 31g |
Polyunsaturated Fat: 4g |
Monounsaturated Fat: 17g |
Trans Fat: 0.4g |
Cholesterol: 137mg |
Sodium: 444mg |
Potassium: 267mg |
Fiber: 2g |
Sugar: 29g |
Vitamin A: 1767IU |
Vitamin C: 4mg |
Calcium: 108mg |
Iron: 7mg
🤎 You might also like
- Patriotic Fourth of July no-bake Cheesecake
- Fig Cheesecake in a Jar {no-bake}
- Spooktacular Cheesecake with “Bloody” Raspberry Filling
- No Bake Pumpkin Cheesecake
⛑️ Food Safety
Always prioritize food safety when preparing any recipe. Here are some important guidelines:
- Cook to a minimum temperature of 165 °F (74 °C) for any ingredients requiring cooking (though not applicable for this no-bake recipe).
- Do not use the same utensils on cooked food that previously touched raw meat.
- Wash hands thoroughly with soap and water after touching raw meat or other raw ingredients.
- Don’t leave food sitting out at room temperature for extended periods, especially dairy-based desserts like cheesecake. Promptly refrigerate or freeze.
- Never leave cooking food unattended.
- Use oils with a high smoking point to avoid harmful compounds if any frying/sautéing is involved.
- Always ensure good ventilation when using a gas stove.
For further information, check Safe Food Handling – FDA.
